Toyota C-HR (2019 year). Manual - part 7
 

  Index      Toyota     Toyota C-HR - service manual 2019 year in english


Search            


Content   ..  5  6  7  8   ..


Toyota C-HR (2019 year). Manual - part 7


97

2. Instrument cluster

2

Instru

me
nt clu

ster

G Monitor

Ending display
When the engine switch is turned off, each of the following will be displayed
on  the  multi-information  display,  and  will  extinguish  after  approximately
30 seconds.

Elapsed time

Distance

Average fuel consumption

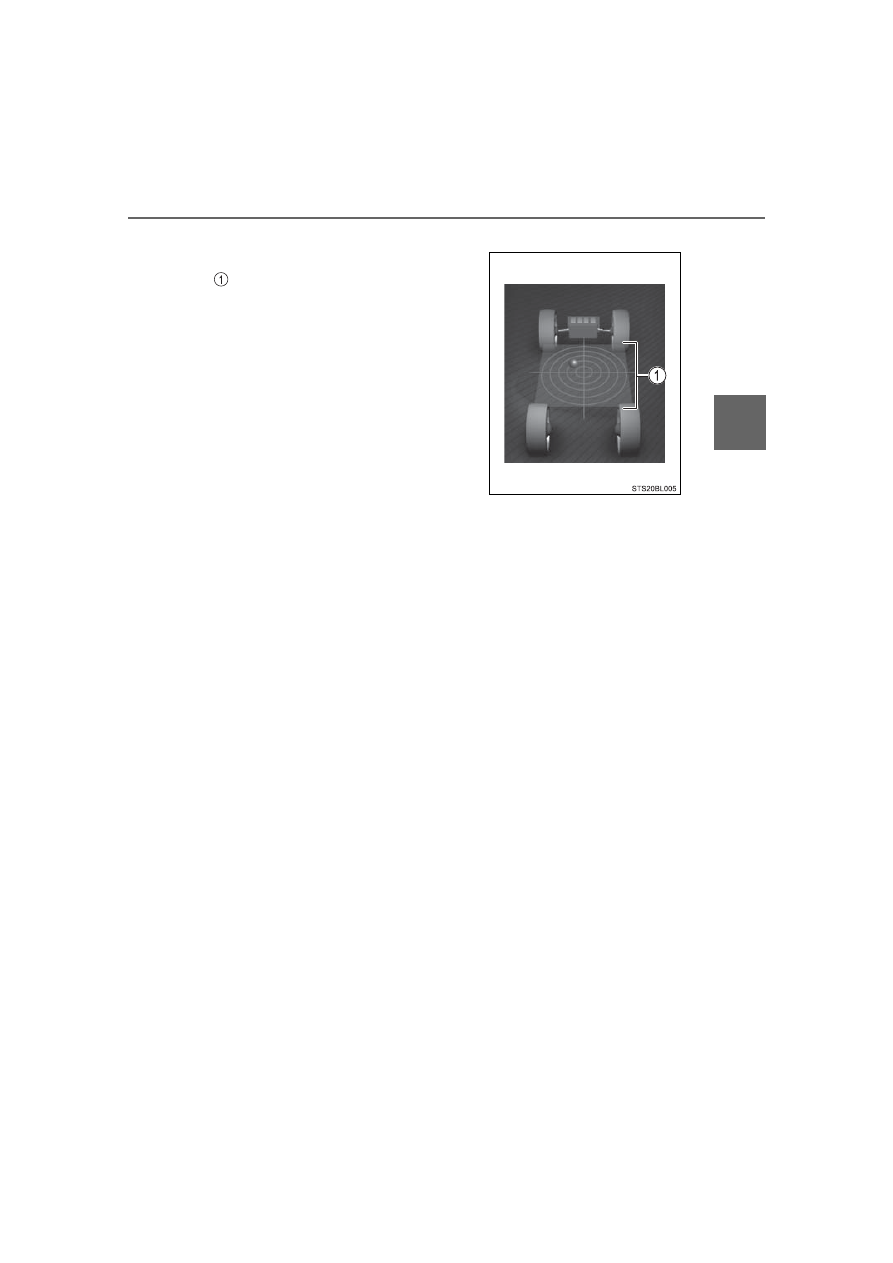
The following item is displayed.

G-force display
Displays the current G-force state.

98

2. Instrument cluster

WARNING

Caution for use while driving

When  operating  the  multi-information  display  while  driving,  pay  extra
attention to the safety of the area around the vehicle.

Do not look continuously at the multi-information display while driving as
you  may  fail  to  see  pedestrians,  objects  on  the  road,  etc.  ahead  of  the
vehicle.

The information display at low temperatures
Allow the interior of the vehicle to warm up before using the liquid crystal
information display. At extremely low temperatures, the information display
monitor may respond slowly, and display changes may be delayed. 
For example, there is a lag between the driver’s shifting and the new gear
number appearing on the display. This lag could cause the driver to down-
shift  again,  causing  rapid  and  excessive  engine  braking  and  possibly  an
accident resulting in death or injury.

Cautions during setting up the display
As the engine needs to be running during setting up the display, ensure that
the vehicle is parked in a place with adequate ventilation. In a closed area
such as a garage, exhaust gases including harmful carbon monoxide (CO)
may  collect  and  enter  the  vehicle.  This  may  lead  to  death  or  a  serious
health hazard.

NOTICE

While setting up the display
To prevent battery discharge, ensure that the engine is running while setting
up the display features.

99

2. Instrument cluster

2

Instru

me
nt clu

ster

Fuel consumption information

Fuel  consumption  information  can  be  displayed  on  the  audio/
visual system screen.

100

2. Instrument cluster

Press the “MENU” button.
Select  “Info”  on  the  “Menu”
screen.
Select  “ECO”  on  the  “Infor-
mation” screen.

If  the  “History”  screen  is  dis-
played, select “Trip Information”.

Resetting  the  consumption
data
Average vehicle speed since
the engine was started
Elapsed  time  since  the
engine was started
Fuel consumption in the past
15 minutes
Cruising range (

P. 101)

Current fuel consumption

Average  fuel  consumption  for  the  past  15  minutes  is  divided  by
color  into  past  averages  and  averages  attained  since  the  engine
switch  was  last  turned  to  the  “ON”  position  (vehicles  without  a
smart  key  system)  or  IGNITION  ON  mode  (vehicles  with  a  smart
key system). Use the displayed average fuel consumption as a ref-
erence.

This image is an example only.

Trip information

1
2

3

101

2. Instrument cluster

2

Instru

me
nt clu

ster

Press the “MENU” button.
Select “Info” on the “Menu” screen.
Select “ECO” on the “Information” screen.

If the “Trip Information” screen is displayed, select “History”.

Resetting  the  past  record
data
Best recorded fuel consump-
tion
Current fuel economy
Previous  fuel  consumption
record

Entune Audio and Entune Audio Plus

Displays the daily average fuel consumption. (Instead of the date,
“Trip 1” through “Trip 5” will be displayed.)

Entune Premium Audio

Displays the daily average fuel consumption

Updating the average fuel consumption data

The average fuel consumption history is divided by color into past
averages and the average fuel consumption since the last updated.
Use the displayed average fuel consumption as a reference.

This image is an example only.

Updating the past record data
Update the average fuel consumption by selecting “Clip” to measure the cur-
rent fuel consumption again.

Resetting the data
The fuel consumption data can be deleted by selecting “Clear”.

Cruising range
Displays the estimated maximum distance that can be driven with the quan-
tity of fuel remaining. 
This distance is computed based on your average fuel consumption. 
As a result, the actual distance that can be driven may differ from that dis-
played.

History

1
2
3

103

3

Operation of

each component

3-1. Key information

Keys .................................. 104

3-2. Opening, closing and 

locking the doors

Side doors......................... 112
Back door.......................... 119
Smart key system ............. 125

3-3. Adjusting the seats

Front seats ........................ 135
Rear seats......................... 136
Head restraints.................. 138

3-4. Adjusting the steering 

wheel and mirrors

Steering wheel .................. 142
Inside rear view mirror ...... 144
Outside rear view 

mirrors............................. 146

3-5. Opening and closing 

the windows

Power windows ................. 149

104

3-1. Key information

Keys

The following keys are provided with the vehicle.

Vehicles without a smart key system (type A)

Key  (with  a  wireless  remote
control function)

Operating the wireless remote con-
trol function

Key (without a wireless remote
control function)
Key number plate

Vehicles without a smart key system (type B)

Key  (with  a  wireless  remote
control function)

Operating the wireless remote con-
trol function

Key number plate

Vehicles with a smart key system

Electronic keys

• Operating the smart key system

(

P. 125)

• Operating  the  wireless  remote

control function

Mechanical keys
Key number plate

The keys

105

3-1. Key information

3

Op
eration

 o

f each

 compo

nen
t

Vehicles without a smart key system

Locks all the doors 

(

P. 112

)

Sounds the alarm 

(

P. 106

)

Unlocks the door 

(

P. 112

)

Pressing  the  button  unlocks  the
driver’s  door.  Pressing  the  button
again within 3 seconds unlocks the
other doors.

Opens the windows

*


(

P. 112

)

*

: These settings must be customized at your Toyota dealer.

Vehicles with a smart key system

Locks all the doors 

(

P. 112

)

Sounds the alarm 

(

P. 106

)

Unlocks the door 

(

P. 112

)

Pressing  the  button  unlocks  the
driver’s  door.  Pressing  the  button
again within 3 seconds unlocks the
other doors.

Opens the windows

*


(

P. 112

)

*

:  These settings must be customized at your Toyota dealer.

Press the button to open the key.

To stow, press the button then fold
the key.

Wireless remote control

Using the key (vehicles without a smart key system)

106

3-1. Key information

To  take  out  the  mechanical  key,
slide  the  release  lever  and  take
the key out.

The  mechanical  key  can  only  be
inserted  in  one  direction,  as  the
key only has grooves on one side.
If  the  key  cannot  be  inserted  in  a
lock  cylinder,  turn  it  over  and  re-
attempt to insert it.
After  using  the  mechanical  key,  store  it  in  the  electronic  key.  Carry  the
mechanical key together with the electronic key. If the electronic key bat-
tery  is  depleted  or  the  entry  function  does  not  operate  properly,  you  will
need the mechanical key. (

P. 448)

Panic mode

If you lose your keys
New genuine keys can be made by your Toyota dealer using the other key
(vehicles  without  a  smart  key  system)  or  mechanical  key  (vehicles  with  a
smart key system) and the key number stamped on your key number plate.
Keep the plate in a safe place such as your wallet, not in the vehicle. 

Using the mechanical key (vehicles with a smart key system)

When 

  is  pressed  for  longer  than

about  one  second,  an  alarm  will  sound
intermittently  and  the  vehicle  lights  will
flash  to  deter  any  person  from  trying  to
break into or damage your vehicle.
To stop the alarm, press any button on the
key  (with  a  wireless  remote  control  func-
tion) or electronic key.

107

3-1. Key information

3

Op
eration

 o

f each

 compo

nen
t

When riding in an aircraft
When  bringing  a  key  with  wireless  remote  control  function  onto  an  aircraft,
make sure you do not press any buttons on the key while inside the aircraft
cabin. If you are carrying the key in your bag, etc., ensure that the buttons are
not likely to be pressed accidentally. Pressing a button may cause the key to
emit radio waves that could interfere with the operation of the aircraft. 

Conditions affecting the operation of the smart key system or wireless
remote control

Vehicles without a smart key system

The wireless remote control function may not operate normally in the follow-
ing situations:

When the wireless key battery is depleted

Near a TV tower, electric power plant, gas station, radio station, large dis-
play, airport or other facility that generates strong radio waves or electrical
noise

When carrying a portable radio, cellular phone or other wireless communi-
cation devices

When multiple wireless keys are in the vicinity

When the wireless key is in contact with, or is covered by a metallic object

When a wireless key (that emits radio waves) is being used nearby

When the wireless key has been left near an electrical appliance such as a
personal computer

If window tint with a metallic content or metallic objects are attached to the
rear window

Vehicles with a smart key system

P. 128

108

3-1. Key information

Key battery depletion

Vehicles without a smart key system

If the wireless remote control function does not operate, the battery may be
depleted. Replace the battery when necessary. (

P. 386)

Vehicles with a smart key system

The standard battery life is 1 to 2 years.

If the battery becomes low, an alarm will sound in the cabin when the engine
stops. (

P. 386)

As the electronic key always receives radio waves, the battery will become
depleted even if the electronic key is not used. The following symptoms indi-
cate  that  the  electronic  key  battery  may  be  depleted.  Replace  the  battery
when necessary. (

P. 386)

• The smart key system or the wireless remote control does not operate.
• The detection area becomes smaller.
• The LED indicator on the key surface does not turn on.
The battery can be exchanged by the users. (

P. 386) However, as there

may be damage to the key when exchanging, it is recommended to have
the battery exchanged at your Toyota Dealer.

To  avoid  serious  deterioration,  do  not  leave  the  electronic  key  within  3 ft.
(1 m) of the following electrical appliances that produce a magnetic field:
• TVs
• Personal computers
• Cellular phones, cordless phones and battery chargers
• Recharging cellular phones or cordless phones
• Table lamps
• Induction cookers

When the key battery is fully depleted
P. 386

Confirmation  of  the  registered  key  number  (vehicles  with  a  smart  key
system)
The number of keys already registered to the vehicle can be confirmed. Ask
your Toyota dealer for details.

Customization
Settings (e.g. wireless remote control system) can be changed. 
(Customizable features: 

P. 486)

109

3-1. Key information

3

Op
eration

 o

f each

 compo

nen
t

Certification for the wireless remote control

For vehicles sold in the U.S.A.

For vehicles sold in Canada

110

3-1. Key information

For vehicles sold in the U.S.A.

For vehicles sold in Canada

111

3-1. Key information

3

Op
eration

 o

f each

 compo

nen
t

NOTICE

To prevent key damage

Do not drop the keys, subject them to strong shocks, or bend them.

Do not expose the keys to high temperatures for long periods of time.

Do not get the keys wet or wash them in an ultrasonic washer, etc.

Do not attach metallic or magnetic materials to the keys or place the keys
close to such materials.

Do not disassemble the keys.

Do not attach a sticker or anything else to the surface of the electronic key
and key (with a wireless remote control function).

Vehicles with a smart key system: Do not place the keys near objects that
produce magnetic fields, such as TVs, audio systems and induction cook-
ers, or medical electrical equipment, such as low-frequency therapy equip-
ment.

Carrying the electronic key on your person (vehicles with a smart key
system)
Carry the electronic key 3.9 in. (10 cm) or more away from electric appli-
ances  that  are  turned  on.  Radio  waves  emitted  from  electric  appliances
within 3.9 in. (10 cm) of the electronic key may interfere with the key, caus-
ing the key to not function properly.

In case of a smart key system malfunction or other key-related prob-
lems (vehicles with a smart key system)
Take your vehicle with all the electronic keys provided with your vehicle to
your Toyota dealer.

When an electronic key is lost (vehicles with a smart key system)
If the electronic key remains lost, the risk of vehicle theft increases signifi-
cantly.  Visit  your  Toyota  dealer  immediately  with  all  remaining  electronic
keys that was provided with your vehicle.

112

3-2. Opening, closing and locking the doors

Side doors

Entry function (vehicles with a smart key system)

Carry the electronic key to enable this function.

Grip the driver’s door handle
to  unlock  the  door.  Grip  the
passenger’s  door  handle  to
unlock all the doors.*

Make  sure  to  touch  the  sensor
on the back of the handle.
The  doors  cannot  be  unlocked
for 3 seconds after the doors are
locked.

Touch  the  lock  sensor  (the  indentation  on  the  side  of  the  front
door handle) to lock all the doors.

Check that the door is securely locked.

*

: The door unlock settings can be changed. (

P. 117, 491)

Wireless remote control

Vehicles without a smart key system

Locks all the doors

Check  that  the  door  is  securely
locked.

Unlocks the door

Pressing the button unlocks the
driver’s door. 
Pressing the button again within
3  seconds  unlocks  the  other
doors.
Press and hold to open the windows

*

*

: These settings must be customized at your Toyota dealer.

Unlocking and locking the doors from the outside


Content   ..  5  6  7  8   ..