Renault Trafic (2023 year). Manual in english - page 4
FUNCTION STOP AND START (3/4)
Conditions preventing the
-
the gradient is too steep for vehicles
fitted with an automatic gearbox;
standby of the engine
Depending on the vehicle, the
-
the “Clear view” function is activated
warning light appears on the instrument
Certain conditions prevent the system
➥ 3.8;
panel to indicate that engine standby
from using the engine standby function,
is not available. The warning light may
including when:
-
the engine temperature is too low;
appear along with a message on the in-
For all vehicles:
–
the emission control system is being
strument panel:
regenerated;
-
the driver’s door is not closed;
-
“Battery charge optimisation” to pri-
-
oritise the battery charge;
–
the driver’s seat belt is not fastened
or was not fastened when driving
-
“Heating comfort priority” to prioritise
began;
the air conditioning;
-
reverse gear is engaged;
-
“Engine running priority” to prioritise
engine functions.
–
parking distance control is in opera-
tion;
-
the bonnet is not locked;
–
the outdoor temperature is too low or
too high;
-
the battery is not sufficiently charged;
–
the difference between the vehicle
interior temperature and the auto-
matic climate control instruction is
too high;
–
the altitude is too high;
Deactivate the Stop and
Start function for any opera-
tion performed in the engine
compartment.
2.10
CarManuals2.co
FUNCTION STOP AND START (4/4)
Special feature of the automatic
Deactivating, activating the
engine re-start
function
Under certain conditions, the engine
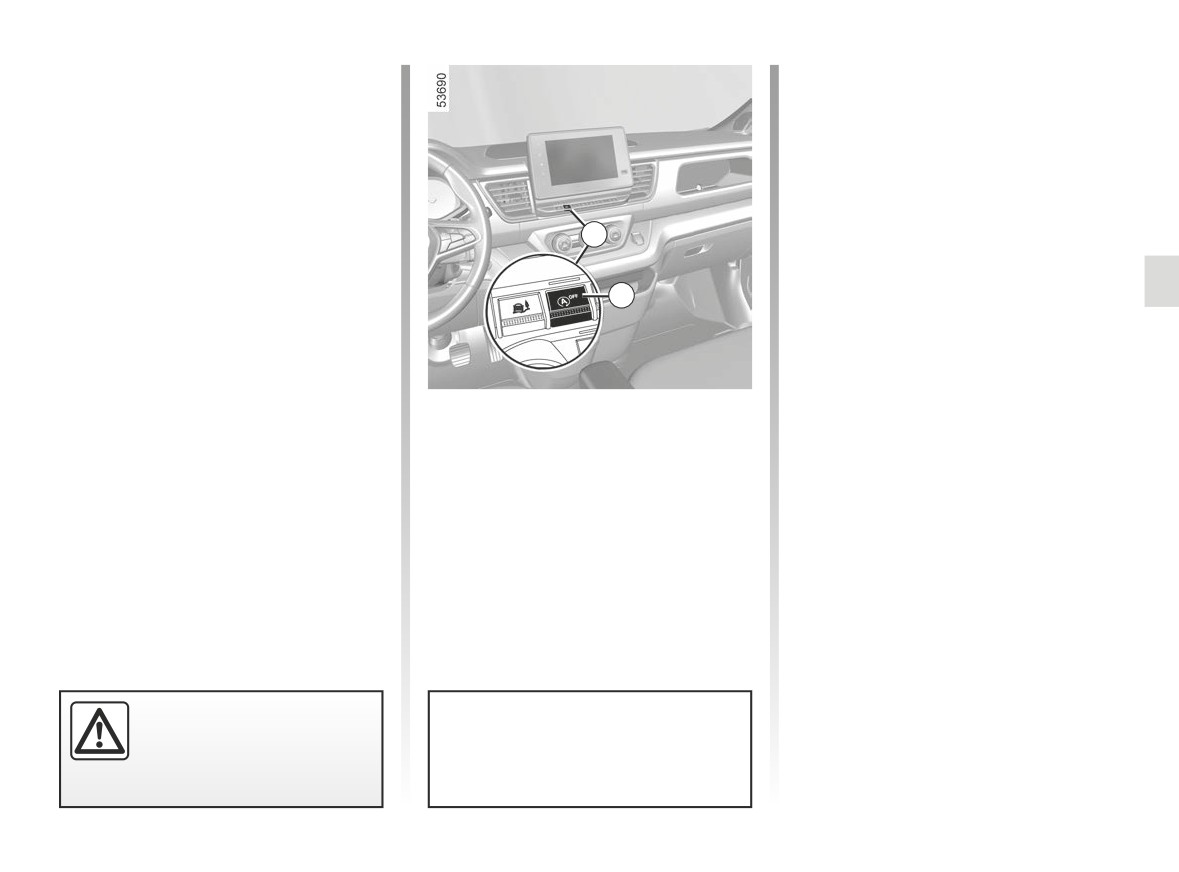
Press 1 to deactivate the function. The
can restart on its own in order to guar-
message “Stop & Start deactivated” will
antee your safety and comfort.
appear on the instrument panel and
This can occur especially when:
the integrated warning light 2 on the
switch 1 will light up.
- the outdoor temperature is too low or
1
too high;
Pressing again will reactivate the
system. The message “Stop & Start
- the “Clear view” function is activated
Activated” will appear on the instrument
➥ 3.8 ;
2
panel and the integrated warning light 2
- the battery is not sufficiently charged;
on switch 1 will go out.
– the vehicle speed is above 3 mph
The system is automatically reactivated
(5 km/h) (downhill slope, etc.);
each time the vehicle is started using
the start button. ➥ 2.3.
- repeated pressing on the brake
pedal or braking system require-
Depending on the vehicle, the
ment;
warning light may be accompanied by a
Operating faults
– ...
message on the instrument panel:
When the message “Check Stop &
- “Battery charge optimisation” to pri-
Start” appears on the instrument panel
Depending on the vehicle, the
oritise the battery charge;
and the integrated warning light 2 lights
warning light is displayed on the instru-
- “Heating comfort priority” to prioritise
up on the switch 1, the system is deac-
ment panel to notify you of automatic
the air conditioning;
tivated.
engine restarting.
- “Engine running priority” to prioritise
Please consult an authorised dealer.
engine functions.
The engine MUST be
stopped (not put in standby)
Special note: with the engine on
before leaving the vehicle.
standby, press switch 1 to automati-
➥ 2.3.
cally restart the engine.
2.11
CarManuals2.co
SPECIAL FEATURES OF DIESEL VERSIONS (1/5)
Diesel engine speed
Precautions to be taken in
Diesel engines are fitted with an injec-
winter
A
tion pump which prevents the engine
To avoid any faults in icy weather:
speed being exceeded irrespective of
-
ensure that the battery is always fully
the gear selected.
charged;
If the message “Check Anti- Pollution
1
-
always keep the diesel tank rela-
System” is displayed along with warn-
tively full to avoid water vapour con-
ing lights Ä
densing in it and accumulating at the
authorised dealer immediately.
bottom of the tank.
When driving, depending on the fuel
grade used, it is possible that white
smoke may be emitted.
This is due to the exhaust particle filter
being cleaned automatically, and does
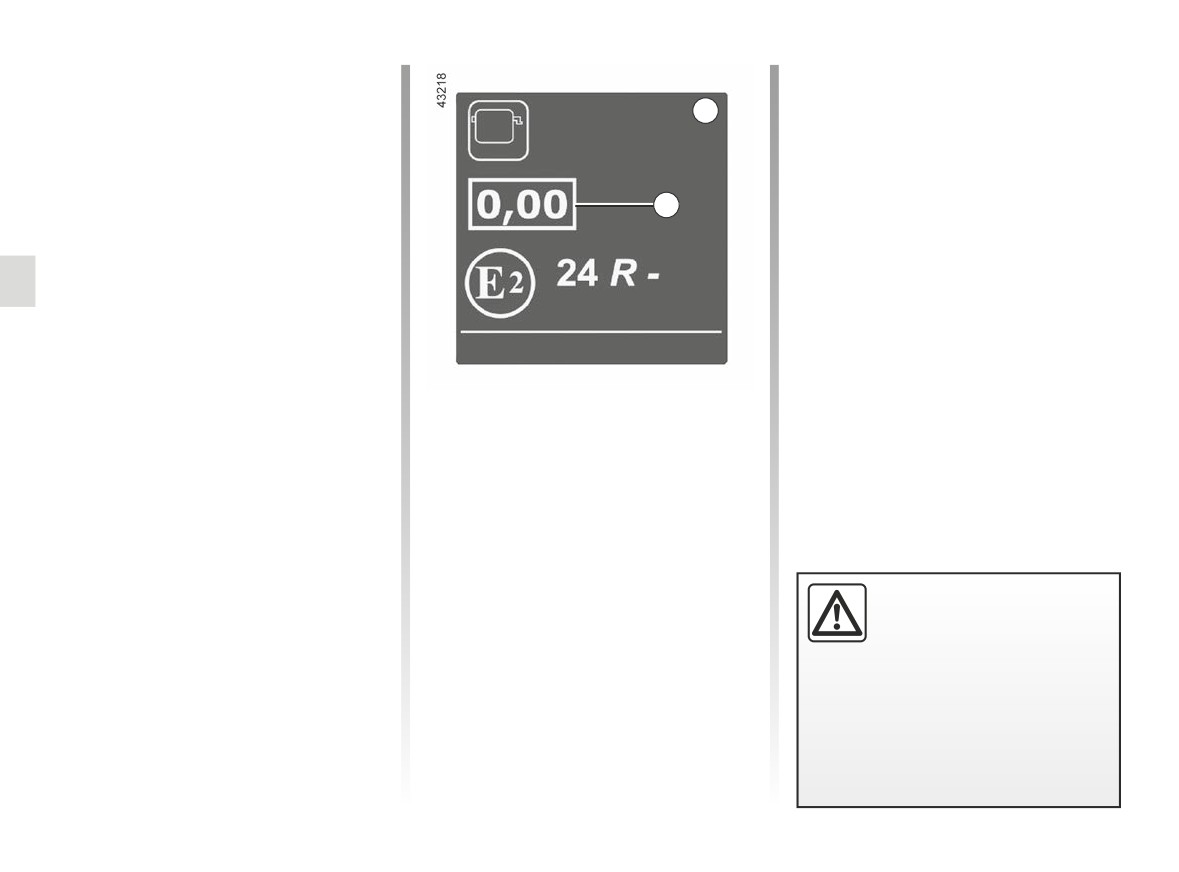
Engine smoke opacity label
not affect the way the vehicle runs.
You can find the information 1 on the
label A stuck in the engine compart-
Running out of fuel
ment or, depending on the vehicle, on
After the tank has been filled following
the vehicle identification plate ➥ 6.2.
a complete draining of fuel, the fuel
1 Diesel exhaust emissions.
system must be reprimed ➥ 1.134 before
restarting the engine.
Do not park the vehicle or
run the engine in locations
where combustible sub-
stances or materials such as
grass or leaves can come into con-
tact with the hot exhaust system.
2.12
CarManuals2.co

SPECIAL FEATURES OF DIESEL VERSIONS (2/5)
Particle filter
The display of the
warning light
The particle filter is used in the treat-
on the instrument panel may be accom-
ment of exhaust gases from diesel en-
panied by an increase in engine speed
gines.
and operation of the cooling system in
Depending on the vehicle, the warning
order to clean the particle filter.
light
displayed on the instrument
Note: the warning light may reappear if
panel indicates that the filter is becom-
the driving conditions are not fully met
ing clogged and requires cleaning.
with regard to cleaning the filter. If the
vehicle is stopped or the engine speed
Automatic regeneration
is below 2,000 rpm before the warning
light is switched off you may have to re-
To do this, when the
warning
start the operation.
light is displayed, continue driving ac-
cording to traffic conditions and observe
the speed limit until the warning lights
disappears. If possible, do not let the
engine speed drop below 2,000 rpm.
The warning light should go out after 10
to 20 minutes. ➥ 1.105.
To facilitate the automatic particle
filter regeneration, carry out a long
driving phase (at least 20 minutes)
on main roads every 124 miles
(200 km).
2.13
CarManuals2.co
SPECIAL FEATURES OF DIESEL VERSIONS (3/5)
Manual regeneration of the particle
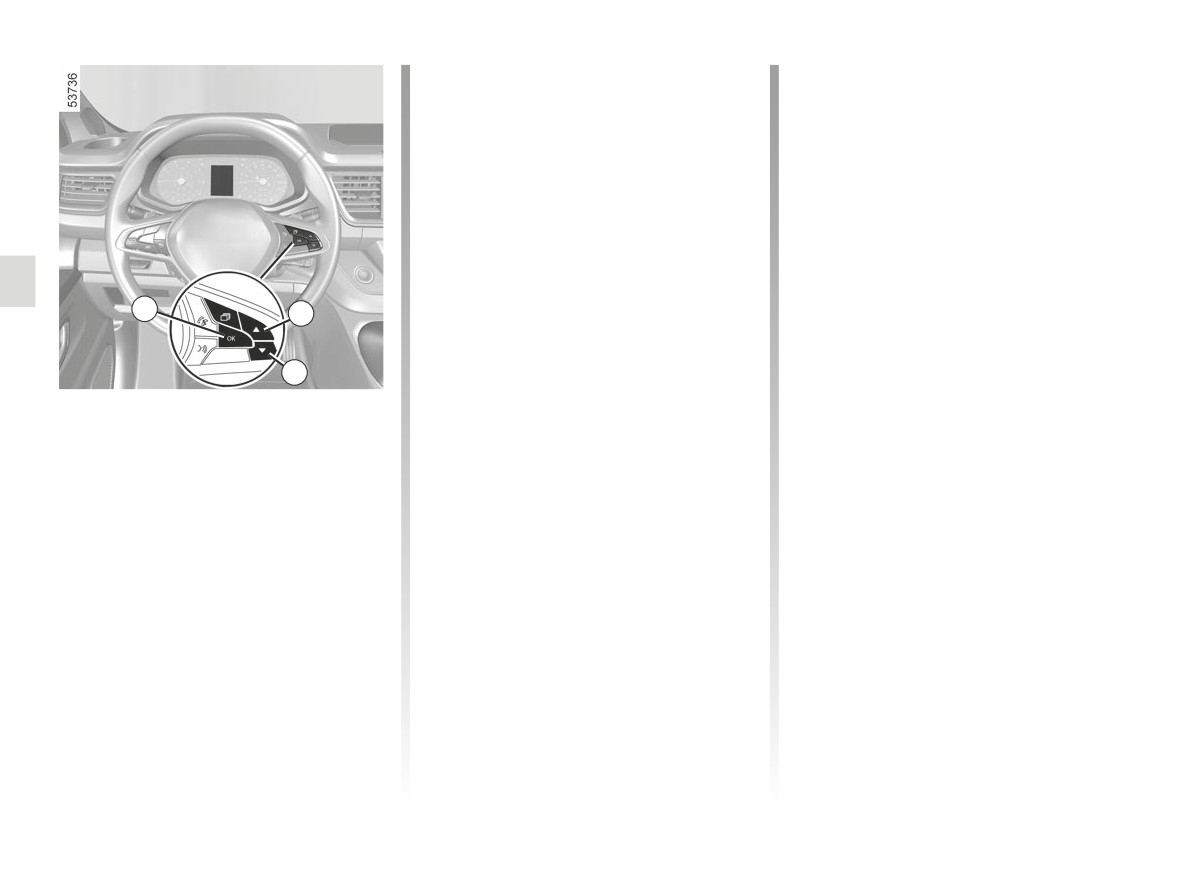
- go to the “Vehicle” tab in the instru-
filter leads to high temperature in the
ment panel menu ➥ 1.109;
exhaust system and exhaust gases.
- press the 3 or 4 buttons repeatedly
Precautions must be taken into account
until the
“Regenerate DPF [long
(see below and on the following page)
press]” message appears;
during the process which lasts for ap-
proximately 40 minutes.
- press and hold the button 2 until
the “DPF regeneration Ongoing” or
“40 min regen-to stop press brake”
To do this, when the
warning
message appears. The warning light
light is on along with the “Regenerate
the particle filter” message:
flashes.
2
3
- park your vehicle off the road, away
Wait until the warning light goes out
from traffic and in a place where it is
(approximately 40 minutes). The mes-
at least three metres from any obsta-
sage “DPF Regeneration Completed” is
4
cles or material which could easily
displayed on the instrument panel.
ignite or melt
(e.g. paper, grass,
Manual regeneration
plastic, dry organic material, etc.);
If the conditions are not met before or
(depending on the vehicle)
- apply the handbrake;
during regeneration, the
warning
If it is not possible to comply with the
light goes out and the message “DPF
conditions (driving time required, etc.),
- position the gear lever in neutral (N)
Regeneration Interrupted” is displayed
position on vehicles equipped with
the
warning light is displayed
and the procedure is cancelled.
an automatic gearbox).
on the instrument panel accompanied
The “Regenerate DPF [long press]”
Then, with the engine running:
by the message “Regenerate the parti-
message will be displayed as soon as
cle filter” to indicate that the saturation
- deactivate the Stop and Start func-
the conditions required to renew the
level is too high for automatic regener-
tion if the vehicle is equipped with it
manual procedure are once again met.
ation.
➥ 2.8;
You must quickly carry out manual re-
generation to avoid saturation of the
particle filter which may require you to
consult an approved dealer.
2.14
CarManuals2.co

SPECIAL FEATURES OF DIESEL VERSIONS (4/5)
Note: do not start the regeneration in
During the regeneration process:
If you need to interrupt the particle
the event of an insufficient oil or coolant
filter regeneration, press one of the
-
the engine speed first increases to
pedals. In this case, regeneration will
approximately 3,000 rpm in order to
level (oil pressure warning light À
only be partial.
warm the engine. It then decreases
or coolant temperature warning light
to approximately 2,000 rpm until the
Ô
lit on the instrument panel). In
end of the regeneration;
this case, top-up ➥ 4.4 and ➥ 4.7.
-
the fan assemblies are triggered.
Regeneration is not possible:
This is normal operation to ensure
engine cooling;
-
if the fuel level is too low;
Do not start the regenera-
-
white fumes and unusual odours are
tion in a garage or a con-
–
if the engine is too cold;
frequently produced in the exhaust
fined area.
-
in extreme weather conditions (cold,
system. This does not indicate that
hot or very high altitude).
the system is operating incorrectly.
Risk of poisoning or suf-
focation by exhaust gas emis-
sions.
Make sure that no one is near the
exhaust when regenerating.
Risk of burns.
Do not park the vehicle in locations
where combustible substances or
materials such as grass, leaves or
paper may come into contact with or
be near to the hot exhaust system.
Fire hazard.
Do not leave your vehicle unsu-
pervised during regeneration.
2.15
CarManuals2.co

SPECIAL FEATURES OF DIESEL VERSIONS (5/5)
Special cases
If the filter becomes excessively sat-
urated, the
warning light and,
depending on the vehicle, the
warning light will appear on the instru-
ment panel, accompanied by the mes-
sage “Check injection”. In this case,
please consult an Authorised Dealer.
If the
®
warning light and, de-
pending on the vehicle, the
warning light appears, accompanied by
the “WARNING: Engine Failure Risk”
message, stop the vehicle, switch off
the engine and contact an Approved
Dealer.
Warning light
®
re-
quires you to stop immedi-
ately, for your own safety,
as soon as traffic conditions
allow. Switch off the engine and do
not restart it. Contact an approved
Dealer.
2.16
CarManuals2.co
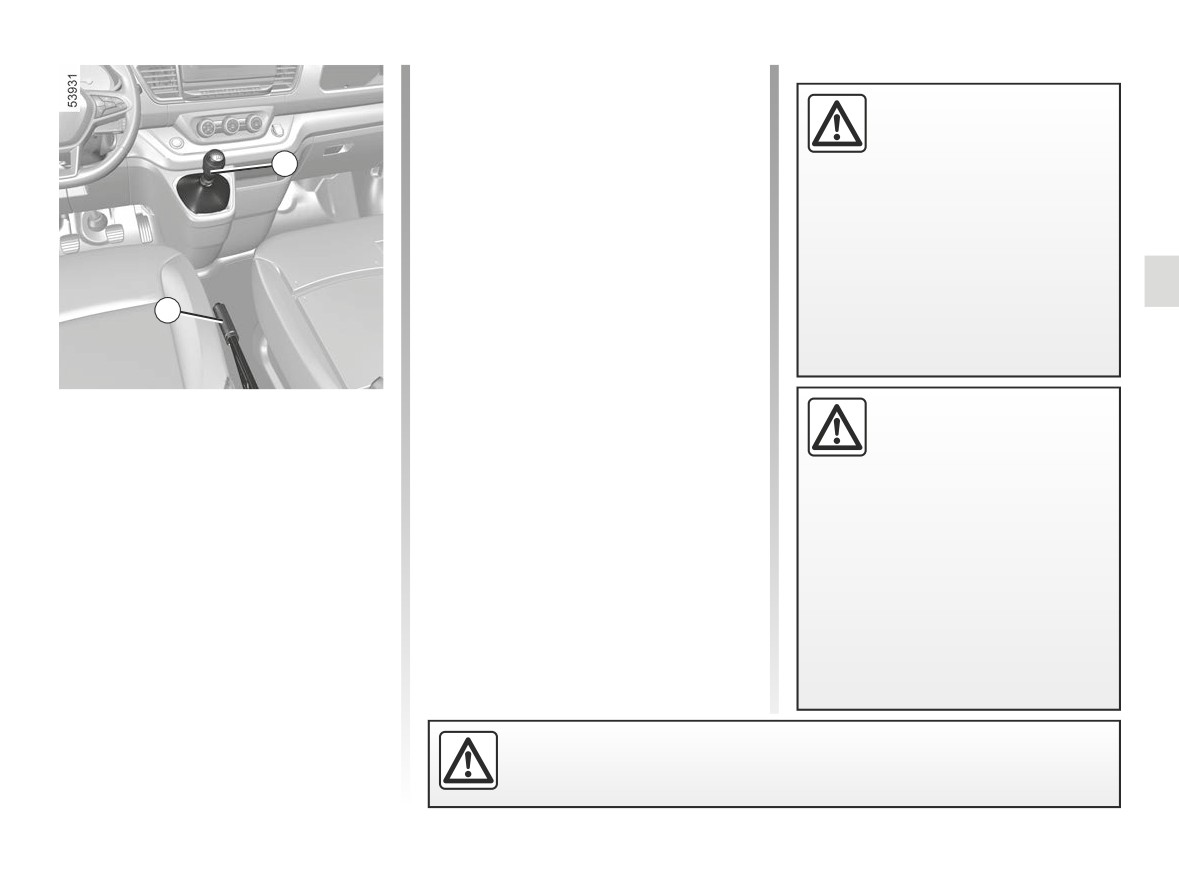
GEAR LEVER/HANDBRAKE
The reversing lights will come on as
soon as reverse gear is selected (with
When stationary and de-
the ignition on).
pending on the slope and/or
Vehicles fitted with parking distance
vehicle load, it may be nec-
1
control ➥ 2.88.
essary to pull up the hand-
brake at least two extra notches and
engage a gear (1st or reverse gear)
Handbrake
on vehicles with a manual gearbox
To release:
or position P on vehicles with an au-
tomatic transmission.
Pull the lever up slightly, press button 2
and then lower the lever to the floor.
2
The red warning light on the instrument
panel will light up if you are driving with
an incorrectly released handbrake.
To apply:
Gear lever
An impact to the underside
Pull the lever upwards and make sure
of the vehicle when revers-
Selecting reverse gear
the vehicle is immobilised.
ing (e.g. striking a raised
kerb) may result in damage
Vehicle with manual gearbox: shift
to the vehicle (eg. deformation of
the lever to neutral, then shift the lever
the rear axle).
to reverse.
To avoid any risk of accident, have
Ring 1 has to be lifted up to the gear
your vehicle checked by an ap-
lever knob to select reverse gear.
proved Dealer.
vehicles with an automatic gearbox
➥ 2.99.
Make sure that the handbrake is properly released when driving (red in-
dicator light off), otherwise overheating may occur.
2.17
CarManuals2.co

DRIVING ADVICE, ECO-DRIVING (1/6)
Fuel consumption is accredited in ac-
Depending on the vehicle, you will have
“Free-wheel” function
cordance with a standard regulatory
various functions which enable you to
Depending on the vehicle, on vehi-
method. Identical for all manufactu-
lower your fuel consumption:
cles fitted with an automatic gearbox
rers, this enables vehicles to be com-
- the rev counter;
and with ECO mode activated, during
pared with one another. Consumption
deceleration phases (driver's foot fully
in real time depends on vehicle usage
- the “free-wheel” function;
off the accelerator pedal), switching to
conditions, the equipment fitted and the
- performance mode;
freewheeling (automatic neutral) allows
user’s driving style. To optimise fuel
you to move farther without accelerat-
- gear change indicator;
consumption, please refer to the fol-
ing in order to save fuel.
lowing advice.
- the driving style indicator;
- the journey record and eco-driving
The
indicator light is displayed
advice via the multimedia screen;
on the instrument panel in green (or in
white, depending on the vehicle) when
- ECO mode activated by the ECO or
the vehicle is freewheeling (automatic
DRIVE MODE button;
neutral).
- the Stop and Start function ➥ 2.8.
Note: the “free-wheel” function is de-
If fitted on the vehicle, the navigation
activated when the brake pedal is
system provides additional information.
pressed or when the accelerator pedal
is pressed.
2.18
CarManuals2.co
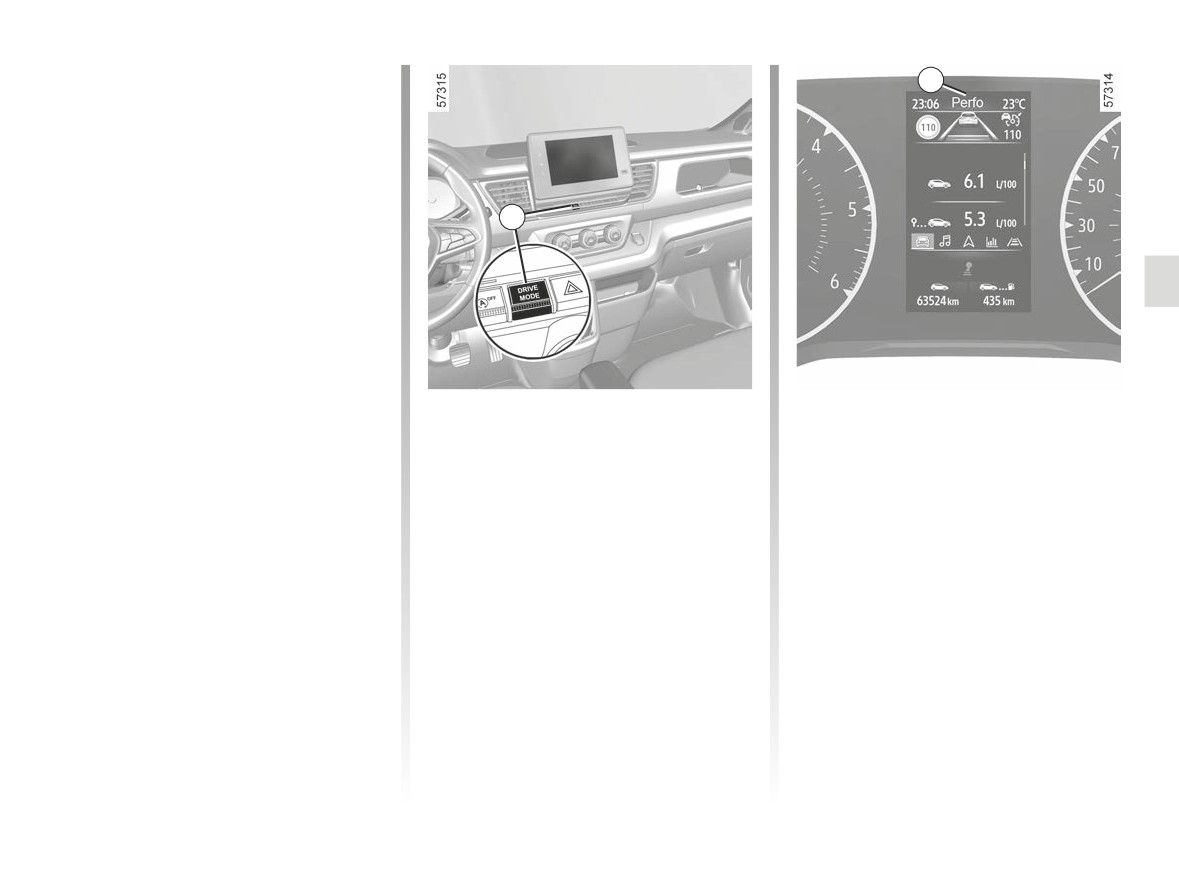
DRIVING ADVICE, ECO-DRIVING (2/6)
Driving advice and ECO
2
driving
If your vehicle is equipped and if driving
under-load, the “Performance mode”
function enables you to limit under-rev-
ving, gives priority to engine braking
when decelerating and enables more
1
dynamic engine driving.
Note: performance mode is only availa-
ble for vehicles fitted with an automatic
gearbox ➥ 2.99.
Activation, deactivation of
Each time the engine is switched off,
performance mode
performance mode will be deactivated
and it will be necessary to select it
Press the 1 button until activation is
again.
confirmed by the message “Perfo” dis-
played in the 2 area on the instrument
Performance mode may be used to
panel.
equal effect in both automatic and
manual modes.
Press the 1 button again as many times
as necessary to return to
“normal”
mode. The “Perfo” indicator light goes
out to confirm deactivation.
2.19
CarManuals2.co
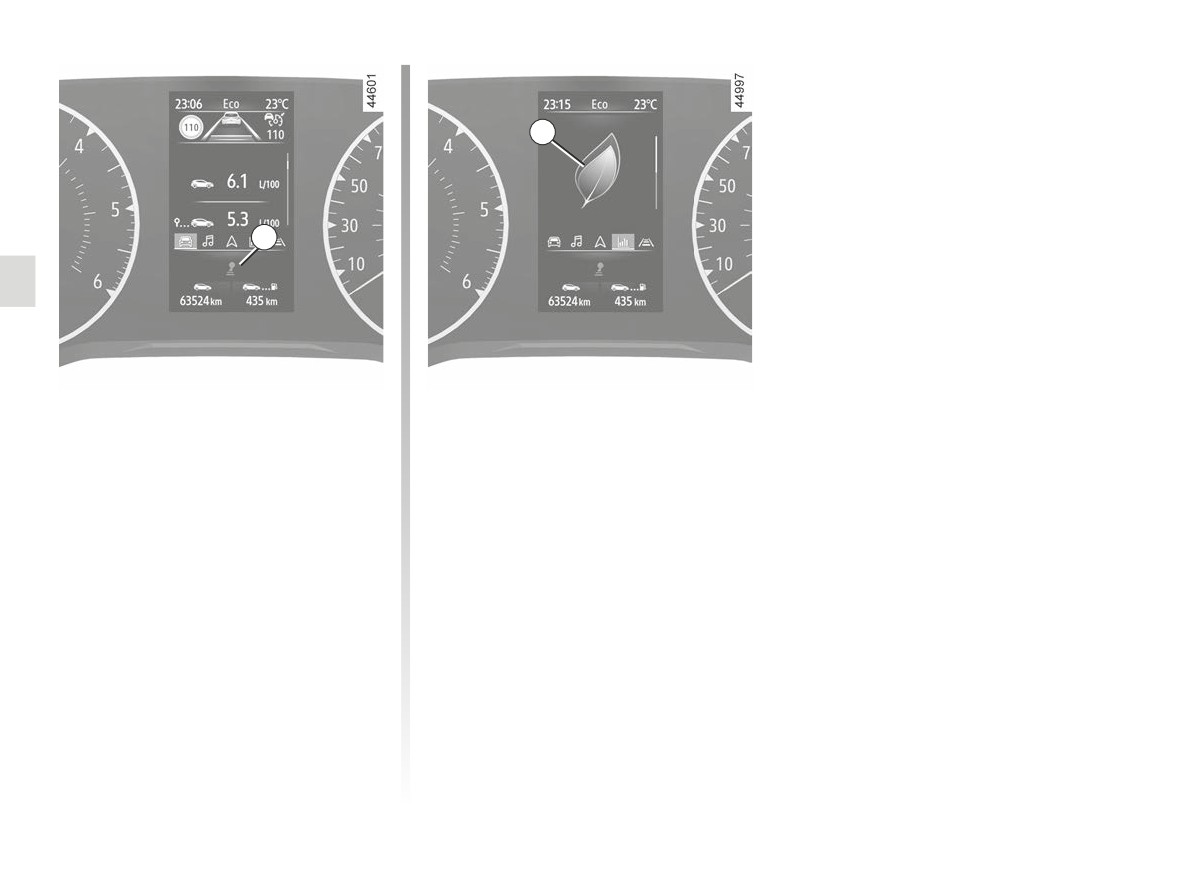
DRIVING ADVICE, ECO-DRIVING (3/6)
4
3
Gear change indicator 3
Driving style indicator 4
Depending on the vehicle, to obtain op-
Informs you about the driving style
timum consumption levels, a warning
adopted in real time. You will be notified
light on the instrument panel lets you
by the size of the 4 indicator light.
know the best time to move up or down
- Large: measured, economical driv-
a gear:
ing;
- Medium: a fairly measured driving
Š
upshift a gear;
style;
‰
downshift a gear.
- Small: driving too fast.
To activate/deactivate the driving style
indicator, please see the multimedia
system instructions.
2.20
CarManuals2.co
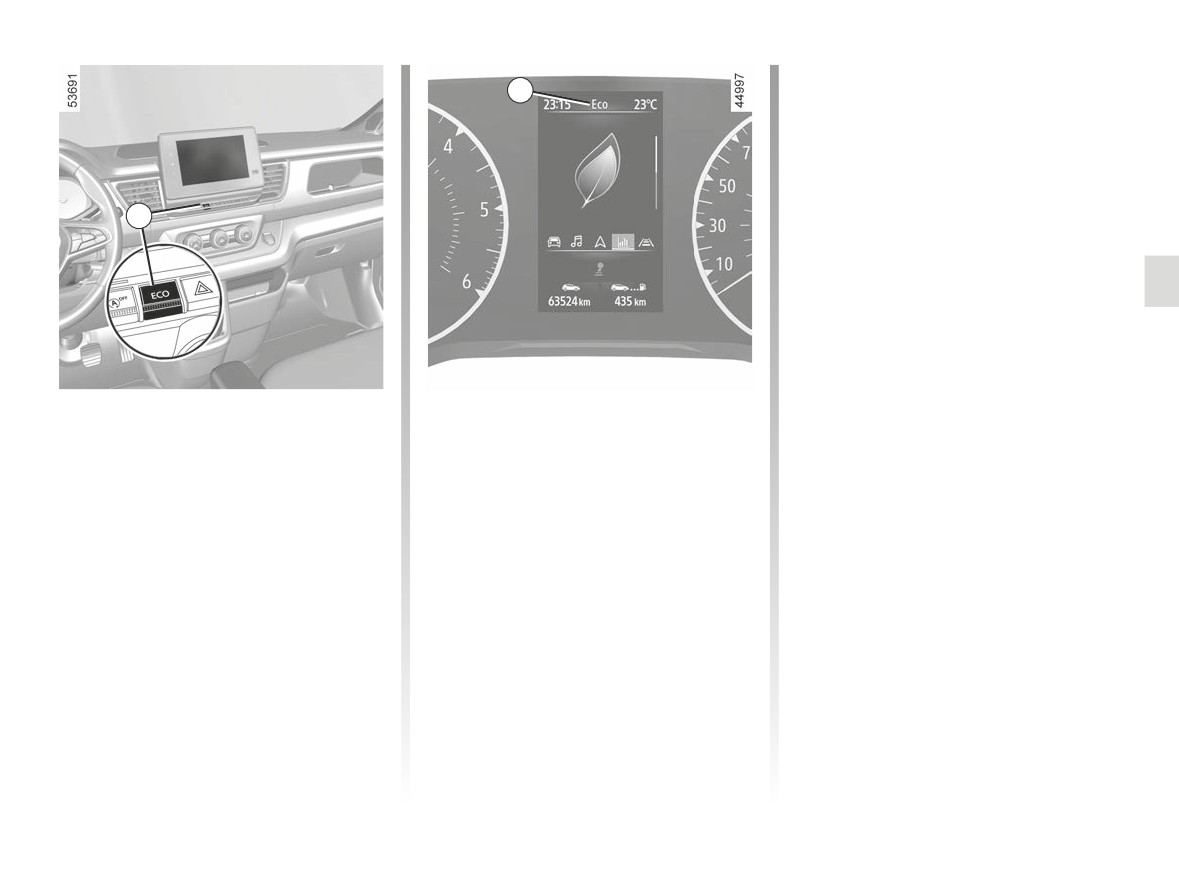
DRIVING ADVICE, ECO-DRIVING (4/6)
Disabling the function
6
Press the 5 switch as many times as
necessary to return to normal mode.
Warning light 6
goes out on the in-
strument panel to confirm deactivation.
Note: on vehicles equipped with an au-
5
tomatic gearbox, each time the engine
is switched off ECO mode will be deac-
tivated and it will be necessary to acti-
vate it again.
ECO mode
Activating the function
ECO mode is a function which opti-
Press the 5 switch until activation is
mises fuel consumption. It affects cer-
confirmed by the 6
warning light
tain driving operations (acceleration,
displayed on the instrument panel.
shifting gears, cruise control, deceler-
While driving, it is possible to exit the
ation, etc.).
ECO mode temporarily in order to im-
Limiting acceleration enables low fuel
prove engine performance.
consumption in urban and surrounding
For this, depress the accelerator pedal
areas.
firmly and fully.
ECO mode is reactivated when you
take pressure off the accelerator pedal.
2.21
CarManuals2.co
DRIVING ADVICE, ECO-DRIVING (5/6)
-
High speeds significantly affect
-
Double declutching and accelerating
the vehicle’s fuel consumption.
before switching off are unnecessary
Examples (at a steady speed):
in modern vehicles.
– reducing the speed from 80 mph
-
Bad weather, flooded roads:
(130 km/h) to 68 mph (110 km/h)
approximately saves up to 20% of
Do not drive through
fuel approximately;
floods if the water is
- reducing the speed from 56 mph
above the lower edge of
(90 km/h) to 50 mph (80 km/h)
the wheel rims.
approximately saves up to 10% of
fuel approximately.
-
Do not over rev the engine in the in-
termediate gears. You should always
use the highest gear possible.
-
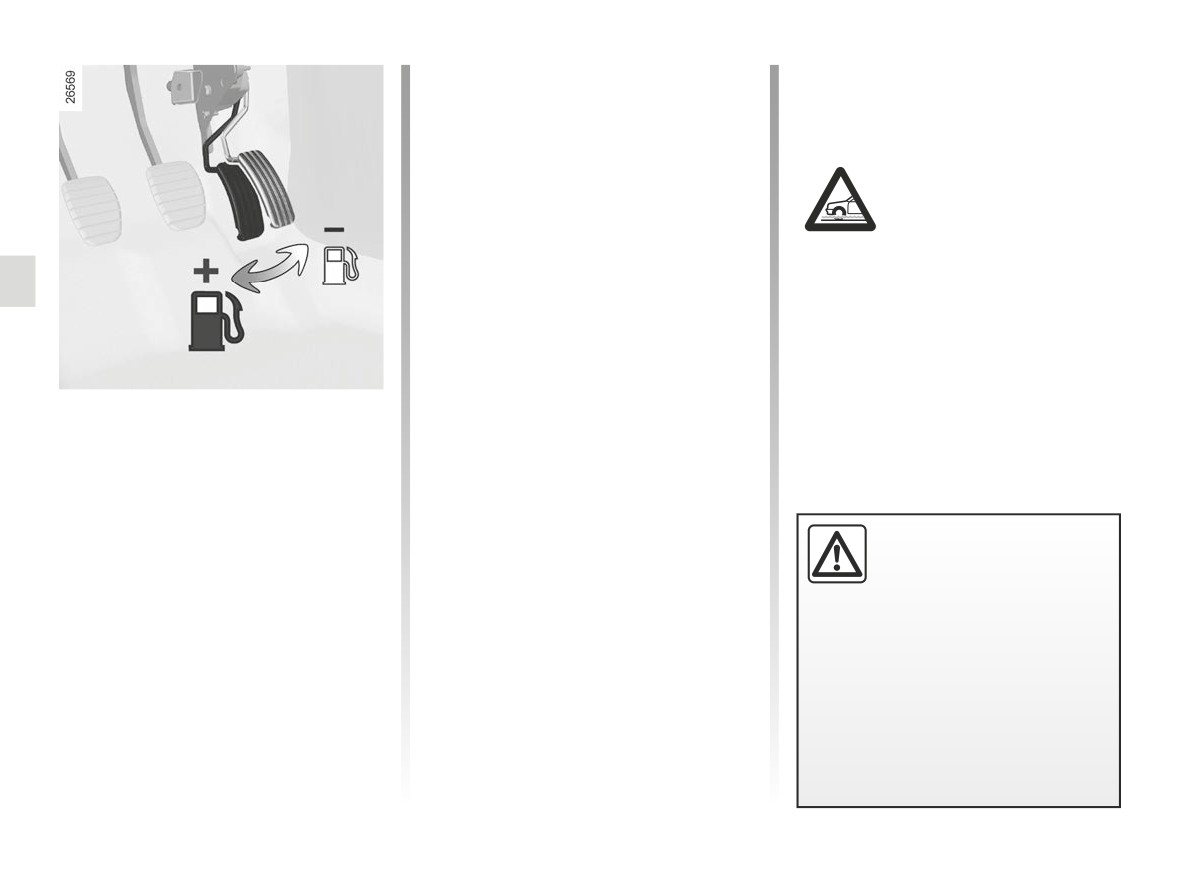
Avoid sudden acceleration.
Driving advice and ECO
-
Brake as little as possible. If you an-
driving
ticipate an obstacle or bend in ad-
vance, you may then simply release
Behaviour
the accelerator pedal.
- Drive carefully for the first few miles
-
Do not try to maintain the same
until the engine reaches its normal
speed up a hill, accelerate no more
Obstructions to the driver
operating temperature, rather than
than you would on the level. Keep
let it warm up while the vehicle is sta-
your foot in the same position on the
On the driver’s side, only
tionary.
accelerator pedal.
use mats suitable for the
vehicle, attached with the
- Dynamic driving involving heavy and
pre-fitted components, and check
frequent acceleration and braking is
the fitting regularly. Do not lay one
expensive on fuel in comparison to
mat on top of another.
the time saved.
There is a risk of wedging the
pedals.
2.22
CarManuals2.co
DRIVING ADVICE, ECO-DRIVING (6/6)
-
In vehicles fitted with air condi-
tioning, it is normal to observe an
increase in fuel consumption (espe-
cially in urban conditions) when it is
used. For vehicles fitted with manual
air conditioning, switch off the system
when it is not required.
Recommendations for reducing
consumption and therefore help-
ing to preserve the environment:
If the vehicle has been parked in the
sun, open the doors for a few mo-
ments to let the hot air escape before
starting the engine.
-
Do not leave an empty roof rack
Tyres
Advice on use
fitted to the vehicle.
-
It is better to fit a trailer for bulky ob-
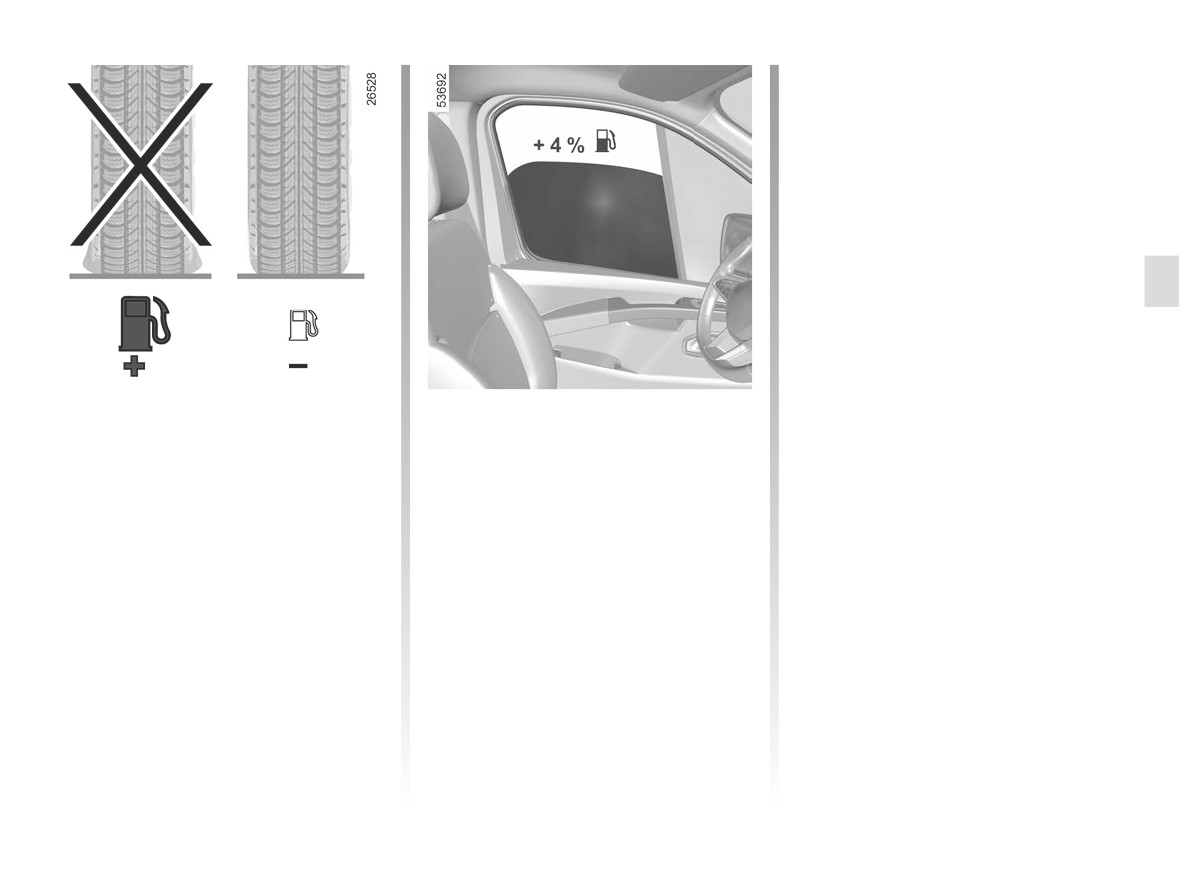
– An underinflated tyre increases fuel
- Favour the ECO mode.
jects.
consumption.
- Electricity is fuel; switch off all the
-
When towing a caravan, fit a wind
- The use of non-recommended tyres
electrical components which are
deflector and adjust it carefully.
can increase fuel consumption.
not really needed. However (safety
-
Avoid using the car for door-to-door
first), keep your lights on when the
calls (short journeys with long waits
visibility is bad (“see and be seen”).
in between) because the engine
never reaches its normal operating
- Use the air vents. Driving with the
temperature.
windows open at 60 mph (100 km/h)
will increase fuel consumption by
4%.
- Never fill the fuel tank right to the
brim to avoid overflow.
2.23
CarManuals2.co

MAINTENANCE AND ANTIPOLLUTION ADVICE
Your vehicle complies with criteria for
Maintenance
Exhaust gas monitoring
recycling and recovering vehicles at the
It is important to remember that failure to
system
end of their service life, which entered
respect antipollution regulations could
The exhaust gas monitoring system will
into force in 2015.
lead to legal action being taken against
detect any operating faults in the vehi-
Some parts of your vehicle have there-
the vehicle owner. In addition, replacing
cle’s antipollution system.
fore been designed to facilitate future
engine, fuel supply system and exhaust
If this system malfunctions, toxic sub-
recycling.
components with parts other than those
stances may be released into the at-
These parts are easy to remove so
originally recommended by the manu-
mosphere or damage may occur.
facturer may alter your vehicle so that
that they can be recovered and repro-
This warning light on the in-
it no longer complies with antipollution
cessed by recycling companies.
Ä
strument panel will indicate if
regulations.
By virtue of its design, moderate fuel
there are any faults in the system:
consumption and initial settings, your
Have your vehicle adjusted and
This lights up when the ignition is
vehicle also conforms to current an-
checked by an approved Dealer, in ac-
switched on and goes out when the
tipollution regulations. The manufac-
cordance with the instructions given in
engine is started.
turer is actively striving to reduce pol-
your maintenance schedule: they will
- If it lights up continuously, consult an
lutant exhaust gas emissions and to
have all the equipment necessary for
approved Dealer as soon as possi-
save energy. But the fuel consumption
ensuring that your vehicle is maintained
ble;
of your vehicle and the level of pollutant
to its original standard.
exhaust gas emissions are also your
- if it flashes, reduce the engine speed
responsibility. Ensure that it is main-
until the light stops flashing. Contact
Engine adjustments
tained and used correctly.
your approved dealer as soon as
- Air filter, diesel filter: a choked el-
possible.
ement will reduce efficiency. It must
➥ 1.137
be replaced.
- Idle speed: this does not require ad-
justment.
2.24
CarManuals2.co

ENVIRONMENT
Your vehicle has been designed with
Emissions
- At the end of the vehicle’s service
respect for the environment in mind for
life, it should be sent to approved
Your vehicle has been designed to
its entire service life: during production,
centres to ensure that it is recycled.
emit fewer greenhouse gases (CO2)
use and at the end of its life.
while in use, and therefore to consume
- In all cases, comply with local legis-
less fuel (e.g. 140 g/km, equivalent to
lation.
Manufacture
1494.6 mpg (5.3 l/100 km) for a diesel
vehicle).
Your vehicle has been manufactured at
Recycling
a factory which complies with a policy
Our vehicles are also equipped with a
Your vehicle is 85% recyclable and
to reduce the environmental impact
particle filter system including a cata-
95% recoverable.
on the surrounding areas (reduction of
lytic converter, an oxygen sensor and
water and energy consumption, visual
an active carbon filter (the latter pre-
To achieve these objectives, many of
and noise pollution, atmospheric emis-
vents vapour from the fuel tank being
the vehicle components have been de-
sions and waste water; sorting and re-
released into the open air).
signed to enable them to be recycled.
using waste).
The materials and structures have
On certain diesel vehicles, this system
been carefully designed to allow these
also includes a particle filter to reduce
components to be easily removed and
the volume of soot particles emitted.
reprocessed by specialist companies.
In order to preserve raw material re-
Please make your own
sources, this vehicle incorporates nu-
contribution towards
merous parts made from recycled plas-
protecting the environment
tics or renewable materials (vegetable
or animal-derived materials such as
too
cotton or wool).
- Worn parts replaced in the course of
routine vehicle maintenance (vehi-
cle battery, oil filter, air filter, batter-
ies, etc.) and oil containers (empty or
filled with used oil) must be disposed
of through specialist organisations.
2.25
CarManuals2.co
TYRE PRESSURE MONITOR (1/5)
1
Resetting the standard level
for the tyre pressures
This should be performed:
- when the standard tyre pressure
needs to be changed to adapt to
usage conditions (empty, carrying a
load, motorway driving, etc.);
- after swapping a wheel (however
this practice is not recommended);
- after changing a wheel.
It should always be done after checking
the tyre pressure of all four tyres when
cold.
If the vehicle is equipped with the func-
Tyre pressures must correspond to the
tion, this system monitors the tyre pres-
current usage of the vehicle (empty,
sure.
carrying a load, motorway driving, etc.).
Operating principle
Each wheel (except for the emergency
spare wheel) has a sensor in the infla-
tion valve which periodically measures
the tyre pressure.
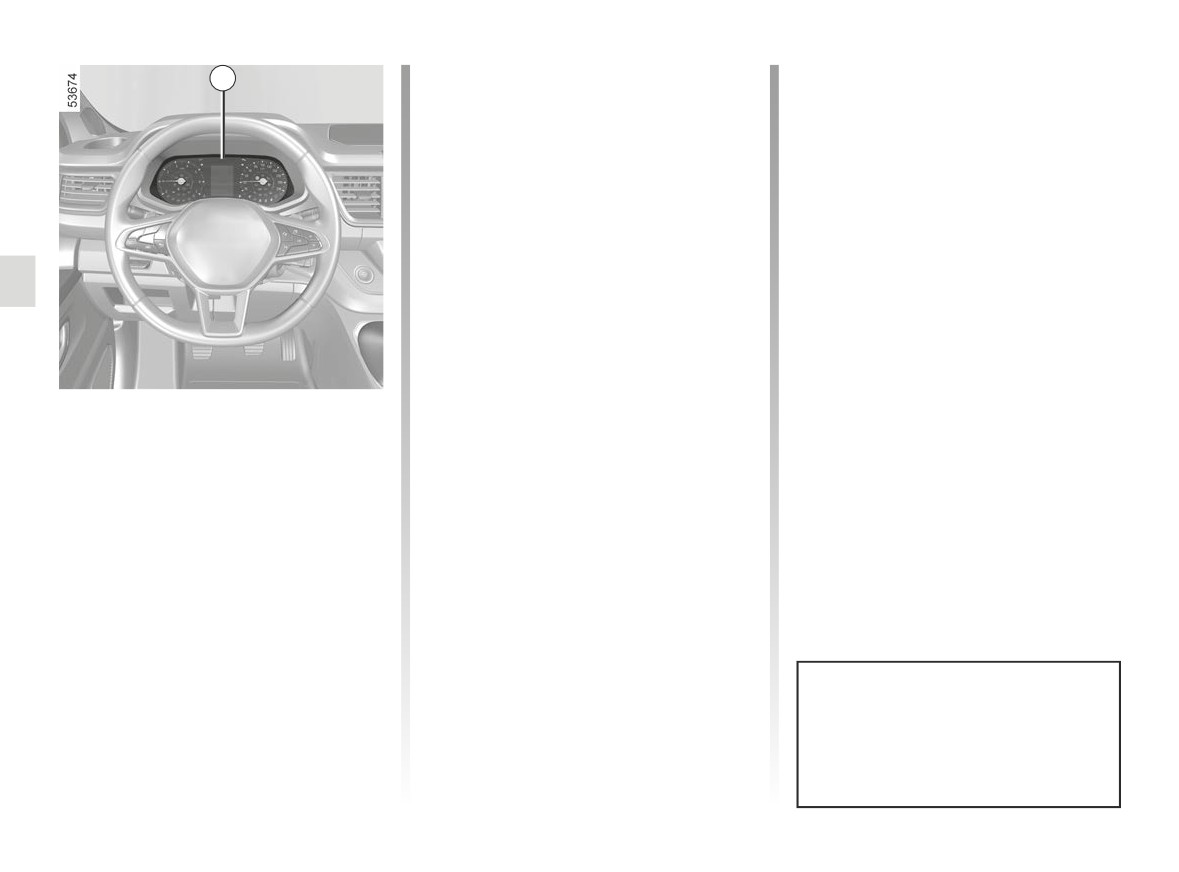
The system displays the current pres-
sures on the instrument panel 1 and
alerts the driver in the event of insuffi-
cient pressure.
If the wheels are swapped, the
system must be reinitialised.
Consult an approved dealer.
2.26
CarManuals2.co
TYRE PRESSURE MONITOR (2/5)
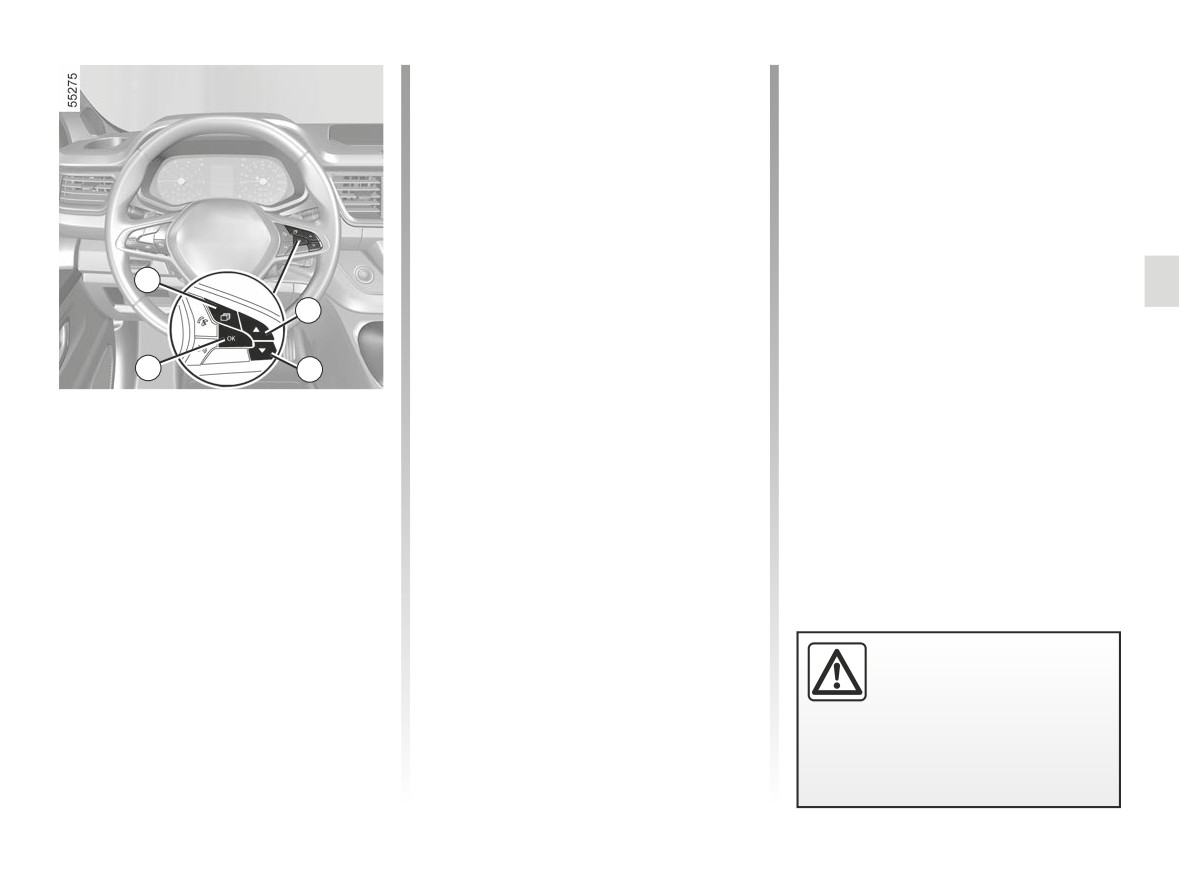
- press and hold (around 3 seconds)
the button 4 to launch the reset. The
flashing tyres followed by the mes-
sages “Learning Tyre Pressures”
and then “Tyres location in progress”
indicates that the reset request for
the tyre pressure reference value
has been acknowledged.
Reset can take several minutes of driv-
ing.
5
If the resetting is followed by short trips,
2
the message “Tyres location in pro-
gress” can remain displayed after suc-
cessive restarts.
4
3
Note: the standard tyre pressure
Resetting procedure
cannot be less than that recommended
Ignition on, vehicle stopped:
and indicated on the door frame.
- tap switch 5 as many times as nec-
essary to reach the Vehicle
tab;
- briefly press the 2 or 3 switch to
reach the “Tyre Pressure” page;
For your safety, the warning
light
®
requires you
to stop immediately as soon
as traffic conditions allow.
2.27
CarManuals2.co
TYRE PRESSURE MONITOR (3/5)
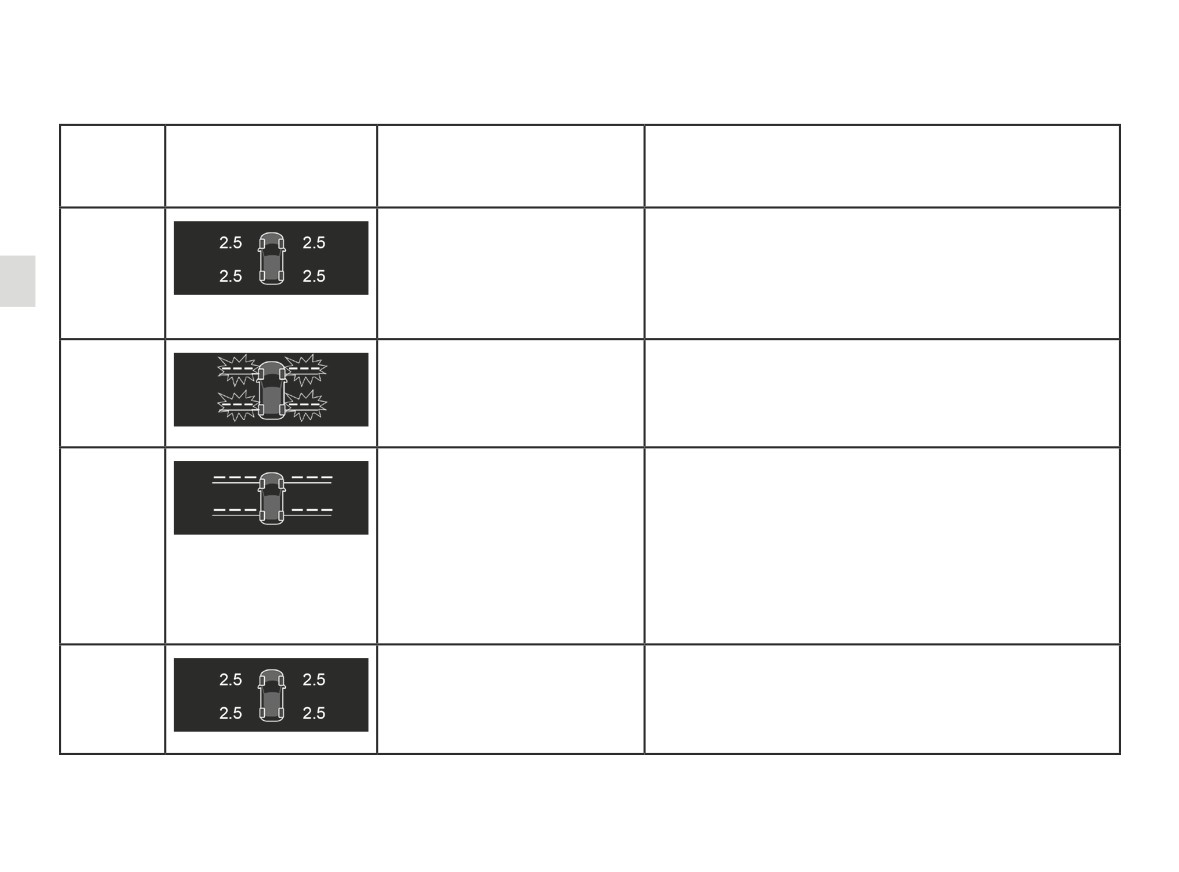
The table below shows the possible messages related to the tyre resetting procedure.
Steps
Displays
Messages
Readings
(depending on
the vehicle)
1
With the ignition on and the vehicle stationary, start the
resetting the pressure of all four tyres by pressing and
holding the 4 OK switch.
Tyre pressure init. long press
2
The “---” symbols in front of each wheel will flash to in-
dicate that the system has registered the tyre pressure
Learning Tyre Pressures
reset for all four wheels.
3
The “---” symbols in front of each wheel will remain lit.
This system resets the tyre pressure of all four tyres.
You can now drive. The message may remain displayed
during short journeys.
Tyres location in progress
Note: during the reset, tyre pressure monitoring remains
in operation.
4
The pressure value of the four tyres is displayed: the re-
setting procedure is complete and successful.
2.28
CarManuals2.co
TYRE PRESSURE MONITOR (4/5)
Readjustment of tyre
Emergency spare wheel
1
pressures
If the vehicle is equipped with an emer-
The pressure of the four tyres must
gency spare wheel, it will not have a
be set when cold (refer to the label lo-
sensor.
cated on the edge of the driver’s door).
If the tyre pressures cannot be checked
Replacing wheels/tyres
when the tyres are cold, the recom-
mended pressures should be increased
This system requires specific equip-
by 0.2 to 0.3 bar (3 PSI).
ment (wheels, tyres, hubcaps, etc.).
➥ 5.12.
Never deflate a hot tyre.
Contact an Approved Dealer to replace
the tyres and to find out about acces-
sories compatible with the system and
available from your dealer network: the
use of any other accessory could affect
the correct operation of the system.
Tyre repair product and
inflation kit
Because the valves are specially de-
signed, only use equipment approved
by the approved network. Please see
the section on ➥ 5.4.
This function is an addi-
tional driving aid.
The function does not take
Tyre pressure faults
Changing a wheel
the place of the driver. It
The table on the following page lists
The system may take sev-
cannot, therefore, under any cir-
the warning messages which appear
eral minutes depending on
cumstances replace the vigilance
on the instrument panel 1 when the
use for the new wheel po-
or the responsibility of the driver.
system detects a tyre pressure fault.
sitions and pressures to be recog-
Check the tyre pressures, including
nised; check the tyre pressures after
the emergency spare wheel, once a
all operations.
month.
2.29
CarManuals2.co
TYRE PRESSURE MONITOR (5/5)
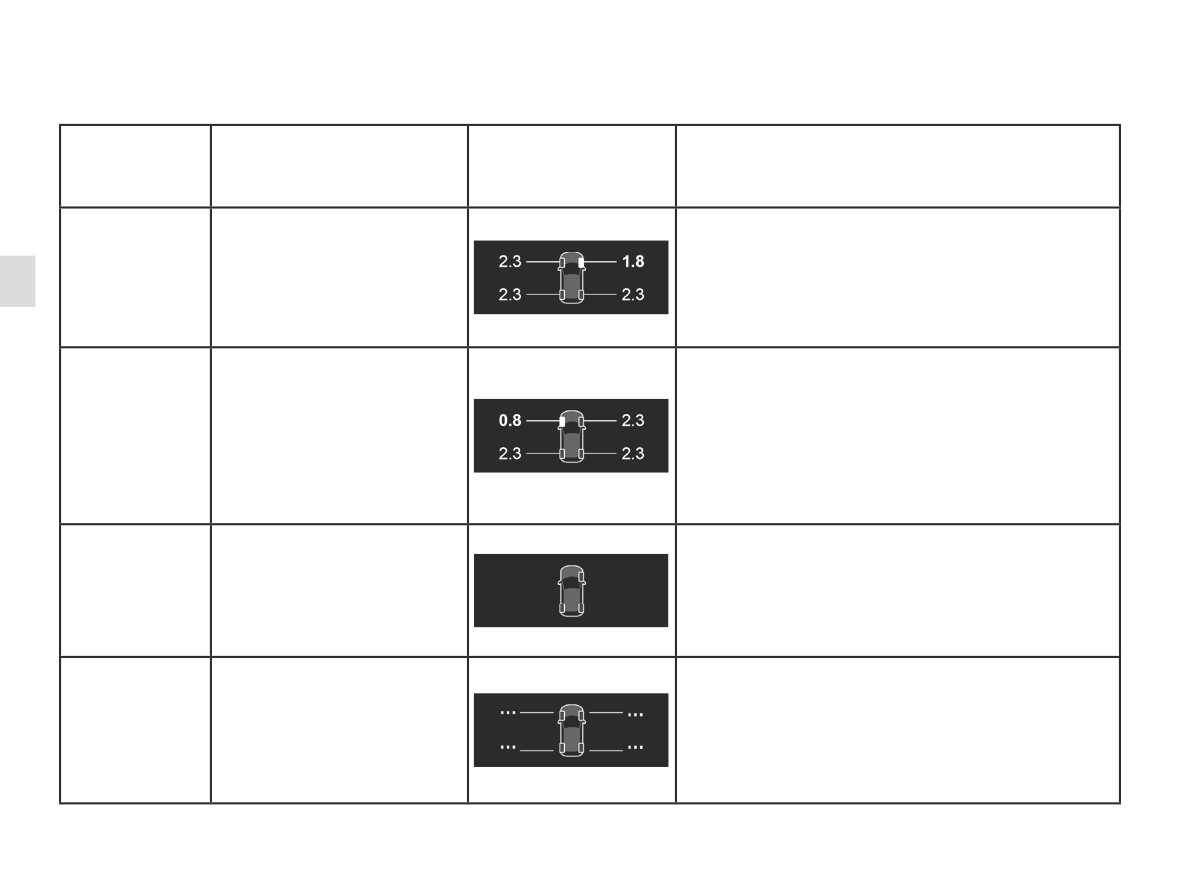
The information on the instrument panel signals any potential tyre pressure faults (e.g. deflated or punctured tyre). For
your safety, the warning light® requires you to stop immediately as soon as traffic conditions allow.
Indicator
Messages
Displays
Readings
lights
(depending on
the vehicle)
The wheel and associated pressure value are dis-
played in yellow.
Adjust Tyre Pressure
This indicates that tyre under-inflation has been de-
tected. Check and adjust the pressure of the four
tyres then reset the system.
The wheel and associated pressure value are dis-
played in red.
This indicates that the tyre concerned is punctured
Puncture
or severely underinflated. Adjust the pressure of the
+®
four tyres while cold and reset the system if the tyre
is deflated. Replace the tyre (or have it replaced) if
it is punctured.
A wheel is no longer displayed.
This indicates that at least one wheel is not fitted with
Check Tyre Pressure Sensors
a sensor (e.g. emergency spare wheel) or that the
sensor is faulty. Consult an approved dealer.
This indicates that the system has not been able to
determine the pressure of each tyre. This may be
Tyre Detection Failure
caused by the use of a sensor not recommended by
an approved dealer. The tyre pressure sensor moni-
toring system remains in operation.
2.30
CarManuals2.co

DRIVING CORRECTION DEVICES AND AIDS (1/5)
Depending on the vehicle, this is com-
Anti-lock braking system
Operating faults:
posed of:
(ABS)
-
and x
lit up on the in-
–
anti-lock braking system (ABS);
Under heavy braking, the ABS prevents
strument panel accompanied
-
electronic stability program (ESC)
the wheels from locking, allowing the
by the messages
“Check ABS”,
with understeer control and trac-
stopping distance to be managed and
“WARNING: Check Braking System”
tion control;
keeping control of the vehicle.
and “Check ESC”: this indicates that
Under these circumstances, the vehi-
the ABS, the ESC and the emer-
-
driver assistance with a trailer;
cle can be steered to avoid an obstacle
gency brake assist are disabled.
–
emergency brake assist;
whilst braking. In addition, this system
Braking is always enabled;
can increase stopping distances, par-
–
grip control;
ticularly on roads with low surface grip
- x
, D
,
and
®
–
hill start assistance.
(wet ground etc.).
lit on the instrument panel accom-
You will feel a pulsation through the
panied by the message “WARNING:
brake pedal each time the system is
Braking System”: this indicates a
activated. The ABS does not in any
fault with the braking system.
way improve the vehicle's physical per-
In both cases, please consult an
formance relating to the road surface
Authorised Dealer.
and road-holding. It is still essential to
follow the rules of good driving practice
(such as driving at a safe distance from
the vehicle in front etc.).
Your braking systems
are partially operational.
However, it is dangerous
In an emergency, apply firm and
to brake suddenly and it
continuous pressure to the brake
is essential to stop immediately, as
pedal. There is no need to pump
soon as traffic conditions allow. Call
it repeatedly. The ABS will modu-
an approved Dealer.
late the force applied in the braking
system.
2.31
CarManuals2.co

DRIVING CORRECTION DEVICES AND AIDS (2/5)
Electronic stability program
Understeer control
Operating faults
(ESC) with understeer control
This system optimises the action of the
When the system detects an operating
and traction control
ESC in the case of pronounced under-
fault the message “Check ESC” and
steer (loss of front axle road holding).
appear
Electronic stability control ESC
Traction control
on the instrument panel. In this case,
This system helps you to keep control
the ESC and traction control system
of the vehicle in critical driving condi-
This system helps to limit wheelspin of
are deactivated.
tions (avoiding an obstacle, loss of grip
the drive wheels and to control the ve-
Consult an approved dealer.
on a bend, etc.).
hicle when pulling away, accelerating or
decelerating.
Operating principle
Operating principle
A sensor in the steering wheel detects
Using the wheel sensors, the system
the direction selected by the driver.
measures and compares the speed of
These functions are an ad-
Other sensors throughout the vehicle
the drive wheels at all times and slows
ditional aid in the event of
measure the actual direction.
down their over-rotation. If a wheel is
critical driving conditions,
starting to slip, the system brakes au-
enabling the vehicle behav-
The system compares driver input to
tomatically until the drive supplied be-
iour to be adapted to suit the driving
the actual trajectory of the vehicle and
comes compatible with the level of grip
conditions.
corrects the trajectory if necessary by
under the wheel again.
controlling the braking of certain wheels
The functions do not take the place
and/or engine power. In the event that
The system also adjusts the engine
of the driver. They do not increase
the system is engaged, indicator light
speed to the grip available under the
the vehicle’s limits and should
wheels, independently of the pressure
not encourage you to drive more
flashes on the instrument panel.
exerted on the accelerator pedal.
quickly. Therefore, they can under
no circumstances replace the vigi-
lance or responsibility of the driver
when manoeuvring the vehicle (the
driver must always be ready for
sudden incidents which may occur
when driving).
2.32
CarManuals2.co

DRIVING CORRECTION DEVICES AND AIDS (3/5)
Driver assistance with a
Emergency brake assist
Braking anticipation
trailer
This system supplements the ABS
Depending on the vehicle, when you
This system helps to maintain control
and helps reduce vehicle stopping dis-
rapidly release the accelerator, the
over the vehicle while using a trailer.
tances.
system anticipates the braking ma-
It detects shaking caused by towing a
noeuvre in order to reduce stopping
trailer under certain driving conditions.
Operating principle
distances.
The system is for detecting an emer-
When using the cruise control:
Operating conditions
gency braking situation. In this case,
- if you use the accelerator, when you
- The towbar must be approved by an
the braking assistance immediately de-
release it, the system may be trig-
authorised dealer;
velops maximum power and may trig-
gered;
- the harness must be approved by an
ger ABS regulation.
- if you do not use the accelerator, the
authorised dealer;
system will not be triggered.
- the towbar must be connected to the
ABS braking is maintained as long as
vehicle.
the brake pedal is applied.
Operating faults
Operating principle
The function stabilises the vehicle by:
Brake lights come on
When the system detects an operating
- asymmetric braking of the front
fault the message “WARNING: Check
Depending on the vehicle, these may
wheels to reduce shaking caused by
Braking System” appears on the instru-
flash in the event of sudden decelera-
the trailer;
tion.
– braking of all four wheels and limita-
ing light.
tion on engine torque to reduce the
Consult an approved dealer.
vehicle speed until the shaking has
stopped.
Warning light
flashes on the in-
strument panel to inform the driver.
2.33
CarManuals2.co
DRIVER CORRECTION DEVICES AND AIDS (4/5)
Grip control
“Soft ground” mode
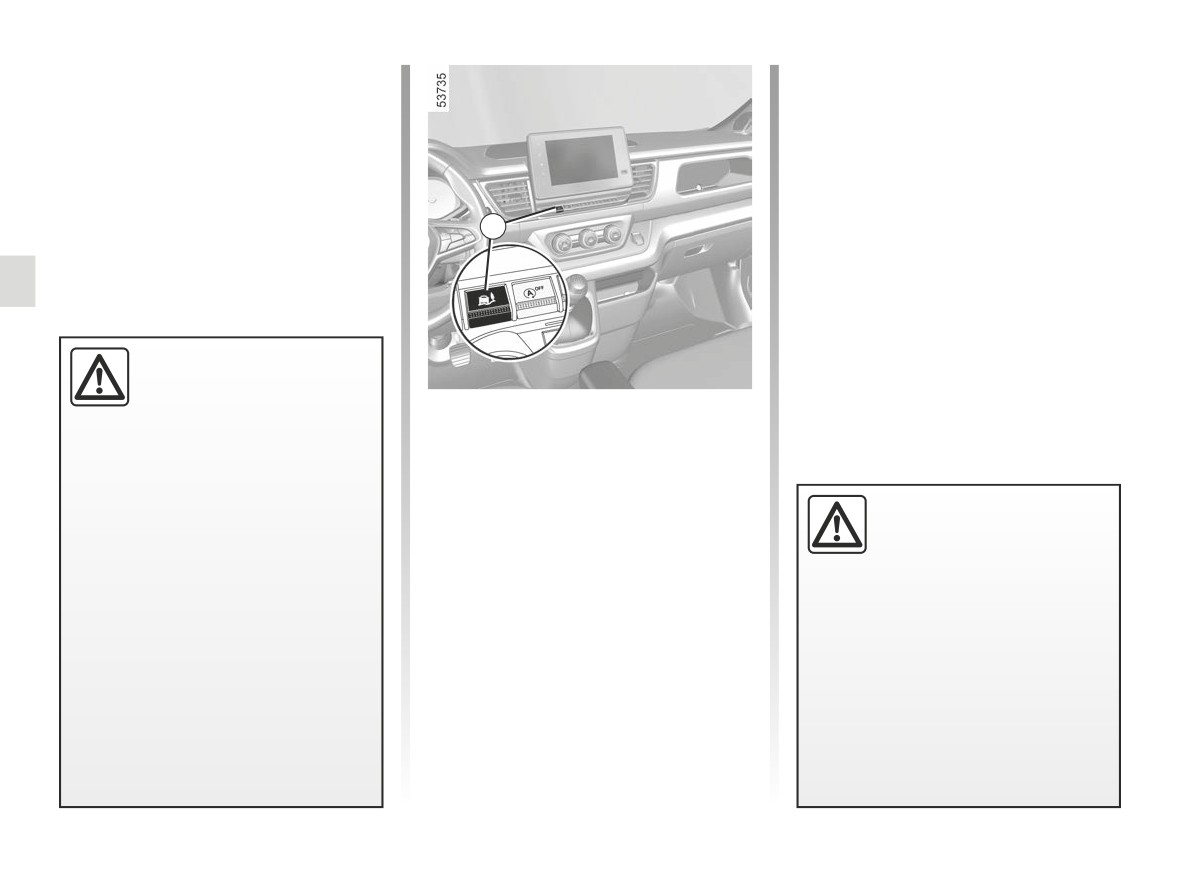
If fitted on the vehicle, grip control
Press the switch 1: the message “Grip
makes it easier to control the vehicle on
Extend Loose Surface ON” is displayed
low grip surfaces (soft ground, etc.).
on the instrument panel and the
warning light is illuminated.
This position enables optimal usage on
1
soft ground (mud, sand, dead leaves,
etc.). In this position, engine speed
remains under the driver’s control.
The system automatically switches
to
“Road” mode over approximately
31 mph (50 km/h).
These functions are an ad-
ditional aid in the event of
critical driving conditions,
“Road” mode
enabling the vehicle behav-
When the vehicle starts,
the
“Grip
iour to be adapted to suit the driving
Extend Traction Control” message is
conditions.
displayed on the instrument panel.
The functions do not take the place
This position enables optimal usage
Tyres
of the driver. They do not increase
under normal driving conditions (dry-
When they need to be re-
the vehicle’s limits and should
ness, humidity, light snow, etc.).
placed, only tyres of the
not encourage you to drive more
same make, size, type and
quickly. Therefore, they can under
“Road” mode uses traction control func-
profile should be used.
no circumstances replace the vigi-
tions.
lance or responsibility of the driver
Tyres fitted to the vehicle should
when manoeuvring the vehicle (the
either be identical to those fitted
driver must always be ready for
originally or conform to those
sudden incidents which may occur
recommended by your approved
when driving).
dealer.
2.34
CarManuals2.co

DRIVING CORRECTION DEVICES AND AIDS (5/5)
Hill start assistance
Depending on the gradient of the in-
cline, this system assists the driver
when starting on a hill. It prevents the
vehicle from rolling backwards, de-
The hill start assistance
pending on the slope, by automatically
system cannot completely
applying the brakes when the driver lifts
prevent the vehicle from
his/her foot off the brake pedal to de-
rolling backwards in all sit-
press the accelerator pedal.
uations (extremely steep gradients
System operation
etc.).
It only operates when the gear lever is
In all cases, the driver may depress
in a position other than neutral and the
the brake pedal to prevent the vehi-
vehicle is completely stationary (brake
cle from rolling backwards.
pedal depressed).
The hill start assistance function
The system holds the vehicle for ap-
should not be used for prolonged
proximately 2 seconds. The brakes are
stops: use the brake pedal.
then gradually released (the vehicle will
This function is not designed to im-
move according to the slope).
mobilise the vehicle permanently.
If necessary, use the brake pedal to
stop the vehicle.
The driver must remain particularly
vigilant when driving on slippery or
low-grip surfaces.
Risk of serious injury.
2.35
CarManuals2.co
LANE DEPARTURE WARNING (1/5)
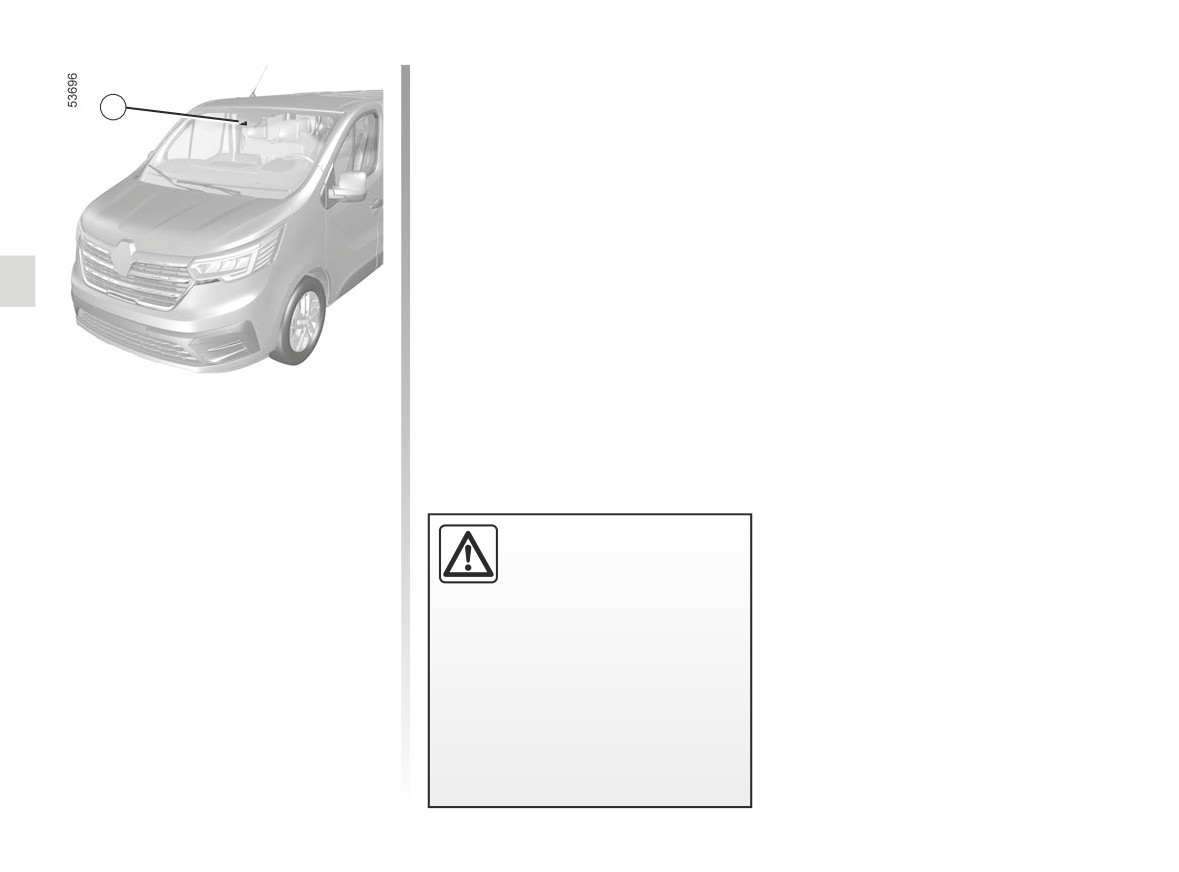
Location of the camera 1
1
Make sure the windscreen is not ob-
scured (dirt, mud, snow, condensation
etc.).
Using information from the 1 camera,
the function warns the driver when a
continuous or broken line is crossed
or when approaching the roadside (di-
vider, barrier, pavement, embankment,
etc.) without the direction indicator
lights being activated.
This function is an addi-
tional driving aid. This func-
tion is not under any cir-
cumstances intended to
replace the due care and attention
of the driver, who should at all times
be in control of the vehicle.
The lane departure warning func-
tion does not correct the vehi-
cle’s trajectory.
2.36
CarManuals2.co
LANE DEPARTURE WARNING (2/5)
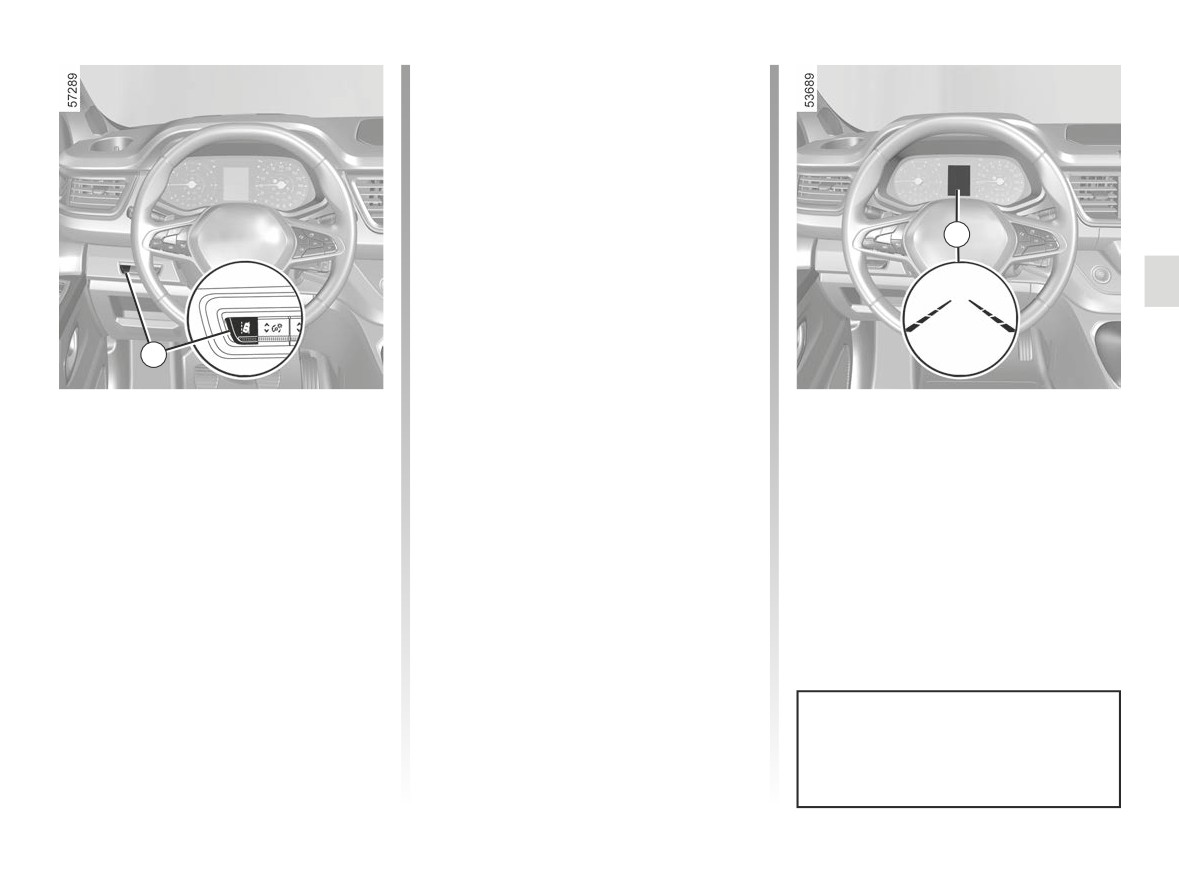
To deactivate the function, press the
switch
2 to select
“Lane departure
warning off” on the instrument panel.
Warning light
goes out on the in-
strument panel.
Operation
3
When the function is activated, the
warning light and the left and
right lines 3 are displayed in grey on the
instrument panel.
2
The function is set to notify the
driver if:
Activation/deactivation
- speed is between approximately
The function alerts the driver:
43 mph (70 km/h) and 112 mph
To activate the function, press
- by emitting an audible warning;
(180 km/h);
the 2 switch to select “Lane Departure
and
and
Warning” on the instrument panel. The
“Lane departure warning on” message
- the
warning light and left/right
- the
warning light and 3 the in-
line indicators 3 are coloured white.
dicator for the crossed line turn red.
and “
” warning light are displayed
on the instrument panel.
The warning function is triggered
if the vehicle breaches a line or ap-
proaches a roadside (divider, barrier,
pavement, embankment, etc.) without
the direction indicator lights being ac-
tivated.
Each time the vehicle is started,
the function continues the mode
saved the last time the engine was
stopped.
2.37
CarManuals2.co
LANE DEPARTURE WARNING (3/5)
Temporarily not available
Conditions for non-activation
4
- Very fast lane departure;
of the system
The system cannot be activated when:
- driving continuously on a line;
- four seconds approximately after
- reverse gear is engaged;
changing lanes;
- the field of vision of the camera is ob-
- tight bends;
structed;
- impaired visibility;
- the û
warning light is displayed.
- activation of one of the direction indi-
cator lights;
The
warning light and the left/
right line indicators turn to grey on the
- strong acceleration;
instrument panel.
- ...
When the function is not available, the
Adjustment
-
“Alert”: adjust the line detection sen-
warning light and the left/right in-
sitivity level. To do this, select:
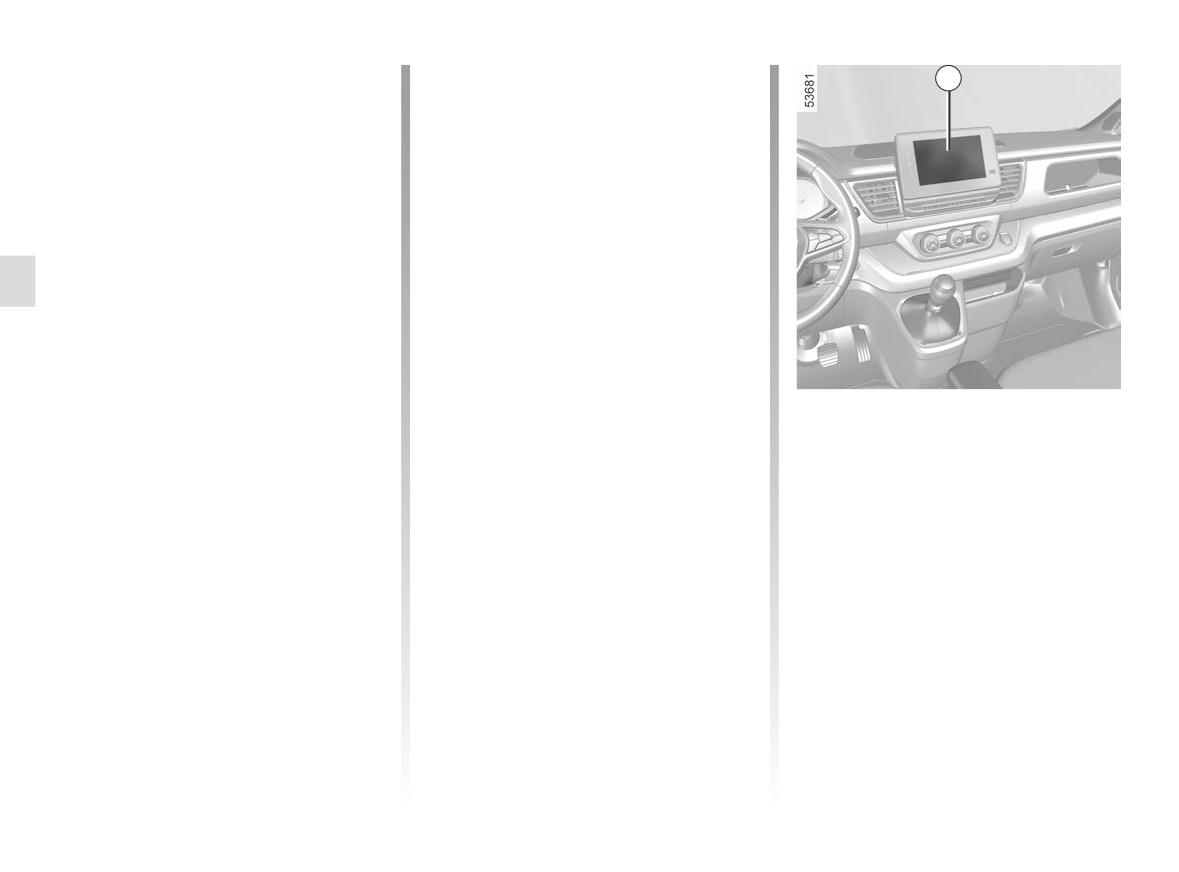
Vehicles fitted with a multimedia
dicators turn to grey on the instrument
screen.
-
“Late”: line detected when crossing;
panel.
To access the multimedia screen func-
-
“Standard”: line detected on ap-
tion settings 4, refer to the multimedia
proach;
instructions:
–
“Early”: line detected nearby.
- “Volume”: adjust the volume of the
audible warning;
2.38
CarManuals2.co
LANE DEPARTURE WARNING (4/5)
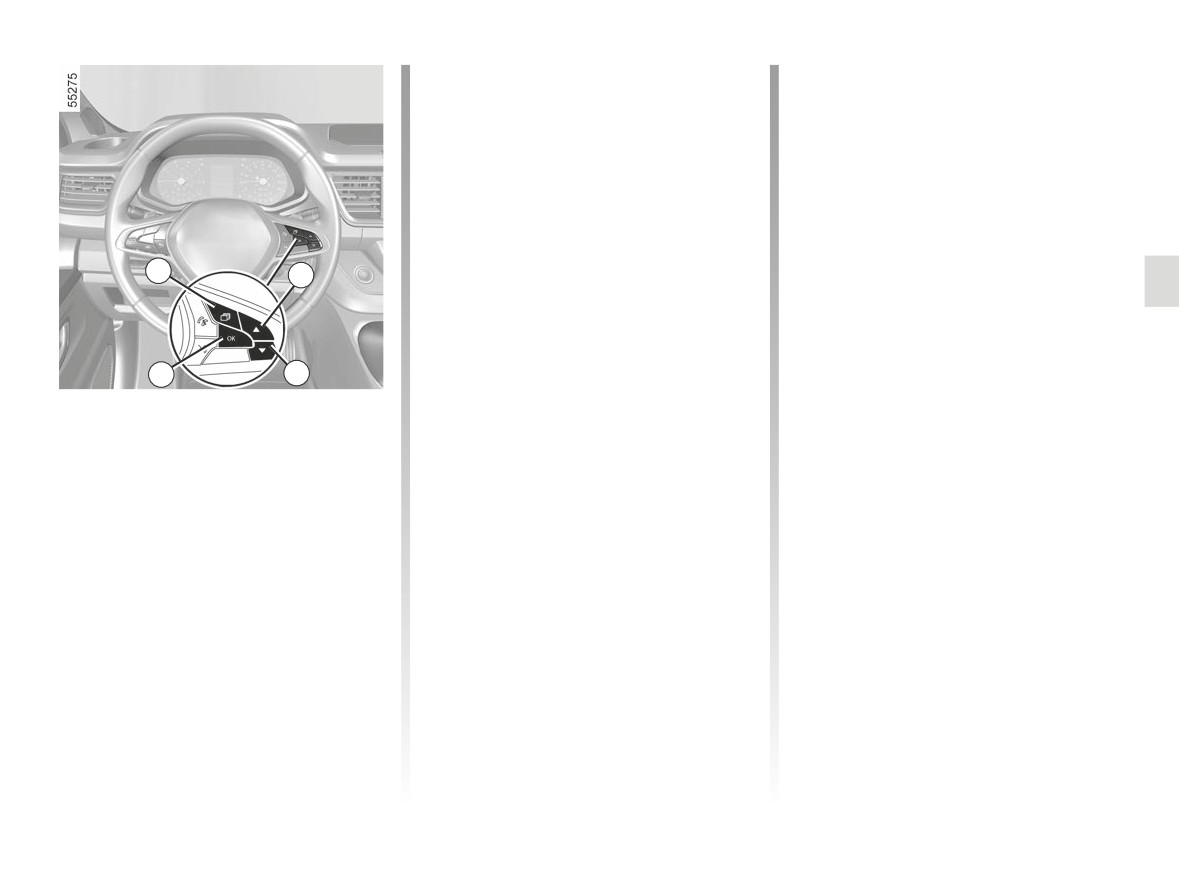
- press the 6 or 7 control repeatedly to
Operating faults
reach the “DRIVING ASSIST” menu.
In the event of a malfunction, the left
Press the switch 8 OK;
and right line indicators (and, depend-
- repeatedly press control 6 or 7 to
access the “Lane Departure Volume”
ing on display style, the
warning
or
“Lane Departure Sensitivity”
light) disappear or stay grey on the in-
menu. Press the switch 8 OK;
strument panel.
- scroll repeatedly pressing control 6
In some cases, they are accompa-
or 7 to adjust the setting. Press the 8
nied by the message “Front camera to
5
6
OK button.
check” or the
warning light on
the instrument panel.
Consult an approved dealer.
8
7
Adjustments (continued)
Vehicles not fitted with a multimedia
screen
- With the vehicle stopped, press the
switch 5 as many times as required
to reach the “Vehicle” tab;
- press the 6 or 7 control repeatedly to
reach the “Settings” menu. Press the
switch 8 OK;
2.39
CarManuals2.co

LANE DEPARTURE WARNING (5/5)
This function is an additional driving aid. This function is not under any circumstances intended to replace the due care
and attention of the driver, who should at all times be in control of the vehicle.
System servicing/repairs
- In the event of an impact, the camera alignment may be changed, and its operation may consequently be affected. Deactivate
the function, then consult an authorised dealer.
- Any work in the area where the camera is located (repairs, replacements, windscreen modifications etc.) must be carried
out by a qualified professional.
Only an authorised dealer is qualified to service the system.
In the event of system disturbance
Some conditions can disturb or damage the operation of the system, such as:
- windscreen obscured (by dirt, ice, snow, condensation etc.);
- a complex environment (tunnel etc.);
- poor weather conditions (snow, rain, hail, black ice etc.) ;
- poor visibility (night, fog etc.);
- the road markings are irregular or difficult to distinguish (e.g. partially erased, excessive spacing, distorted road surface) ;
- being dazzled (glaring sun, lights of vehicles travelling in the opposite direction etc.);
- the road is narrow, winding or undulating (tight bends etc.);
- closely following a vehicle travelling in the same lane.
Risk of false alarms or absence of warnings
2.40
CarManuals2.co
BLIND SPOT WARNING (1/6)
B
C
A
A
Special feature
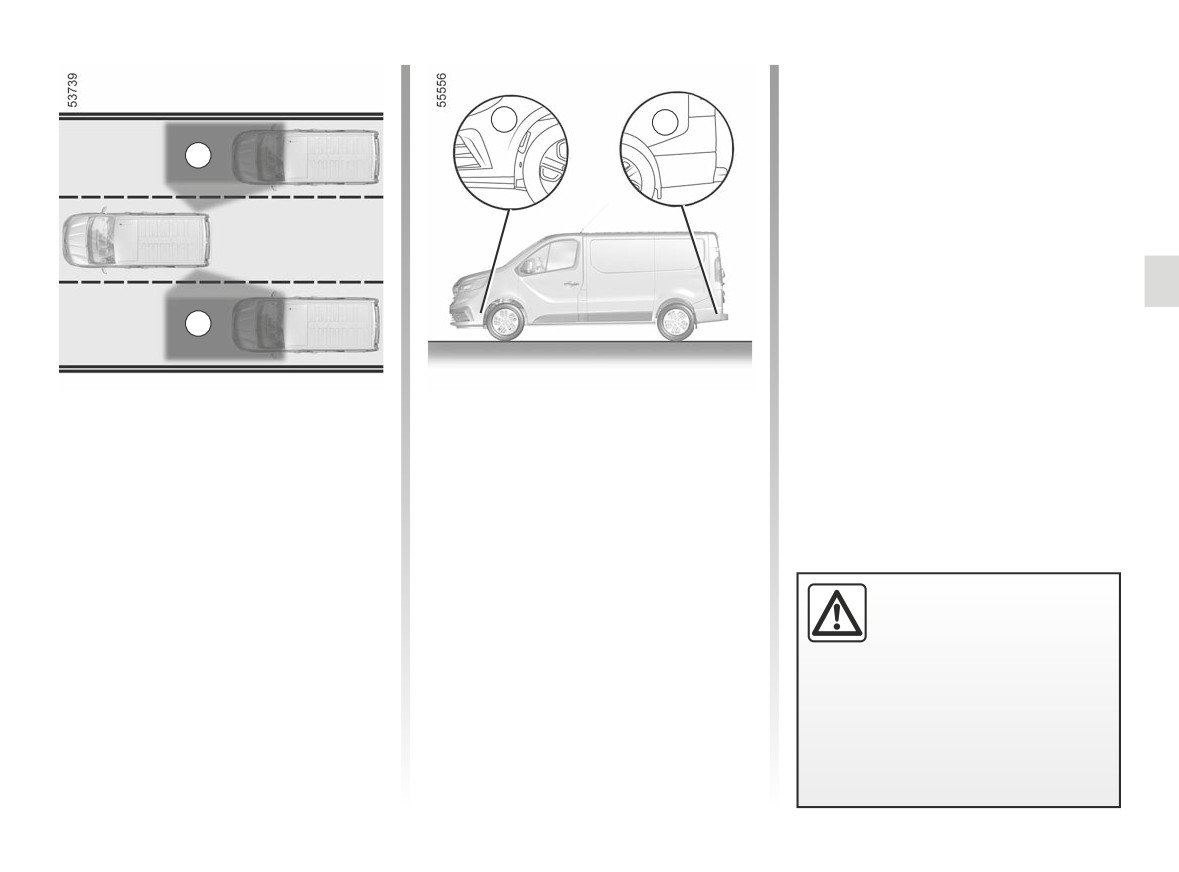
Using information from the ultrasonic
sensors fitted on each side of the
Ensure that the ultrasonic sensor
bumpers (zone B), the system notifies
zones B and C on each side of the
the driver when another vehicle ap-
bumpers are not obscured (by dirt,
pears in the detection zone A.
mud, snow etc.).
The function warns you when the vehi-
If one of the ultrasonic sensors is ob-
cle is moving at a speed over approxi-
scured, the message “Side radars no
mately 18 mph (30 km/h).
visibility” will appear on the instrument
panel. Clean the ultrasonic sensor
This function is an addi-
zones.
tional driving aid. This func-
tion is not under any cir-
cumstances intended to
replace the due care and attention
of the driver, who should at all times
be in control of the vehicle.
2.41
CarManuals2.co
BLIND SPOT WARNING (2/6)
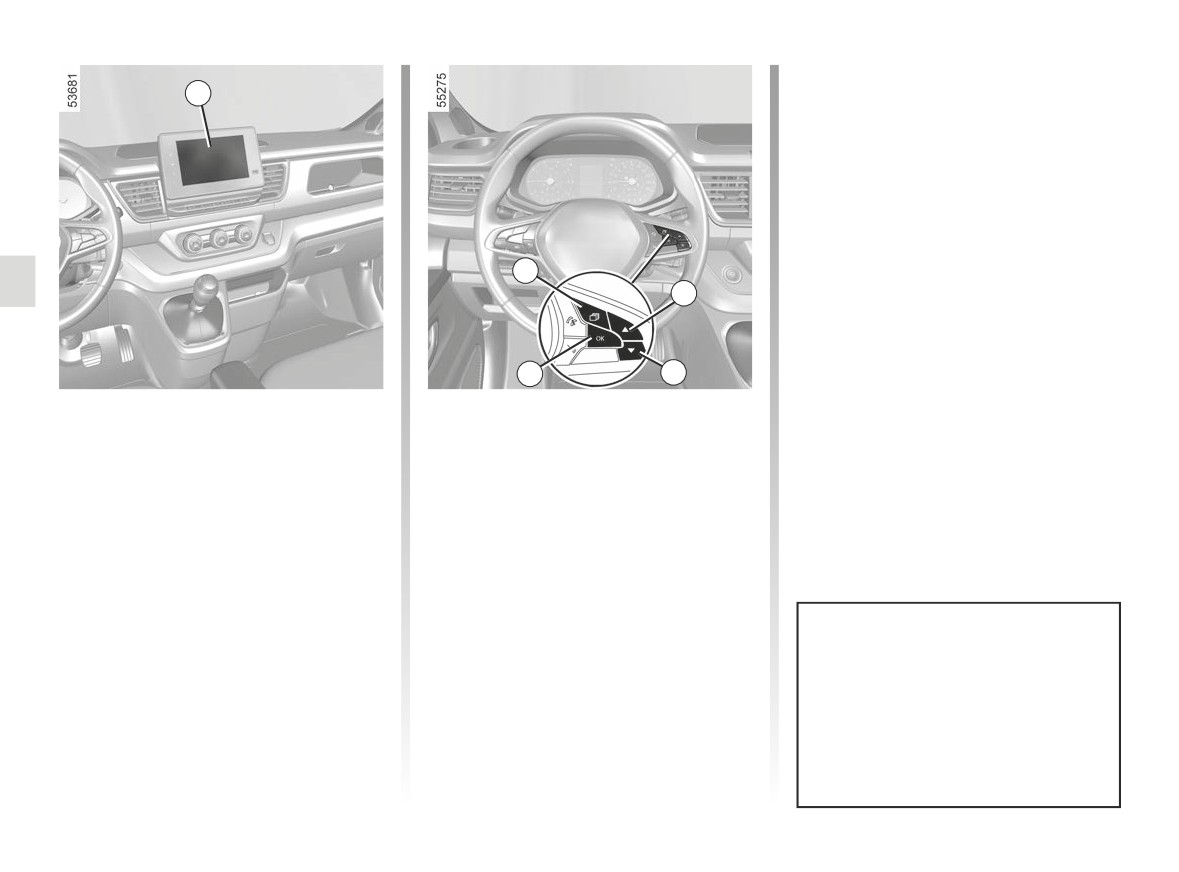
- press the switch 5 OK again to acti-
1
vate or deactivate the function:
=
function activated
<
function deactivated
2
3
5
4
Activation/deactivation
- press the 3 or 4 control repeatedly to
reach the “Settings” menu. Press the
Vehicles fitted with a multimedia
switch 5 OK;
screen 1
- press control 3 or 4 repeatedly until
To activate or deactivate the function,
you reach the “Driving aids” menu.
refer to the multimedia instructions.
Press the switch 5 OK;
Select ON or OFF.
- press the 3 or 4 control repeatedly to
reach the “Blind spot alert” menu and
Vehicles not fitted with a multimedia
press the 5 OK switch;
screen
- With the vehicle stopped, press the 2
switch as many times as required to
The system’s detection range oper-
reach the “Vehicle” tab;
ates according to a standard lane
width. When driving in a narrow
lane, the function can warn you
when a vehicle is detected beyond
the adjacent lane.
2.42
CarManuals2.co
BLIND SPOT WARNING (3/6)
Operating faults
6
If the system detects a fault, the mes-
sage “Check Side radars” is displayed
on the instrument panel. Consult an ap-
A
proved dealer.
7
A
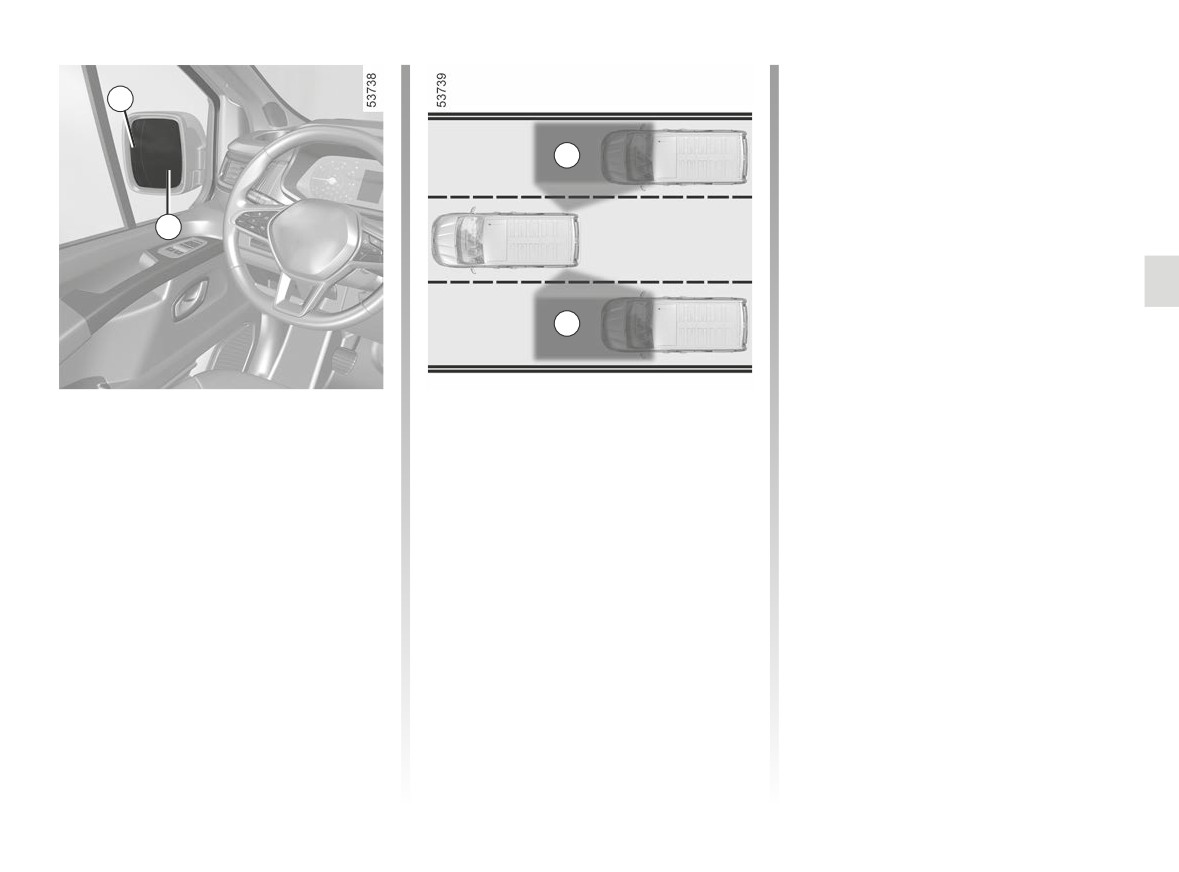
Indicator 6
Operation
An indicator light 6 is located on each
The function alerts you if your vehicle
rear view mirror 7.
speed is above 18 mph (30 km/h) and
another vehicle is in the blind spot A
Note: clean the rear view mirrors 7 reg-
and moving in the same direction as
ularly so that the indicators 6 can be
your vehicle;
seen.
If you overtake another vehicle, the 6
indicator will only come on if that vehi-
cle remains for a long enough period in
your vehicle’s blind spot A.
2.43
CarManuals2.co
BLIND SPOT WARNING (4/6)
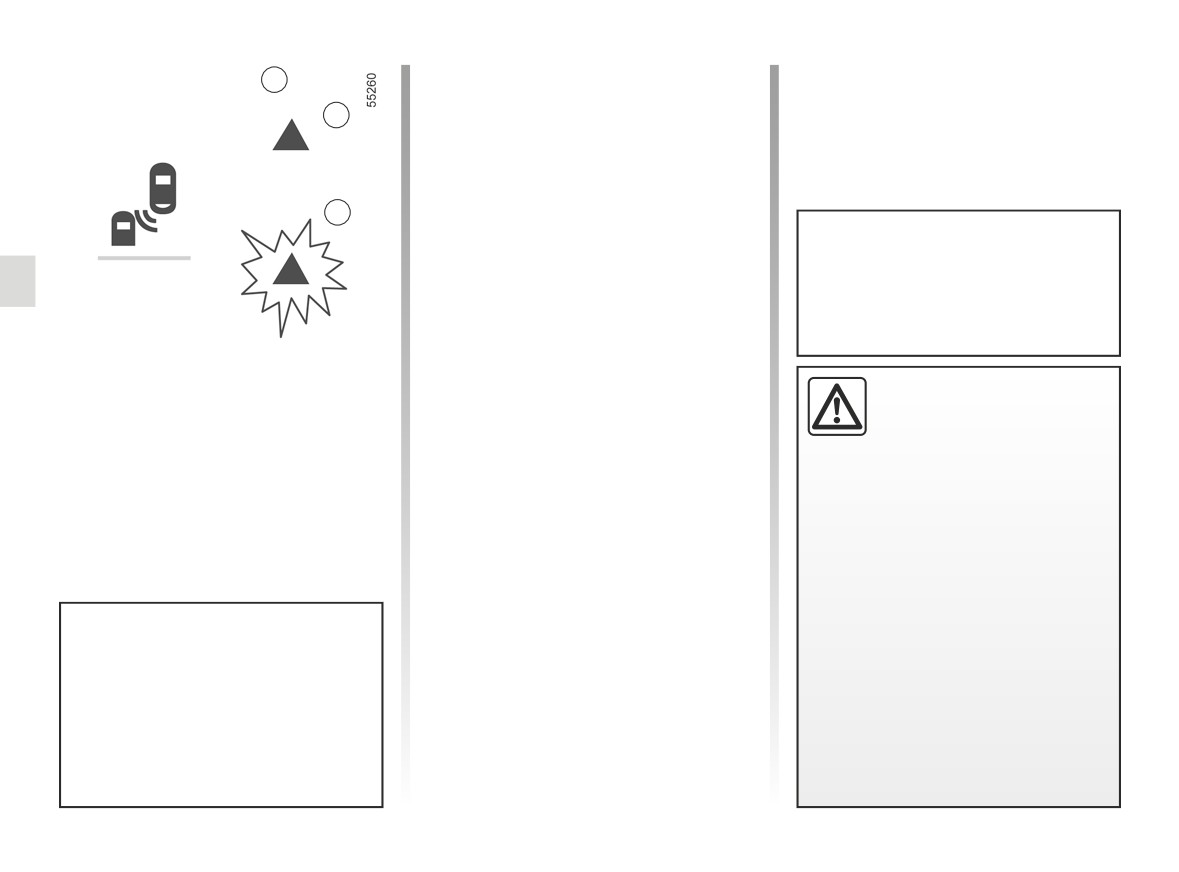
Display E
6
Direction indicator activated, the 6
D
warning light flashes when the func-
tion detects a vehicle in the blind spot
warning area and/or a vehicle is rapidly
approaching from the rear on the side
towards which you will turn the wheel.
E
If you cancel the direction indicator, the
function will return to the initial warning
When the engine is started, the
(display D).
system adopts the last status saved
before the ignition was switched off
(refer to the previous pages).
Conditions for non-function
- When driving on a road with tight
bends;
-The system’s detection
Display D
- in reverse.
range operates according
If the vehicle is equipped with a towbar
to a standard lane width. If
First warning: direction indicator not
recognised by the system, the “Trailer:
you are driving in wide traf-
activated, the 6 warning light indicates
blind spot alert off” message displayed
fic lanes, the system might not
that a vehicle is detected in the blind
on the instrument panel informs you
be able to detect a vehicle in the
spot area and/or that a vehicle is rap-
that the function is not operational. For
blind spot.
idly approaching from the rear in an ad-
jacent lane.
information on the range of equipment
- The system might be disrupted
adapted to your vehicle, we advise you
momentarily if it is exposed to
to consult an approved Dealer.
strong electromagnetic waves
(as beneath high-tension power
lines) or to very poor weather
conditions
(heavy rain, snow
Due to the presence of ultrasonic
etc.). Remain aware of driving
sensors behind the bumper, it is ad-
conditions.
visable to entrust any operation on
the bumper (repair, replacement,
There is a risk of accidents.
paintwork etc.) to a qualified profes-
sional.
2.44
CarManuals2.co

BLIND SPOT WARNING (5/6)
This function is an additional driving aid. This function is not under any circumstances intended to replace the due care
and attention of the driver, who should at all times be in control of the vehicle.
The driver should always adapt their speed to the traffic conditions, regardless of the system indications.
The system should under no circumstances be taken to be an obstacle detector or an anti-collision system.
System servicing/repairs
- In the event of an impact, the alignment of the ultrasonic sensors may be altered and its operation may consequently be af-
fected. Deactivate the function and consult an authorised dealer.
- Any work in the area where the ultrasonic sensors are located (repairs, replacements etc.) must be carried out by a qualified
professional.
Only an authorised dealer is qualified to service the system.
System disturbance
Some conditions can disturb or damage the operation of the system, such as:
- complex surroundings (metal bridges, tunnels, roads with barriers at the edge, etc.);
- poor weather conditions (snow, hail, black ice, etc.).
Risk of false alarms or absence of warnings
In the event of the system behaving abnormally, deactivate it and consult an authorised dealer.
2.45
CarManuals2.co

BLIND SPOT WARNING (6/6)
Limitation of the system operation
- The ultrasonic detection zones should be kept clean and free of any modifications in order to ensure the proper op-
eration of the system.
- Small objects moving close to the vehicle (motorcycles, bicycles, pedestrians, etc.) may not be recognised by the system.
- When turning into a bend, the ultrasonic sensors may temporarily cease to detect vehicles in adjacent lanes.
- The function may warn you late if two other vehicles are approaching from the rear, driving side by side in the adjacent lanes
(i.e. driving on a 3-lane road) at a much higher speed than your vehicle.
- The system may not provide a warning when the other vehicles are travelling at a significantly different speed.
- If the vehicle is being overtaken by a long vehicle (e.g. heavy goods vehicle overtaking at a similar speed to the vehicle) the
system may interrupt the warning before the end of the manoeuvre.
- The vehicle is travelling on a winding road.
Deactivating the function
You must disable the function if:
- the ultrasonic sensor zones have been damaged (front and rear bumpers);
- the vehicle is fitted with a towbar that is not recognised by the system.
2.46
CarManuals2.co
SAFE DISTANCE WARNING (1/4)
The function is activated when the vehi-
1
cle speed is between about 19 and
124 mph (30 and 200 km/h).
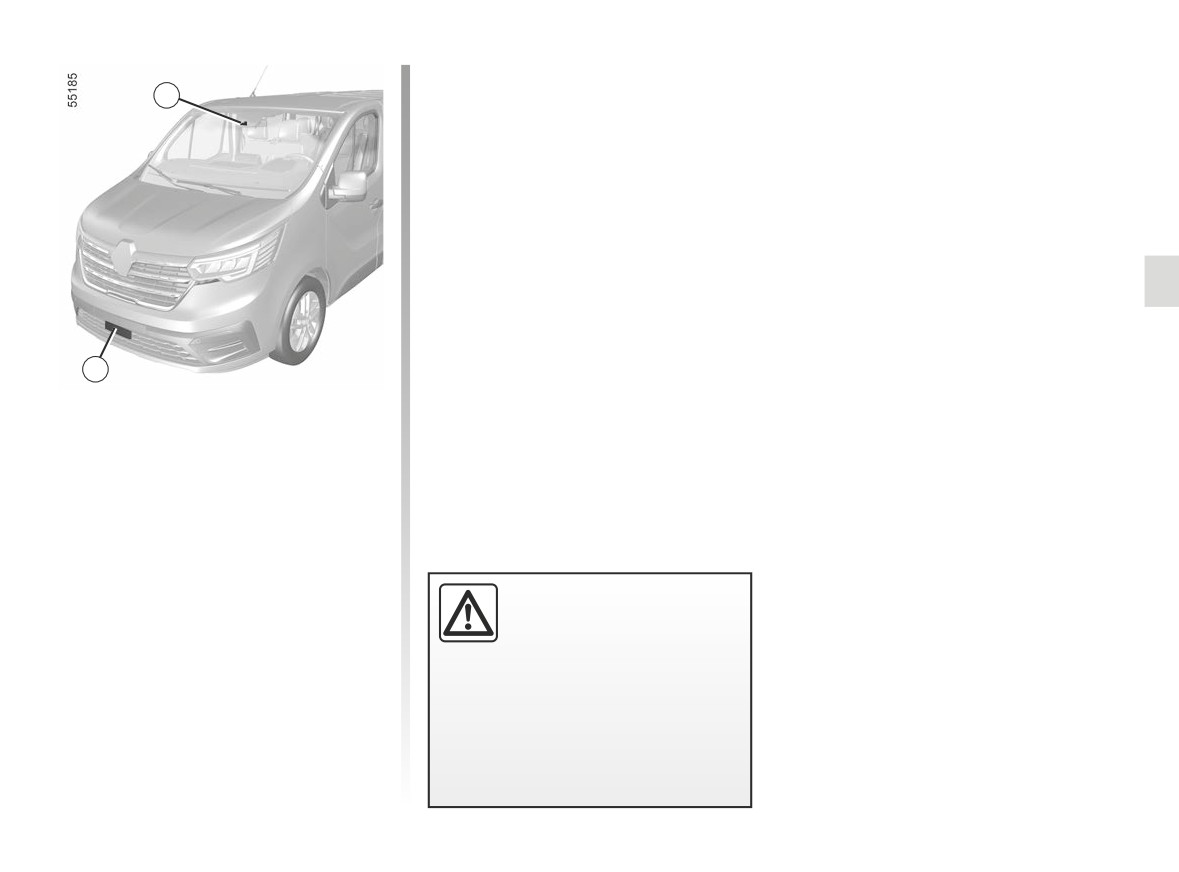
Location of the camera 1
Make sure the windscreen is not ob-
scured (by dirt, mud, snow, condensa-
tion etc.).
Location of the radar 2
Ensure that the radar area is not ob-
structed (by dirt, mud, snow, a badly
fitted front number plate), impacted,
modified (including painting) or hidden
2
by any accessory fitted on the front of
the vehicle (on the grille or logo etc.).
Using the information from the radar 2
and camera 1, this function informs the
driver of the time interval between their
vehicle and the vehicle in front so that a
safe stopping distance between the two
vehicles can be maintained.
This function is an addi-
tional driving aid. This func-
tion is not under any cir-
cumstances intended to
replace the due care and attention
of the driver, who should at all times
be in control of the vehicle.
2.47
CarManuals2.co
SAFE DISTANCE WARNING (2/4)
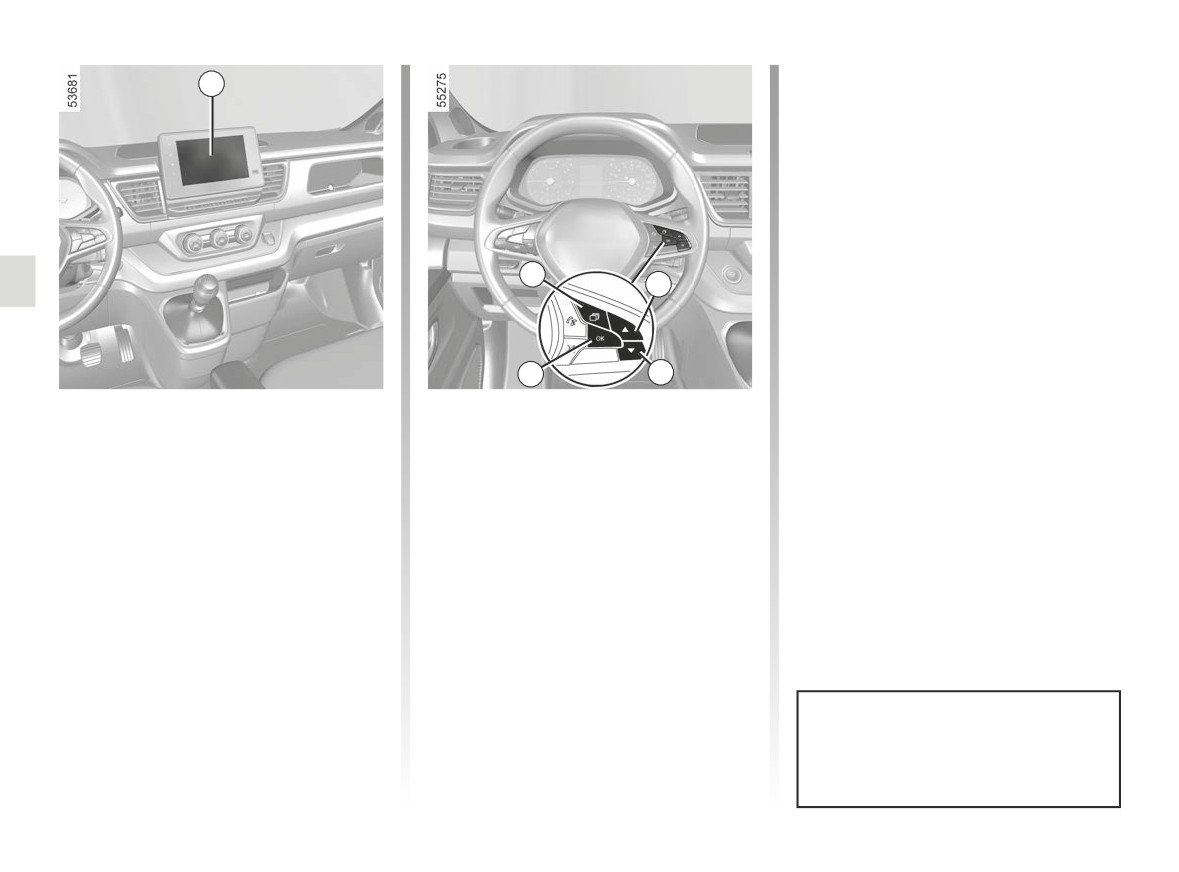
- press the 5 or 6 control repeatedly to
3
reach the “Distance warning” menu.
Press the switch 7 OK;
- press the switch 7 OK again to acti-
vate or deactivate the function:
=
function activated
<
function deactivated
4
5
7
6
Activating/deactivating the
Vehicles not fitted with a multimedia
screen
function
- With the vehicle stopped, press the
Vehicles fitted with a multimedia
switch 4 as many times as required
screen 3
to reach the “Vehicle” tab;
To activate or deactivate the function,
- press the 5 or 6 control repeatedly to
refer to the multimedia instructions.
reach the “Settings” menu. Press the
Select “ON” or “OFF”.
switch 7 OK;
- press the 5 or 6 control repeatedly to
reach the “DRIVING ASSIST” menu.
Press the switch 7 OK;
Each time the vehicle is started,
the function continues the mode
saved the last time the engine was
stopped.
2.48
CarManuals2.co
SAFE DISTANCE WARNING (3/4)
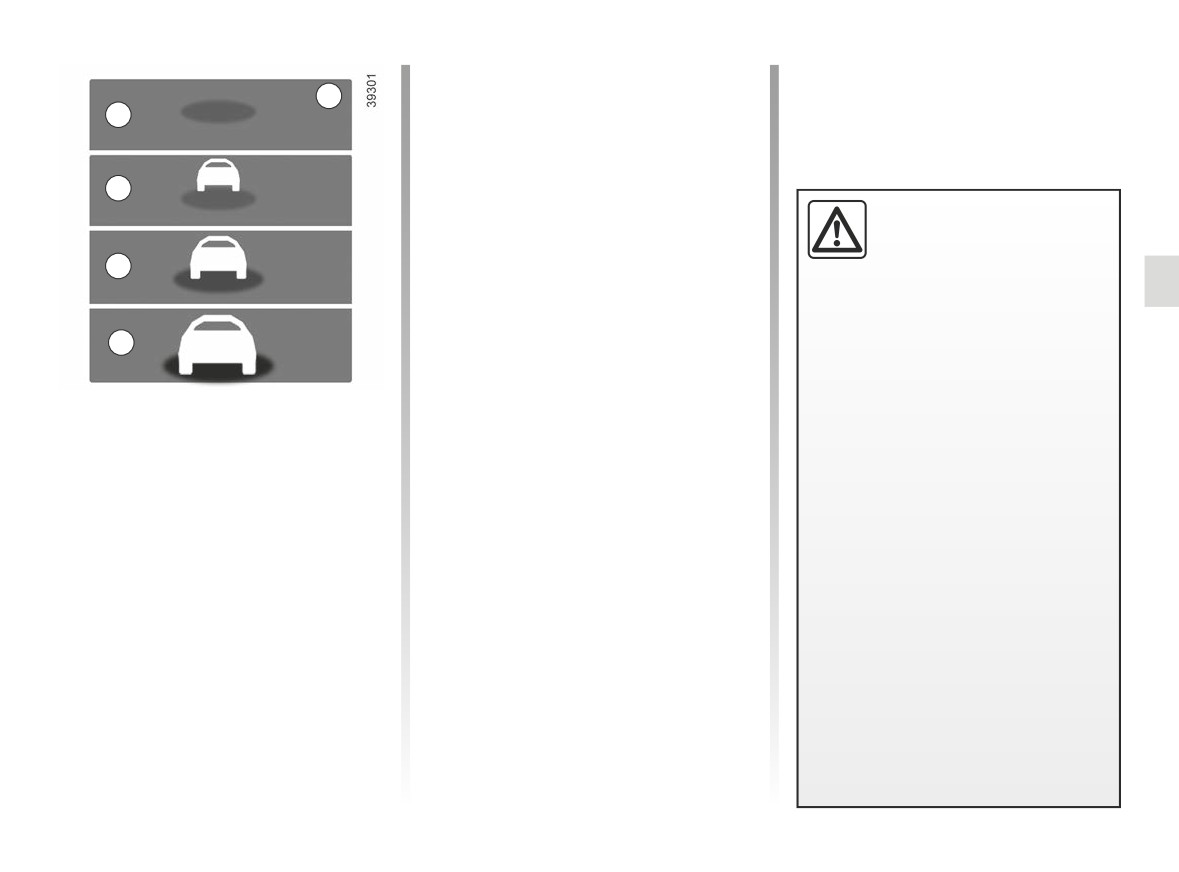
- C (orange): the time interval falls be-
8
tween around 1 and 2 seconds (in-
A
sufficient distance between the two
vehicles);
- D (red): the time interval is less than
B
or equal to around one second (very
insufficient distance between the two
The measurement is dis-
vehicles).
played for information: the
If the interval between the two vehi-
system does not carry out
C
cles is less than approximately 0.5 sec-
any action on the vehicle.
onds, the 8 indicator and the D display
This function is not designed for use
will flash in red on the instrument panel
in urban conditions or for a dynamic
D
along with “-.- s”.
driving style (sudden cornering, ac-
Under certain conditions, the time inter-
celeration, braking, etc.), but rather
val may not be displayed:
for stable driving conditions.
Operation
- while cornering;
The function does not interact with
With the function activated, the 8 in-
the braking system.
- when changing lane;
dicator is displayed on the instrument
The radar and camera zones must
panel and informs the driver of the dis-
- if the vehicle in front is sufficiently far
be kept clean and free of any tam-
tance between their vehicle and the ve-
or outside the range of the radar or
pering in order to ensure the proper
hicle in front.
camera.
operation of the system.
- A (grey): function not operational;
Any work carried out in the area
- A (green): no vehicle detected;
where the radar or camera is lo-
cated (repairs, replacements, wind-
- B (green): the time interval is greater
screen and/or bumper modifica-
than or equal to around two seconds
tions, etc.) must be carried out by a
(distance between the two vehicles
qualified professional.
adapted to your speed);
2.49
CarManuals2.co

SAFE DISTANCE WARNING (4/4)
This function is an additional driving aid. This function is not under any circumstances intended to replace the due care
and attention of the driver, who should at all times be in control of the vehicle.
System servicing/repairs
- In the event of an impact, the radar and/or camera alignment may be changed and its operation may consequently be af-
fected. Deactivate the function and consult an authorised dealer.
- Any work carried out in the area where the radar and/or camera is located (replacements, repairs, windscreen and/or
bumper modifications, etc.) must be carried out by a qualified professional.
Only an authorised dealer is qualified to service the system.
In the event of system disturbance
- Obstruction of the windscreen or the bumper (by dirt, ice, snow, condensation etc.);
- a complex environment (metal bridge, tunnel etc.);
- poor weather conditions (snow, hail, black ice etc.);
- poor visibility (night, fog etc.);
- poor contrast between the vehicle preceding it and the surrounding area (e.g. white vehicle in a snowy area etc.) ;
- being dazzled (glaring sun, lights of vehicles travelling in the opposite direction etc.);
- the road is narrow, winding and undulating (tight bends etc.)
Risk of erroneous false alarms.
2.50
CarManuals2.co
ACTIVE EMERGENCY BRAKING (1/6)
Depending on the reactivity of the
1
driver, the system can assist with brak-
ing in order to limit damage or prevent
a collision.
Note: ensure that the windscreen and
front bumper are not obstructed (by
dirt, mud, snow, condensation, number
plate, etc.).
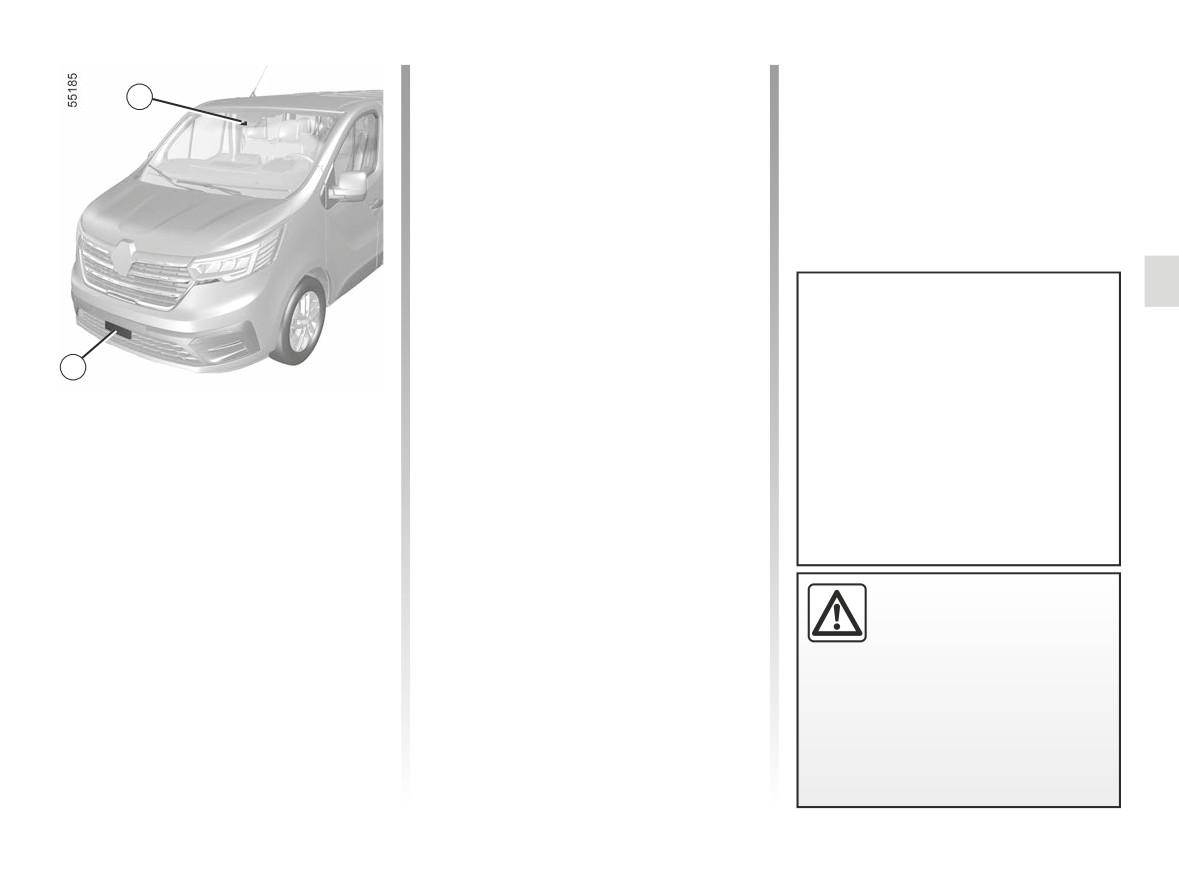
Location of the camera 1
Make sure the windscreen is not ob-
scured (by dirt, mud, snow, condensa-
This system can apply maximum
tion etc.).
braking to the vehicle until it is
2
completely stationary if necessary.
Using information from the radar 2 and
Location of the radar 2
For safety reasons, always wear
the camera 1, the system determines
your seat belt when travelling in
Ensure that the radar area is not ob-
the distance from the vehicle in front.
your vehicle and make sure that it
structed (by dirt, mud, snow, a badly
is loaded so that no items can be
The system informs the driver if there
fitted front number plate), impacted,
thrown forward and hit the occu-
is a risk of head-on collision to enable
modified (including painting) or hidden
pants.
appropriate emergency manoeuvres
by any accessory fitted on the front of
(pressing the brake pedal and/or turn-
the vehicle (on the grille or logo etc.).
ing the steering wheel).
This function is an addi-
tional driving aid. This func-
tion is not under any circum-
stances intended to replace
the due care and attention of the
driver, who should at all times be
in control of the vehicle.
2.51
CarManuals2.co
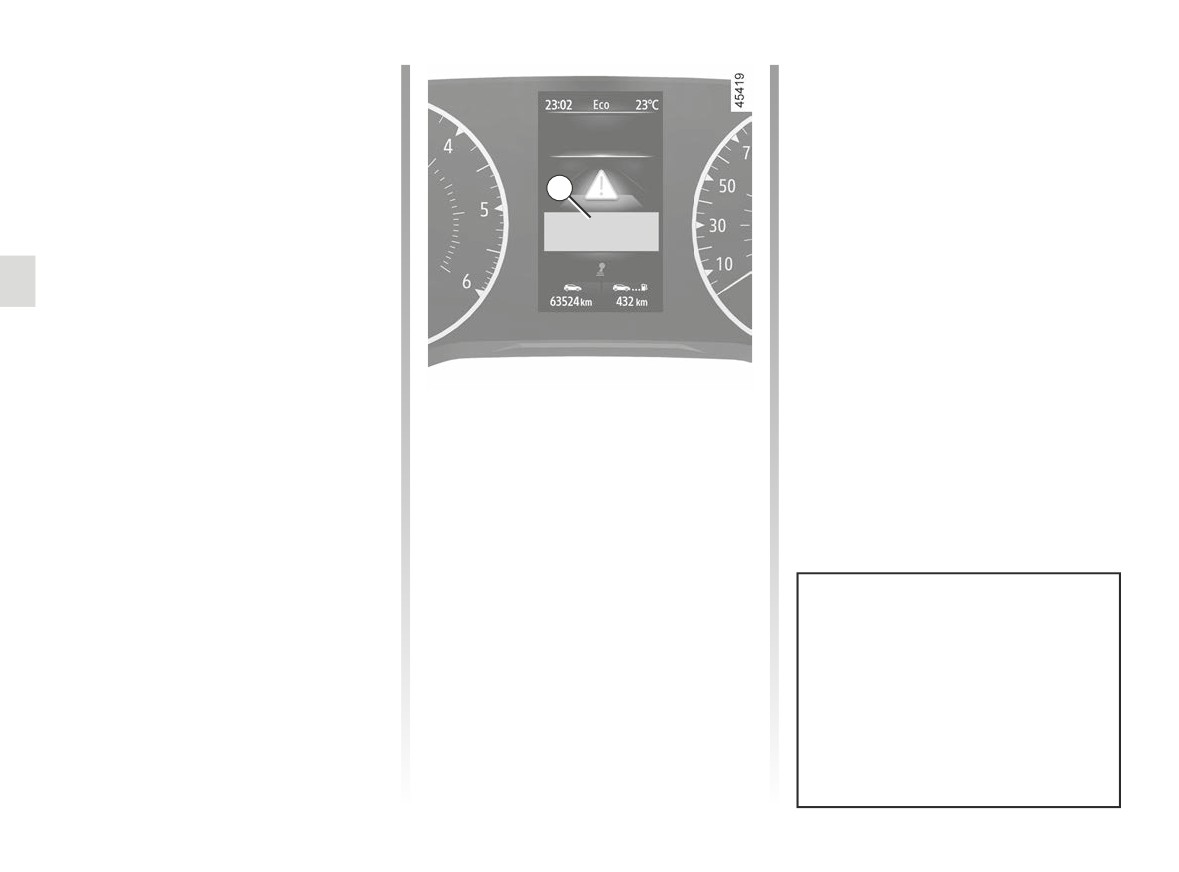
ACTIVE EMERGENCY BRAKING (2/6)
Operation
Special features of warnings
Depending on the speed, the warning
Detection of vehicles
and braking may be activated simulta-
When driving, in the event of a risk of
neously.
collision with the vehicle in front the
system will:
Special features of stationary
3
vehicles
- warn of the risk of collision: when
the vehicle speed is between 4 mph
Stationary vehicles are detected when
(7 km/h) and 106 mph (170 km/h),
your vehicle is being driven at a speed
the message “Brake” is displayed
between approximately 4 mph (7 km/h)
in red on the instrument panel 3 ac-
and 50 mph (80 km/h). The system is
companied by an audible warning.
not active and does not emit a warning
for stationary vehicles when you exceed
If the driver depresses the brake
approximately 50 mph (80 km/h).
pedal and the system still detects a
risk of collision, the brake force is in-
creased.
If the vehicle stopped as a result of
active emergency braking, the driver
- braking may be triggered: when
must keep the vehicle stationary by ap-
the vehicle is moving slower than ap-
plying the brake pedal.
proximately 75 mph (120 km/h), if the
driver does not respond to the warn-
Note: if the driver uses the vehicle con-
ing and a collision is imminent.
trols (steering wheel, pedals, etc.) the
system may delay certain operations or
not activate.
In the event of emergency manoeu-
vre, you can stop braking at any
moment by:
- tapping the accelerator pedal;
or
- turning the steering wheel as a
collision avoidance manoeuvre.
2.52
CarManuals2.co
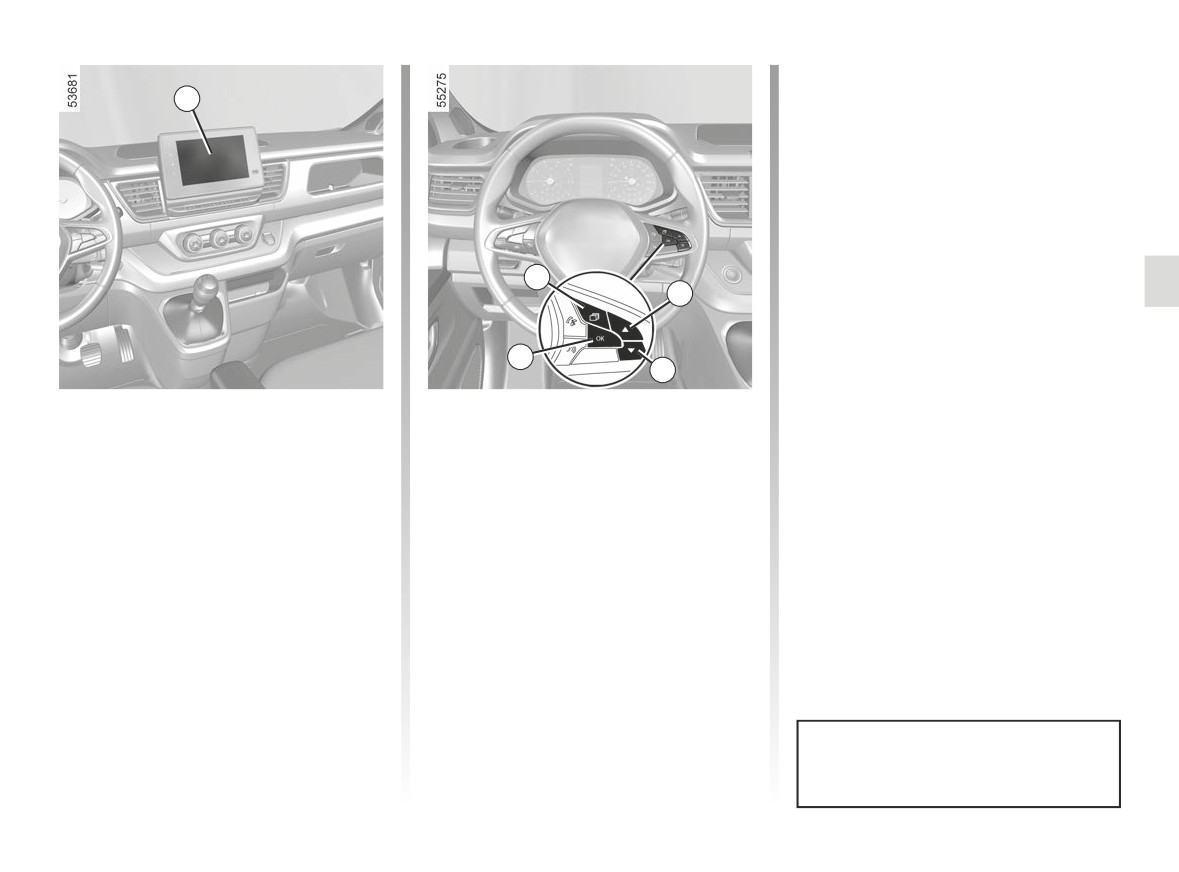
ACTIVE EMERGENCY BRAKING (3/6)
- press the 6 or 7 control repeatedly to
reach the “Active braking” menu and
4
press the 8 OK switch.
Press the switch 8 OK again to activate
or deactivate the function:
=
function activated
<
function deactivated
5
The warning light
is displayed on
6
the instrument panel when the system
is deactivated.
8
7
Activating or deactivating the
For vehicles not fitted with a
multimedia screen
system
- With the vehicle stopped, press the
Vehicles fitted with a multimedia
switch 5 as many times as required
screen 4
to reach the “Vehicle” tab;
To activate or deactivate the function,
- press the 6 or 7 control repeatedly to
refer to the multimedia instructions.
reach the “Settings” menu. Press the
Select “ON” or “OFF”.
switch 8 OK;
- press the 6 or 7 control repeatedly to
reach the “DRIVING ASSIST” menu.
Press the switch 8 OK;
This system is reactivated each time
the ignition is switched on.
2.53
CarManuals2.co

ACTIVE EMERGENCY BRAKING (4/6)
Temporarily not available
Operating faults
If the system detects a temporary fault,
and
illuminated on the in-
the
warning light appears on the
strument panel: this indicates that the
instrument panel.
system has detected an operating fault.
Consult an approved dealer.
The possible causes are:
- the system is temporarily blinded
(glare from the sun, dipped beam
headlights, bad weather conditions
etc.). The system will be operational
again when visibility conditions are
better;
- the system is temporarily interrupted
(e.g. the windscreen or the front or
rear bumper is obscured by dirt,
mud, snow, condensation, etc.). In
this case, park the vehicle and switch
off the engine. Clean the windscreen
and front bumper. When you next
start the engine, the warning light
and the message go out.
If this is not the case, this may arise from
another cause; contact an Approved
Dealer.
2.54
CarManuals2.co

ACTIVE EMERGENCY BRAKING (5/6)
Active emergency braking
This function is an additional driving aid. This function is not under any circumstances intended to replace the due care
and attention of the driver, who should at all times be in control of the vehicle. The triggering of this function may be
delayed or prevented when the system detects clear signs of control of the vehicle by the driver (action on the steer-
ing wheel, pedals etc.).
The system cannot be activated:
- when the gearbox lever is in neutral or the clutch pedal has been depressed during approximately ten seconds;
- when the parking brake is activated;
- when the Electronic Stability Program (ESC) has started.
System servicing/repairs
- In the event of an impact, the radar and/or camera alignment may be changed and its operation may consequently be af-
fected. Deactivate the function and consult an authorised dealer.
- Any work in the area where the radar and/or camera is located (repairs, replacements, windscreen modifications, etc.) must
be carried out by a qualified professional.
Only an authorised dealer is qualified to service the system.
System disturbance
Some conditions can disturb or damage the operation of the system, such as:
- a complex environment (metal bridge, tunnel etc.);
- poor weather conditions (snow, hail, black ice etc.);
- poor visibility (night, fog etc.) ;
- poor contrast between an object (vehicle, etc.) and the surrounding area (e.g. white vehicle in snowy conditions, etc.) ;
- being dazzled (glaring sun, lights of vehicles travelling in the opposite direction etc.) ;
- obstruction of the windscreen or the radar area (by dirt, ice, snow, condensation etc.);
- ...
In these conditions, the system may not react, may warn the driver or may brake inadvertently.
2.55
CarManuals2.co

ACTIVE EMERGENCY BRAKING (6/6)
Limitation of the system operation
- Each time the vehicle is started, the system carries out a calibration according to the vehicle surroundings and may
be inactive for a length of time between approximately two to five minutes.
- A vehicle travelling in the opposite direction will not trigger any alert or any action on the system operation.
- The radar and camera zones must be kept clean and free of any modifications in order to ensure that the system operates
correctly.
- The system cannot respond to small vehicles such as motorbikes or bicycles as effectively as to other vehicles;
- The system may not operate optimally when the road surface is slippery (rain, snow, black ice etc.) ;
- ...
In these conditions, the system may not react, may warn the driver or may brake inadvertently.
Deactivating the function
You must disable the function if:
- the brake lights are not functioning;
- the area of the camera has been damaged (e.g. on the inside or outside of the windscreen);
- the front of the vehicle was damaged (impact, scratch on the radar, etc.);
- the vehicle is being towed (breakdowns);
- the windscreen is cracked or distorted (do not carry out windscreen repairs in this area; have it changed by an approved
dealer);
- you are not driving on a paved road.
In the event of the system behaving abnormally, deactivate it and consult an authorised dealer.
Halting the function
You can halt the active emergency braking function at any time by tapping the accelerator pedal or by turning the steering
wheel in an avoidance manoeuvre.
2.56
CarManuals2.co
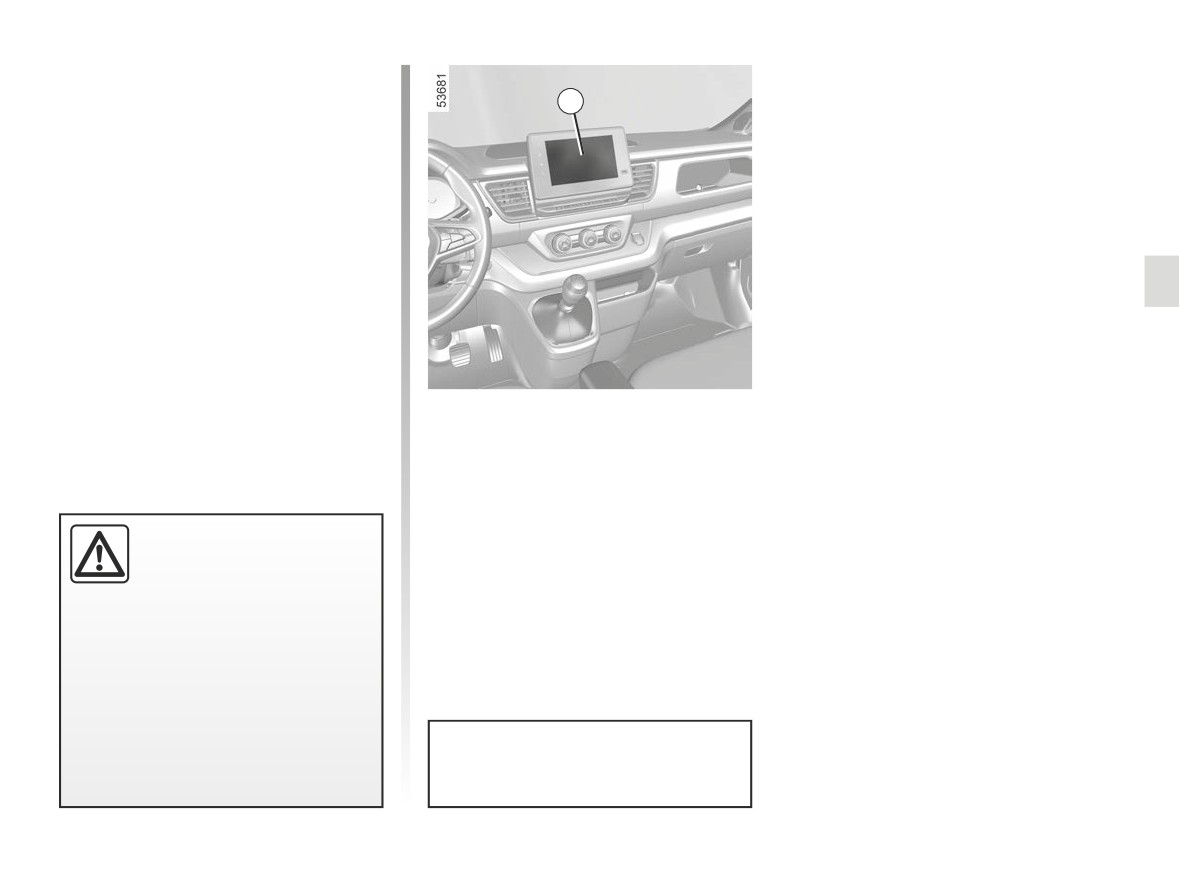
FATIGUE DETECTION WARNING (1/2)
The fatigue detection warning is a func-
tion which is useful on monotonous
1
roads (motorways, high-speed roads
etc.).
It analyses driver behaviour and takes
account of events to inform you of any
risk of fatigue such as:
- steering wheel movement;
- driver actions on other devices (indi-
cators, windscreen washer etc.);
- time spent driving without stopping;
- ...
Activation/deactivation
Vehicles fitted with a multimedia
screen 1
To activate or deactivate the function,
refer to the multimedia instructions.
This function is an addi-
Select ON or OFF.
tional driving aid in case of
risk of fatigue. This function
does not take the place of
the driver.
Under no circumstances should this
function replace the driver’s care or
responsibility whilst driving.
The function is activated by default
every time the vehicle is started.
2.57
CarManuals2.co
FATIGUE DETECTION WARNING (2/2)
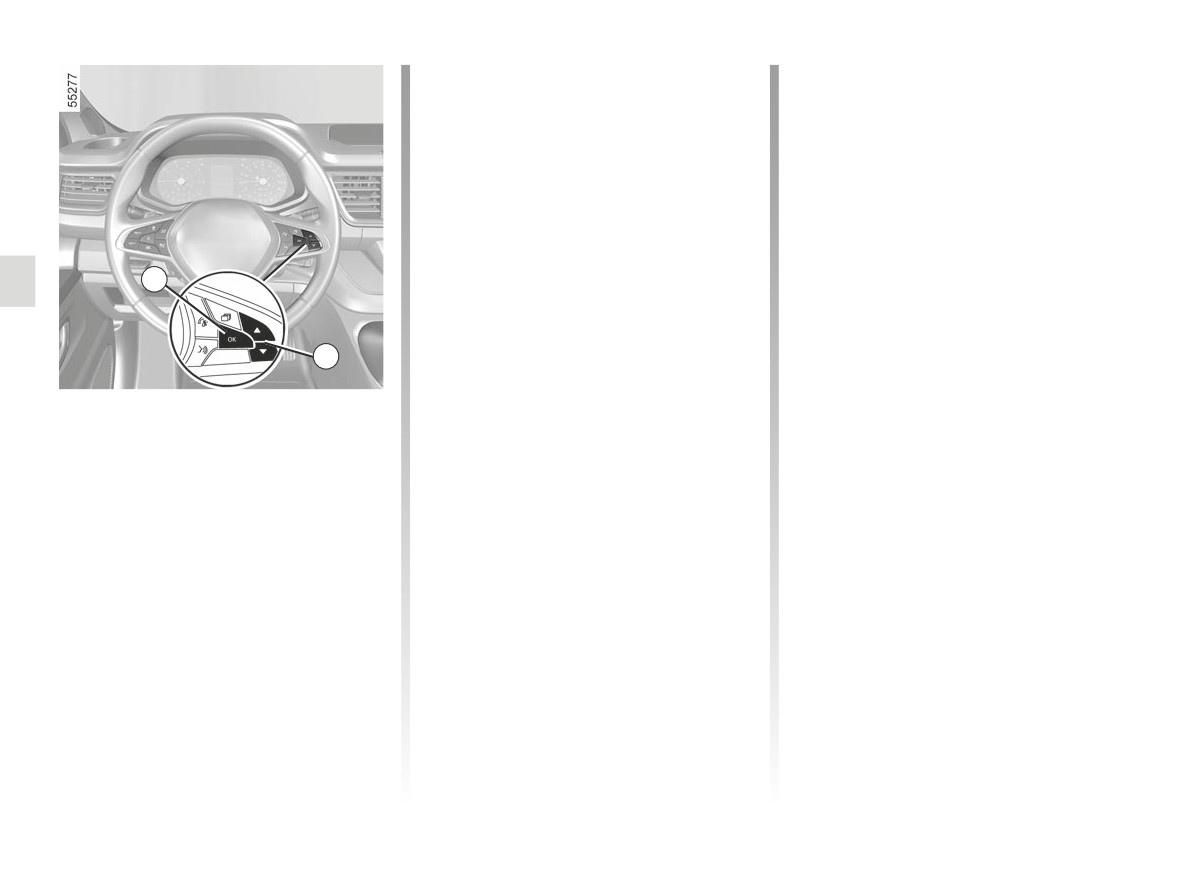
- repeatedly press the control 3 up or
When a risk of fatigue is detected,
down until you reach the Fatigue de-
the message “Fatigue warning have a
tection warning menu, then press the
break” is displayed on the instrument
switch 2 OK .
panel accompanied by a beep.
- press the 2 OK switch again to acti-
Press switch 2 OK to delete the warn-
vate or deactivate the function.
ing.
It is advisable to stop as soon as pos-
Operation
sible for a break.
The function is set to notify the
Note:
2
driver if:
- if the warning is not deleted by press-
- the vehicle is driven for more than
ing switch 2 OK, the beep repeats;
five minutes after each vehicle stop;
- the function may interpret certain
3
- the vehicle speed is greater than ap-
driving styles as a sign of tiredness
proximately 40 mph (65 km/h);
(sporty driving, incorrect driving etc.)
Vehicles not fitted with a multimedia
and
or driving along a road which is in
screen
poor condition.
- Approximately
10 minutes have
– With the vehicle at a standstill, press
passed since the deletion of the pre-
and hold the switch 2 OK to access
vious warning.
Operating faults
the settings menu;
The function triggers an alert if the
If the system detects a fault, the mes-
- repeatedly press the control 3 up or
system detects repeated signs of fa-
sage “Check fatigue warning” is dis-
down until you reach the “Driving as-
tigue in the driver at the steering wheel.
played on the instrument panel. Call an
sistance” menu. Press the switch 2
approved Dealer.
OK;
2.58
CarManuals2.co
DETECTION OF ROAD SIGNS (1/4)
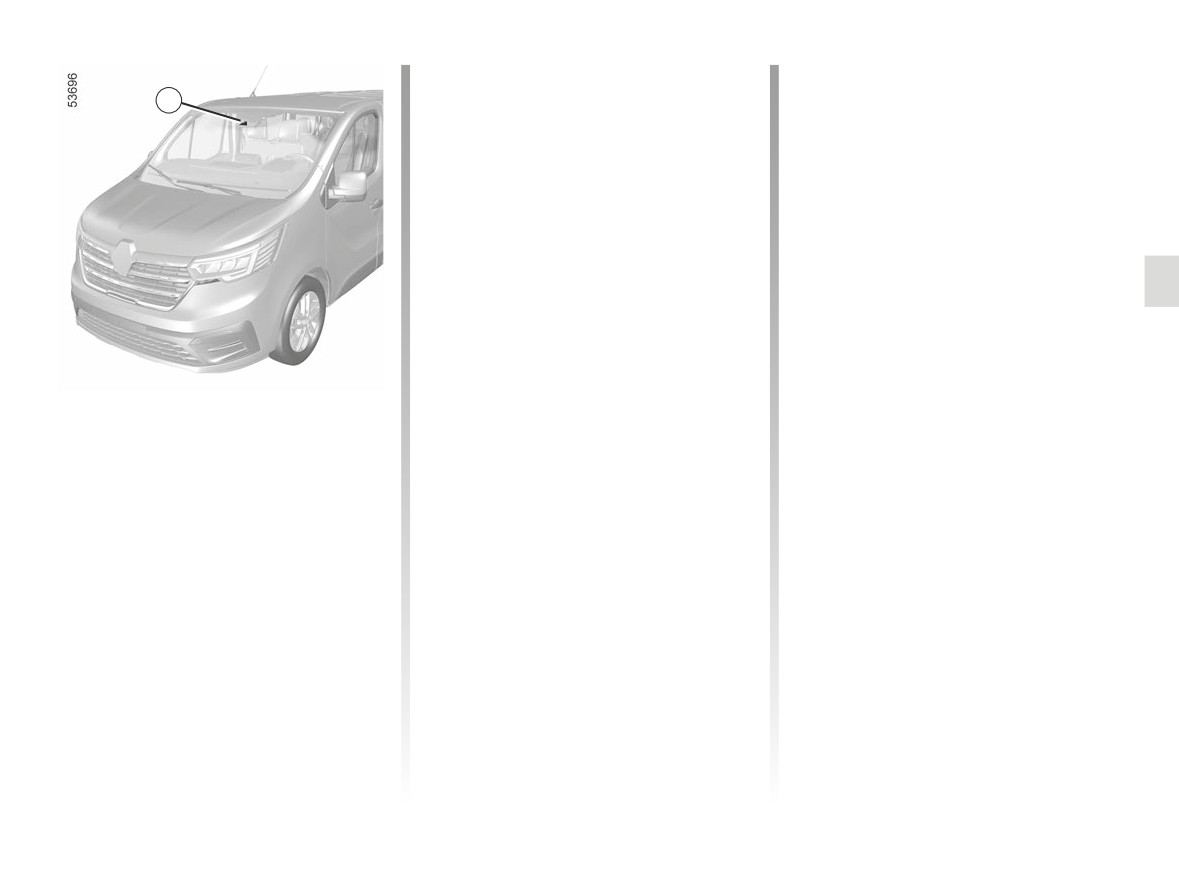
Note: make sure the windscreen is not
For vehicles equipped with a navigation
obscured (dirt, mud, snow, condensa-
system and if the vehicle is travelling in
1
tion etc.).
a country where the speed units differ
from those of the vehicle, the system
For vehicles which are equipped with it,
displays the speed limit sign in the unit
the system also uses information from
of the country, alongside the speed limit
the navigation system.
converted to the unit used by the vehi-
Once the speed limiter is activated, you
cle’s instrument panel.
can adjust the speed limiter indication
For countries where the speed limit is
displayed by the system.
reduced during rainy weather on some
If the limit speed is exceeded, the dis-
types of roads, on vehicles equipped
play panel is modified to warn the driver.
with a navigation system, the system
can modify the limited speed after a few
seconds of wiping the windscreen.
Special situations
The system detects speed limit signs
The system does not take into account
on the side of the road and displays the
exceptional speed limit measures, such
speed limit on the instrument panel.
as peak pollution days.
It mainly uses information taken from
the camera 1, attached to the wind-
screen behind the rear view mirror.
2.59
CarManuals2.co