Nissan Qashqai (2007-2010). Manual - part 1454


  Index      Nissan     Nissan Qashqai - service and repair manual 2007 - 2010 year


Search            copyright infringement  


Content   ..  1452  1453  1454  1455   ..


Nissan Qashqai (2007-2010). Manual - part 1454
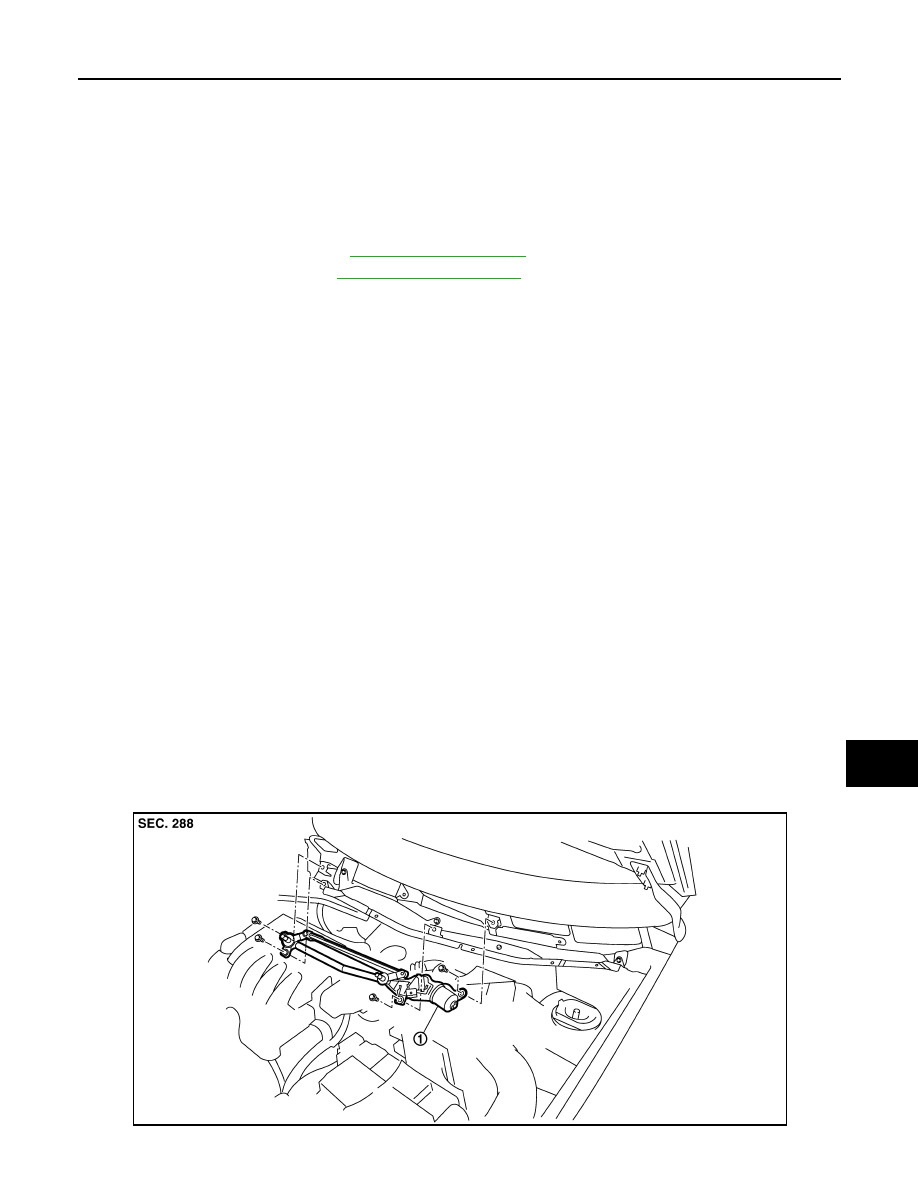


FRONT WIPER DRIVE ASSEMBLY

WW-107

< ON-VEHICLE REPAIR >

C

D

E

F

G

H

I

J

K

M

A

B

WW

N

O

P

3.

Remove bolts from the front wiper drive assembly.

4.

Disconnect the front wiper motor connector.

5.

Remove front wiper drive assembly from the vehicle.

INSTALLATION

1.

Install the front wiper drive assembly to the vehicle.

2.

Connect the front wiper motor connector.

3.

Operate the front wiper to move it to the auto stop position.

4.

Install the cowl top cover. Refer to 

EXT-19, "Exploded View"

.

5.

Install front wiper arms. Refer to 

WW-104, "Exploded View"

.

LHD MODELS : Disassembly and Assembly

INFOID:0000000000924471

DISASSEMBLY

1.

Remove the front wiper linkage 1 and 2 from the front wiper drive assembly.

CAUTION:

Do not bend the linkage or damage the plastic part of the ball joint when removing the front wiper
linkage.

2.

Remove the front wiper motor mounting screws, and then remove the front wiper motor from the front
wiper frame.

ASSEMBLY

1.

Connect the front wiper motor connector.

2.

Operate the front wiper to move it to the auto stop position.

3.

Disconnect the front wiper motor connector.

4.

Install front wiper motor to front wiper frame.

5.

Install the front wiper linkage 2 to the front wiper motor and the front wiper frame.

6.

Install the front wiper linkage 1 to the front wiper frame.

CAUTION:

• Do not drop front wiper motor or cause it to come into contact with other parts.
• Be careful for the grease condition at the front wiper motor and front wiper linkage joint

(retainer). Apply multi

purpose grease or an equivalent if necessary.

RHD MODELS

RHD MODELS : Exploded View

INFOID:0000000000949930

REMOVAL VIEW

JPLIA0296ZZ

WW-108

< ON-VEHICLE REPAIR >

FRONT WIPER DRIVE ASSEMBLY

DISASSEMBLY VIEW

RHD MODELS : Removal and Installation

INFOID:0000000000949931

REMOVAL

1.

Remove front wiper arm. Refer to 

WW-104, "Exploded View"

.

2.

Remove cowl top cover. Refer to 

EXT-19, "Exploded View"

.

3.

Remove bolts from the front wiper drive assembly.

4.

Disconnect the front wiper motor connector.

5.

Remove front wiper drive assembly from the vehicle.

INSTALLATION

1.

Install the front wiper drive assembly to the vehicle.

2.

Connect the front wiper motor connector.

3.

Operate the front wiper to move it to the auto stop position.

4.

Install the cowl top cover. Refer to 

EXT-19, "Exploded View"

.

5.

Install front wiper arms. Refer to 

WW-104, "Exploded View"

.

RHD MODELS : Disassembly and Assembly

INFOID:0000000000949932

DISASSEMBLY

1.

Remove the front wiper linkage 1 and 2 from the front wiper drive assembly.

CAUTION:

Do not bend the linkage or damage the plastic part of the ball joint when removing the front wiper
linkage.

2.

Remove the front wiper motor mounting screws, and then remove the front wiper motor from the front
wiper frame.

ASSEMBLY

1.

Connect the front wiper motor connector.

2.

Operate the front wiper to move it to the auto stop position.

1.

Front wiper drive assembly

1.

Front wiper linkage 1

2.

Shaft seal

3.

Front wiper linkage 2

4.

Front wiper frame

5.

Front wiper motor

: Multi

purpose grease or an equivalent.

JPLIA0298GB

FRONT WIPER DRIVE ASSEMBLY

WW-109

< ON-VEHICLE REPAIR >

C

D

E

F

G

H

I

J

K

M

A

B

WW

N

O

P

3.

Disconnect the front wiper motor connector.

4.

Install front wiper motor to front wiper frame.

5.

Install the front wiper linkage 2 to the front wiper motor and the front wiper frame.

6.

Install the front wiper linkage 1 to the front wiper frame.

CAUTION:

• Do not drop front wiper motor or cause it to come into contact with other parts.
• Be careful for the grease condition at the wiper motor and wiper linkage joint (retainer). Apply

multi

purpose grease or an equivalent if necessary.

WW-110

< ON-VEHICLE REPAIR >

RAIN SENSOR

RAIN SENSOR

Exploded View

INFOID:0000000000906861

Refer to 

EXL-175, "Exploded View"

.

Removal and Installation

INFOID:0000000000906863

Refer to 

EXL-175, "Removal and Installation"

.


Content   ..  1452  1453  1454  1455   ..