Lexus LS (2023 year). Manual in english - page 5
 

  Index      Manuals     Lexus LS (2023 year). Manual in english


Search            copyright infringement  


Content      ..     3      4      5      6     ..


Lexus LS (2023 year). Manual in english - page 5


162

3-3. Adjusting the seats

On vehicles with adjustable seat cush-
ion side bolsters, when the driver’s 
door is opened with the power switch 
off, the seat cushion side bolsters will 
lower if they are in the default position.
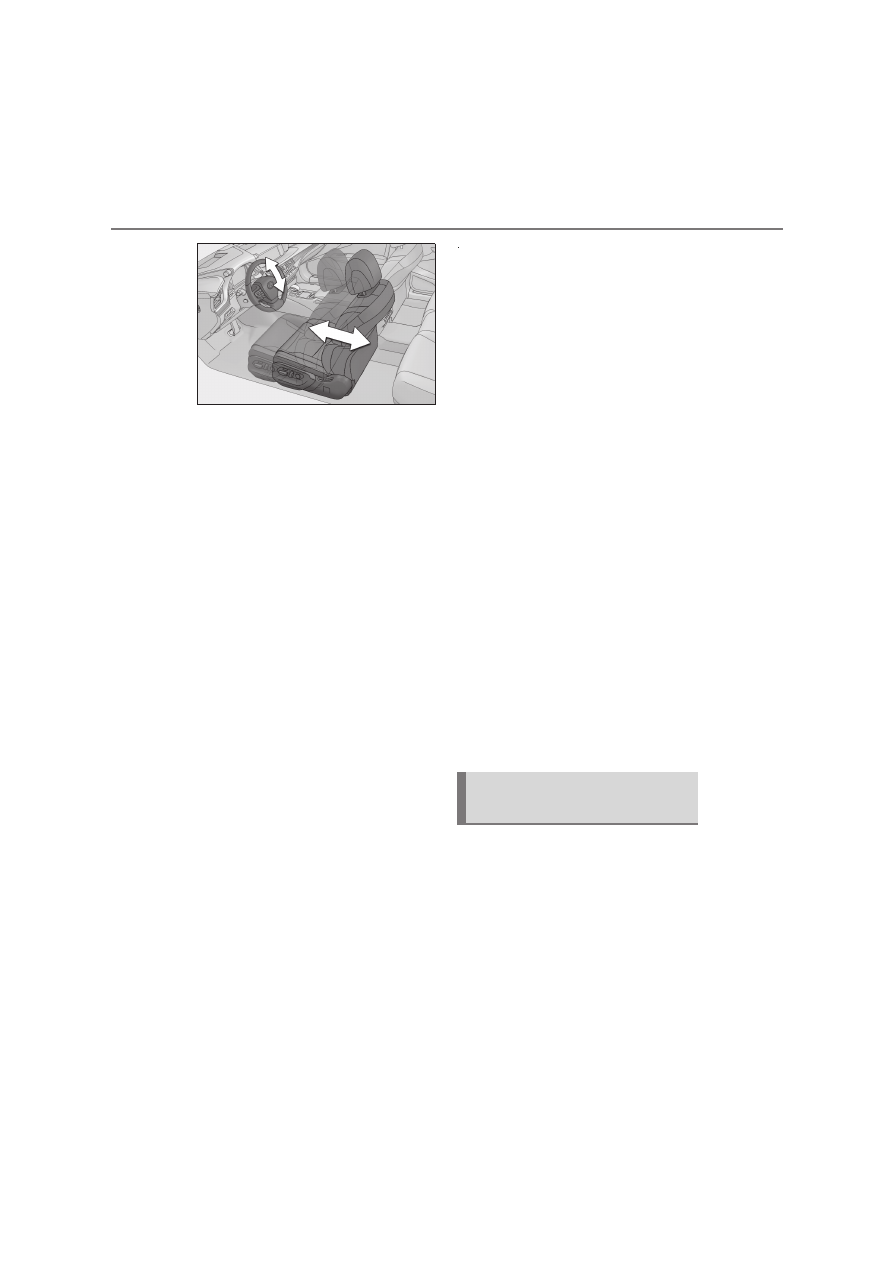
When any of the following has been 
performed, the seat and steering 
wheel automatically return to their 
original positions.
• The power switch has been turned 

to ACCESSORY mode or ON 
mode.

• The driver’s seat belt has been fas-

tened.

Front passenger’s seat

If all of the following have been per-
formed while the vehicle is stopped, 
the lumbar support, pelvic support, 
shoulder bolster (if equipped), 
seatback side bolster (if equipped), 
and hip support (if equipped) will be 
moved to their default position. On 
vehicles with adjustable seat cushion 
side bolsters, the seat cushion side bol-
sters will lower.
• The passenger’s seat belt has been 

unfastened.

• The front passenger’s door is 

opened.

Operation of the power easy access sys-

tem

When exiting the vehicle, the power easy 

access system may not operate if the seat 

is already in the rearmost or uppermost 

position or close to the rear seat.

If the seat position is adjusted during 

power easy access system operation, the 

automatic operation will stop. (The seat 

will change to manual operation.)

If the seat position is adjusted during or 

after the power easy access system oper-

ation when the driver is exiting the vehi-

cle, the power easy access system will not 

operate when entering the vehicle.

Seat cushion side bolster adjustment (if 

equipped)

If the seat cushion side bolsters have been 

lowered, when the front door is closed, the 

seat cushion side bolsters will move to their 

default position.
If the seat is adjusted while the seat cushion 

side bolsters are moving to the default posi-

tion, their movement will be temporarily 

suspended. (The seat cushion side bolsters 

will move to the default position after a cer-

tain amount of time.)

Customization

Some functions can be customized. 

(

P.540)

1

Turn the power switch to ON 
mode.

2

Check that the shift position is in P.

3

Adjust the driver’s seat, steering 
wheel, outside rear view mirrors 
and head-up display (if equipped) 
to the desired positions.

4

While pressing the “SET” button, or 
within 3 seconds after the “SET” 

Recording a driving position into 
memory

163

3

3-3. Adjusting the seats

Be

fore
 driving

button is pressed, press button “1”, 
“2” or “3” until the buzzer sounds.

If the selected button has already been 

preset, the previously recorded position 

will be overwritten.
When the driver’s seat adjustment 

switches are in front passenger mode 

(

P.150), the position of the driver’s seat 

cannot be registered.

To record the position of the front pas-
senger’s seat, adjust the front passen-
ger’s seat to the desired position and 
perform step 

4

 using the buttons on 

the front passenger’s side.

In order to correctly use the driving 

position memory function

If a seat position is already in the furthest 

possible position and the seat is operated in 

the same direction, the recorded position 

may be slightly different when it is recalled.

1

Turn the power switch to ON 
mode.

2

Check that the shift position is in P.

3

Press one of the buttons for the 
driving position you want to recall 
until the buzzer sounds.

When the driver’s seat adjustment 

switches are in front passenger mode 

(

P.150), a driving position cannot be 

recalled.

To stop the position recall operation 

part-way through

Perform any of the following operations:

Press the “SET” button.

Press button “1”, “2” or “3”.

Press the mode change button.

Operate any of the seat adjustment 

switches (only cancels seat position 

recall).

Operate the tilt and telescopic steering 

control switch (only cancels steering 

wheel position recall).

Recalling a driving position

If a driving position is recalled, the move-

ment of the front seat may be stopped part-

way if the seat moves close to the rear seat.
If a rear passenger is determined to be in 

the vehicle, the rearward movement of the 

front seat may be stopped partway to 

ensure sufficient space for the rear passen-

ger.

Recalling the front passenger’s seat 

position (vehicles with a rear seat with 

an ottoman)

If the ottoman of the rear seat is extended, 

WARNING

Seat adjustment caution

Take care during seat adjustment so that 

the seat does not strike the rear passen-

ger or squeeze your body against the 

steering wheel.

Recalling a driving position

164

3-3. Adjusting the seats

the front passenger’s seat position cannot 

be recalled.

Operating the driving position memory 

after turning the power switch off

Driver’s seat:

Recorded seat positions can be activated 

up to 180 seconds after the driver’s door is 

opened and another 60 seconds after it is 

closed again.
Front passenger’s seat:

Recorded seat positions can be recalled up 

to 180 seconds after the front passenger’s 

door is opened.

When the recorded seat position can-

not be recalled

The seat position may not be recalled in 

some situations when the seat position is 

recorded in a certain range. For details, 

contact any authorized Lexus retailer or 

Lexus authorized repairer, or any reliable 

repairer.

Registering procedure

Record your driving position to button 
“1”, “2” or “3” before performing the 
following:
Carry only the key you want to register, 
and then close the driver’s door.
If 2 or more keys are in the vehicle, the 
driving position cannot be recorded 
properly.

1

Turn the power switch to ON 
mode.

2

Check that the shift position is in P.

3

Recall the driving position that you 
want to record.

4

While pressing the recalled button, 
press and hold the door lock switch 
(either lock or unlock) until the 
buzzer sounds.

If the button could not be registered, the 

buzzer sounds continuously for approxi-

mately 3 seconds.

Cancelation procedure

Carry only the key you want to cancel 
and then close the driver’s door.
If 2 or more keys are in the vehicle, the 
driving position cannot be canceled 
properly.

1

Turn the power switch to ON 
mode.

2

Check that the shift position is in P.

3

While pressing the “SET” button, 
press and hold the door lock switch 
(either lock or unlock) until the 
buzzer sounds twice.

If the button could not be canceled, the 

buzzer sounds continuously for approxi-

mately 3 seconds.

Recall procedure

1

Make sure that the doors are 
locked before recalling the driving 
position. Carry the electronic key 
that has been registered to the driv-
ing position, and then unlock and 
open the driver’s door using the 

Registering/canceling/recall a 
driving position to an electronic 
key (including a card key) (mem-
ory recall function)

165

3

3-3. Adjusting the seats

Be

fore
 driving

smart entry & start system or wire-
less remote control.

The driving position will move to the 

recorded position (not including the steer-

ing wheel and head-up display [if 

equipped]). However, the seat will move to 

a position slightly behind the recorded 

position in order to make entering the vehi-

cle easier.
If the driving position is in a position that 

has already been recorded, the seat and 

outside rear view mirrors will not move.

2

Turn the power switch to ACCES-
SORY mode or ON mode, or fas-
ten a seat belt.

The seat, steering wheel and head-up dis-

play (if equipped) will move to the 

recorded position.

Recalling the driving position using the 

memory recall function

Different driving positions can be regis-

tered for each electronic key. Therefore, 

the driving position that is recalled may 

be different depending on the key being 

carried.

If a door other than the driver’s door is 

unlocked with the smart entry & start sys-

tem, the driving position cannot be 

recalled. In this case, press the driving 

position button which has been set.

Customization

Some functions can be customized. 

(

P.540)

*

: If equipped

1

Turn the power switch to ON 
mode.

2

Display the home screen on the 
Rear Multi Operation Panel 
(

P.390) and then touch “Seat”.

3

Touch “Left” or “Right”.

4

Adjust the rear seat to the desired 
position and then touch “SET”.

5

Touch “1” or “2”.

If the preset is being used, the previously 

recorded seat position will be overwritten.

In order to correctly use the position 

memory function

If a seat position is already in the furthest 

possible position and the seat is operated in 

the same direction, the recorded position 

may be slightly different when it is recalled.

Rear seat position memory

*

The rear seat position can be mem-
orized and recalled with the touch 
of a button.

Recording a position into mem-
ory

WARNING

Seat adjustment caution

Take care during seat adjustment so that 

the rear passengers do not strike the 

front seats.

166

3-3. Adjusting the seats

1

Turn the power switch to ON 
mode.

2

Display the home screen on the 
Rear Multi Operation Panel 
(

P.390) and then touch “Seat”.

3

Touch “Left” or “Right”.

4

Touch “1” or “2”.

When the operating conditions are not 

met, the buttons will be grayed out.
To stop the operation touch “STOP”.
If the seat is adjusted while a memorized 

position is being recalled, the automatic 

operation will stop. (The seat will change to 

manual operation.)

Operating condition

The weight of an occupant is detected on 

the rear seat or the rear seat belt is fas-

tened.
Once weight is detected on the seat, the 
seat will be judged as occupied until the 
rear door is opened then closed or the 
power switch is turned off.

Recalling a rear seat position

If a memorized rear seat position is recalled, 

the seat may stop part-way to ensure suffi-

cient space for the rear passenger.

Recalling the ottoman position (if 

equipped)

When a seat position is recalled, the otto-

man will not raise or extend. The ottoman 

position can only be recalled if the memo-

rized position is lower and shorter than the 

current position.

Recalling the memorized posi-
tion

Head restraints

Head restraints are provided for all 
seats.

Vehicles with power rear seat: The 
head restraint for the rear center 
seat is integrated into the seatback 
and cannot be adjusted.

WARNING

Head restraint precautions

Observe the following precautions 

regarding the head restraints. Failure to 

do so may result in death or serious 

injury.

Use the head restraints designed for 

each respective seat.

Adjust the head restraints to the cor-

rect position at all times.

Manual type: After adjusting the head 

restraints, push down on them and 

make sure they are locked in position.

Do not drive with the head restraints 

removed.

167

3

3-3. Adjusting the seats

Be

fore
 driving

Front seats

Center Display

1

Press the seat switch.

2

Select “Adjustments”.

3

Select “Driver seat” or “Passenger 
seat”.

4

Select “Headrest” then the desired 
adjustment button  ,  ,   or   
to adjust the head restraint.

Up
Backward
Down
Forward

The head restraint moves while the adjust-

ment button is selected.

Seat adjustment switches (on some 
models)

1

Up

2

Down

Rear seats

1

Display the home screen on the 
Rear Multi Operation Panel 
(

P.390) and then touch “Seat”.

2

Touch “Left” or “Right”.

3

Touch   then the desired adjust-
ment button  ,  ,  , or   to 
adjust the head restraint.

Up
Backward
Down
Forward

The head restraint moves while the adjust-

ment button is touched.

Adjusting a head restraint verti-
cally and horizontally (power 
head restraints)

A B C

D

A
B
C
D

A

B C D

E

B
C
D

E

168

3-3. Adjusting the seats

1

Up

Pull the head restraints up.

2

Down

Push the head restraint down while press-
ing the lock release button 

.

Front seat head restraints (power head 

restraints)

Depending on the position of the front seat, 

the front head restraint may not be able to 

be adjusted upward if it is close to the ceil-

ing.

Adjusting the height of the head 

restraints

Make sure that the head restraints are 

adjusted so that the center of the head 

restraint is closest to the top of your ears.

Adjusting the rear seat head restraints 

(manual head restraints)

Always raise the head restraint one level 

from the stowed position when using.

The position of the head restraint can 
be adjusted forward in 4 stages.

If the head restraint is pulled forward from 
the foremost position, it will return to the 
rearmost position.

Push the sides of the head restraint.

Pull the head restraint up while press-
ing the lock release button  .

Adjusting a head restraint verti-
cally (manual head restraints)

A

Adjusting a head restraint hori-
zontally (manual head restraints)

Adjusting the side supports (if 
equipped)

Removing the head restraints 
(manual head restraints)

A

169

3

3-3. Adjusting the seats

Be

fore
 driving

Removing the head restraints (power 

head restraints)

For removal and installation of the head 

restraint, ask any authorized Lexus retailer 

or Lexus authorized repairer, or any reliable 

repairer.

Align the head restraint with the instal-
lation holes and push it down to the 
lock position.
Press and hold the lock release button 

 when lowering the head restraint.

Installing the head restraints 
(manual head restraints)

A

170

3-4. Adjusting the steering wheel and mirrors

3-4.Adjusting the steering wheel and mirrors

Operating the switch moves the steer-
ing wheel in the following directions:

1

Up

2

Down

3

Toward the driver

4

Away from the driver

The steering wheel can be adjusted 

when

The power switch is in ACCESSORY or 
ON mode

*

.

*

: If the driver’s seat belt is fastened, the 

steering wheel can be adjusted regard-
less of power switch mode.

Automatic adjustment of the steering 

position

A desired steering position can be entered 

to memory and recalled automatically by 

the driving position memory system. 

(

P.161)

Power easy access system

The steering wheel and driver’s seat move 

in accordance with power switch mode and 

the driver’s seat belt condition. (

P.161)

Customization

Some functions can be customized. 

(

P.540)

Press on or close to the 

 mark.

Steering wheel

Adjustment procedure

WARNING

Caution while driving

Do not adjust the steering wheel while 

driving.

Doing so may cause the driver to mis-

handle the vehicle and cause an acci-

dent, resulting in death or serious injury.

Sounding the horn

171

3

3-4. Adjusting the steering wheel and mirrors

Be

fore
 driving

*

: If  equipped

The height of the rear view mirror can 
be adjusted to suit your driving pos-
ture.
Adjust the height of the rear view mir-
ror by moving it up and down.

Responding to the level of brightness 
of the headlights of vehicles behind, the 
reflected light is automatically 
reduced.

Turn the automatic anti-glare function 
mode on/off

When the automatic anti-glare function is 
in ON mode, the indicator 

 illuminates.

The function will set to ON mode each 
time the power switch is turned to ON 
mode.
Pressing the button turns the function to 
OFF mode. (The indicator 

 also turns 

off.)

To prevent sensor error

To ensure that the sensors operate properly, 

do not touch or cover them.

Inside rear view mirror

*

The rear view mirror’s position can 
be adjusted to enable sufficient 
confirmation of the rear view.

Adjusting the height of rear view 
mirror

WARNING

Caution while driving

Do not adjust the position of the mirror 

while driving.

Doing so may lead to mishandling of the 

vehicle and cause an accident, resulting 

in death or serious injury.

Anti-glare function

A

A

172

3-4. Adjusting the steering wheel and mirrors

*

: If  equipped

Camera indicator

Indicates that the camera is operating nor-
mally.

Icon display area

Displays icons, adjusting gauge, etc. 
(

P.174)

Select button

Press to change the setting of the item you 
want to adjust.

Menu button

Press to display the icon display area and 
select the item you want to adjust.

Lever

Operate to change between digital mirror 
mode and optical mirror mode.

Operate the lever to change between 
digital mirror mode and optical mirror 
mode.

Digital Rearview Mirror

*

The Digital Rearview Mirror is a 
system that uses the camera on the 
rear of the vehicle and displays its 
image on the display of the Digital 
Rearview Mirror.

The Digital Rearview Mirror can be 
changed between optical mirror 
mode and digital mirror mode by 
operating the lever.

The Digital Rearview Mirror allows 
the driver to see the rear view 
despite obstructions, such as the 
head restraints, luggage or rear 
sunshade ensuring rear visibility. 
Also, the rear seats are not dis-
played and privacy of the passen-
gers is enhanced.

WARNING

Observe the following precautions.

Failure to do so may result in death or 

serious injury.

Before using the Digital Rearview 

Mirror

Make sure to adjust the mirror before 

driving. (

P.173)

• Change to optical mirror mode and 

adjust the position of the Digital Rear-

view Mirror so that the area behind 

your vehicle can be viewed properly.

• Change to digital mirror mode and 

adjust the display settings.

As the range of the image displayed by 

the Digital Rearview Mirror is different 

from that of the optical mirror, make 

sure to check this difference before 

driving.

System components

Changing modes

A

B

C

D

E

173

3

3-4. Adjusting the steering wheel and mirrors

Be

fore
 driving

1

Digital mirror mode

Displays an image of the area behind the 
vehicle.

 will illuminate in this mode.

2

Optical mirror mode

Turns off the display of the Digital Rearview 
Mirror allows it to be used as an optical 
mirror.

Digital mirror mode operating condi-

tion

The power switch is turned to ON mode.
When the power switch is changed from 

ON mode to off or ACCESSORY mode, 

the image will disappear after several sec-

onds.

When using the Digital Rearview Mir-

ror in digital mirror mode

If it is difficult to see the displayed image 

due to light reflected off the Digital Rear-

view Mirror, the camera being dirty, or if 

lights of a vehicle behind your vehicle or 

the displayed image are bothering you, 

change to optical mirror mode.

When the trunk is open, the Digital Rear-

view Mirror image may not display prop-

erly. Before driving, make sure the trunk 

is closed.

If the display is difficult to see due to 

reflected light, close the sunshade for the 

moon roof.

Any of the following conditions may 

occur when driving in the dark, such as at 

night. None of them indicates that a mal-

function has occurred.

• Colors of objects in the displayed image 

may differ from their actual color.

• Depending on the height of the lights of 

the vehicle behind, the area around the 

vehicle may appear white and blurry.

• Automatic image adjustment for brighter 

surrounding image may cause flickering.

If it is difficult to see the displayed image or 
flickering bothers you, change to optical 
mirror mode.

The Digital Rearview Mirror may 

become hot while it is in digital mirror 

mode.

This is not a malfunction.

Depending on your physical condition or 

age, it may take longer than usual to focus 

on the displayed image. In this case, 

change to optical mirror mode.

Do not let passengers stare at the dis-

played image when the vehicle is being 

driven, as doing so may cause motion 

sickness.

When the system malfunctions

If the symbol shown in the illustration is dis-

played when using the Digital Rearview 

Mirror in digital mirror mode, the system 

may be malfunctioning. The symbol will dis-

appear in a few seconds. Operate the lever, 

change to optical mirror mode and have the 

vehicle inspected by any authorized Lexus 

retailer or Lexus authorized repairer, or any 

reliable repairer.

Adjusting the mirror height

The height of the rear view mirror can 
be adjusted to suit your driving pos-

Adjusting the mirror

174

3-4. Adjusting the steering wheel and mirrors

ture.
Change to optical mirror mode, adjust-
ing the height of the rear view mirror by 
moving it up and down.

Display settings (digital mirror 
mode)

Settings of the display in the digital mir-
ror mode, on/off operation of the auto-
matic anti-glare function, etc. can be 
changed.

1

Press the menu button.

The icons will be displayed.

2

Press the menu button repeatedly 
and select the item you want to 
adjust.

3

Press 

 or 

 to change the set-

ting.

The icons will disappear if a button is not 

operated for approximately 5 seconds or 

more.

*

: This is a function for the optical mirror 

mode, however, the setting can also be 
changed while using the digital mirror 
mode.

Enabling/disabling the automatic 
anti-glare function (optical mirror 
mode)

The automatic anti-glare function in the 
optical mirror mode can be ena-
bled/disabled. The setting can be 
changed in both the digital mirror 
mode and the optical mirror mode.

When using the digital mirror mode

P.174

Icons

Settings

Select to adjust the brightness of 
the display.

Select to adjust the area dis-
played up/down.

Select to adjust the area dis-
played to the left/right.

Select to adjust the angle of the 
displayed image.

Select to zoom in/out the dis-
played image.

Select to enable/disable the 
automatic anti-glare function.

*

Responding to the brightness of 
the headlights of vehicles 
behind, the reflected light is 
automatically adjusted.
The automatic anti-glare func-
tion is enabled each time the 
power switch is changed to ON 
mode.

175

3

3-4. Adjusting the steering wheel and mirrors

Be

fore
 driving

When using the optical mirror mode

1

Press the menu button.

The icons will be displayed.

2

Press the menu button repeatedly 
and select 

.

The setting display will be displayed.

3

Press 

 or 

 to enable 

(“ON”)/disable (“OFF”) the auto-
matic anti-glare function.

The icons will disappear if a button is not 

operated for approximately 5 seconds or 

more.

Adjusting the display (digital mirror 

mode)

If the displayed image is adjusted, it may 

appear distorted. This is not a malfunc-

tion.

If the brightness of the Digital Rearview 

Mirror is set too high, it may cause eye 

strain. Adjust the Digital Rearview Mirror 

to an appropriate brightness. If your eyes 

become tired, change to optical mirror 

mode.

The brightness of the Digital Rearview 

Mirror will change automatically accord-

ing to the brightness of the area in front of 

your vehicle.

To prevent the light sensors from mal-

functioning

To prevent the light sensors from malfunc-

tioning, do not touch or cover them.

WARNING

Observe the following precautions.

Failure to do so may result in death or 

serious injury.

While driving

Do not adjust the position of the Digital 

Rearview Mirror or adjust the display 

settings while driving.

Stop the vehicle and operate the Digi-

tal Rearview Mirror control switches. 

Failure to do so may cause a steering 

wheel operation error, resulting in an 

unexpected accident.

Always pay attention to the vehicle’s 

surroundings.

The size of the vehicles and other objects 

may look different when in digital mirror 

mode and optical mirror mode.

When backing up, make sure to directly 

check the safety of the area around your 

vehicle, especially behind the vehicle.

Additionally, if a vehicle approaches from 

the rear in the dark, such as at night, the 

surrounding area may appear dim.

To prevent causes of fire

If the driver continues using the Digital 

Rearview Mirror while smoke or odor 

comes from the mirror, it may result in 

fire. Stop using the system immediately 

and contact any authorized Lexus 

retailer or Lexus authorized repairer, or 

any reliable repairer.

176

3-4. Adjusting the steering wheel and mirrors

Cleaning the mirror surface

If the mirror surface is dirty, the image 
on the display may be difficult to see.
Clean the mirror surface gently using a 
soft dry cloth.

Cleaning the camera

If the camera lens is dirty or covered 
with foreign matter, such as water 
droplets, snow, mud, etc., the displayed 
image may not be clear. In this case, 
rinse the camera lens with a large 
quantity of water and then wipe it clean 
with a soft cloth dampened with water.
Dirt on the camera lens can be cleaned 
by operating the dedicated camera 
cleaning washer. (

P.229)

The camera

The camera for the Digital Rearview Mirror 

is located as shown.

Cleaning the Digital Rearview 
Mirror

NOTICE

To prevent the Digital Rearview Mir-

ror from malfunctioning

Do not use detergents, such as thinner, 

benzine, and alcohol to clean the mir-

ror. They may discolor, deteriorate or 

damage the mirror surface.

Do not smoke, use matches, use ciga-

rette lighters or allow open flames 

near the mirror. It may damage the 

mirror or cause a fire.

Do not remove, disassemble or modify 

the mirror.

To prevent the camera from malfunc-

tioning

Observe the following precautions, 

otherwise the Digital Rearview Mirror 

may not operate properly.

• Do not strike or hit the camera or sub-

ject it to a strong impact, as the camera 

installation position and angle may be 

changed.

• Do not remove, disassemble or modify 

the camera.

• When washing the camera, rinse it 

with a large quantity of water and then 

wipe it clean with a soft cloth damp-

ened with water.

Do not strongly rub the camera lens, 

as it may be scratched and will not be 

able to transmit a clear image.

• Do not allow organic solvent, car wax, 

window cleaner or glass coat to 

adhere to the camera cover. If this hap-

pens, wipe it off as soon as possible.

• Do not apply hot water to the camera 

in cold weather, as the sudden change 

of temperature may cause the camera 

to not operate properly.

• When using a high pressure washer to 

wash the vehicle, do not directly spray 

the camera and its surrounding area, 

as doing so may cause the camera to 

not operate properly.

177

3

3-4. Adjusting the steering wheel and mirrors

Be

fore
 driving

If you notice any of the following symptoms, refer to the following table for the likely 
cause and the solution.
If the symptom is not resolved by the solution, have the vehicle inspected by any 
authorized Lexus retailer or Lexus authorized repairer, or any reliable repairer.

NOTICE

Do not subject the camera to a strong 

impact as this could cause a malfunc-

tion.

If this happens, have the vehicle 

inspected by any authorized Lexus 

retailer or Lexus authorized repairer, 

or any reliable repairer as soon as pos-

sible.

If you notice any symptoms

178

3-4. Adjusting the steering wheel and mirrors

Symptom

Likely cause

Solution

The image is difficult to 
see.

The mirror surface is dirty.

Clean the mirror surface 
gently, using a soft dry cloth.

Sunlight or headlights are shining 
directly into the Digital Rearview 
Mirror.

Change to optical mirror 
mode.
(If the light is coming through 
the moon roof, close the sun-
shade.)

• The vehicle is in a dark area.
• The vehicle is near a TV tower, 

broadcasting station, electric 
power plant, or other location 
where strong radio waves or 
electrical noise may be pres-
ent.

• The temperature around the 

camera is extremely high/low.

• The ambient temperature is 

extremely low.

• It is raining or humid.
• Sunlight or headlights are shin-

ing directly into the camera 
lens.

• The vehicle is under fluores-

cent lights, sodium lights, mer-
cury lights, etc.

• Exhaust gas is obstructing the 

camera.

Change to optical mirror 
mode.
(Change back to digital mir-
ror mode when the condi-
tions have improved.)

The image is difficult to 
see.

Foreign matters (such as water 
droplets, snow, mud, etc.) is on 
the camera lens.

Operate the dedicated 
camera cleaning washer 
and clean the camera lens. 
(

P.229)

Change to optical mirror 
mode.

Rinse the camera with a 
large quantity of water, 
wipe it clean with a soft 
cloth dampened with water, 
and then change back to 
digital mirror mode.

179

3

3-4. Adjusting the steering wheel and mirrors

Be

fore
 driving

The image is out of 
alignment.

The trunk is not fully closed.

Fully close the trunk.

The camera or its surrounding 
area has received a strong 
impact.

Change to optical mirror 
mode and have the vehicle 
inspected by any authorized 
Lexus retailer or Lexus 
authorized repairer, or any 
reliable repairer.

The display is dim and 

 is displayed.

The system may be malfunction-
ing.

Change to optical mirror 
mode and have the vehicle 
inspected by any authorized 
Lexus retailer or Lexus 
authorized repairer, or any 
reliable repairer.

 goes off.

 is displayed.

The Digital Rearview Mirror is 
extremely hot.
(The display will gradually 
become more dim. If the temper-
ature continues to increase, the 
Digital Rearview Mirror will turn 
off.)

Reducing the cabin tempera-
ture is recommended to 
reduce the temperature of 
the mirror.
(

 will disappear when the 

mirror becomes cool.)

If 

 does not disappear 

even though the mirror is 
cool, have the vehicle 
inspected by any authorized 
Lexus retailer or Lexus 
authorized repairer, or any 
reliable repairer.

The lever cannot be 
operated properly.

The lever may be malfunctioning.

Change to optical mirror 
mode and have the vehicle 
inspected by any authorized 
Lexus retailer or Lexus 
authorized repairer, or any 
reliable repairer.
(To change to optical mirror 
mode, press and hold the 
menu button for approxi-
mately 10 seconds.)

Symptom

Likely cause

Solution

180

3-4. Adjusting the steering wheel and mirrors

When using the outside rear view mir-

rors in a cold weather

When it is cold and the outside rear view 

mirrors are frozen, it may not be possible to 

fold/extend them or adjust the mirror sur-

face. Remove the ice, snow, etc. covering 

the outside rear view mirrors.

1

To select a mirror to adjust, press 
the switch.

The indicator comes on.

Left
Right

Pressing the same switch again will put the 

switch in neutral.

2

To adjust the mirror, press the 
switch.

Up
Right
Down
Left

Mirror angle can be adjusted when

The power switch is in ACCESSORY or 

ON mode.

Defogging the mirrors

The outside rear view mirrors can be 

cleared using the mirror defoggers. Turn on 

the rear window defogger to turn on the 

outside rear view mirror defoggers. 

(

P.395)

Outside rear view mirrors

The rear view mirror’s position can 
be adjusted to enable sufficient 
confirmation of the rear view.

WARNING

Important points while driving

Observe the following precautions while 

driving.

Failure to do so may result in loss of con-

trol of the vehicle and cause an accident, 

resulting in death or serious injury.

Do not adjust the mirrors while driving.

Do not drive with the mirrors folded.

Both the driver and passenger side 

mirrors must be extended and prop-

erly adjusted before driving.

Adjustment procedure

A
B

A
B
C
D

181

3

3-4. Adjusting the steering wheel and mirrors

Be

fore
 driving

Auto anti-glare function

When the anti-glare inside rear view mirror 

is set to automatic mode, the outside rear 

view mirrors will activate in conjunction with 

the anti-glare inside rear view mirror to 

reduce reflected light. (

P.171, 174)

Automatic adjustment of the mirror 

angle

A desired mirror face angle can be entered 

to memory and recalled automatically by 

the driving position memory. (

P.161)

Linked mirror function when reversing

When either “L” or “R” of the mirror select 

switch is selected, the outside rear view mir-

rors will automatically angle downwards 

when the vehicle is reversing in order to 

give a better view of the ground.
To disable this function, select neither “L” 

nor “R”.
To set the mirror angle used when the vehi-

cle is reversing, adjust the mirror angle at a 

desired position with the shift position in R.
The adjusted angle will be memorized and 

the mirror will automatically tilt to the mem-

orized angle whenever the shift position is 

shifted to R from next time.
The memorized downward tilt position of 

the mirror is linked to the normal position 

(angle adjusted with the shift position in 

other than R). Therefore, if the normal posi-

tion is changed after adjustment, the tilt 

position will also change.
When the normal position is changed, read-

just the angle in reversing.

Using the switch

Press the switch to fold the mirrors.

Press it again to extend them to the original 
position.

Setting automatic mode

Automatic mode allows the folding or 
extending of the mirrors to be linked to 
locking/unlocking of the doors.
Press the “AUTO” switch to set auto-
matic mode.

The indicator 

 will come on.

Pressing the switch once more will return 
to manual mode.

When disconnecting and reconnecting 

12-volt battery terminals

The automatic folding/extending mirror 

function will return to off as default. To turn 

WARNING

When the mirror defoggers are oper-

ating

Do not touch the rear view mirror sur-

faces, as they can become very hot and 

burn you.

Folding and extending the mir-
rors

A

182

3-4. Adjusting the steering wheel and mirrors

the function on, press the switch again to 

select on.

Customization

Some functions can be customized. 

(

P.540)

WARNING

When a mirror is moving

To avoid personal injury and mirror mal-

function, be careful not to get your hand 

caught by the moving mirror.

183

3

3-5. Opening, closing the windows and moon roof

Be

fore
 driving

3-5.Opening, closing the windows and moon roof

The power windows can be opened 
and closed using the switches.
Operating the switch moves the win-
dows as follows:

1

Closing

2

One-touch closing

*

3

Opening

4

One-touch opening

*

*

: To stop the window partway, operate the 

switch in the opposite direction.

The power windows can be operated 

when

The power switch is in ON mode.

When the driver’s power window switch 

is used to open a rear power window 

(vehicles with rear door sunshades)

If a rear door sunshade is extended or being 

extended when the driver’s power window 

switch is pushed, only the rear door sun-

shade will be retracted. To open the rear 

power window from the driver’s seat, push 

the driver’s power window switch again.

Operating the power windows after 

turning the hybrid system off

The power windows can be operated for 

approximately 45 seconds even after the 

power switch is turned to ACCESSORY 

mode or turned off. They cannot, however, 

be operated once either front door is 

opened.

Jam protection function

If an object becomes jammed between the 

window and the window frame while the 

window is closing, window movement is 

stopped and the window is opened slightly.

Catch protection function

If an object becomes caught between the 

door and window while the window is open-

ing, window movement is stopped.

When the side window cannot be 

opened or closed

When the jam protection function or catch 

protection function operates unusually and 

the side window cannot be opened or 

closed, perform the following operations 

with the power window switch of that door.

Stop the vehicle. With the power switch in 

ON mode, within 4 seconds of the jam 

protection function or catch protection 

function activating, continuously operate 

the power window switch in the 

one-touch closing direction or one-touch 

opening direction so that the side window 

can be opened and closed.

If the side window cannot be opened and 

closed even when performing the above 

operations, perform the following proce-

dure for function initialization.

1

Turn the power switch to ON mode.

2

Pull and hold the power window switch 

in the one-touch closing direction and 

completely close the side window.

3

Release the power window switch for a 

moment, resume pulling the switch in 

the one-touch closing direction, and 

hold it there for approximately 6 sec-

onds or more.

4

Press and hold the power window 

switch in the one-touch opening direc-

tion. After the side window is com-

pletely opened, continue holding the 

switch for an additional 1 second or 

more.

Power windows

Opening and closing the power 
windows

184

3-5. Opening, closing the windows and moon roof

5

Release the power window switch for a 

moment, resume pushing the switch in 

the one-touch opening direction, and 

hold it there for approximately 4 sec-

onds or more.

6

Pull and hold the power window switch 

in the one-touch closing direction 

again. After the side window is com-

pletely closed, continue holding the 

switch for a further 1 second or more.

If you release the switch while the window is 

moving, start again from the beginning.

If the window reverses and cannot be fully 

closed or opened, have the vehicle 

inspected by any authorized Lexus retailer 

or Lexus authorized repairer, or any reliable 

repairer.

Door lock linked window operation

The power windows can be opened and 
closed using the mechanical key.

*


(

P.513)

The power windows can be opened and 

closed using the wireless remote con-
trol.

*

 (

P.132)

*

: These settings must be customized at 

any authorized Lexus retailer or Lexus 
authorized repairer, or any reliable 
repairer.

Power windows open warning buzzer

A buzzer sounds and a message is shown 

on the multi-information display in the 

instrument cluster when the power switch is 

turned off and the driver’s door is opened 

with the power windows open.

Customization

Some functions can be customized. 

(

P.540)

WARNING

Observe the following precautions.

Failure to do so may result in death or 

serious injury.

Closing the windows

The driver is responsible for all the 

power window operations, including 

the operation for the passengers. In 

order to prevent accidental operation, 

especially by a child, do not let a child 

operate the power windows. It is possi-

ble for children and other passengers 

to have body parts caught in the power 

window. Also, when riding with a child, 

it is recommended to use the window 

lock switch. (

P.185)

Check to make sure that all passen-

gers do not have any part of their body 

in a position where it could be caught 

when a window is being operated.

When using the wireless remote con-

trol or mechanical key and operating 

the power windows, operate the 

power window after checking to make 

sure that there is no possibility of any 

passenger having any of their body 

parts caught in the window. Also do 

not let a child operate window by the 

wireless remote control or mechanical 

key. It is possible for children and other 

passengers to get caught in the power 

window.

When exiting the vehicle, turn the 

power switch off, carry the key and exit 

the vehicle along with the child. There 

may be accidental operation, due to 

mischief, etc., that may possibly lead to 

an accident.

Jam protection function

Never use any part of your body to 

intentionally activate the jam protec-

tion function.

185

3

3-5. Opening, closing the windows and moon roof

Be

fore
 driving

This function can be used to prevent 
children from accidentally opening or 
closing a passenger window.
Press the switch.

The indicator 

 will come on and the pas-

senger windows will be locked.
The passenger windows can still be 
opened and closed using the driver’s 
switch even if the lock switch is on.

The power windows can be operated 

when

The power switch is in ON mode.

When the 12-volt battery is discon-

nected

The window lock switch is disabled. If nec-

essary, press the window lock switch after 

reconnecting the 12-volt battery.

WARNING

The jam protection function may not 

work if something gets jammed just 

before the window is fully closed. Be 

careful not to get any part of your body 

jammed in the window.

Catch protection function

Never use any part of your body or 

clothing to intentionally activate the 

catch protection function.

The catch protection function may not 

work if something gets caught just 

before the window is fully opened. Be 

careful not to get any part of your body 

or clothing caught in the window.

Preventing accidental operation 
(window lock switch)

A

186

3-5. Opening, closing the windows and moon roof

Opening and closing

1

Opens the moon roof

*

The moon roof tilts up and then fully opens.

2

Closes the moon roof

*

*

: Lightly press either side of the moon roof 

switch to stop the moon roof partway.

Tilting up and down

1

Tilts the moon roof up

*

2

Tilts the moon roof down

*

*

: Lightly press either side of the moon roof 

switch to stop the moon roof partway.

The moon roof can be operated when

The power switch is in ON mode.

Operating the moon roof after turning 

the hybrid system off

The moon roof can be operated for approx-

imately 45 seconds after the power switch 

is turned to ACCESSORY mode or turned 

off. It cannot, however, be operated once 

either front door is opened.

Jam protection function

If an object is detected between the moon 

roof and the frame while the moon roof is 

closing or tilting down, travel is stopped and 

the moon roof opens slightly.

Sunshade

The sunshade can be opened and closed 

manually. However, the sunshade will open 

automatically when the moon roof is 

opened.

Door lock linked moon roof operation

The moon roof can be opened and 
closed using the mechanical key.

*


(

P.513)

The moon roof can be opened and 

closed using the wireless remote con-
trol.

*

 (

P.132)

*

: These settings must be customized at 

any authorized Lexus retailer or Lexus 
authorized repairer, or any reliable 
repairer.

When the moon roof does not close nor-

mally

Perform the following procedure:

1

Stop the vehicle.

2

Press and hold the “CLOSE” switch.

*

The moon roof will close, reopen and pause 

for approximately 10 seconds. Then it will 

close again and stop at the completely 

closed position.

3

Check to make sure that the moon roof 

is completely closed and then release 

the switch.

*

: If the switch is released at the incorrect 

Moon roof

Use the overhead switches to open 
and close the moon roof and tilt it 
up and down.

Operating the moon roof

187

3

3-5. Opening, closing the windows and moon roof

Be

fore
 driving

time, the procedure will have to be per-
formed again from the beginning.

If the moon roof does not fully close even 

after performing the above procedure cor-

rectly, have the vehicle inspected by any 

authorized Lexus retailer or Lexus author-

ized repairer, or any reliable repairer.

If the moon roof does not move normally

If the moon roof does not open or close 

normally or the automatic opening function 

does not operate, perform the following ini-

tialization procedure.

1

Stop the vehicle.

2

Press and hold the “DOWN” switch.

*

The moon roof will stop at the tilt-up posi-

tion. After that, it will open, close, tilt up, tilt 

down, and stop at the fully closed position.

3

Confirm that the moon roof has com-

pletely stopped and release the switch.

*

: If you release the switch while the moon 

roof is moving, perform the procedure 
again from the beginning.

If, after performing the above procedures 

correctly, the moon roof still does not open 

or close normally or the automatic opening 

function does not operate, have the vehicle 

inspected by any authorized Lexus retailer 

or Lexus authorized repairer, or any reliable 

repairer.

Moon roof open warning buzzer

A buzzer sounds and a message is shown 

on the multi-information display in the 

instrument cluster when the power switch is 

turned off and the driver’s door is opened 

with the moon roof open.

Customization

Some functions can be customized. 

(

P.540)

WARNING

Observe the following precautions.

Failure to do so may cause death or seri-

ous injury.

Opening the moon roof

Do not allow any passengers to put 

their hands or heads outside the vehi-

cle while it is moving.

Do not sit on top of the moon roof.

Opening and closing the moon roof

The driver is responsible for moon roof 

opening and closing operations.

In order to prevent accidental opera-

tion, especially by a child, do not let a 

child operate the moon roof. It is possi-

ble for children and other passengers 

to have body parts caught in the moon 

roof.

Check to make sure that all passen-

gers do not have any part of their body 

in a position where it could be caught 

when the moon roof is being operated.

When using the wireless remote con-

trol or mechanical key and operating 

the moon roof, operate the moon roof 

after checking to make sure that there 

is no possibility of any passenger hav-

ing any of their body parts caught in 

the moon roof. Also, do not let a child 

operate moon roof by the wireless 

remote control or mechanical key. It is 

possible for children and other passen-

gers to get caught in the moon roof.

188

3-5. Opening, closing the windows and moon roof

WARNING

When exiting the vehicle, turn the 

power switch off, carry the key and exit 

the vehicle along with the child. There 

may be accidental operation, due to 

mischief, etc., that may possibly lead to 

an accident.

Jam protection function

Never use any part of your body to 

intentionally activate the jam protec-

tion function.

The jam protection function may not 

work if something gets caught just 

before the moon roof is fully closed. 

Also, the jam protection function is not 

designed to operate while the moon 

roof switch is being pressed. Take care 

so that your fingers, etc. do not get 

caught.

4

189

4

Driving

Driving

.

4-1. Before driving

Driving the vehicle......................

191

Cargo and luggage...................

197

Trailer towing...............................

198

4-2. Driving procedures

Power (ignition) switch............

199

EV drive mode ...........................

203

Hybrid transmission.................

205

Turn signal lever .........................

212

Parking brake ..............................

213

Brake Hold....................................

216

4-3. Operating the lights and wipers

Headlight switch.........................

218

AHS (Adaptive High-beam Sys-

tem)...............................................

221

AHB (Automatic High Beam)

........................................................

224

Multi Weather Lights ..............

227

Rear fog lights.............................

228

Windshield wipers and washer

........................................................

229

4-4. Refueling

Opening the fuel tank cap.....

234

4-5. Using the driving support sys-

tems

Lexus Safety System + A........

236

Lexus Safety System + ............

242

PCS (Pre-Collision System) (vehi-

cles with Lexus Safety System + 
A) ..................................................

247

PCS (Pre-Collision System) (vehi-

cles with Lexus Safety System +)

.......................................................

260

FCTA (Front Cross Traffic Alert)

........................................................

272

LTA (Lane Tracing Assist) (vehi-

cles with Lexus Safety System + 
A)...................................................

276

LTA (Lane Tracing Assist) (vehi-

cles with Lexus Safety System +)

.......................................................

286

RSA (Road Sign Assist) .........

295

Dynamic radar cruise control with 

full-speed range .....................

299

Cruise control...............................

311

BSM (Blind Spot Monitor).....

313

PKSA (Parking Support Alert)

........................................................

318

Lexus parking assist-sensor ..

319

RCTA (Rear crossing traffic alert) 

function ......................................

328

RCD (Rear Camera Detection) 

function ......................................

333

PKSB (Parking Support Brake)

.......................................................

336

Parking Support Brake function 

(static objects)...........................

341

Parking Support Brake function 

(rear-crossing vehicles) ......

344

Parking Support Brake function 

(rear pedestrians)..................

346

Lexus Teammate Advanced Park

.......................................................

348

190


Driving mode select switch...

372

Electronically modulated air sus-

pension .......................................

373

GPF (Gasoline Particulate Filter) 

system .........................................

376

Driving assist systems..............

377

4-6. Driving tips

Hybrid electric vehicle driving tips

........................................................

384

Winter driving tips ....................

386

191

4

4-1. Before driving

Driving

4-1.Before driving

Starting the hybrid system

P.199

Driving

1

With the brake pedal depressed, 
shift the shift position to D. 
(

P.205)

Check that the shift position indicator 

shows D.

2

If the parking brake is set, release 
the parking brake. (

P.213)

3

Gradually release the brake pedal 
and gently depress the accelerator 
pedal to accelerate the vehicle.

Stopping

1

Depress the brake pedal.

2

If necessary, set the parking brake.

If the vehicle is to be stopped for an 

extended period of time, shift the shift posi-

tion to P. (

P.206)

Parking the vehicle

1

Depress the brake pedal to stop the 
vehicle completely.

2

If the parking brake is released, set 
the parking brake. (

P.213)

3

Shift the shift position to P. 
(

P.206)

Check that the shift position indicator 

shows P and the parking brake indicator is 

illuminated.

4

Press the power switch to stop the 
hybrid system.

5

Slowly release the brake pedal.

6

Lock the door, making sure that you 
have the electronic key on your 
person.

If parking on a hill, block the wheels as 

needed.

Starting off on a steep uphill

1

Firmly depress the brake pedal and 
shift the shift position to D.

The hill-start assist control will be activated.

2

Set the parking brake. (

P.213)

3

Release the brake pedal and gently 
depress the accelerator pedal to 
accelerate the vehicle.

4

Release the parking brake. 
(

P.213)

For fuel-efficient driving

Keep in mind that hybrid electric vehicles 

are similar to conventional vehicles, and it is 

necessary to refrain from activities such as 

sudden acceleration. (

P.384)

Driving in the rain

Drive carefully when it is raining, because 

visibility will be reduced, the windows 

may become fogged-up, and the road 

will be slippery.

Drive carefully when it starts to rain, 

because the road surface will be espe-

cially slippery.

Refrain from high speeds when driving on 

an expressway in the rain, because there 

may be a layer of water between the tires 

and the road surface, preventing the 

steering and brakes from operating prop-

erly.

Engine speed while driving

In the following conditions, the engine 

speed may become high while driving. This 

Driving the vehicle

The following procedures should be 
observed to ensure safe driving:

Driving procedure

192

4-1. Before driving

is due to automatic up-shifting control or 

down-shifting implementation to meet driv-

ing conditions. It does not indicate sudden 

acceleration.

The vehicle is judged to be driving uphill 

or downhill

When the accelerator pedal is released

When the brake pedal is depressed

Restraining the hybrid system output 

(Brake Override System)

When the accelerator and brake pedals 

are depressed at the same time, the 

hybrid system output may be restrained.

A warning message is displayed on the 

multi-information display while the sys-

tem is operating.

Breaking in your new Lexus

To extend the life of the vehicle, observing 

the following precautions is recommended:

For the first 300 km (186 miles):

Avoid sudden stops.

For the first 1000 km (621 miles):

• Do not drive at extremely high speeds.

• Avoid sudden acceleration.

• Do not drive continuously in low gears.

• Do not drive at a constant speed for 

extended periods.

Drum-in-disc type parking brake system

Your vehicle has a drum-in-disc type park-

ing brake system. This type of brake system 

needs bedding-down of the brake shoes 

periodically or whenever the parking brake 

shoes and/or drum are replaced. Have any 

authorized Lexus retailer or Lexus author-

ized repairer, or any reliable repairer per-

form the bedding down operation.

Operating your vehicle in a foreign 

country

Comply with the relevant vehicle registra-

tion laws and confirm the availability of the 

correct fuel. (

P.530)

WARNING

Observe the following precautions.

Failure to do so may result in death or 

serious injury.

When starting the vehicle

Always keep your foot on the brake 

pedal while stopped with the “READY” 

indicator is illuminated. This prevents the 

vehicle from creeping.

When driving the vehicle

Do not drive if you are unfamiliar with 

the location of the brake and accelera-

tor pedals to avoid depressing the 

wrong pedal.

• Accidentally depressing the accelera-

tor pedal instead of the brake pedal 

will result in sudden acceleration that 

may lead to an accident.

• When backing up, you may twist your 

body around, leading to a difficulty in 

operating the pedals. Make sure to 

operate the pedals properly.

• Make sure to keep a correct driving 

posture even when moving the vehicle 

only slightly. This allows you to depress 

the brake and accelerator pedals 

properly.

• Depress the brake pedal using your 

right foot. Depressing the brake pedal 

using your left foot may delay 

response in an emergency, resulting in 

an accident.

The driver should pay extra attention 

to pedestrians when the vehicle is 

powered only by the electric motor 

(traction motor). As there is no engine 

noise, the pedestrians may misjudge 

the vehicle’s movement. Even with the 

Acoustic Vehicle Alerting System acti-

vate, drive with care as pedestrians in 

the vicinity may still not notice the vehi-

cle if the surrounding area is noisy.

193

4

4-1. Before driving

Driving

WARNING

Do not drive the vehicle over or stop 

the vehicle near flammable materials.

The exhaust system and exhaust gases 

can be extremely hot. These hot parts 

may cause a fire if there is any flamma-

ble material nearby.

During normal driving, do not turn off 

the hybrid system. Turning the hybrid 

system off while driving will not cause 

loss of steering or braking control, 

however, power assist to the steering 

will be lost. This will make it more diffi-

cult to steer smoothly, so you should 

pull over and stop the vehicle as soon 

as it is safe to do so.

In the event of an emergency, such as if 

it becomes impossible to stop the vehi-

cle in the normal way: 

P.486

Use engine braking (downshift) to 

maintain a safe speed when driving 

down a steep hill.

Using the brakes continuously may 

cause the brakes to overheat and lose 

effectiveness. (

P.205)

Do not adjust the positions of the 

steering wheel, the seat, or the inside 

or outside rear view mirrors while driv-

ing.

Doing so may result in a loss of vehicle 

control.

Always check that all passengers’ 

arms, heads or other parts of their 

body are not outside the vehicle.

When driving on slippery road sur-

faces

Sudden braking, acceleration and 

steering may cause tire slippage and 

reduce your ability to control the vehi-

cle.

Sudden acceleration, engine braking 

due to shifting, or changes in engine 

speed could cause the vehicle to skid.

After driving through a puddle, lightly 

depress the brake pedal to make sure 

that the brakes are functioning prop-

erly. Wet brake pads may prevent the 

brakes from functioning properly. If the 

brakes on only one side are wet and 

not functioning properly, steering con-

trol may be affected.

When shifting the shift position

Do not let the vehicle roll backward 

while a forward driving position is 

selected, or roll forward while the shift 

position is in R.

Doing so may result in an accident or 

damage to the vehicle.

Do not shift the shift position to P while 

the vehicle is moving.

Doing so can damage the transmission 

and may result in a loss of vehicle con-

trol.

Do not shift the shift position to R while 

the vehicle is moving forward.

Doing so can damage the transmission 

and may result in a loss of vehicle con-

trol.

Do not shift the shift position to a driv-

ing position while the vehicle is moving 

backward.

Doing so can damage the transmission 

and may result in a loss of vehicle con-

trol.

Changing the shift position to N while 

the vehicle is moving will disengage 

the hybrid system. Regenerative brak-

ing is not available with the hybrid sys-

tem disengaged.


Content      ..     3      4      5      6     ..