Harley Davidson Softail 2000-2005. Service manual - page 10
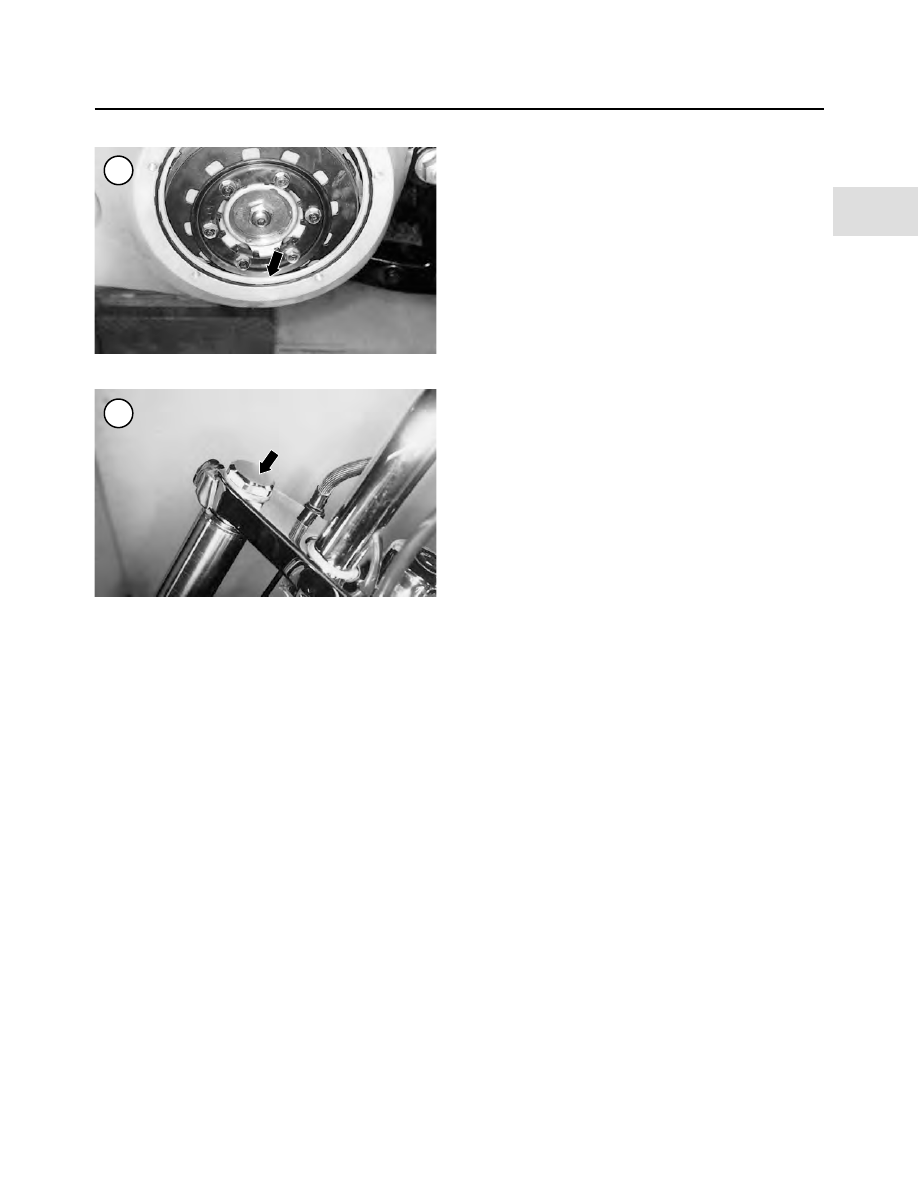
6. Install the clutch inspection cover (Figure 17) and
tighten the screws to 84-108 in.-lb. (9.5-12 N•m).
Primary Chaincase Oil Change
Table 1 lists the recommended replacement intervals
for the primary chaincase lubricant.
1. Ride the motorcycle for approximately ten minutes and
shift through all five gears until the primary chaincase oil
has reached normal operating temperature. Turn off the en-
gine and allow the oil to settle. Park the motorcycle on a
level surface and have an assistant support it so that it is
standing straight up. Do not support it with its jiffy stand.
2. Place a drain pan under the chaincase and remove the
drain plug (B, Figure 16).
3. Allow the oil to drain for at least ten minutes.
4. The drain plug is magnetic. Check the plug for metal
debris that may indicate drive component or clutch dam-
age, then wipe the plug off. Replace the plug if it is dam-
aged.
5. Reinstall the drain plug and tighten it securely.
6. Remove the screws securing the clutch inspection
cover and quad ring (Figure 17). Remove the cover.
CAUTION
Do not add engine oil. Only add the recom-
mended primary chaincase lubricant listed
in
Table 5
.
7. Refill the primary chaincase through the clutch opening
with the recommended quantity (Table 4) and type (Table
5) of primary chaincase oil. Do not overfill. The oil level
must be even with the bottom of the clutch opening or at the
bottom of the clutch diaphragm spring (Figure 18).
8. Install the clutch inspection cover quad ring onto the
primary chain case cover.
9. Install the clutch inspection cover (Figure 17) and
tighten the screws to 84-108 in.-lb. (9.5-12 N•m).
10. Ride the motorcycle until the primary chaincase oil
reaches normal operating temperature. Then shut the en-
gine off.
11. Check the primary chaincase drain plug for leaks.
Front Fork Oil Change
This procedure is for a routine fork oil change. If the
fork has been disassembled for service, refer to Chapter
Ten for fork oil refilling and oil level procedures and spec-
ifications.
Table 1 lists the recommended fork oil change intervals.
CAUTION
Use only a 6-point socket to loosen and
tighten the fork tube cap to avoid cosmetic
damage to the fork tube cap. Using a
12-point socket may round off the corners of
the fork tube cap.
NOTE
The fork tube cap is not under fork spring
pressure.
1. Remove the fork tube cap, spacer and oil seal (Figure
19) from the top of the fork tube plug.
2. Place a drain pan beside one fork tube, then remove the
drain screw and washer (Figure 20, typical) from the
slider.
3. Straddle the motorcycle and apply the front brake le-
ver. Push down on the fork and release. Repeat to force as
much oil out of the fork tube and slider as possible.
CAUTION
Do not allow the fork oil to come in contact
with the brake components.
4. Replace the drain screw washer if it is damaged.
5. Repeat Steps 1-4 for the opposite fork tube.
LUBRICATION, MAINTENANCE AND TUNE-UP
69
3
19
18