Ford Orion. Manual - part 25
7 Examine the valve seats in each of the
combustion chambers. If they are severely
pitted, cracked or burned, then they will need
to be renewed or re-cut by an engine overhaul
specialist. If they are only slightly pitted, this
can be removed by grinding-in the valve
heads and seats with fine valve-grinding
compound, as described below.
8 If the valve guides are worn, indicated by a
side-to-side motion of the valve, new guides
must be fitted. Measure the diameter of the
existing valve stems (see below) and the bore
of the guides, then calculate the clearance,
and compare the result with the specified
value; if the clearance is excessive, renew the
valves or guides as necessary.
9 The renewal of valve guides is best carried
out by an engine overhaul specialist.
10 If the valve seats are to be re-cut, this
must be done only after the guides have been
renewed.
Valves
11 Examine the head of each valve for
pitting, burning, cracks and general wear, and
check the valve stem for scoring and wear
ridges. Rotate the valve, and check for any
obvious indication that it is bent. Look for pits
and excessive wear on the tip of each valve
stem. Renew any valve that shows any such
signs of wear or damage.
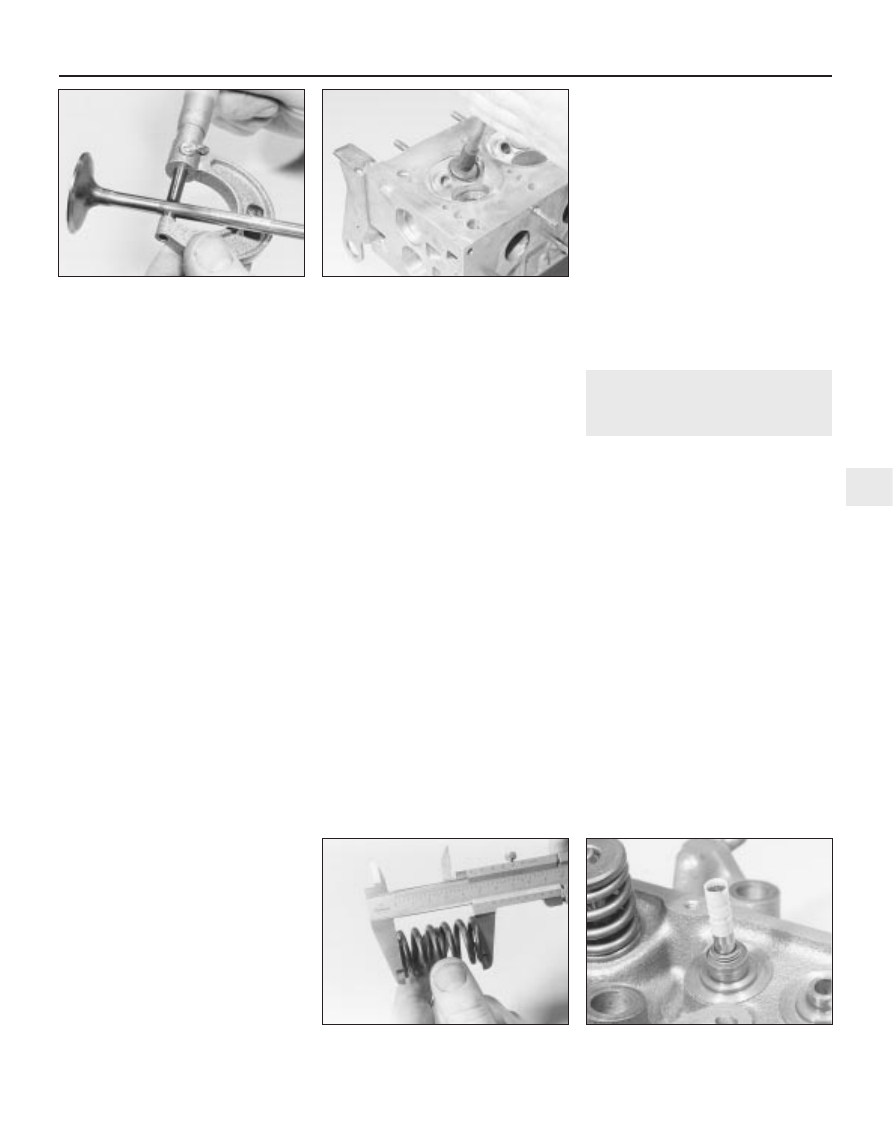
12 If the valve appears satisfactory at this
stage, measure the valve stem diameter at
several points, using a micrometer (see
illustration). Any significant difference in the
readings obtained indicates wear of the valve
stem. Should any of these conditions be
apparent, the valve(s) must be renewed.
13 If the valves are in satisfactory condition,
they should be ground (lapped) into their
respective seats, to ensure a smooth gas-
tight seal. If the seat is only lightly pitted, or if
it has been re-cut, fine grinding compound
only should be used to produce the required
finish. Coarse valve-grinding compound
should not be used unless a seat is badly
burned or deeply pitted; if this is the case, the
cylinder head and valves should be inspected
by an expert, to decide whether seat re-
cutting, or even the renewal of the valve or
seat insert, is required.
14 Valve grinding is carried out as follows.
Place the cylinder head upside-down on a
bench, with a block of wood at each end to
give clearance for the valve stems.
15 Smear a trace of (the appropriate grade
of) valve-grinding compound on the seat face,
and press a suction grinding tool onto the
valve head. With a semi-rotary action, grind
the valve head to its seat, lifting the valve
occasionally to redistribute the grinding
compound (see illustration). A light spring
placed under the valve head will greatly ease
this operation.
16 If coarse grinding compound is being
used, work only until a dull, matt even surface
is produced on both the valve seat and the
valve, then wipe off the used compound, and
repeat the process with fine compound. When
a smooth unbroken ring of light grey matt
finish is produced on both the valve and seat,
the grinding operation is complete. Do not
grind in the valves any further than absolutely
necessary, or the seat will be prematurely
sunk into the cylinder head.
17 When all the valves have been ground-in,
carefully wash off all traces of grinding
compound, using paraffin or a suitable solvent,
before reassembly of the cylinder head.
Valve components
18 Examine the valve springs for signs of
damage and discolouration, and also measure
their free length (see illustration). If possible,
compare each of the existing springs with a
new component.
19 Stand each spring on a flat surface, and
check it for squareness. If any of the springs
are damaged, distorted, or have lost their
tension, obtain a complete set of new springs.
20 Check the spring upper seats and collets
for obvious wear and cracks. Any
questionable parts should be renewed, as
extensive damage will occur if they fail during
engine operation. Any damaged or
excessively-worn parts must be renewed; the
valve spring lower seat/stem oil seals must be
renewed as a matter of course whenever they
are disturbed.
21 Check the rocker gear components and
hydraulic tappets as described in earlier parts
of this Chapter according to engine type.
10 Cylinder head - reassembly
4
1 Before reassembling the cylinder head, ensure
that it is perfectly clean, and no traces of grinding
paste are left in the head or on the valves and
guides. Use compressed air, if available, to blow
out all the oil holes and passages.
2 Commence reassembly of the cylinder
head by lubricating the valve stems and
guides with clean engine oil.
HCS engine
3 Insert the first valve into its guide. Wipe the
oil from the top of the valve stem, then wind
some insulation tape over the split collet
location groove, to protect the new valve stem
seal as it is fitted over the valve and into
position. As the seal is fitted, support the
valve to prevent it from falling out; push the
seal down the valve, and locate it flush to the
valve guide. Press the seal down firmly and
evenly using a suitable diameter tube or
socket, and take care not to distort the seal as
it is located. Check that the seal spring is
correctly located to ensure that it seals
correctly, then remove the tape from the valve
stem (see illustrations).
4 Locate the valve spring and its retainer over
the valve stem, and engage the valve spring
Engine removal and general engine overhaul procedures 2D•17
9.15 Grinding-in a valve seat - do not grind
in the valves any more than absolutely
necessary, or their seats will be
prematurely sunk into the cylinder head
9.12 Measuring the diameter of a valve
stem - if any significant difference is found
in the readings obtained, excessive valve
stem wear is indicated
10.3A Tape the end of the valve stem
before fitting the valve stem seal
9.18 Checking the valve spring free length
2D