Ford Orion. Manual - part 20
and discard the gasket, and remove the
crankshaft right-hand oil seal. Thoroughly
clean and degrease all components,
particularly the mating surfaces of the pump,
the sump, and the cylinder block/crankcase.
Inspection
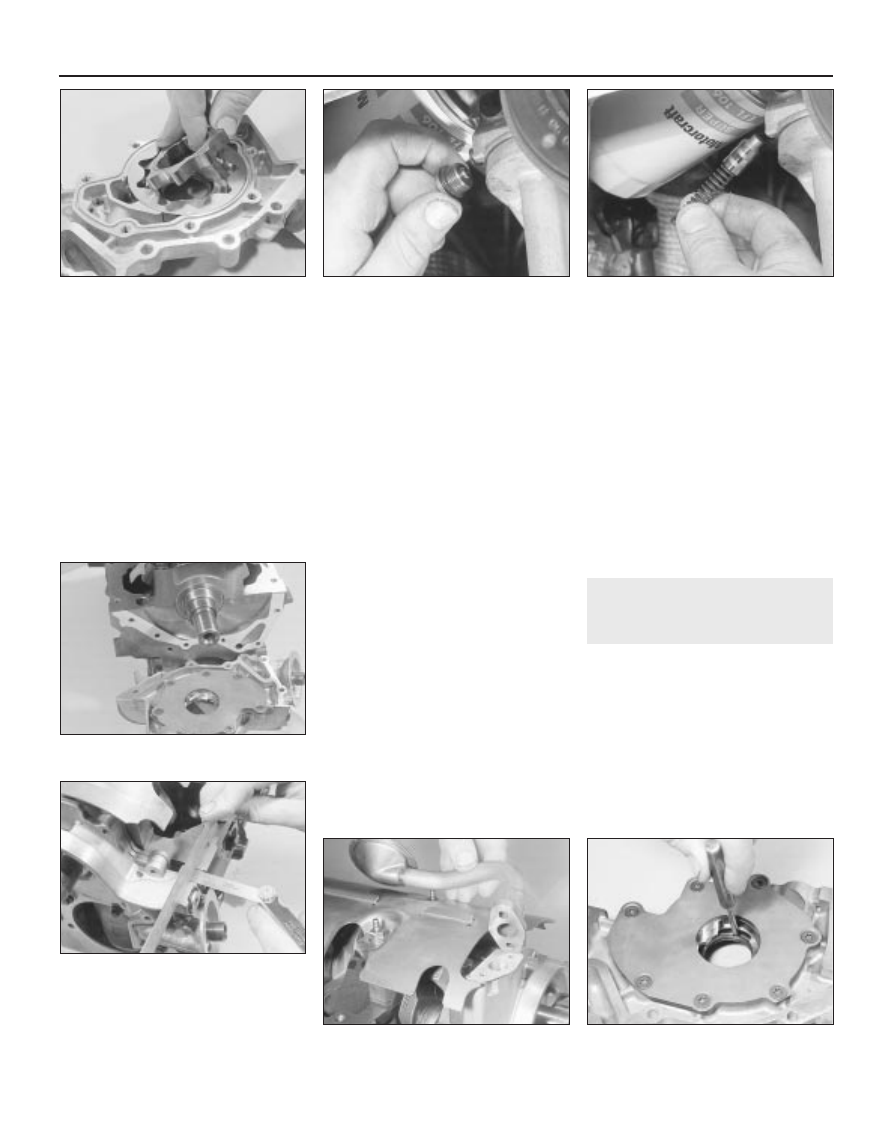
6 Unscrew the Torx screws, and remove the
pump cover plate; noting any identification
marks on the rotors, withdraw the rotors (see
illustration).
7 Inspect the rotors for obvious signs of wear
or damage, and renew if necessary; if either
rotor, the pump body, or its cover plate are
scored or damaged, the complete oil pump
assembly must be renewed.
8 The oil pressure relief valve can be
dismantled, if required, without disturbing the
pump. With the vehicle parked on firm level
ground, apply the handbrake securely and
raise its front end, supporting it securely on
axle stands. Remove the front right-hand
roadwheel and auxiliary drivebelt cover (see
Chapter 1) to provide access to the valve.
9 Unscrew the threaded plug, and recover
the valve spring and plunger (see
illustrations). If the plug’s sealing O-ring is
worn or damaged, a new one must be
obtained, to be fitted on reassembly.
10 Reassembly is the reverse of the
dismantling procedure; ensure the spring and
valve are refitted the correct way round, and
tighten the threaded plug securely.
Refitting
11 The oil pump must be primed on
installation, by pouring clean engine oil into it,
and rotating its inner rotor a few turns.
12 Using grease to stick the new gasket in
place on the cylinder block/crankcase, and
rotating the pump’s inner rotor to align with
the flats on the crankshaft, refit the pump and
insert the bolts, tightening them lightly at first
(see illustration).
13 Using a suitable straight edge and feeler
gauges, check that the pump is both centred
exactly around the crankshaft, and aligned
squarely so that its (sump) mating surface is
exactly the same amount - between 0.3 and
0.8 mm - below that of the cylinder
block/crankcase on each side of the
crankshaft
(see illustration). Being careful
not to disturb the gasket, move the pump into
the correct position, and tighten its bolts to
the specified torque wrench setting.
14 Check that the pump is correctly located;
if necessary, unbolt it again, and repeat the
full procedure to ensure that the pump is
correctly aligned.
15 Fit a new crankshaft right-hand oil seal
(see Section 17).
16 Using grease to stick the gasket in place
on the pump, refit the pick-up/strainer pipe,
tightening its screws and nut to their specified
torque wrench settings (see illustration).
17 The remainder of reassembly is the
reverse of the removal procedure, referring to
the relevant text for details where required.
17 Crankshaft oil seals -
renewal
4
Note: Don’t try to prise these seals out without
removing the oil pump or seal carrier - the
seals are too soft, and the amount of space
available is too small, for this to be possible
without considerable risk of damage to the seal
housing and/or the crankshaft journal. Follow
exactly the procedure given below.
Right-hand seal
1 Remove the oil pump (see Section 16).
2 Drive the oil seal out of the pump from
behind (see illustration).
2C•18 Zetec engine – in-car engine repair procedures
17.2 Driving out crankshaft right-hand oil
seal
16.16 Use new gasket when refitting oil
pick-up pipe to pump
16.13 Oil pump must be centred on
crankshaft, and square to cylinder block/
crankcase-to-sump mating surface - use
straight edge and feeler gauges to check
that pump surface is an equal amount
(within permissible limits) below crankcase
surface on both sides of crankshaft
16.12 Use new gasket when refitting oil
pump
16.9B . . . to withdraw oil pressure relief
valve spring and plunger
16.9A Unscrew threaded plug - seen
through right-hand wheel arch . . .
16.6 Withdrawing oil pump inner rotor