SANY Crawler Hydraulic Excavator SY215CLC (CUMMINS QSB6.7 engine). Shop Manual - page 31
 

  Index      Manuals     SANY Crawler Hydraulic Excavator SY215CLC (CUMMINS QSB6.7 engine). Shop Manual


Search            copyright infringement  


Content      ..     29      30      31      32     ..


SANY Crawler Hydraulic Excavator SY215CLC (CUMMINS QSB6.7 engine). Shop Manual - page 31


Disassembly and Assembly

SY215C

LC

8-4

8.1.1.3 Installation


Unless speci

fi

 ed otherwise, installation of a 

part is a reverse procedure of removing the 
part. 


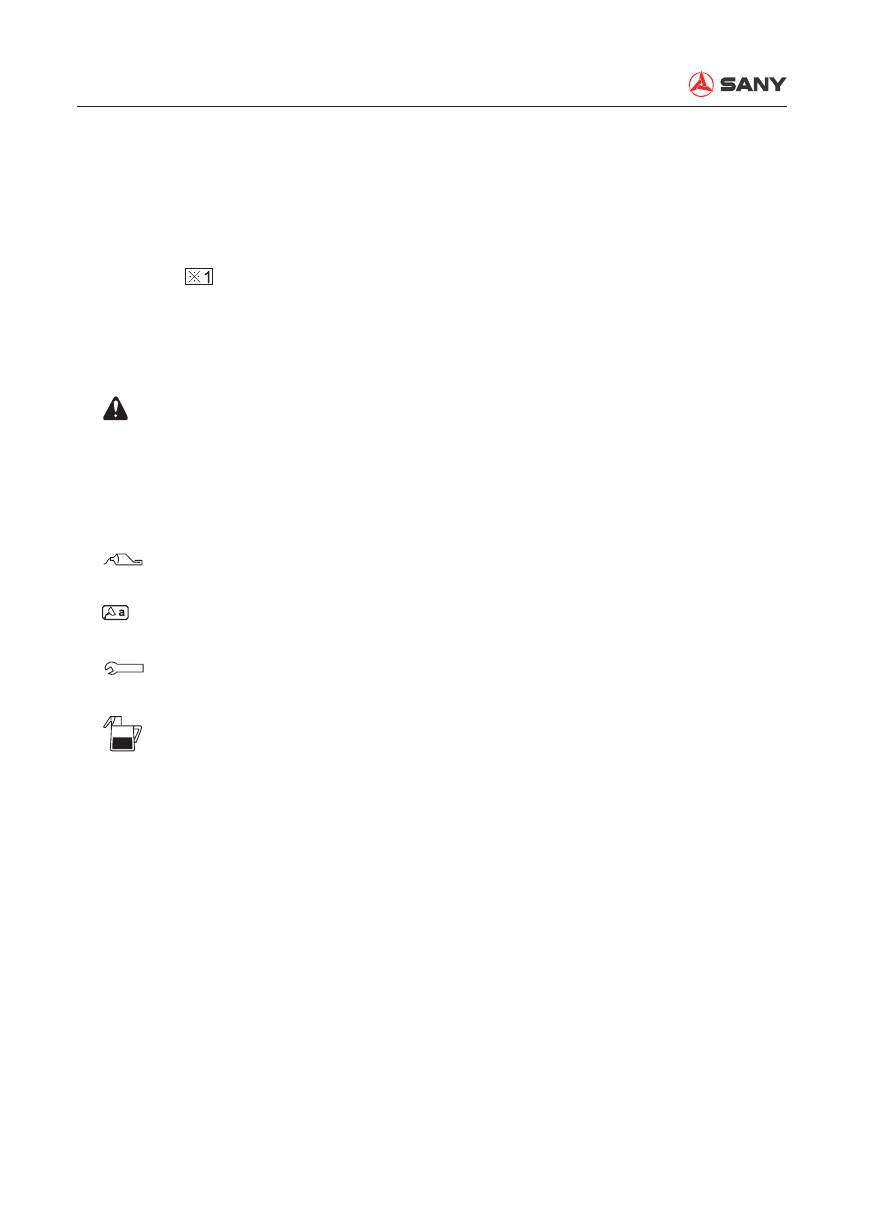
The mark 

 used in the "Installation" 

section indicates the rules and precautions 
related to parts installation. 


Symbols used in the "Installation" sections 
are shown below: 

    This symbol indicates that safety-

related precautions must be ob-
served when doing the job.  

     This symbol is followed by instruc-

tions or precautions when perform-
ing a procedure. 

  This symbol indicates that specific 

coating agent must be used. 

    This symbol indicates the lubricant 

required. 

 This symbol indicates a torque 

speci

fi

 ed. 

  This symbol indicates the amount of 

oil or water to be added. 

Disassembly and Assembly

SY215C

LC

8-5

8.1.2  Disassembling and assembling an assembly

8.1.2.1 Special tools


Special tools for parts disassembly and as-
sembly are listed. 


Necessary characteristics of the tools are 
noted in the list of special tools. 

:  Special tools that cannot be replaced 

and must be used. 

:  Very useful tools, which can be re-

placed with commercially available 
ones. 

8.1.2.2 Disassembly


The "Disassembly" section contains proce-
dure, precautions and the amount of oil or 
water to be discharged. 


The symbols used the in the "Disassem-
bly" section are described below: 

  This symbol indicates that safety-

related precautions must be ob-
served when doing the job.  

    This symbol is followed by instruc-

tions or precautions when perform-
ing a procedure. 

  This symbol indicates related rules 

and precautions that must be 
obeyed when installing the pats. 

 This symbol indicates the amount of 

oil or water to be discharged. 

Disassembly and Assembly

SY215C

LC

8-6

8.1.2.3 Assembly


The "Assembly " section contains oper-
ating procedure, precautions, technical 
speci

fi

 cation and the amount of oil or water 

to be added. 


The symbols used the in the "Assembly" 
section are described below: 

    This symbol indicates that safety-

related precautions must be ob-
served when doing the job.  

      This symbol is followed by instruc-

tions or precautions when perform-
ing a procedure. 

 This symbol indicates that specific 

coating agent must be used. 

    This symbol indicates the lubricant 

required. 

 This symbol indicates a torque 

speci

fi

 ed. 

  This symbol indicates the amount of 

oil or water to be added. 

Disassembly and Assembly

SY215C

LC

8-7

8.2 Operating Precautions

The following precautions must be observed 
before removing or installing (disassembling 
or assembling) a component. 

1.  Precautions to be observed prior to removal 

operation


Dispose the engine coolant properly if anti-
freeze is contained in the engine coolant. 


After disconnecting a hose or tube, cover 
or plug must be used to prevent invasion 
of dirt or dust. 


A suitable container must be prepared to 
collect oil when draining the oil. 


Matching mark must be made at where 
is necessary before removing in order to 
avoid mistake during reinstallation. 


Do not pull the wire and avoid the wire 
coming off its contact. To avoid excessive 
force imposing on the wire, hold the con-
nector when disconnecting a wire. 


Tag the wires and the hoses in order to 
ensure their connecting positions. By doing 
so, mistakes can be avoided during rein-
stallation. 


Count and check the number and thick-
ness of the shims, and keep them in a safe 
place.


When raising or lifting components, be 
sure to use proper lifting equipment of am-
ple strength and safety.


When forcing screws are used to remove 
any components, tighten the screws evenly 
in turn.


The surrounding area must be cleaned 
before removing a unit. Cover the unit after 
removal in order to prevent invasion of dirt 
or dust. 

Disassembly and Assembly

SY215C

LC

8-8

B: Thread-connected adaptors (plug and nut used in combination)

I.D. (mm)

Code

Description

Code

Description

Light Thread Connection

6

B210780000903

Taper bore plug

23002925

Nut

8

B210780001146

Plug

B210770000011

Nut

10

B210780000088

Plug

B210334000011

Nut

12

B210780000089

Plug

B210334000012

Nut

15

B210780000882

Plug

B210334000004

Nut

20

B210780000090

Plug

B210334000010

Nut

22

B210780000091

Plug

B210780000112

Nut

Heavy Thread Connection

12

B210780001143

Plug

B210780000406

Nut

16

A820205001523

Plug

B210780000405

Nut

20

B210780000902

Plug

B210780000904

Nut

25

B210780001172

Plug

B210334000006

Nut

A: Thread-connected hoses

I.D. (mm)

Code

Description

Light Thread Connection

6

B210780001189

Plug

8

B210780001190

Plug

10

B210780000077

Plug

12

B210780000078

Plug

15

B210780000883

Plug

20

B210780000079

Plug

22

60056667

Plug

Heavy Thread Connection

12

B210780001142

Plug

16

60002397

Plug

20

B210780000080

Plug

25

B210780000081

Plug


Precautions to be observed when disassembling the lines

The lines disassembled must be blinded with plugs.

Disassembly and Assembly

SY215C

LC

8-9

2.  Precautions to be observed prior to instal-

lation operation


Tighten all the screws and nuts (sleeve 
nuts) to speci

fi

 ed torques. 


Install the hoses without twisting or inter-
ference.


Replace the gaskets, O-rings, cotter pins 
and lock plates with new parts. 


Bend the cotter pin or lock plate securely.


Before applying the adhesive, clean the 
parts of oil and dust. Apply 2 or 3 drops of 
adhesive to the threaded portion. 


Before applying the sealant to the gasket, 
clean the gasket surface of oil and dust. 
Check the gasket for contamination or 
damage. Apply the gasket sealant evenly. 


Clean all parts, and correct any damage, 
dents, burrs, or rust.


Apply engine oil to the moving parts. 


Before installing a snap ring, make sure 
that the snap ring is mounted properly in 
the circular groove. 


Before connecting the wiring connector, 
clean the wiring connector of oil, dirt or wa-
ter. Make sure that the wiring connector is 
connected securely. 


Before using an eyebolt, check the eyebolt 
for deformation or deterioration. Screw on 
the eyebolt as far as possible and align it 
to the direction of the hook. 


Before tightening the split 

fl

 ange, tighten it 

evenly in turn in order to prevent over tight-
ening on one side. 


After reassembling the hydraulic cylinder, 
main pump or other hydraulic equipment 
that has been disassembled and repaired, 
it is necessary to bleed the air from the 
hydraulic cylinder prior to initial operation 

Disassembly and Assembly

SY215C

LC

8-10

3.  Precautions to be observed upon comple-

tion of the operations


Completely discharge the engine cool-
ant, tighten the drain valve, and add 
coolant to the specified level. Run the 
engine to circulate the coolant through 
the system. Check the coolant level 
again. 


Add hydraulic oil to the specified level 
after disassembly and reinstallation of 
a hydraulic unit. Run the engine to cir-
culate the hydraulic oil through the sys-
tem. Check the oil level again. 


Bleed the air from the system after 
removing and repairing the lines or hy-
draulic unit and reassembling the parts. 


Bleed the air. For more information, see “Air 
in Each Component - Bleed” on page 6-35. 


Add the specified amount of grease 
(molybdenum disulphide) to the work 
equipment related parts.

of the cylinder. The purging procedure is 
performed as the following: 

1)  Start the engine and run the engine at 

low idle. 

2)  Operate the work equipment control 

lever in order to cycle the movement of 
the hydraulic cylinder 4 or 5 times. Hold 
the cylinder at where it is 100 mm from 
its stroke end. 

3)  Go on operating the hydraulic cylinder 

3 or 4 times to its stroke end. 

4)  You can run the engine at normal 

speed after this operation. 


This procedure is to be performed before 
using your machine for the first time after 
repair or long storage.

Disassembly and Assembly

SY215C

LC

8-11

8.3  

Radiator AS - Remove and Install

8.3.1 Removal

1.  Open the engine hood. 

2.  Open the pressure cap (1). Open the drain 

valve to discharge engine coolant from the 
coolant tank. 

  Coolant: approx. 22.5 L

3.  Remove the coverplate. 

4.  Remove the two U-bolts (2). 

5.  Disconnect the hydraulic oil cooler inlet 

connector (3) and outlet connector (4). 
Block the openings to prevent leakage of 
hydraulic oil. 

6.  Discharge hydraulic oil from the hydraulic 

cooler. 

  Hydraulic oil radiator: 

approx. 5.6 L

7.  Disconnect the coolant tank hose (5). 

2

4

3

ZX215T-1006029

5

ZX215T-1006030

1

Cover

Disassembly and Assembly

SY215C

LC

8-12

10.  Remove the four bolts (10) from the air 

conditioner radiator. Remove the air condi-
tioner radiator and store it properly. 

11.  Remove the radiator fan guard (11). 

8.  Disconnect the cooler inlet hose (6) and 

outlet hose (7). 

9.  Disconnect the intercooler air inlet tube (8) 

and outlet tube (9). 

6

7

8

9

ZX215T-1006031

10

10

ZX215T-1006032

11

ZX215T-1006033

Disassembly and Assembly

SY215C

LC

8-13

13.  Mount the hoisting bolts (14) to both sides 

of the radiator in order to hoist the radiator 
assembly. 


Before the radiator assembly is hoisted, 
move the radiator assembly axially until 
the fan avoids its guard. 

12.  Remove the four mounting bolts (12) from 

the radiator bottom and the two mounting 
bolts (13) from the left and right brackets. 

12

13

ZX215T-1006034

14

ZX215T-1006035

Disassembly and Assembly

SY215C

LC

8-14

8.3.2 Installation


Installation is to be performed in the re-
verse order of removal. 


Adjust the clearance (a) between the 
fan and the fan guard in order to have a 
uniform clearance surrounding the fan. 


Check the values (a) at the four measuring 
points in the left, right, top and bottom di-
rections, which should be as the following: 


Standard clearance (a) in all directions: 
15±1.5 mm


Fan diameter (b): ø620 mm


Fan guard inner diameter (c): ø650 mm


Engine coolant and hydraulic oil adding

Add a specific amount of coolant and 
hydraulic oil. Start the engine to circulate 
the coolant and hydraulic oil. Check the 
coolant level and the oil level. 

           Engine coolant: approx. 22.5 L 

           Hydraulic oil radiator: approx.  5.6 L

Disassembly and Assembly

SY215C

LC

8-15

8.4  Engine and Hydraulic Pump AS - Remove and Install

8.4.1 Removal

  Lower the work equipment to the ground. 

Stop the engine. Disconnect the cable 
from the battery negative (-) post. 

  Loosen the butter

fl

 y nut on the breather 

valve and press the relief button to re-
lieve internal pressure. 


Mark the lines to avoid mistakes during 
reinstallation. 

1.  Remove the hydraulic tank suction filter 

element and block the opening. 

2.  Drain the engine of coolant. 

  Coolant: approx.  22.5 L

3.  Open the engine hood. 

4.  Disconnect piping (1), (2) and (3). 

1

2

3

ZX215T-1006036

Disassembly and Assembly

SY215C

LC

8-16

5.  Disconnect piping (4), (5) and (6). 

6.  Remove the sensors (7) and (8). 

7.  Remove the clamps (9) and (10). Remove 

the line (11) and the cable (12). 

8.  Unscrew the connection bolt (13) of the 

governor motor and the connection bolt (14) 
of the engine stopper. 

9.  Disconnect the external cable from the 

starter (15). 

10.  Remove the mounting bolt (16) from the 

hose clamp. 

4

6

5

7

8

ZX215T-1006037

9

10

11

12

ZX215T-1006038

14

13

15

16

ZX215T-1006039

Disassembly and Assembly

SY215C

LC

8-17

11.  Disconnect the cables (17) and (18) as 

well as the tubes (19) and (20) from the 
compressor. 

12.  Disconnect the hoses (21), (22), (23) and 

(24) between the engine and the radiator

13.  Disconnect the air intake hose (25). 

17

18

19

20

ZX215T-1006040

24

23

21

22

ZX215T-1006041

25

ZX215T-1006042

Disassembly and Assembly

SY215C

LC

8-18

14.  Disconnect the external cable (26) of the 

rpm sensor. 

15.  Disconnect the external cable (27) of 

engine oil pressure sensor. 

16.  Disconnect the engine oil inlet tube (28) 

and outlet tube (29). 

17.  Disconnect the wiring (30) of the engine 

oil pressure switch. 

18.  Disconnect the cables (31) and (32), and 

remove the hose clamp (33). 

26

27

ZX215T-1006043

28

29

30

ZX215T-1006044

31

32

33

ZX215T-1006045

Disassembly and Assembly

SY215C

LC

8-19

19.  Remove the hose clamp (35). 

20.  Disconnect the wiring (34) of the water 

temperature sensor. 

21.  Disconnect the cables (36) and (37) of the 

water temperature switch. 

22.  Disconnect the oil return hose (38). 

23.  Disconnect the A/C water pipe (39). 

34

35

ZX215T-1006046

36

37

ZX215T-1006047

38

39

ZX215T-1006048


Content      ..     29      30      31      32     ..