Manitou MRT 2150 Privilege Plus ST4 S2 / MRT 2550 Privilege Plus ST4 S2. MANUALE D’ISTRUZIONI (2016) - 4
IT
EN
NL
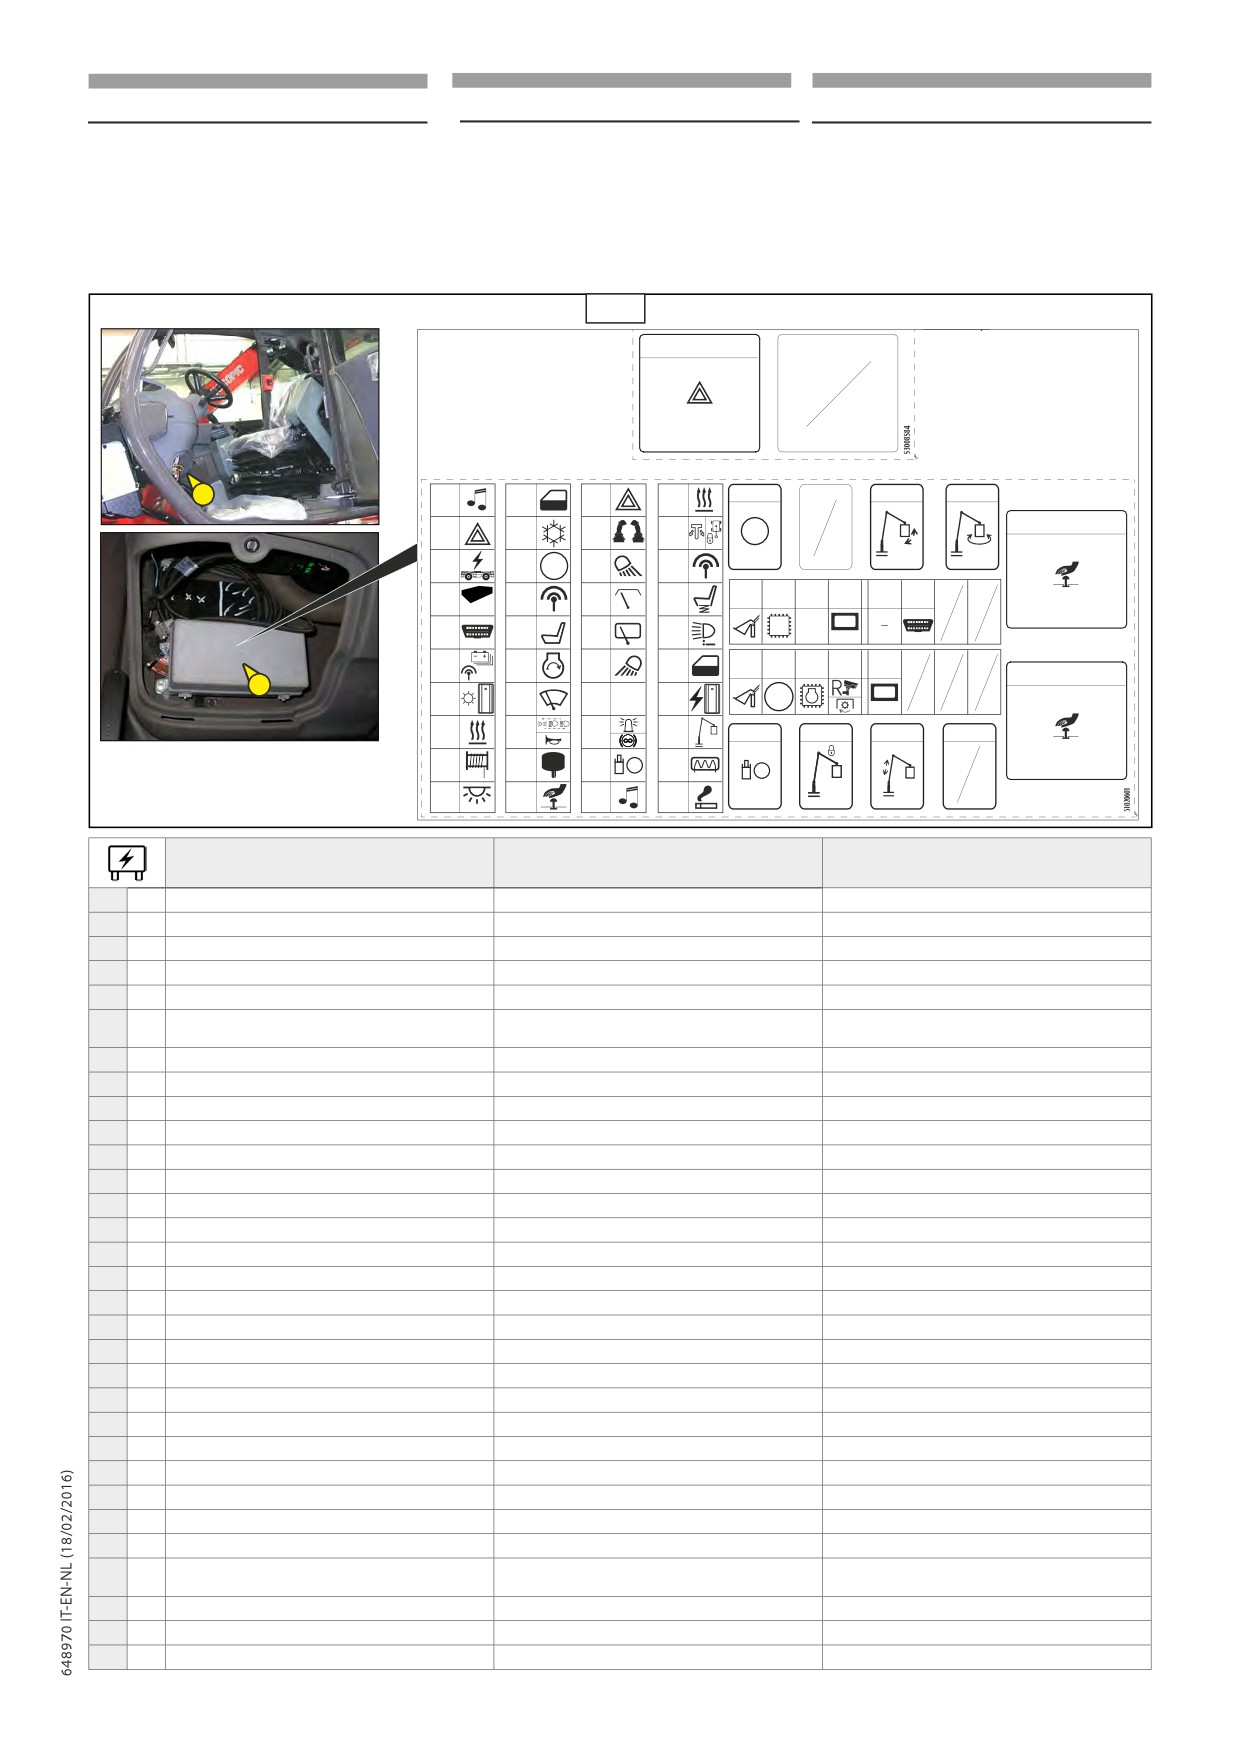
8 FUSIBILI E RELÈ IN CABINA (7)
8 FUSE AND RELAY IN CABINE (7)
8 ZEKERINGEN EN RELAIS IN DE CABINE (7)
- Rimuovere lo sportellino di accesso (1,7)
- Remove the door (1,7)for access to the
- Verwijder het toegangsdeurtje (1,7) tot
ai fusibili e relè (2,7).
fuses and relays (2,7).
de zekeringen en de relais (2,7).
Sostituire sempre un fusibile
Always replace a faulty fuse with
Vervang altijd een defecte
difettoso con uno equivalente.
another of equivalent rating.
zekering door een gelijksoortige.
p
Non utilizzare mai un fusibile
p
Never use a fuse that has been
p
Gebruik nooit een gerepareerde
riparato.
repaired.
zekering opnieuw.
7
R35
1
F30
F40
F50
F60
R24
R28
R30
(10A)
(5A)
(7.5A)
(10A)
F31
F41
F51
F61
DISTR
R32
!
(7.5A)
(7.5A)
(10A)
(5A)
F32
F42
DISTR
F52
F62
(5A)
(7.5A)
!
(10A)
(10A)
F70
F72
F74
F76
F78
F80
F33
F43
F53
F63
(10A)
(25A)
(5A)
(5A)
(5A)
(5A)
(5A)
MC2M T
(5A)
T
(10A)
(15A)
F34
F44
F54
F64
DISPLAY
(5A)
(5A)
(10A)
(10A)
F35
F45
F55
F65
F71
F73
F75
F77
F79
(5A)
T
(5A)
(10A)
(15A)
(25A)
(5A)
(5A)
(5A)
(5A)
R33
2
F36
F46
F56
F66
12/24V
OPTIONAL
(5A)
X
(10A)
(10A)
(7.5A)
X
DISPLAY
F37
F47
F57
F67
(7.5A)
(10A)
(7.5A)
(5A)
R25
R27
R29
R31
F38
F48
F58
F68
ENC
P
(7.5A)
(5A)
(10A)
(7.5A)
P
F39
F49
F59
F69
(7.5A)
(10A)
(10A)
(5A)
FUNZIONI
FUNCTIONS
FUNCTIES
F30
10A
fusibile “30” + 12V alimentazione auto-radio
Fuse "30" +12V car-radio supply
Zekering “30” + 12v voeding autoradio
F31
7.5A
fusibile “30” alimentazione luci di emergenza
Fuse "30" Hazard supply
Zekering “30” voeding waarschuwingslichten
F32
5A
fusibile “15” alimentazione carro
Fuse "15" chassis supply
Zekering “15” voeding wagen
F33
5A
fusibile “15” alimentazione centralina carro
Fuse "15" +VE vehicle ECU supply
Zekering “15” voeding regeleenheid wagen
F34
5A
fusibile “30” alimentazione presa diagnostica
Fuse "30" diagnostic plug supply
Zekering “30” voeding diagnosecontact
fusibile “30” alimentazione carica batteria radiocomando + presa
Zekering “30” voeding batterij afstandsbediening + contact
F35
5A
Fuse "30" Remote battery charger + predisposition plug supply
predisposizione
inrichting
F36
5A
fusibile “15” illuminazione interruttori
Fuse "15" switch illumination
Zekering “15” verlichting
schakelaars
F37
7.5A
fusibile “15” alimentazione riscaldatore cabina
Fuse "15" cab heater supply
Zekering “15” voeding verwarmer cabine
F38
7.5A
fusibile “15” microinterruttore argano
Fuse "15" winch microswitch
Zekering “15” microschakelaar lier
F39
7.5A
fusibile “30” luce in cabina
Fuse"30" cab spot light
Zekering “30” licht in de cabine
F40
5A
fusibile “15” alimentazione microinterruttore porta
Fuse "15" door microswitch supply
Zekering “15” voeding microschakelaar deur
F41
7.5A
fusibile “15” A/C
Fuse"15" A/C
Zekering “15” a/c
F42
7.5A
fusibile “15” alimentazione distributore
Fuse "15" boom solenoid bench supply
Zekering “15” voeding distributie
F43
5A
fusibile “15” alimentazione radiocomando
Fuse "15" remote safety contact supply
Zekering “15” voeding radiobesturing
F44
5A
Fusibile “15” interruttori posto guida
Fuse "15" seat switch supply
Zekering “15” schakelaars bestuurdersplaats
F45
5A
Fusibile “50” consenso avviamento da chiave principale
Fuse"50" cranking from main key
Zekering “50” toestemming opstarten met hoofdsleutel
F46
10A
Fusibile “15” alimentazione tergicristallo anteriore
Fuse "15" front windscreen wiper supply
Zekering “15” voeding ruitenwisser vooraan
F47
10A
Fusibile “15” alimentazione leva luci strada
Fuse "15" road light lever supply
Zekering “15” voeding hendel weglichten
F48
5A
Fusibile “15” encoder rotazione torretta (anelli collettore)
Fuse "15" tower rotation encoder (slip rings)
Zekering “15” encoder zwenken zwenkkop (ringen collector)
F49
10A
Fusibile “15” alimentazione bottone d’emergenza STOP motore
Fuse "15" emergency button supply for engine STOP
Zekering “15” voeding noodstopknop stop motor
F50
7.5A
Fusibile “15” pulsante emergenza (4frecce)
Fuse "15" Hazard supply
Zekering “15” noodknop (4 richtingaanwijzers)
F51
10A
Fusibile “15” alimentazione joystick
Fuse "15" Joystick supply
Zekering “15” voeding joystick
F52
10A
Fusibile “15” alimentazione faro lavoro posteriore cabina
Fuse "15" Rear cab work light supply
Zekering “15” voeding werklicht cabine achter
F53
10A
Fusibile “15” alimentazione tergicristallo superiore
Fuse "15" roof windscreen wiper
Zekering “15” voeding ruitenwisser bovenaan
F54
10A
Fusibile “15” alimentazione tergicristallo posteriore
Fuse "15" rear windscreen wiper supply
Zekering “15” voeding ruitenwisser achteraan
F55
10A
Fusibile “15” alimentazione faro lavoro anteriore cabina
Fuse "15" Front cab work light supply
Zekering “15” voeding werklicht cabine vooraan
F56
10A
Fusibile “15” alimentazione convertitore 24/12V
Fuse "15" DC/DC converter supply
Zekering “15” voeding omzetter 24/12v
Fusibile “15” alimentazione girofaro + rallentatore magnetico
Zekering “15” voeding knipperlicht + magnetische vertrager
F57
7.5A
Fuse "15" beacon + magnetic retarder supply (OPT)
(opzionale)
(optioneel)
F58
10A
Fusibile alimentazione trasduttori 3B6
Fuse "15" boom cylinder pressure sensor supply
Zekering voeding stroomopnemers 3b6
F59
10A
Fusibile “15” alimentazione +12 auto-radio
Fuse "15" +12V car radio supply
Zekering “15” voeding + 12 autoradio
F60
10A
Fusibile "30" alimentazione riscaldatore cabina
Fuse "30" cab heater supply
Zekering “30” voeding verwarmer cabine
2-79
IT
EN
NL
F61
5A
Fusibile “15” alimentazione allineamento torretta + sensore blocco torretta
Fuse "15" tower allignment + tower lock sensor supply
Zekering “15” voeding uitlijning zwenkkop + blokkeringssensor zwenkkop
F62
10A
Fusibile “15” alimentazione RFID + cestello
Fuse "15" RFID + basket supply
Zekering “15” voeding RFID + kooi
F63
15A
Fusibile “15” alimentazione sedile pneumatico + sedile riscaldato
Fuse "15" pneumatic seat + heated seat supply
Zekering “15” voeding pneumatische stoel + verwarmde stoel
F64
10A
Fusibile “15” alimentazione fari lavoro braccio
Fuse "15" boom work lights supply
Zekering “15” voeding werklicht cabine arm
F65
15A
Fusibile “15” alimentazione vetro porta
Fuse "15" door windows supply
Zekering “15” voeding raam deur
F66
7.5A
Fusibile “15” alimentazione interruttori
Fuse "15" switches supply
Zekering “15” voeding schakelaars
F67
5A
Fusibile “15” + 12V alimentazione funzioni cestello 3D
Fuse "15" +12V 3D basket functions supply
Zekering “15” + 12V voeding functies kooi 3D
F68
7.5A
Fusibile “15” alimentazione sbrinamento vetro posteriore
Fuse "15" rear windows defrost supply (OPT)
Zekering “15” voeding ontdooiing achterraam
F69
5A
Fusibile “15” alimentazione +12V / accendisigari
Fuse "15" +12V lighter
Zekering “15” voeding +12V / aansteker
F70
10A
Fusibile “15” alimentazione +12V benna mix
Fuse "15" +12V mix bucket
Zekering “15” voeding +12V / grijpbak mix
F71
25A
Fusibile “15” alimentazione +12V benna mix grande
Fuse "15" big mix bucket
Zekering “15” voeding +12V / grijpbak mix groot
F72
25A
Fusibile “15” alimentazione centralina
Fuse "15" ECU power supply
Zekering “15” voeding regeleenheid
F73
5A
Fusibile “15” alimentazione presa opzionale
Fuse "15" optional plug supply
Zekering “15” voeding optioneel contact
F74
5A
Fusibile “15” alimentazione antifurto + telecamera posteriore
Fuse "15" antitheft + reverse camera supply
Zekering “15” voeding inbraakbeveiliging + camera achteraan
F75
5A
Fusibile “30” alimentazione centralina motore - CPC4
Fuse "30" Engine ECU - CPC4
Zekering “30” voeding regeleenheid motor - CPC4
F76
5A
Fusibile “30” alimentazione display + antifurto
Fuse "30" display + antitheft supply
Zekering “30” voeding display + inbraakbeveiliging
F77
5A
Fusibile “15” alimentazione telecamera posteriore + flusso olio idraulico in continuo
Fuse "15" reverse camera + continuos hydaulic flow supply
Zekering “15” voeding camera achteraan + continustroom hydraulische olie
F78
5A
Fusibile “15” alimentazione presa predisposizione cabina
Fuse "15" cab predisposition plug supply
Zekering “15” voeding inrichting voor contact cabine
F79
5A
Fusibile “15” alimentazione display
Fuse "15" display supply
Zekering “15” voeding Display
F80
5A
Fusibile “15” alimentazione presa diagnostica
Fuse "15" diagnostic plug supply
Zekering “15” voeding diagnose
R24
Relè distributore
Boom solenoid bench supply relay
Relais verdeler
R25
Relè trasduttori 3B6
Boom cylinder pressure sensor supply relay
Relais stroomopnemers 3B6
R27
Relè blocco cestello 3D
3D basket locking solenoid relay
Relais vergrendeling korf 3D
R28
Relè inclinazione cestello 3D
Tilting solenoid 3D basket relay
Relais hellingshoek korf 3D
R29
Relè sollevamento cestello 3D
Lifting solenoid 3D basket relay
Relais heffen korf 3D
R30
Relè rotazione cestello 3D
Rotation solenoid 3D basket relay
Relais rotatie korf 3D
R32
“15” dopo bottone arresto d’emergenza
“15” after red button Relay
“15” na noodstopknop
R33
“15” prima bottone arresto d’emergenza
"15" before red button relay
“15” voor noodstopknop
R34
“15” dopo bottone arresto d’emergenza
"15" after red button Relay
“15” na noodstopknop
R35
Intermittenza (4frecce)
Flasher
Knippering (4 richtingaanwijzers)
Solo se
installata l’aria condizionata.
Only if installed air conditioning. (8)
Alleen als de airconditioning is
(8)
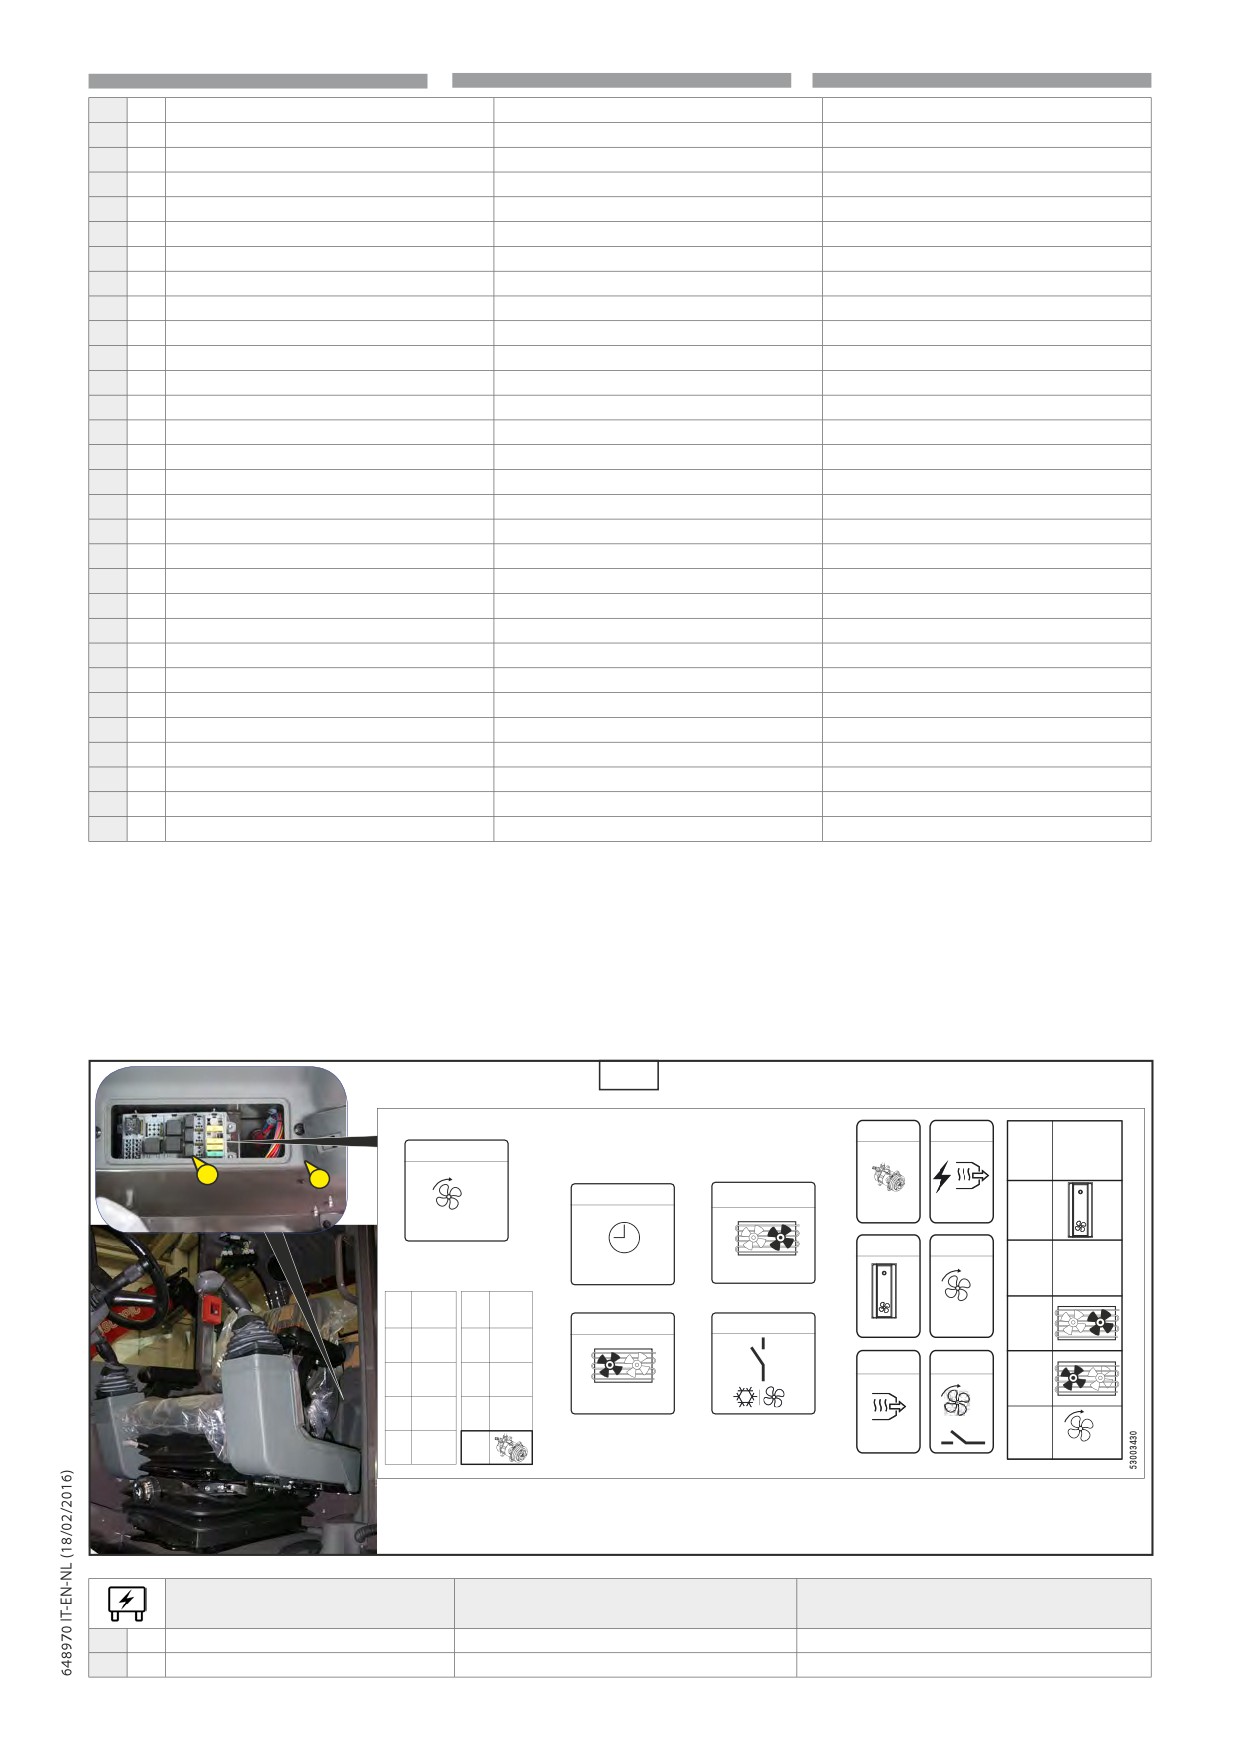
- Remove the door (18) for access to the
geïnstalleerd. (8)
- Rimuovere lo sportellino (18) di accesso
fuses and relays (28).
- Verwijder het toegangsdeurtje (1,8) tot
ai fusibili e relè (28).
de zekeringen en de relais (2,8).
Always replace a faulty fuse with
Sostituire sempre un fusibile
another of equivalent rating.
Vervang altijd een defecte
difettoso con uno equivalente.
p
Never use a fuse that has been
zekering door een gelijksoortige.
p
Non utilizzare mai un fusibile
repaired.
p
Gebruik nooit een gerepareerde
riparato.
zekering opnieuw.
8
R7
R10
R1
2
1
3
3
T1
R3
2
F4
2
1
(20A)
1
R6
R9
300 s
3
3
2
2
1
1
R2
R4
F3
(20A)
R5
R8
F2
3
(20A)
2
1
F1
3
F5
(30A)
2
(7,5A)
1
FUNZIONI
FUNCTIONS
FUNCTIES
F1-a
30A
Fusibile 3a velocità ventola cabina
Fuse for 3rd speed of cabin fan
Zekering 3de snelheid ventilator cabine
F2-a
20A
Fusibile ventola condensatore 2
Fuse for condenser fan 2
Zekering ventilator condensator (2)
2-80
IT
EN
NL
F3-a
20A
Fusibile ventola condensatore 1
Fuse for condenser fan 1
Zekering ventilator condensator (1)
F4-a
20A
Fusibile interruttore ventole cabina e kit NORDIC
Fuse for cabin fan switch and NORDIC kit
Zekering schakelaar ventilator cabine en OPTION NORDIC
F5-a
7,5A
Fusibile elettrovalvola compressore e portello
Fuse for compressor solenoid valve and door
Zekering elektromagnetische klep compressor en lucht deur
R1-a
-
Relè 3a velocità ventola cabina
Relay for for 3rd speed of cabin fan
Relais 3de snelheid ventilator cabine
R2-a
-
Relè ventola condensatore 2
Relay for condenser fan 2
Relais ventilator condensator (2)
R3-a
-
Relè ventola condensatore 1
Relay for condenser fan 1
Relais ventilator condensator (1)
R4-a
-
Relè stacco alimentazione ventola cabina
Relay for cabin fan supply disconnection
Relais Trennung Versorgung Kabinengebläse
R5-a
-
Relè portello aria
Relay for air door
Relais Luftklappe
R6-a
-
Relè interruttore ventole cabina
Relay for cabin fan switch
Relais Schalter Kabinengebläse
R7-a
-
Relè elettrovalvola compressore
Relay for compressor solenoid valve
Relais Magnetventil Kompressor
R8-a
-
Relè ventilazione kit NORDIC
Relay for NORDIC kit ventilation
Relais Belüftung NORDIC Set
T1
-
Relè temporizzatore per portello
Relay for door timer
Relais Schaltschütz für Tür
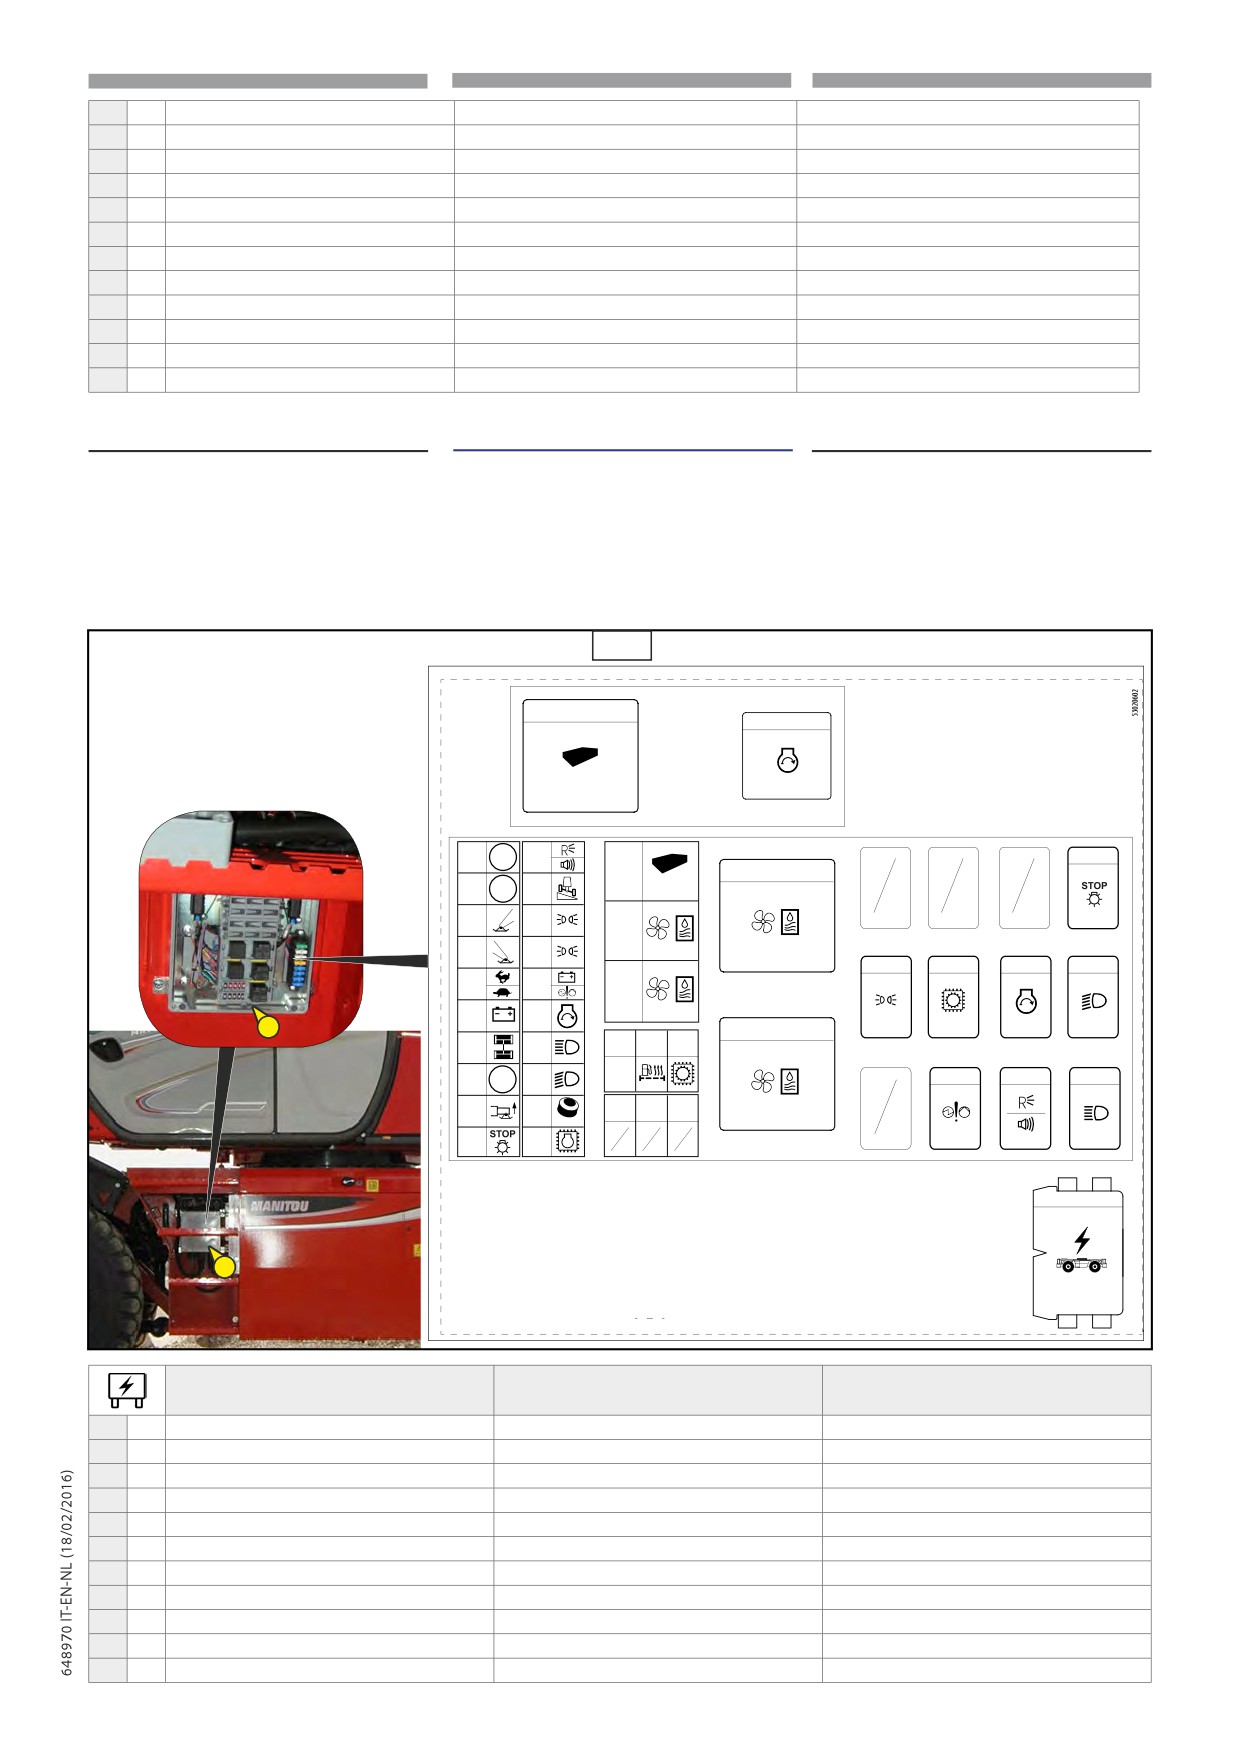
9 FUSIBILI E RELÈ CARRO (9)
9 FUSE AND RELAY ON CHARIOT (9)
9 ZEKERINGEN EN RELAIS HEFTRUCK (9)
- Rimuovere lo sportello (1,9) di
- Remove the (1,9) door for access to the
- Verwijder het deurtje (1,9) di
accesso ai fusibili e relè (2,9).
dat toegang verleent tot de zekeringen en
fuses and relays (2,9).
de relais (2,9).
Sostituire sempre un fusibile
Always replace a faulty fuse with
difettoso con uno equivalente.
Vervang altijd een defecte
another of equivalent rating.
p
Non utilizzare
mai
un
fusibile
zekering door een gelijksoortige.
p
Never use a fuse that has been
riparato.
p
Gebruik nooit een gerepareerde
repaired.
zekering opnieuw.
9
R2
R5
MC2M C
F1
F11
(3A)
OPTIONAL
(7,5A)
R15
F21
(30A)
R3
F2
F12
MC2M C
(3A)
OPTIONAL
(7,5A)
F3
F13
(5A)
(10A)
F22
(25A)
F4
F14
(5A)
(7,5A)
R7
R10
R13
R16
F5
F15
(5A)
(15A)
F23
(25A)
F6
F16
(7,5A)
(10A)
2
R4
F7
F17
F24
F25
F26
(7,5A)
(15A)
(20A)
(20A)
(15A)
F8
OPTIONAL
F18
12/24V
R11
R14
R17
(7,5A)
(15A)
F9
F19
F27
F28
F29
(7,5A)
(7,5A)
ACQ
F10
F20
(7,5A)
(10A)
R1
1
FUNZIONI
FUNCTIONS
FUNCTIES
F1
3A
Fusibile “30” alimentazione connettore opzionale
Fuse "30" Optional supply connector
Zekering “30” voeding optionele connector
F2
3A
Fusibile “15” alimentazione connettore opzionale
Fuse "15" Optional supply connector
Zekering “15” voeding optionele connector
F3
5A
Fusibile “15” microinterruttore stabilizzatori al
suolo
Fuse "15" outriggers on ground microswitches
Zekering “15” microschakelaar stabilisatoren op de grond
F4
5A
Fusibile “15” microinterruttore stabilizzatori al
suolo
Fuse "15" outriggers on ground microswitches
Zekering “15” microschakelaar stabilisatoren op de grond
F5
5A
Fusibile “15” microinterruttore marcia lenta-veloce
Fuse "15" fast/slow gear microswitch
Zekering “15” microschakelaar traag-snel rijden
F6
7.5A
Fusibile “30” alternatore
Fuse"30" alternator
Zekering “30” alternator
F7
5A
Fusibile “15” sensori allineamento assale
Fuse "15" alignment axle sensor
Zekering “15” sensoren uitlijning achteras
F8
7.5A
Fusibile “15” alimentazione connettore Opzionale
Fuse "15" Optional supply connector
Zekering “15” voeding optionele connector
F9
7.5A
Fusibile “15” microinterruttori stabilizzatori sollevati
Fuse "15" outriggers up microswitches
Zekering “15” microschakelaar opgeheven stabilisatoren
F10
7.5A
Fusibile “15” luci stop
Fuse "15" stop lights
Zekering “15” remlichten
F11
7.5A
Fusibile “15” luci retromarcia + cicalino
Fuse "15" reverse gear light + buzzer
Zekering “15” achteruitrijdlicht + waarschuwingssignaal
2-81
IT
EN
NL
F12
3A
Fusibile “15” alimentazione sensore livellamento carro
Fuse "15" Chassis level sensor supply
Zekering “15” voeding nivelleringssensor wagen
F13
5A
Fusibile “15” luci strada
Fuse "15" Road light
Zekering “15” weglichten
F14
5A
Fusibile “15” luci strada
Fuse "15" Road light
Zekering “15” weglichten
F15
10A
Fusibile “15” alternatore + pompa d’emergenza
Fuse "15" alternator + emergency pump
Zekering “15” wisselstroomdynamo + noodpomp
F16
7.5A
Fusibile “15” relè consenso avviamento
Fuse "15" cranking relay
Zekering “15” toestemming starten
F17
7.5A
Fusibile “15” luce abbagliante
Fuse "15" high beam lights
Zekering “15” groot licht
F18
7.5A
Fusibile “15” luce anabbagliante
Fuse "15" low beam lights
Zekering “15” dimlicht
F19
7.5A
Fusibile “15” sensore estensimetro
Fuse "15" extensimeter sensor
Zekering “15” sensor rekmeter
F20
10A
Fusibile “15” centralina Mercedes ACM2.1
Fuse "15" Mercedes ECU ACM2.1
Zekering “15” regeleenheid Mercedes ACM2.1
F21
30A
Fusibile “30” centralina carro MC2M
Fuse "30" Vehicle ECU MC2M
Zekering “30” regeleenheid wagen MC2M
F22
25A
Fusibile “30” ventola elettrica raffreddamento olio idraulico
Fuse "30" Oil cooler electric fan
Zekering “30” elektrische ventilator afkoeling hydraulische olie
F23
25A
Fusibile “30” ventola elettrica raffreddamento olio idraulico
Fuse "30" Oil cooler electric fan
Zekering “30” elektrische ventilator afkoeling hydraulische olie
F24
20A
Fusibile “30” convertitore DC/DC 24/12V
Fuse "30" DC/DC converter
Zekering “30” DC/DC 24/12V-convector
F25
20A
Fuse "15" filtro diesel riscaldamento
Fuse "15" diesel filter heating
Relais "15" dieselfilter verwarming
Relais "15" voeding regeleenheid overbrenging Sauer
F26
15A
Fuse "15" centralina trasmissione Sauer Danfoss
Fuse "15" Transmission ECU Sauer Danfoss
Danfoss
R1
Relè principale +15
+15 main relay
Hoofdrelais +15
R2
Relè alimentazione MC2M carro
MC2M Power supply relay
Relais voeding MC2M wagen
R3
Relè ventola elettrica raffreddamento olio idraulico
Oil cooler electric fan relay
Relais elektrische ventilator afkoeling hydraulische olie
R4
Relè ventola elettrica raffreddamento olio idraulico
Oil cooler electric fan relay
Relais elektrische ventilator afkoeling hydraulische olie
R5
Relè consenso avviamento
Cranking relay
Relais toestemming starten
R7
Relè luci strada
Road lights relay
Relais weglichten
R10
Relè alimentazione centralina trasmissione Sauer Danfoss
Transmission ECU Sauer Danfoss supply relay
Relais voeding regeleenheid overbrenging Sauer Danfoss
R11
Relè pompa d’emergenza
Emergency pump relay
Relais noodpomp
R13
Relè consenso avviamento
Cranking relay
Relais toestemming starten
R14
Relè luci retromarcia + cicalino
Reverse light + buzzer relay
Relais achteruitrijdlicht+ waarschuwingssignaal
R15
Relè luci stop
Stop lights relay
Relais remlichten
R16
Relè luce anabbagliante
Low beams relay
Relais dimlicht
R17
Relè luce abbagliante
High beams relay
Relais groot licht
2-82
IT
EN
NL
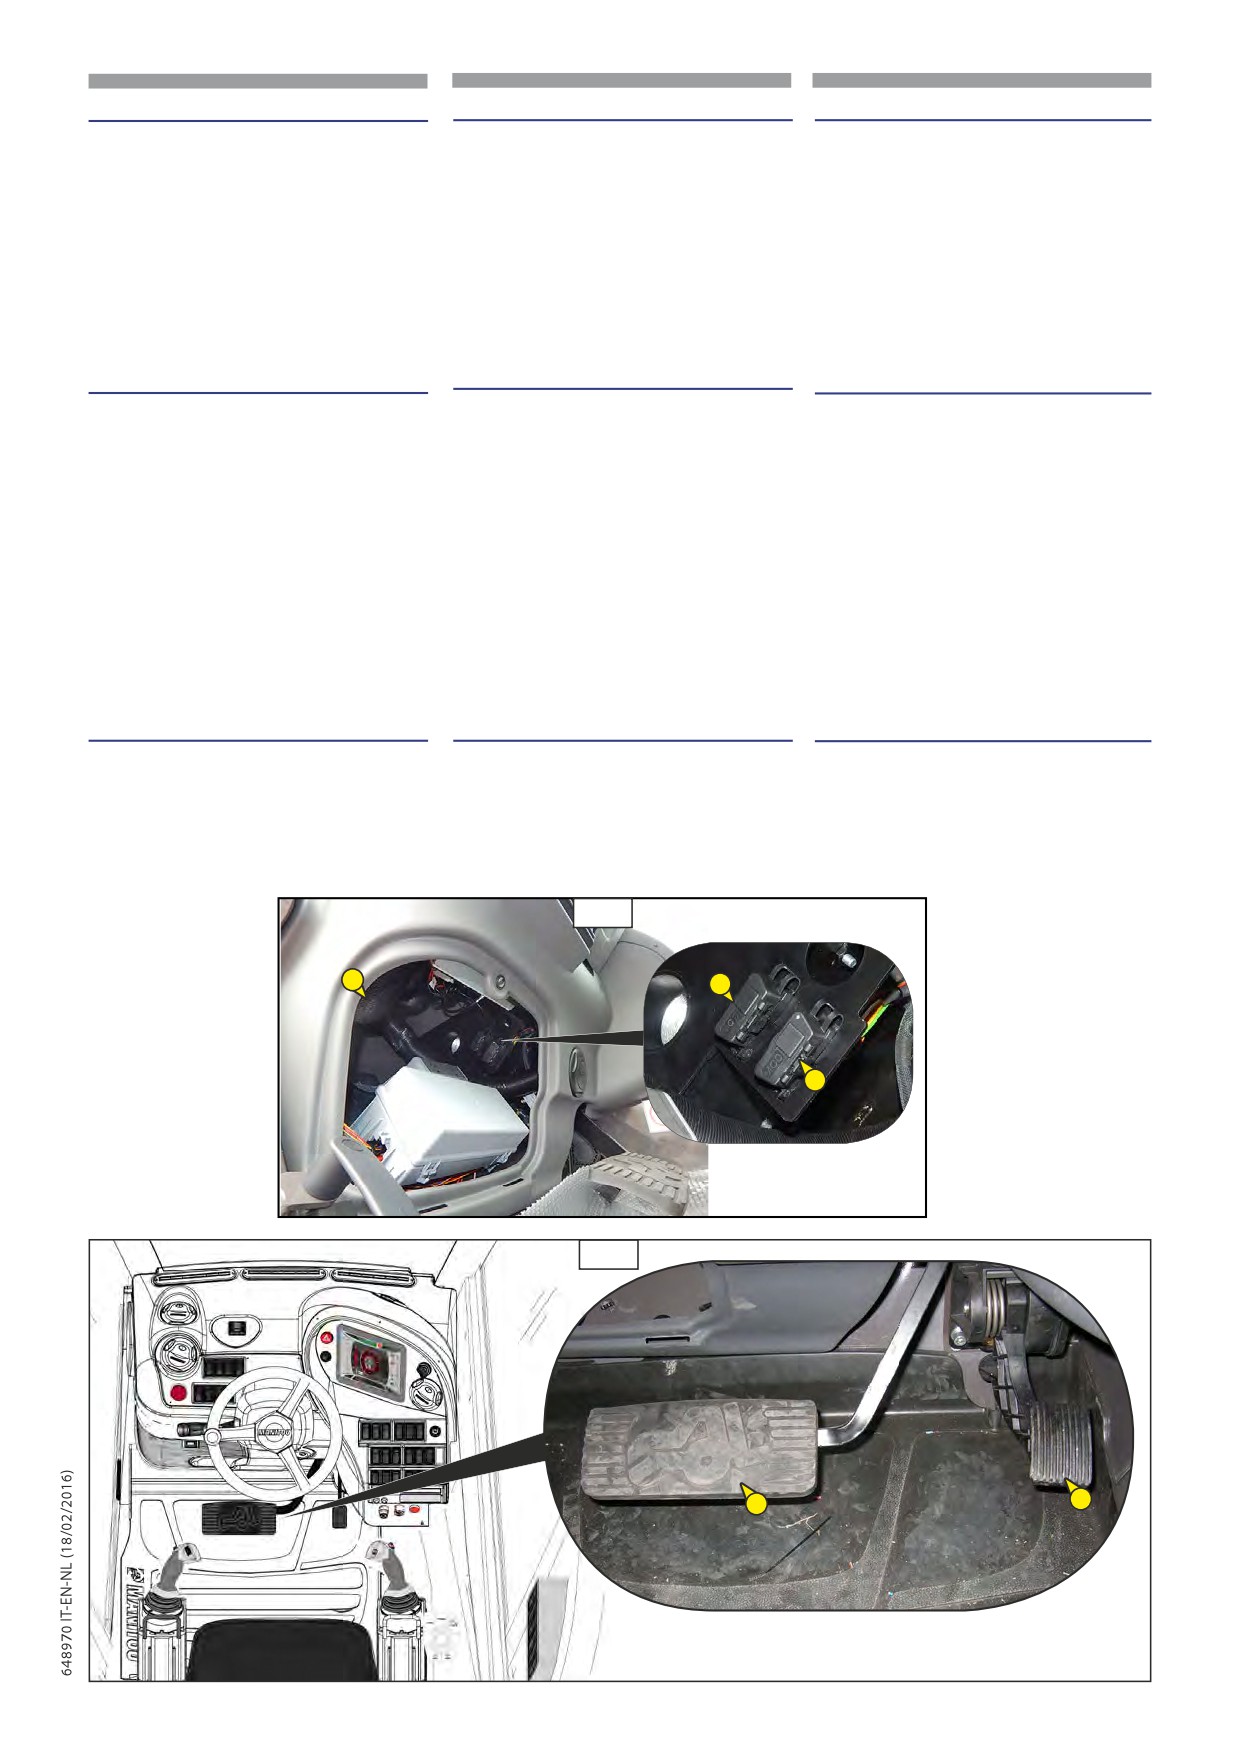
10 PRESE DIAGNOSI
10 DIAGNOSIS SOCKETS
10 DIAGNOSECONTACTEN
Rimuovere la copertura
(1,10) per
Remove cover (1,10) to access diagnosis
Verwijder de bedekking (1,10) om toegang te
accedere alle prese diagnostica (2, 3, 10):
sockets (2, 3,10) :
krijgen tot de diagnosecontacten (2, 3, 10):
• Elettronica macchina (2,10)
• Machine electronics (2,10)
• Elektronica machine (2,10)
• Elettronica macchina e Motore
• Machine electronics and Engine
• Elektronica machine en motor
(3,10)
(3,10)
(3,10)
11 PEDALE FRENI DI SERVIZIO
11 SERVICE BRAKES PEDAL
11 REMPEDAAL
(1,11)
(1,11)
(1,11)
Il pedale agisce sulle ruote anteriori e
The pedal acts on the front and rear
Het pedaal bedient de voor- en
posteriori e permette di rallentare e di
wheels and makes it possible to slow
achterwielen om de heftruck af te
bloccare il carrello elevatore. Il pedale
down and
remmen en tot stilstand te brengen.
freno nei primi 20 mm di corsa funziona
block the forklift truck. In the initial
Het rempedaal werkt de eerste 20 mm
da pedale Inching permettendo
20 mm of travel, the brake pedal acts
van zijn beweging als inching-pedaal,
movimenti precisi e lenti, nella restante
as the Inching pedal to allow slow,
waardoor nauwkeurige en langzame
corsa produce l’effetto frenante.
accurate movements, and during the
bewegingen gemaakt kunnen worden,
remaining part of the travel it produces
de rest van zijn bewegingsloop remt
the braking effect.
hij.
12 PEDALE ACCELERATORE
12 ACCELERATOR PEDAL
12 GASPEDAAL
(2,11)
(2,11)
(2,11)
Pedale elettronico che permette di variare
Electronic pedal which is used for changing
Elektronisch pedaal waarmee u de snelheid
la velocità del carrello elevatore agendo
the forklift truck speed by acting on the rpm
van de heftruck kunt variëren door het
sul numero dei giri che compie il motore
of the I.C. engine.
toerental van de thermische motor te
termico.
veranderen.
10
1
3
2
11
2
1
2-83
IT
EN
NL
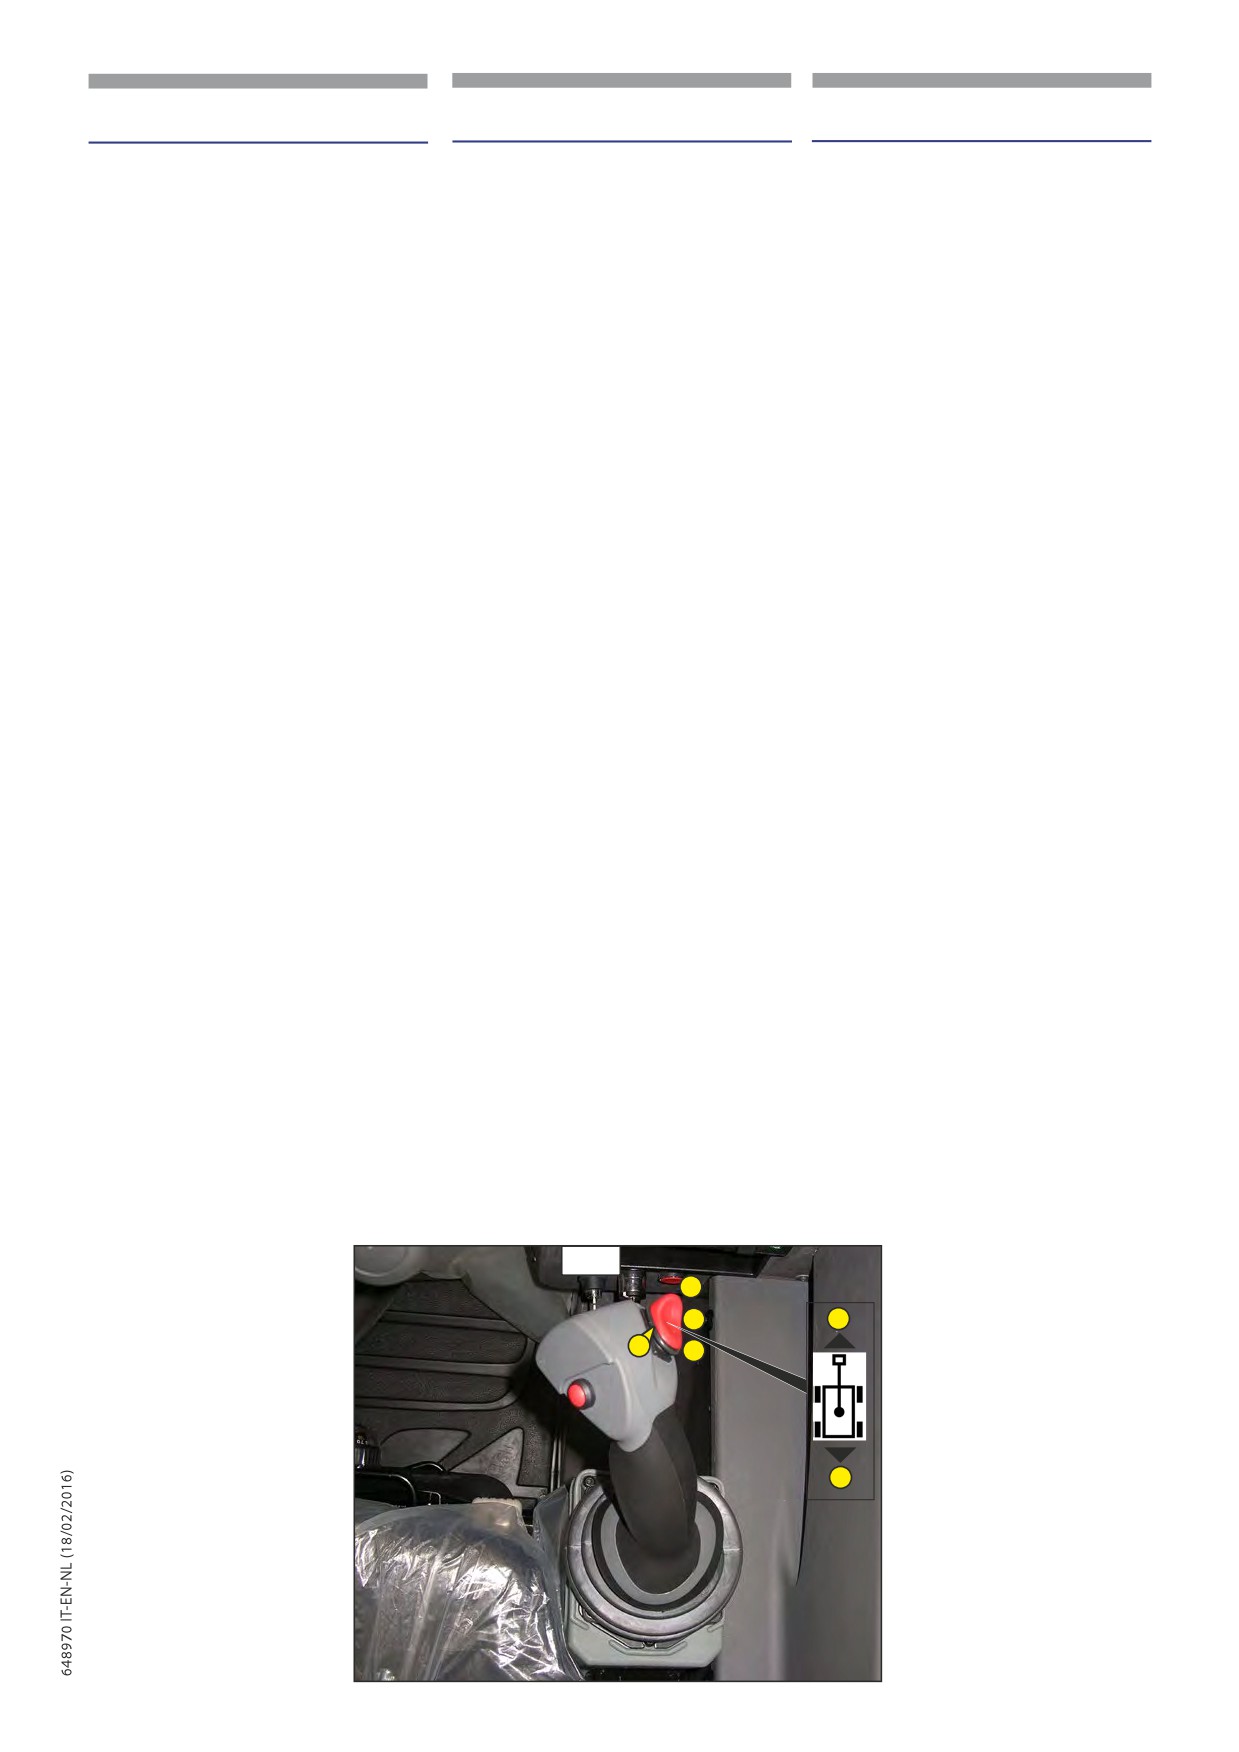
13 SELETTORE DI MARCIA AVANTI/FOLLE/
13
FORWARD/NEUTRAL/REVERSING
13
RIJRICHTINGSCHAKELAAR VOORUIT/
RETROMARCIA
MOVEMENT SELECTOR
VRIJ/ACHTERUIT
(1,12)
(1,12)
(1,12)
MARCIA AVANTI: Spingere in avanti
FORWARD MOVEMENT: Push the switch
VOORUIT: Druk de schakelaar naar voren
l’interruttore (F,12)
forwards (F,12).
(F,12)
RETROMARCIA: Tirare indietro l’interruttore
REVERSING: Pull swicth bakcwards (R,12)
ACHTERUIT: Trek de schakelaar naar achter
(R,12).
NEUTRAL: To start up the forklift truck
(R,12).
IN FOLLE: Per l’avviamento del carrello
the switch must be in the neutral position
VRIJE STAND: Om de heftruck te starten moet
elevatore, l’interruttore deve essere in posizione
(N,12).
de schakelaar in de vrije stand staan (N,12).
neutro (N,12).
The control panel displays, in “road travel mode
Op het bedieningspaneel in “modaliteit op de
Su pannello di controllo in “modalità su strada
(F1)”, the direction of movement selected (F - N
weg (F1)” wordt de geselecteerde rijrichting
(F1)” viene visualizzata direzione di marcia
- R).
weergegeven (F - N - R).
selezionata (F - N - R).
L’inversione di marcia del carrello elevatore deve
The gear change of the forklift truck must be
De rijrichting van de heftruck mag alleen
esser fatta a bassa velocità e senza accelerare.
done at low speed, without accelerating.
omgekeerd worden bij lage snelheid en zonder
gas te geven.
Se la portiera cabina è aperta
If the cab door is open, the
Als het portier van de cabine
la traslazione della macchina è
movement of the vehicle is
geopend is, is de verplaatsing van
p
p
blocked.
p
bloccata.
de machine geblokkeerd.
12
F
N
F
1
R
R
2-84
IT
EN
NL
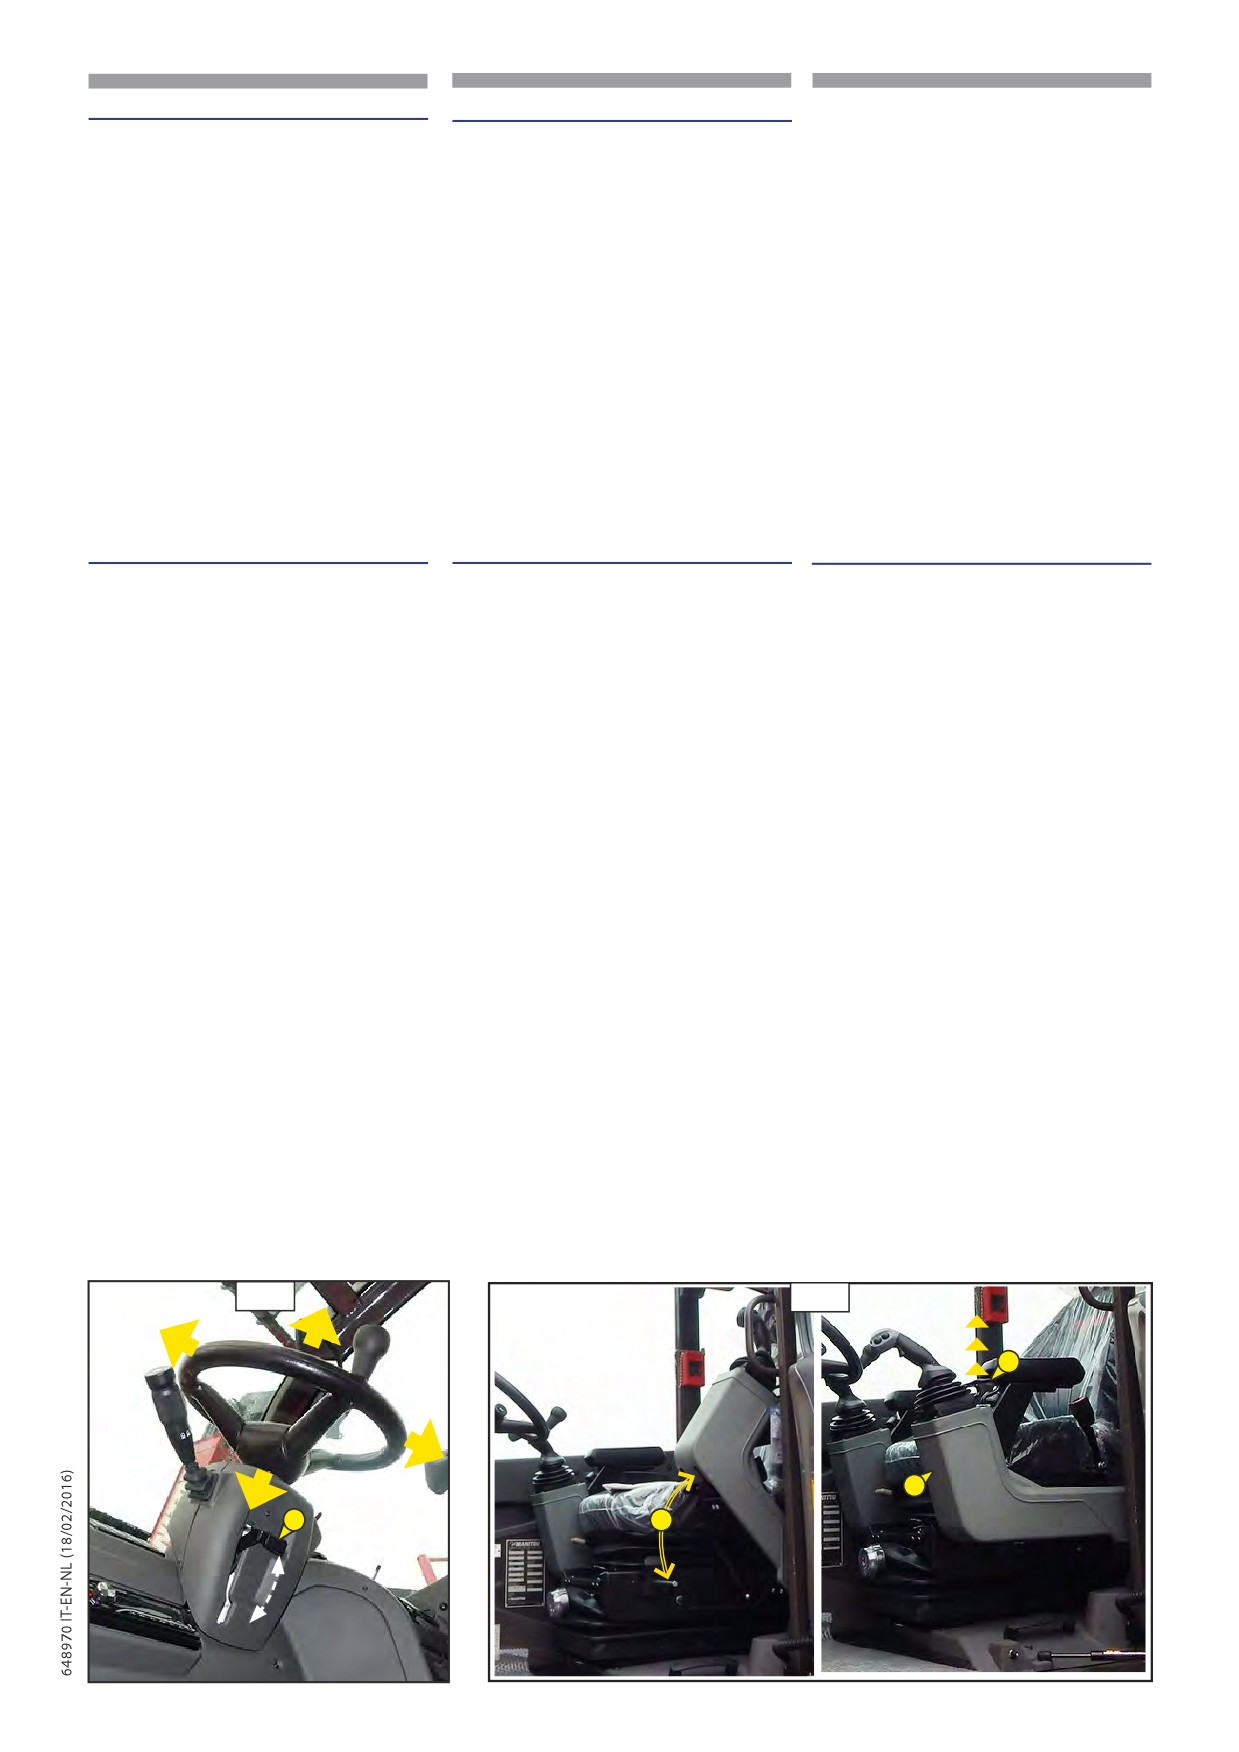
14 LEVA REGOLAZIONE VOLANTE
14 STEERING WHEEL ADJUSTER LEVER
14 HENDEL OM HET STUUR AF TE STELLEN
(1,13)
(1,13)
(1,13)
La leva permette di regolare il volante in
The lever is used to adjust the steering
Met deze hendel kunt u het stuur afstellen
base all’operatore:
wheel according to the operator:
afhankelijk van de bestuurder:
- spingere verso il basso la leva (1,13)
- push lever (1,13) downwards to sla-
- duw de hendel (1,13) naar beneden
per allentare la presa del blocco volante,
cken the grip of the steering wheel block,
om het stuurblok los te zetten,
- si eÓettua la regolazione in altezza
- the height is adjusted (13),
- hoogteregeling (13),
(13),
- the telescopic adjustment is made (13)
- regeling van de uitschuiving (13),
- si eÓettua la regolazione telescopica
,
- Trek de hendel (1,13) naar boven om
(13),
- Pull the lever upwards (1,13) to block
het stuur te blokkeren.
- Tirare verso l’alto la leva (1,13) per
the steering wheel.
bloccare il volante.
15 LEVA COMANDO ALZATA BRACCIOLO
15 CONTROL LEVER FOR LIFTING LH ARM
15 BEDIENINGSHENDEL LINKER ARMSTEUN
SINISTRO DEL SEDILE
REST OF SEAT
VAN DE BESTUURDERSSTOEL OMHOOG
Tirando la leva (1,13) è possibile sbloccare
Pull the lever upwards (1,13) to unlock
Door aan de hendel (1,13) te trekken kunt u
il bracciolo alla sinistra dell’operatore.
the arm-rest to the LH of the operator.
de armsteun links van de bestuurder loszetten.
Il bracciolo può essere collocato in due
The arm-rest can be set in two positions.
De armsteun kan in twee standen gezet
posizioni.
worden.
Position (2,13)
Posizione (2,13)
The arm-rest is in the raised position
Stand (2,13)
Il bracciolo è nella posizione alta tra il
between the seat and cab column.
De armsteun staat in de hoge stand tussen
sedile e il montante della cabina.
In this position
de stoel en de stijl van de cabine.
In questa posizione viene facilitato
it is easier for the operator to enter the cab.
In deze stand kan de bestuurder
l’ingresso in cabina dell’operatore.
makkelijker in de cabine stappen.
Position (3,13)
Posizione (3,13)
The arm-rest must be in this position when
Stand (3,13)
Il bracciolo deve essere in questa posizione
the operator is in the driving seat.
De armsteun moet in deze stand staan als
quando l’operatore si trova al posto di
de bestuurder op de bestuurdersplaats zit.
guida.
13
14
1
3
1
2
2-85
IT
EN
NL
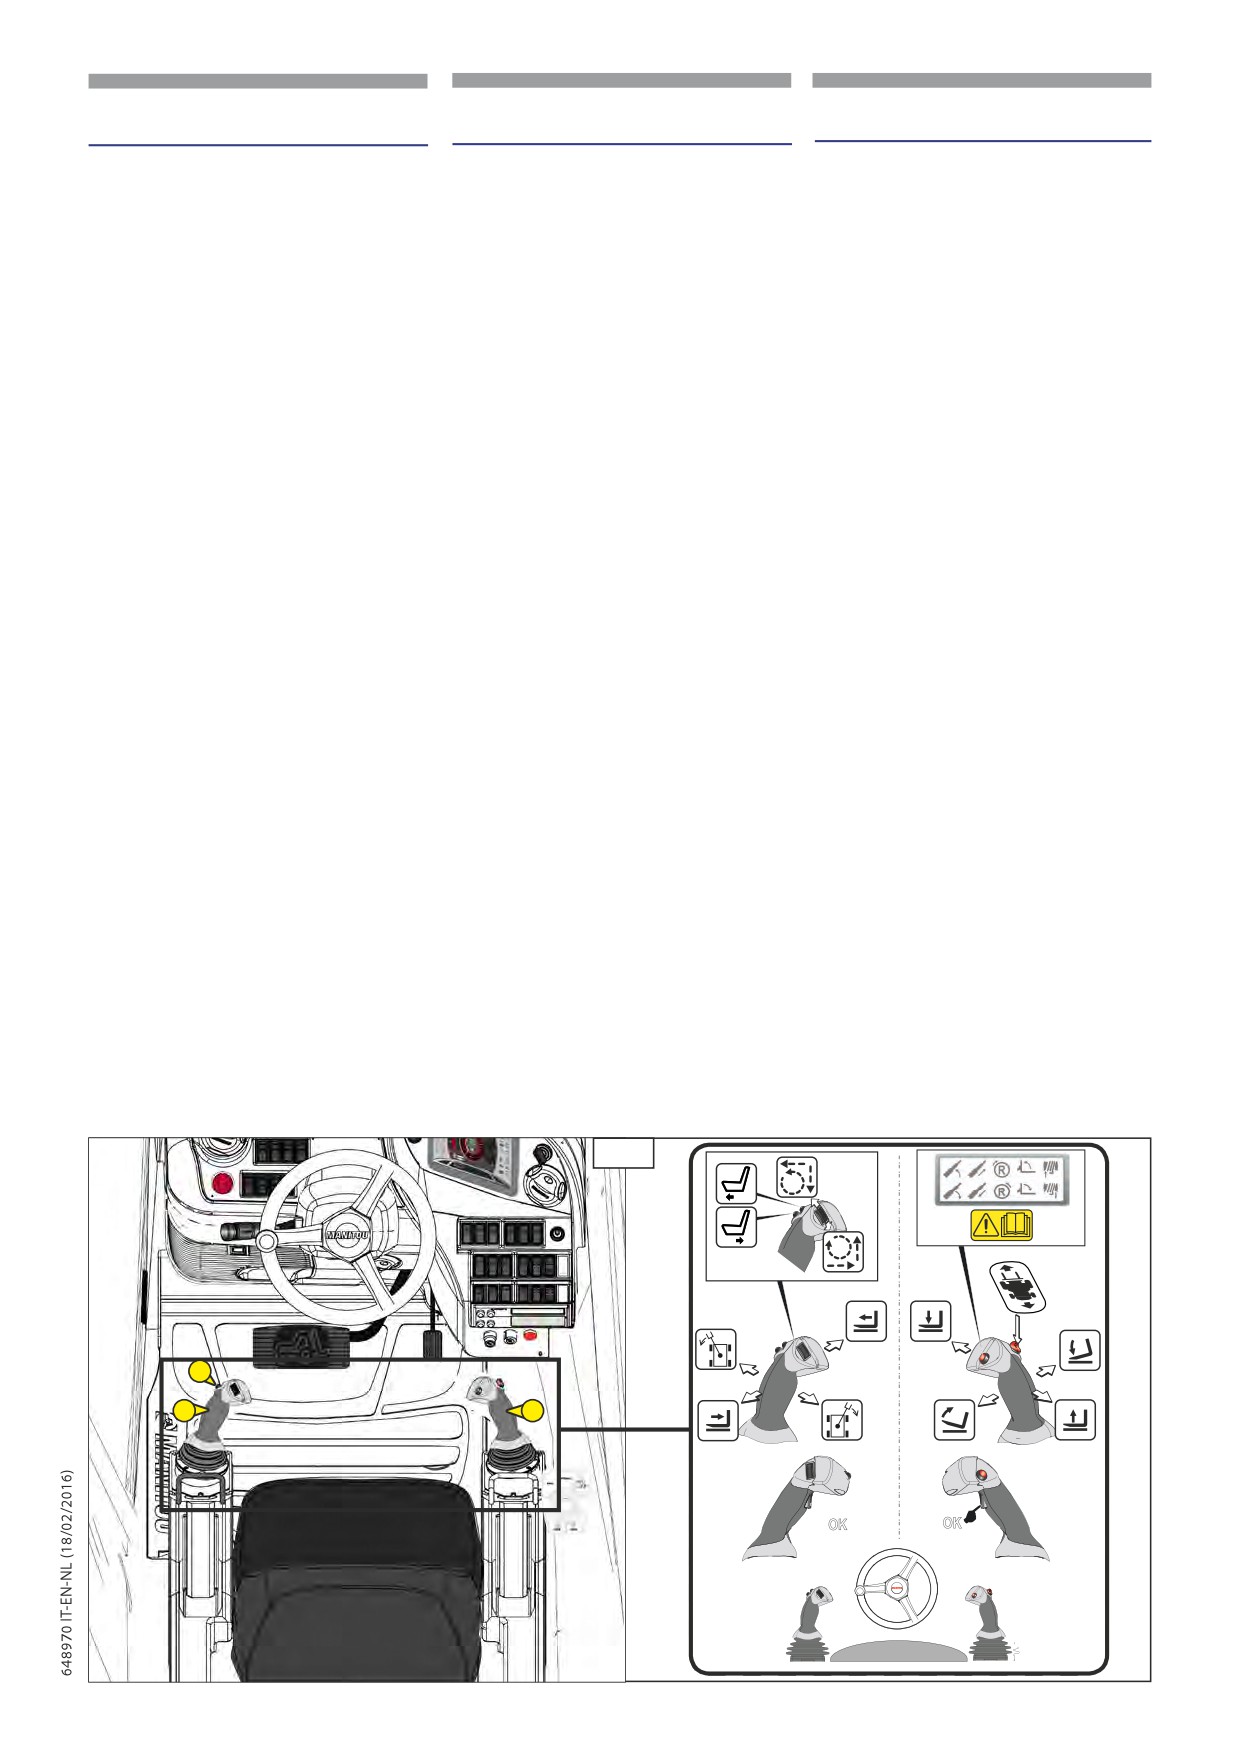
16 SERVOCOMANDI ELETTRO IDRAULICI
16 PROPORTIONAL ELECTRO HYDRAULIC
16 PROPORTIONELE ELEKTROHYDRAULISCHE
PROPORZIONALI
SERVO CONTROLS
SERVOBESTURINGEN
Il carrello è dotato di due servocomandi
The forklift truck is equipped with two
De heftruck is voorzien van twee
elettroidraulici uno alla destra
(1,15)
electro-hydraulic servocontrols, one to the RH
elektrohydraulische servobesturingen, één rechts
dell’operatore e uno alla sinistra
(2,15)
(1,15)of the operator and the other to the
(1,15) van de bestuurder en één links (2,15),
entrambi sui braccioli del sedile per garantire
LH (2,15) both on the arm-rests to ensure
beide op de armsteun van de bestuurdersstoel,
un migliore controllo e comfort.
better control and comfort.
voor een optimale bediening en comfort.
I manipolatori funzionano solo
De stuurknuppels werken alleen als
The manipulators work only
con portiera cabina chiusa e
het portier van de cabine gesloten is
with the cab door closed and the
p
pulsanti di consenso manovre
p
en de knoppen voor de toestemming
p
manoeuvre consent pushbuttons
premuti.
van de manoeuvres zijn ingedrukt.
pressed.
Servocomando (1,15)
Servobesturing (1,15)
Servocontrol (1,15)
Può azionare simultaneamente due
Kan twee dubbelwerkende
It can simultaneously activate two
movimenti a doppio effetto: sollevamento del
bewegingen tegelijkertijd bedienen: lading
double-action movements: lifting the load
carico e inclinazione delle forche.
opheffen en vorken hellen.
and inclining the forks.
Per abilitare e compiere i movimenti
Om de bewegingen te activeren en uit te voeren, houd
To enable and carry out the movements
mantenere premuto il consenso manovre
de knop voor de toestemming van de manoeuvres
keep the manoeuvre enable (OK,15) on
(OK,15) su manipolatore (1,15).
(OK,15) op de stuurknuppel (1,15) ingedrukt.
manipulator (1,15) pressed.
- Per sollevare il carico tirare indietro la
- Om de last op te tillen de hendel naar
- To raise the load, pull the lever backwards.
leva.
achteren trekken.
- To lower the load, push the lever
- Per abbassare il carico spingere la leva in
- Om de last te laten dalen, de hendel naar
avanti.
forwards.
voren drukken.
- Per far inclinare la forca verso il basso
- To incline the fork downwards push the
- Om de vork naar beneden te hellen de
spingere la leva verso destra.
lever to the RH.
hendel naar rechts drukken.
- Per inclinare verso l’alto la forca spingere
- To incline the fork upwards push the le-
- Om de vork naar boven te hellen, de
la leva a sinistra.
ver to the LH.
hendel naar links drukken.
- Pulsante per impostare la velocità
- Pushbutton for setting maximum speed
- Knop om de maximale snelheid van de
massima dei movimenti idraulici
of hydraulic movements
hydraulische bewegingen in te stellen
Servocomando (2,15)
Servo-control (2,15)
Servobesturing (2,15)
Può azionare simultaneamente tre movimenti
It can simultaneously activate three double-
Kan drie dubbelwerkende bewegingen
a doppio effetto: Sfilo del braccio telescopico;
action movements: Telescopic boom
tegelijkertijd bedienen: Uitschuiving van
rotazione della torretta e comando optional.
extension, turret rotation and optional
de telescopische arm; draaiing van de
Per abilitare e compiere i movimenti
command.
zwenkkop en bediening optional.
mantenere premuto il consenso manovre
To enable and carry out the movements
Om de bewegingen te activeren en uit te
(OK,15) su manipolatore (2,15).
keep the manoeuvre enable (OK,15) on
voeren, houd de knop voor de toestemming
- Per sÐlare il braccio telescopico spingere
manipulator (2,15) pressed.
van de manoeuvres
(OK,15) op de
la leva in avanti.
- To extend the telescopic boom press the
stuurknuppel (2,15) ingedrukt.
- Per far rientrare il braccio tirare indietro
lever forwards.
- Om de telescopische arm uit te schuiven,
la leva.
de hendel naar voren drukken.
- To retract the boom, pull the lever
- Per far ruotare la torretta in senso orario
backwards.
- Om de arm weer in te trekken, de hendel
spingere la leva verso destra.
naar achteren trekken.
- To rotate the turret clockwise push the
- Per far ruotare la torretta in senso
- Om de zwenkkop rechtsom te draaien,
lever to the RH.
antiorario spingere la leva verso sinistra.
de hendel naar rechts drukken.
- To rotate the turret anticlockwise push
- Per comandare l’optional nei suoi
- Om de zwenkkop linksom te draaien, de
the lever to the LH.
movimenti ruotare il roller sopra la leva
hendel naar links drukken.
- To control the movements of the optio-
(2,15).
- Om de optional te bedienen, de roller
nal turn the roller on the lever (2,15)
op de hendel (2,15) draaien.
- Muovere avanti-indietro il sedile
- Move the seat forwards-backwards
- Beweeg de stoel elektrisch naar
elettricamente premendo i due bottoni
electrically by pressing the two but-
voren en naar achteren door op de
(3,15) su manipolatore sinistro.
tons on the LH manipulator
(3,15).
twee knoppen (3,15) op de linker
In avanti si inclina anche di 13° verso
It can also be inclined upwards forwards
stuurknuppel te drukken.
l’alto.
by 13°.
Vooruit helt hij ook 13° omhoog.
15
3
2
1
OK
OK
53010700
2-86
IT
EN
NL
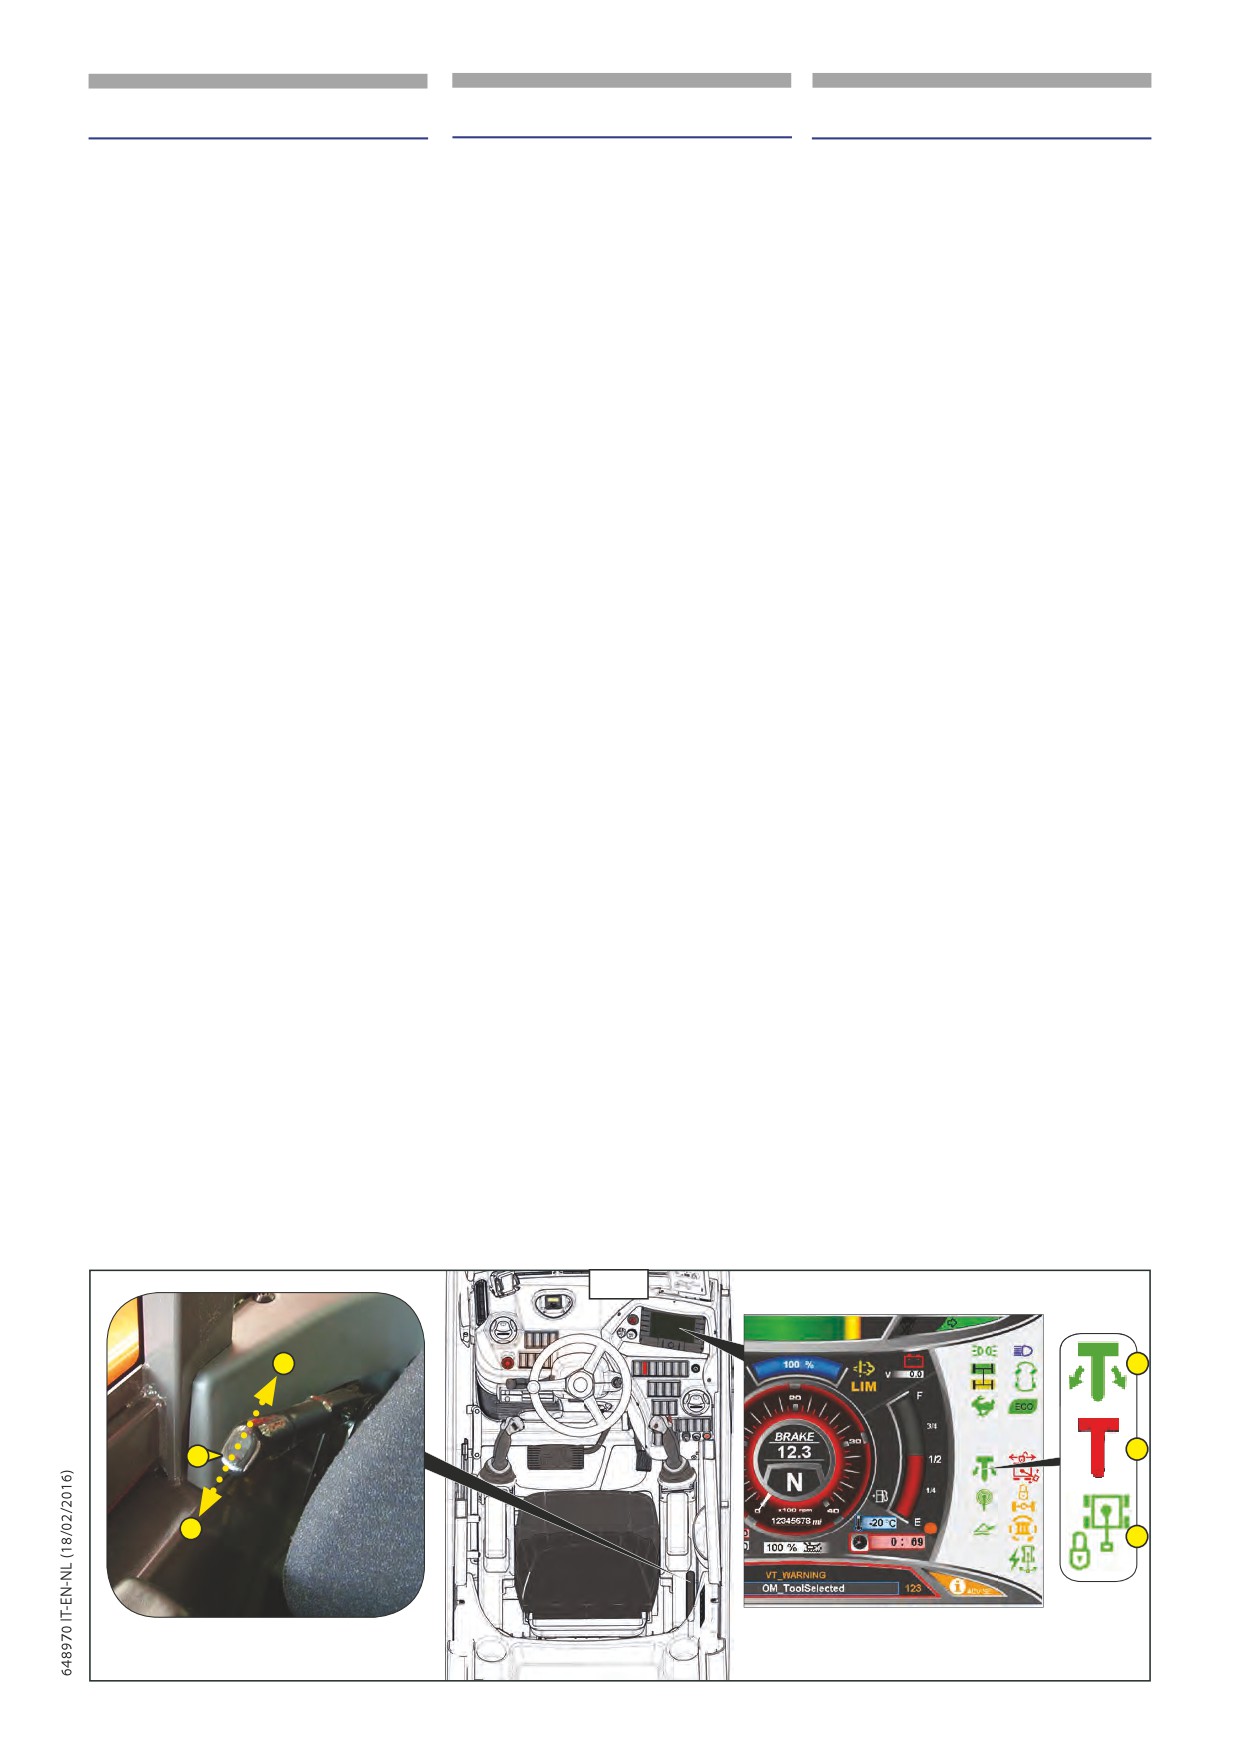
17
LEVA COMANDO PERNO BLOCCO
17 ROTATION BLOCKING PIN CONTROL
17
HENDEL BEDIENING PEN
ROTAZIONE
LEVER
DRAAIBLOKKERING
Questa leva situata alla destra dell’operatore
This lever, on the RH of the operator, con-
Deze hendel bevindt zich aan de rechterkant
comanda il perno che blocca la rotazione
trols the pin which blocks the hydraulic ro-
van de bediener en bedient de pen die de
idraulica del carrello elevatore. La leva ha
tation of the forklift truck. The lever has two
hydraulische zwenkbeweging van de heftruck
due posizioni:
positions:
blokkeert. De hendel heeft twee standen:
- Per inserire il perno di blocco spingere la
- To insert the blocking pin, push the lever
- Om de blokkeringspen aan te brengen,
leva in posizione (A,114).
in position (A,114).
duw de hendel in de positie (A,114).
- Per disinserire il perno di blocco tirare la
- To deactivate the blocking pin pull the
- Om de blokkeringspen te verwijderen, trek
leva indietro in posizione (B,114).
lever backwards in position (B,114).
de hendel achteruit in de positie (A,114).
Prima di inserire il perno nella
Before inserting the pin in its
Voordat u de pen in de houder
sede per bloccare la rotazione,
seat to block the rotation, check
steekt om de zwenkbeweging te
p
blokkeren, dient u te controleren
p
veri care che la parte superiore
p
to make sure the upper part
of het bovenste gedeelte van de
del carrello (torretta) sia allineata
of the forklift truck
(turret) is
heftruck (zwenkkop) in lijn ligtmet
tramite la spia (C2,114). Una
aligned by means of indicator
behulp van het controlelampje
volta inserito il perno la spia
(C2,114). When the pin is
(C2,114). Wanneer u de pen
(C3,114). segnala la presenza
inserted indicator
(C3,114).
aangebracht heeft, meldt het
controlelampje
(C3,114) de
del perno nella sede. È importante
indicates that the pin is in its seat.
aanwezigheid van de pen in de
al momento di usare il comando
It is important when using the
houder. Het is belangrijk dat u, op
della
“Rotazione” di veri care
“Rotation” command to check by
het moment dat u de bediening
tramite la spia
(C1,114).
means of indicator (C1,114).
“Zwenken” gebruikt, een controle
uitvoert met behulp van het
controlelampje
(C1,114).
Per un corretto e migliore
For correct and optimum use of
utilizzo di questo dispositivo
this device, refer to paragraph
Voor een correct en beter
fare riferimento al paragrafo
“USING THE ROTATION DEVICE”
gebruik van deze inrichting, zie
“UTILIZZO DEL DISPOSITIVO
(See Chapter 1-INSTRUCTIONS).
de paragraaf
“GEBRUIK VAN
DI ROTAZIONE” (Vedi Capitolo
DE ZWENKINRICHTING”
(Zie
1-ISTRUZIONI).
Hoofdstuk 1-INSTRUCTIES).
Als de zwenkkop niet uitgelijnd
Se la torretta non è allineata ed
is en de blokkeringspen omlaag
è stato erroneamente abbassato
If the turret is not aligned
p
wordt gehaald, dan wordt de
p
il perno di blocco rotazione, il
and it was erroneously
zwenkbedieningvandezwenkkop
comando di rotazione torretta
p
lowered the rotation lock
via de joystick uitgeschakeld.
da joystick viene disabilitato.
pin,
the
turret
rotation
Om de zwenkbediening via
Per ripristinare il comando
control by joystick is disabled.
joystick te herstellen, til de
di
rotazione torretta
da
To restore the turret rotation
blokkeringspen omhoog door
joystick sollevare il perno di
control by joystick lift the turret
aan de handgreep (17,114) te
blocco torretta tirando la leva
locking pin by pulling the lever
trekken.
(17,114).
(17,114).
114
B
C1
C2
17
A
C3
2-87
IT
EN
NL
18 - ACCENSIONE E REGOLAZIONE
18 - SWITCHING ON AND REGULATING
18
- INSCHAKELEN EN REGELEN
RISCALDAMENTO
HEATING
VERWARMING
IMMAGINE COMPLESSIVA (16)
OVERVIEW (16)
GEDETAILLEERDE AFBEELDING (16)
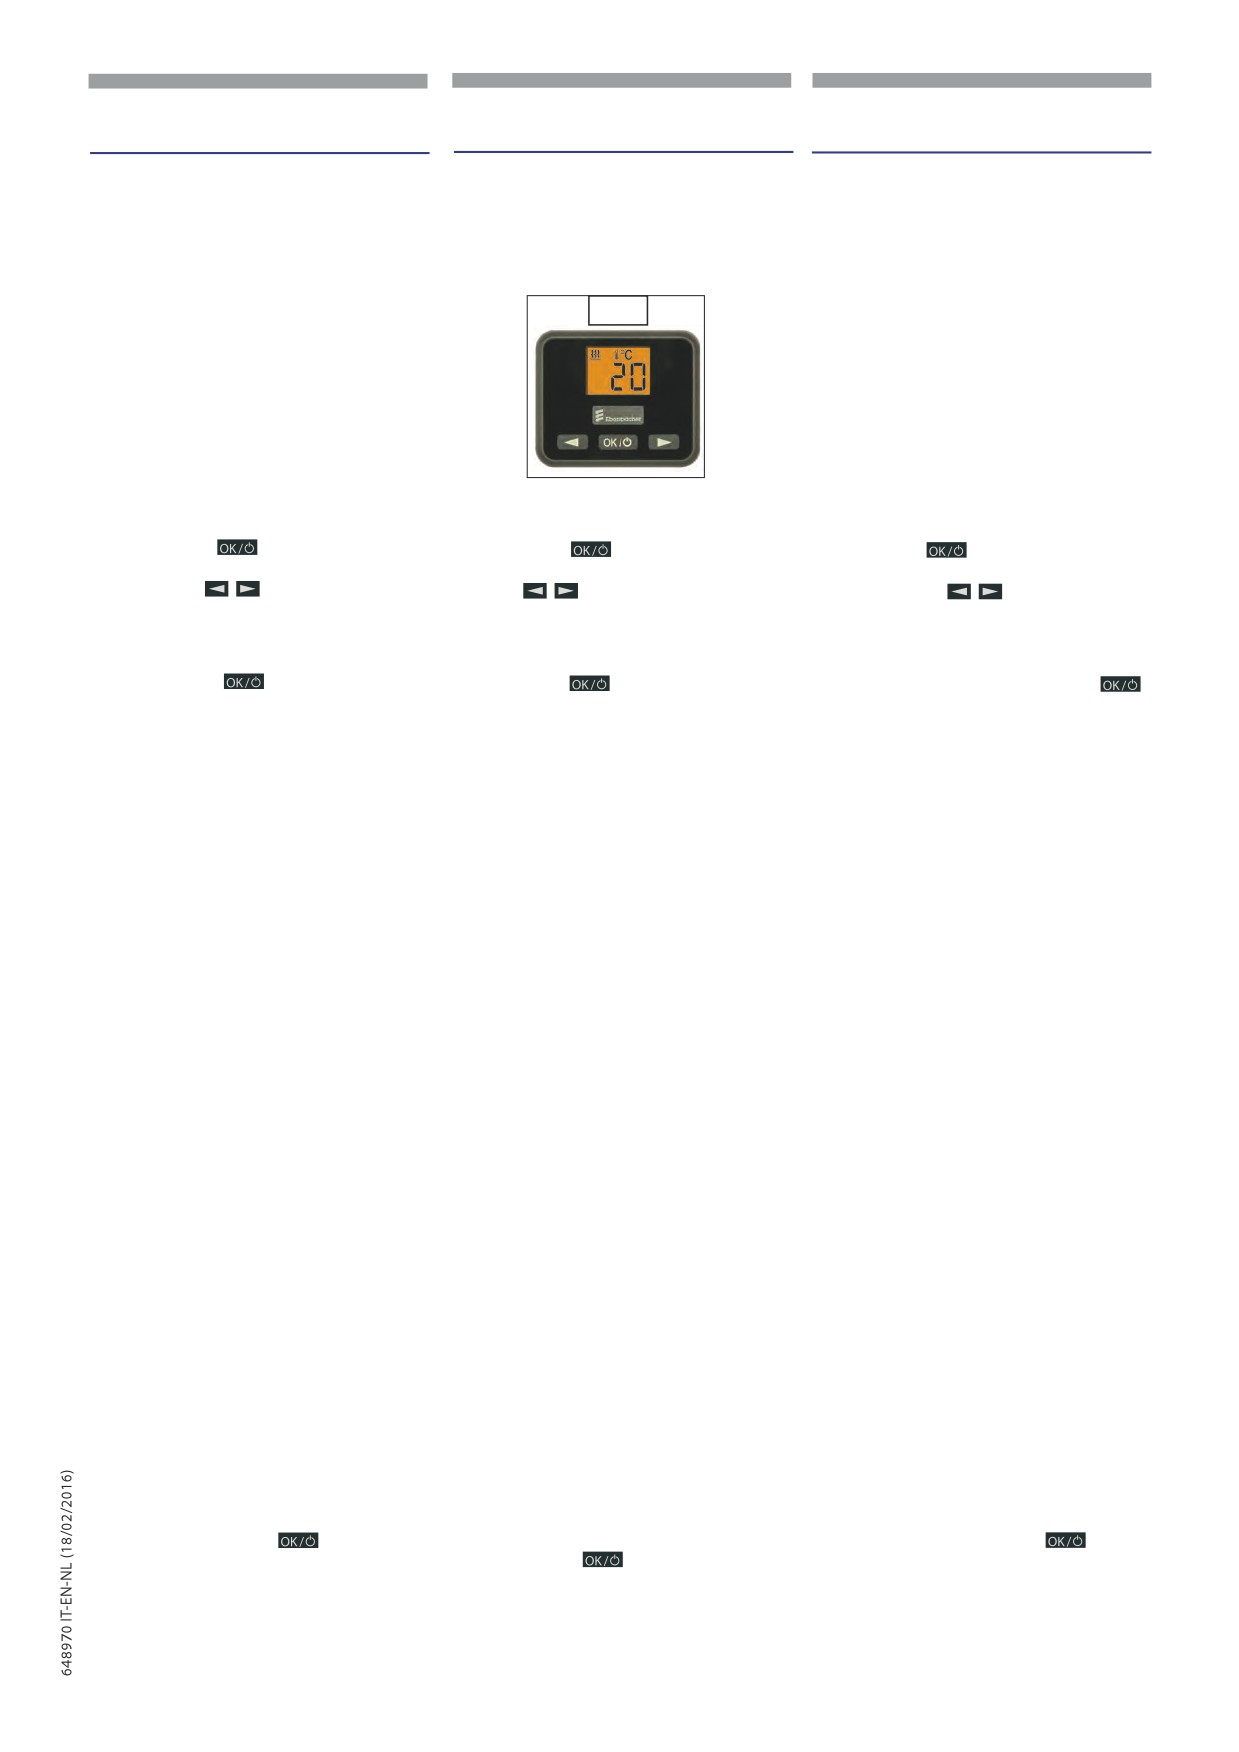
EasyStart Select
EasyStart Select
EasyStart Select
Con EasyStart Select si possono eseguire le
Met EasyStart Select kunt u de nodige instellingen
The EasyStart Select can be used to make the
impostazioni necessarie per il funzionamento del
uitvoeren met betrekking tot de werking van de
necessary settings for operation of the heater.
riscaldatore.
verwarming.
16
Funzioni base dei tasti
Basic button functions
Basisfuncties van de toetsen
Premendo il tasto
si accende o si spegne il
Press the button
to switch the heater
Druk op de toets
om de verwarming in of uit
riscaldatore e si confermano le operazioni.
on or off and to confirm actions.
te schakelen en de operaties te bevestigen.
Premendo i tasti
si selezionano le opzioni
Press the
buttons to select menu items
Druk op de toetsen
om de opties van het
del menu e si effettuano le impostazioni.
and make settings.
menu te selecteren en de instellingen uit te voeren.
Longpress - la via diretta
Longpress - the direct way
Longpress - onmiddellijke inschakeling
Premere longpress
per più di 2 secondi - il
Longpress Press
for longer than 2 seconds
Druk langer dan 2 seconden op Longpress
-
riscaldamento viene avviato immediatamente.
– Heating mode is started immediately.
de verwarming wordt onmiddellijk ingeschakeld.
OPERAT ION AND SE TTING ADJUSTMENT
BEDIENING EN INSTELLING
COMANDO E IMPOSTAZIONE
NOTES ON OPERATION AND SETTING
WAARSCHUWINGEN MET BETREKKING TOT HET
AVVERTENZE SULL’IMPIEGO E LA REGOLAZIONE
GEBRUIK EN DE REGELING
Activat ing the EasyStart Select
Attivare Easystart Select
EasyStart Select inschakelen
If the display is not lit the EasyStart Select
Se il display non è illumina to, si deve attivare
Als het display niet verlicht is, dient EasyStart
must be activated (not if heating On with
EasyStart Select (non in Riscaldamento ON con
Select geactiveerd te worden
(niet met
Longpress).
Longpress).
Verwarming ON met Longpress).
Short press (less than 2 seconds) on one of
Shortpress (per meno di 2 secondi) su uno dei
Shortpress
(minder dan 2 seconden) op een
the three buttons, the Start display appears in
tre tasti, sul display viene visualizzata la videata
van de vier toetsen, op het display wordt het
the display, then continue with the opera tion or
iniziale, quindi si continua con l’impiego o la
beginscherm weergegeven, vervolgens gaat u
setting.
regolazione.
verder met het gebruik of de regeling.
Activat ing a menu item
Attivare l’opzione del menu
The symbol of the menu item to be activated
De optie van het menu activeren
Il simbolo dell’opzione del menu da attivare viene
appears in the display and is flashing.
Het symbool van de optie van het menu dat
visualizzato lampeggiante sul display.
geactiveerd moet orden knippert op het display.
Display
Display
The display is lit:
Display
Il display è illuminato:
Het display is verlicht:
• during use of the EasyStart Select.
• durante l’uso di EasyStart Select.
• tijdens het gebruik van EasyStart Select.
• if terminal 58 is connected, with
• quando si collega il morsetto 58, se è
• wanneer de klem 58 wordt
switched on vehicle lighting.
attivata l’illuminazione del veicolo.
aangesloten, als de verlichting van
• if the heater is On.
• in Riscaldatore ON.
het voertuig is ingeschakeld.
• met Verwarming ON.
Display disappears
Il display si spegne
Het display wordt uitgeschakeld
If the vehicle lighting is switched off, no
Se l’illuminazione del veicolo è disinserita, nessun
Als de verlichting van het voertuig uitgeschakeld
heater is switched on or if no setting or actuation
riscaldatore è attivato o non viene eseguita
is, is er geen enkele verwarming geactiveerd, wordt
is made, the display goes out within 10 seconds,
nessuna regolazione o nessun azionamento, il
er geen regeling of inschakeling uitgevoerd, het
i.e. the EasyStart Select switches to standby.
display si spegne entro 10 secondi, vale a dire,
display wordt binnen 10 seconden uitgeschakeld,
For renewed input, one of the three buttons
EasyStart Select va in standby.
i.e. EasyStart Select schakelt over op stand-by.
must be pressed first (not in hea ting On with
Per poter reinserire dati si deve premere prima
Om de gegevens opnieuw te kunnen invoeren,
Longpress).
uno dei tre tasti (non in Riscaldamento ON con
dient u eerst een van de drie toetsen in te drukken
Longpress).
(niet met Verwarming ON met Longpress).
Simbolo lampeggiante
Knipperend symbool
Si può attivare un simbolo lampeggiante nella
Flashing symbol
Een knipperend symbool in de menubalk kan
barra del menu con il tasto
A flashing symbol in the Menu bar can be
geactiveerd worden met de toets
activated with the
button.
Riscaldamento on con Longpress
Verwarming ON met Longpress
Heat ing On with Longpress
Il riscaldatore viene acceso immediatamente.
De verwarming wordt onmiddellijk ingeschakeld.
The heater is switched on immediately.
2-88
IT
EN
NL
Confermare la selezione
Confirm selection
De selectie bevestigen
La selezione delle opzioni Riscaldamento
Selection of the Heating
or Ventilation
Het selecteren van de opties Verwarming
of
o Ventilazione
va sempre confermata con il
menu items must al ways be confirmed
Ventilatie
moet altijd bevestigd worden met
tasto
with the
button.
de toets
Modalità operativa ventilazione
Ventilat ion operat ing mode
Modaliteit ventilatie
La modalità operativa Ventilazione non è
Ventilat ion mode is not possible with all
De modaliteit Ventilatie is niet mogelijk met
possibile in tutte le versioni di riscaldatori (vedi
heater types (see the Technical Description of the
alle verwarmingversies
(zie de technische
descrizione tecnica del riscaldatore).
heater for details).
specificaties van de verwarming).
Temperat ure sensor
Sensore di temperatura
Temperatuursensor
In the case of air hea ters the temperature
Nei riscaldatori ad aria, il sensore di temperatura
Bij luchtverwarmers wordt de temperatuursensor
sensor installed in the hea ter and which is
installato nel riscaldatore e previsto per la
van de verwarmer die voorzien is voor de regeling
provided for control of the hea ter can also be
regolazione viene usato anche per rilevare la
ook gebruikt om de interne temperatuur waar te
used to determine the interior tempera ture.
temperatura interna.
nemen.
Videata iniziale
Start display
Beginscherm
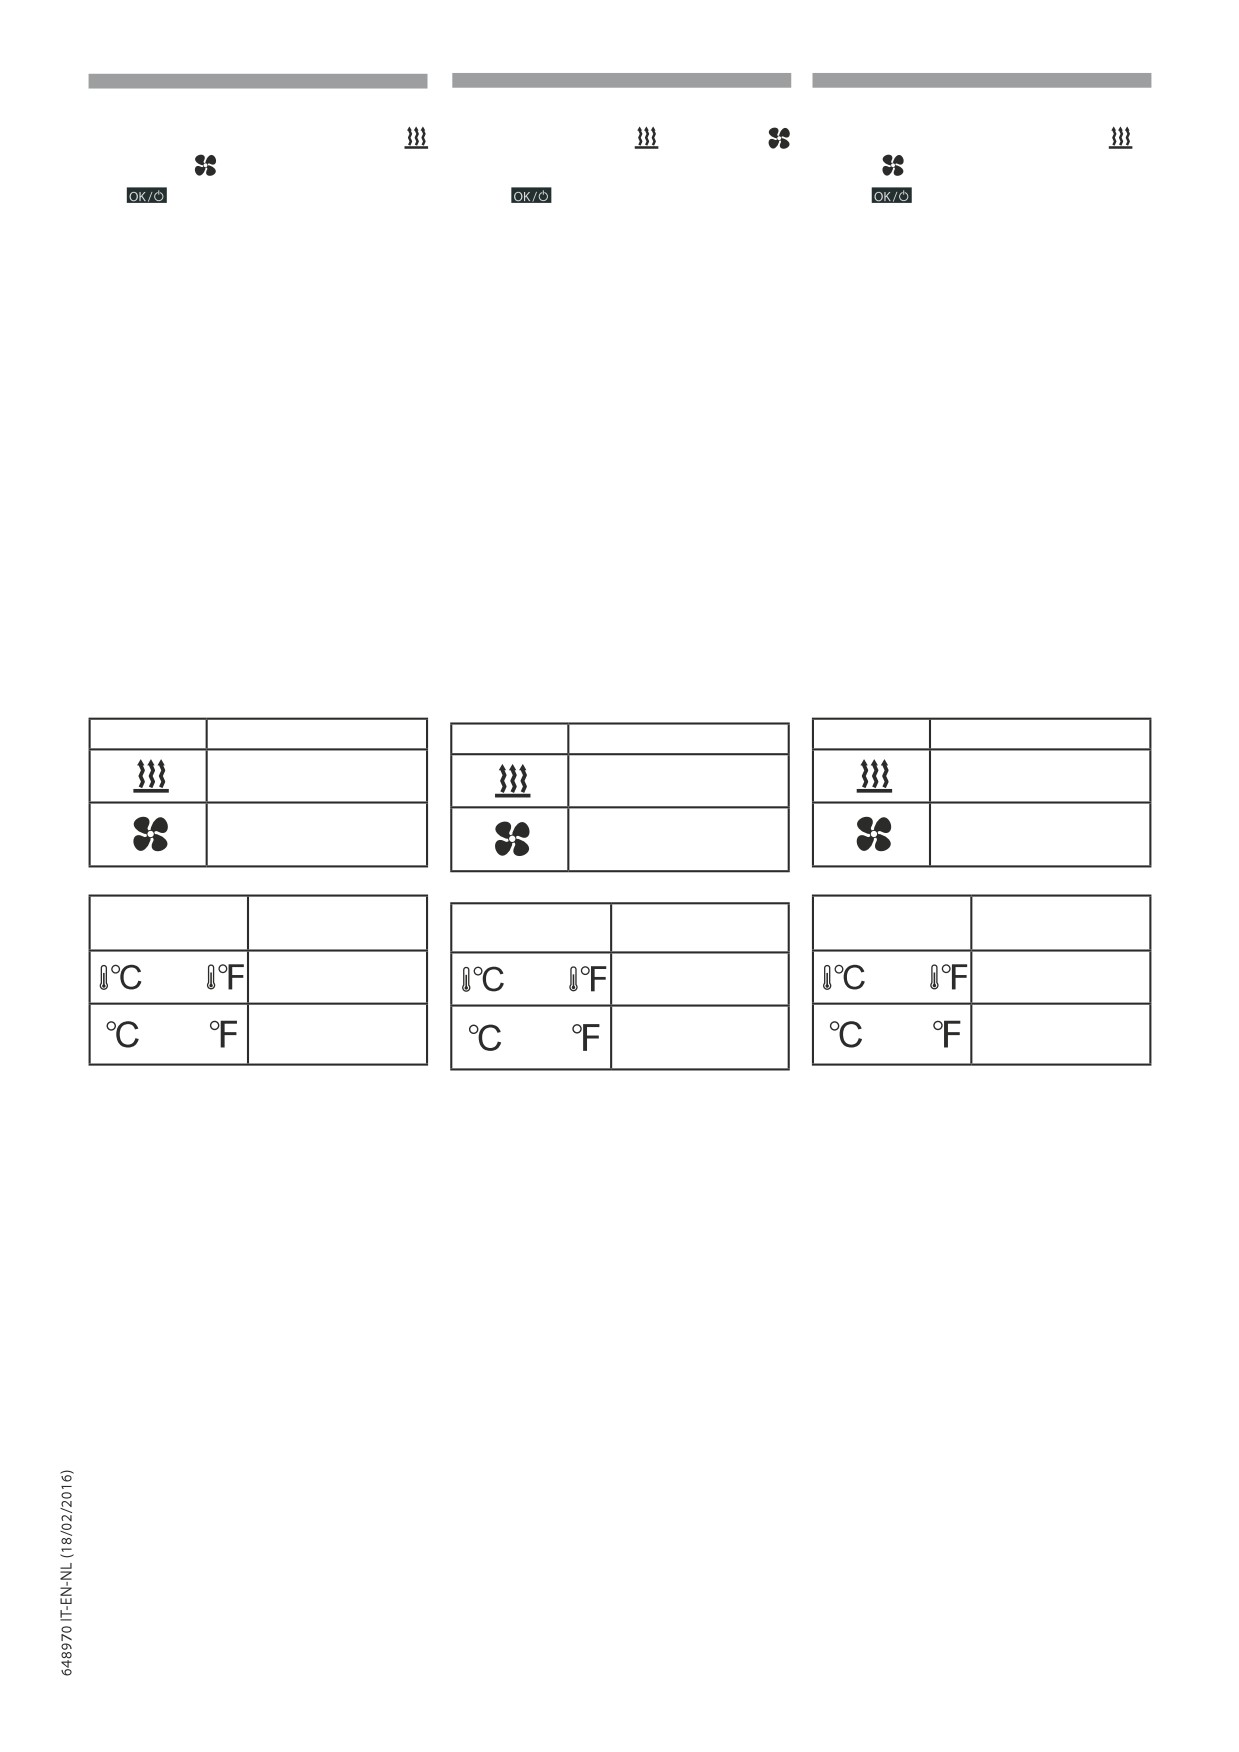
Barra del menu
Menubalk
Menu bar
Zona di stato
Statuszone
Status area
Barra del menu
Menu bar
Menubalk
Simbolo
Funzione
Symbol
Function
Symbool
Functie
Riscaldamento ON / OFF
Verwarming ON / OFF
Heating On / OÓ
Ventilazione ON / OFF
Ventilatie ON / OFF
Ventilation On / OÓ
Simbolo
Indicazioni nella zona
Symbool
Aanduidingen in de
Symbol
Display in the status
di stato
statuszone
area
Temperatura
Temperature inside
Temperatuur in de
nell’abitacolo
the vehicle
cabine
Valore nom.
Nom.
Temperature setpoint
temperatura
temperatuurwaarde
Zona di stato
Stat us area
Statuszone
Se non è attivata nessuna opzione del menu,
If no menu item is activa ted, the temperature
Als er geen enkele optie van het menu
nella zona di stato viene visualizzata la
inside the vehicle is displayed in the sta tus area.
is
geactiveerd, geeft de statuszone de
temperatura all’interno dell’abitacolo del veicolo.
temperatuur in de cabine van het voertuig weer.
If a menu item (HEAT ING, VENTILAT ION) is
Als er een optie is geactiveerd (VERWARMING,
Se è attivata un’opzione (RISCALDAMENTO,
activated the following appears in the status
VENTILATIE) worden afwisselend de temperatuur
VENTILAZIONE), nella zona di sta to dei riscaldatori
area the temperature inside the vehicle and the
in de cabine en de nominale temperatuurwaarde
ad aria in modalità di funzionamento continuo viene
temperature setpoint are displayed
weergegeven in de statuszone van de
visualizzata la temperatura dell’abitacolo e il valore
alternately for air heaters in continuous
luchtverwarmers met continu werking.
nominale della temperatura alternativamente.
operation.
Als bij de eerste opstarting de continu
Se al primo avviamento, la modalità di
If during the initial commissioning the
verwarmingsmodaliteit gewijzigd wordt in
riscaldamento continuo viene trasformata in
installation workshop changed the continuous
werking met beperkte duur in de garage waar
durata di esercizio limitata da parte dell’officina
heating mode to limited time opera tion, the
de montage wordt uitgevoerd, dan wordt
che esegue il montaggio, oltre alla temperatura
remaining operating time is displayed in addition
er naast de temperatuur in de cabine en de
dell’abitacolo e alla temperatura nominale viene
to the tempera ture inside the vehicle and the
nominale temperatuur ook de resterende duur
visualizzata anche la durata di esercizio residua.
temperature setpoint.
weergegeven.
2-89
IT
EN
NL
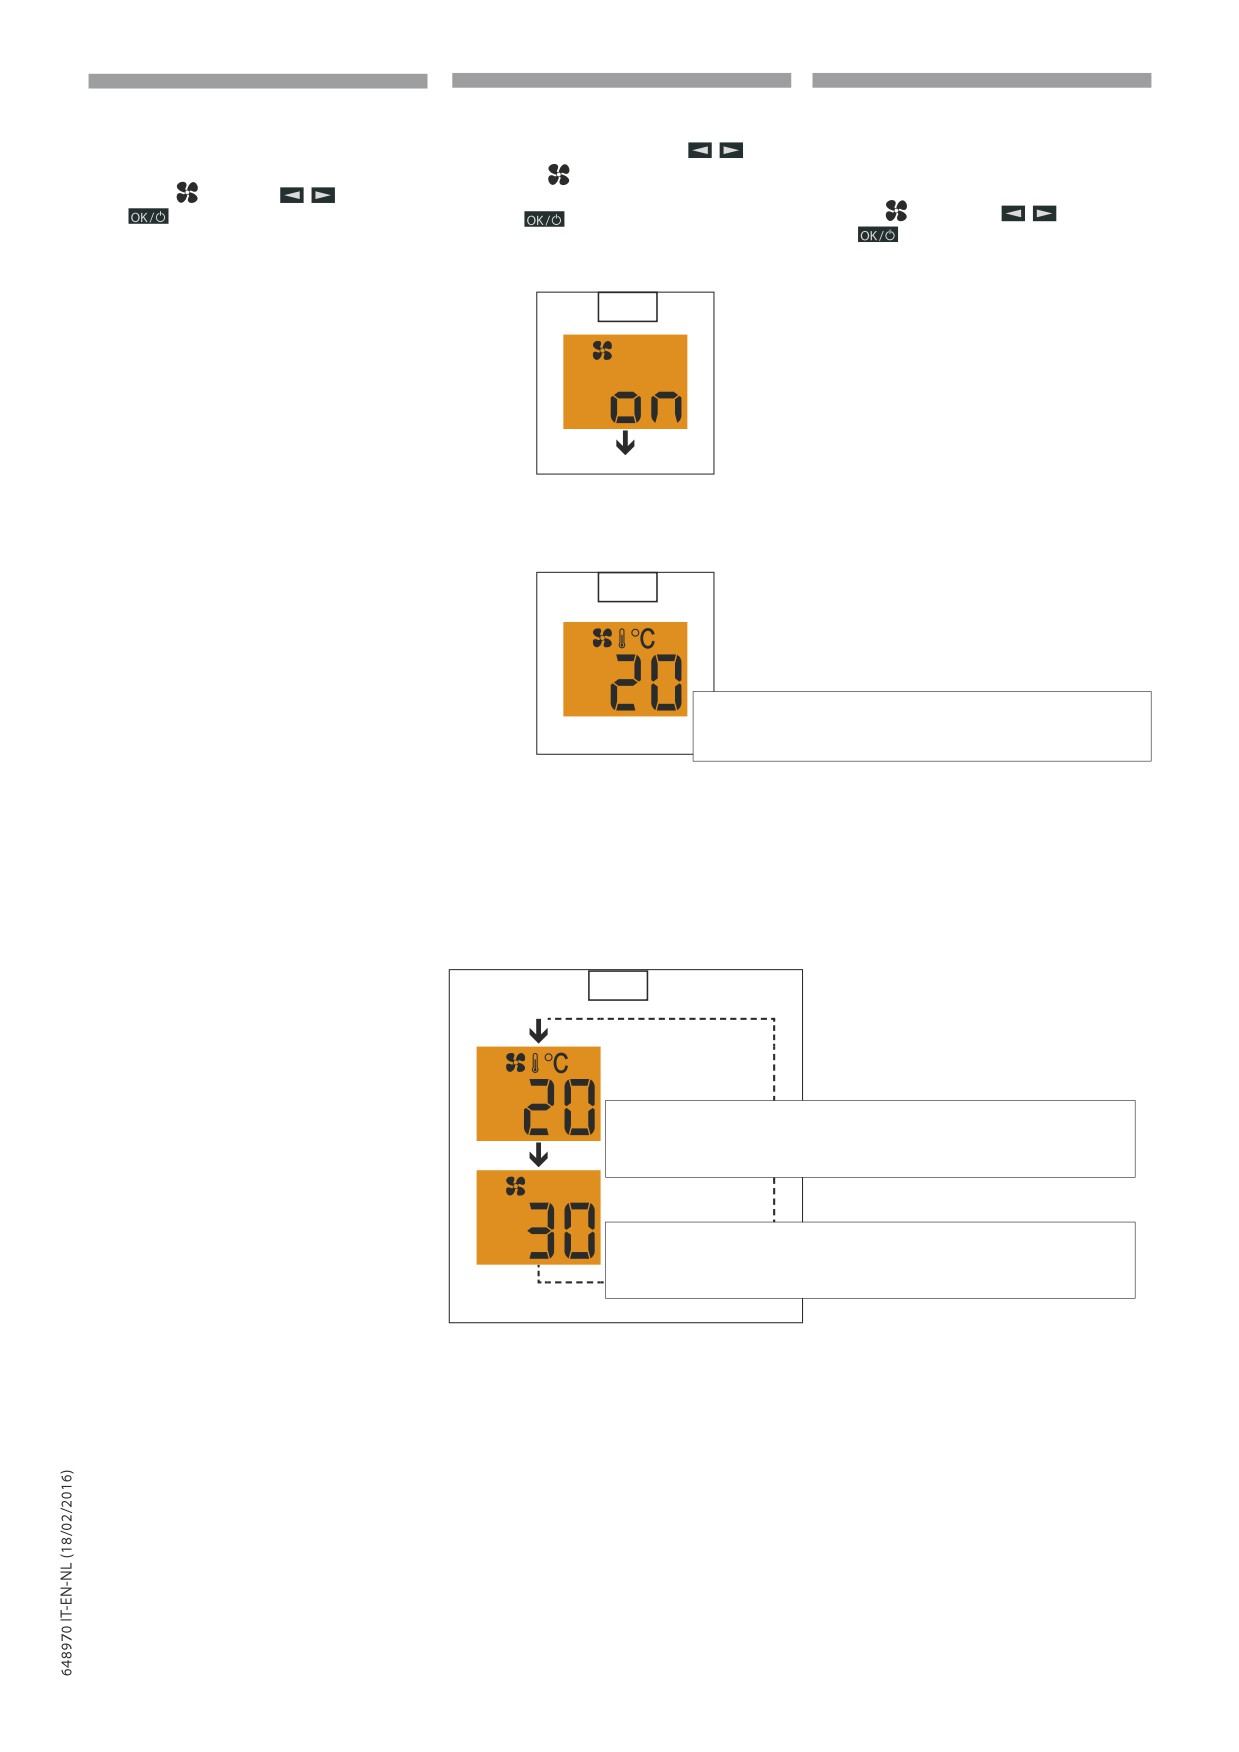
Riscaldamento immediato con Longpress
Heating immediately with Longpress
Onmiddellijke verwarming met Longpress
Tasto
Longpress, per più di 2 secondi.
Press the
Longpress button for longer
Toets
Longpress, langer dan 2 seconden.
than 2 seconds.
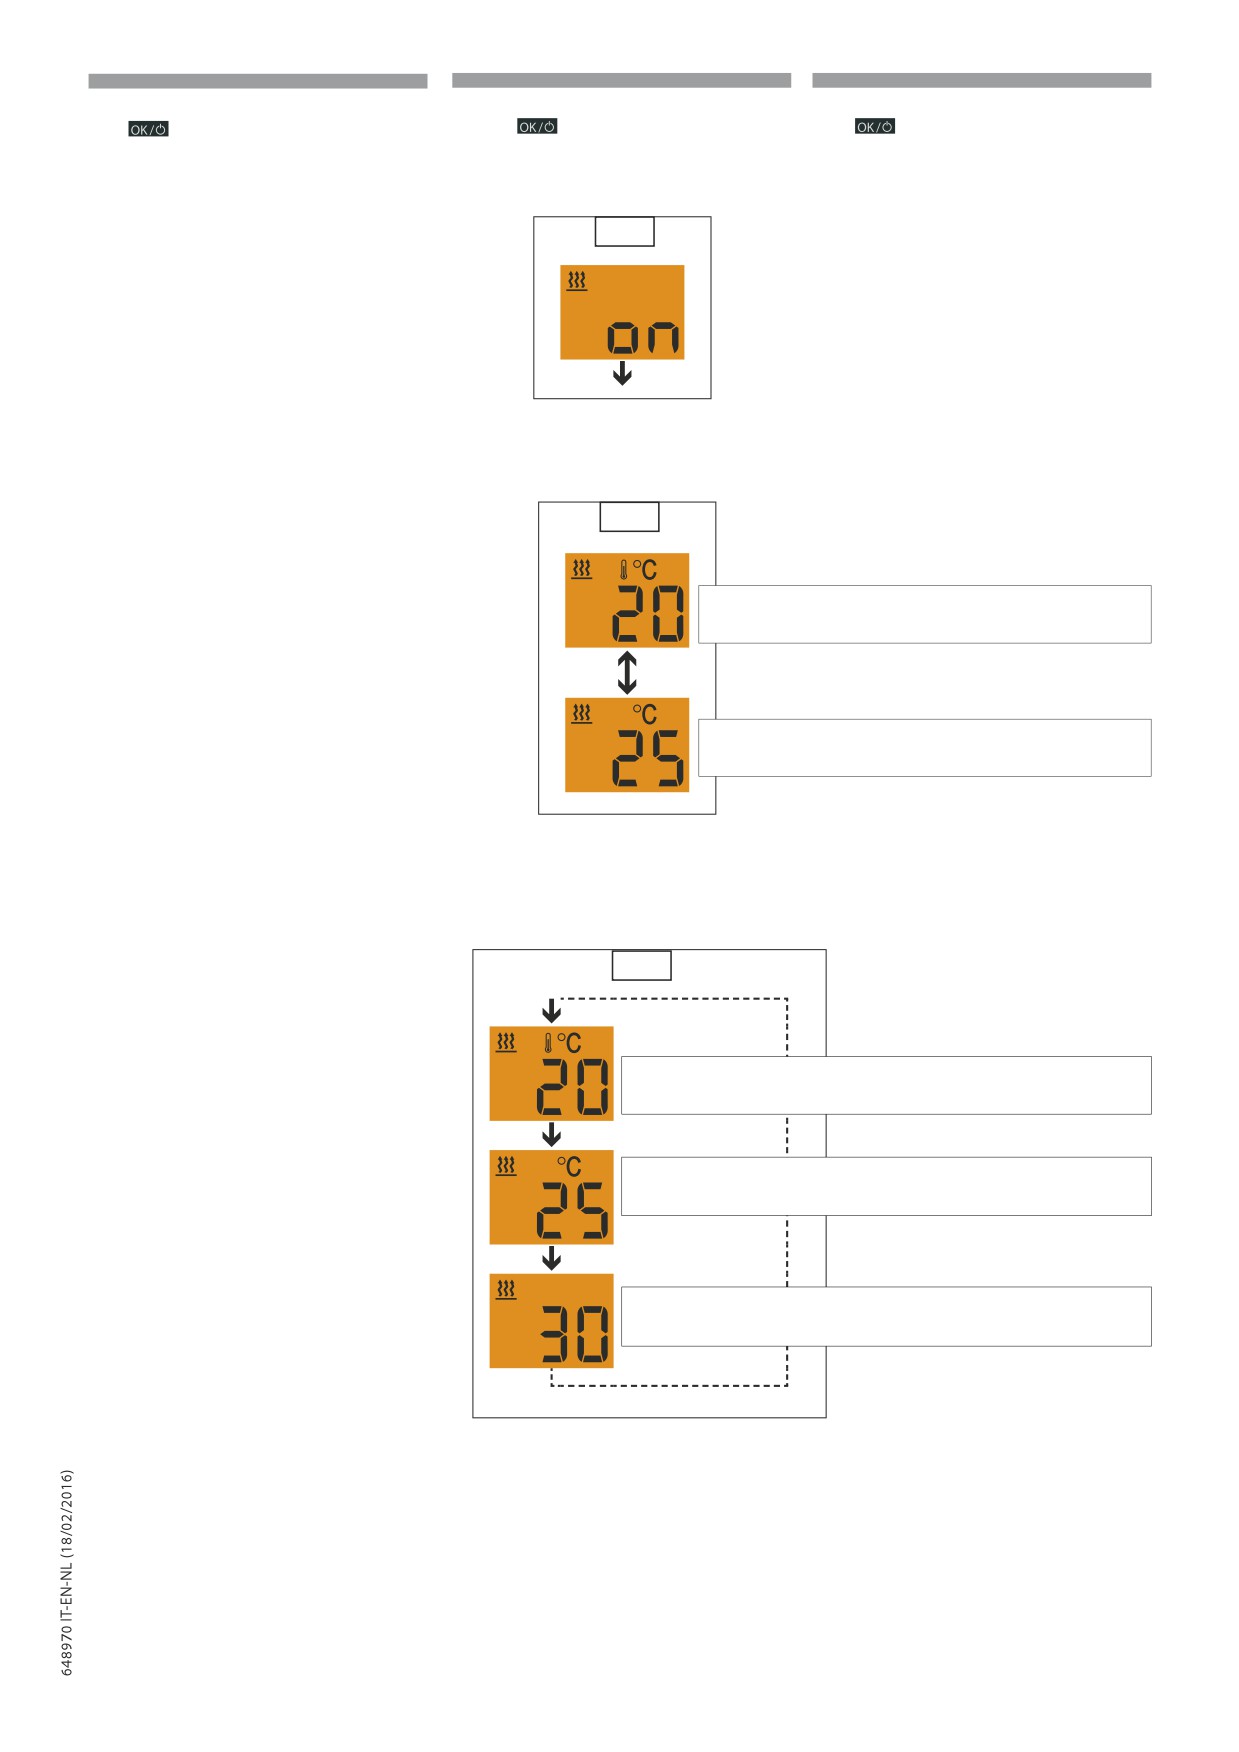
Riscaldatore On (17)
Verwarming ON (17)
Heat er On (17)
17
Indicazione per i riscaldatori ad aria in
Aanwijzing voor luchtverwarmers met continu
modalità di riscaldamento continuo
Display for air heat ers in continuous heat ing
verwarmingsmodaliteit
(fabrieksinstelling)
mode (factor y setting)
(impostazione di fabbrica) (18)
(18)
(18)
18
Temperatura nell’abitacolo
Temperature inside the cab
Temperatuur in de cabine
Valore nom. temperatura
Temperature setpoint
Nom. temperatuurwaarde
Indicazione per i riscaldatori ad aria con
Aanwijzing voor luchtverwarmers met
durata di esercizio limitata (ad es. 30 min.)
beperkte bedrijfsduur
(bv.
30 min.)
Display for air heat ers with limited
(19)
(19)
operat ing time (e.g. 30 min) (19)
19
Temperatura nell’abitacolo
Temperature inside the cab
Temperatuur in de cabine
Valore nom. temperatura
Temperature setpoint
Nom. temperatuurwaarde
Durata di esercizio residua
Remaining operating
Resterende tijdsduur
AVVERTENZA! I valori impostati
WAARSCHUWING! De ingestelde
vengono
prelevati
dal
PLEASE NOTE! Set values are
waarden worden opgenomen
p
riscaldamento precedente.
copied from the previous heating
p
van de vorige verwarming.
p
mode.
2-90
IT
EN
NL
Impostare il valore nominale della temperatura
Set temperature setpoint during heating
De nominale temperatuurwaarde instellen
durante il riscaldamento- solo nei riscaldatori
mode - for air heaters only
tijdens de verwarming
- alleen voor
ad aria
Use the
button to set the tem -
luchtverwarmers
Impostare il valore nominale della temperatura
perature setpoint.
Stel de nominale temperatuurwaarde in met de
con il tasto
toets
Campo di regolazione valore nominale
Veld om de nominale temperatuurwaarde te
Temperature setpoint setting range (20):
temperatura (20):
8 °C - 36 °C in 1 °C increments,
regelen (20):
8 °C - 36 °C in incrementi di 1 °C,
46 °F - 97 °F in 1 °F increments.
8 °C - 36 °C met toename van 1 °C,
46 °F - 97 °F in incrementi di 1 °F.
46 °F - 97 °F met toename van 1 °F.
20
AVVERTENZA! Il valore nominale
WAARSCHUWING! IDe gewijzigde
PLEASE NOTE! The changed
della tempera tura modi cato
nominale
temperatuurwaarde
temperature setpoint is o ered
p
viene visualizzato al successivo
p
wordt weergegeven bij de
p
again the next time the system is
avvio.
volgende start.
started.
Riscaldamento off con Shortpress
Heating off with Shortpress
Verwarming OFF met Shortpress
L’opzione Riscaldamento viene visualizzata sul
The Heat ing menu item appears in the
De optie Verwarming wordt weergegeven op het
display.
display.
display.
Tasto
Shortpress, per meno di 2 secondi.
Press the
Shortpress button for less
Toets
Shortpress, minder dan 2 seconden.
than 2 seconds.
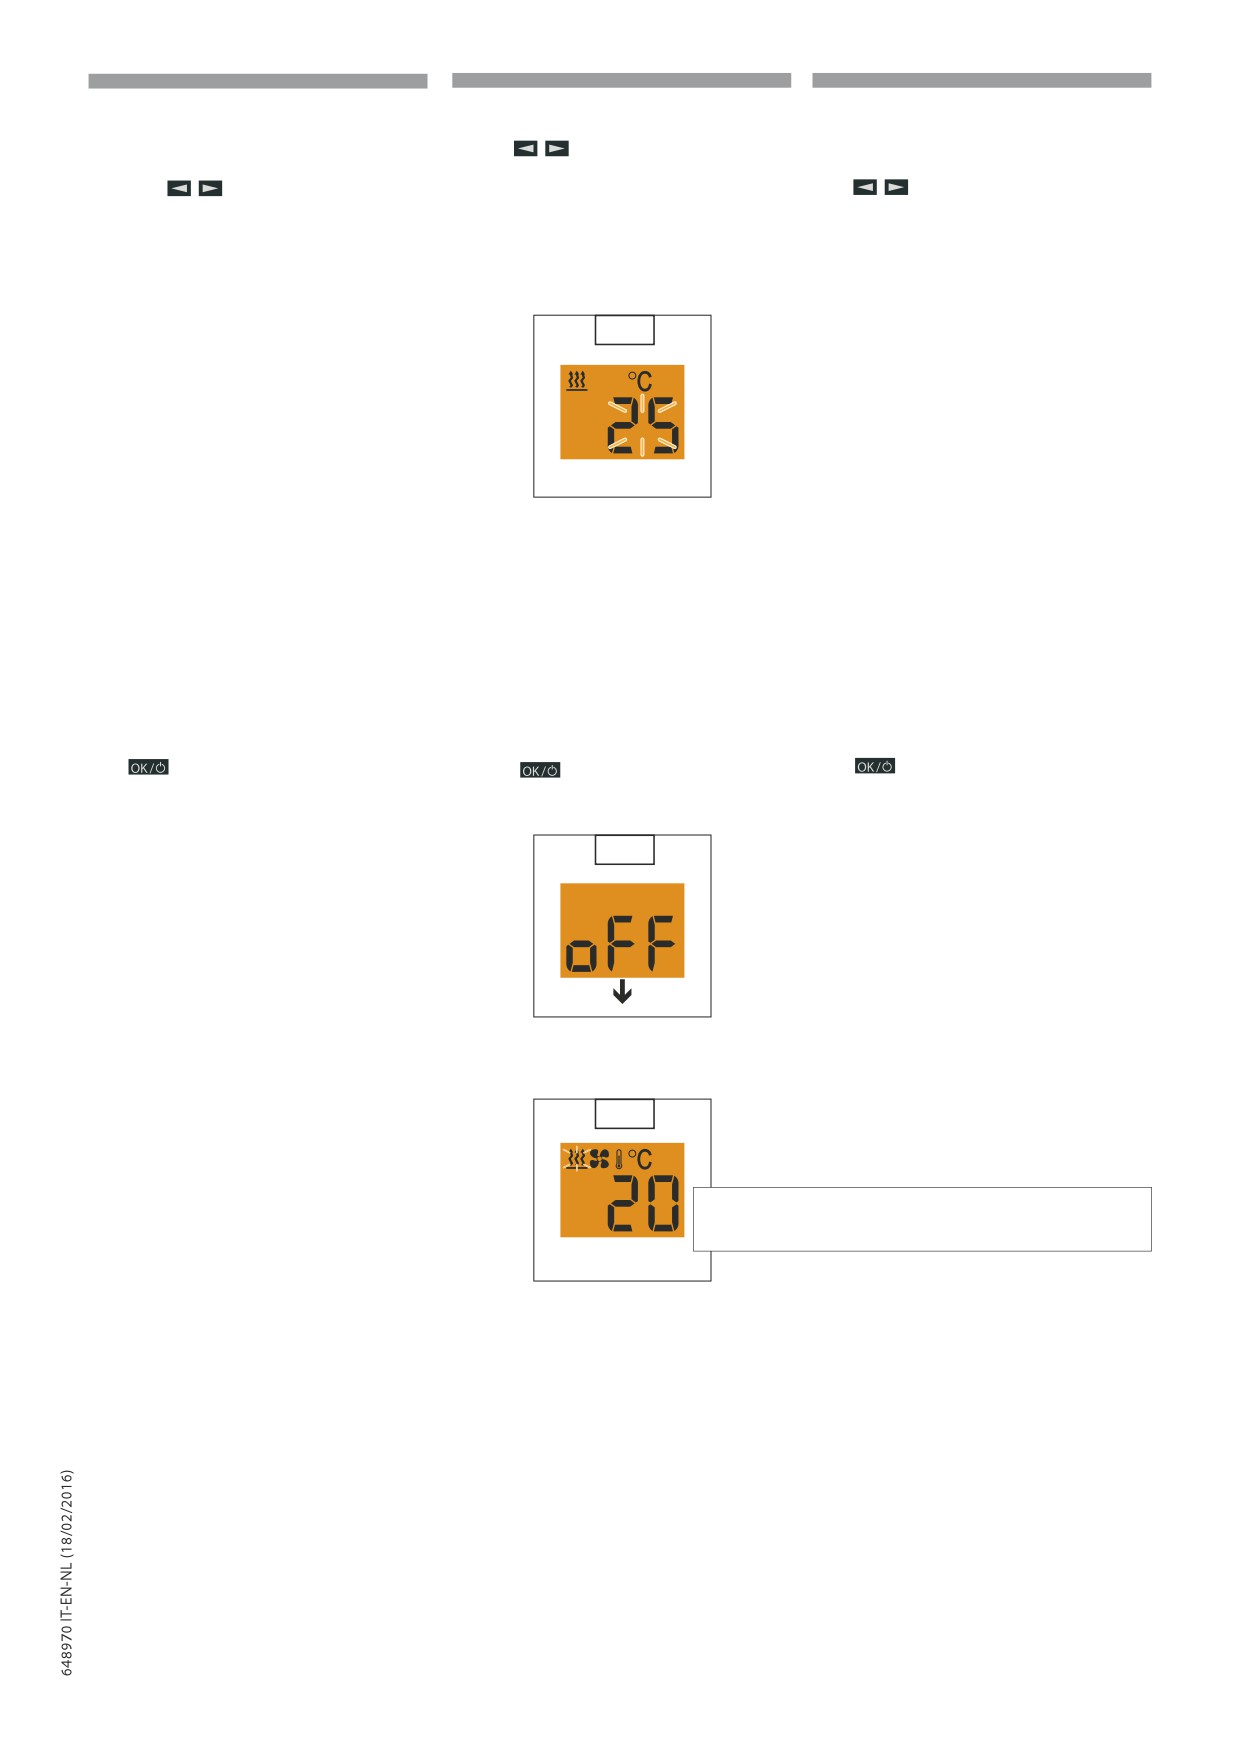
Riscaldatore off (21)
Heat er Off (21)
Verwarming OFF (21)
21
Videata iniziale nei riscaldatori ad aria (22)
Beginscherm luchtverwarmers (22)
Start display for air heaters (22)
22
Temperatura nell’abitacolo
Temperature inside the cab
Temperatuur in de cabine
AVVERTENZA! Con l’illuminazione
WAARSCHUWING! Als
de
del veicolo ACCESA, la videata
verlichting van het voertuig
PLEASE NOTE! If the vehicle
p
iniziale
rimane visualizzata
p
AAN is, wordt het beginscherm
lighting is ON the Start display
permanentemente.
Con
permanent weergegeven. Als
p
is shown continuously. If the
l’illuminazione
del
veicolo
de verlichting van het voertuig
vehicle lighting is OFF the display
SPENTA, il display si disattiva
UIT is, wordt het display
goes out after 10 seconds.
dopo 10 secondi.
uitgeschakeld na 10 seconden.
2-91
IT
EN
NL
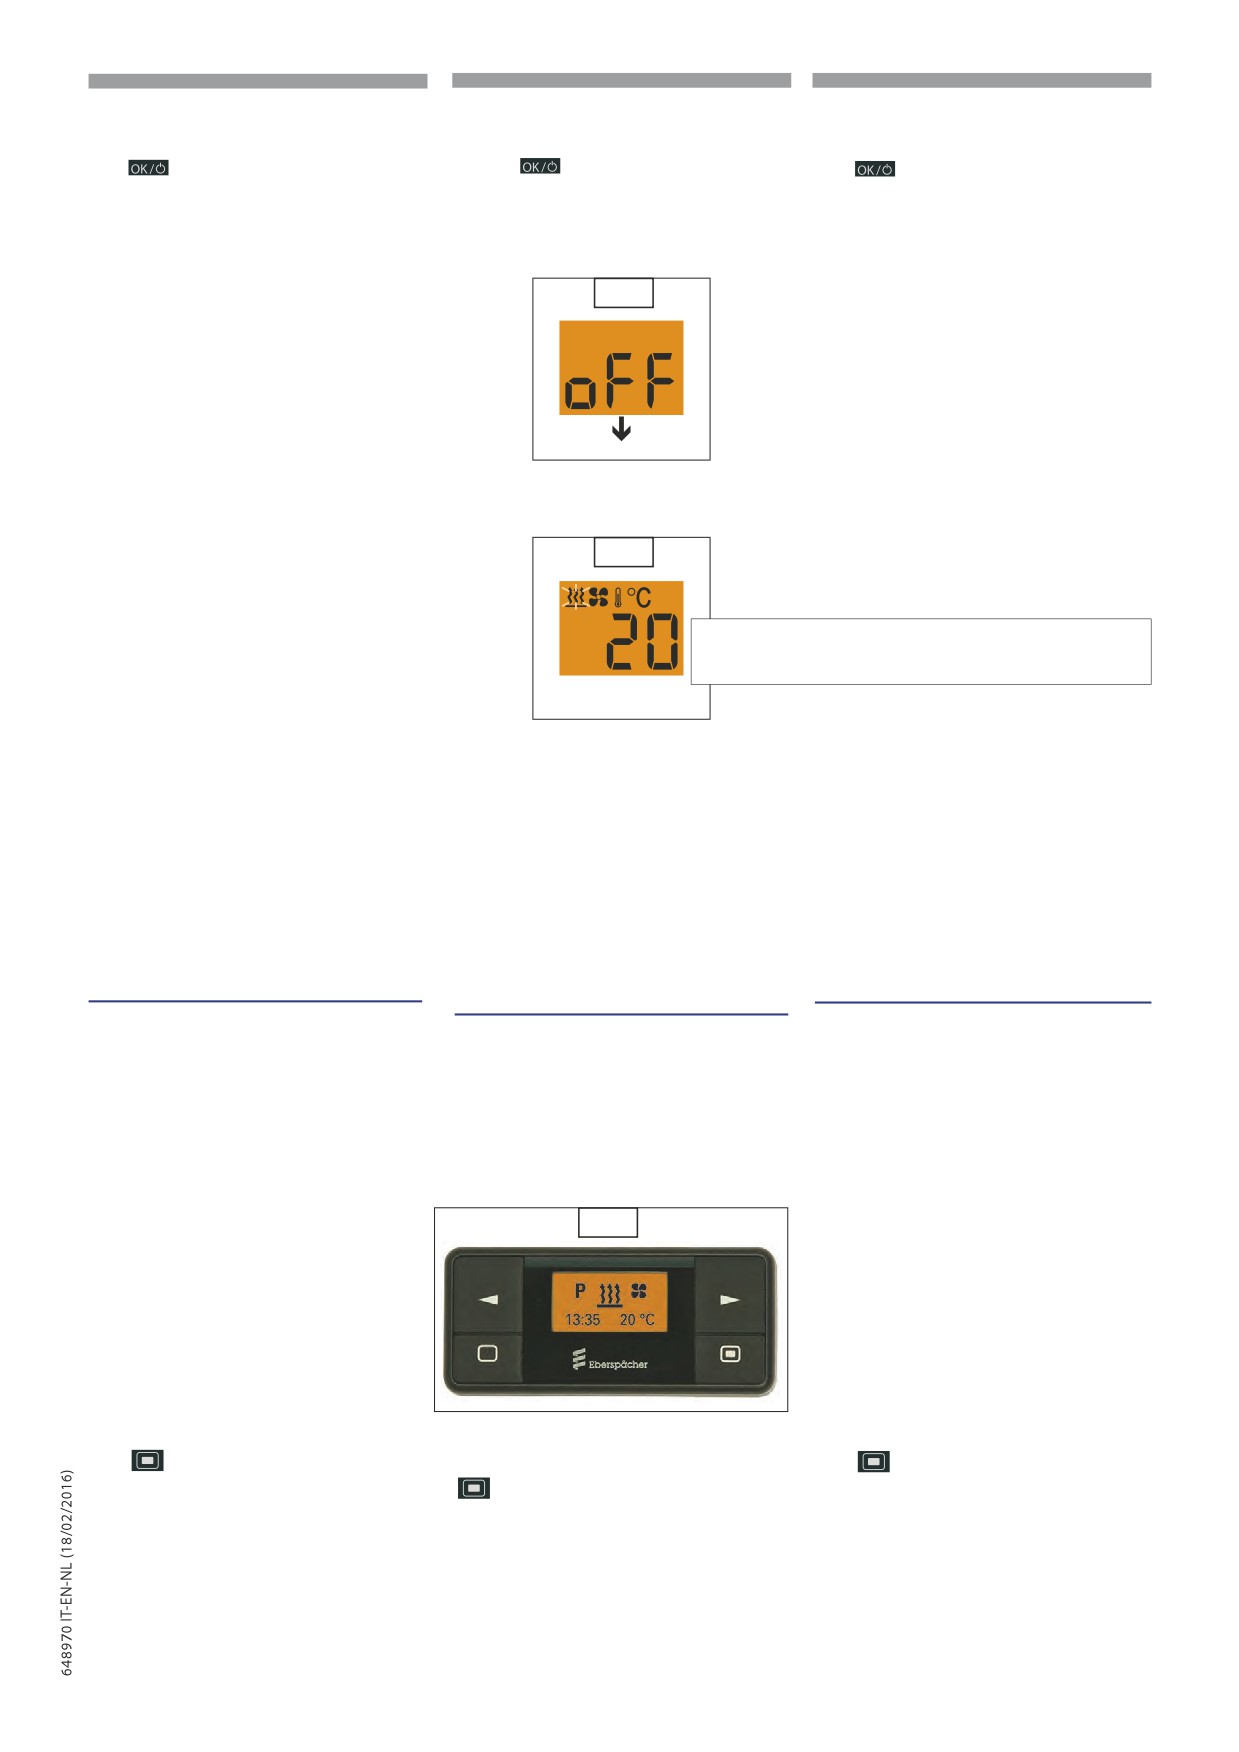
Ventilazione On con Shortpress
Ventilation On with Shortpress
Ventilatie ON met Shortpress
Attivare EasyStart Select con un tasto qualsiasi.
Activate EasyStart Select with any button.
Activeer EasyStart Select met om het even welke
Dopodiché appare la videata iniziale. Selezionare
The Start display appears. Use the
button
toets.
dalla barra del menu il simbolo di
Daarna verschijnt het beginscherm. Selecteer op
to select the
ventilation symbol in the Menu
de menubalk het symbool
ventilazione
con il tasto
bar.
Tasto
Shortpress, per meno di 2 secondi.
ventilatie
met de toets
Press the
Short press button for less than
Toets
Shortpress, minder dan 2 seconden.
2 seconds.
Riscaldatore On (23)
Heater On (23)
Verwarming ON (23)
23
Indicazione per i riscaldatori ad aria (24)
Display for wat er heaters (24)
Aanwijzing voor luchtverwarmers (24)
24
Temperatura nell’abitacolo
Temperature inside the cab
Temperatuur in de cabine
AVVERTENZA! I valori impostati
PLEASE NOTE! Set values are
WAARSCHUWING! De ingestelde
vengono
prelevati
dal
copied from the previous heating
waarden worden opgenomen
p
riscaldamento precedente.
p
mode.
p
van de vorige verwarming.
Indicazione per i riscaldatori ad aria con durata
Display for air heat ers with limited operat ing
Aanwijzing voor luchtverwarmers met
di esercizio limitata (ad es. 30 min.) (25)
time (e.g. 30 min) (25)
beperkte bedrijfsduur (bv. 30 min.) (25)
25
Temperatura nell’abitacolo
Temperature inside the cab
Temperatuur in de cabine
Durata di esercizio residua
Remaining operating
Resterende tijdsduur
AVVERTENZA! I valori impostati
WAARSCHUWING! De ingestelde
vengono
prelevati
dal
PLEASE NOTE! Set values are
waarden worden opgenomen
p
riscaldamento precedente.
copied from the previous heating
p
van de vorige verwarming.
p
mode.
2-92
IT
EN
NL
entilazione off con Shortpress
Ventilation OFF with SHORTPRESS
Ventilatie OFF met Shortpress
L’opzione ventilazione viene visualizzata sul
The Ventilat ion menu item appears in the
De optie Ventilatie wordt weergegeven op het
display.
display.
display.
Tasto
shortpress, per meno di 2 secondi.
Press the
Short press button for less
Toets
Shortpress, minder dan 2 seconden.
than 2 seconds.
Riscaldatore off (26)
Verwarming OFF (26)
Heater Off (26)
26
Videata iniziale nei riscaldatori ad aria (27)
Beginscherm luchtverwarmers (27)
27)
Start display for air heaters (
27
Temperatura nell’abitacolo
Temperature inside the cab
Temperatuur in de cabine
AVVERTENZA!
Con
WAARSCHUWING! Als
de
l’illuminazione
del
veicolo
verlichting van het voertuig
PLEASE NOTE! If the vehicle
p
ACCESA, la videata
iniziale
p
AAN is, wordt het beginscherm
lighting is ON the Start display
rimane
visualizzata
permanent weergegeven. Als
p
is shown continuously. If the
permanentemente.
Con
de verlichting van het voertuig
vehicle lighting is OFF the display
l’illuminazione
del
veicolo
UIT is, wordt het display
goes out after 10 seconds.
SPENTA,
il
display
si
uitgeschakeld na 10 seconden.
disattiva dopo
10 secondi.
18a - TIMER DIGITALE SETTIMANALE
18a - WEKELIJKSE DIGITALE TIMER
18a - WEEKLY DIGITAL TIMER FOR
PER RISCALDATORE (OPTIONAL)
VOOR DE VERWARMING (OPTIONAL)
HEATER (OPTIONAL)
IMMAGINE COMPLESSIVA (28)
GEDETAILLEERDE AFBEELDING (28)
OVERVIEW (28)
EasyStart Timer
EasyStart Timer
EasyStart Timer
Con EasyStart Timer si possono eseguire le
Met EasyStart Timer kunt u de nodige instellingen
The EasyStart Timer can be used to make the
impostazioni necessarie per il funzionamento
uitvoeren voor de werking van de verwarming
necessary settings for operation of the heater
del
riscaldatore
e/o
dell‘apparecchio
en/of het bijkomende apparaat.
and / or the add-on unit.
supplementare.
28
Funzioni dei tasti
Functies van de toetsen
Button functions
Tasto
Longpress (pressione lunga)
Toets
Longpress (lang drukken)
Il tasto si deve premere per più di 2 secondi.
Longpress button
De toets moet langer dan 2 seconden worden
Con display On o Off, il riscaldatore viene
The button must be pressed for longer than 2
ingedrukt.
acceso immediatamente (a parte se è in corso
seconds.
Met het display ON of OFF wordt de verwarming
la programmazione o durante le impostazioni).
The heater is switched on immediately if ON or
onmiddellijk ingeschakeld (behalve tijdens de
Off appears in the display (except if programming
programmering of tijdens de instellingen).
is running or while making settings).
2-93
IT
EN
NL
Tasto
Shortpress (pressione breve)
Shortpress button
Toets
Shortpress (kort drukken)
Il tasto si deve premere per meno di 2 secondi
The button must be pressed for less than 2
De toets moet minder dan 2 seconden worden ingedrukt
- con display OÓ EasyStart Timer On,
- met display OFF EasyStart Timer ON
seconds
viene visualizzato il display iniziale.
wordt het beginscherm weergegeven.
- if the display shows OÓ EasyStart Ti-
- si conferma una funzione selezionata.
mer ON, the Start display appears.
- een geselecteerde functie bevestigen.
- si confermano i dati immessi.
- ingevoerde gegevens bevestigen.
- a selected function is conÐrmed.
- inputs are conÐrmed.
Tasto
Longpress (pressione lunga)
Toets
Longpress (lang drukken)
Il tasto si deve premere per più di 2 secondi
Longpress button
De toets moet langer dan 2 seconden worden ingedrukt
- tutte le funzioni vengono disattivate.
The button must be pressed for longer than 2
- alle functies worden uitgeschakeld.
- con display OÓ EasyStart Timer On,
seconds
- met display OFF EasyStart Timer ON
viene visualizzato il display iniziale.
wordt het beginscherm weergegeven.
- all functions are ended.
- if the display shows OÓ EasyStart Ti-
mer On, the Start display appears.
Tasto
Shortpress (pressione breve)
Shortpress button
Toets
Shortpress (kort drukken)
Il tasto si deve premere per meno di 2 secondi
The button must be pressed for less than 2
De toets moet minder dan 2 seconden worden ingedrukt
- la funzione attiva visualizzata viene
- de weergegeven actieve functie wordt
seconds
uitgeschakeld, de andere functies blijven
disattivata, le altre funzioni attive
- the displayed, activated function is en-
geactiveerd.
rimangono attivate.
ded, other activated functions are retai-
- Telkens als Shortpress wordt geactiveerd,
- Ad ogni azionamento di Short press
ned.
keert het display terug naar het vorige
il display torna al livello superiore
hogere niveau tot aan EsasyStart Timer
- with each Shortpress the display
precedente Ðno ad EasyStart Timer OÓ.
OFF.
changes to a next-higher level up to
- Viene visualizzata la videata iniziale e
EasyStart Timer OÓ.
- Het beginscherm wordt weergegeven
nessuna funzione è attiva EasyStart
en er is geen enkele functie actief
- the Start display appears and no fun-
Timer OÓ.
EasyStart Timer OFF.
ction is active: EasyStart Timer OÓ.
- EasyStart Timer bevindt zich in het
- EasyStart Timer si trova nel sottomenu
- EasyStart Timer is in submenu the
submenu de instelling wordt voltooid,
l‘impostazione viene terminata, i valori
setting is
de reeds ingesteld waarden worden niet
già impostati non vengono salvati.
- exited, already set values are not sa ved.
opgeslagen.
- con display OÓ EasyStart Timer On,
- met display OFF EasyStart Timer ON
- if the display shows OÓ EasyStart Ti-
viene visualizzato il display iniziale.
wordt het beginscherm weergegeven.
mer On, the Start display appears.
Premere 1 volta / tenere premuto il tasto
Press
button 1x / keep pressed
Druk 1 keer op / houd de toets
ingedrukt
- EasyStart Timer si trova nel menu
- EasyStart Timer is in the Main menu and
- EasyStart Timer bevindt zich in het
principale e viene visualizzata la videata
the Start display appears
in the
hoofdmenu; het beginscherm verschijnt
iniziale nella barra del menu viene
Menu bar the next, righthand symbol
in de menubalk in het midden
visualizzato al centro e lampeggiante il
appears in the middle and ×ashing.
en knipperend rechts het volgende
successivo simbolo a destra.
- EasyStart Timer is in the submenu,
symbool.
- EasyStart Timer si trova nel sottomenu
the displayed value is changed (larger),
- EasyStart Timer bevindt zich in het
il valore visualizzato viene cambiato
or the next selection is displayed.
submenu de weergegeven waarde
(incrementato),
oppure
viene
wordt gewijzigd (verhoogd) of wordt de
- if the display shows OÓ EasyStart Ti-
visualizzata la successiva selezione.
volgende selectie weergegeven.
mer On, the Start display appears.
- con display OÓ EasyStart Timer On,
- met display OFF EasyStart Timer ON
viene visualizzato il display iniziale.
wordt het beginscherm weergegeven.
Premere 1 volta / tenere premuto il tasto
Druk 1 keer op / houd de toets
ingedrukt
Press
button 1x / keep pressed
- EasyStart Timer si trova nel menu
- EasyStart Timer bevindt zich in het
- EasyStart Timer is in the Main menu
principale e viene visualizzato il display
hoofdmenu; het optionele display
and the Start display appears in the
opzionale nella barra del menu viene
verschijnt
in de menubalk in het
Menu bar the next, lefthand symbol ap-
visualizzato al centro e lampeggiante il
midden en knipperend links het
pears in the middle and ×ashing.
successivo simbolo a sinistra.
volgende symbool.
- EasyStart Timer is in the submenu,
- EasyStart
Timer si
trova
nel
- EasyStart Timer bevindt zich in het
the displayed value is changed (smal-
sottomenuil valore visualizzato viene
submenude weergegeven waarde
ler), or the next selection is displayed.
cambiato (decrementato), oppure viene
wordt gewijzigd (verlaagd) of wordt de
- if the display shows OÓ EasyStart Ti-
visualizzata la successiva selezione.
volgende selectie weergegeven.
mer On, the Start display appears.
- con display OÓ EasyStart Timer On,
- met display OFF EasyStart Timer ON
viene visualizzato il display iniziale.
wordt het beginscherm weergegeven.
-
2-94
IT
EN
NL
COMANDO E IMPOSTAZIONE
OPERAT ION AND SE TTING/ADJUSTMENT
BEDIENING EN INSTELLING
Avvertenze sull’impiego e la regolazione
Notes on operation and setting
Waarschuwingen met betrekking tot het
gebruik en de regeling
Attivare EasyStart Timer
Activat ing the EasyStart Timer
Se il display non è illuminato, si deve attivare
If the display is not lit the EasyStart Timer must be
EasyStart Timer inschakelen
Als het display niet verlicht is, dient EasyStart Timer
EasyStart Timer (non in Riscaldamento On con
activated (not if heating On with Longpress).
geactiveerd te worden (niet met Verwarming ON
Longpress).
Short press on one of the four buttons, the Start
met Longpress).
Shortpress su uno dei quattro tasti, sul display
display appears in the display, then continue with
Shortpress op een van de vier toetsen, op het
viene visualizzata la videata iniziale, quindi si
the operation or setting.
display wordt het beginscherm weergegeven,
continua con l’impiego o la regolazione.
vervolgens gaat u verder met het gebruik of de
regeling.
Activating a menu item
Attivare l’opzione del menu
De optie van het menu activeren
The symbol of the menu item to be activa ted
Het symbool van de optie van het menu dat
Il simbolo dell’opzione del menu da attivare viene
appears in the middle and flashing in the display.
geactiveerd moet worden knippert in het
visualizzato lampeggiante al centro del display.
In the case of several activated menu items the
midden van het display. Als er verschillende
Se sono attivate diverse opzioni del menu, i
opties van het menu zijn geactiveerd, worden
symbols are displayed alternately.
simboli vengono visualizzati alternativamente.
de symbolen afwisselend weergegeven.
Display
Display
Display
The display is lit
Il display è illuminato
• during use of the EasyStart Timer.
Het display is verlicht
• durante l’uso di EasyStart Timer.
• tijdens het gebruik van EasyStart Timer.
• if terminal 58 is connected, with
• quando si collega il morsetto 58, se è
switched on vehicle lighting.
• wanneer de klem 58 wordt
attivata l’illuminazione del veicolo.
• if the heater / add-on heater is On.
aangesloten, als de verlichting van
• in Riscaldatore / apparecchio
het voertuig is ingeschakeld.
supplementare On.
• met de Verwarming / bijkomend
apparaat ON.
Display disappears
Il display si spegne
Het display wordt uitgeschakeld
If the vehicle lighting is switched off, no heater
Se l’illuminazione del veicolo è disinserita, nessun
Als de verlichting van het voertuig uitgeschakeld
or add-on unit is switched on or if no setting or
riscaldatore o apparecchio supplementare
is, is geen enkele verwarming of bijkomend
actuation is made, the display goes out within
è attivato o non viene eseguita nessuna
apparaat geactiveerd, wordt er geen regeling
10 seconds, i.e. the EasyStart Timer switches to
regolazione o nessun azionamento,il display si
of inschakeling uitgevoerd, het display wordt
standby.
spegne entro 10 secondi, vale a dire, EasyStart
binnen 10 seconden uitgeschakeld, i.e. EasyStart
For renewed input, one of the four buttons
Timer va in standby.
Timer schakelt over op stand-by.
must be pressed first (not in hea ting On with
Per poter reinserire dati si deve premere prima
Om de gegevens opnieuw te kunnen invoeren,
Longpress).
uno dei quattro tasti (non in Riscaldamento on
dient u eerst een van de vier toetsen in te drukken
con Longpress).
(niet met Verwarming ON met Longpress).
Simbolo lampeggiante / valore lampeggiante
Knipperend symbool / knipperende waarde
Flashing symbol / flashing val ue
Si può attivare un simbolo lampeggiante nella
Een knipperend symbool in de hoofdmenubalk
In the Main menu a flashing symbol in the Menu
barra del menu principale con il tasto
kan geactiveerd worden met de toets
bar is activated with the
button.
Con il tasto
si può attivare nel
Met de toets
kunt u in het submenu
In the submenu a flashing value can be confirmed
sottomenu un valore lampeggiante o una
een knipperende waarde of een selectie
a selection made using the or button.
selezione.
activeren.
Riscaldamento On con Longpress
Heat ing On with Longpress
Verwarming ON met Longpress
Il riscaldatore viene acceso immediatamente.
The heater is switched on immediately. An add-on
De verwarming
wordt
onmiddellijk
Contemporaneamente non viene acceso un
heater is not switched on immediately.
ingeschakeld. Op hetzelfde moment wordt er
apparecchio supplementare.
geen bijkomend apparaat ingeschakeld.
Heat ing OFF with Longpress
Riscaldamento Off con Longpress
If a heater and an add-on unit is in opera- tion
Verwarming OFF met Longpress
Se sono attivi un riscaldatore e un apparecchio
both are switched off.
Als de verwarming en een bijkomend apparaat
supplementare, vengono spenti entrambi.
geactiveerd zijn, worden ze beiden uitgeschakeld.
Annullare / terminare le impostazioni
Cancel / exit settings
De instellingen annuleren / voltooien
L’impostazione si può interrompere o terminare
The setting can be cancelled or exited by pressing
De instelling kan onderbroken of voltooid
con il tasto
the
button.
worden met de toets
Confermare l’immissione
Confirm input
De invoer bevestigen
Le impostazioni e le modifiche devono essere
The settings and changes must al ways be
De instellingen en de wijzigingen moet altijd
sempre confermate con il tasto
, altrimenti
confirmed by pressing the
button, otherwise
bevestigd worden met de toets
, anders
si perdono i dati.
they are lost.
gaan de gegevens verloren.
2-95
IT
EN
NL
Impostare durata di esercizio
De bedrijfsduur instellen
Setting the operat ing time
La durata di esercizio si può impostare con il
De bedrijfsduur kan individueel ingesteld
The operating time can be set using the
tasto
in modo individuale.
worden met de toets
button. Setting range of the opera ting time min.
Campo di regolazione della durata di esercizio
Veld om de bedrijfsduur te regelen min.
10 - max. 120 minutes, the input is made in
min. 10 - max. 120 minuti, l’immissione avviene
10 - max. 120 minuten, de invoeging vindt
1 min. intervals. Continuous heating mode is
in incrementi di
1 min. Nei riscaldatori ad
plaats met een toename van
1 min. Met
additionally possible for air heaters.
aria è possibile attivare anche la modalità di
luchtverwarmers is het ook mogelijk om de
The operating time for a hea ter and for an
riscaldamento continuo.
continu verwarmingsmodaliteit te activeren.
add-on unit can be set independently of each
La durata di esercizio per un riscaldatore e per
De bedrijfsduur voor een verwarmer en voor een
other.
un apparecchio supplementare si può impostare
bijkomend apparaat kan afzonderlijk worden
indipendentemente.
ingesteld.
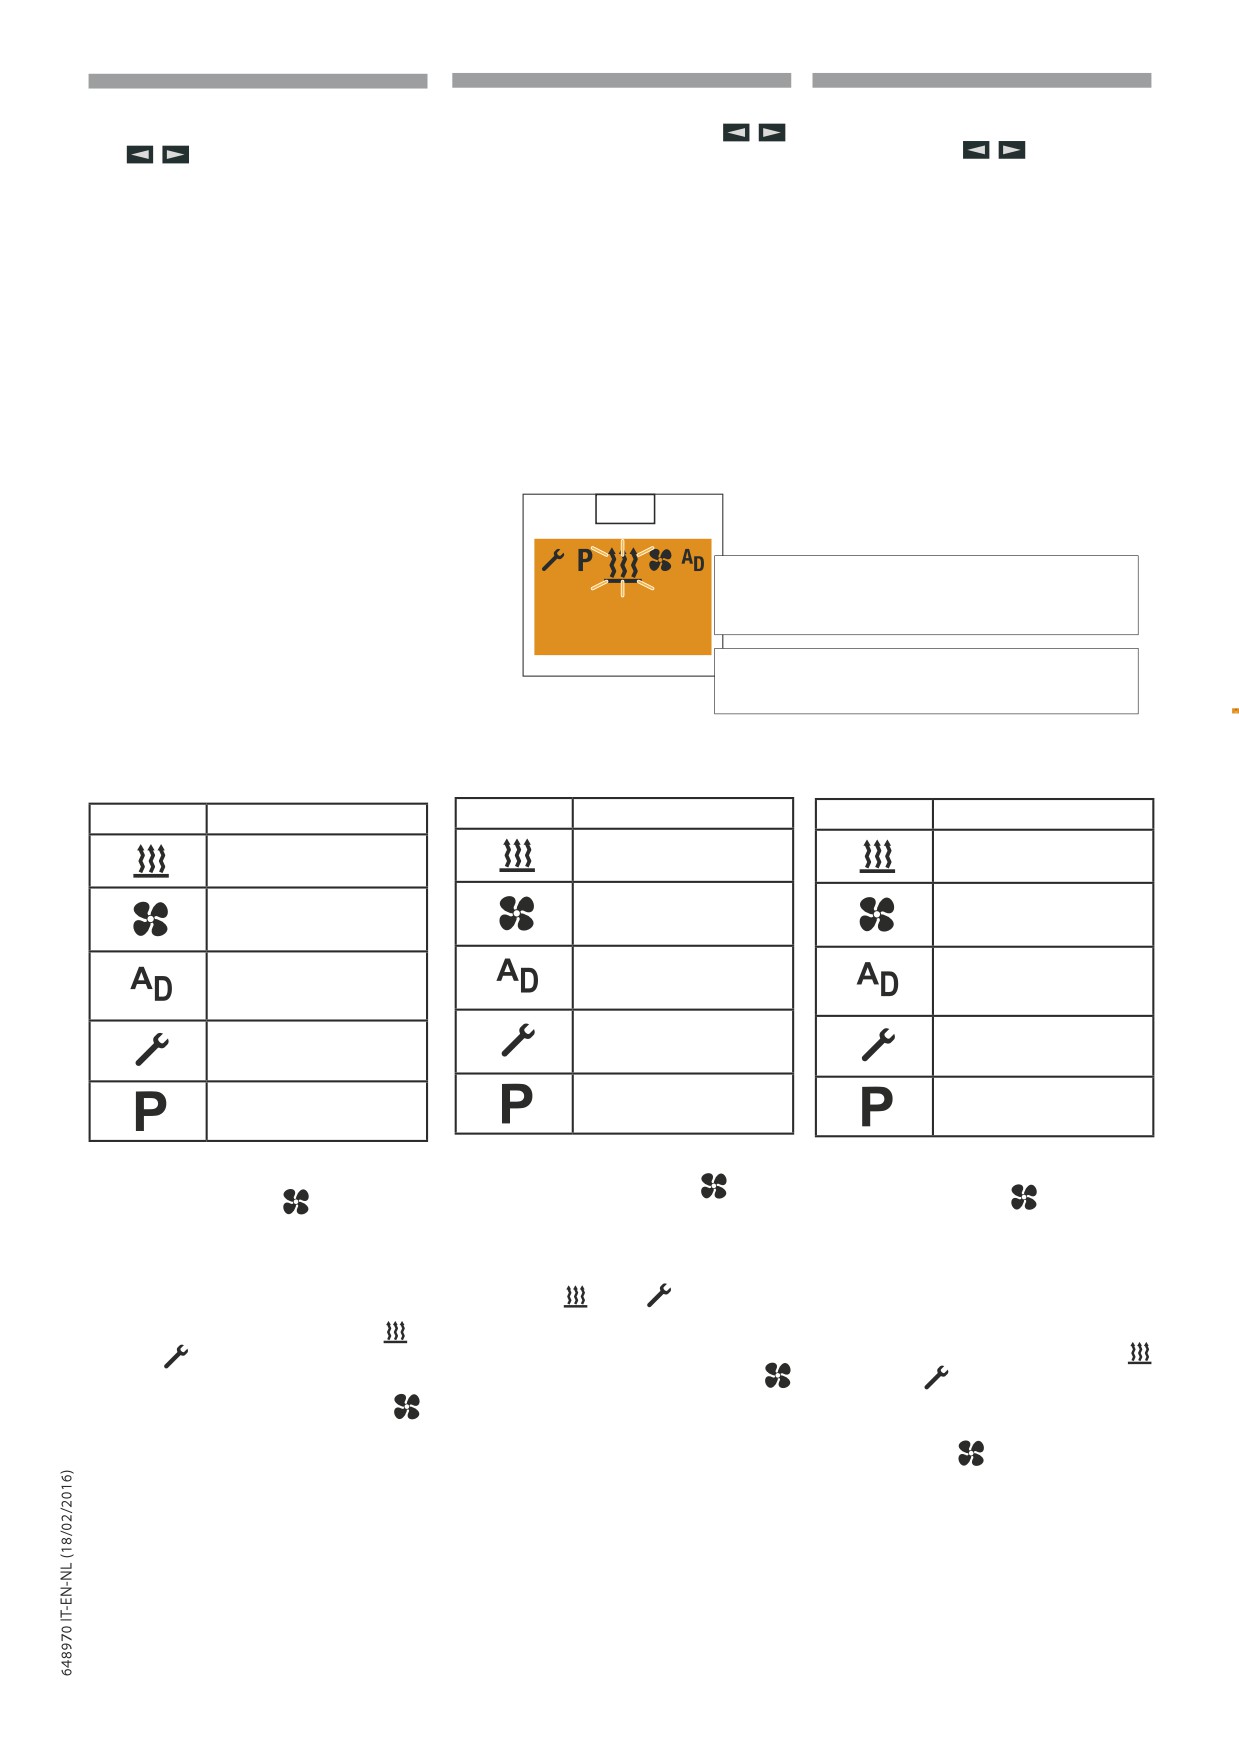
Menu principale (29)
Main menu (29)
Hoofdmenu (29)
29
Barra del menu
Menu bar
Menubalk
17:30
21 °C
Zona di stato
Status area
Statuszone
Menu bar
Menubalk
Barra del menu
The following menu items can be selected.
Nel menu sono disponibili le seguenti opzioni.
Het menu bevat de volgende opties.
Symbol
Function
Symbool
Functie
Simbolo
Funzione
Heating On / OÓ
Verwarming ON / OFF
Riscaldamento ON / OFF
Ventilation On / OÓ
Ventilatie ON / OFF
Ventilazione ON / OFF
Bijkomend apparaat ON/
Apparecchio supplementare
Add-on unit On / OÓ
On / OÓ (ad es. un secondo
(e.g. a second heater)
OFF (bv. een tweede
verwarmer)
riscaldatore)
Settings
Instellingen
Impostazioni
Program / Preselection
Programma / keuze
Programma / preselezione
PLEASE NOTE! The
symbol
Il
simbolo
dell’opzione
Het symbool
van de optie
for the ventilat ion menu item
VENTILATIE van het menu
VENTILAZIONE del menu viene
p
is now displayed, if the heater
p
visualizzato solo se la funzione
p
wordt alleen weergegeven
supports this function. Only
è supportata dal riscaldatore. Nei
als de functie ondersteund
the
and
symbols are
wordt door de verwarmer. In
veicoli in modalità ADR vengono
displayed in machines in ADR
voertuigen in ADR-modaliteit
visualizzati solo i simboli
e
mode. If the heater supports
worden alleen de symbolen
. Se il riscaldatore supporta
la funzione Ventilazione viene
the Ventilation function the
en
weergegeven. Als de
visualizzato anche il simbolo
symbol is also displayed.
verwarmer de functie Ventilatie
ondersteunt, dan wordt ook het
symbool weergegeven.
Zona di stato
Stat us area
Statuszone
Nella zona di stato, quando non è attivata
If no menu item is activa ted, the current time
In de statuszone, als er geen optie van het menu is
nessuna opzione del menu, viene visualizzata
and, if an
(optional) temperature sensor is
geactiveerd, wordt het huidige uur weergegeven
l‘ora attuale e, se è collegato un sensore di
connected, the temperature in the vehicle
en, indien er een temperatuursensor (optional) is
temperatura (optional), la temperatura all‘interno
interior are displayed in the status area.
aangesloten, ook de temperatuur in de cabine.
dell‘abitacolo del veicolo.
2-96
IT
EN
NL
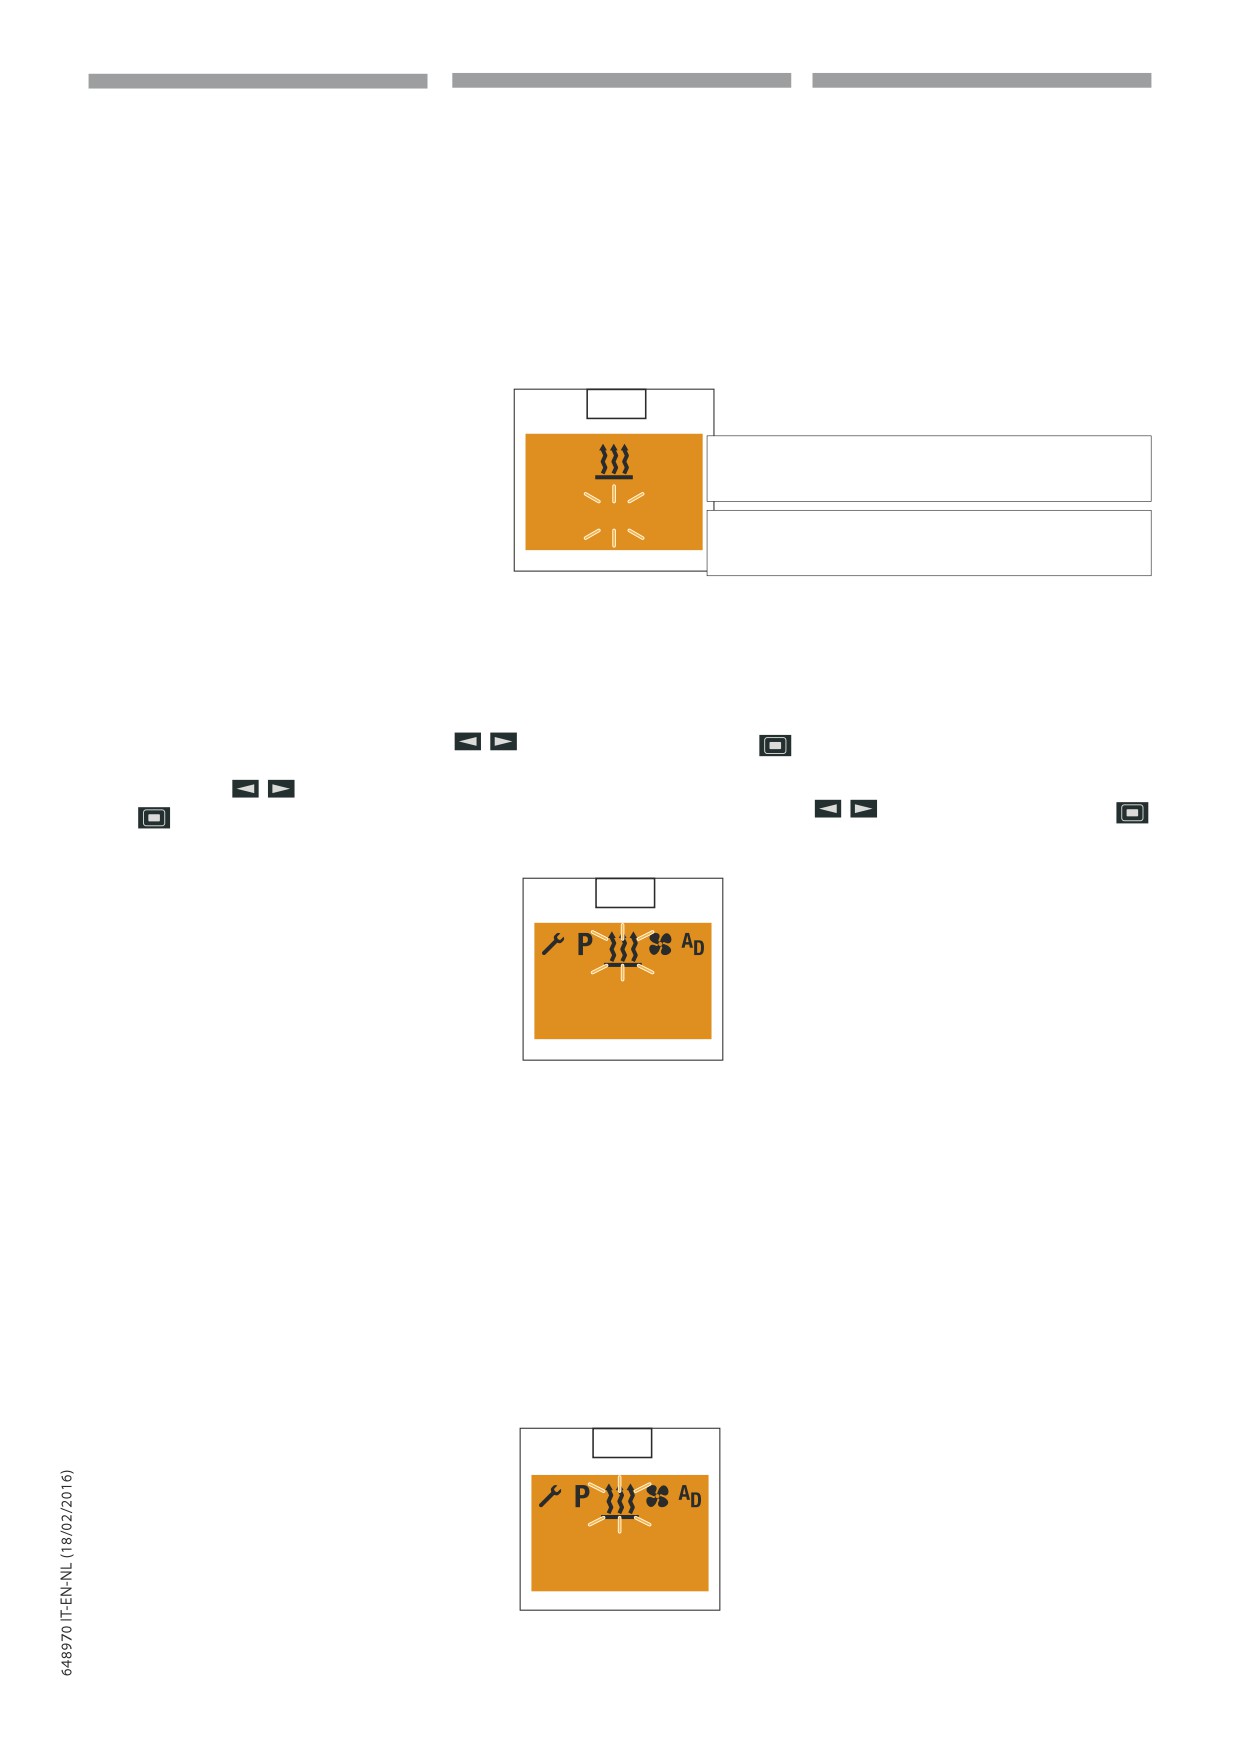
Videata iniziale:
Start display:
Beginscherm:
• ora attuale, ad es. le 17:30
• Time, e.g. 17:30
• het huidige uur, bv. 17.30 uur
• temperatura all‘interno dell‘abitacolo
• Temperature in the vehicle interior,
• de temperatuur in de cabine van het
del veicolo, ad es. 21 °C.
e.g. 21 °C.
voertuig, bv. 21°C.
Se è attivata un‘opzione del menu (Riscaldamento,
If a menu item is activa ted (heating, ventilation,
Als er een optie van het menu is geactiveerd
Ventilazione,
Apparecchio supplementare,
addon unit, settings or program / preselection),
(Verwarming, Ventilatie, Bijkomend apparaat,
Impostazioni o Programma
/ preselezione),
different information is displayed in the sta tus
Instellingen of Programma/ keuze), worden er in
nella zona di stato vengono visualizzate diverse
area; this appears and described in the relevant
de statuszone verschillende soorten informatie
informazioni, riportate e descritte nelle relative
sections.
weergegeven, die in de desbetreffende
sezioni.
paragrafen worden vermeld en beschreven.
Sottomenu (30)
Submenu (30)
Submenu (30)
30
Barra del menu
Menu bar
Menubalk
⊳ 107 min
Zona d‘immissione
Input area
Toevoerzone
Display: e.g. Heat ing On / Operating time 107
Aanwijzing: bv. Verwarming ON / Bedrijfsduur
Indicazione: ad es. Riscaldamento On /Durata di
min.
107 min.
esercizio 107 min.
In the submenu, the symbol of the selected
In het submenu wordt in het midden van het
Nel sottomenu viene visualizzato al centro
menu item appears in the middle of the display.
display het symbool van de geselecteerde optie
del display il simbolo dell‘opzione del menu
The corresponding set value is displayed flashing
van het menu weergegeven.
selezionata.
in the entry area and can be set using the
De desbetreffende ingestelde waarde wordt
Il relativo valore impostato viene visualizzato
button and confirmed with the
knipperend weergegeven in de invoerzone. Deze
lampeggiante nella zona d‘immissione e si può
button.
waarde kan ingesteld worden met de toetsen
impostare con i tasti
e confermare con
en bevestigd worden met de toets
il tasto
Start display after switching on (31)
Beginscherm bij de inschakeling (31)
Videata iniziale all’accensione (31)
31
17:30
21 °C
If no menu item is activa ted, the Start display
Als er geen enkele optie van het menu
La videata iniziale viene visualizzata, se non
appears with a flashing hea ter symbol in the
is
geactiveerd, wordt het beginscherm
è attivata nessuna opzione del menu, con un
weergegeven
met
een
knipperend
simbolo di riscaldamento lampeggiante al centro
Menu bar, with the current time and the actual
verwarmingssymbool in het midden van de
della barra del menu, insieme all’ora attuale e alla
menubalk, samen met het huidige uur en de
tempera ture in the status area.
temperatura effettiva nella zona di stato.
temperatuur in de statuszone.
Altre possibili operazioni sono:
Other possible actions are:
Andere mogelijke operaties zijn:
• Heating Immediately with
• Riscaldamento immediato con
• Onmiddellijke verwarming met
Longpress.
Longpress.
Longpress.
• Heating On with Shortpress, in addi-
• Riscaldamento On con
• Verwarming ON met Shortpress.
tion conÐrm and if applicable set the
Shortpress, inoltre confermare ed
temperature setpoint and operating
Bevestig en stel eventueel de
eventualmente impostare il valore
time.
nominale temperatuurwaarde en de
nominale della temperatura e la
bedrijfsduur in.
durata di esercizio.
• select a new menu item.
• selecteer een nieuwe optie van het
• selezionare una nuova opzione del
menu.
Displays for activated menu items
menu.
Heating On (32)
Indicazioni con le opzioni del menu attivate
Aanwijzingen met de opties van het menu geactiveerd
32
Riscaldamento On (32)
Verwarming ON (32)
60 min
21 °C
Altre possibili operazioni sono:
Andere mogelijke operaties zijn:
Other possible actions are:
• Riscaldamento OÓ.
• Verwarming OFF.
• Heating OÓ
• Selezionare una nuova opzione del
• Selecteer een nieuwe optie van het
• Select a new menu item.
menu.
menu.
2-97
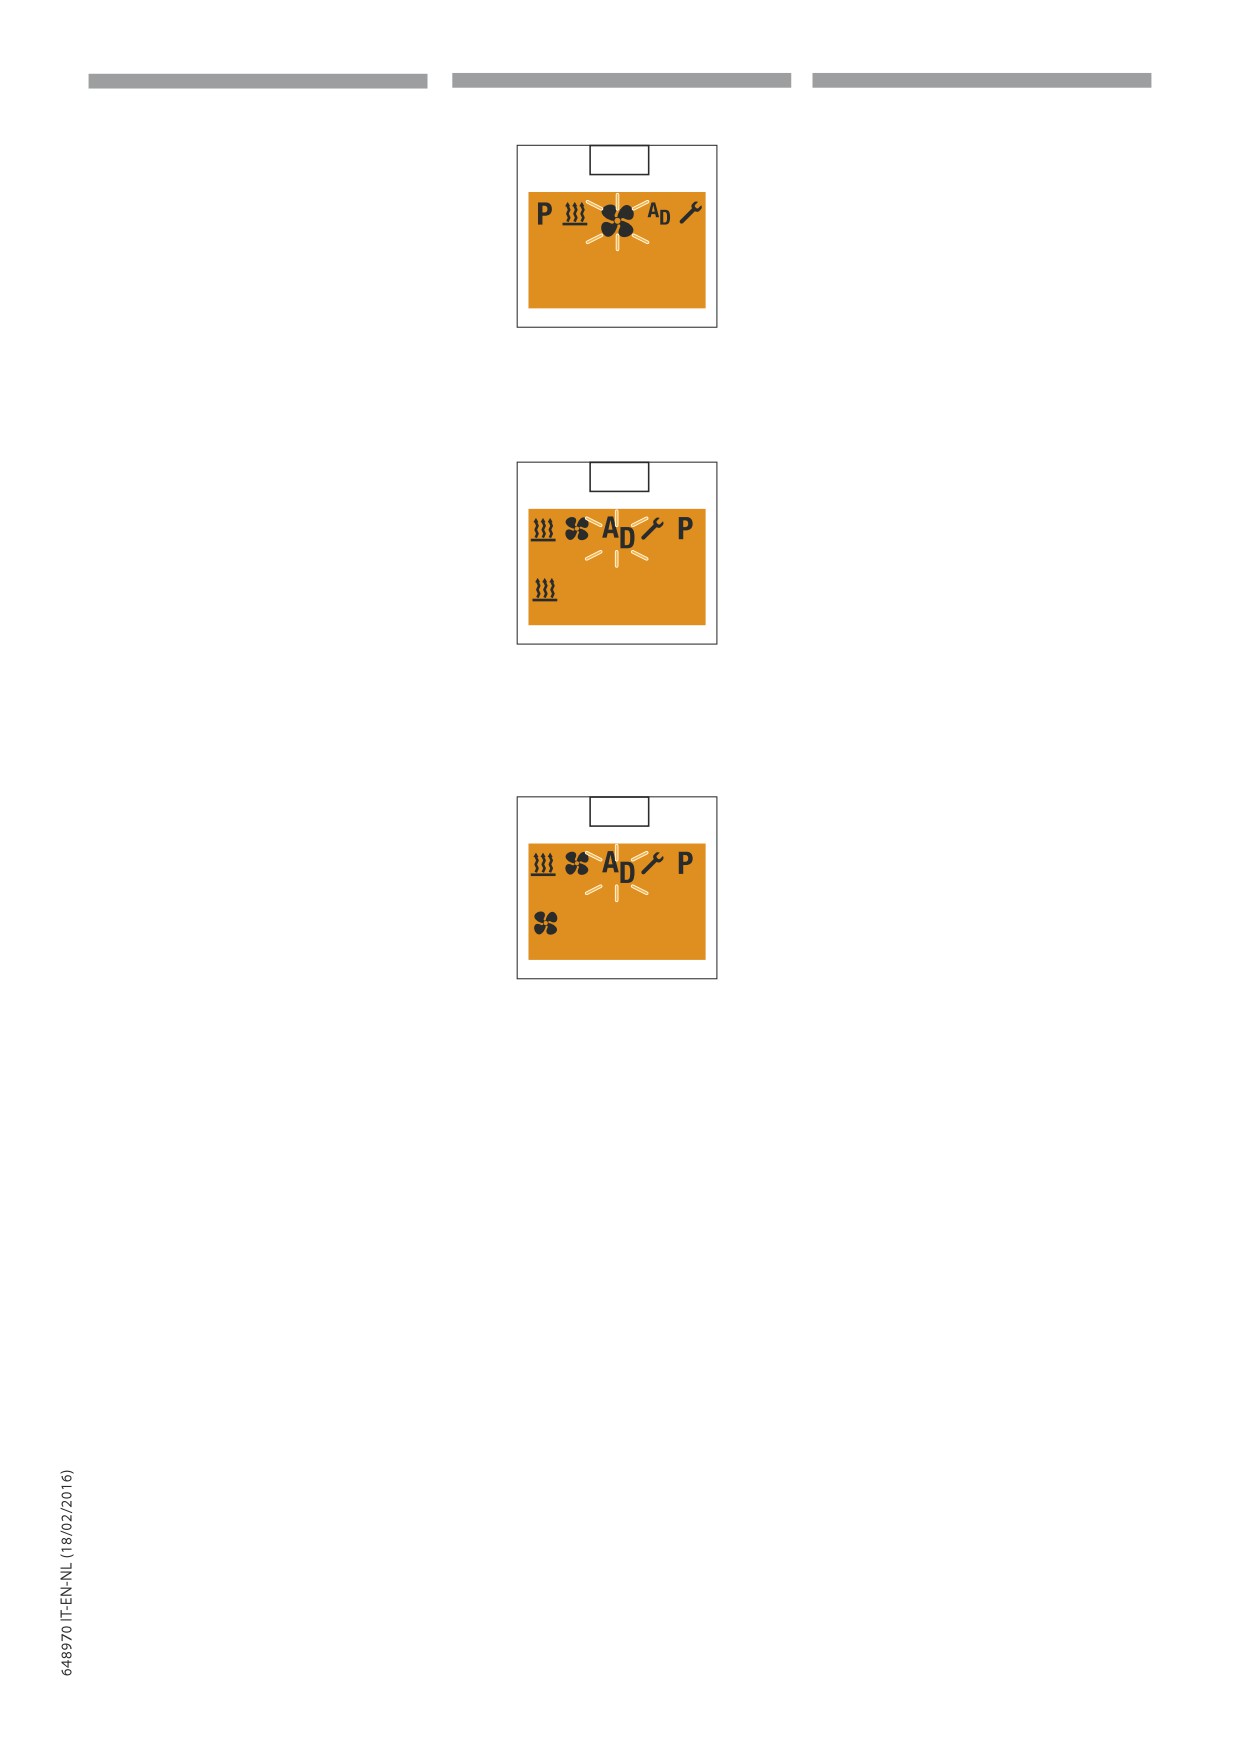
IT
EN
NL
Ventilazione On (33)
Ventilation On (33)
Ventilatie ON (33)
33
60 min
21 °C
Altre possibili operazioni sono:
Other possible actions are:
Andere mogelijke operaties zijn:
• Ventilazione OÓ, vedi pagina 15.
• Ventilat ion OÓ,
• Ventilatie OFF; zie pagina 15.
• selezionare una nuova opzione del
• select a new menu item.
• selecteer een nieuwe optie van het
menu.
menu.
Apparecchio supplementare Riscaldamento
Add-on heat er heat ing On (34)
Bijkomend apparaat Verwarming ON
On (34)
(34)
34
90 min
Altre possibili operazioni sono:
Andere mogelijke operaties zijn:
Other possible actions are:
• Apparecchio supplementare
• Bijkomend apparaat Verwarming
• Add-on unit heat ing OÓ,
Riscaldamento OÓ,
OFF,
• selezionare una nuova opzione del
• select a new menu item.
• selecteer een nieuwe optie van het
menu.
menu.
Apparecchio supplementare Ventilazione On
Add-on heat er ventilat ion On(35)
Bijkomend apparaat Ventilatie ON
(35)
35
(35)
90 min
Altre possibili operazioni sono:
Andere mogelijke operaties zijn:
Other possible actions are:
• Apparecchio supplementare
• Bijkomend apparaat Ventilatie OFF,
• Add-on unit ventilat ion OÓ,
Ventilazione OÓ,
• select a new menu item.
• selecteer een nieuwe optie van het
• selezionare una nuova opzione del
menu.
menu.
2-98
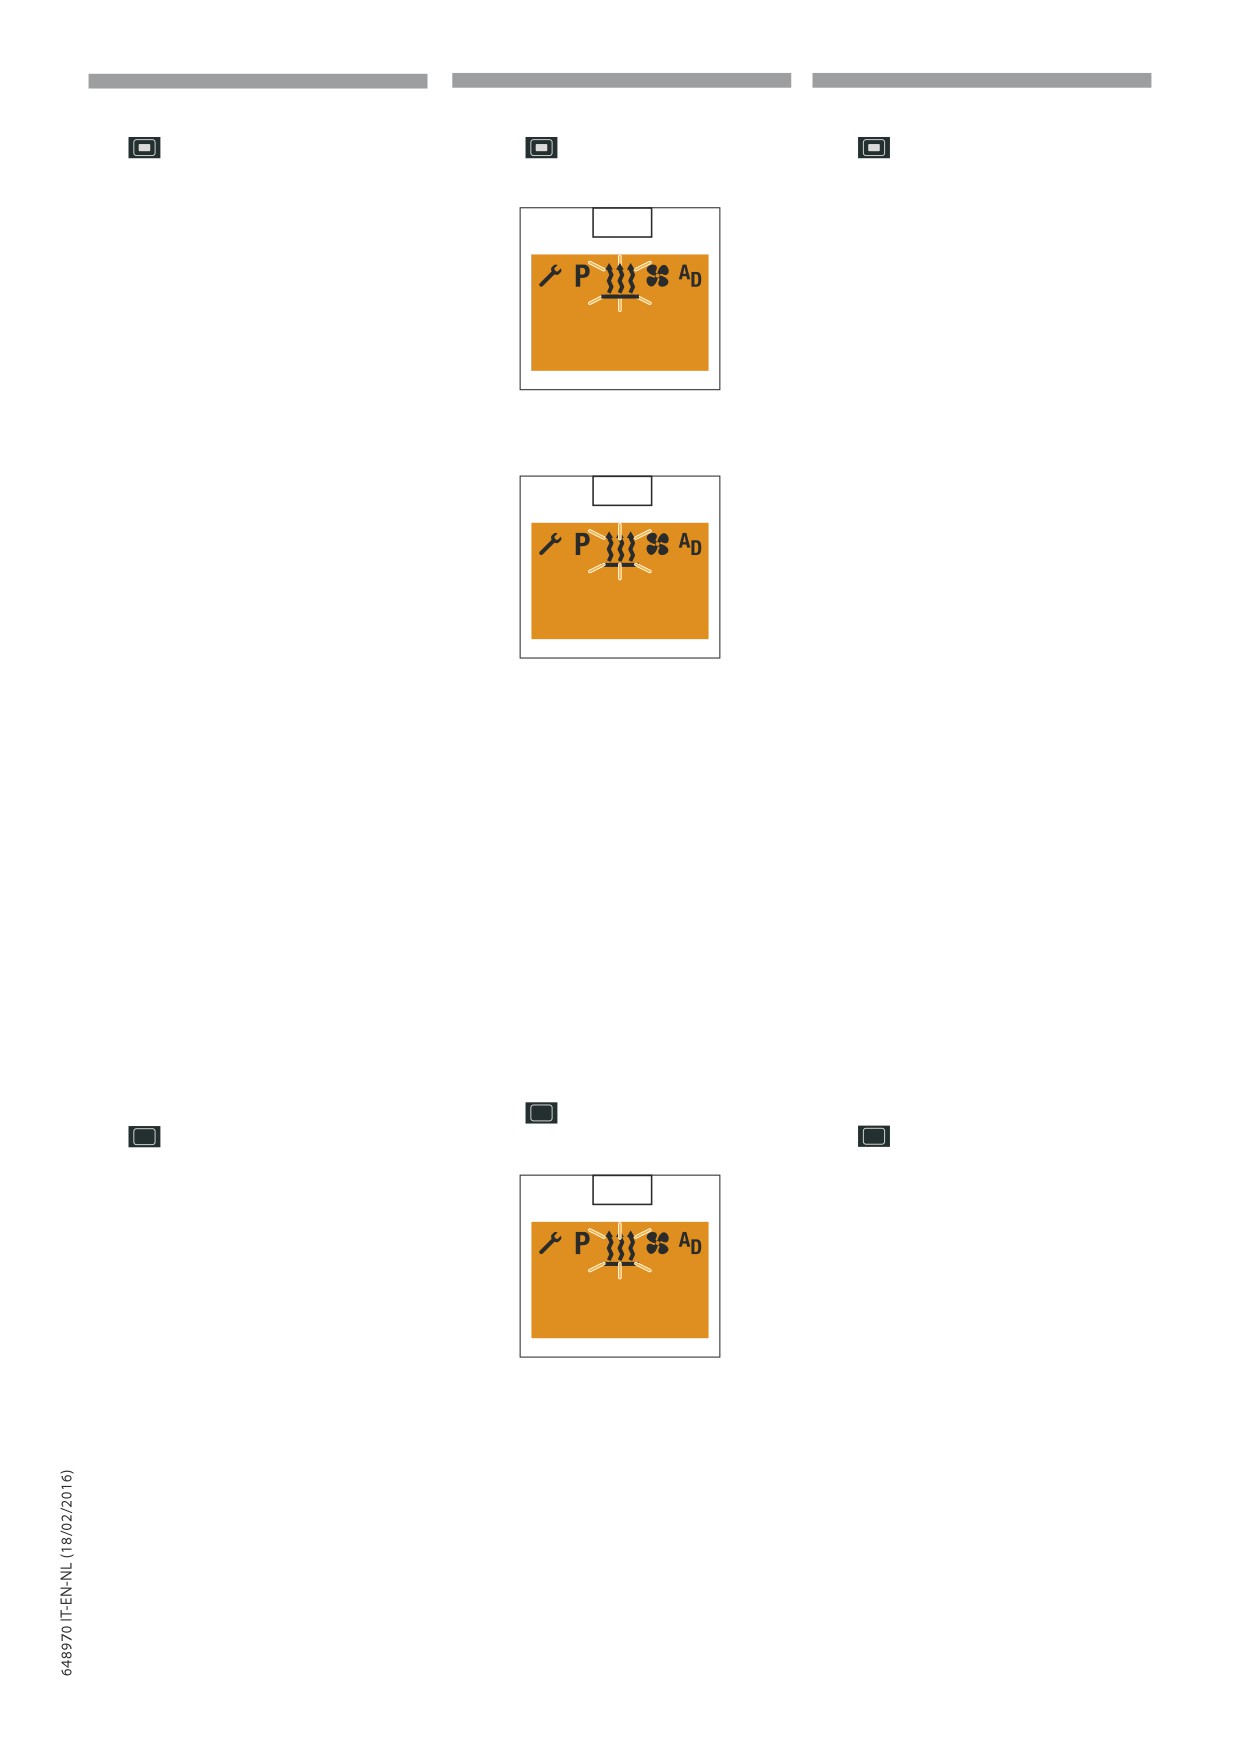
IT
EN
NL
Riscaldamento immediato con Longpress
Heating immediately with Longpress
Onmiddellijke verwarming met Longpress
(senza imposta zioni)
(without settings)
(zonder instellingen)
Tasto
Longpress, per più di 2 secondi.
Press the
Longpress button for longer than
Toets
Longpress, langer dan 2 seconden.
2 seconds.
Riscaldatore On (36).
Verwarming ON (36).
Heater On (36).
36
30 min
21 °C
Indicazione per i riscaldatori ad aria in modalità
Aanwijzing voor luchtverwarmers met continu
Display for air heaters in continuous heating
di riscaldamento continuo
(impostazione di
verwarmingsmodaliteit (fabrieksinstelling).
mode (factory setting).
fabbrica).
37
∞
21 °C
Avvertenza! All’accensione viene
Waarschuwing!
Bij
de
Please note! After switching on,
visualizzato per
2 sec.
“On” e
inschakeling wordt gedurende
“On” is displayed for 2 sec and
p
quindi la durata di esercizio
p
2 seconden “On” weergegeven
p
then the remaining operating
residua o ∞ nei riscaldatori ad
en vervolgens de resterende
time or ∞ for air heaters. Set
aria. I valori impostati vengono
bedrijfsduur
∞ van de
values are copied from the
prelevati dal riscaldamento
luchtverwarmers. De ingestelde
previous hea ting mode. If
precedente. Con Longpress
waarden worden opgenomen
Longpress is pressed during hea
durante
il
riscaldamento
van de vorige verwarming.
ting mode the display switches
l’indicazione
commuta al
Met Longpress schakelt tijdens
to the Heat ing submenu Set
sottomenu
Riscaldamento
de verwarming de aanwijzing
Temperat ure Setpoint (only for
Impostare valore nominale
over naar het submenu
air hea ter) and Set Operating
temperatura
-
(solo per il
Verwarming Instellen nominale
Time. During heating mode it
riscaldatore ad aria) e Impostare
temperatuurwaarde
-
(alleen
is possible to s witch to another
durata di esercizio. Durante il
voor de luchtverwarmer) en
menu item. Under the Ventilat ion
Instellen bedrijfsduur. Tijdens de
riscaldamento si può commutare
menu item, check the operating
verwarming is het mogelijk om
ad un’altra opzione del menu.
time and if necessary adjust
over te gaan naar een andere
Veri care la durata di esercizio
optie van het menu. Controleer
nell’opzione Ventilazione del
(37).
de bedrijfsduur van de optie
menu, eventualmente impostarla
Ventilatie van het menu, stel ze
(37).
eventueel in (37).
Riscaldamento Off con Longpress (38)
Heating Off with Longpress (38)
Verwarming OFF met Longpress (38)
Display On, viene visualizzata l’opzione
Display On, the Heating menu item is displayed.
Display ON, de optie Verwarming van het menu
Riscaldamento del menu.
Press the
Longpress button for longer than
wordt weergegeven.
Tasto
Longpress, per più di 2 secondi.
2 seconds.
Toets
Longpress, langer dan 2 seconden.
Riscaldatore Off.
Heater Off.
Verwarming OFF.
38
O
21 °C
Dopo l’indicazione Riscaldamento Off viene
Na de aanduiding Verwarming OFF wordt het
After the Heating Off the Start display appears.
visualizzata la videata iniziale. In Illuminazione
beginscherm weergegeven. Met Verlichting
If the vehicle lighting is Off the display lighting
veicolo Off dopo
10 secondi si spegne
voertuig OFF wordt de verlichting van het
goes out after 10 seconds.
l’illuminazione del display.
display na 10 seconden uitgeschakeld.
2-99
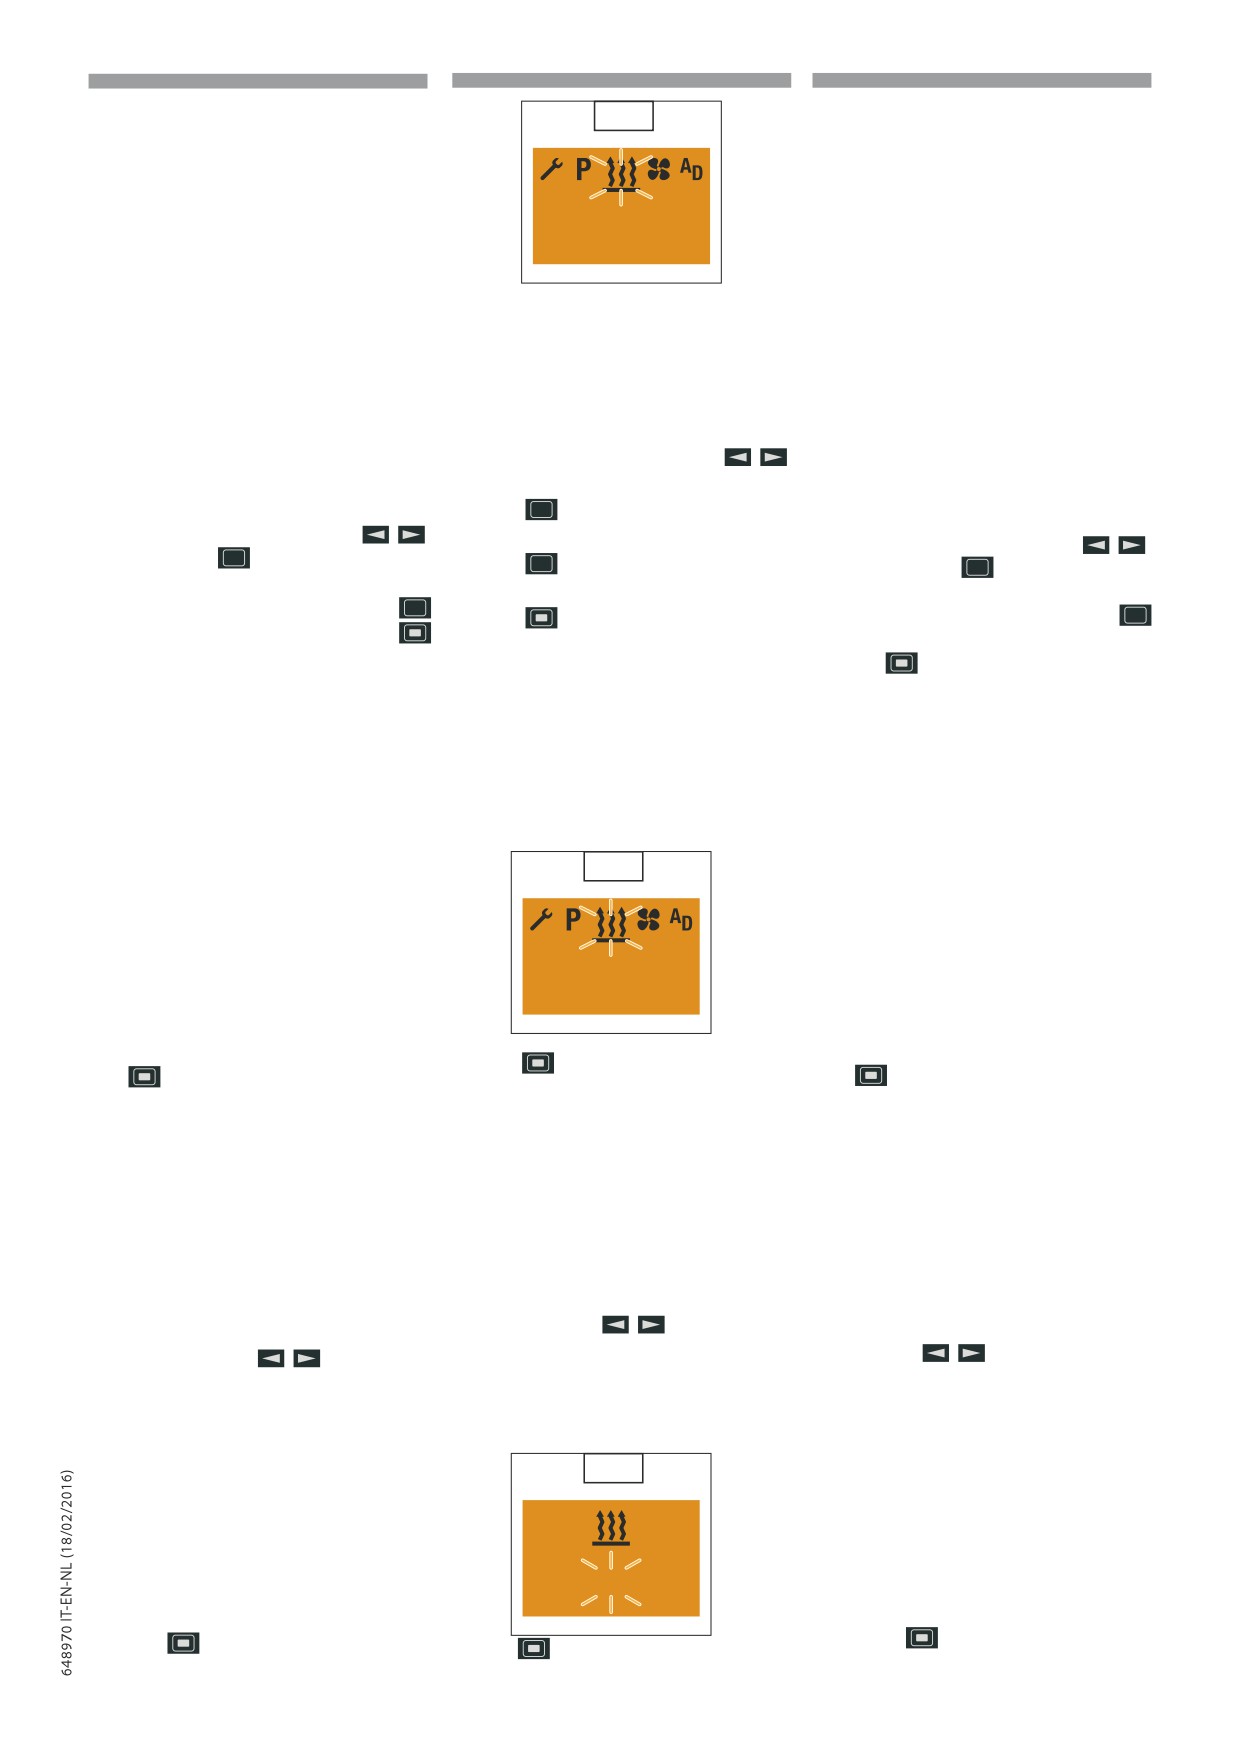
IT
EN
NL
39
17:30
21 °C
Please note! With Heat
Waarschuwing!
Met
Avvertenza! In Riscaldamento
ing O with Longpress all
Verwarming
OFF
met
O con Longpress vengono
p
active functions are ended.
p
Longpress worden alle actieve
p
disattivate tutte le funzioni
The following actions are
functies uitgeschakeld. Terwijl
attive.
Mentre
è
attiva
possible during the Heating
de aanduiding Verwarming
l’indicazione
Riscaldamento
OFF geactiveerd is, kunnen
O si possono eseguire
O display: Use the
de volgende
handelingen
le
seguenti
operazioni:
button to select a menu item.
uitgevoerd
worden:
Selezionare
un’opzione
del
Shortpress button, the
Een optie van het menu
menu con il tasto
Start display appears, if the
selecteren met de toets
Tasto
Shortpress
, viene
Shortpress button is
Toets
Shortpress
,
visualizzata la videata iniziale,
pressed a gain, Display O .
weergave van het beginscherm,
nuovo azionamento tasto
Shortpress button, the
nieuwe druk op de toets
Shortpress, Display O . Tasto
Heating submenu is displayed
Shortpress, Display OFF. Toets
Shortpress, viene visualizzato
Shortpress, het submenu
(39).
il
sottomenu Riscaldamento
Verwarming wordt weergegeven
(39).
(39).
Heating On with Shortpress and with
Riscaldamento On con Shortpress e con
settings (40)
Verwarming ON met Shortpress en met
Display On, the Start display appears.
Impostazioni (40)
Instellingen (40)
Display On, viene visualizzata la videata iniziale.
Display ON, het beginscherm verschijnt.
40
17:30
21 °C
Press the
Shortpress button for less than 2
Tasto
Shortpress, per meno di 2 secondi.
Toets
Shortpress, minder dan 2 seconden.
seconds.
Avvertenza!
Le
seguenti
Please note! The following
Waarschuwing!
De volgende
impostazioni o conferme (Valore
settings and con rmations
instellingen
of
bevestigingen
p
nominale temperatura e Durata
p
(temperature setpoint and
p
(nominale temperatuurwaarde en
di esercizio) sono indispensabili.
operating time) are always
bedrijfsduur) zijn absoluut noodzakelijk.
required.
Set temperature setpoint - For air heat ers
Impostare valore nominale temperatura - solo
De nominale temperatuurwaarde instellen -
only (41)
nei riscaldatori ad aria (41)
alleen bij luchtverwarmers (41)
If applicable, use the
button to set the
Impostare eventualmente il valore nominale della
Stel eventueel de nominale temperatuurwaarde
temperature setpoint.
temperatura con il tasto
in met de toets
Temperature setpoint setting range:
Veld om de nominale temperatuurwaarde te
Campo di regolazione valore nominale
8 °C - 36 °C in 1 °C increments,
regelen:
temperatura:
46 °F - 97 °F in 1 °F increments.
8 °C - 36 °C in incrementi di 1 °C,
8 °C - 36 °C met toename van 1 °C,
46 °F - 97 °F met toename van 1 °F.
46 °F - 97 °F in incrementi di 1 °F.
41
⊳ 21 °C
Bevestig het nominale veld van de temperatuur
Confermare il campo nominale della temperatura
met de toets
con il tasto
Press the
button to confirm the temperature
setpoint.
2-100
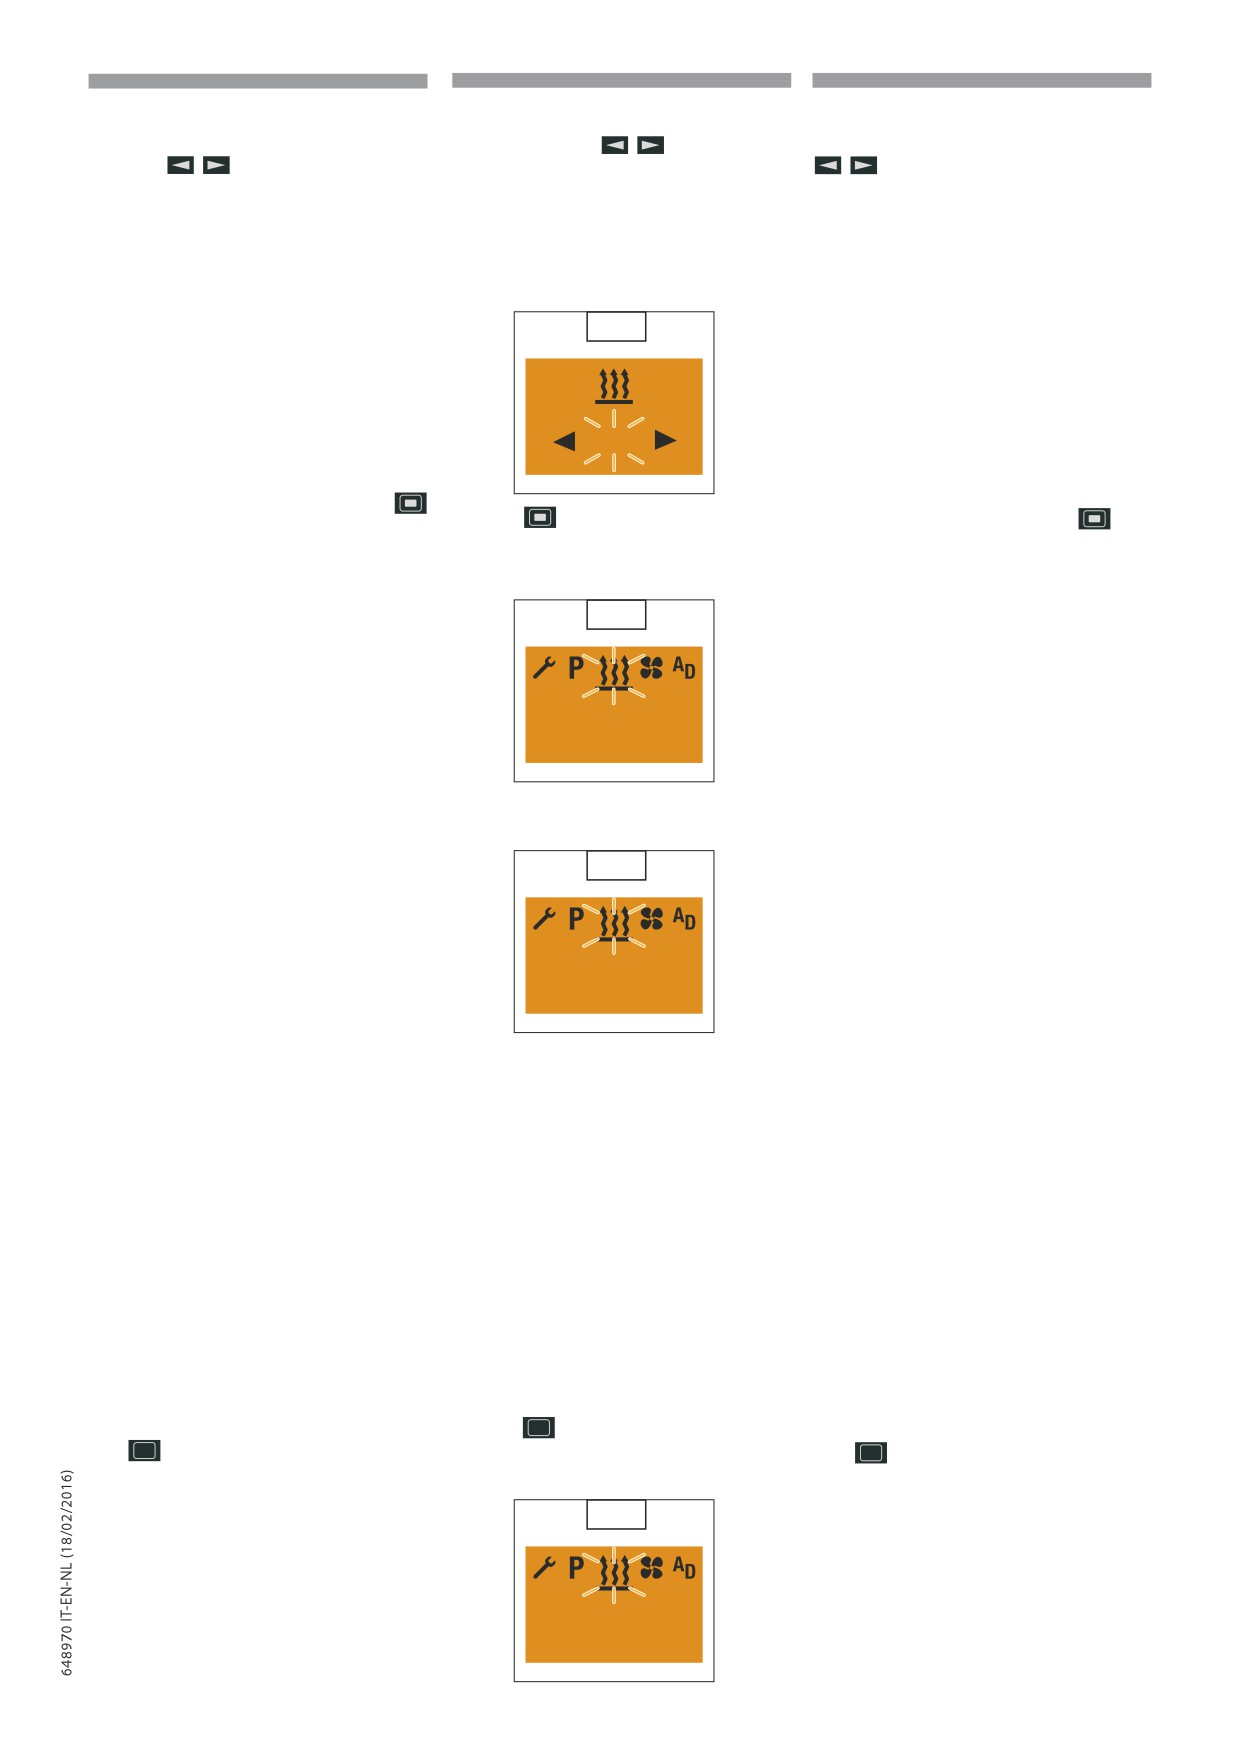
IT
EN
NL
Impostare durata di esercizio
Setting the operating time
De bedrijfsduur instellen
Impostare eventualmente la durata di esercizio
If necessary, use the
button to set the
Stel eventueel de bedrijfsduur in met de toets
con il tasto
operating time.
Campo di regolazione durata di esercizio
Veld om de bedrijfsduur te regelen
Operating time setting range (41):
(41):
Min 10 - max 120 min in 1 min. increments,
(41):
min. 10 - max. 120 min. in incrementi di 1 min.,
continuous heating mode is possible for air hea
min. 10 - max. 120 min. met toename van
nei riscaldatori ad aria è possibile la modalità di
ters.
1 min., met luchtverwarmers is de continu
riscaldamento continuo.
verwarmingsmodaliteit mogelijk.
41
60 min
Confermare la durata di esercizio con il tasto
Press the
button to confirm the operating
Bevestig de bedrijfsduur met de toets
time.
Riscaldatore On (42).
Verwarming ON (42).
Heater On (42).
42
60 min
21 °C
Display for air heaters in continuous heating
Indicazione per i riscaldatori ad aria in modalità
Aanwijzing voor luchtverwarmers met continu
mode (factory setting).
di riscaldamento continuo
(impostazione di
verwarmingsmodaliteit (fabrieksinstelling).
fabbrica).
43
∞
21 °C
Waarschuwing!
Bij
de
Avvertenza! All’accensione viene
Please note! After switching on,
inschakeling wordt gedurende
visualizzato per 2 sec. “On” e
“On” is displayed for 2 sec and
p
2 seconden “On” weergegeven
p
quindi la durata di esercizio
p
then the remaining operating
en vervolgens de resterende
residua o ∞ nei riscaldatori ad
time or ∞ for air heaters. During
bedrijfsduur
∞ van de
aria. Durante il riscaldamento
heating mode it is possible to
luchtverwarmers. Tijdens de
si può commutare ad un’altra
s witch to another menu item.
verwarming is het mogelijk om
opzione del menu. Veri care la
Under the Ventilat ion menu
over te gaan naar een andere
durata di esercizio nell’opzione
item, check the operating time
optie van het menu. Controleer
Ventilazione
del
menu,
and if necessar y adjust. The
de bedrijfsduur van de optie
eventualmente impostarla. La
changed operating time is
Ventilatie van het menu, stel
durata di esercizio modi cata
o ered a gain the next time the
ze eventueel in. De gewijzigde
viene visualizzata al successivo
system is started (43).
bedrijfsduur wordt weergegeven
avvio. (43)
bij de volgende start. (43)
Riscaldamento Off con Shortpress
Heating Off with Shortpress
Verwarming OFF met Shortpress
Display On, viene visualizzata l’opzione
Display On, the Heating menu item is displayed.
Display ON, de optie Verwarming van het menu
Riscaldamento del menu.
Press the
Shortpress button for less than 2
wordt weergegeven.
Tasto
Shortpress, per meno di 2 secondi.
seconds.
Toets
Shortpress, minder dan 2 seconden.
Riscaldatore Off (44).
Heater Off (44).
Verwarming OFF (44).
44
O
21 °C
2-101
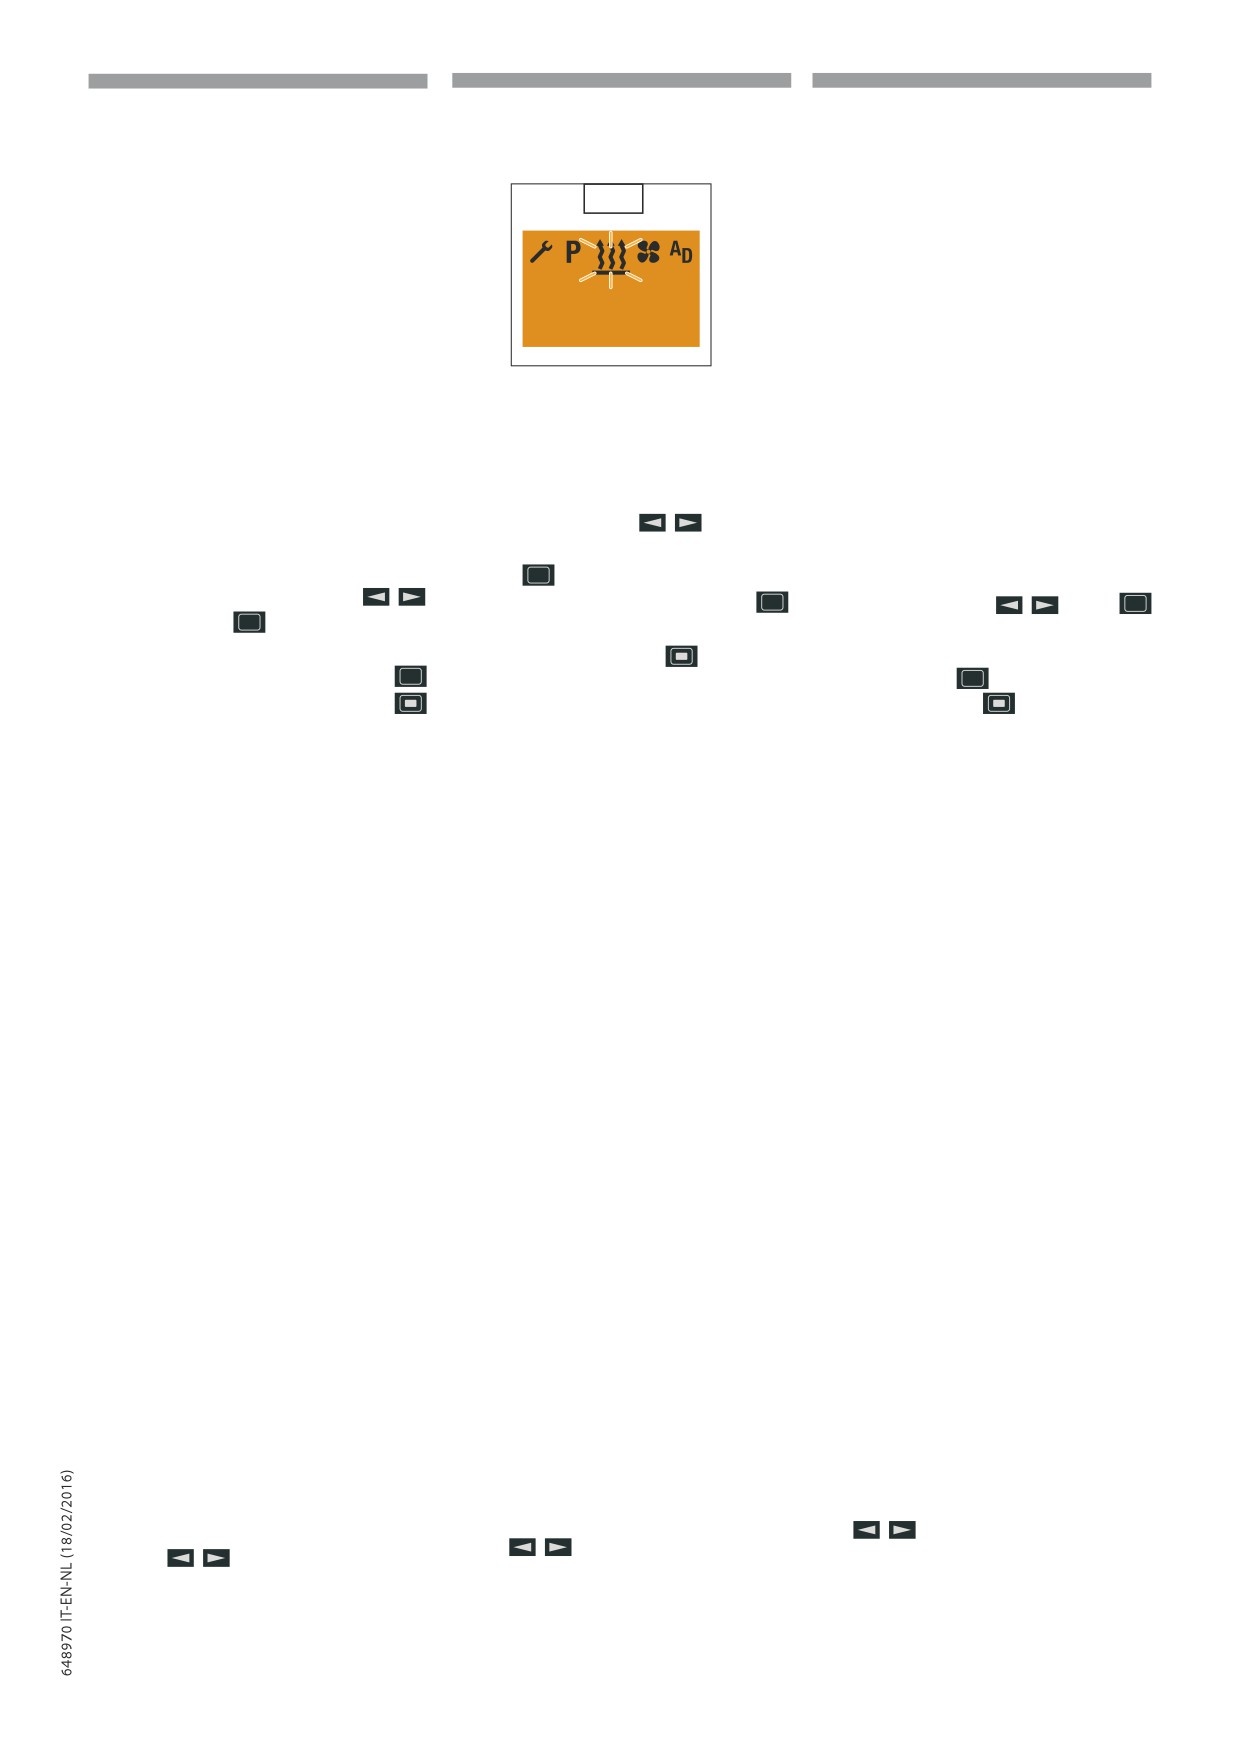
IT
EN
NL
Dopo l’indicazione Riscaldamento Off viene
After the Heat ing Off the Start display appears.
Na de aanduiding Verwarming OFF wordt het
visualizzata la videata iniziale.
If the vehicle lighting is Off the display lighting
beginscherm weergegeven.
In Illuminazione veicolo Off dopo 10 secondi si
goes out after 10 seconds.
Met Verlichting voertuig OFF wordt de verlichting
spegne l’illuminazione del display.
van het display na 10 seconden uitgeschakeld.
45
17:30
21 °C
Please note! The heater
Avvertenza! Il riscaldatore
Waarschuwing! De verwarmer
switches o
, an active add-on
si spegne, un apparecchio
wordt uitgeschakeld, een
p
unit remains in operation. The
p
geactiveerd
bijkomend
p
supplementare attivo rimane
following actions are possible
apparaat blijft in werking.
in funzione. Durante l’indicazione
during the Heating O display:
Tijdens
de
aanduiding
Riscaldamento
O
sono
Use the
button
Verwarming OFF zijn de
possibili le seguenti operazioni:
to select a menu item.
volgende handelingen mogelijk:
Selezionare un’opzione del
Shortpress button, the
Een optie van het menu selecteren
menu con il tasto
Start display appears, if the
met de toets
. Toets
. Tasto
Shortpress, viene
Shortpress button is pressed a
Shortpress, weergave van het
visualizzata la videata iniziale,
beginscherm, nieuwe druk op
gain, Display O .
Shortpress
nuovo azionamento tasto
de toets
Shortpress, Display
button, the Heating submenu is
Shortpress, Display O . Tasto
OFF. Toets
Shortpress, het
displayed (45).
Shortpress, viene visualizzato
submenu Verwarming wordt
il
sottomenu Riscaldamento
weergegeven (45).
(45).
De nominale temperatuurwaarde en/of de
Cambiare durante il funzionamento il valore
bedrijfsduur veranderen tijdens de werking
nominale della temperatura e / o la durata di
Change the temperature setpoint and / or the
Display ON, weergaven van de optie van het
esercizio
operating time during operation
menu Verwarming
/ Ventilatie
/ Bijkomend
Display On, viene visualizzata l’opzione del menu
apparaat verwarming of Bijkomend apparaat
Riscaldamento
/ Ventilazione
/ Apparecchio
Display On, the Heat ing / Ventilat ion / Add-On
ventilatie.
supplementare Riscaldamento o Apparecchio
Unit Heat ing or Add-On Ventilation menu item
Toets Shortpress, minder dan 2 seconden.
supplementare Ventilazione.
is displayed.
Tasto Shortpress, per meno di 2 secondi.
Press the Short press button for less than
Waarschuwing! Als ingestelde
2 seconds.
waarden worden de nominale
Avvertenza!
Come valori
p
temperatuurwaarde
impostati
vengono
Please note! The temperature
weergegeven die ingesteld
p
visualizzati
il
valore
setpoint set before s witching
of bevestigd zijn voor het
nominale della temperatura
p
on the heater or con rmed
inschakelen en de huidige
impostato o confermato prima
temperature setpoint and the
resterende
bedrijfsduur
dell’accensione
e
l’attuale
current remaining operating time
(min. limiet
10 minuten). De
durata di esercizio residua
(lower limit 10 min) are displayed
bedrijfsduur en de nominale
(limite inferiore
10 min.). La
as set values. The operating time
temperatuurwaarde worden één
durata di esercizio e il valore
and the tempera ture setpoint
keer gewijzigd. Beide ingestelde
nominale della temperatura
are changed once. Both set
waarden moeten bevestigd
vengono modi cati una sola
values must be con rmed.
worden.
volta. Entrambi i valori impostati
devono essere confermati.
De nominale temperatuurwaarde instellen
Impostare valore nominale della temperatura
- alleen voor luchtverwarmers, niet in de
- solo nei riscaldatori ad aria, non nella
functie Ventilatie
Set temperature setpoint - Only for air
funzione Ventilazione
Stel de nominale temperatuurwaarde in met de
heaters, not for the Ventilat ion function
Impostare il valore nominale della temperatura
toets
Use the
button to set the temperature
con il tasto
setpoint.
2-102
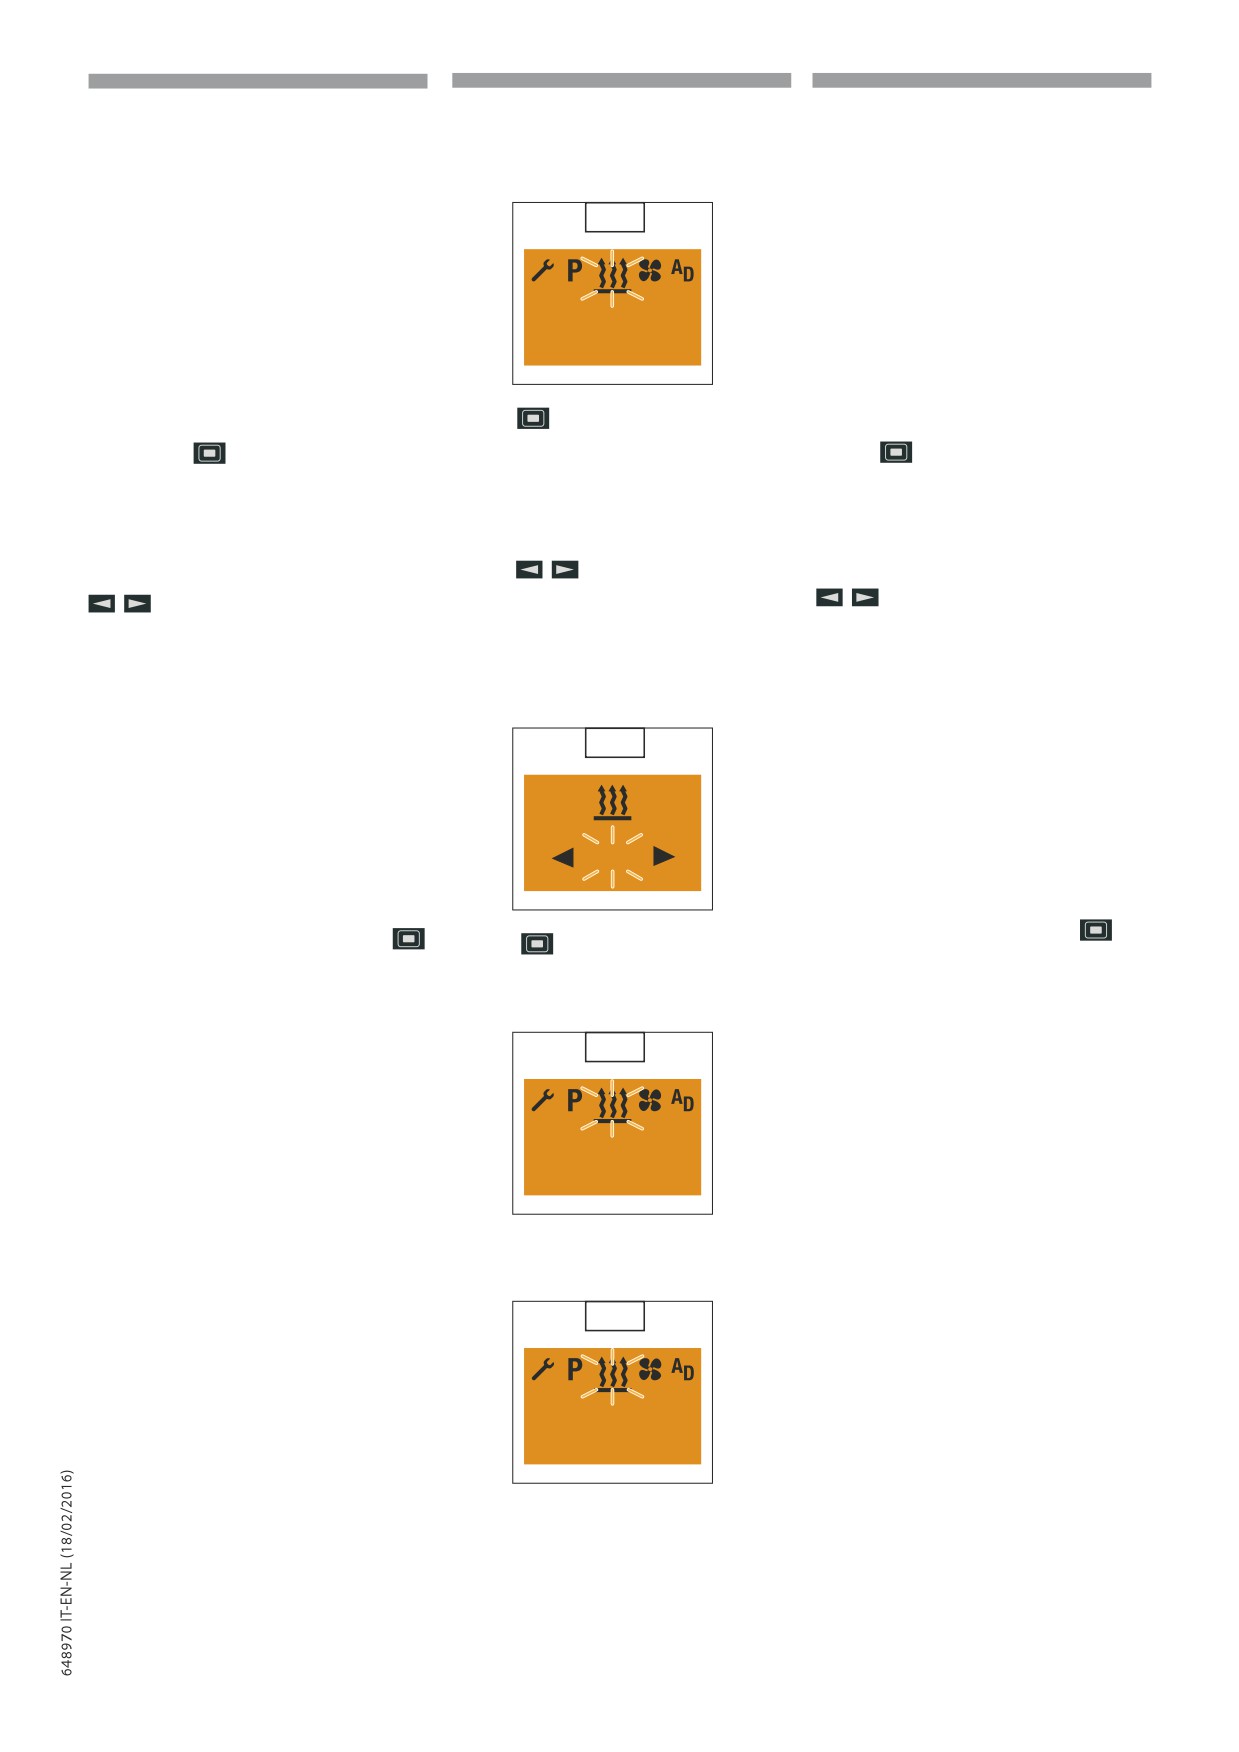
IT
EN
NL
Campo di regolazione valore nominale
Veld om de nominale temperatuurwaarde te
Temperature setpoint setting range (46):
temperatura (46):
8 °C - 36 °C in 1 °C increments,
regelen (46):
8 °C - 36 °C in incrementi di 1 °C,
46 °F - 97 °F in 1 °F increments.
8 °C - 36 °C met toename van 1 °C,
46 °F - 97 °F in incrementi di 1 °F.
46 °F - 97 °F met toename van 1 °F.
46
17:30
21 °C
Press the
button to confirm the temperature
Confermare il campo nominale della temperatura
Bevestig het nominale veld van de temperatuur met
setpoint.
con il tasto
Il valore nominale della
de toets
. De nominale temperatuurwaarde
The temperature setpoint is changed once.
temperatura si cambia una sola volta.
wordt slechts één keer gewijzigd.
Setting the operat ing time
Impostare durata di esercizio
De bedrijfsduur instellen
Use the
button to set the operating
Impostare la durata di esercizio con il tasto
Stel de bedrijfsduur in met de toets
time.
Operating time setting range (47):
Veld om de bedrijfsduur te regelen
Campo di regolazione durata di esercizio
Min 10 - max 120 min in 1 min. increments,
(47):
(47):
continuous heating mode is possible for air hea
min. 10 - max. 120 min. met toename van
min. 10 - max. 120 min. in incrementi di 1 min.,
ters.
1 min., met luchtverwarmers is de continu
nei riscaldatori ad aria è possibile la modalità di
verwarmingsmodaliteit mogelijk.
riscaldamento continuo.
47
60 min
Bevestig de bedrijfsduur met de toets
Confermare la durata di esercizio con il tasto
Press the
button to confirm the opera ting
De bedrijfsduur kan één keer gewijzigd worden.
La durata di esercizio si cambia una sola volta.
time.
(48)
(48)
The operating time is changed once. (48)
48
60 min
21 °C
Aanwijzing voor luchtverwarmers met continu
Indicazione per i riscaldatori ad aria in modalità di
Display for air heaters in continuous heating
verwarmingsmodaliteit (49).
riscaldamento continuo (49).
mode (49).
49
∞
21 °C
2-103
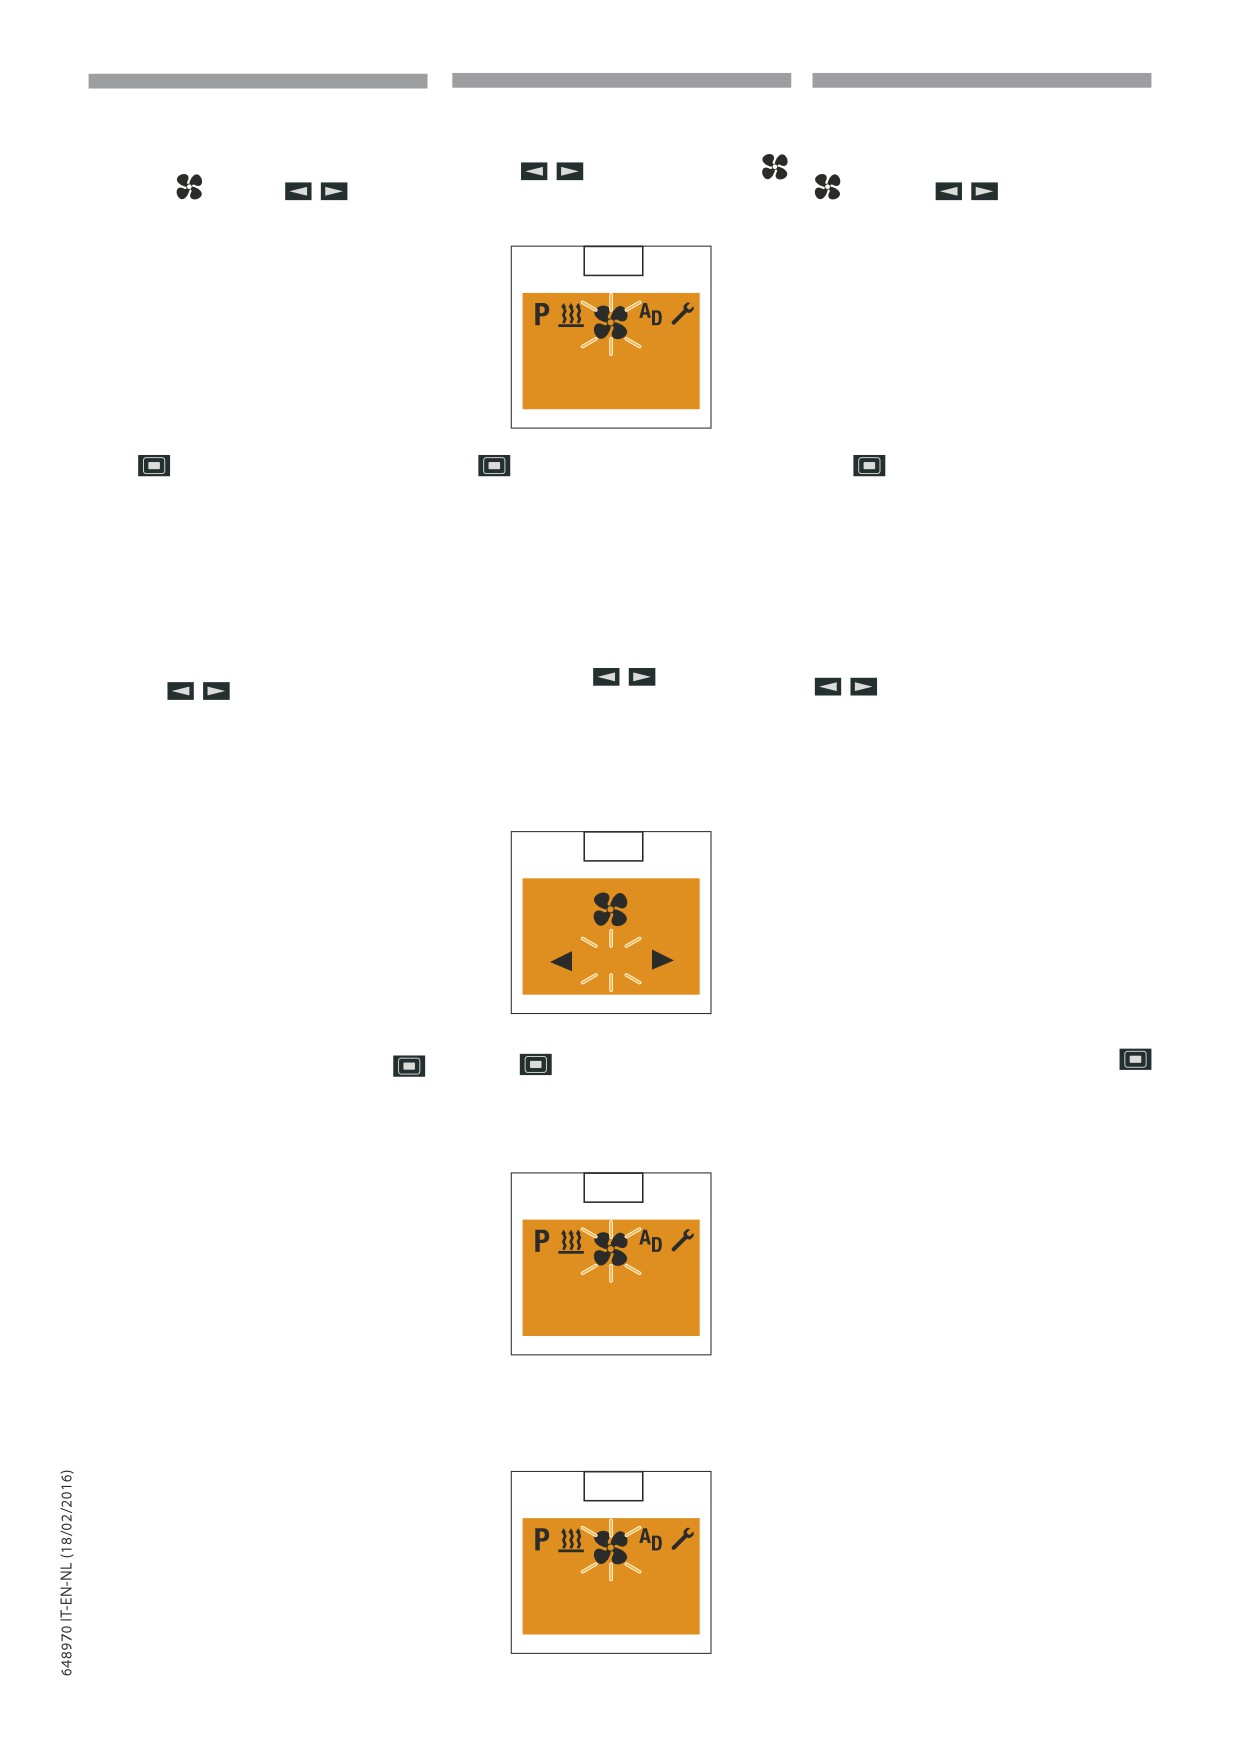
IT
EN
NL
Ventilazione On con Shortpress, eventualm.
Set Ventilation On with Shortpress and if
Ventilatie ON met Shortpress, stel eventueel
impostare la durata di esercizio
applicable set the operating time
de bedrijfsduur in
Display On, viene visualizzata la videata iniziale.
Display On, the Start display appears.
Display ON, het beginscherm verschijnt.
Selezionare dalla barra del menu il simbolo di
Selecteer op de menubalk het ventilatiesymbool
Use the
button to select the
ventilazione
con il tasto
ventilation symbol in the Menu bar.
met de toets
(50).
(50)
(50).
50
O
21 °C
Confermare l’opzione Ventilazione del menu con
Confirm the Ventilat ion menu item by pressing
Bevestig de optie Ventilatie van het menu met de
il tasto
the
button.
toets
Avvertenza!
La seguente
Please note! The following
Waarschuwing! De volgende
impostazione o conferma è
setting or con rmation is
instelling of bevestiging is
p
indispensabile.
p
absolutely necessary.
p
absoluut noodzakelijk.
Impostare durata di esercizio
De bedrijfsduur instellen
Setting the operat ing time
Impostare eventualmente la durata di esercizio
Stel eventueel de bedrijfsduur in met de toets
If necessary, use the
button to set the
con il tasto
operating time.
Campo di regolazione della durata di esercizio
Veld om de bedrijfsduur te regelen
Operating time setting range (51):
(51):
(51):
Min 10 - max 120 min in 1 min. increments,
min. 10 - max. 120 min. in incrementi di 1 min.,
min. 10 - max. 120 min. met toename van
continuous ventilat ion mode possible for air
nei riscaldatori ad aria è possibile la modalità di
1 min., met luchtverwarmers is de continu
heaters.
ventilatiemodaliteit mogelijk.
funzionamento continuo Ventilazione.
51
30 min
Bevestig de bedrijfsduur met de toets
Confermare la durata di esercizio con il tasto
Press the
button to confirm the opera ting
time.
De bedrijfsduur kan permanent gewijzigd
La durata di esercizio si cambia permanentemente
The operating time is changed permanently
worden (52)
(52)
(52).
52
30 min
21 °C
Aanwijzing voor luchtverwarmers met continu
Indicazione nei riscaldatori ad aria in modalità di
Display for air heaters in continuous ventilation
ventilatiemodaliteit (53)
funzionamento continuo Ventilazione (53)
mode (53)
53
∞
21 °C
2-104
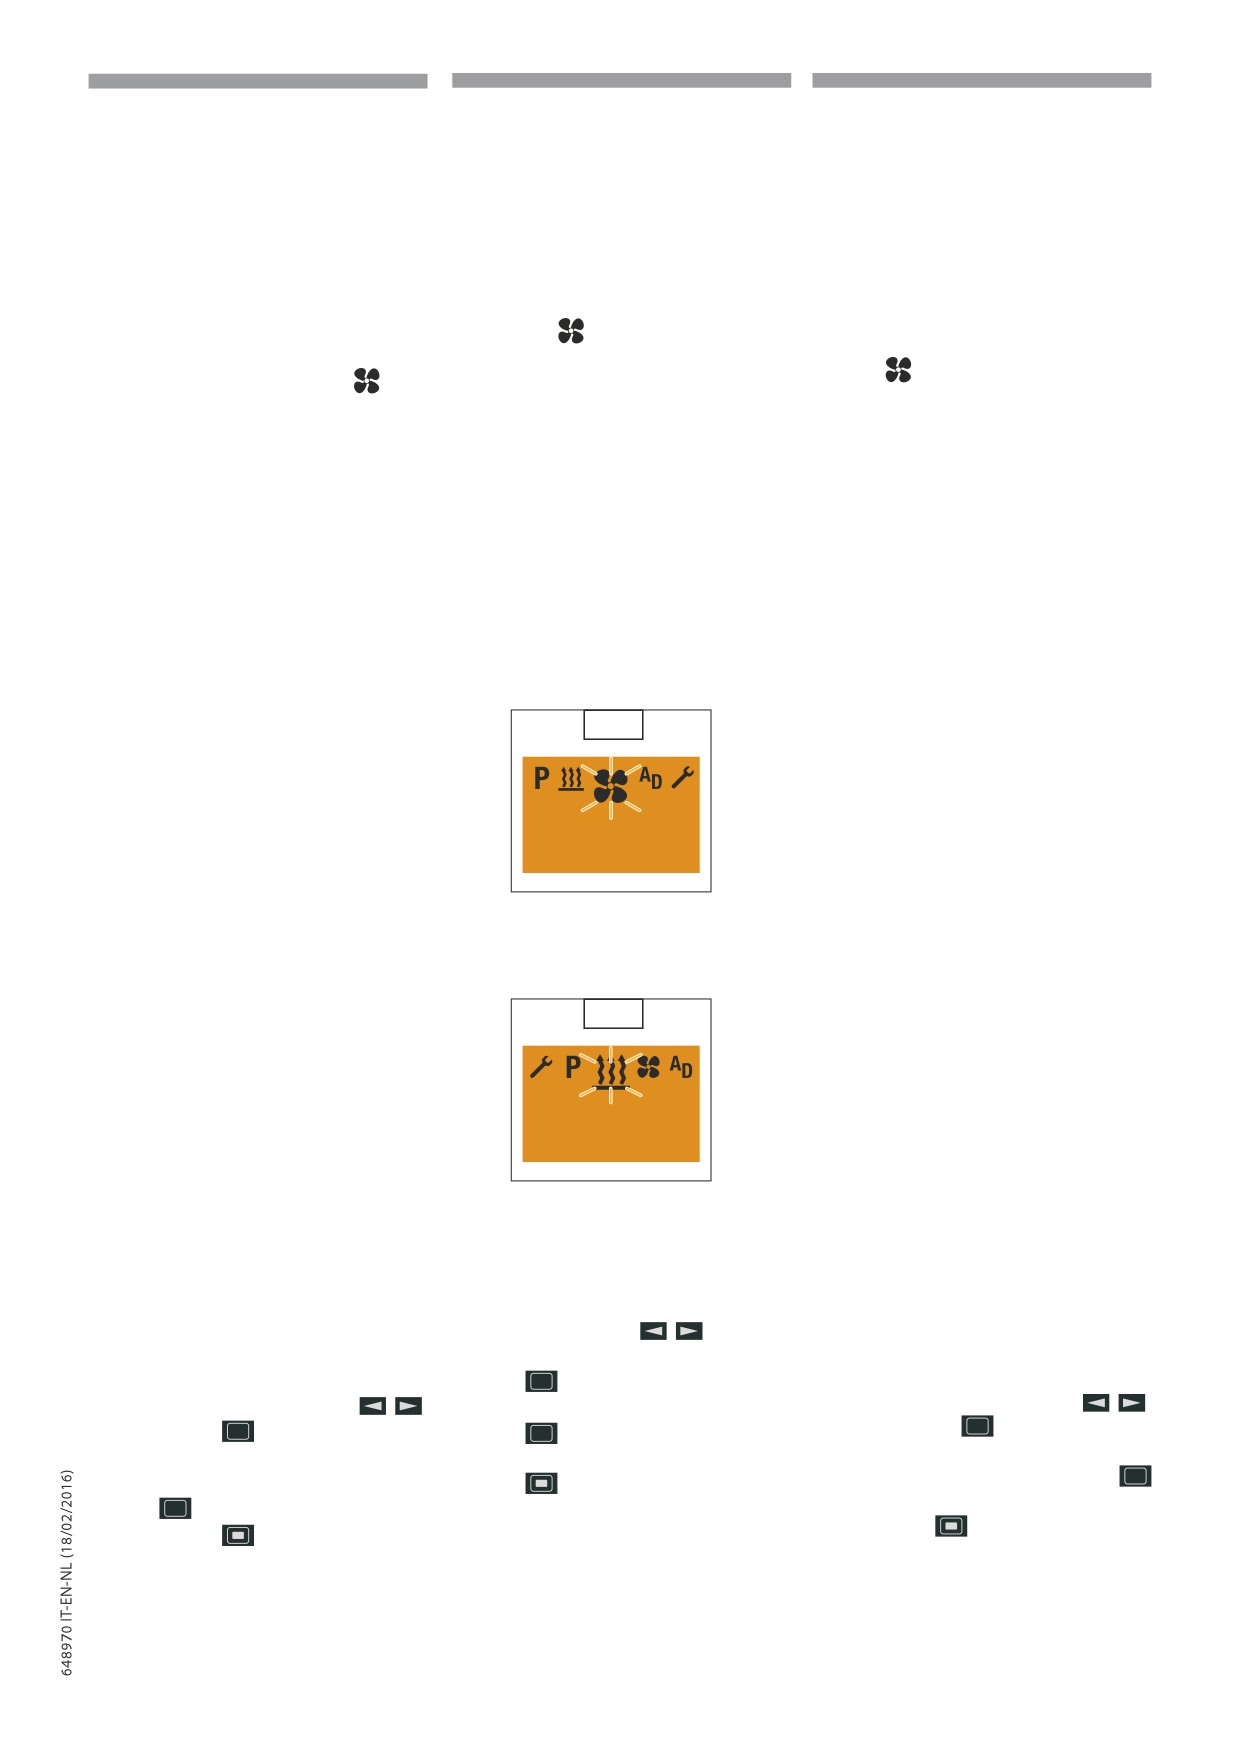
IT
EN
NL
Avvertenza!
All’accensione
Please note! After switching on,
Waarschuwing!
Bij
de
viene visualizzato per
2
“On” is displayed for 2 sec and
inschakeling wordt gedurende
p
2 seconden “On” weergegeven
p
sec.
“On” e quindi la durata
p
then the remaining operating
en vervolgens de resterende
di esercizio residua o
∞ nei
time or
∞ for air heaters.
bedrijfsduur
∞ van de
riscaldatori ad aria. Durante la
During ventilation mode it is
luchtverwarmers. Tijdens de
ventilazione si può commutare
possible to s witch to another
ventilatie is het mogelijk om
ad un’altra opzione del menu.
menu item. Under the Heat ing
over te gaan naar een andere
Nell’opzione
Riscaldamento
menu item, check the operating
optie van het menu. In de optie
del
menu, veri care ed
time and if necessar y adjust. If
Verwarming van het menu,
eventualmente impostare la
controleer de bedrijfsduur en stel
the
symbol is not displayed
durata di esercizio. Se non viene
hem eventueel in. Als het symbool
the Ventilat ion function is not
niet wordt weergegeven, dan
visualizzato il simbolo
, vuol
activated or is not a vailable
betekent dit dat de Ventilatie-
dire che la funzione Ventilazione
for the heater. The changed
functie niet is geactiveerd of niet
non è attivata o non è prevista
operating time is o ered a
voorzien is voor de verwarmer.
per il riscaldatore. La durata
gain the next time the system is
De gewijzigde bedrijfsduur wordt
di esercizio modi cata viene
started.
weergegeven bij de volgende
visualizzata al successivo avvio.
start.
Ventilazione Off con Longpress
Ventilation Off with Longpress
Ventilatie OFF met Longpress
Display On, viene visualizzata l’opzione
Display On, the Ventilat ion menu item is
Display ON, de optie Ventilatie van het menu
Ventilazione del menu.
displayed.
wordt weergegeven.
Tasto Longpress, per più di 2 secondi
Press the Longpress button for longer than
Toets Longpress, langer dan 2 seconden
2 seconds
Riscaldatore Off (54).
Verwarming OFF (54).
Heater Off (54).
54
O
21 °C
Dopo l’indicazione Ventilazione Off viene
After the Ventilat ion Off display the Start display
Na de aanduiding Ventilatie OFF wordt het
visualizzata la videata iniziale.
appears.
beginscherm weergegeven.
In Illuminazione veicolo Off dopo 10 secondi si
If the vehicle lighting is Off the display lighting
Met Verlichting voertuig OFF wordt de verlichting
spegne l’illuminazione del display.
van het display na 10 seconden uitgeschakeld.
goes out after 10 seconds (55).
(
55)
(55)
55
17:30
21 °C
Avvertenza! In Ventilazione
Please note! With Ventilat ion
Waarschuwing! Met Ventilatie
O con Longpress vengono
O with Longpress all active
OFF met Longpress worden alle
p
disattivate tutte le funzioni
p
functions are ended. The
p
actieve functies uitgeschakeld.
attive.
Mentre è attiva
following actions are possible
Terwijl
de
aanduiding
l’indicazione
Ventilazione
during theVentilationO display:
Ventilatie
OFF geactiveerd
O si possono eseguire
Use the
button
is,
kunnen de volgende
le
seguenti
operazioni:
to select a menu item.
handelingen uitgevoerd worden:
Selezionare
un’opzione del
Shortpress button, the
Een optie van het menu
menu con il tasto
Start display appears, if the
selecteren met de toets
Toets
Shortpress
,
Tasto
Shortpress, viene
Shortpress button is
visualizzata la videata iniziale,
pressed a gain, Display O .
weergave van het beginscherm,
nuovo azionamento tasto
Shortpress button, the
nieuwe druk op de toets
Shortpress,
Display
OFF.
Shortpress, Display O .
Ventilat
ion submenu is
Toets
Shortpress, weergave
Tasto
Shortpress, viene
displayed.
van het submenu Ventilatie.
visualizzato
il
sottomenu
Ventilazione.
2-105
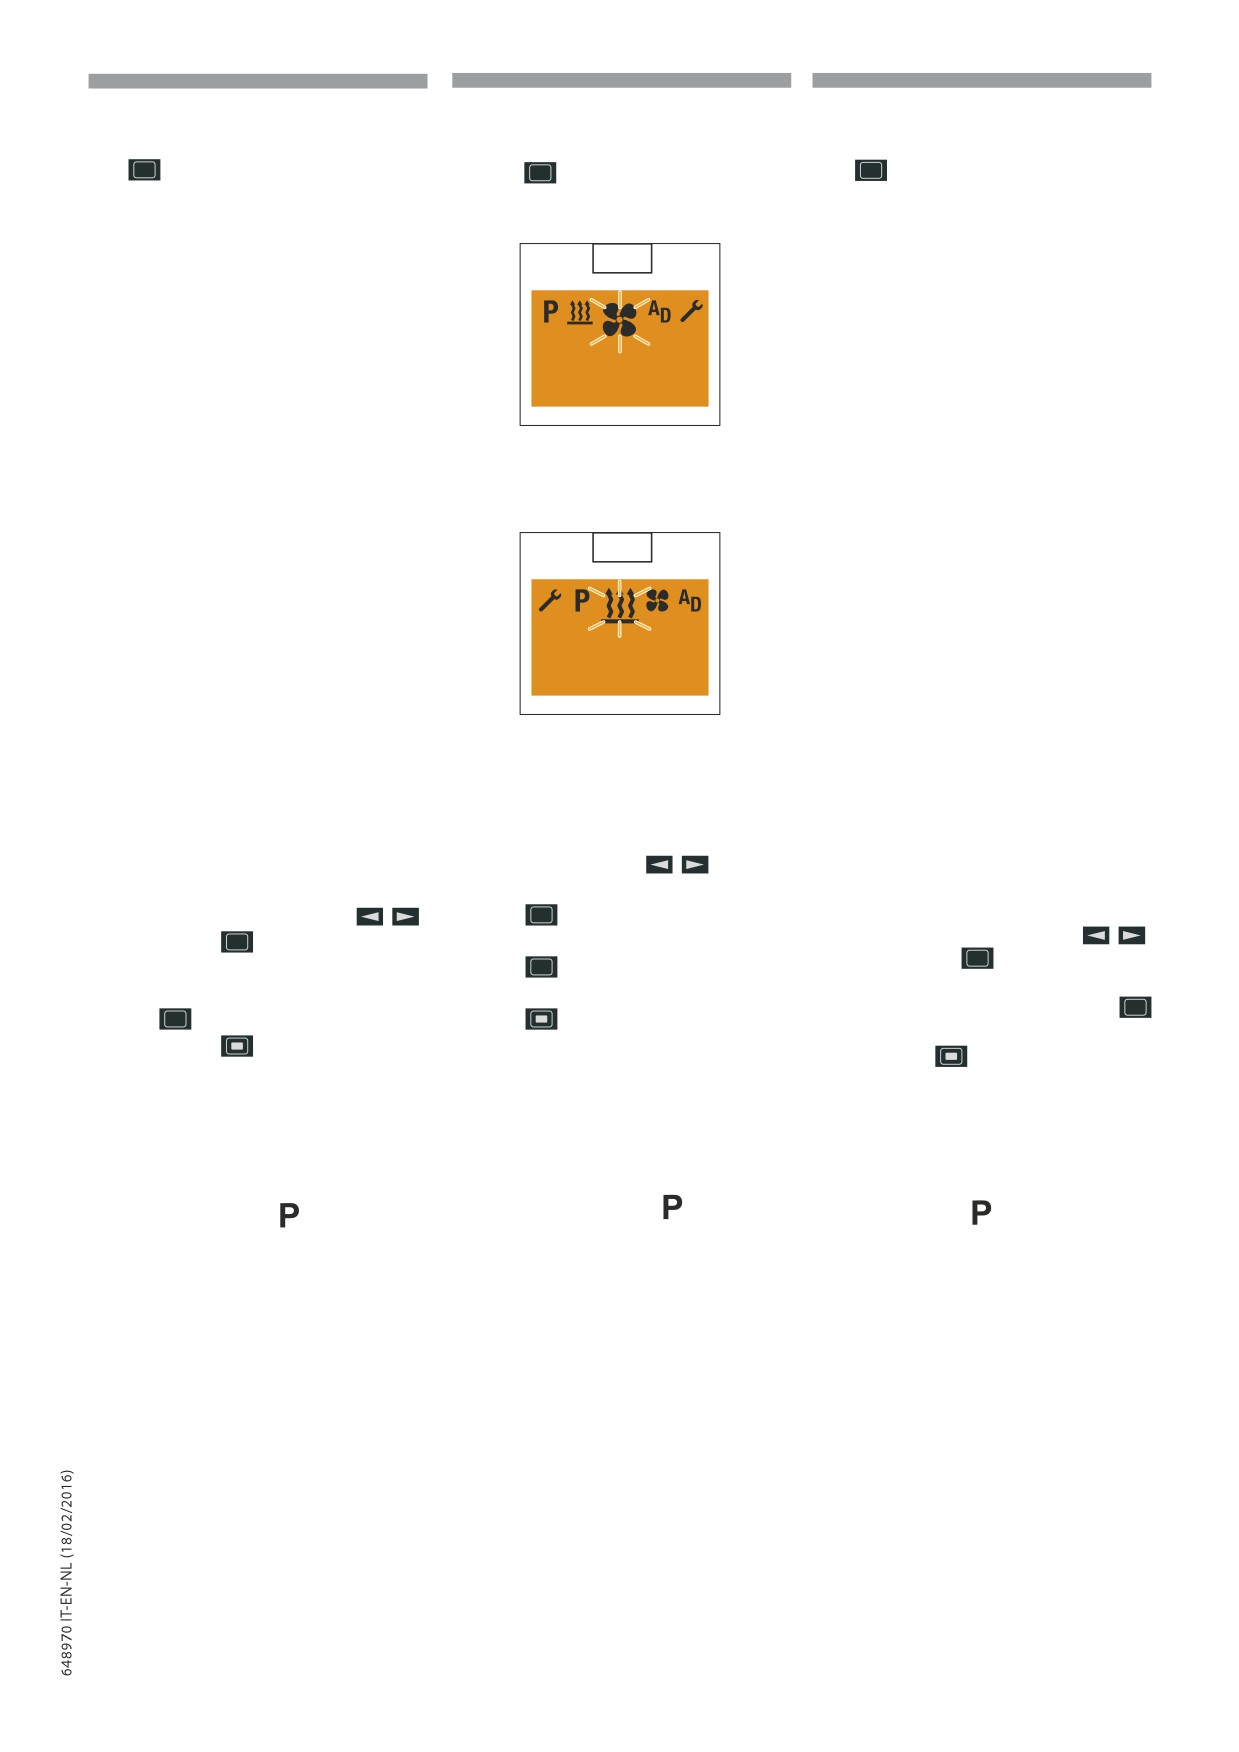
IT
EN
NL
Ventilazione Off con Shortpress
VENTILATI ON OFF with Shortpress
Ventilatie OFF met Shortpress
Display On, viene visualizzata l’opzione
Display ON, the Ventilat ion menu item is
Display ON, de optie Ventilatie van het menu
Ventilazione del menu.
displayed.
wordt weergegeven.
Tasto
Shortpress, per meno di 2 secondi.
Press the
Shortpress button for less than 2
Toets
Shortpress, minder dan 2 seconden.
seconds.
Riscaldatore Off (56).
Verwarming OFF (56).
Heater Off (56).
56
O
21 °C
Dopo l’indicazione Ventilazione Off viene
After the Ventilat ion Off display the Start display
Na de aanduiding Ventilatie OFF wordt het
visualizzata la videata iniziale.
appears.
beginscherm weergegeven.
In Illuminazione veicolo Off dopo 10 secondi si
If the vehicle lighting is Off the display lighting
Met Verlichting voertuig OFF wordt de verlichting van
spegne l’illuminazione del display (57).
goes out after 10 seconds (57).
het display na 10 seconden uitgeschakeld (57).
57
17:30
21 °C
Avvertenza! Il riscaldatore
Waarschuwing! De verwarmer
si spegne, un apparecchio
Please note! The heater
wordt uitgeschakeld, een
p
supplementare attivo rimane
switches o
, an active add-
p
geactiveerd
bijkomend
in funzione. Mentre è attiva
p
on unit remains in operation.
apparaat blijft in werking.
l’indicazione
Ventilazione
The following actions are possible
Terwijl
de
aanduiding
O si possono eseguire
during the Ventilation O display:
Ventilatie
OFF geactiveerd
le
seguenti
operazioni:
Use the
button
is,
kunnen de volgende
Selezionare un’opzione del
to select a menu item.
handelingen uitgevoerd worden:
Een optie van het menu
menu con il tasto
Shortpress button, the
selecteren met de toets
Tasto
Shortpress, viene
Start display appears, if the
Toets
Shortpress
,
visualizzata la videata iniziale,
Shortpress button is
weergave van het beginscherm,
nuovo azionamento tasto
pressed a gain, Display O .
nieuwe druk op de toets
Shortpress, Display O .
Shortpress button, the
Shortpress,
Display
OFF.
Tasto
Shortpress, viene
Ventilat ion submenu is displayed.
Toets
Shortpress, weergave
visualizzato
il
sottomenu
van het submenu Ventilatie.
Ventilazione.
Avvertenze generali sulla programmazione
Algemene waarschuwingen met betrekking
General information on programming the
del orario di preselezione
tot het programmeren van het keuzetijdstip
preset time
La programmazione dell’orario di preselezione
De programmering van het keuzetijdstip wordt
The programming of the preset time is
viene eseguita nell’opzione
del menu.
uitgevoerd in de optie van het menu.
Con EasyStart Timer si possono programmare
carried out in menu item .
Met EasyStart Timer kunt u
3 verschillende
3 orari di preselezione. I 3 orari di preselezione
The
EasyStart
Timer
can
be
keuzetijdstippen
programmeren. De
3
possono essere assegnati a un giorno della
used to program
3 preset times.
tijdstippen kunnen toegewezen worden aan
settimana oppure essere distribuiti a diversi
de dag van de week of verspreid worden over
The 3 preset times can either all take place
giorni della settimana.
verschillende dagen van de week.
on one weekday or can be distributed
Si possono selezionare anche
3 periodi di
Er kunnen ook
3 periodes van weekdagen
between diÓerent weekdays.
giorni della settimana, che si possono avviare
worden geselecteerd, die elke dag op een
3 weekday ranges are a vailable to choose
rispettivamente ogni giorno con un orario di
keuzetijdstip gestart kunnen worden.
preselezione.
from, these can each be started daily with a
Periodes van weekdagen:
Periodi di giorni della settimana:
preset time.
Zat. - Zon. 2 keer verwarming / ventilatie
Sa. - Do. 2 volte Riscaldamento / Ventilazione
Weekday ranges:
Maa. - Vrij. 5 keer verwarming / ventilatie
Lu. - Ve. 5 volte Riscaldamento / Ventilazione
Sat - Sun 2x Heat ing / Ventilation
Maa. - Zon. 7 keer verwarming / ventilatie
Lu. - Do. 7 volte Riscaldamento / Ventilazione
Mon - Fri 5x Heat ing / Ventilation
Als u een geprogrammeerde periode van
Se si attiva un periodo di giorni della settimana
weekdagen activeert, worden alle dagen van de
Mon - Sun 7x Heat ing / Ventilation
programmato, vengono elaborati tutti i giorni
week achtereenvolgens verwerkt; daarna dient u
If the system is activated with programmed
della settimana in successione, poi occorre fare
een nieuwe programmering uit te voeren.
weekday range, all weekdays are worked
una nuova programmazione.
Voorbeeld:
through consecutively; after that renewed
Esempio:
programming is required.
als EasyStart Timer geactiveerd wordt op zondag
se si attiva di domenica EasyStart Timer con un
met een geprogrammeerde periode weekdagen
periodo di giorni della settimana programmato
Example:
Maa. - Vri., dan activeert de verwarmer de
Lu. - Ve., il riscaldatore attiva il riscaldamento o
If the EasyStart Timer with a programmed
verwarming of de ventilatie vanaf maandag
la ventilazione da lunedì e venerdì con i valori
weekday range Mon - Fri is activated on
tot vrijdag met de ingestelde waarden (5 keer
2-106
IT
EN
NL
di preset impostati
(5 volte Riscaldamento/
Sunday, the heater heats or ventilates from
Verwarming / Ventilatie).
Ventilazione).
Monday to Friday with the set defaults (5x
Als EasyStart Timer geactiveerd wordt op
Se si attiva di mercoledì EasyStart Timer con un
Heat ing / Ventilat ion).
woensdag met een geprogrammeerde periode
periodo di giorni della settimana programmato
If the EasyStart Timer with a programmed
weekdagen Maa. - Vri., dan activeert de verwarmer
Lu. - Ve., il riscaldatore attiva il riscaldamento o la
weekday range Mon - Fri is activated on
de verwarming of de ventilatie op donderdag en
ventilazione giovedì e
Wednesday, the heater heats or ventilates
vrijdag, maar niet op zaterdag en zondag. Van
venerdì, ma non si attiva sabato e domenica. Da
on Thursday and Friday, the heater is not
maandag tot woensdag van de daaropvolgende
lunedì a mercoledì della settimana successiva
operated on Saturday and Sunday. From
week wordt de werking verder gezet met
continua il funzionamento con i valori di preset
Monday to Wednesday of the following
de ingestelde waarden
(5 keer Verwarming
/
impostati (5 volte Riscaldamento/ Ventilazione).
week the operation is continued with the
Ventilatie).
Al termine di un periodo di giorni della settimana,
set defaults (5x Heat ing / Ventilat ion).
Aan het einde van een periode weekdagen dient
occorre ripetere la programmazione.
After a weekday range has been worked
de programmering herhaald te worden.
through renewed programming is required.
Avvertenza! Se nella barra del
Waarschuwing! Als in de
menu non appare il simbolo
menubalk het symbool
Please note! If the
symbol
p
, vuol dire che l’apparecchio
p
niet verschijnt, dan wil dit
is not displayed in the Menu
si trova nella modalità ADR,
zeggen dat het apparaat zich
p
bar
, the heater is in ADR
in de ADR-modaliteit bevindt;
quindi non è possibile attivare
mode; preselected heating
bijgevolg is het niet mogelijk
una modalità di riscaldamento
mode is not possible here. When
om een vooraf geselecteerde
preselezionata.
Nella
programming the EasyStart
verwarmingsmodaliteit
te
programmazione di EasyStart
Timer, note the operating mode
activeren. In de programmering
Timer si deve tener conto della
as described in the follo wing.
van EasyStart Timer dient
modalità operativa come di
u rekening
te
houden
seguito descritto.
met
de
bovenvermelde
werkingsmodaliteit.
Modalità operativa Orario di partenza
Departure time operating mode (factor y
Werkingsmodaliteit
Starttijdstip
(impostazione di fabbrica)
setting)
(fabrieksinstelling)
Alle seguenti condizioni, la modalità di
Under the following conditions the preselected
Onder de volgende voorwaarden wordt de
riscaldamento preselezionata non viene avviata
hea ting
vooraf geselecteerde verwarmingsmodaliteit
alla data attuale.
mode is not started on the current day .
niet geactiveerd op de huidige dag.
• La data attuale e il giorno
• The current day and the preselected
• De huidige datum en de gekozen
preselezionato sono identici.
day are identical.
dag zijn hetzelfde.
• L’ora attuale si trova nel periodo di
• The current time lies within the
• Het huidige uur bevindt zich in
tempo: orario di partenza meno
time period, departure time minus
de tijdspanne: starttijdstip min
durata di esercizio.
operating time.
bedrijfsduur.
Esempio:
Example:
Voorbeeld:
data attuale / giorno preselezionato: Gi.
Current day / preselected day: Thu
huidige dag / gekozen dag: Don.
ora attuale: ore 18:45
Current time: 18:45
huidige uur: 18.45 uur
orario di partenza: ore 19:00
Departure time: 19:00
starttijdstip: 19.00 uur
durata di esercizio: 30 minuti
Operating time: 30 minutes
duur: 30 minuten
periodo di tempo: dalle ore 18:30 alle 19:00
Duration: 18:30 to 19:00
periode: van 18.30 tot 19.00 uur
L’ora attuale si trova nel periodo di tempo, il
The current time lies within the time period, the
Het huidige uur bevindt zich in de tijdspanne, de
riscaldatore non viene attivato.
heater is not switched on.
verwarmer wordt niet geactiveerd.
Il programma viene eseguito la settimana
The program will be run during the next week.
Het programma wordt de volgende week
successiva.
uitgevoerd.
Modalità operativa Tempo di avvio
Start time operating mode
Werkingsmodaliteit Starttijd
Nella modalità operativa Tempo di avvio il
In Start Time operating mode the heater is
In de werkingsmodaliteit Starttijd wordt de
riscaldatore viene avviato alla data preselezionata
started on the preselected day and when the set
verwarmer opgestart op de vooraf geselecteerde
e quando arriva l’ora impostata.
time is reached.
datum en op het ingestelde uur.
2-107
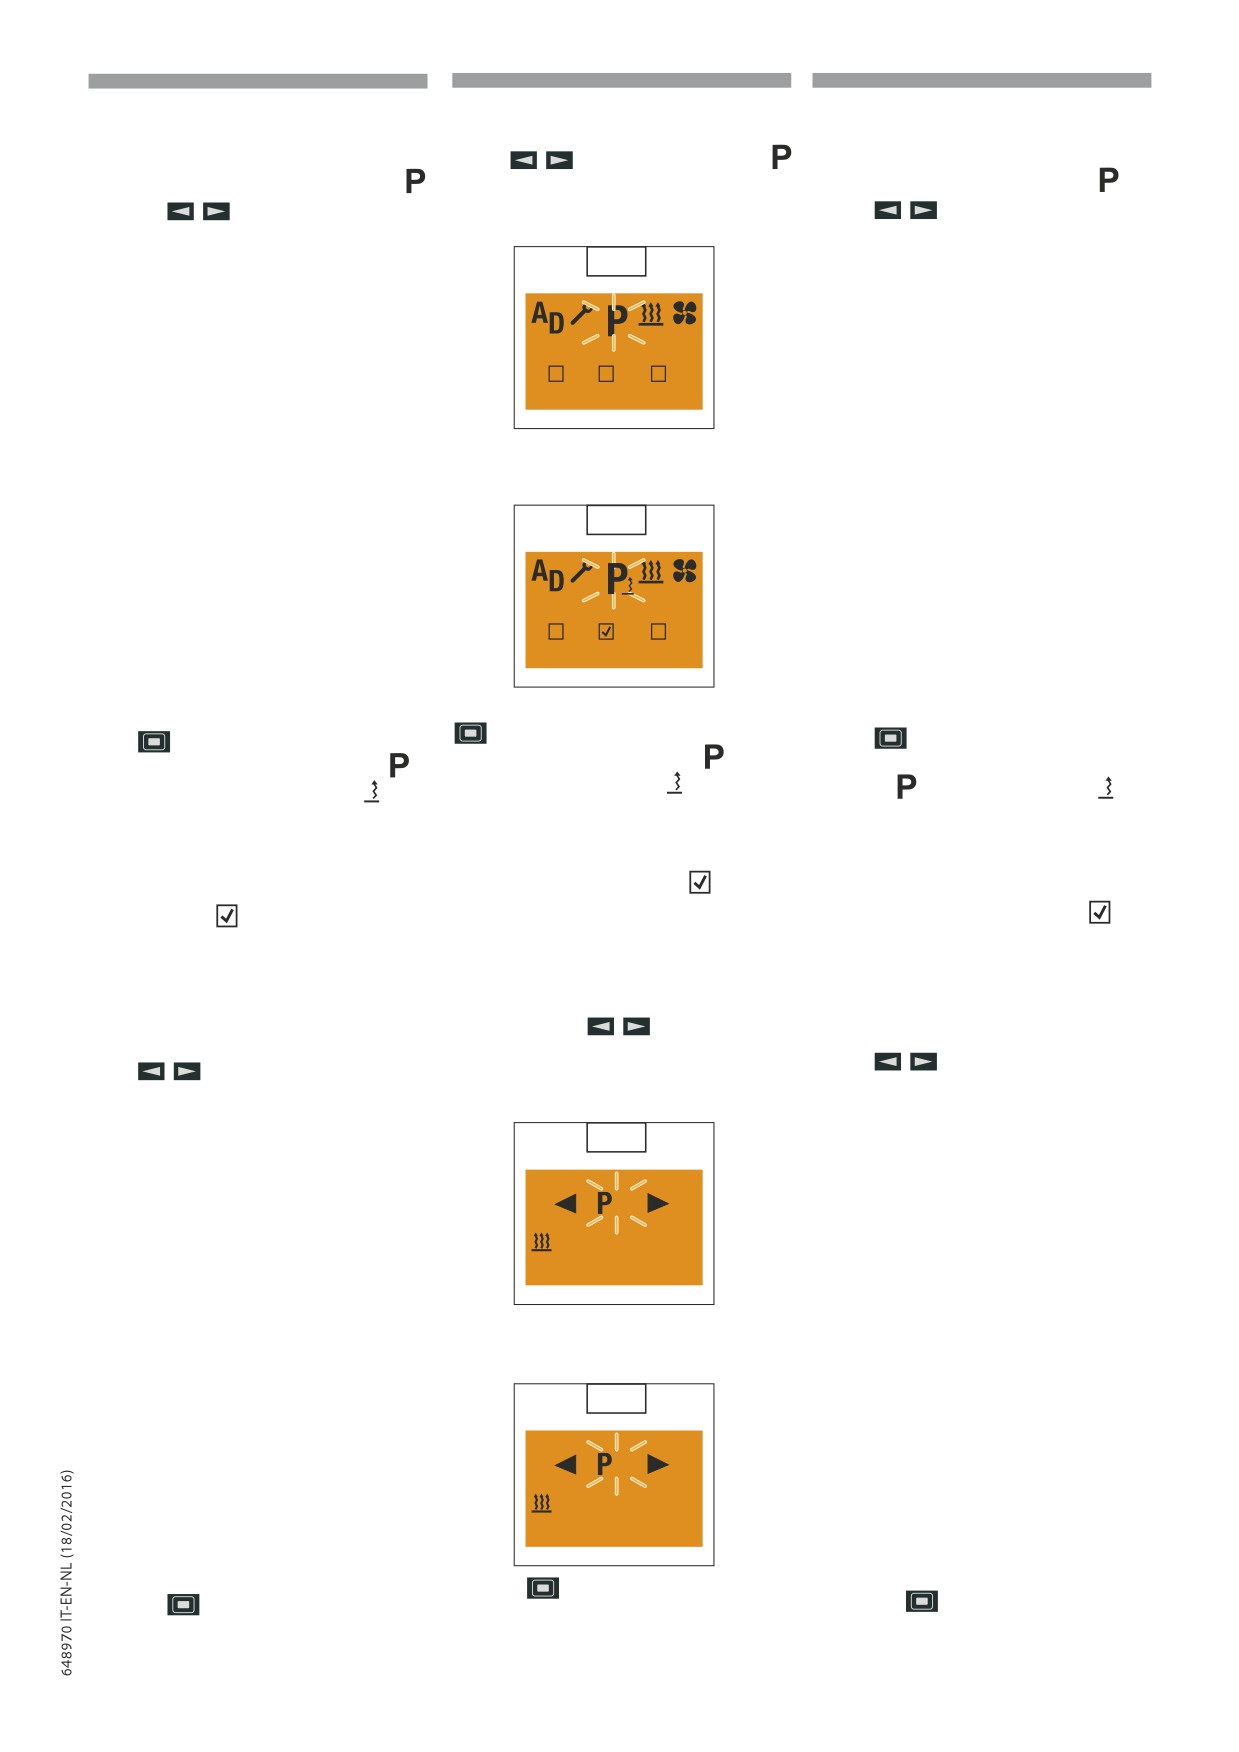
IT
EN
NL
Programmare gli orari di preselezione
Program preset times
De keuzetijdstippen programmeren
Display On, viene visualizzata la videata iniziale
Display ON, het beginscherm verschijnt
Display On, the Start display appears (58).
(58).
Use the
button to select the symbol
(58).
Selezionare dalla barra del menu il simbolo
in the Menu bar.
Selecteer op de menubalk het symbool
met
con il tasto
Display, if no preselection is activated.
de toets
Indicazione quando non è attivata nessuna
Aanduiding wanneer er geen enkele keuze
preselezione.
58
geactiveerd is.
1
2
3
Indicazione quando è attivata una preselezione,
Aanduiding wanneer er een keuze geactiveerd is,
Display, if a preselection is activa ted e.g. P2.
ad es. P2. (59)
bv. P2. (59)
(59)
59
1
2
3
Confirm the Program menu item by pressing the
Confermare l’opzione Programma del menu con
Bevestig de optie Programma van het menu met
button.
de toets
il tasto
Please note! If the
symbol
Waarschuwing! Als het symbool
Avvertenza! Se il simbolo
è
is marked with
, a or several
gemarkeerd is met een
, dan
contrassegnato con un
, vuol
p
program memories is/are
p
betekent dit dat een of meerdere
p
dire che una o diverse memorie
already activated. Activated
programmageheugens
reeds
programmi sono già attivate. Le
program memories are marked
geactiveerd is/zijn. De geactiveerde
memorie programmi attivate
in the display with a
programmageheugens worden op
sono contrassegnate sul display
con un
het display gemarkeerd met
EasyStart Timer settings
Impostazioni di EasyStart Timer
Instellingen van EasyStart Timer
Selecting the program memory
Selecteer het programmageheugen
Selezionare la memoria programmi
Viene visualizzata la memoria programmi
The P1 program memory is displayed, if
Het
programmageheugen
P1
wordt
P1, eventualmente selezionare la memoria
applicable, use the
button to select the
weergegeven; selecteer eventueel het volgende
programmi successiva P2, P3 o di nuovo P1 con
programmageheugen P2, P3 of opnieuw P1 met
next program memory P2, P3 or P1 again.
de toets
il tasto
Program memory P1 display, factory setting.
Aanduiding
programmageheugen
P1,
Indicazione
memoria
programmi
P1,
(60)
fabrieksinstelling.
impostazione di fabbrica.
60
(60)
(60)
1
Mo. - Fr.
21 °C
07 : 00
30 min.
Indicazione memoria programmi P2 con
Aanduiding programmageheugen P2 met
Program memory P2 display with programmed
preselezione programmata. (61)
geprogrammeerde keuze. (61)
preselection. (61)
61
2
Mi.
21 °C
06 : 30
60 min.
Confermare la memoria programmi selezionata
Bevestig het geselecteerde programmageheugen
Press the
button to confirm the selected
con il tasto
met de toets
program memory.
2-108
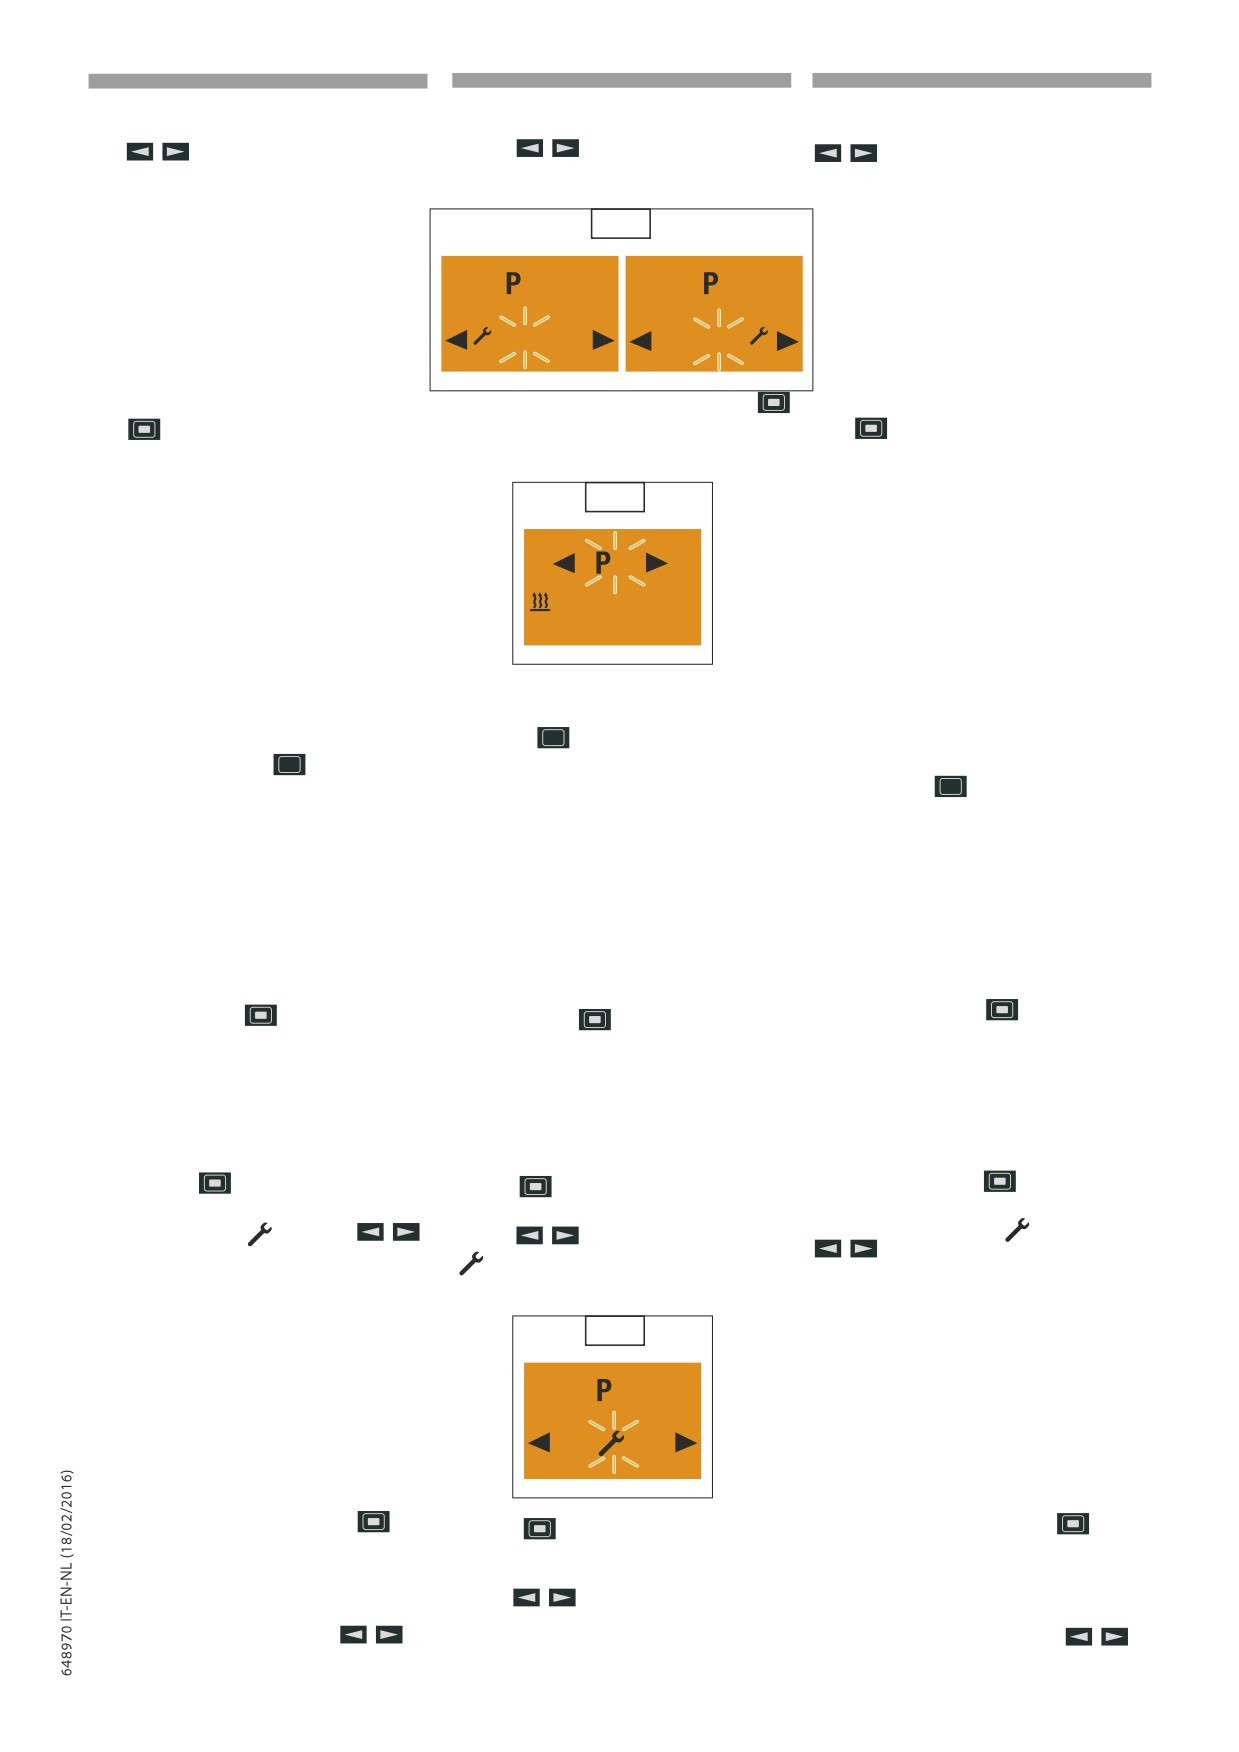
IT
EN
NL
Attivare / disattivare una memoria programmi
Activating
/ deactivating the program
Een programmageheugen in- / uitschakelen
Selezionare l’impostazione “On” o “Off” con il
memory
Selecteer de instelling “On” of “Off” met de toets
tasto
. (62)
Use the
button to select the “On” or
. (62)
“Off” setting. (62)
62
2
2
O
On
On
O
Confermare l’impostazione “On” o “Off” con il
Confirm the “On” or “Off” setting with the
Bevestig de instelling
“On” of “Off” met de
tasto
; il programma, ad es. P2, è attivato o
button, the program, e.g. P2 is activated or
toets
; het programma, bv. P2, wordt in- of
disattivato. (63)
deactivated. (63)
uitgeschakeld. (63)
63
2
Mi.
21 °C
06 : 30
60 min.
Avvertenza!
Al
termine
Please note! After editing
Waarschuwing! Nadat u het
dell’elaborazione
del
the program, press the
programma bewerkt heeft, keer
p
programma, tornare
con
p
button to return to
p
terug naar de optie Programma
il
tasto
all’opzione
the Program
/ Preselection
/ Keuze van het menu met de
Programma / Preselezione del
menu item or wail until
toets
of wacht totdat in
menu oppure attendere nché in
- if the vehicle lighting is
- Verlichting voertuig ON de
- Illuminazione veicolo On viene
On the Program / Preselec-
optie Programma / Keuze van
visualizzata l’opzione Program
tion menu item is displayed,
het menu weergegeven wordt,
ma / Preselezione del menu, in -
- if the vehicle lighting is O the
-
Verlichting voertuig OFF de
Illuminazione veicolo O si spe-
display lighting goes out.
verlichting van het display
gne l’illuminazione del display.
uitgeschakeld wordt.
Non premere il tasto
, poiché altrimenti si
Druk niet op de toets
, anders wordt de
Do not press the
button, as otherwise the
instelling “ON gewijzigd in “OFF” en omgekeerd.
commuta l’impostazione “On” in “Off” e viceversa.
“On” setting switches to “Off” and vice versa.
Elaborare la memoria programmi
Editing the program memory
Het programmageheugen bewerken
Con il tasto
confermare la memoria
Bevestig met de toets
het geselecteerde
Use the
button to confirm the selected
programmi selezionata, ad es. P2.
program memory, e.g. P2.
programmageheugen, bv. P2.
Selezionare il simbolo
con il tasto
Selecteer het symbool
met de toets
Use the
button to select the symbol
(64)
(
64)
(64)
64
2
O
On
Confermare l’impostazione con il tasto
Bevestig de instelling met de toets
Press the
button to confirm the setting.
Selezionare il gruppo di giorni della settimana
Een groep weekdagen / dag van de week
Selecting the weekday group / weekday
/giorno della settimana
selecteren
Selezionare il gruppo di giorni della settimana Lu
Use the
button to select the weekday
Selecteer de groep weekdagen Maa - Vri, Zat-
- Ve, Sa- Do, Lu - Do o un giorno della settimana
group Mon - Fri, Sat - Sun, Mon - Sun or a
Zon, Maa - Zon of een dag van de week Maa, Din,
Lu, Ma, Me, Gi, Ve, Sa, Do con il tasto
weekday Mon, Tue, Wed, Thu, Fri, Sat, Sun.
Woe, Don, Vri, Zat, Zon met de toets
(65)
(65)
(65)
2-109
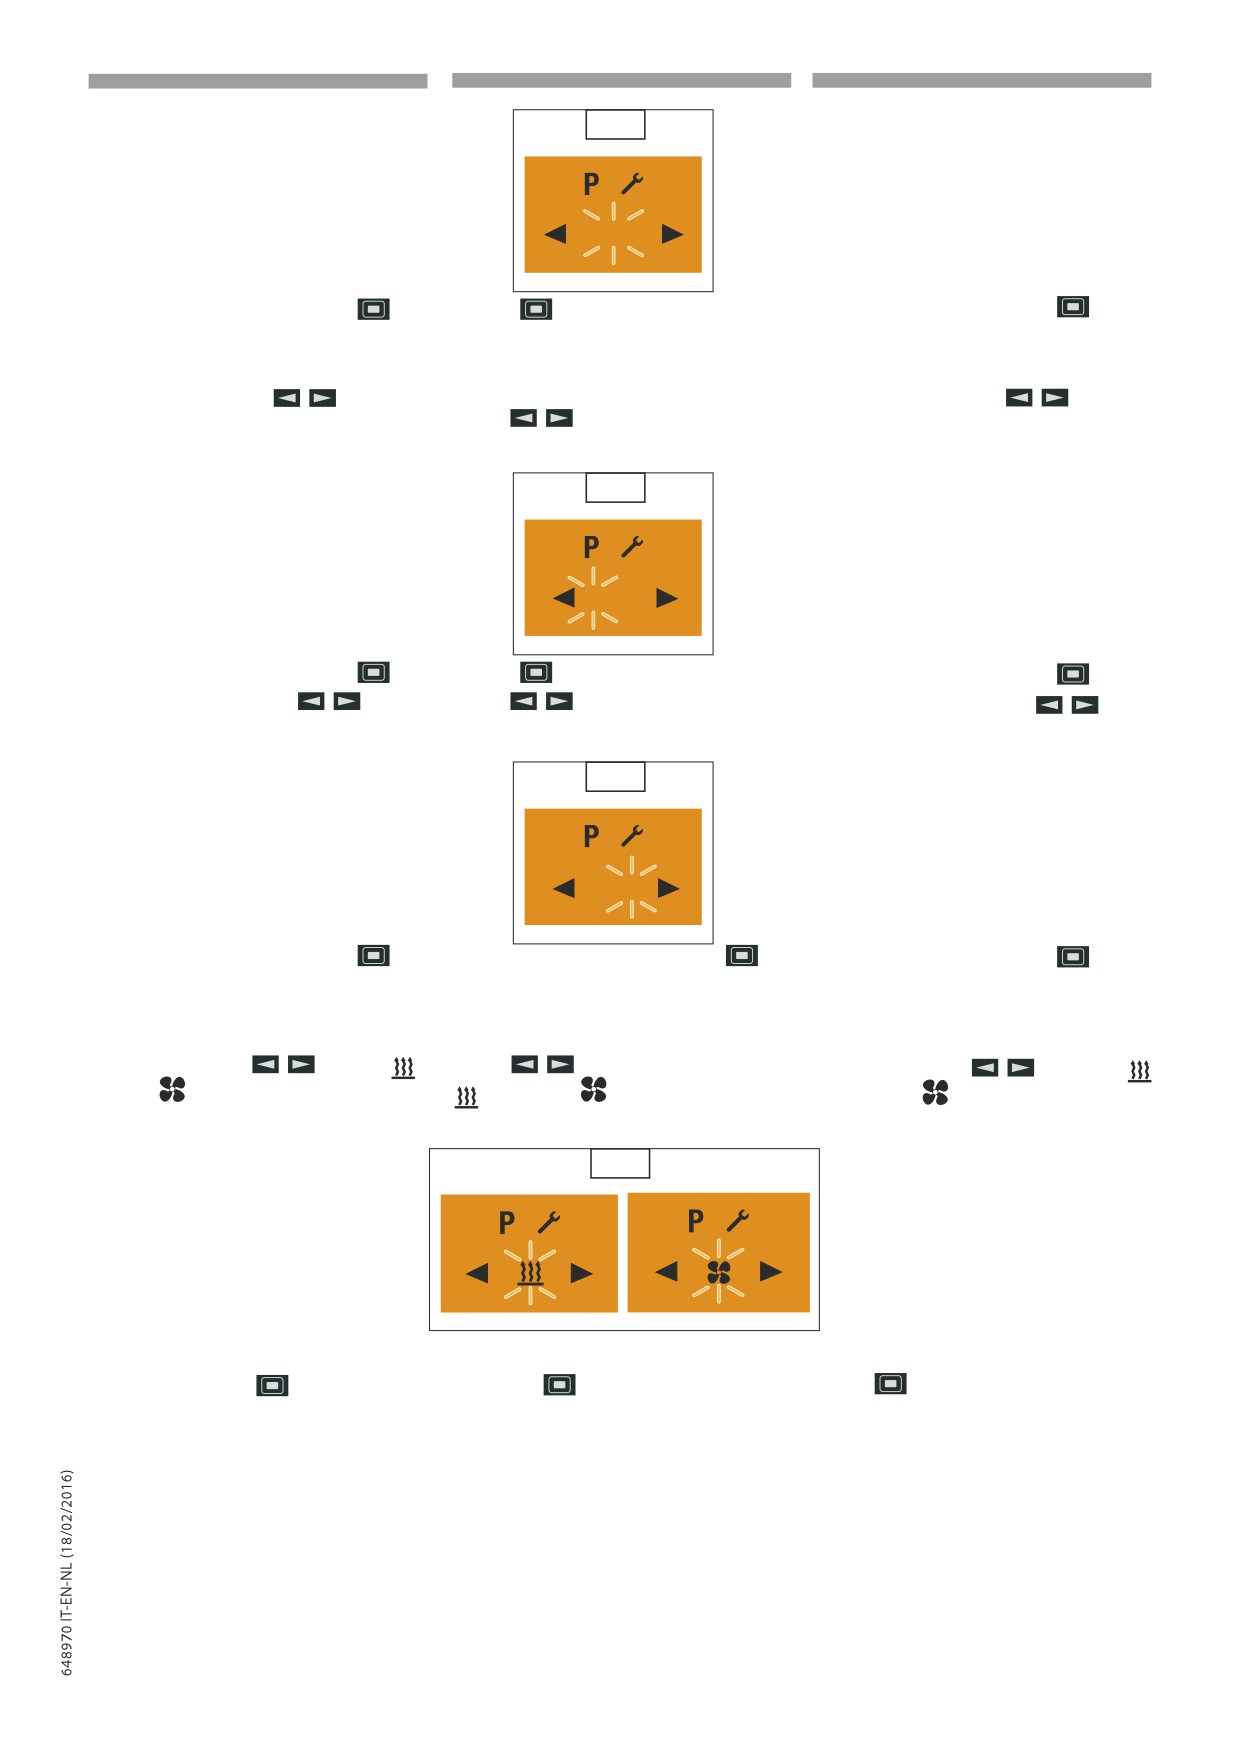
IT
EN
NL
65
2
Mi.
Confermare l’impostazione con il tasto
Press the
button to confirm the setting.
Bevestig de instelling met de toets
Impostare orario di partenza / tempo di avvio
Setting the departure time / start time
Het starttijdstip instellen
Impostare l’ora con il tasto
Stel het uur in met de toets
Use the
button to set the hours.
(66)
(66)
(
66)
66
2
06 : 00
Confermare l’impostazione con il tasto
Press the
button to confirm the setting.
Bevestig de instelling met de toets
Impostare i minuti con il tasto
Use the
button to set the minutes.
Stel de minuten in met de toets
(67)
(67)
(67)
67
2
06 : 30
Confermare l’impostazione con il tasto
Press the button to confirm the setting
Bevestig de instelling met de toets
Selezionare la modalità operativa
Selecting the operating mode
De werkingsmodaliteit selecteren
Selezionare con il tasto
il simbolo
o
Use the
button to deselect the symbol
Selecteer met de toets
het symbool
il simbolo
or the symbol
of het symbool
(68)
(68)
(68)
68
2
2
Confermare la funzione Riscaldamento o
Confirm the Heating or Ventilation function by
Bevestig de functie Verwarming of Ventilatie met
Ventilazione con il tasto
pressing the
button.
de toets
2-110
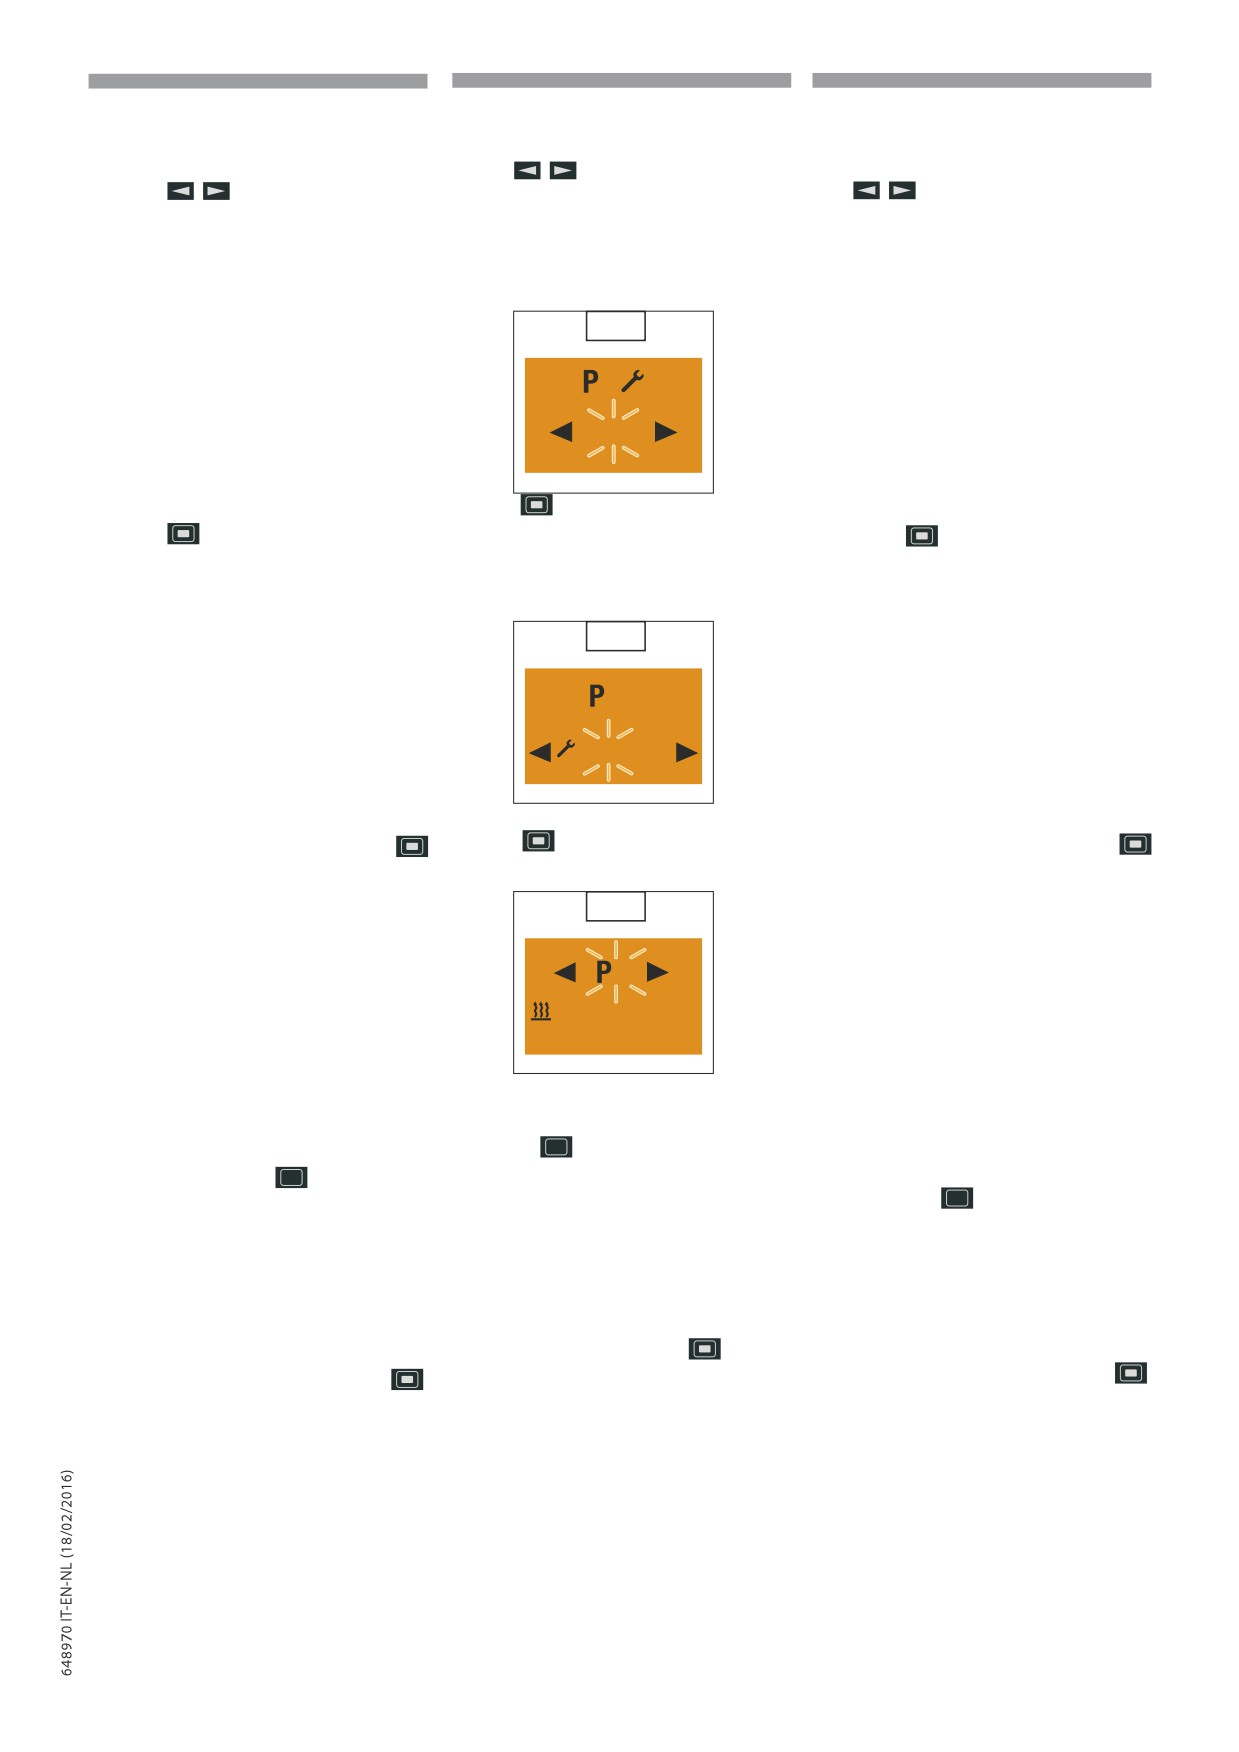
IT
EN
NL
Impostare valore nominale temperatura - solo
Set temperature setpoint - for air heaters
De nominale temperatuurwaarde instellen -
nei riscaldatori ad aria
only
alleen bij luchtverwarmers
Impostare il valore nominale della temperatura
Stel de nominale temperatuurwaarde in met de
Use the
button to set the temperature
con il tasto
setpoint.
toets
Campo di regolazione valore nominale
Temperature setpoint setting range:
Veld om de nominale temperatuurwaarde te
temperatura:
8 °C - 36 °C in 1 °C increments,
regelen:
8 °C - 36 °C in incrementi di 1 °C,
46 °F - 97 °F in 1 °F increments.
8 °C - 36 °C met toename van 1 °C,
46 °F - 97 °F in incrementi di 1 °F.
46 °F - 97 °F met toename van 1 °F.
(69)
(69)
(69)
69
2
21 °C
Confermare il campo nominale della temperatura
Press the
button to confirm the temperature
Bevestig het nominale veld van de temperatuur
setpoint.
con il tasto
met de toets
Attivare memoria programmi
Activat ing the program memory (70)
Het programmageheugen activeren
(70)
(70)
70
2
On
O
Confermare l’impostazione “On” con il tasto
Press the
button to confirm the “On” setting
Bevestig de instelling “On” met de toets
(71)
(71)
(71)
71
2
Mi.
21 °C
06 : 30
60 min.
Avvertenza!
Al
termine
Please note! After editing
Waarschuwing! Nadat u het
dell’elaborazione
del
the program, press the
programma bewerkt heeft, keer
p
programma, tornare
con
p
button to return to
p
terug naar de optie Programma
il
tasto
all’opzione
the Program
/ Preselection
/ Keuze van het menu met de
Programma / Preselezione del
menu item or wail until
toets
of wacht totdat
menu oppure attendere nché
- if the vehicle lighting is On
- in Verlichting voertuig ON de
- in Illuminazione veicolo On
the Program
/ Preselection
optie Programma
/ Keuze van
viene visualizzata l’opzione Pro
menu item
is
displayed,
het menu weergegeven wordt,
- if the vehicle lighting is O
-
in
Verlichting
voertuig
gramma / Preselezione del menu,
the display lighting goes out.
OFF de verlichting van het
- in Illuminazione veicolo O si
spegne l’illuminazionedeldisplay.
Do not press the
button,
display uitgeschakeld wordt.
as otherwise the “On” setting
Druk niet op de toets
,
Non premere il tasto
,
switches to “O
” and vice versa.
anders
wordt
de
poiché altrimenti si commuta
instelling “On”gewijzigd in “O
”en
l’impostazione “On” in “O
” e
omgekeerd.
viceversa.
2-111
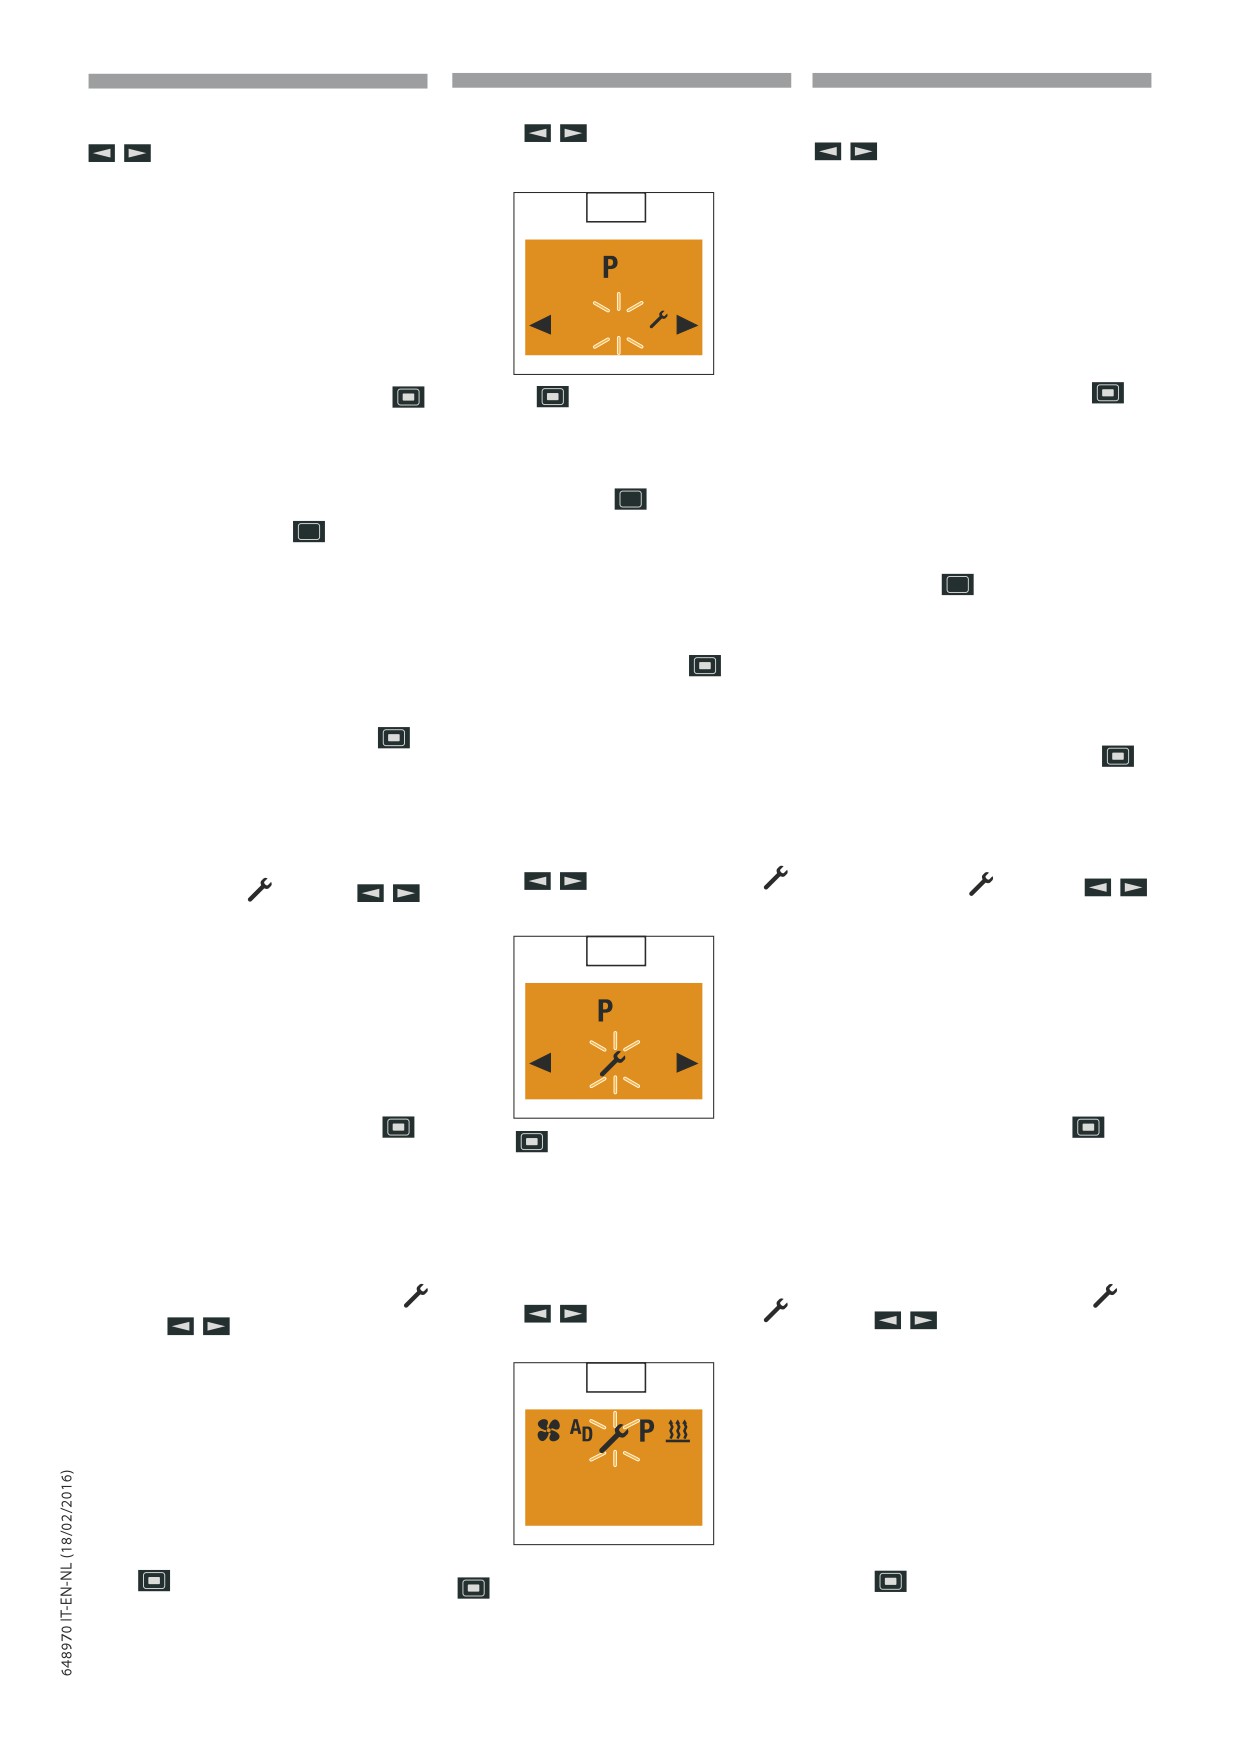
IT
EN
NL
Disattivare memoria programmi
Deactivat ing the program memory
Het programmageheugen uitschakelen
Selezionare l’impostazione
“Off” con il tasto
Selecteer de instelling
“Off” met de toets
Use the
button to select the “Off”
. (72)
. (72)
setting. (72)
72
2
On
O
Confermare l’impostazione “Off” con il tasto
Press the
button to confirm the “Off”
Bevestig de instelling “Off” met de toets
setting.
Avvertenza! Le impostazioni
Waarschuwing! De instellingen
Please note! The settings remain
rimangono memorizzate. Al
blijven in het geheugen
saved. After editing the program,
p
termine
dell’elaborazione
p
opgeslagen. Nadat u het
p
press the
button to return
del
programma,
tornare
programma bewerkt heeft, keer
to the Program / Preselection
con il tasto
all’opzione
terug naar de optie Programma
menu item or wail until
Programma
/ Preselezione del
- if the vehicle lighting is On
/ Keuze van het menu met de
menu oppure attendere nché
the Program
/ Preselection
toets
of wacht totdat
-
in
Illuminazione veicolo
menu item
is
displayed,
- in Verlichting voertuig ON de
On
viene
visualizzata
- if the vehicle lighting is O
optie Programma / Keuze van
l’opzione
Programma
/
the display lighting goes out.
het menu weergegeven wordt,
Preselezione
del
menu,
Do not press the
button,
as otherwise the “On” setting
- met Verlichting voertuig OFF de
- in Illuminazione veicolo O si
switches to “O
” and vice versa.
verlichting van het display
spegne l’illuminazione del display.
uitgeschakeld
wordt.
Non premere il tasto
,
poiché altrimenti si commuta
Druk niet op de toets
,
l’impostazione
“On” in “O
” e
anders wordt de instelling “On”
viceversa.
gewijzigd in “O
” en omgekeerd.
Edit the program memory again
Het programmageheugen opnieuw bewerken
Rielaborare memoria programmi
Use the
button to select the
Selecteer het symbool
met de toets
Selezionare il simbolo
con il tasto
symbol. (73)
(73)
(73)
73
2
O
On
Confermare l’impostazione con il tasto
e
Bevestig de instelling met de toets
en ga
Use the
button to confirm the setting and
proseguire.
verder.
continue.
Impostazioni
Instellingen
Settings
Impostare l’ora
Het uur instellen
Display On, viene visualizzata la videata iniziale.
Setting the time
Display ON, het beginscherm verschijnt.
Display On, the Start display appears.
Selezionare dalla barra del menu il simbolo
Selecteer op de menubalk het symbool
met
Use the
button to select the
de toets
con il tasto
symbol in the Menu bar. (74)
(74)
(74)
74
Mo.
10:30
Confermare l’opzione Impostazioni del menu con
Bevestig de optie Instellingen van het menu met
Confirm the Settings menu item by pressing the
il tasto
de toets
button.
2-112
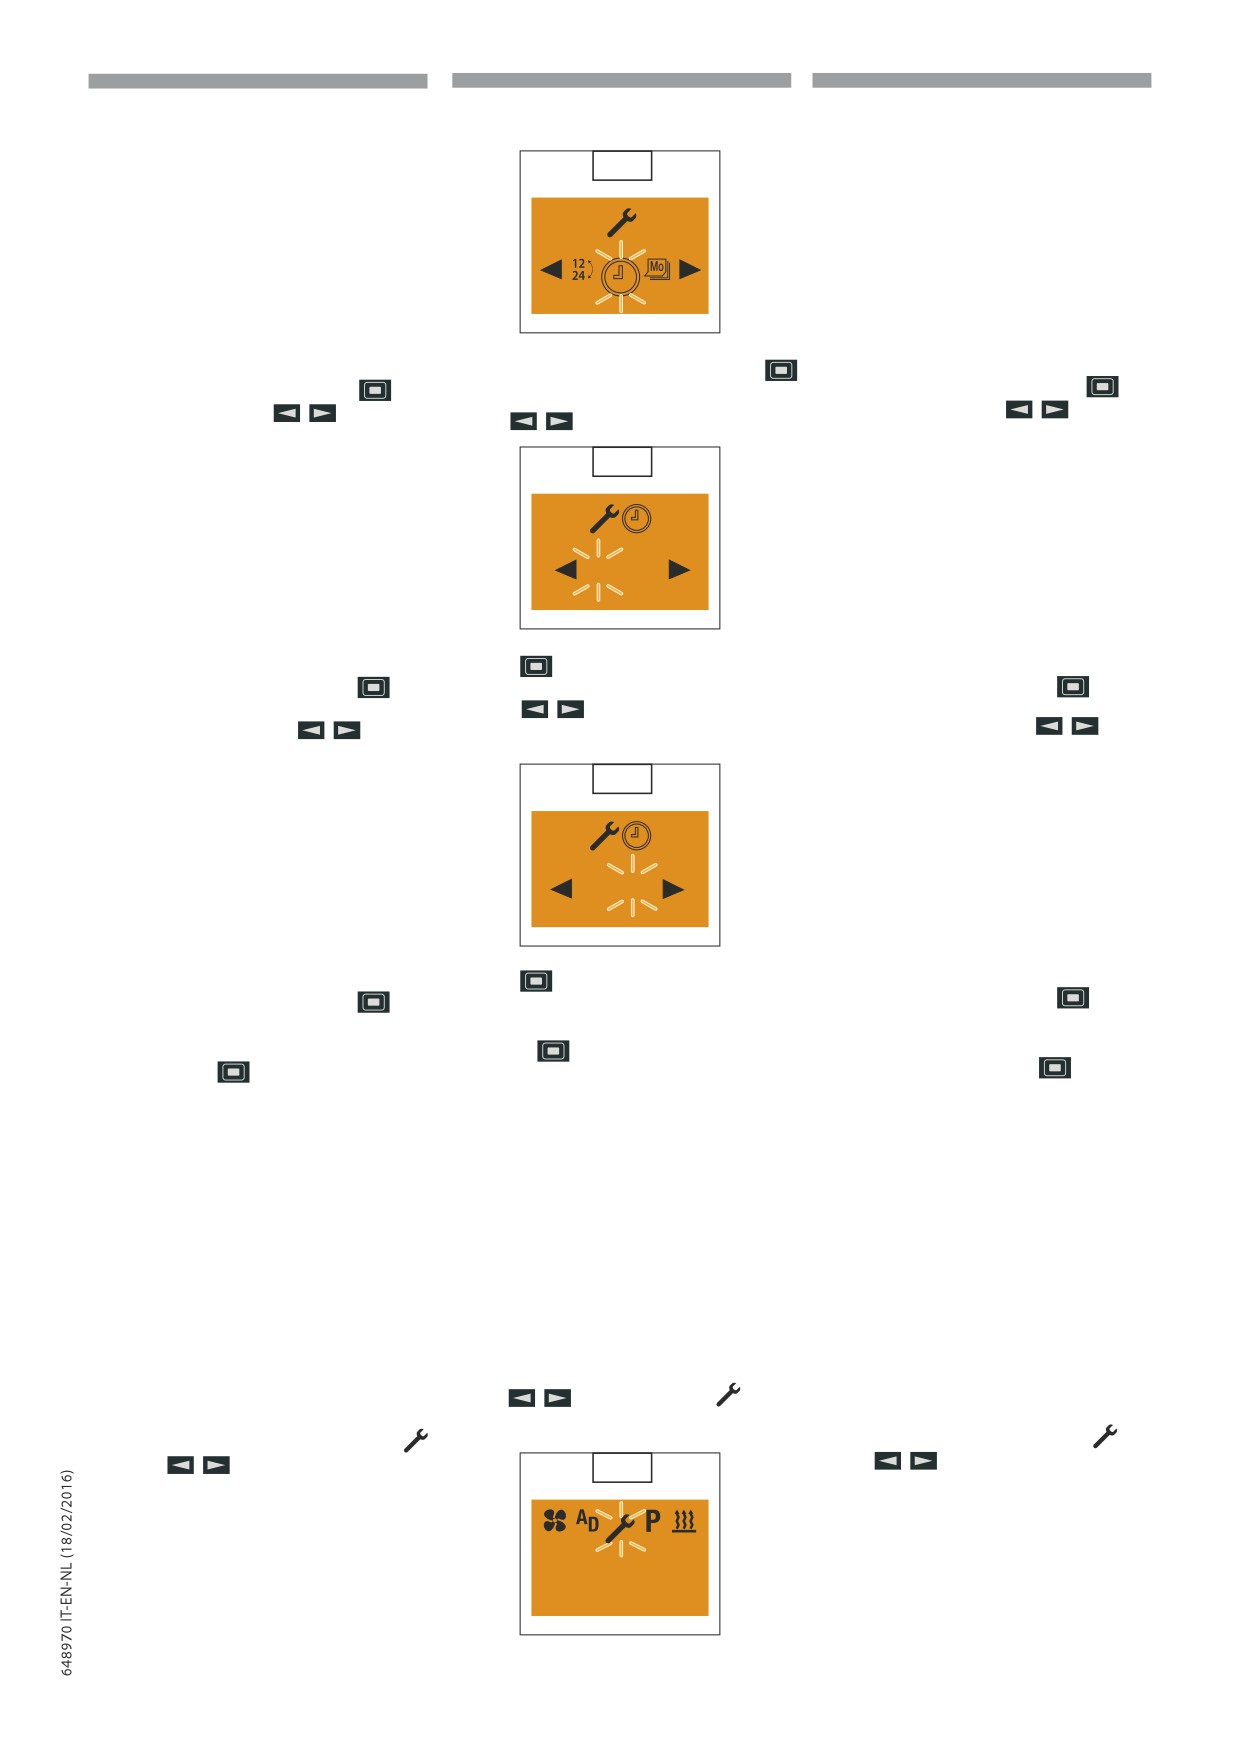
IT
EN
NL
75
Confirm the Set the Time by pressing the
Confermare Impostare l’ora con il tasto
button.
Bevestig Het uur instellen met de toets
Impostare l’ora con il tasto
Stel het uur in met de toets
Use the
button to set the hours. (76)
(76)
(76)
76
06 : 00
Press the
button to confirm the setting.
Confermare l’impostazione con il tasto
Bevestig de instelling met de toets
Use the
button to set the minutes.
Impostare i minuti con il tasto
Stel de minuten in met de toets
(77)
(77)
(77)
77
06 : 30
Press the
button to confirm the setting.
Confermare l’impostazione con il tasto
Bevestig de instelling met de toets
Please note! Do not press the
Avvertenza! Non premere il
button, as otherwise Set
Waarschuwing! Druk niet
op de toets
,
anders
tasto
, altrimenti sul display
p
the Time appears in the display
p
verschijnt op het
display
p
riappare Impostar e l’ora.
a gain. After making the setting,
Al termine dell’impostazione
press the button to return to the
opnieuw Het uur instellen. Keer
tornare con il tasto all’opzione
Settings menu item or wail until
na het instellen terug met de
Imposta zioni
del
menu
- if the vehicle lighting is On the
toets naar de optie Instellingen
oppure
attendere
nché
Settings menu item is displayed,
van het menu of wacht totdat
- in Verlichting voertuig ON
- in Illuminazione veicolo On
- if the vehicle lighting is O the
de optie Instellingen van het
viene visualizzata l’opzione
display lighting goes out.
menu wordt weergegeven,
Imposta zioni del menu,
- in Verlichting voertuig OFF de
- in Illuminazione veicolo O
verlichting van het display wordt
si spegne l’illuminazione del
display.
Setting the weekday
uitgeschakeld.
Display On, the Start display appears.
Impostare giorno della settimana
De dag van de week instellen
Use the
button to select the
symbol
Display On, viene visualizzata la videata iniziale.
Display ON, het beginscherm verschijnt.
in the Menu bar. (78)
Selezionare dalla barra del menu il simbolo
Selecteer op de menubalk het symbool
met
con il tasto
78
de toets
(78)
(78)
Mo.
10:30
Confermare l’opzione Impostazioni del menu con Confirm the Settings menu item by pressing the
Bevestig de optie Instellingen van het menu met
2-113
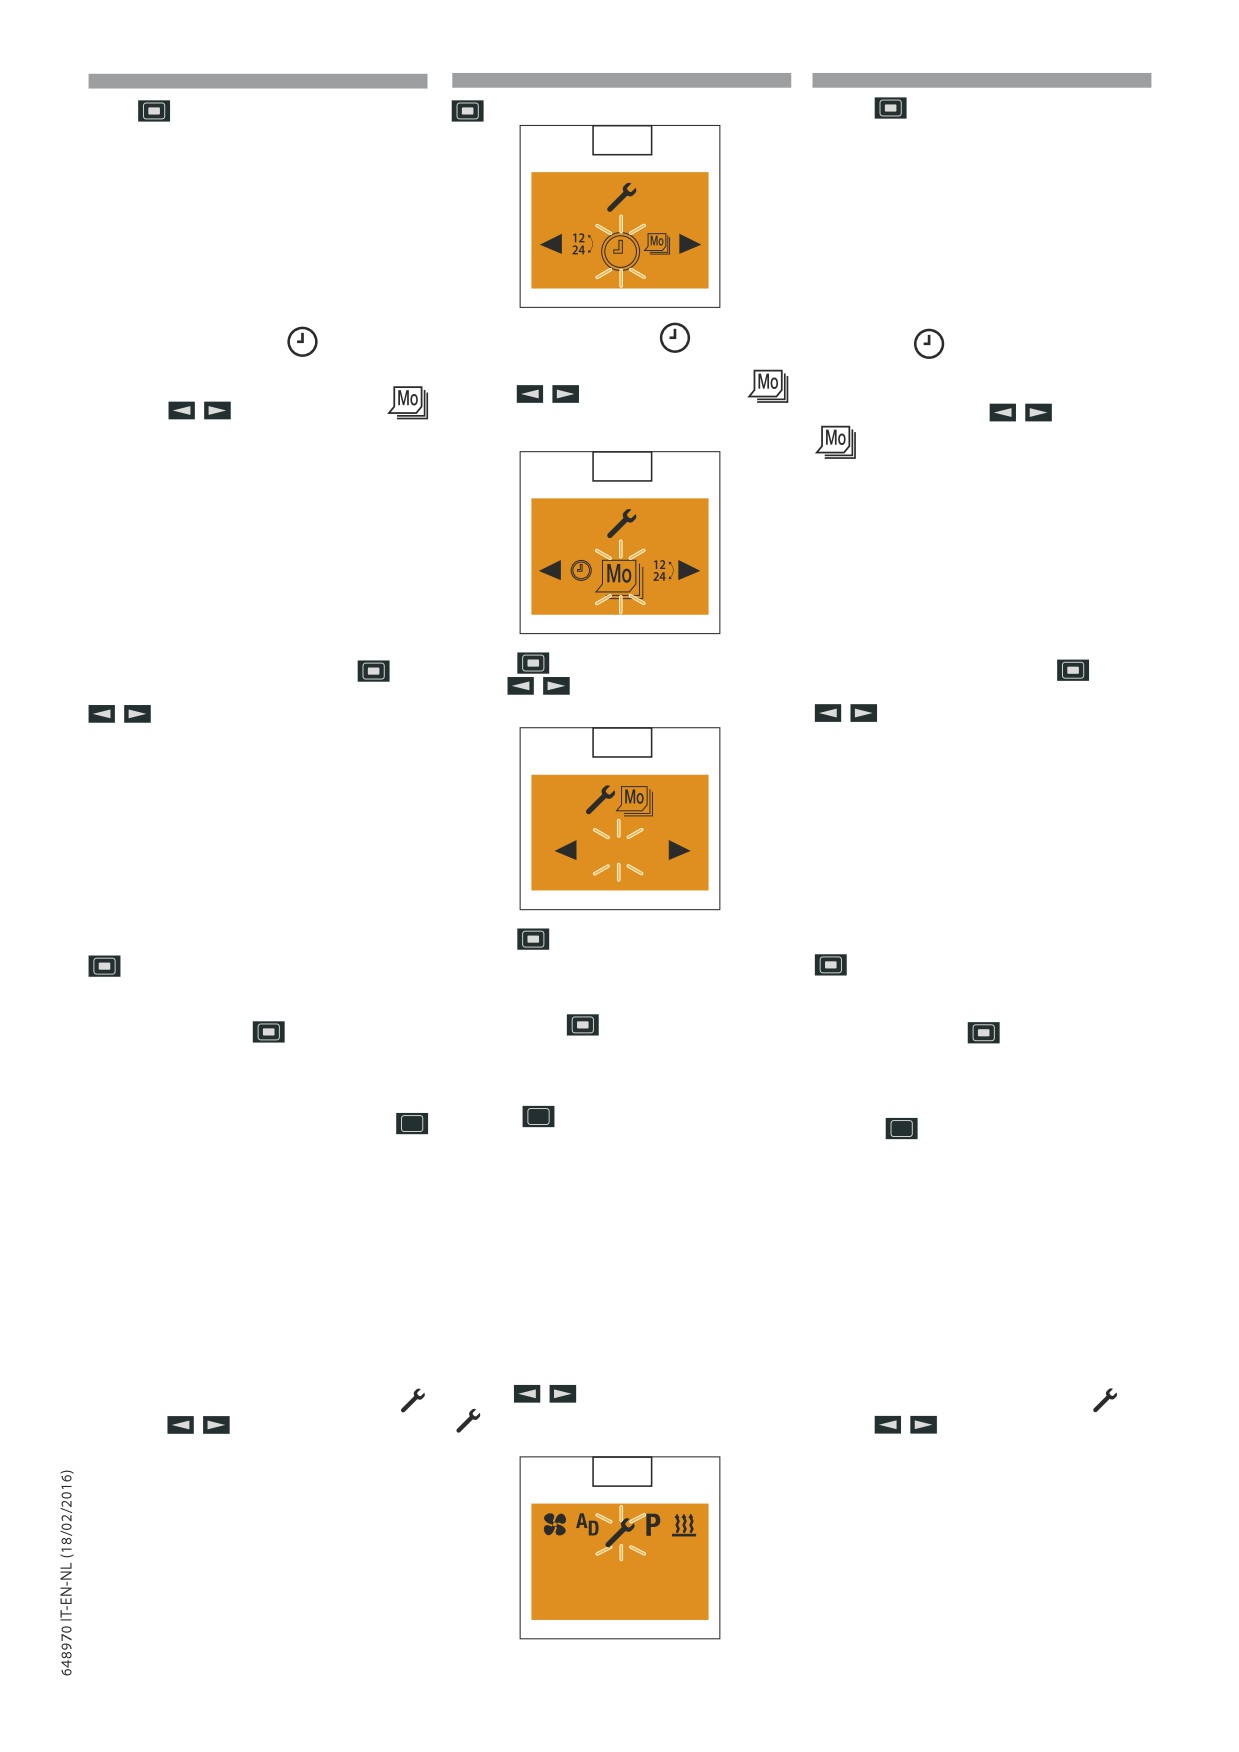
IT
EN
NL
il tasto
button.
de toets
79
Viene visualizzato il simbolo
Impostare l’ora.
The Set the Time symbol
is displayed
Het symbool
Het uur instellen verschijnt.
(79)
(79).
(79)
Use the
button to select the
Con il tasto
selezionare il simbolo
Selecteer met de toets
het symbool
Weekday symbol. (80)
Giorno della settimana. (80)
Dag van de week. (80)
80
Press the
button to confirm the setting.
Confermare l’impostazione con il tasto
Bevestig de instelling met de toets
Use the
button to select the weekday.
Selezionare il giorno della settimana con il tasto
Selecteer de dag van de week met de toets
(81)
(81)
81
(81)
Mo.
Confermare il giorno della settimana con il tasto
Press the
button to confirm the weekday.
Bevestig de dag van de week met de toets
Please note! Do not press
Avvertenza!
Non premere
Waarschuwing! Druk niet op
the
button, as otherwise
il tasto
,
altrimenti sul
de toets
, anders verschijnt
p
Set the Weekday appears
p
display
riappareImpostar
p
De dag van de week instellen
in the display a gain. After
e giorno della settimana. Al
opnieuw op het display. Keer na
making the setting, press the
termine
dell’impostazione
het instellen terug met de toets
button to return to the
tornare con il tasto
naar de optie Instellingen
Settings menu item or wail until
all’opzione Imposta zioni del
van het menu of wacht totdat
- if the vehicle lighting is On the
menu oppure attendere nché
- in Verlichting voertuig ON
Settings menu item is displayed,
- in Illuminazione veicolo On
de optie IInstellingen van het
- if the vehicle lighting is O the
viene visualizzata l’opzione
menu wordt weergegeven,
display lighting goes out.
Imposta zioni del menu,
- in Verlichting voertuig OFF de
- in Illuminazione veicolo O
verlichting van het display wordt
si spegne l’illuminazione del
uitgeschakeld.
display.
Impostare formato dell’ora
Setting the time format
Het formaat van het uur instellen
Display On, viene visualizzata la videata iniziale.
Display ON, the Start display appears.
Display ON, het beginscherm verschijnt.
Use the
button to select the symbol
Selezionare dalla barra del menu il simbolo
Selecteer op de menubalk het symbool
met
con il tasto
in the Menu bar. (82)
de toets
(82)
(82)
82
Mo.
10:30
Confirm the Settings menu item by pressing the
Confermare l’opzione Impostazioni del menu con
Bevestig de optie Instellingen van het menu met
2-114
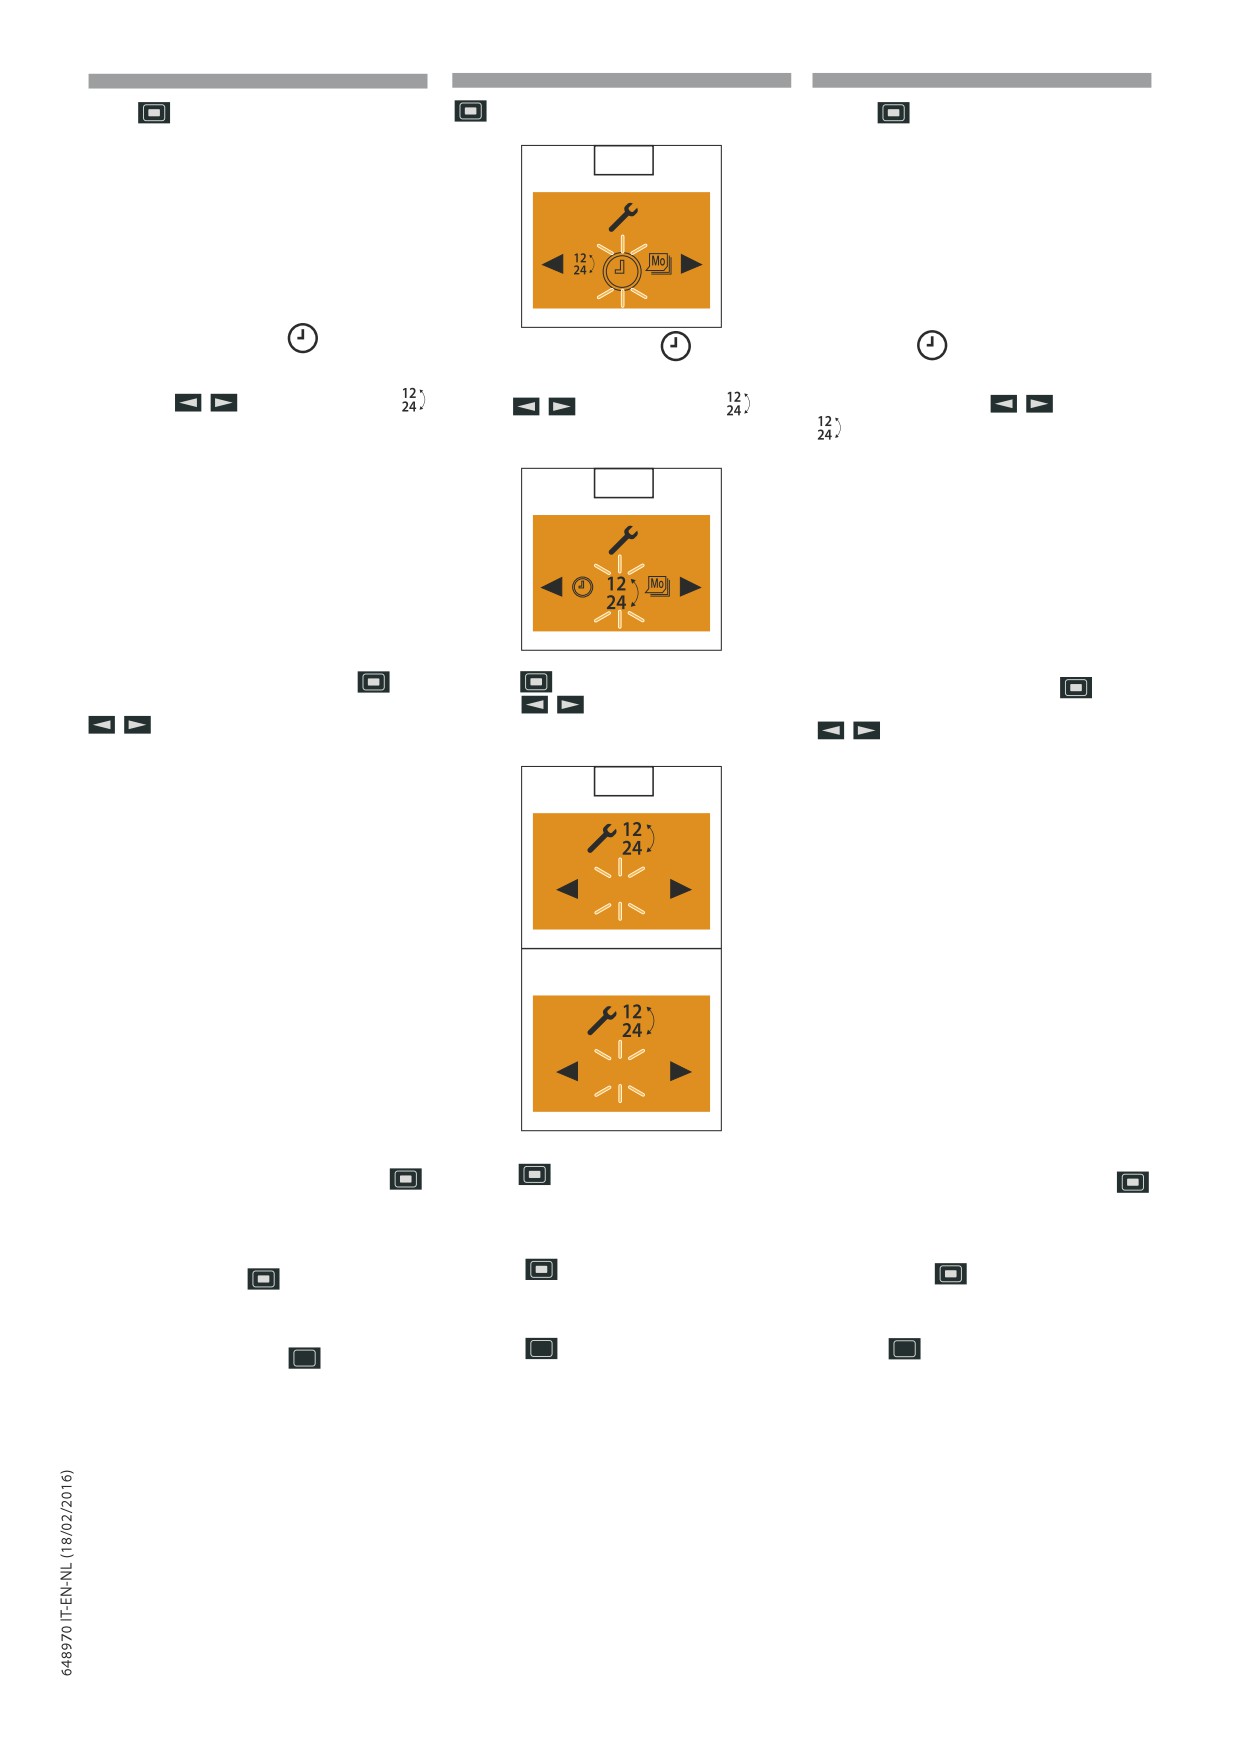
IT
EN
NL
il tasto
button.
de toets
83
Viene visualizzato il simbolo
Impostare l’ora
The Set the Time symbol
is displayed
Het symbool
Het uur instellen verschijnt
(83).
(83)
(83).
Con il tasto
selezionare il simbolo
Use the
button to select the
Time
Selecteer met de toets
het symbool
Formato dell’ora.
Format symbol. (84)
Formaat van het uur.
(84)
(84)
84
Confermare l’impostazione con il tasto
Press the
button to confirm the setting.
Bevestig de instelling met de toets
Selezionare il formato dell’ora con il tasto
Use the
button to select the time
Selecteer het formaat van het uur met de toets
format. (85)
(85)
(85)
85
12 h
24 h
Press the
button to confirm the time format.
Confermare il formato dell’ora con il tasto
Bevestig het formaat van het uur met de toets
(85)
(85)
(85)
Please note! Do not press the
Avvertenza!
Non premere
Waarschuwing! Druk niet op de
button, as otherwise Set
toets
, anders verschijnt Het
il
tasto
,
altrimenti sul
p
p
the Time Format appears
p
formaat van het uur instellen
display riappare Impostare
in the display a gain. After
opnieuw op het display. Keer na
formato dell’ora. Al termine
making the setting, press the
het instellen terug met de toets
dell’impostazione
tornare
button to return to the
naar de optie Instellingen
con il tasto
all’opzione
Settings menu item or wail until
van het menu of wacht totdat
Impostazioni
del
menu
- if the vehicle lighting is On the
- met Verlichting voertuig ON
oppure
attendere
nché
Settings menu item is displayed,
de optie Instellingen van het
- in Illuminazione veicolo On
- if the vehicle lighting is O the
menu wordt weergegeven,
viene visualizzata l’opzione
display lighting goes out.
- met Verlichting voertuig OFF de
Imposta zioni del menu,
verlichting van het display wordt
- in Illuminazione veicolo O
uitgeschakeld.
si spegne l’illuminazione del
display.
2-115
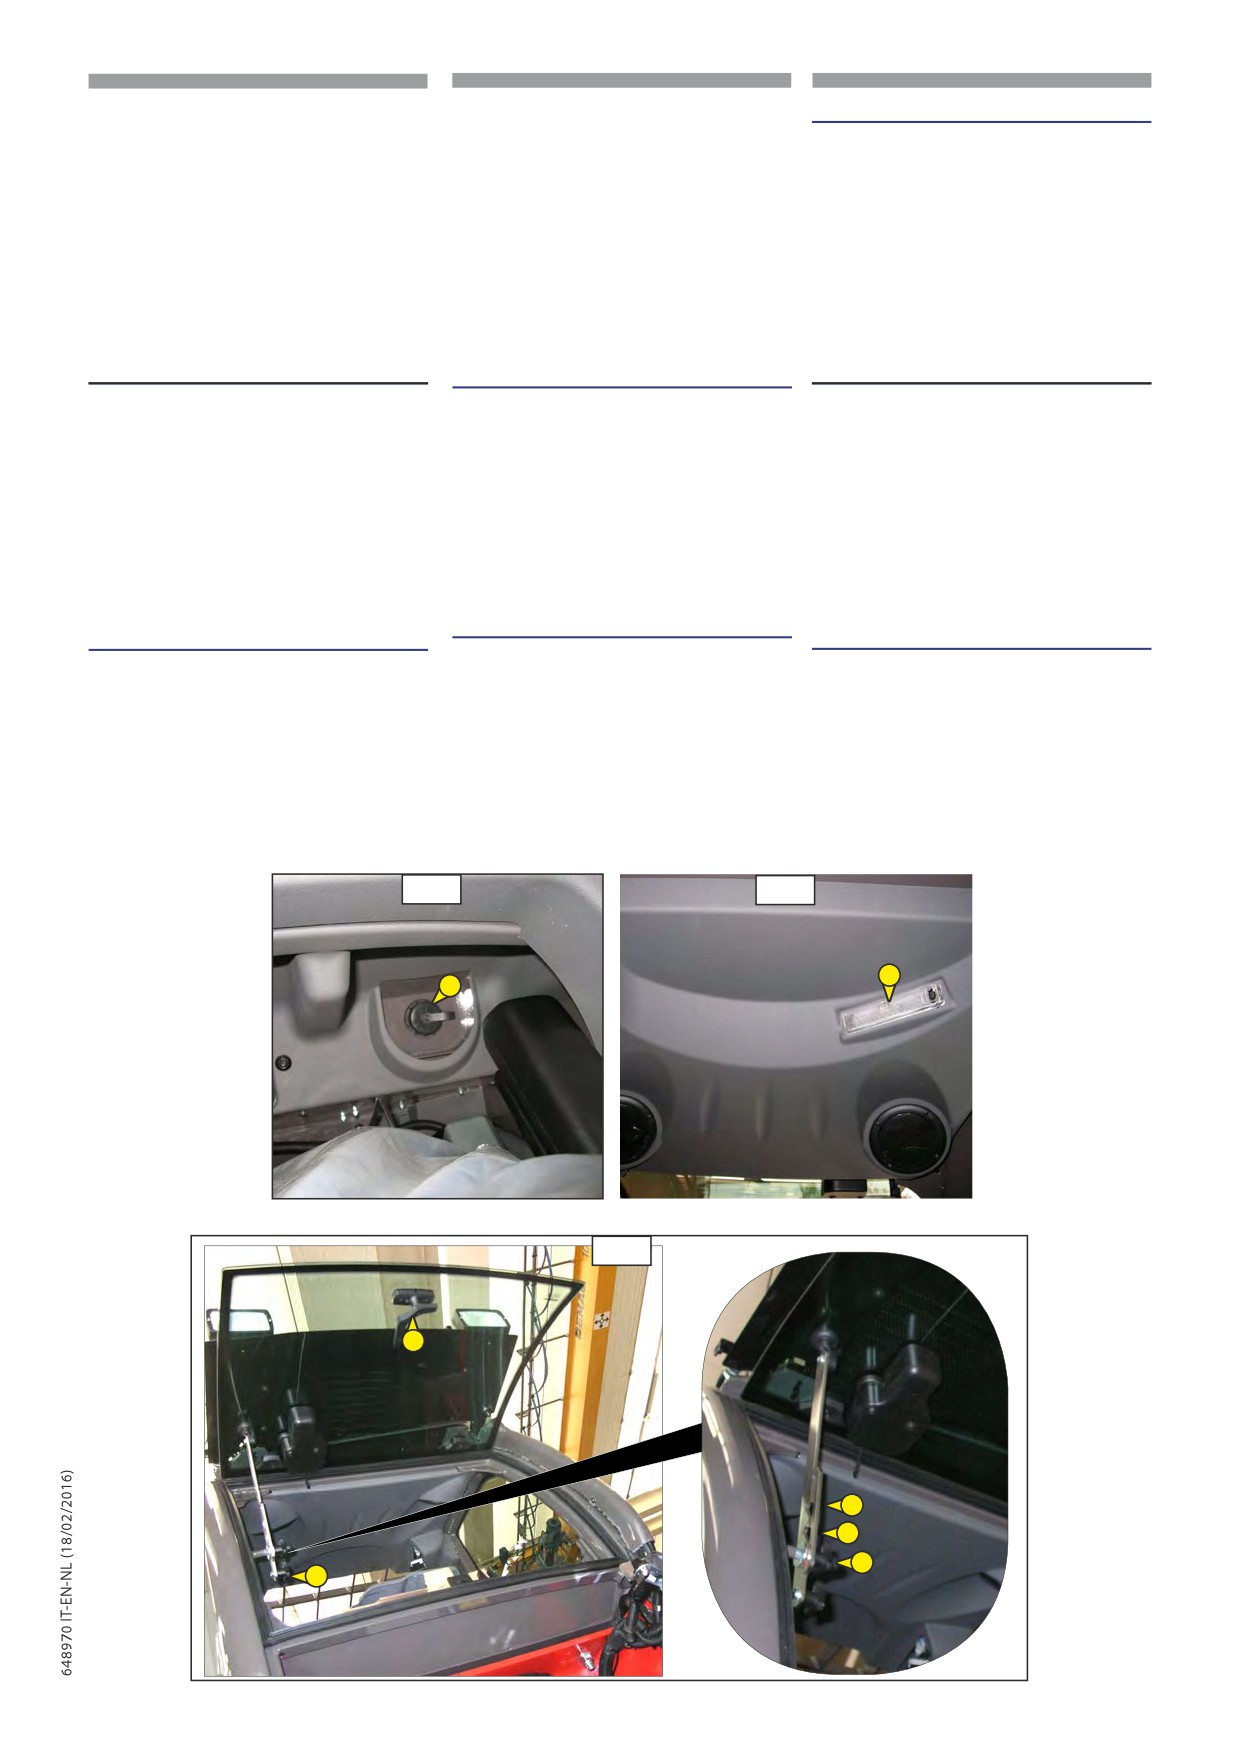
IT
EN
NL
19 SERBATOIO LIQUIDO LAVAVETRO
19 WINDSCREEN WIPER LIQUID TANK
19 TANK RUITENWISSERVLOEISTOF
Posizionato a sinistra dell’operatore. Svitare il
Bevindt zich aan de linkerkant van de bestuurder.
Present on the LH of the operator. Unscrew cap
tappo di chiusura (1,86), assicurarsi che il
Draai de dop (1,86) los, de tank moet altijd
(1,86), and make sure the tank is always full.
serbatoio sia sempre pieno. Liquido da usare:
vol zijn. Te gebruiken vloeistof: water plus
Liquid to be used: water + detergent for glass
acqua più detergente per vetri (usare un antigelo
reinigingsmiddel voor ruiten
(gebruik een
windows (use an anti-freeze in winter)
in inverno)
antivriesmiddel in de winter)
20 PLAFONIERA
20 CEILING LIGHT
20 PLAFONDLAMPJE
L’interruttore
(1,87)
è
De
schakelaar
(1,87)
is
incorporato
nella
plafoniera.
The (1,87) switch is built into the ceiling light.
ingebouwd
in
het
plafondlampje.
Ha due posizioni: illuminazione continua e
It has two positions: continuous lighting and Off.
Hij heeft twee standen: continu verlichting en
spegnimento.
uitschakeling.
21 LEVA D’APERTURA DEL FINESTRINO
21 REAR WINDOW OPENING LEVER
POSTERIORE
21 HENDEL OPENEN ACHTERRUIT
Per l’apertura del finestrino posteriore tirare la
Om de achterruit te openen, draai de hendel
To open the rear window pull the (1,88) lever
leva (1,88) in senso orario e spingere il vetro.
(1,88) rechtsom en duw tegen het glas.
clockwise and push the window.
Bloccare col pomolo
(2,88) il finestrino
Blokkeer de achterruit met de knop (2,88) in
Use knob (2,88) to block the rear window in
posteriore, su tre diverse posizioni.
drie verschillende standen.
three different positions.
86
87
1
1
88
1
2
2
2-116
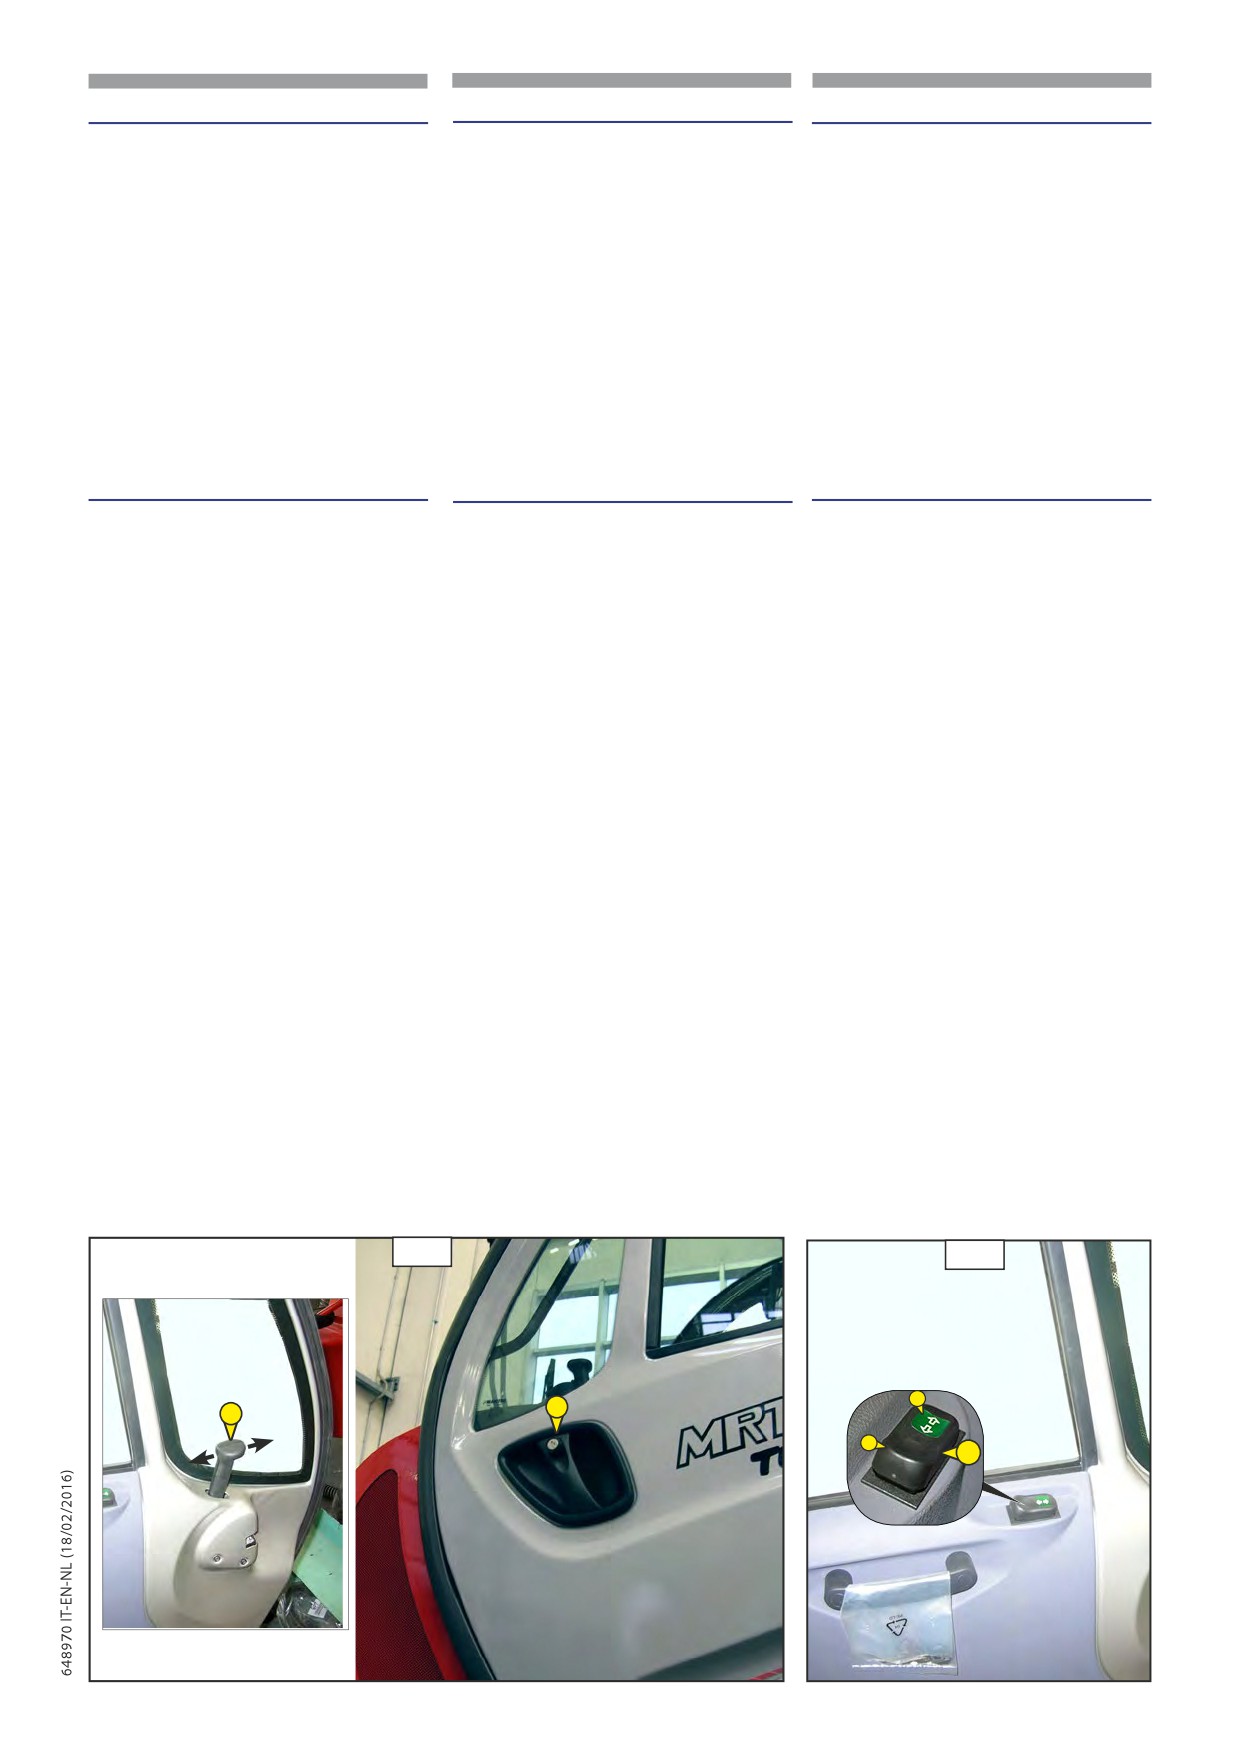
IT
EN
NL
22 CHIUSURA DELLA PORTIERA
22 DOOR CLOSURE
22 SLUITING VAN HET PORTIER
Chiusura esterna: Per aprire la portiera, premere
External closure: To open the door press button
Van buitenaf: Om het portier te openen, druk op
il bottone (1,89). Due chiavi sono fornite con
(1,89). Two keys are supplied with the truck
de knop (1,89). Er worden twee sleutels bij de
il carrello per la chiusura.
for closure.
heftruck geleverd om hem af te sluiten.
Chiusura interna: Per aprire la portiera, afferrare la
Internal closure: To open the door, grip lever
Van binnenuit: Om het portier te openen, pak de
leva (2,89) e spingerla in avanti.
(2,89) and push it forwards.
hendel (2,89) vast en druk hem naar voor.
23 INTERRUTTORE ALZACRISTALLI
23 WINDOW LIFT POWER OPERATED
23 KNOP ELEKTRISCHE
ELETTRICO
SWITCH
RAAMOPENER
Questo interruttore
(5,90) attiva il
This switch (5,90) active the control that
Deze knop
(5,90) activeert de
comando che alza o abbassa il Ðnestrino
raises or lowers the cab door window using
bediening die het portierraam van de
della portiera della cabina mediante un
cabine met behulp van een elektrisch
a powered mechanism.
meccanismo elettrico.
mechanisme.
Opening the window
Apertura del nestrino.
Het raam openen.
Press the switch forward
(1a,90) and
Premere l’interruttore in avanti (1a,90) e
Duw de knop naar voor (1a,90) en
hold it until the window has moved to the
tenerlo premuto Ðno a quando il Ðnestrino
houd hem ingedrukt totdat het raam zich
desired position.
ha raggiunto la posizione desiderata.
in de juiste positie bevindt.
Press the switch forward (1a,90) and hold
Premere l’interruttore in avanti (1a,90) e
Duw de knop naar voor (1a,90) en
it until the window will open all the way.
tenerlo premuto Ðno all’apertura completa
houdt hem ingedrukt totdat het raam
Closing the window
del Ðnestrino.
volledig geopend is.
Press the switch back (1b,90) and hold it
Chiusura del nestrino
Het raam sluiten
Premere l’interruttore all’indietro (1b,90)
until the window has moved to the desired
Duw de knop naar achter (1b,90) en
e tenerlo premuto Ðno a quando il Ðnestrino
position.
houd hem ingedrukt totdat het raam zich
ha raggiunto la posizione desiderata.
Press the switch back (1b,90) and hold it
in de juiste positie bevindt.
Premere l’interruttore all’indietro (1b,90)
until the window will close all the way.
Duw de knop naar achter (1b,90) en
e tenerlo premuto Ðno alla
houdt hem ingedrukt totdat
chiusura completa del Ðnestrino.
het raam volledig gesloten is.
89
90
1a
1
2
1b
5
2-117
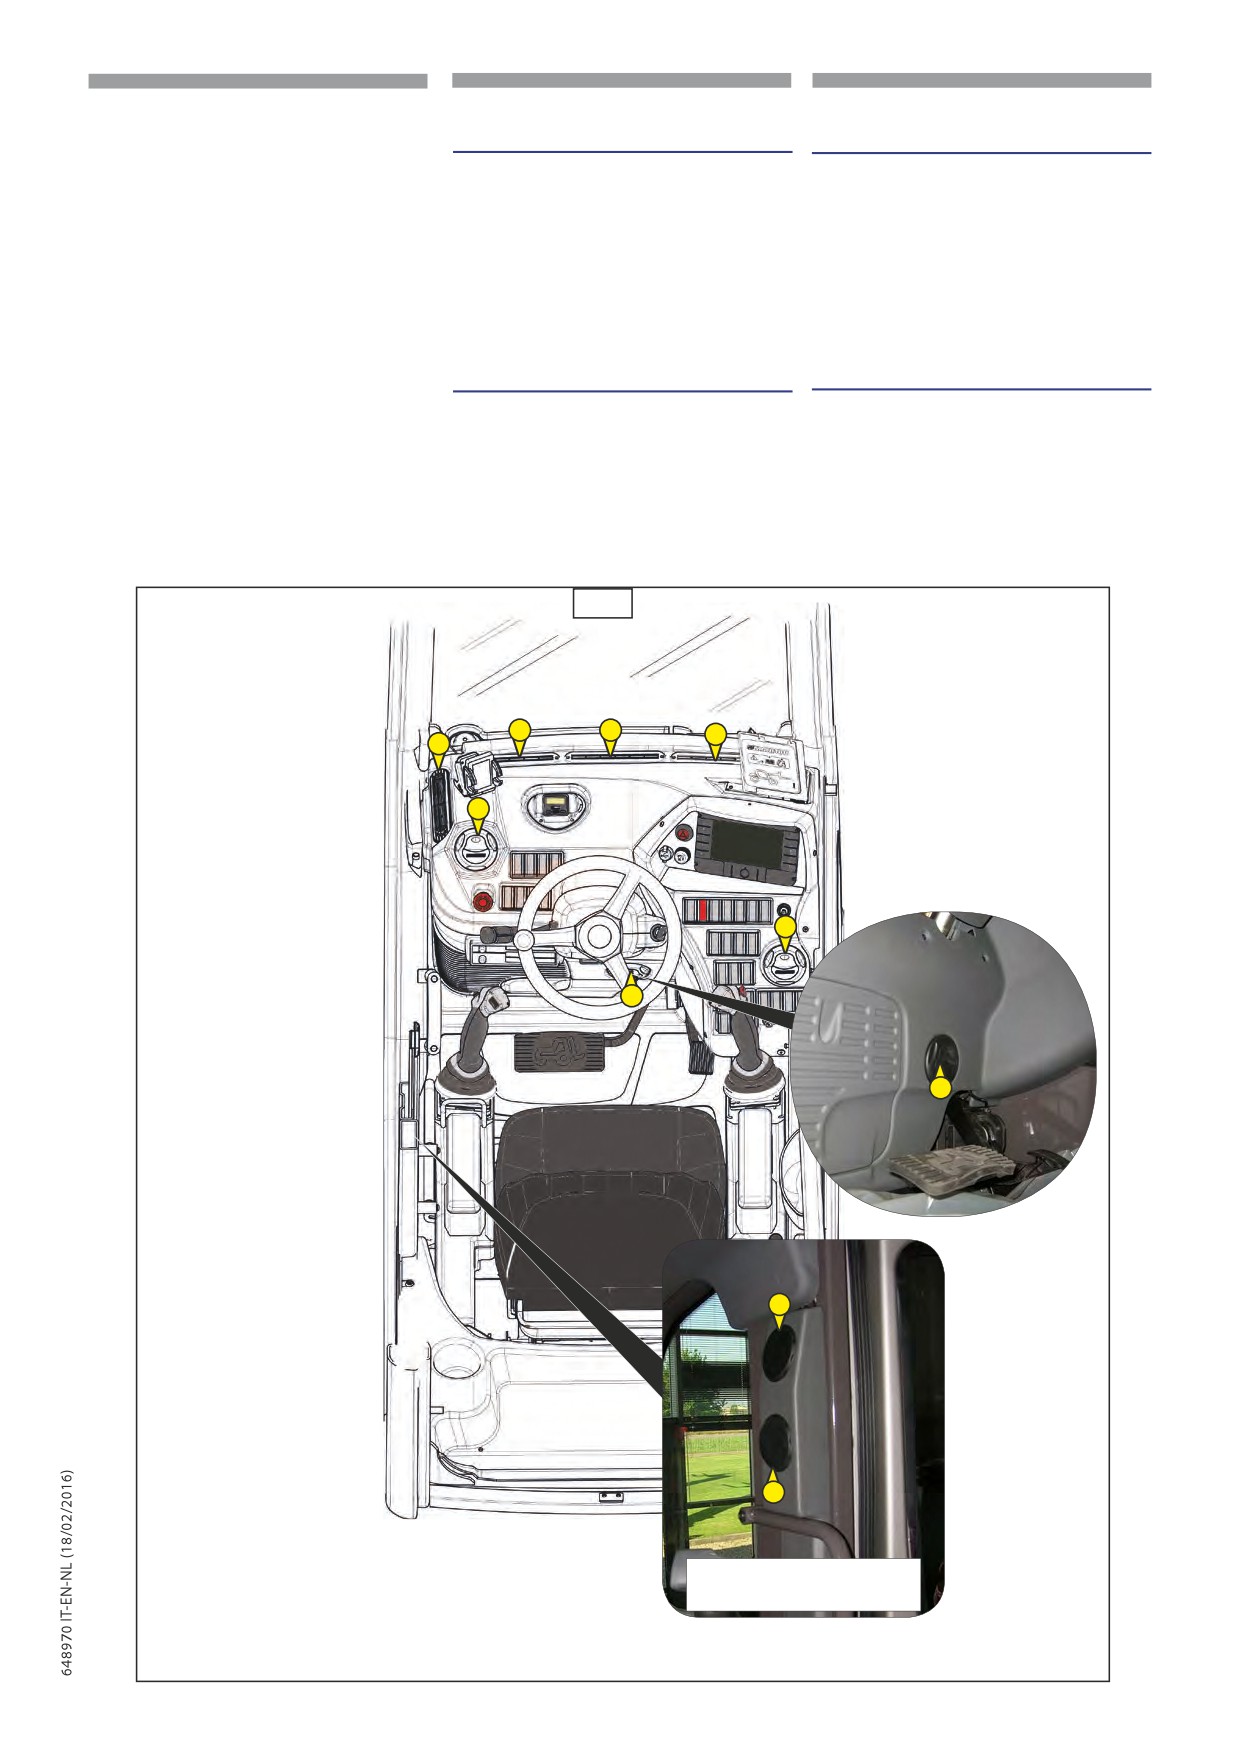
IT
EN
NL
24
- DIFFUSORI D’ARIA PER IL
24 - AIR DIFFUSERS FOR DEMISTING
24 - VENTILATOREN WASEMUITSLAG OP
DISAPPANNAMENTO DEL PARABREZZA
WINDSCREEN
VOORRUIT
Per un’efficacia ottimale, chiudere i diffusori del
For optimum performance, close the heating
Sluit voor een optimaal rendement de
riscaldamento.
diffusers.
verwarmingsventilatoren.
(1,91)
(1,91)
(1,91)
25 -DIFFUSORID’ARIADELRISCALDAMENTO
25 - AIR DIFFUSERS OF HEATING
25 - VERWARMINGSVENTILATOREN
I diffusori del riscaldamento permettono di
The heating diffusers make it possible to
De luchtverdeling van de verwarming maakt het
distribuire l’aria ventilata all’interno della cabina
distribute the ventilated air inside the cab and on
mogelijk om de geventileerde lucht in de cabine
e sui vetri laterali.
the side windows.
en op de zijruiten te verspreiden.
(2,91)
(2,91)
(2,91)
91
1
1
1
1
2
2
2
2
2
2
OPZIONE ARIA CONDIZIONATA
AIR-CONDITIONING OPTION
OPTIE AIRCONDITIONING
2-118
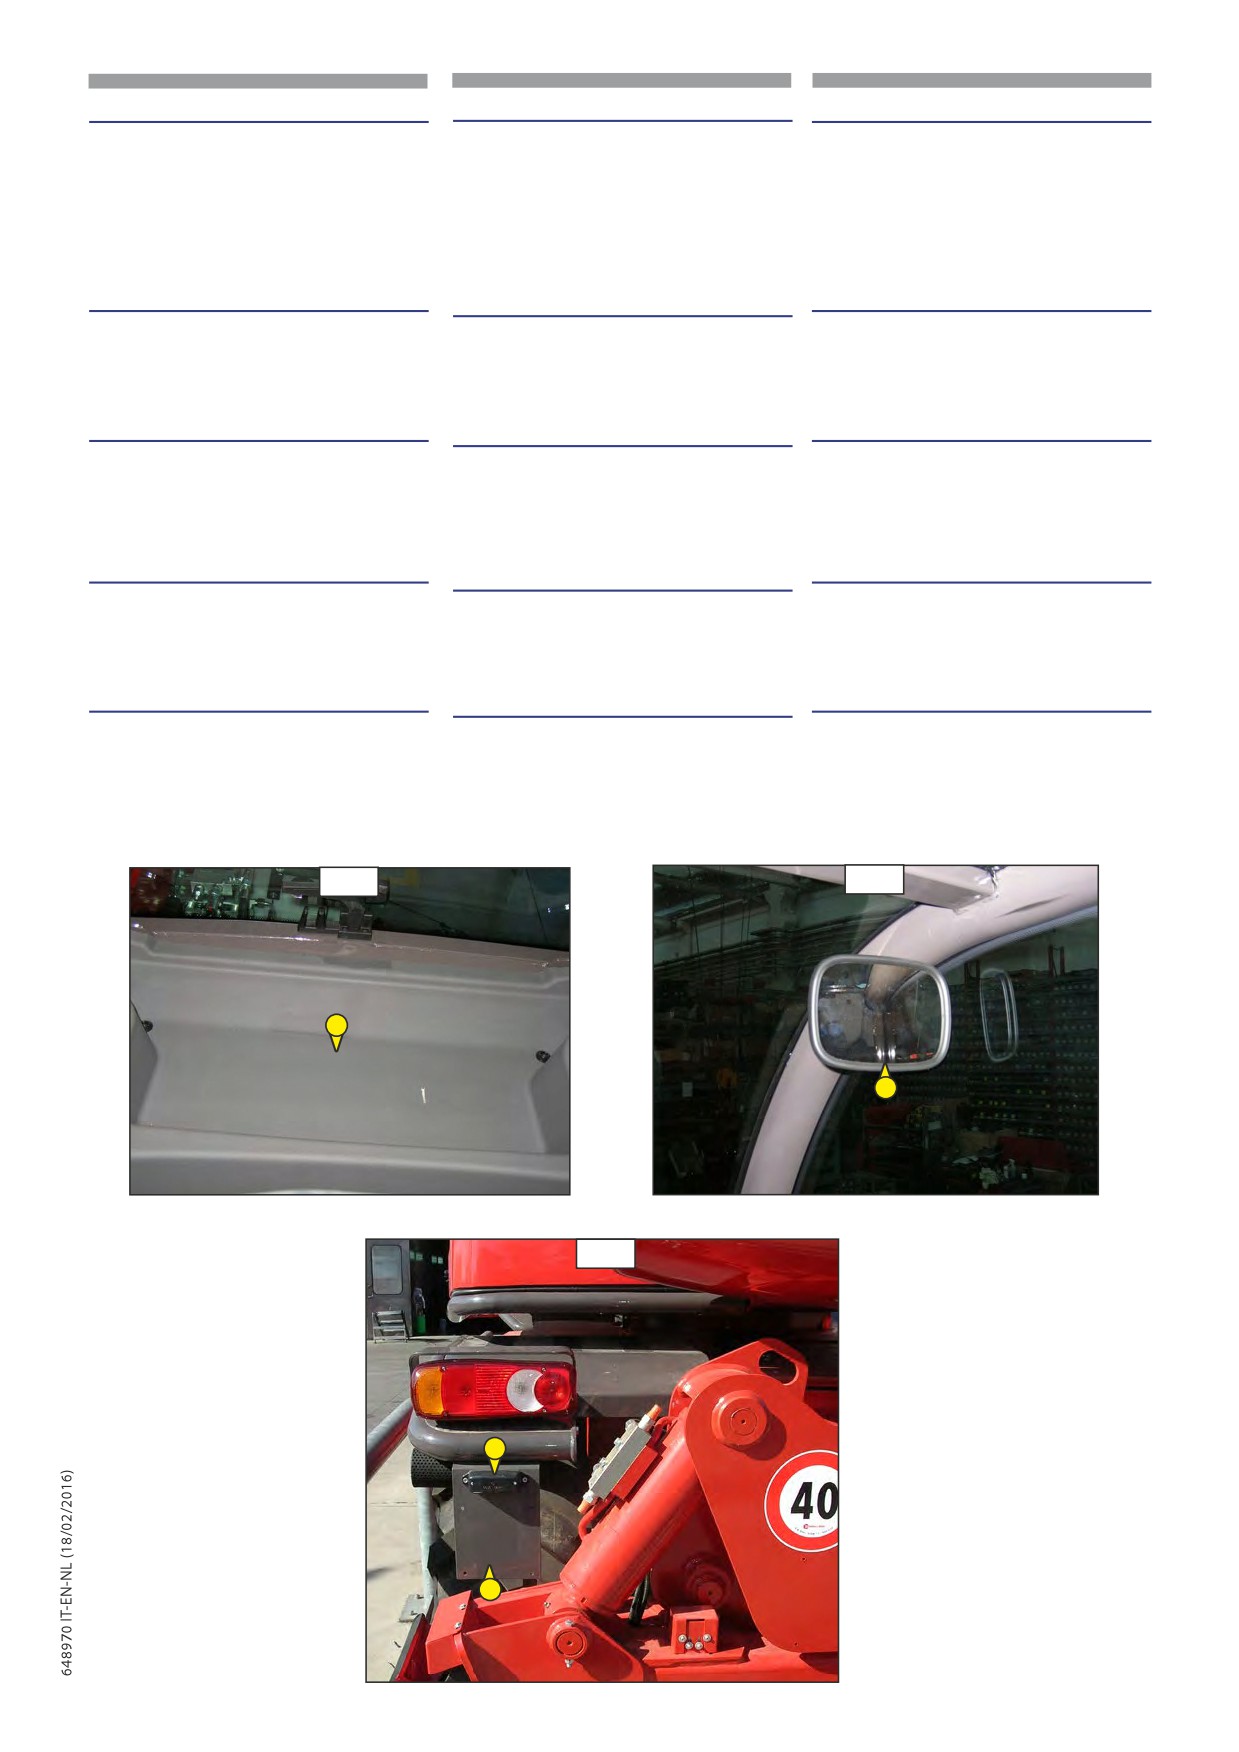
IT
EN
NL
26 - PORTADOCUMENTI
26 - DOCUMENTS HOLDER
26 - OPBERGVAK
Accertarsi che il manuale d’istruzioni sia al suo
Make sure the Instruction manual is placed in the
Controleer of de handleiding naar behoren
posto nel vano portadocumenti.
document-holder compartment.
opgeborgen is in het opbergvak.
(1,92)
(1,92)
(1,92)
27 - AUTORADIO (OPTIONAL)
27 - AUTORADIO (OPTIONAL)
27 - AUTORADIO (OPTIONAL)
28 - RETROVISORE INTERNO
28 - INTERNE ACHTERUITKIJKSPIEGEL
28 - INTERNAL REARVIEW MIRROR
(1,93)
(1,93)
(1,93)
29 - TARGA
29 - NUMMERBORD
29 - LICENSE PLATE
(1,94)
(1,94)
(1,94)
30 - ILLUMINAZIONE DELLA TARGA
30 - NUMMERBORDVERLICHTING
30 - LICENSE PLATE LIGHT
(2,94)
(2,94)
(2,94)
93
94
1
1
95
2
1
2-119