Yaskawa iQpump Micro AC Drive Compact Intelligent Pump Controller. User Manual (2014) - page 7
5.11 P: Pump
When P9-12 is set to 2, the output frequency must also fall below the level set in P9-13.
No.
Name
Setting Range
Default
P9-14
Remove Delta Level
0.0 to 6000.0
0.0 PSI
n P9-15: Remove Delay Time
Sets the delay time before the lead drive is removed from the system.
No.
Name
Setting Range
Default
P9-15
Remove Delay Time
0 to 3600 s
10 s
n P9-16: Stabilization Time
Sets the time used to stabilize the system when a pump is staged or de-staged. Lead-lag control and pump protection is
suspended during this time.
No.
Name
Setting Range
Default
P9-16
Stabilization Time
0 to 3600 s
3 s
n P9-17: Setpoint Modifier
The system setpoint is incremented with the P9-17 value depending on the number of pumps running.
Pump 1: Setpoint
Pump X: Setpoint + ((X-1) (P9-17))
No.
Name
Setting Range
Default
P9-17
Setpoint Modifier
-999.9 to 999.9
0.0 PSI
n P9-18: High Feedback Quick De-Stage
Sets the feedback level to trigger a quick de-stage as a percentage of parameter P1-09.
No.
Name
Setting Range
Default
P9-18
High Feedback Quick De-Stage
0.0 to 100.0%
97.0%
The quick de-stage ignores parameters P9-12 to P9-15 and only uses an internal 2-second delay. A setting of 0.0 disables the
High Feedback De-stage feature.
n P9-19: Alternation Unit
Selects the units for parameter P9-03, Alternation Time.
No.
Name
Setting Range
Default
P9-19
Alternation Unit
0, 1
0
Setting 0: Hours
Setting 1: Minutes
n P9-20: Allow Network Run
No.
Name
Setting Range
Default
5
P9-20
Allow Network Run
0 to 3
0
Setting 0: Always
Allows the drive to respond to all network Run commands (first drive, staging, alternation).
Setting 1: First/Alternation
The drive is limited to being either the first drive or for alternation.
Setting 2: First only
The drive can only be a first drive.
241
5.11 P: Pump
Setting 3: Alternation only
The drive is only available for alternation. When P9-04 is set to 0, FIFO Auto, and there are two drives or more running, the
iQpump MEMOBUS Network does not actually alternate a drive in, but it removes the expired first drive and allows the
iQpump MEMOBUS Multiplex feature to stage a new drive. Explicit alternation still occurs in FIFO Auto when there is only
one drive running at time of alternation.
n P9-21: Run Priority
Sets the lead drive selection priority overriding the P9-01 selection. If multiple drives have the lowest P9-21 value, then P9-01
determines which drive becomes the lead.
No.
Name
Setting Range
Default
P9-21
Run Priority
1 to 16
8
n P9-22: System Fault Retry
No.
Name
Setting Range
Default
P9-22
System Fault Retry
0 to 10
5
When a system fault is detected, the iQpump MEMOBUS Network sends out a system message to all other drives informing
them of the fault, stops all drives that are running, and prevents any drives from running until the fault is cleared.
When Fault Restarts are enabled, system faults do not consume L5-01 attempts, but instead use P9-22. The system fault retry
attempts apply to all the drives on the network and are incremented when a drive with a system fault auto-restarts. Set this
parameter to the same value on all drives in the MEMOBUS network for proper operation.
The following faults are considered system faults on the MEMOBUS network and work as described below:
Not Maintaining Setpoint: Active on the lead drive in the network. When the lead drive has an NMS fault, it will stop all
other network drives and prevent the drives from running until the fault is cleared. The HOA keypad display message “Net
Pump Err” is displayed on all other network drives.
Low Feedback / Low Water Level: Active on any network drive. When the drive has an LFB or LWL fault, it will stop all
other network drives and prevent the drives from running until the fault is cleared. The HOA keypad display message “Net
Pump Err” is displayed on all other network drives.
High Feedback / High Water Level: Active on any network drive. When the lead drive has an HFB or HWL fault, it will
stop all other network drives and prevent them from running until the fault is cleared. The HOA keypad display message “Net
Pump Err” is displayed on all other network drives.
Flow Meter: Low Flow, High Flow, and Accumulated Level:Active on any network drive that has an Auto Run command.
When the drive has a LOWFL, HIFLO, or ACCUM fault, the network stops all other drives and prevent them from running
until the fault is cleared. The HOA keypad display message “Net Pump Err” is displayed on all other network drives.
Setting P9-22 to 0 disables the system restart regardless of L5-01, P4-07, and P4-08 parameter settings. When P9-22 > 0, and
L5-01 = 0 or P4-07/P4-08 are set to disable the fault restart, when that drive gets a system fault, the system will not be able
to restart.
When a drive with a system fault auto-restarts, the network System Fault Restart counter gets incremented and the L5-01 fault
restart counter does not increase. When the system fault restart counter equals the P9-22 setting, the iQpump MEMOBUS
Network disables automatic fault restart and manually resetting the fault will clear the system fault restart counter. If the
iQpump MEMOBUS Network does not experience a system fault for 10 minutes, it clears the system restart fault counter.
Note:
Losing power or communications to a drive with a system fault will clear the fault and allow other drives in the system to run.
n P9-23: Maximum Number of Running Pumps
Limits the maximum number of pumps that can run on the system.
No.
Name
Setting Range
Default
P9-23
Maximum Number of Running Pumps
1 to 8
8
n P9-24: Lead Swap at Sleep
Sets the time that the lead drive must be asleep when another drive is available with a lower P9-21 value until the drive will
request for a swap. A setting of 0 disables this function.
No.
Name
Setting Range
Default
P9-24
Lead Swap at Sleep
0 to 7200 s
0 s
242
5.11 P: Pump
n P9-25: Highest Node Address
Selects the highest possible node address in the Modbus network.
To yield optimal network performance, set serial communication address H5-01 starting from 01h and then consecutively up
to the last drive and then set the P9-25 parameter to highest used H5-01 address.
No.
Name
Setting Range
Default
P9-25
Highest Node Address
2 to 8
8
n P9-26: Master Time-out
Sets the minimum amount of time that the follower drives will wait for a message from the master before performing the action
set in P9-27.
No.
Name
Setting Range
Default
P9-26
Master Time-out
1.0 to 10.0 s
4.0 s
n P9-27: Network Recovery
Sets the follower drive response action when no messages are received from the master for the time set in P9-26.
No.
Name
Setting Range
Default
P9-27
Network Recovery
0 to 3
0
Setting 0: Automatic
Drive will attempt to assume master functionality.
Setting 1: Slave/resume
Drive will continue running when the master is lost, and will wait for a master to come online.
Note:
Drive will keep running in its current operation state which could cause an undesirable condition.
Setting 2: Slave/stop
Drive will stop running when the master is lost, and will wait for a master to come online.
Setting 3: Fault MSL
Fault the drive with an MSL (Master Lost).
n P9-28: NETSCAN Alarm Time
Sets the amount of time that the follower drives will wait for a message from the master before displaying a NETSCAN alarm.
No.
Name
Setting Range
Default
P9-28
NETSCAN Alarm Time
1.0 to 10.0 s
2.0 s
n P9-29: Net Start Delay
Sets the time that the drive will wait before selecting and starting the lead drive after the first drive on the network has been
put on AUTO mode.
No.
Name
Setting Range
Default
P9-29
Net Start Delay
0.0 to 60.0 s
2.0 s
5
n P9-30: Lag Drive Speed Follower Gain
Sets the gain that will be applied to the speed of the current lead drive when Lag Drive Mode is activated.
No.
Name
Setting Range
Default
P9-30
Lag Drive Speed Follower Gain
0.0 to 300.0%
100.0%
n P9-31: Lag Drive Speed Follower Bias
Sets the bias that will be applied to the speed of the current lead drive when Lag Drive Mode is activated.
No.
Name
Setting Range
Default
P9-31
Lag Drive Speed Follower Bias
-60.0 to 60.0 Hz
0.0 Hz
243
5.11 P: Pump
n P9-32: Lag Follower Deceleration Time
Sets the deceleration time when the P9-33 timer is running and the drive is running as Lag Drive Speed Follower (P9-05 = 3).
No.
Name
Setting Range
Default
P9-32
Lag Follower Deceleration Time
0.0 to 1000.0 s
60.0 s
n P9-33: Lag Follower Deceleration Time Active Time
Sets the window during which the P9-32 deceleration time is effective. The drive will use the standard deceleration rates when
the P9-32 time expires.
A setting of 0.0 will disable the Lag Follower deceleration time switching.
No.
Name
Setting Range
Default
P9-33
Lag Follower Deceleration Time Active Time
0.0 to 360.0 s
0.0 s
n P9-34: Low Feedback Quick De-Stage
Sets the low feedback level that will trigger a quick de-stage. The quick de-stage ignores parameters P9-12 to P9-15 and uses
an internal 2-second delay.
A setting of 0.0 disables the Low Feedback De-Stage feature.
No.
Name
Setting Range
Default
P9-34
Low Feedback Quick De-Stage
0.0 to 6000.0
0.0 PSI
n P9-99: Network Compatibility Selection
Selects the communication compatibility for the iQpump MEMOBUS network.
No.
Name
Setting Range
Default
P9-99
Network Compatibility Selection
0 to 2
0
Setting 0: A-Ver: 30034
Setting 1: B-Ver: 30035/36
Setting 2: iQ SmartNetwork
244
5.12 Q: PID Controller
5.12 Q: PID Controller
u Q1: Preset Setpoint
n Q1-01: PID Controller Setpoint 1
Sets the PID setpoint for the controller. The drive will use the system feedback signal and modulate the pump speed to regulate
the feedback at the Q1-01 setpoint. The units for Q1-01 are selected by b1-01 and the scaling is set in parameter P1-03. This
parameter is active when b1-01 (Reference Source) is set to 0 (HOA keypad).
No.
Parameter Name
Setting Range
Default
Q1-01
PID Controller Setpoint 1
0.0 to 6000.0
0.0 PSI
n Q1-02 to Q1-04: PID Controller Setpoint 2 to 4
Sets the PID Setpoint when the corresponding Multi Setpoint or Alternate Multi Setpoint digital inputs are closed.
No.
Name
Setting Range
Default
Q1-02 to Q1-04
PID Controller Setpoint 2 to 4
0.0 to 6000.0
0.0
n Q1-09: Setpoint MOP
Selects whether parameters Q1-01 to Q1-04 are changed via MOP using the Up and Down arrow keys on the HOA keypad.
No.
Name
Setting Range
Default
Q1-09
Setpoint MOP
0, 1
0
Setting 0: Disabled
Setting 1: Enabled
u Q3: Output Current Limit
The drive reduces the frequency reference in an attempt to limit the output current. The current limit setpoint is determined
by parameter P1-11. When the actual motor current rises above the setpoint, the frequency reference is reduced by a PI controller
and the minimum output frequency reference is limited to fmin. The HOA keypad will display a "Current Limit Foldback"
alarm when the current limit function is active.
n Q3-01: Output Current Limit Select
Enables and disables the output current regulator.
No.
Name
Setting Range
Default
Q3-01
Output Current Limit Select
0, 1
0
Setting 0: Disabled
Setting 1: Enabled
n Q3-02: Current Limit
Sets the value of the output current to which the drive will limit if the output current exceeds the value.
No.
Name
Setting Range
Default
5
Q3-02
Current Limit
0.0 to 1000.0 A
0.0 A
n Q3-10: Ripple Regulator Selection
Enables and disables the Single Phase power DC bus ripple regulator. This function will lower the output frequency if the DC
bus voltage ripple exceeds the value set in Q3-11.
No.
Name
Setting Range
Default
Q3-10
Ripple Regulator Selection
0, 1
1
245
5.12 Q: PID Controller
Setting 0: Disabled
Setting 1: Enabled
n Q3-11: Ripple Regulator Setpoint
Set as a percentage of the maximum amount of ripple allowed before an input phase loss fault is detected.
No.
Name
Setting Range
Default
Q3-11
Ripple Regulator Setpoint
0.0 to 200.0%
95.0%
u S6: Drive Protection
n S6-01: Emergency Override Speed
Sets the sped command used in emergency override mode when S6-02 = 0.
No.
Name
Setting Range
Default
S6-01
Emergency Override Speed
0.00 to 240.00 Hz
0.00 Hz
n S6-02: Emergency Override Reference Selection
Selects the emergency override speed source.
No.
Name
Setting Range
Default
S6-02
Emergency Override Reference Selection
0, 1
0
Setting 0: Use S6-01 Reference
Setting 1: Use Frequency Reference
u T: Motor Tuning
Auto-Tuning automatically sets and tunes parameters required for optimal motor performance.
Refer to T: Motor Tuning on page 368 for details on Auto-Tuning parameters.
246
5.13 U: Monitor Parameters
5.13 U: Monitor Parameters
Monitor parameters let the user view various aspects of drive performance as it is shown on the operator display.
Some monitors can be output from terminal AM by assigning the specific monitor parameter number to H4-01. Refer to
H4-01: Multi-Function Analog Terminal AM Monitor Selection on page 186 for details on assigning functions to the analog
output.
u U1: Operation Status Monitors
Status monitors display drive status like output frequency, current etc. Refer to U1: Operation Status Monitors on page 369
for a complete list of U1-oo monitors and descriptions.
u U2: Fault Trace
These monitor parameters are used to view the status of various drive aspects when a fault occurs. This information is helpful
for finding out why a fault occurred. Refer to U2: Fault Trace on page 372 for a complete list of U2-oo monitors and
descriptions.
U2-oo monitors are not reset when the drive is initialized. Refer to o4-11: U2, U3 Initialization on page 221 for instructions
to initialize the fault trace.
u U3: Fault History
These parameters display faults that have occurred during operation as well as the drive operation time when those faults
occurred. Refer to U3: Fault History on page 372 for a complete list of U3-oo monitors and descriptions.
U3-oo monitors are not reset when the drive is initialized. Refer to o4-11: U2, U3 Initialization on page 221 for instructions
to initialize the fault trace.
u U4: Maintenance Monitors
Maintenance monitors show:
• Runtime data of the drive.
• Maintenance data and replacement information for various drive components.
• Highest peak current that has occurred and output frequency at the time the peak current occurred.
Refer to U4: Maintenance Monitors on page 374 for a complete list of U4-oo monitors and descriptions.
u U5: PID Monitors
These monitors display various aspects of PID control. Refer to PID Block Diagram on page 132 for a description of where
each monitor is located in the PID control block.
Refer to U5: PID Monitors on page 376 for a complete list of U5-oo monitors and descriptions.
u U6: Control Monitors
Control Monitors:
• Reference data for the output voltage and vector control.
5
• The bias value added to the frequency reference by the Up/Down 2 function. Refer to Settings 75 and 76: Up 2/Down 2
Function on page 171.
Refer to U6: Control Monitors on page 376.
u U9: Operation Status Monitors
Refer to U9: Operation Statusl Monitors on page 376 for a complete list of U9-oo monitors and descriptions.
247
5.13 U: Monitor Parameters
This Page Intentionally Blank
248
6
Troubleshooting
This chapter provides descriptions of the drive faults, alarms, errors, and messages. Guidance
information for troubleshooting is also included.
6.1
SECTION SAFETY
250
6.2
DRIVE FAULTS, ALARMS, ERRORS, AND MESSAGES
252
6.3
FAULT DETECTION
253
6.4
ALARM DETECTION
268
6.5
OPERATOR PROGRAMMING ERRORS
280
6.6
COPY FUNCTION RELATED DISPLAYS
283
6.7
DIGITAL OPERATOR DISPLAY MESSAGES
285
249
6.1 Section Safety
6.1
Section Safety
DANGER
Electrical Shock Hazard
Do not connect or disconnect wiring while the power is on.
Failure to comply will result in death or serious injury.
WARNING
Electrical Shock Hazard
Do not operate equipment with covers removed.
Failure to comply could result in death or serious injury.
The diagrams in this section may illustrate drives without covers or safety shields to display details. Be sure to reinstall covers
or shields before operating the drives and run the drives according to the instructions described in this manual.
Always ground the motor-side grounding terminal.
Improper equipment grounding could result in death or serious injury by contacting the motor case.
Do not touch terminals before the capacitors have fully discharged.
Failure to comply could result in death or serious injury.
Before wiring terminals, disconnect all power to the equipment. The internal capacitor remains charged even after the drive
input power is turned off. The charge indicator LED will extinguish when the DC bus voltage is below 50 Vdc. To prevent
electric shock, wait at least five minutes after all indicators are off and measure the DC bus voltage level to confirm safe
level.
Do not allow unqualified personnel to perform work on the drive.
Failure to comply could result in death or serious injury.
Installation, maintenance, inspection and servicing must be performed only by authorized personnel familiar with installation,
adjustment and maintenance of AC drives.
Do not perform work on the drive while wearing loose clothing, jewelry, or without eye protection.
Failure to comply could result in death or serious injury.
Remove all metal objects such as watches and rings, secure loose clothing and wear eye protection before beginning work
on the drive.
Do not remove covers or touch circuit boards while the power is on.
Failure to comply could result in death or serious injury.
Fire Hazard
Tighten all terminal screws to the specified tightening torque.
Loose electrical connections could result in death or serious injury by fire due to overheating of electrical connections.
Do not use an improper voltage source.
Failure to comply could result in death or serious injury by fire.
Verify that the rated voltage of the drive matches the voltage of the incoming drive input power before applying power.
Do not use improper combustible materials.
Failure to comply could result in death or serious injury by fire.
Attach the drive to metal or other noncombustible material.
250
6.1 Section Safety
NOTICE
Observe proper electrostatic discharge procedures (ESD) when handling the drive and circuit boards.
Failure to comply may result in ESD damage to the drive circuitry.
Never connect or disconnect the motor from the drive while the drive is outputting voltage.
Improper equipment sequencing could result in damage to the drive.
Do not use unshielded cable for control wiring.
Failure to comply may cause electrical interference resulting in poor system performance. Use shielded twisted-pair wires
and ground the shield to the ground terminal of the drive.
Do not allow unqualified personnel to use the product.
Failure to comply could result in damage to the drive or braking circuit.
Carefully review instruction manual TOBPC72060000 when connecting a braking option to the drive.
Do not modify the drive circuitry.
Failure to comply could result in damage to the drive and will void warranty.
Yaskawa is not responsible for modification of the product made by the user.
Check all the wiring after installing the drive and connecting other devices to ensure that all connections are correct.
Failure to comply could result in damage to the drive.
6
251
6.2 Drive Faults, Alarms, Errors, and Messages
6.2
Drive Faults, Alarms, Errors, and Messages
u Types of Faults, Alarms, and Errors
Check the drive digital operator for information about possible faults if the drive or motor fails to operate.
If problems occur that are not covered in this manual, contact the nearest Yaskawa representative with the following
information:
• Drive model
• Software version
• Date of purchase
• Description of the problem
• List of modified parameters.
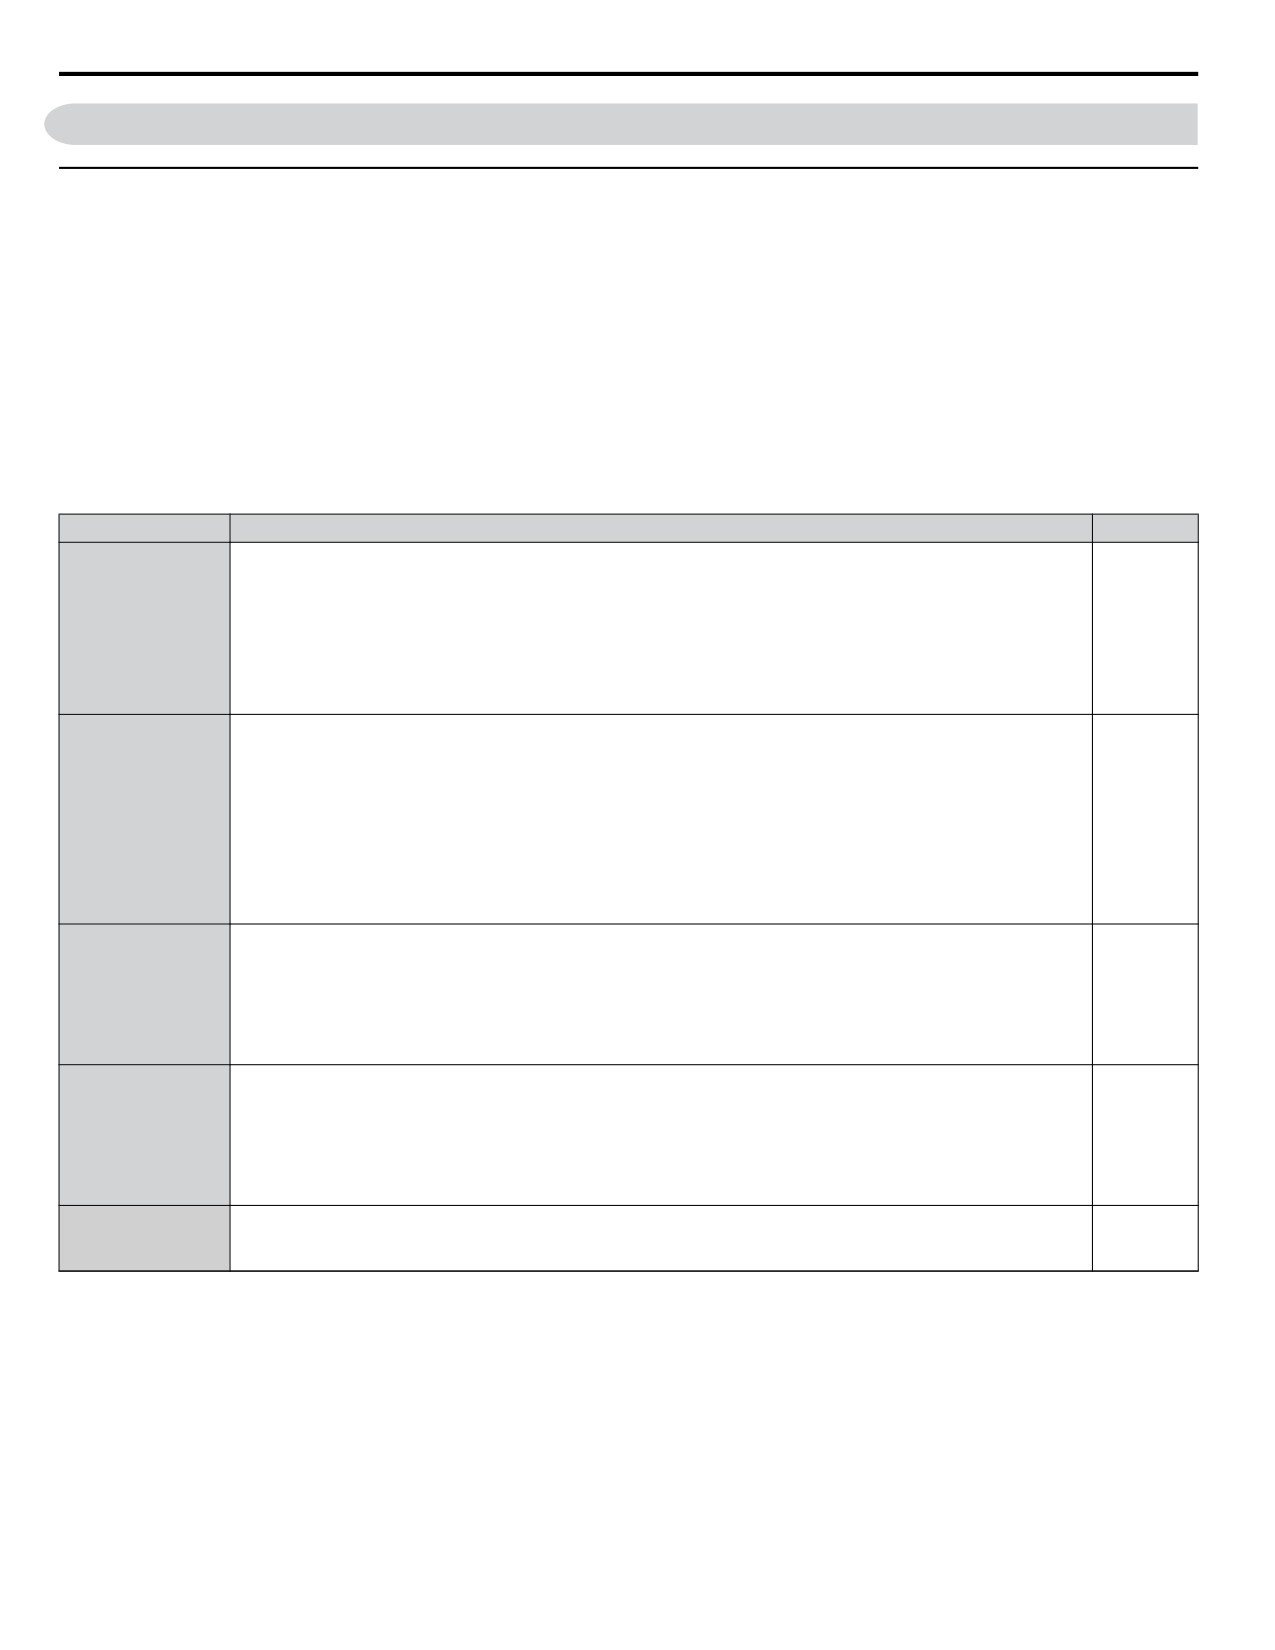
Table 6.1 contains descriptions of the various types of alarms, faults, and errors that may occur while operating the drive.
Table 6.1 Types of Faults, Alarms, and Errors
Type
Drive Response
Page
When the drive detects a fault:
• The digital operator or optional HOA keypad displays text indicating the specific fault and the ALM indicator
LED remains lit until the fault is reset.
Faults
• The fault interrupts drive output and the motor coasts to a stop.
253
• Some faults allow the user to select the stopping method when the fault occurs.
• If a digital output is programmed for fault output (H2-oo = E), it will close if a fault occurs.
The drive will remain inoperable until the fault is cleared. Refer to Fault Reset Methods on page 286 for details.
When the drive detects an alarm or a minor fault:
• The digital operator/HOA keypad displays text indicating the specific alarm or minor fault, and the ALM indicator
LED flashes.
• The drive continues running the motor, although some alarms allow the user to select a stopping method when
Minor Faults and
the alarm occurs.
268
Alarms
• A multi-function contact output set to be tripped by a minor fault (H2- oo = 10) closes. If the output is set to
be tripped by an alarm, the contact will not close.
• The digital operator/HOA keypad displays text indicating a specific alarm and the ALM indicator LED flashes.
Remove the cause of the problem to reset a minor fault or alarm.
An Operator Programming error occurs when parameter settings conflict or do not match hardware settings (such
as with an option card).
Operator
When the drive detects an Operator Programming error:
Programming
280
• The digital operator/HOA keypad displays text indicating the specific error.
Errors
• Multi-function contact outputs do not operate.
The drive will not operate the motor until the error has been reset. Correct the settings that caused the error.
Copy Function Errors occur when using the optional HOA keypad or the USB Copy Unit to copy, read, or verify
parameter settings.
Copy Function
• The HOA keypad displays text indicating the specific error.
283
Errors
• Multi-function contact outputs do not operate.
Pressing any key on the keypad will clear the fault. Investigate the cause of the problem (such as model
incompatibility) and try again.
The drive will display messages on the LED operator or optional HOA keypad to indicate temporary drive statuses
Digital Operator
during normal pump operation. Messages do not require any action from the user and will clear from the display
285
Display Messages
automatically.
252
6.3 Fault Detection
6.3
Fault Detection
u Fault Displays, Causes, and Possible Solutions
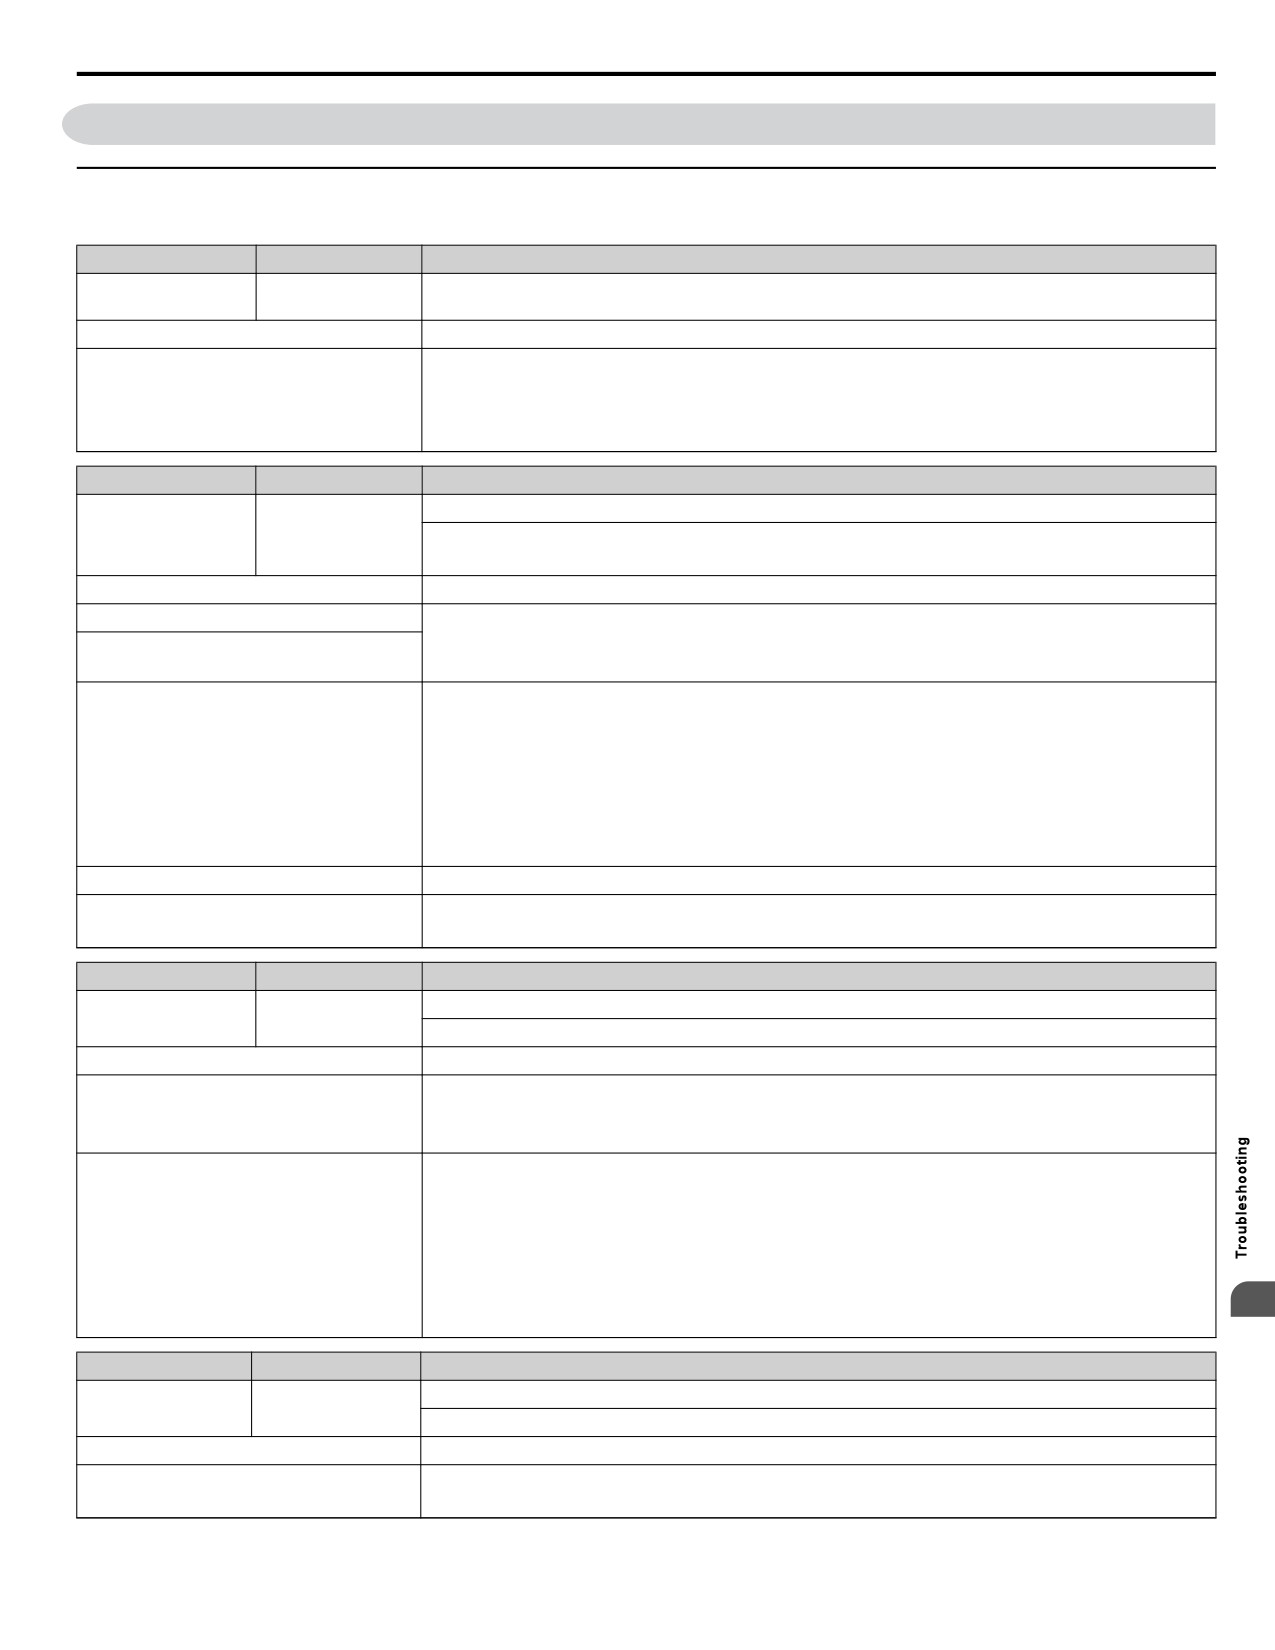
Table 6.2 Detailed Fault Displays, Causes, and Possible Solutions
LED Display
LCD Display
Fault Name
AJF
AJF
Anti-Jam Fault
Anti-Jam Fault
Cause
Possible Solution
The drive was not able to clear debris from
• Check for proper pump operation. Remove debris from the pump impeller.
the impeller in fewer than the number of
attempts set in P7-02. This is only effective
• Adjust the P7-03 level or the P7-02 counts.
when P7-01, Anti-jam Operation is set to 1
• Drive response to this condition is controlled by P7-01, Anti-jam Operation Selection.
(enabled).
LED Display
LCD Display
Fault Name
Option Communication Error
bv5
bUS
• The connection was lost after establishing initial communication.
• Only detected when the run command frequency reference is assigned to an option card.
Cause
Possible Solution
No signal was received from the PLC
• Check for faulty wiring.
Faulty communications wiring or an existing
• Correct the wiring.
short circuit
• Check for disconnected cables and short circuits and repair as needed.
• Check the various options available to minimize the effects of noise.
• Counteract noise in the control circuit, main circuit, and ground wiring.
• Ensure that other equipment such as switches or relays do not cause noise. Use surge absorbers if
Communication data error occurred due to
necessary.
noise
• Use only recommended cables or other shielded line. Ground the shield on the controller side or the
drive input power side.
• Separate all communication wiring from drive power lines. Install an EMC noise filter to the drive power
supply input.
The option card is damaged
Replace the option card if there are no problems with the wiring and the error continues to occur.
The option card is not properly connected to
• The connector pins on the option card do not line up properly with the connector pins on the drive.
the drive
• Reinstall the option card.
LED Display
LCD Display
Fault Name
MEMOBUS/Modbus Communication Error
ce
CE
Control data was not received for the CE detection time set to H5-09.
Cause
Possible Solution
• Check for faulty wiring.
Faulty communications wiring or an existing
• Correct the wiring.
short circuit
• Check for disconnected cables and short circuits and repair as needed.
• Check the various options available to minimize the effects of noise.
• Counteract noise in the control circuit, main circuit, and ground wiring.
• Use only recommended cables or other shielded line. Ground the shield on the controller side or the
Communication data error occurred due to
drive input power side.
noise
• Ensure that other equipment such as switches or relays do not cause noise. Use surge suppressors if
required.
• Separate all communication wiring from drive power lines. Install an EMC noise filter to the drive power
6
supply input.
LED Display
LCD Display
Fault Name
A/D Conversion Error
cpf02
CPF02
An A/D conversion error or control circuit error occurred.
Cause
Possible Solution
• Cycle power to the drive.
Control circuit is damaged
• If the problem continues, replace the drive.
253
6.3 Fault Detection
LED Display
LCD Display
Fault Name
• Check for wiring errors along the control circuit terminals.
Control circuit terminals have shorted out
• Correct the wiring.
(+V, AC).
Check the resistance of the speed potentiometer and related wiring.
Control terminal input current has exceeded
• Check the input current.
allowable levels.
• Reduce the current input to control circuit terminal (+V) to 20 mA.
LED Display
LCD Display
Fault Name
PWM Data Error
cPF03
CPF03
There is a problem with the PWM data.
Cause
Possible Solution
Hardware is damaged
Replace the drive.
LED Display
LCD Display
Fault Name
EEPROM Memory Data Error
cPF06
CPF06
Error in the data saved to EEPROM
Cause
Possible Solution
• Turn off the power and check the connection between the control board and the drive.
There is an error in EEPROM control circuit
• If the problem continues, replace the drive.
The power supply was switched off while
Reinitialize the drive (A1-03 = 2220, 3330).
parameters were being saved to the drive
LED Display
LCD Display
Fault Name
Terminal Board Communications Error
cPF07
CPF07
A communication error occurred at the terminal board.
Cause
Possible Solution
There is a faulty connection between the
Turn off the power and reconnect the control circuit terminals.
terminal board and the control board
LED Display
LCD Display
Fault Name
EEPROM Serial Communication Fault
cPF08
cPF08
EEPROM communications are not functioning properly.
Cause
Possible Solution
Terminal board or control board is not
Turn the power off and check the control terminal connections.
connected properly.
There is a faulty connection between the
Turn off the power and reconnect the control circuit terminals.
terminal board and the control board
LED Display
LCD Display
Fault Name
cPF11
CPF11
RAM Fault
Cause
Possible Solution
Hardware is damaged
Replace the drive.
LED Display
LCD Display
Fault Name
FLASH Memory Fault
cPF12
CPF12
Problem with the ROM (FLASH memory).
Cause
Possible Solution
Hardware is damaged
Replace the drive.
LED Display
LCD Display
Fault Name
Watchdog Circuit Exception
cPF13
CPF13
Self-diagnostics problem.
Cause
Possible Solution
Hardware is damaged
Replace the drive.
254
6.3 Fault Detection
LED Display
LCD Display
Fault Name
Control Circuit Fault
cPF14
CPF14
CPU error (CPU operates incorrectly due to noise, etc.)
Cause
Possible Solution
Hardware is damaged
Replace the drive.
LED Display
LCD Display
Fault Name
Clock Fault
cPF16
CPF16
Standard clock error.
Cause
Possible Solution
Hardware is damaged
Replace the drive.
LED Display
LCD Display
Fault Name
Timing Fault
cPF17
CPF17
A timing error occurred during an internal process.
Cause
Possible Solution
Hardware is damaged
Replace the drive.
LED Display
LCD Display
Fault Name
Control Circuit Fault
cPF18
CPF18
CPU error. Non-Maskable Interrupt (An unusual interrupt was triggered by noise, etc.)
Cause
Possible Solution
Hardware is damaged
Replace the drive.
LED Display
LCD Display
Fault Name
Control Circuit Fault
cPF19
CPF19
CPU error (Manual reset due to noise, etc.)
Cause
Possible Solution
Hardware is damaged
Replace the drive.
LED Display
LCD Display
Fault Name
One of the following faults occurred: RAM fault, FLASH memory error, watchdog circuit exception, clock
error
cPF20
CPF20
• RAM fault.
or
or
• FLASH memory error (ROM error).
cPF21
CPF21
• Watchdog circuit exception (self-diagnostic error).
• Clock error.
Cause
Possible Solution
Hardware is damaged
Replace the drive.
LED Display
LCD Display
Fault Name
A/D Conversion Fault
cPF22
CPF22
A/D conversion error.
Cause
Possible Solution
• Cycle power to the drive.
Control circuit is damaged.
• If the problem continues, replace the drive.
6
LED Display
LCD Display
Fault Name
PWM Feedback Fault
cPF23
CPF23
PWM feedback error.
Cause
Possible Solution
Hardware is damaged
Replace the drive.
LED Display
LCD Display
Fault Name
Drive Unit Signal Fault
cPF24
CPF24
The drive capacity cannot be detected correctly (drive capacity is checked when the drive is powered up).
255
6.3 Fault Detection
LED Display
LCD Display
Fault Name
Cause
Possible Solution
Hardware is damaged
Replace the drive.
LED Display
LCD Display
Fault Name
cPF25
CPF25
Terminal Board Not Connected
Cause
Possible Solution
Terminal board is not connected correctly
Reconnect the terminal board to the connector on the drive, then cycle the power to the drive.
LED Display
LCD Display
Fault Name
cPF26
CPF26
Control Circuit Error
to
to
cPF35
CPF35
_ _ _ _ _ _ _
_ _ _ _ _ _ _
CPU error
cPF40
CPF40
to
to
cPF43
CPF43
Cause
Possible Solution
Hardware is damaged
Replace the drive.
LED Display
LCD Display
Fault Name
SI-T3 Watchdog Timer Error
E5
E5
The watchdog timed out.
Cause
Possible Solution
Execute DISCONNECT or ALM_CLR, then issue a CONNECT command or SYNC_SET command and
Data has not been received from the PLC
proceed to phase 3. Refer to the SI-T3 Option Technical Manual for more details on troubleshooting.
LED Display
LCD Display
Fault Name
Option Card External Fault
EF0
EF0
An external fault condition is present.
Cause
Possible Solution
An external fault was received from the PLC
• Remove the cause of the external fault.
and F6-03 is set to a value other than 3.
• Remove the external fault input from the PLC.
Problem with the PLC program
Check the PLC program and correct problems.
LED Display
LCD Display
Fault Name
Pump Fault (input terminal S1)
EF1
EF1
External fault at multi-function input terminal S1.
Pump Fault (input terminal S2)
EF2
EF2
External fault at multi-function input terminal S2.
Pump Fault (input terminal S3)
EF3
EF3
External fault at multi-function input terminal S3.
Pump Fault (input terminal S4)
EF4
EF4
External fault at multi-function input terminal S4.
Pump Fault (input terminal S5)
EF5
EF5
External fault at multi-function input terminal S5.
Pump Fault (input terminal S6)
EF6
EF6
External fault at multi-function input terminal S6.
Pump Fault (input terminal S7)
EF7
EF7
External fault at multi-function input terminal S7.
Cause
Possible Solution
An external device tripped an alarm function
Remove the cause of the external fault and reset the fault.
• Properly connect the signal lines to the terminals assigned for external fault detection
Wiring is incorrect
(H1-oo = 20 to 2F).
• Reconnect the signal line.
256
6.3 Fault Detection
LED Display
LCD Display
Fault Name
Multi-function contact input setting is
• Check for unused terminals set for H1-oo = 20 to 2F (External Pump Fault).
incorrect
• Change the terminal settings.
LED Display
LCD Display
Fault Name
EEPROM Write Error
ERR
Err
Data cannot be written to the EEPROM
Cause
Possible Solution
• Press “ENTER” on the digital operator.
Noise has corrupted data while writing to the
• Correct the parameter setting.
EEPROM
• Cycle power to the drive.
• If the problem continues, replace the drive.
Hardware problem
If the problem continues, replace the drive.
LED Display
LCD Display
Fault Name
FAn
FAn
Internal Cooling Fan Failure
Cause
Possible Solution
• Cycle power to the drive.
Internal cooling fan has malfunctioned
• Check for fan operation.
• If the problem continues, replace the fan.
LED Display
LCD Display
Fault Name
PID Feedback Loss
FDBKL Wire
FDB-L
Break
The analog input programmed for PID feedback has risen above 21 mA or fallen below 3 mA.
Cause
Possible Solution
The analog input programmed for PID
• Confirm that the PID feedback source is installed and working properly.
feedback loss has risen above 21 mA or
• Drive response to this condition is controlled by b5-12, Feedback Loss 4 to 20 mA Detection Selection
fallen below 3 mA. This is effective only
and b5-13, Feedback Loss Go To Frequency.
when b5-12 Feedback Loss 4 to 20 mA
Detection Selection is set to 2 (fault).
• Auto-restart of this fault is controlled by L5-42, Feedback Loss Fault Retry Selection.
LED Display
LCD Display
Fault Name
Ground Fault
Gf
GF
• A current short to ground exceeded 50% of rated current on the output side of the drive.
• Setting L8-09 to 1 enables ground fault detection in models 2V0020 to 2V0069 and 4V0011 to 4V0038.
Cause
Possible Solution
• Check the insulation resistance of the motor.
Motor insulation is damaged
• Replace the motor.
• Check the motor cable.
A damaged motor cable is creating a short
• Remove the short circuit and reapply power to the drive
circuit
• Check the resistance between the cable and the ground terminal.
• Replace the cable.
• Reduce the carrier frequency.
Excessive leakage current at the drive output
• Reduce the amount of stray capacitance.
The drive started to run during a current
• Set b3-01 to 1 to enable Speed Search at Start.
offset fault or while coasting to a stop
• Perform Speed Search 1 or 2 (H1-oo = 61 or 62) via one of the external terminals.
Hardware problem
If the problem continues, replace the drive.
6
LED Display
LCD Display
Fault Name
High Feedback
HFB
HFB
The feedback signal is too high.
Cause
Possible Solution
257
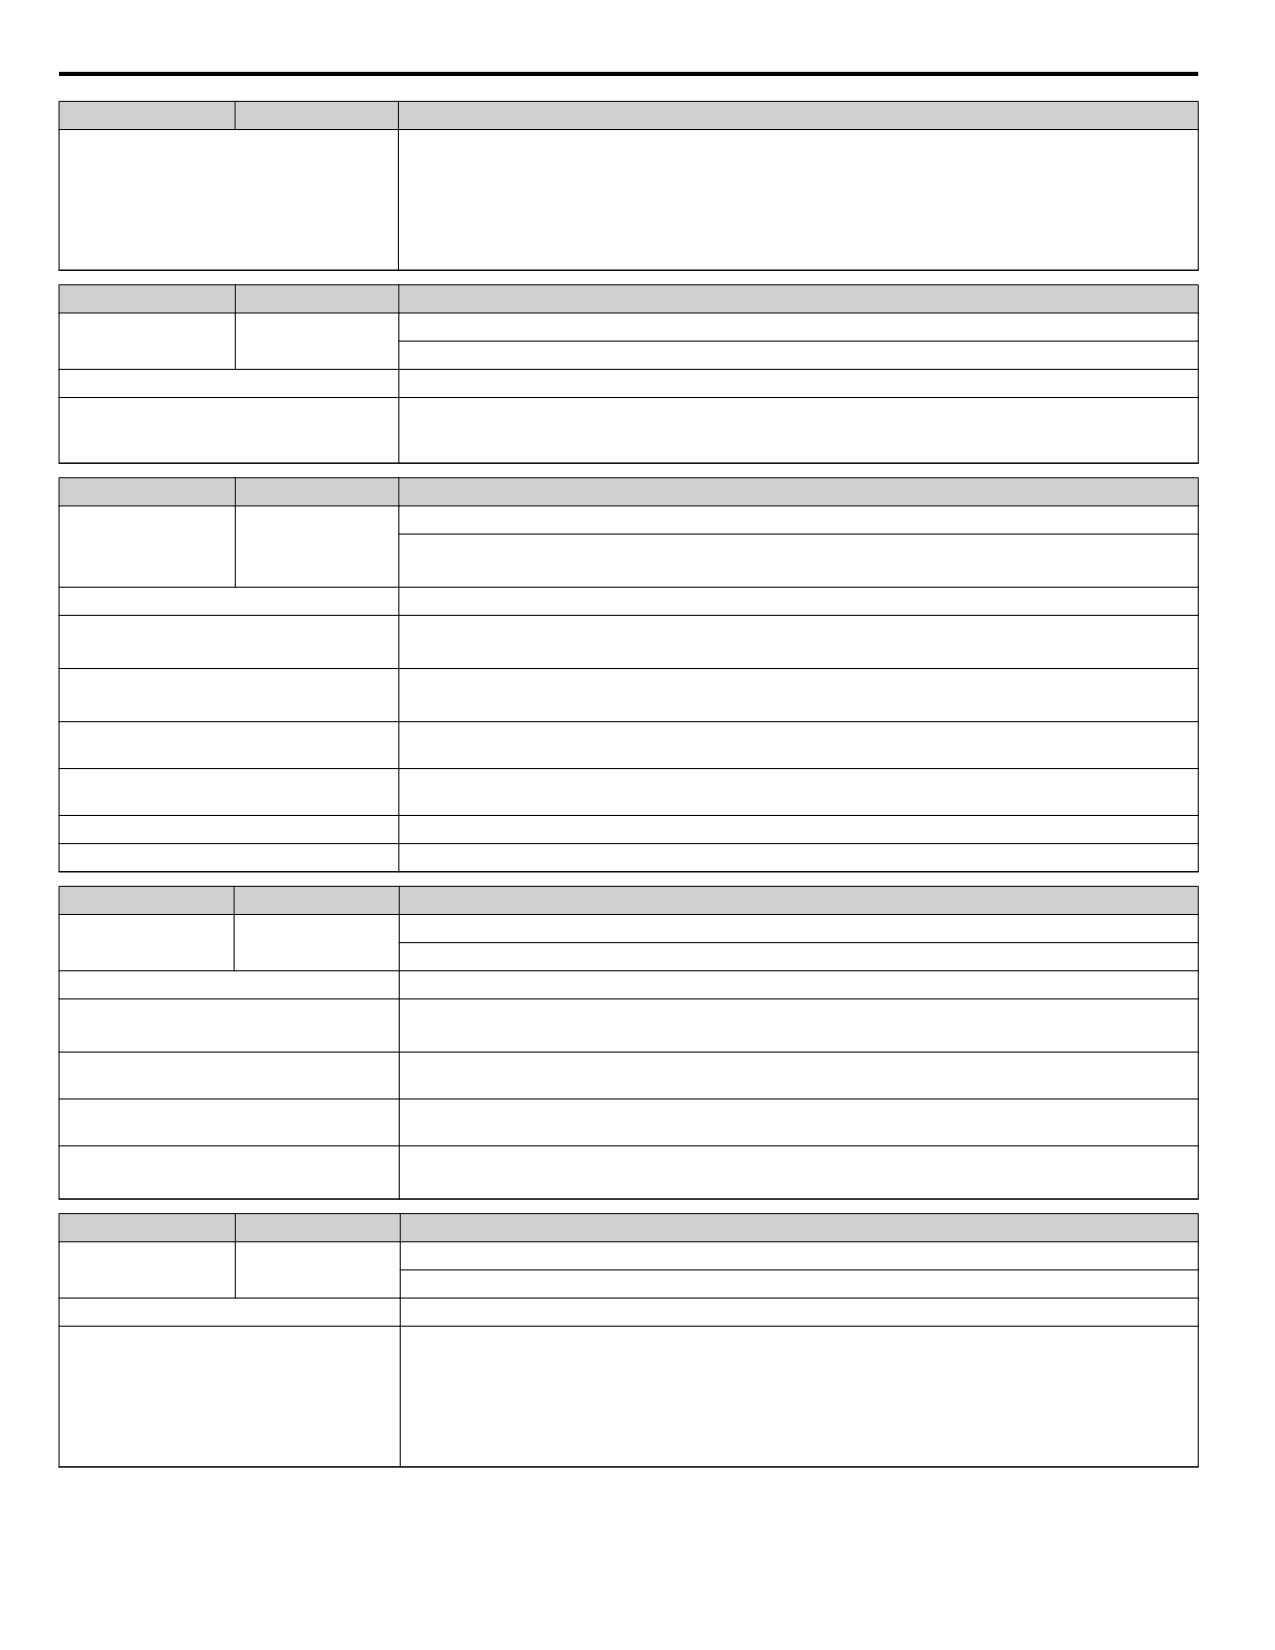
6.3 Fault Detection
LED Display
LCD Display
Fault Name
The feedback signal has risen above the level
set in P1-11, High Feedback Level, for the
time set in P1-12, High Feedback Level Fault
• Set the High Feedback fault characteristics in P1-11 and P1-12.
Delay Time.
• Drive response to this condition is controlled by P1-13, High Feedback Selection. Auto-restart of this
This is effective only when P1-13, High
fault is controlled by L5-41, High Feedback Fault Retry Selection.
Feedback Selection, is set to 0 (Fault and
digital out).
LED Display
LCD Display
Fault Name
High Water Level
H1H20
HWL
The “High Water Level” digital input is active (H1-0o = 90).
Cause
Possible Solution
The Low Water Level switch is activated or
P1-31, High Water Digital Input
Lower the water level and/or adjust the High Water Level switch.
Configuration, is programmed incorrectly.
LED Display
LCD Display
Fault Name
Output Phase Loss
LF
LF
• Phase loss on the output side of the drive.
• Setting L8-07 to 1 or 2 enables Phase Loss Detection.
Cause
Possible Solution
• Check for wiring errors and properly connect the output cable.
The output cable is disconnected
• Correct the wiring.
• Check the resistance between motor lines.
The motor winding is damaged
• Replace the motor if the winding is damaged.
• Apply the tightening torque specified in this manual to fasten the terminals. Refer to Wire Gauges and
The output terminal is loose
Tightening Torques on page 50 for details.
The rated current of the motor being used is
Check the drive and motor capacities.
less than 5% of the drive rated current
An output transistor is damaged
If the problem continues, replace the drive.
A single-phase motor is being used
The drive cannot operate a single phase motor.
LED Display
LCD Display
Fault Name
Output current imbalance
LF2
LF2
One or more of the phases in the output current is lost.
Cause
Possible Solution
Phase loss has occurred on the output side of
• Check for faulty wiring or poor connections on the output side of the drive.
the drive.
• Correct the wiring.
Terminal wires on the output side of the drive
Apply the tightening torque specified in this manual to fasten the terminals. Refer to Wire Size and Torque
are loose.
Specifications on page 57 for details.
No signal displays from the gate driver
Replace the drive. Contact Yaskawa for assistance.
board.
Motor impedance or motor phases are
• Measure the line-to-line resistance for each motor phase. Ensure all values are the same.
uneven.
• Replace the motor. Contact Yaskawa for assistance.
LED Display
LCD Display
Fault Name
Low Feedback
LFB
LFB
The feedback signal is too low.
Cause
Possible Solution
The feedback signal has dropped below the
level set in P1-08, Low Feedback Level, for
• Set the Low Feedback fault characteristics in P1-08 and P1-09.
the time set in P1-09, Low Feedback Level
Fault Delay Time.
• Drive response to this condition is controlled by P1-10, Low Feedback Selection.
This is effective only when P1-10, Low
• Auto-restart of this fault is controlled by L5-40, Low Feedback Fault Retry Selection.
Feedback Selection, is set to 0 (Fault and
digital out).
258
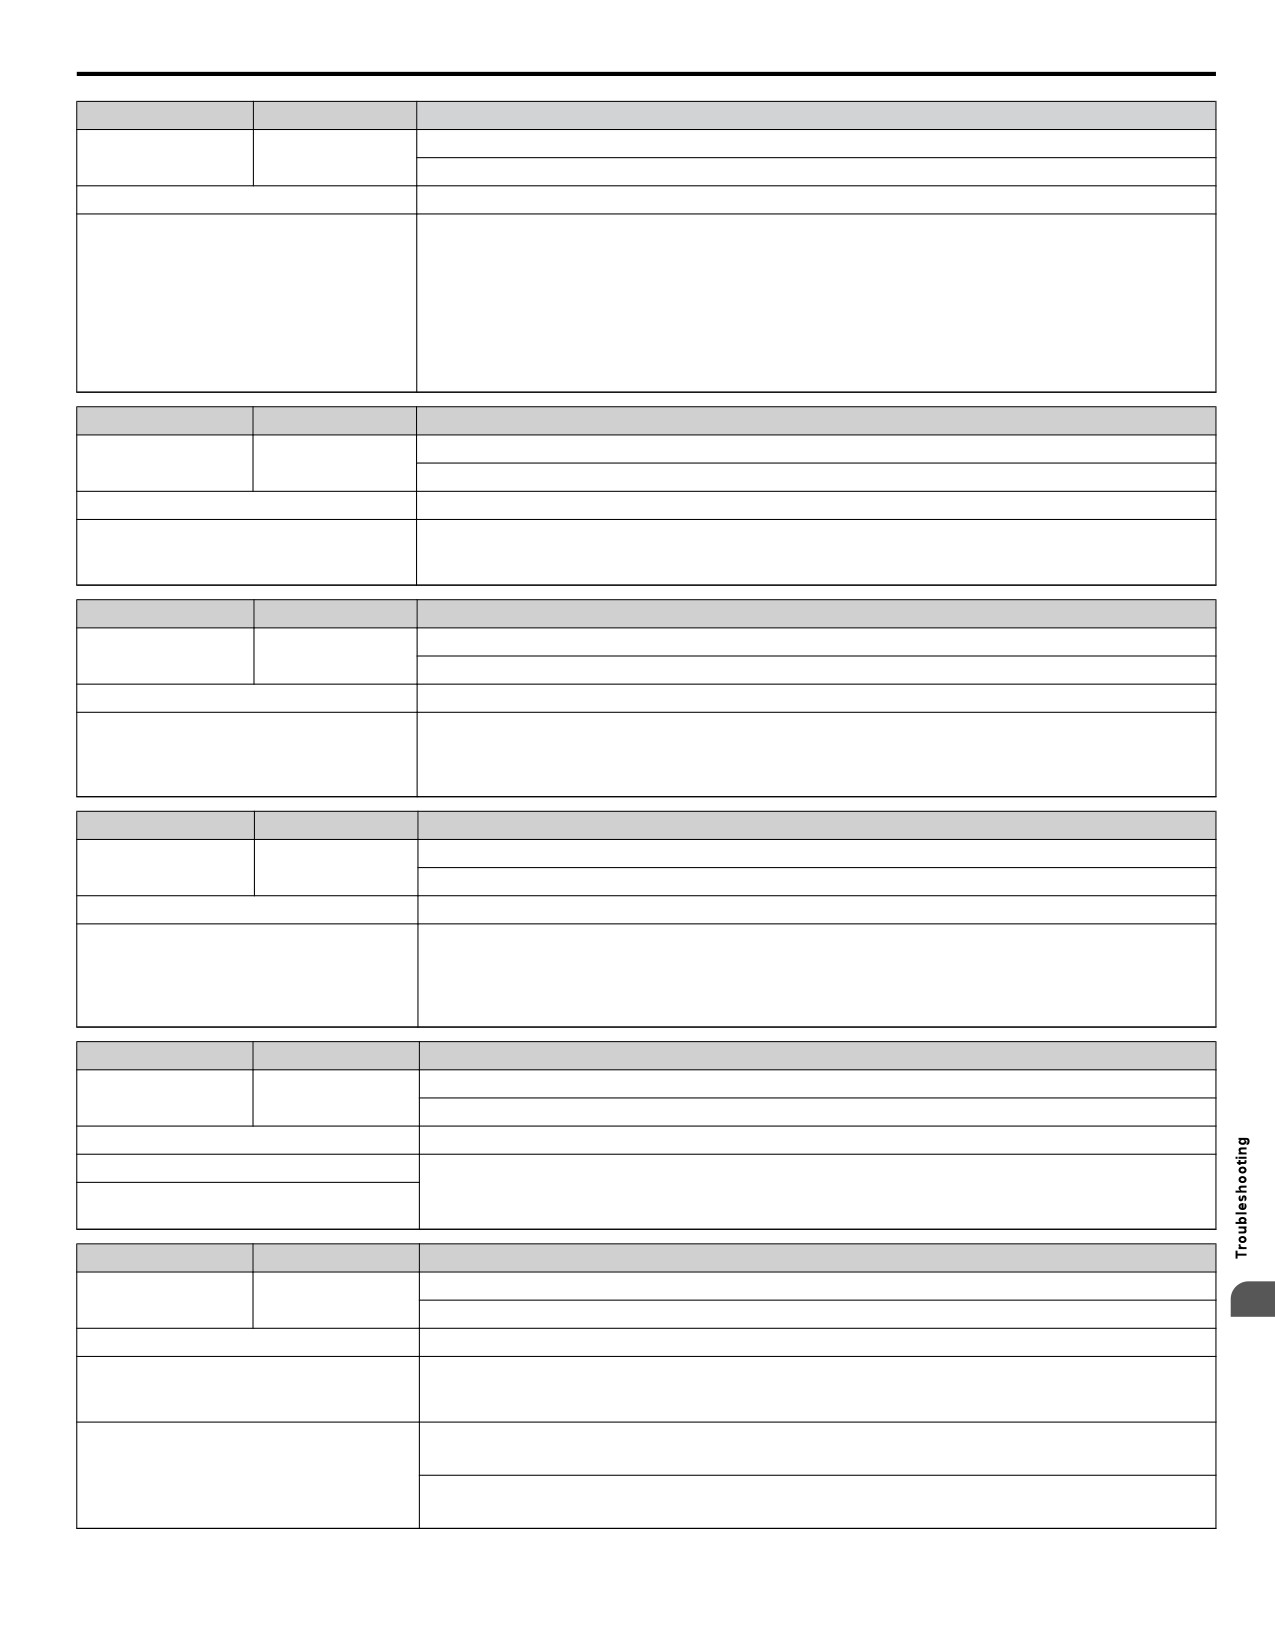
6.3 Fault Detection
LED Display
LCD Display
Fault Name
Loss of Prime
LOP
LOP
The pump has lost its prime.
Cause
Possible Solution
The pump load, measured based on the P1-18
setting (output current, kilowatts, or power),
• Check for a dry well, air in the system, or no water in the system. Restart the pump using the preferred
has dropped below the level set in P1-19,
priming method suggested by the pump manufacturer.
Prime Loss Level, for the time set in P1-20,
• Set the Loss of Prime fault characteristics in P1-18, P1-19, P1-20, and P1-21.
Loss of Prime Time, and the output
• Drive response to this condition is controlled by P1-21, Loss of Prime Selection.
frequency has risen above P1-21, Prime Loss
Frequency. This is effective only when
• Auto-restart of this fault is controlled by L5-51, Loss of Prime Fault Retry Selection and P1-23, Loss of
P1-22 Loss of Prime Selection is set to 0
Prime Maximum Restart Time after Fault
(fault).
LED Display
LCD Display
Fault Name
Low Water Level
LOH20
LWL
The “Low Water Level” digital input is active (H1-0o = 8F).
Cause
Possible Solution
The Low Water Level switch is activated,
defective, or P1-30, Low Water Digital Input
Raise the water level and/or adjust the Low Water Level switch.
Configuration, is programmed incorrectly.
LED Display
LCD Display
Fault Name
Net Master Lost
MSL
N5l
Net Master Loss
The MEMOBUS master has been lost
Cause
Possible Solution
Network Recovery is set to Fault MSL
• Increase the P9-26 setting to account for network latency.
(P9-27 = 3) and no message has been
• Verify that there is a drive on the network with parameter P1-01 set to 3 and P9-27 to 0.
received from the master within the time set
in P9-26.
• Check network connections and verify H5-01 and P9-25 settings for all drives on the network.
LED Display
LCD Display
Fault Name
Not Maintaining Setpoint
NOT5P
NMS
The setpoint cannot be maintained and P1-17 is set to 0.
Cause
Possible Solution
• Check for a blocked impeller, over cycling, or broken pipe.
When the feedback deviates from the
setpoint at a level greater than P1-15, for a
• Set the Not Maintaining Setpoint fault characteristics in P1-16 and P1-17.
time set in P1-16. This is effective only when
• Drive response to this condition is controlled by P1-17, Not Maintaining Setpoint Selection.
P1-17 is set to 0 (fault).
• Auto-restart of this fault is controlled by L5-50, Setpoint Not Met Retry.
LED Display
LCD Display
Fault Name
Node Setup Error
n5e
nSE
A terminal assigned to the node setup function closed during run.
Cause
Possible Solution
The node setup terminal closed during run.
A Run command was issued while the node
Stop the drive when using the node setup function.
setup function was active.
LED Display
LCD Display
Fault Name
Overcurrent
Oc
oC
6
Drive sensors detected an output current greater than the specified overcurrent level.
Cause
Possible Solution
The motor has been damaged due to
• Check the insulation resistance.
overheating or the motor insulation is
• Replace the motor.
damaged
• Check the motor cables.
• Remove the short circuit and reapply power to the drive.
One of the motor cables has shorted out or
there is a grounding problem
• Check the resistance between the motor cables and the ground terminal.
• Replace damaged cables.
259
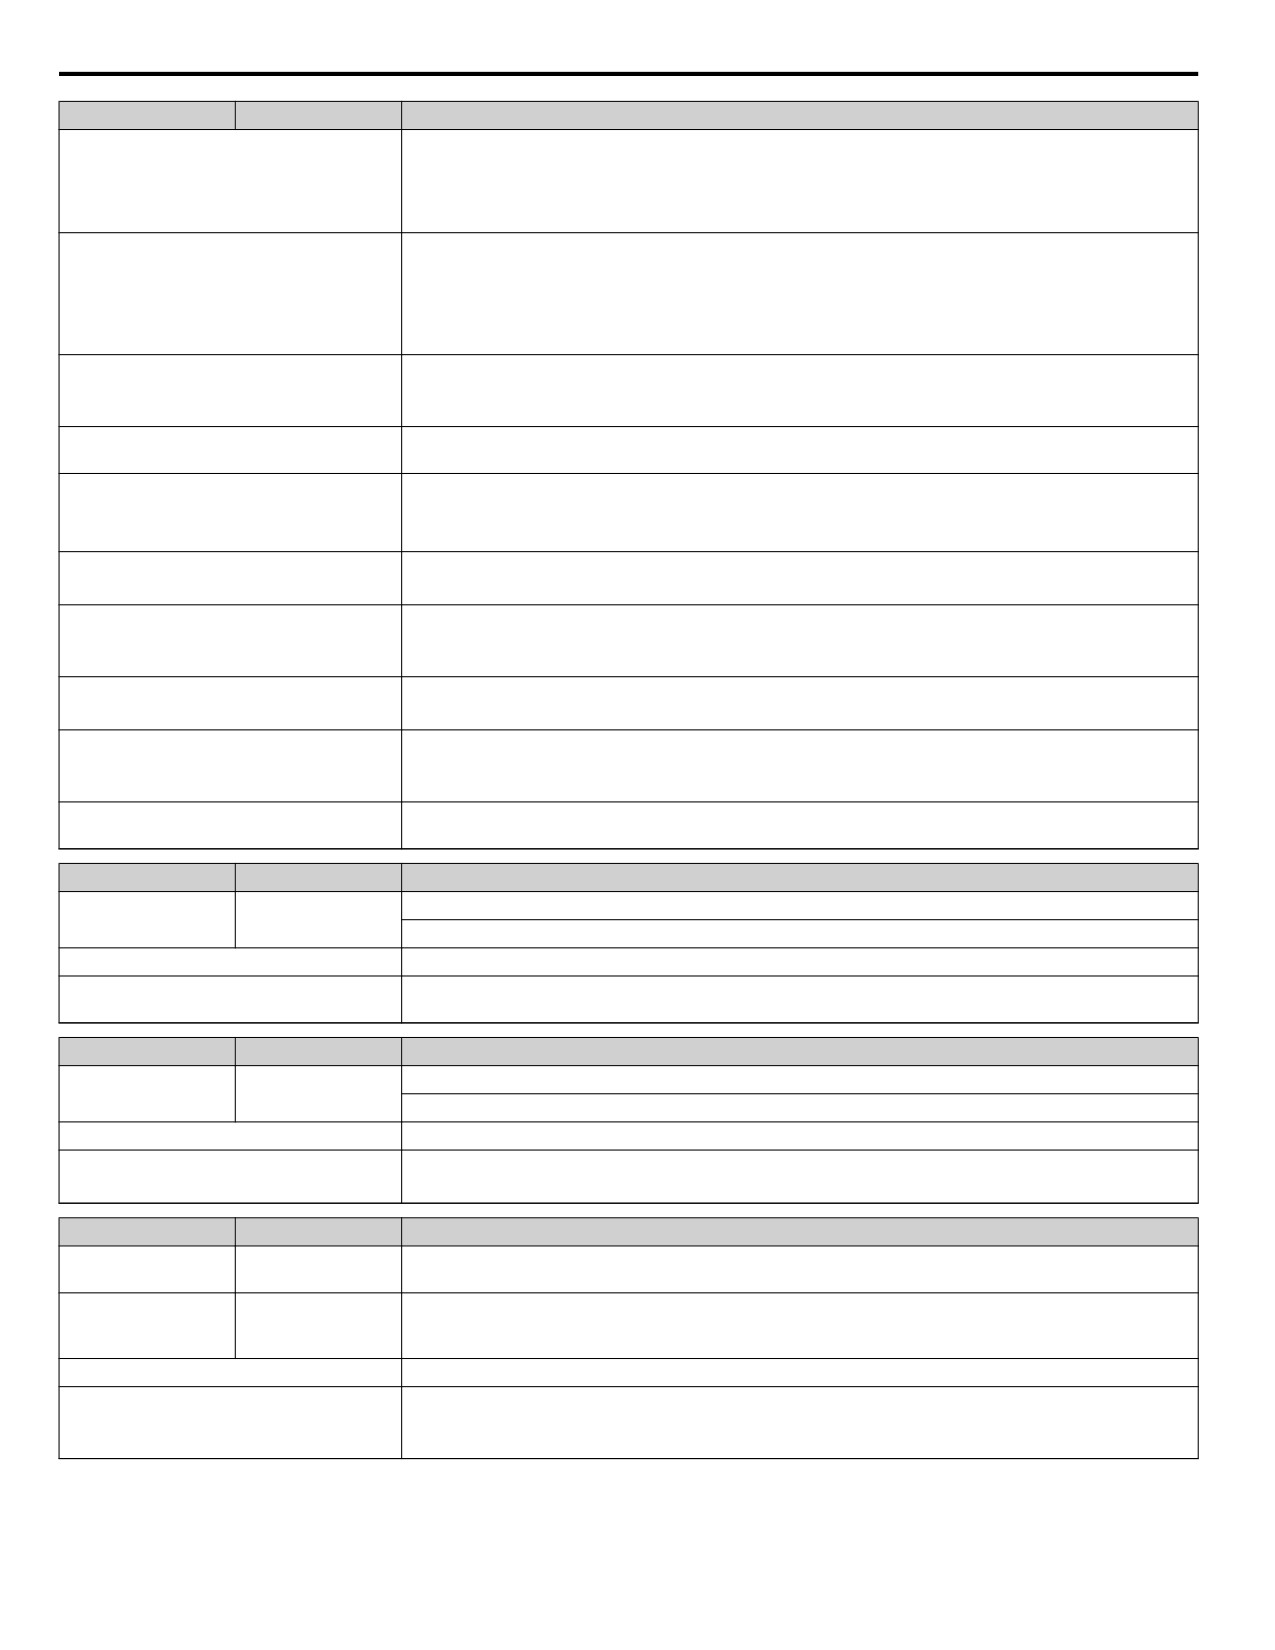
6.3 Fault Detection
LED Display
LCD Display
Fault Name
• Measure the current flowing into the motor.
• Replace the drive with a larger capacity drive if the current value exceeds the rated current.
The load is too heavy
• Determine if there is sudden fluctuation in the current level.
• Reduce the load to avoid sudden changes in the current level or switch to a larger drive.
Calculate the torque needed during acceleration relative to the load inertia and the specified acceleration
time. If it is not possible to set the proper amount of torque, make the following changes:
The acceleration or deceleration times are too
• Increase the acceleration time (C1-01, C1-03).
short
• Increase the S-curve characteristics (C2-01 through C2-04).
• Increase the capacity of the drive.
The drive is attempting to operate a
• Check the motor capacity.
specialized motor or a motor larger than the
• Ensure that the rated capacity of the drive is greater than or equal to the capacity rating found on the
maximum size allowed
motor nameplate.
Magnetic contactor (MC) on the output side
Set up the operation sequence so the MC does not trip while the drive is outputting current.
of the drive has turned on or off
• Check the ratios between the voltage and frequency.
V/f setting is not operating as expected
• Set parameters E1-04 through E1-10 appropriately.
• Lower the voltage if it is too high relative to the frequency.
• Check the amount of torque compensation.
Excessive torque compensation
• Reduce the torque compensation gain (C4-01) until there is no speed loss and less current.
• Review the possible solutions provided for handling noise interference.
Drive fails to operate properly due to noise
• Review the section on handling noise interference and check the control circuit lines, main circuit lines,
interference
and ground wiring.
• Check if the fault occurs simultaneously with overexcitation function operation.
Overexcitation gain is set too high
• Consider motor flux saturation and reduce the value of n3-13 (Overexcitation Deceleration Gain).
• Set b3-01 to 1 to enable Speed Search at Start.
Run command was applied while motor was
• Program the Speed Search command input through one of the multi-function contact input terminals
coasting
(H1-oo = 61 or 62).
The rated output current of the drive is too
Use a larger drive.
small
LED Display
LCD Display
Fault Name
Option Card Connection Error at Option Port CN5
oFA00
oFA00
Option compatibility error
Cause
Possible Solution
The option card installed into port CN5 is
Check if the drive supports the option card to be installed. Contact Yaskawa for assistance.
incompatible with the drive
LED Display
LCD Display
Fault Name
Option Card Fault at Option Port CN5
oFA01
oFA01
Option not properly connected
Cause
Possible Solution
The option card connection to port CN5 is
• Turn off the power and reconnect the option card.
faulty
• Check if the option card is properly plugged into the option port. Make sure the card is fixed properly.
LED Display
LCD Display
Fault Name
oFA03
oFA03
Option Card Error Occurred at Option Port CN5
oFA04
oFA04
oFA30
oFA30
to
to
Communication Option Card Connection Error (CN5)
oFA43
oFA43
Cause
Possible Solution
• Cycle power to the drive.
Option card or hardware is damaged
• If the problem continues, replace the control board or the entire drive. Contact Yaskawa or a Yaskawa
representative for instructions on replacing the control board.
260
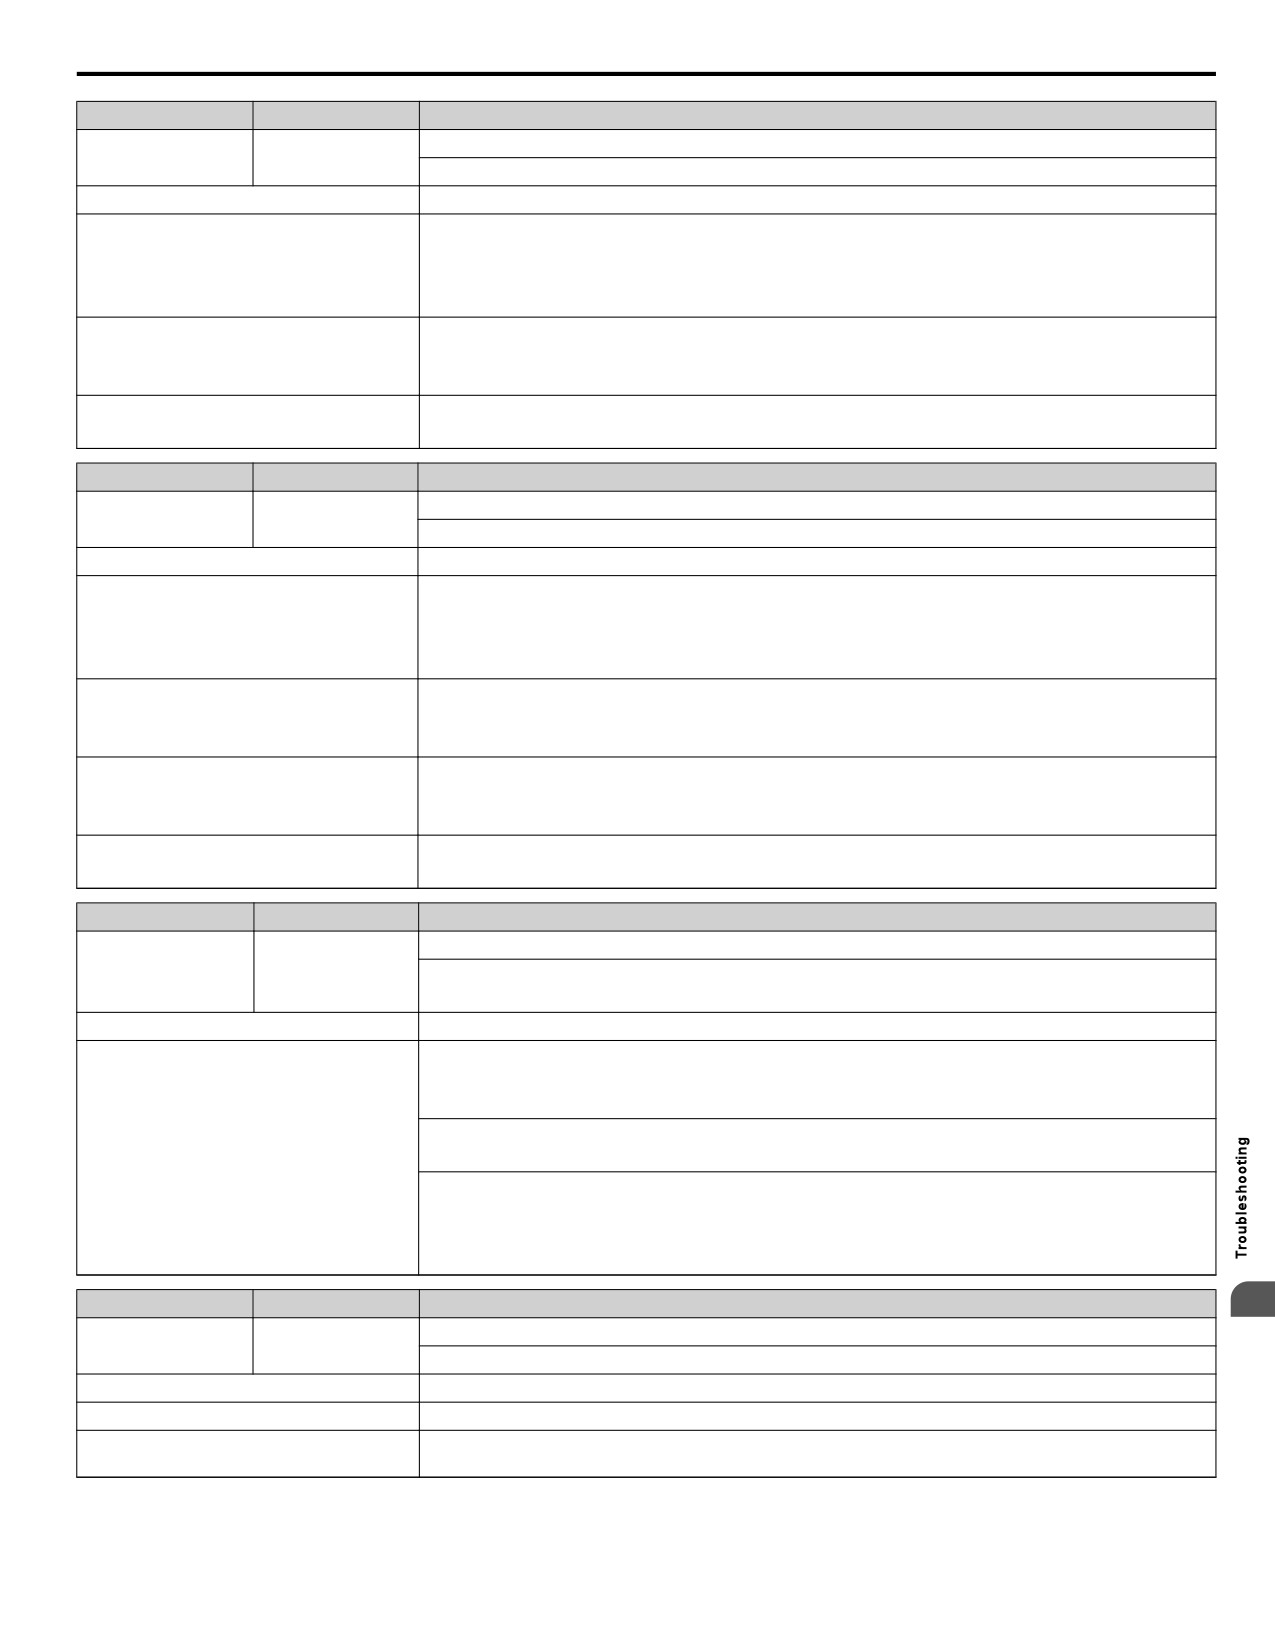
6.3 Fault Detection
LED Display
LCD Display
Fault Name
Heatsink Overheat
oH
oH
The heatsink temperature exceeded the overheat pre-alarm level set to L8-02.
Cause
Possible Solution
• Check the temperature surrounding the drive. Verify temperature is within drive specifications.
• Improve the air circulation within the enclosure panel.
Surrounding temperature is too high
• Install a fan or air conditioner to cool the surrounding area.
• Remove anything near the drive that might be producing excessive heat.
• Measure the output current.
Load is too heavy
• Decrease the load.
• Lower the carrier frequency (C6-02).
• Replace the cooling fan. .
Internal cooling fan is stopped
• After replacing the cooling fan, set parameter o4-03 to 0 to reset the cooling fan maintenance.
LED Display
LCD Display
Fault Name
Overheat 1 (Heatsink Overheat)
oH1
oH1
The heatsink temperature exceeded the drive overheat level.
Cause
Possible Solution
• Check the temperature surrounding the drive.
• Improve the air circulation within the enclosure panel.
Surrounding temperature is too high
• Install a fan or air conditioner to cool the surrounding area.
• Remove anything near the drive that might be producing excessive heat.
• Measure the output current.
Load is too heavy
• Lower the carrier frequency (C6-02).
• Reduce the load.
• Check the maintenance time for the cooling fan (U4-04).
The internal cooling fan has reached its
• If U4-04 exceeds 90%, replace the cooling fan.
performance life or has malfunctioned.
• After replacing fan, reset the fan maintenance time (o4-03 = “0”).
Current flowing to control circuit terminal
• Check the current level of the terminal.
+V exceeded the tolerance level.
• Set the current to the control circuit terminal to be 20 mA or less.
LED Display
LCD Display
Fault Name
Motor Overheat Fault (PTC Input)
oH4
oH4
• The motor overheat signal to analog input terminal A1 or A2 exceeded the fault detection level.
• Detection requires setting multi-function analog inputs H3-02 or H3-10 to E.
Cause
Possible Solution
• Check the size of the load, the accel/decel times, and the cycle times.
• Decrease the load.
• Increase the acceleration and deceleration times (C1-01 through C1-04).
• Adjust the preset V/f pattern (E1-04 through E1-10) by reducing E1-08 and E1-10.
Motor has overheated
• Do not set E1-08 and E1-10 too low. This reduces load tolerance at low speeds.
• Check the motor rated current.
• Enter the motor rated current to parameter E2-01 as indicated on the motor nameplate.
• Ensure the motor cooling system is operating normally.
• Repair or replace the motor cooling system.
LED Display
LCD Display
Fault Name
6
Motor Overload
oL1
oL1
The electronic motor overload protection tripped
Cause
Possible Solution
Load is too heavy
Reduce the load.
Cycle times are too short during acceleration
Increase the acceleration and deceleration times (C1-01 through C1-04).
and deceleration
261
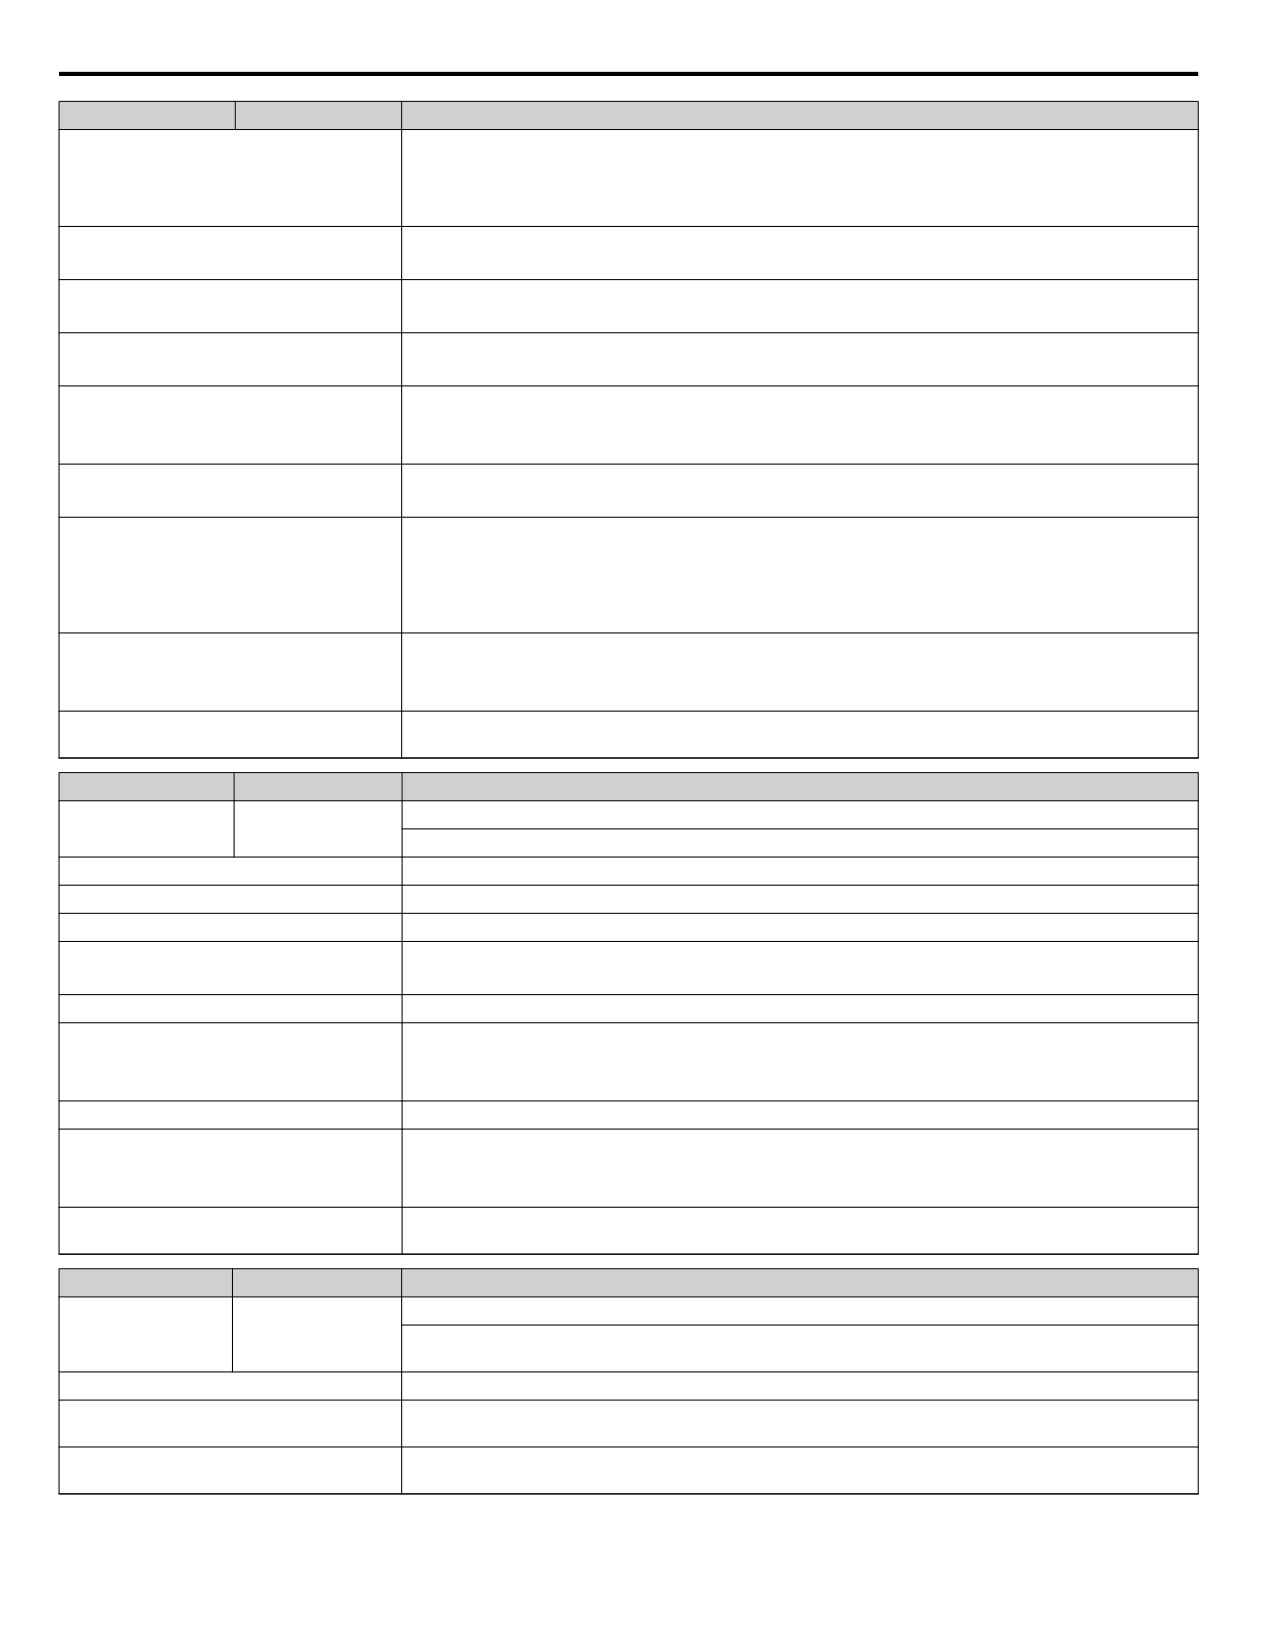
6.3 Fault Detection
LED Display
LCD Display
Fault Name
•
Reduce the load.
A general-purpose motor is driven below the
•
Increase the speed.
rated speed with a high load
•
If the motor is supposed to operate at low speeds, either increase the motor capacity or use a motor
specifically designed to operate in the desired speed range.
•
Adjust the user-set V/f pattern (E1-04 through E1-10) by reducing E1-08 and E1-10.
The output voltage is too high
•
Do not set E1-08 and E1-10 too low. This reduces load tolerance at low speeds.
•
Check the motor-rated current.
The wrong motor rated current is set to E2-01
•
Enter the motor rated current to parameter E2-01 as indicated on the motor nameplate.
•
Check the rated frequency indicated on the motor nameplate.
The base frequency is set incorrectly
•
Enter the rated frequency to E1-06 (Base Frequency).
•
Check the motor characteristics.
The electrical thermal protection
characteristics and motor overload
•
Correct the type of motor protection that has been selected (L1-01).
characteristics do not match
•
Install an external thermal relay.
The electrical thermal relay is operating at the
•
Check the current rating listed on the motor nameplate.
wrong level
•
Check the value set for the motor rated current (E2-01).
•
Overexcitation increases the motor loss and the motor temperature. Excessive duration of overexcitation
may cause motor damage. Prevent excessive overexcitation operation or apply proper cooling to the
Motor overheated by overexcitation
motor.
operation
•
Reduce the excitation deceleration gain (n3-13).
•
Set L3-04 (Stall Prevention during Deceleration) to a value other than 4.
•
Check values set to Speed Search related parameters.
Parameters related to Speed Search are set
•
Adjust the Speed Search current and Speed Search deceleration times (b3-02 and b3-03 respectively).
incorrectly
•
After Auto-Tuning, set b3-24 to 1 to enable Speed Estimation Speed Search.
Output current fluctuation due to power
Check the power supply for phase loss.
supply loss
LED Display
LCD Display
Fault Name
Drive Overload
oL2
oL2
The thermal sensor of the drive triggered overload protection.
Cause
Possible Solution
Load is too heavy
Reduce the load.
Acceleration or deceleration time is too short
Increase the settings for the acceleration and deceleration times (C1-01 through C1-04).
• Adjust the preset V/f pattern (E1-04 through E1-10) by reducing E1-08 and E1-10.
The output voltage is too high
• Do not lower E1-08 and E1-10 excessively. This reduces load tolerance at low speeds.
Drive capacity is too small
Replace the drive with a larger model.
• Reduce the load when operating at low speeds.
Overload occurred when operating at low
• Replace the drive with a model that is one frame size larger.
speeds
• Lower the carrier frequency (C6-02).
Excessive torque compensation
Reduce the torque compensation gain in parameter C4-01 until there is less current but no speed loss.
• Check the settings for all Speed Search related parameters.
Parameters related to Speed Search are set
• Adjust the current used during Speed Search (b3-03) and the Speed Search deceleration time (b3-02).
incorrectly
• After Auto-Tuning, set b3-24 to 1 to enable Speed Estimation Speed Search.
Output current fluctuation due to input phase
Check the power supply for phase loss.
loss
LED Display
LCD Display
Fault Name
Overtorque Detection 1
oL3
oL3
The current has exceeded the value set for torque detection (L6-02) for longer than the allowable time
(L6-03).
Cause
Possible Solution
Parameter settings are not appropriate for the
Check L6-02 and L6-03 settings.
load
Fault on the machine side (e.g., machine is
Check the status of the load. Remove the cause of the fault.
locked up)
262
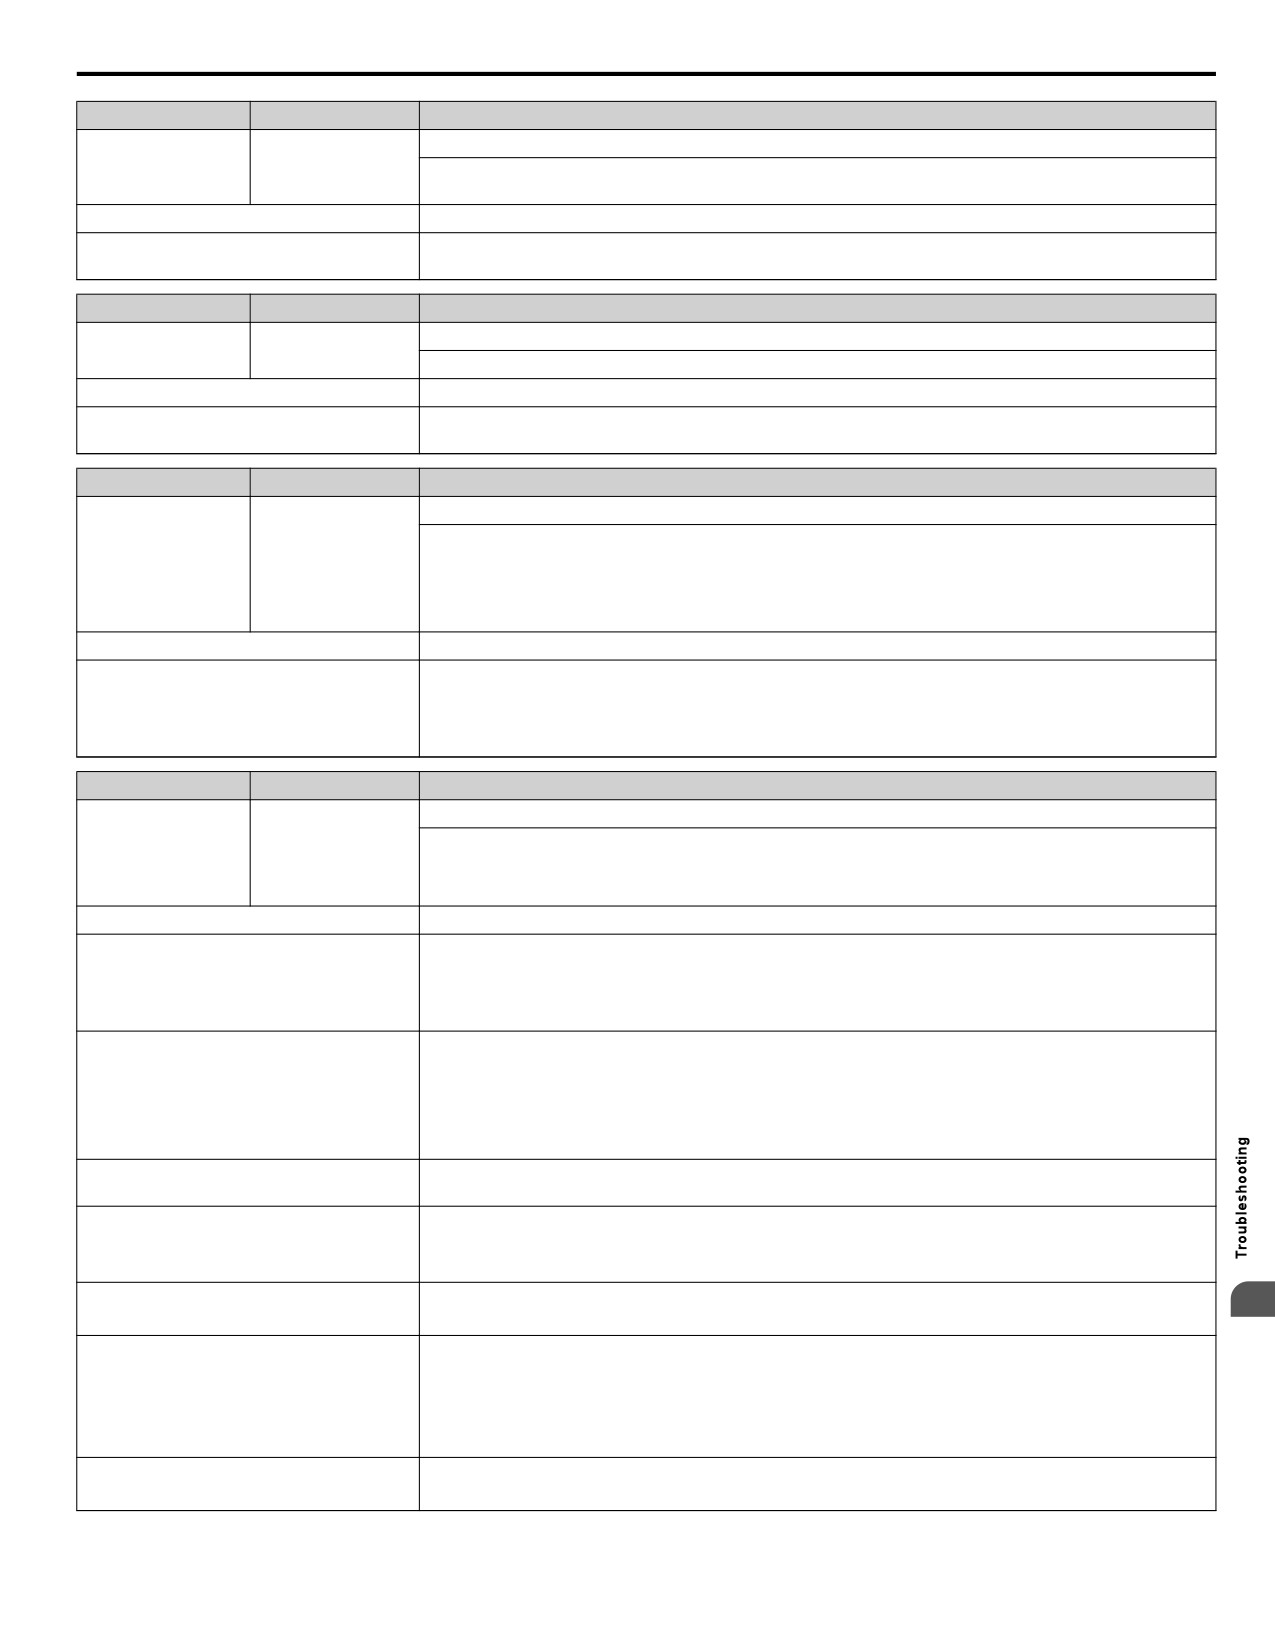
6.3 Fault Detection
LED Display
LCD Display
Fault Name
Overtorque Detection 2
oL4
oL4
The current has exceeded the value set for Overtorque Detection 2 (L6-05) for longer than the allowable
time (L6-06).
Cause
Possible Solution
Parameter settings are not appropriate for the
Check the settings of parameters L6-05 and L6-06.
load
LED Display
LCD Display
Fault Name
Mechanical Weakening Detection 1
oL5
oL5
Overtorque occurred, matching the conditions specified in L6-08.
Cause
Possible Solution
Overtorque occurred, triggering the
Check for the cause of mechanical weakening.
mechanical weakening level set to L6-08.
LED Display
LCD Display
Fault Name
External Operator Connection Fault
The external operator has been disconnected from the drive.
oPr
oPr
Note:
An oPr fault will occur when all of the following conditions are true:
• Output is interrupted when the keypad is disconnected (o2-06 = 1).
• The Run command is assigned to the operator (b1-02 = 0 and HAND has been selected).
Cause
Possible Solution
• Check the connection between the keypad and the drive.
External operator is not properly connected
• Replace the cable if damaged.
to the drive
• Turn off the drive input power and disconnect the keypad. Reconnect the keypad and reapply drive input
power.
LED Display
LCD Display
Fault Name
Overvoltage
Voltage in the DC bus has exceeded the overvoltage detection level.
ou
ov
• For 200 V class drives: approximately 410 V
• For 400 V class drives: approximately 820 V (740 V when E1-01 is less than 400)
Cause
Possible Solution
• Increase the deceleration time (C1-02 and C1-04).
Deceleration time is too short and
• Install a dynamic braking resistor or a dynamic braking resistor unit.
regenerative energy is flowing from the
motor into the drive
• Set L3-04 to 1 to enable stall prevention during deceleration. Stall Prevention is enabled as the default
setting.
• Check if sudden drive acceleration triggers an overvoltage alarm.
• Increase the acceleration time.
Fast acceleration time causes the motor to
• Use longer S-curve acceleration and deceleration times.
overshoot the speed reference
• Enable the Overvoltage Suppression function (L3-11 = 1).
• Lengthen the S-curve at acceleration end.
The braking torque was too high, causing regenerative energy to charge the DC bus. Reduce the braking
Excessive braking load
torque, use a dynamic braking option, or lengthen decel time.
Install a DC link choke.
Surge voltage entering from the drive input
power
Note:
Voltage surge can result from a thyristor convertor and phase advancing capacitor using the
same input power supply.
Ground fault in the output circuit causes the
• Check the motor wiring for ground faults.
6
DC bus capacitor to overcharge
• Correct grounding shorts and reapply power.
• Check the settings for Speed Search-related parameters.
Improper parameters related to Speed Search
• Enable Speed Search restart function (b3-19 greater than or equal to 1 to 10).
(including Speed Search after a momentary
• Adjust the current level during Speed Search and the deceleration time (b3-02 and b3-03 respectively).
power loss and after a fault restart)
• Perform Stationary Auto-Tuning for line-to-line resistance and then set b3-14 to 1 to enable Speed
Estimation Speed Search.
• Check the voltage.
Drive input power voltage is too high
• Lower drive input power voltage within the limits listed in the specifications.
263
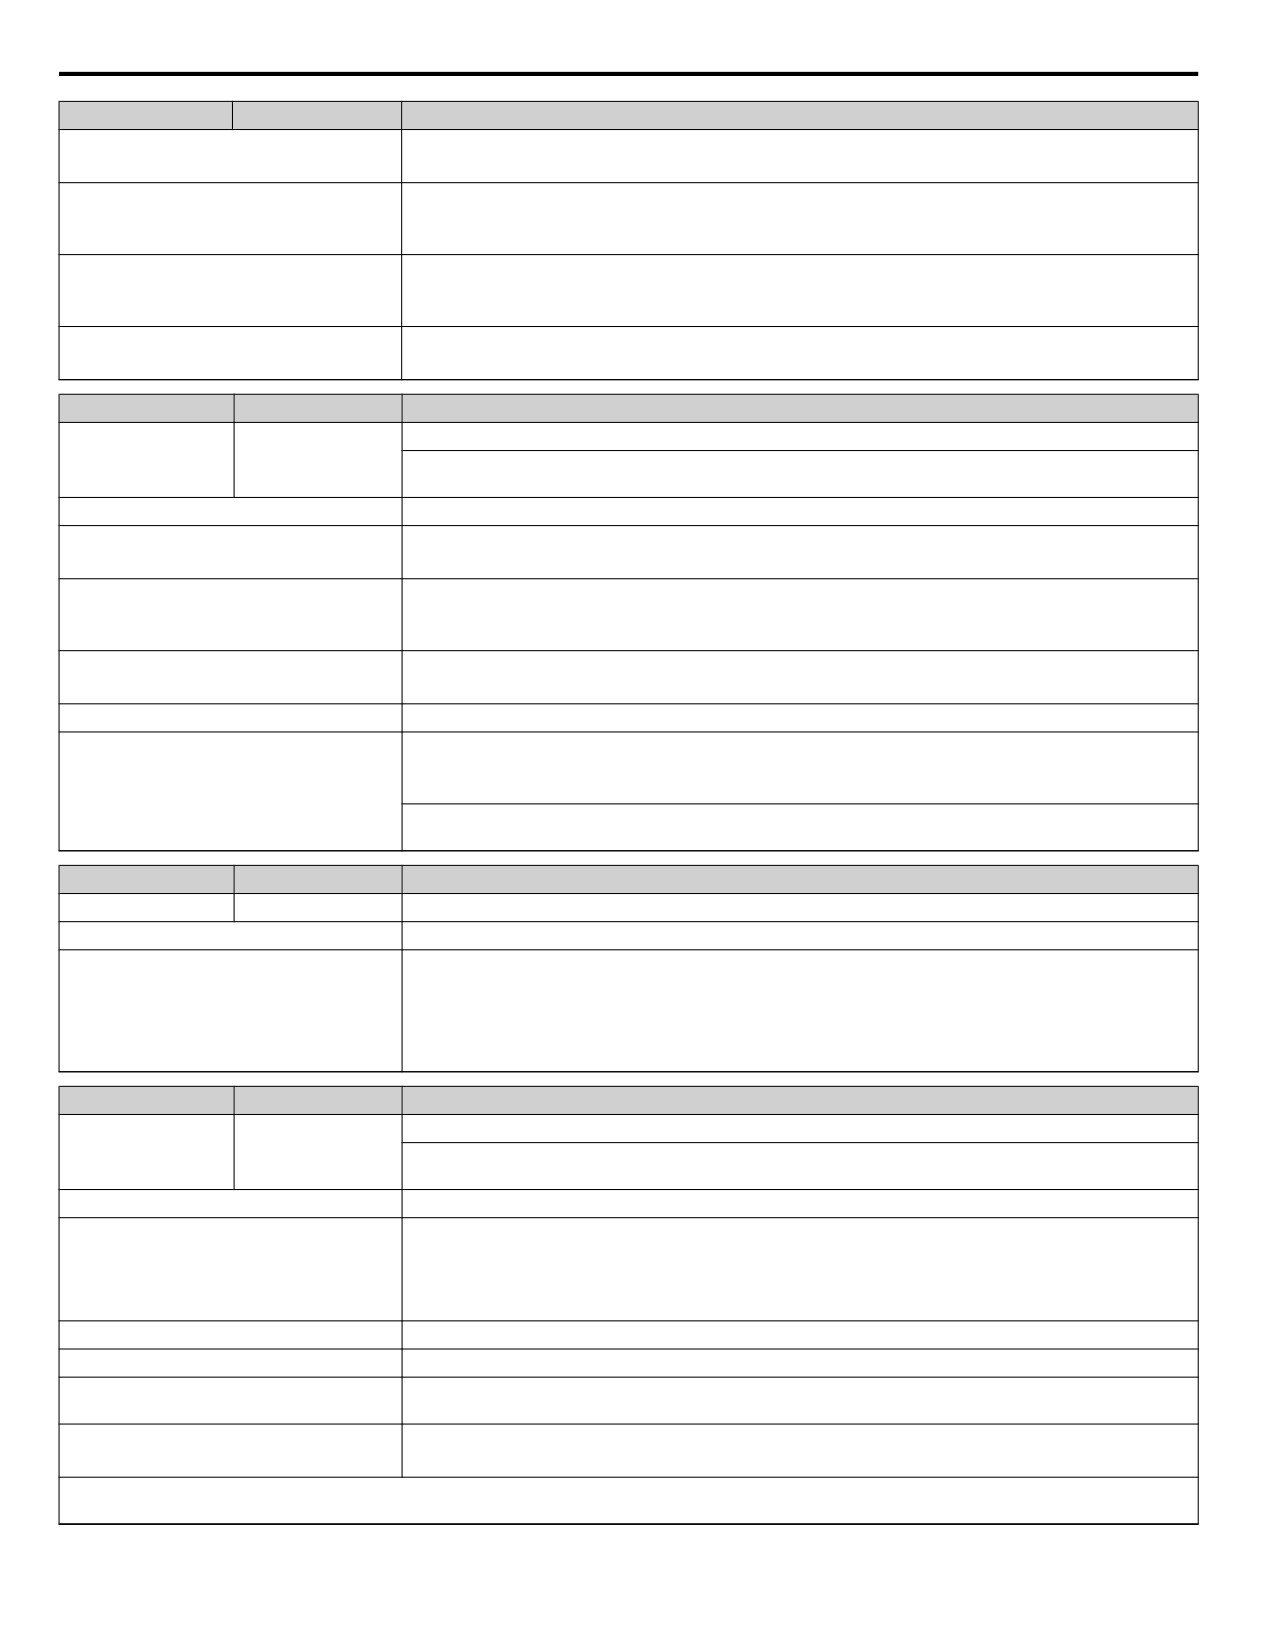
6.3 Fault Detection
LED Display
LCD Display
Fault Name
The braking transistor or braking resistor are
• Check braking transistor and braking resistor wiring for errors.
wired incorrectly
• Properly rewire the braking resistor device.
• Review the list of possible solutions provided for controlling noise.
Drive fails to operate properly due to noise
• Review the section on handling noise interference and check the control circuit lines, main circuit lines,
interference
and ground wiring.
• Check the load inertia settings when using KEB, overvoltage suppression, or Stall Prevention during
Load inertia is set incorrectly
deceleration.
• Adjust the load inertia ratio in L3-25 to better match the load.
• Adjust the parameters that control hunting.
Motor hunting occurs
• Set the gain for Hunting Prevention (n1-02).
LED Display
LCD Display
Fault Name
Input Phase Loss
PF
PF
Drive input power has an open phase or has a large imbalance of voltage between phases. Detected when
L8-05 is set to 1 (enabled).
Cause
Possible Solution
• Check for wiring errors in the main circuit drive input power.
There is phase loss in the drive input power
• Correct the wiring.
• Ensure the terminals are tightened properly.
There is loose wiring in the drive input power
• Apply the tightening torque as specified in this manual. Refer to Wire Gauges and Tightening
terminals
Torques on page 50 for details.
There is excessive fluctuation in the drive
• Check the voltage from the drive input power.
input power voltage
• Review the possible solutions for stabilizing the drive input power.
There is poor balance between voltage phases
Stabilize drive input power or disable phase loss detection.
• Check the maintenance time for the capacitors (U4-05).
• Replace the capacitor if U4-05 is greater than 90%. For instructions on replacing the capacitor, contact
The main circuit capacitors are worn out
Yaskawa or a Yaskawa representative.
Check for problems with the drive input power. If drive input power appears normal but the alarm continues
to occur, replace the drive.
LED Display
LCD Display
Fault Name
POc
PoC
Pump Over Cycle
Cause
Possible Solution
• Set the Pump Over Cycle fault characteristics in P2-10 and P2-11.
The pump has exceeded the number of cycles
• Drive response to this condition is controlled by P2-12, Over Cycling Mode.
set in P2-10 in the time set in P2-11 and P2-12
• Auto-restart of this fault is controlled by L5-52, Pump Over Cycle Fault Retry Selection.
is set to 2 (fault).
• Set the Pump Over Cycle automatic setpoint compensation in P2-12, Over Cycling Mode, P2-13,
Setpoint Compensation, and P2-14, Maximum Setpoint Compensation.
LED Display
LCD Display
Fault Name
Braking Resistor Overheat
rH
rH
Braking resistor protection was triggered.
Fault detection is enabled when L8-01 = 1 (disabled as a default).
Cause
Possible Solution
• Check the load, deceleration time, and speed.
Deceleration time is too short and excessive
• Reduce the load inertia.
regenerative energy is flowing back into the
• Increase the deceleration times (C1-01 to C1-04).
drive
• Replace the dynamic braking option with a larger device that can handle the power that is discharged.
The duty cycle is too high
Check the duty cycle. Maximum of 3% duty cycle is available when L8-01 = 1.
Excessive braking inertia
Recalculate braking load and braking power. Reduce the braking load by adjusting braking resistor settings.
Check the braking operation duty cycle. Braking resistor protection for ERF-type braking resistors
The braking operation duty cycle is too high
(L8-01 = 1) allows a braking duty cycle of maximum 3%.
The proper braking resistor has not been
• Check the specifications and conditions for the braking resistor device.
installed
• Select the optimal braking resistor.
Note:
The magnitude of the braking load trips the braking resistor overheat alarm, NOT the surface temperature. Using the braking resistor more
frequently than its rating permits will trip the alarm even when the braking resistor surface is not very hot.
264
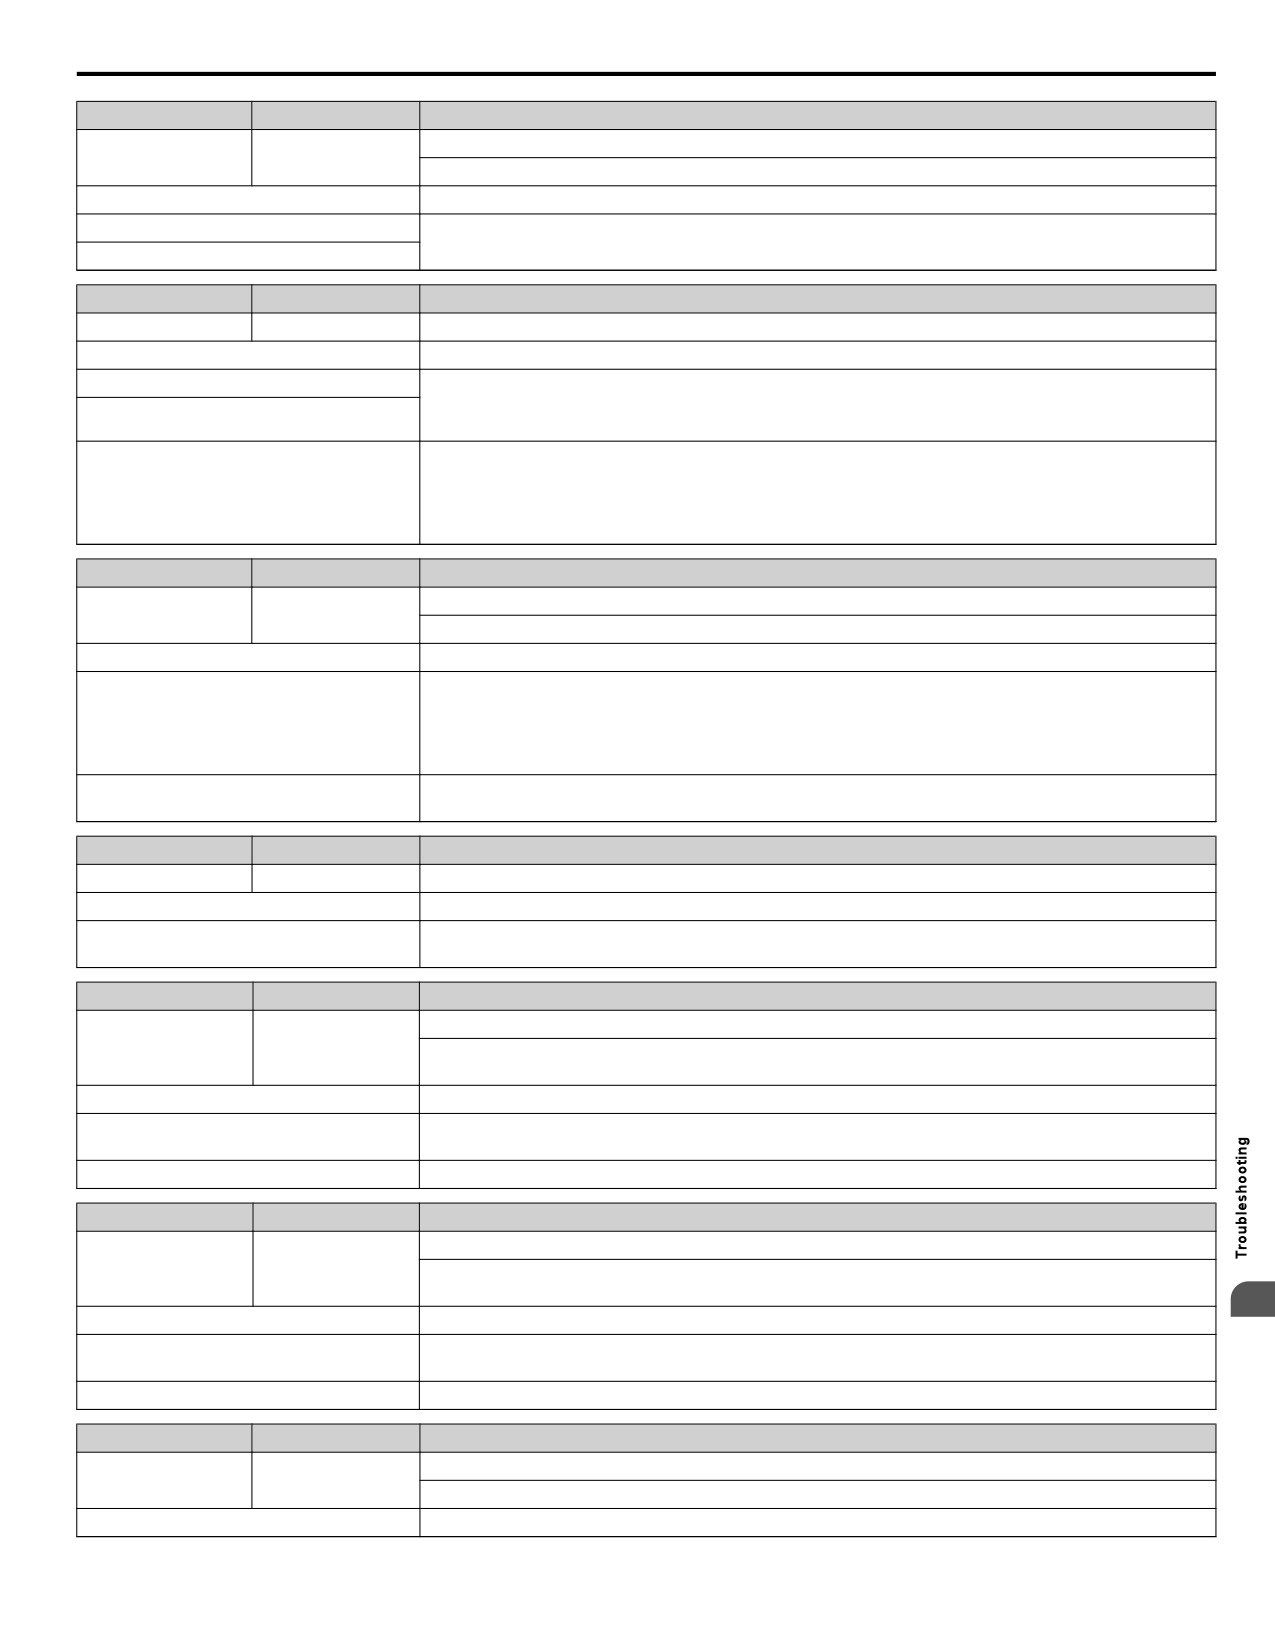
6.3 Fault Detection
LED Display
LCD Display
Fault Name
Dynamic Braking Transistor
rr
rr
The built-in dynamic braking transistor failed.
Cause
Possible Solution
The braking transistor is damaged
• Cycle power to the drive and check for reoccurrence of the fault.
The control circuit is damaged
• Replace the drive.
LED Display
LCD Display
Fault Name
5c
SC
IGBT Short Circuit or Ground Fault
Cause
Possible Solution
IGBT fault
• Check motor wiring.
• Turn off the power supply, then turn it on. If the problem continues, contact your Yaskawa representative
IGBT short circuit detection circuit fault
or the nearest Yaskawa sales office.
• Check the drive output side short circuit for a broken output transistor
B1 and U/T1, V/T2, W/T3
The drive is damaged
- and U/T1, V/T2, W/T3
• Contact your Yaskawa representative or nearest Yaskawa sales office.
LED Display
LCD Display
Fault Name
Too Many Speed Search Restarts
5Er
SEr
The number of Speed Search restarts exceeded the value set to b3-19.
Cause
Possible Solution
• Reduce the detection compensation gain during Speed Search (b3-10).
Parameters related to Speed Search are set to
• Increase the current level when attempting Speed Search (b3-17).
the wrong values
• Increase the detection time during Speed Search (b3-18).
• Repeat Auto-Tuning.
The motor is coasting in the opposite
Set b3-14 to 1 to enable Bi-Directional Speed Search.
direction of the Run command
LED Display
LCD Display
Fault Name
T1 E
TIE
Time Interval Error
Cause
Possible Solution
An error has occurred in the Real-Clock Time
Replace the HOA keypad. For instructions on replacing the HOA keypad, contact Yaskawa or your nearest
function of the HOA keypad.
sales representative.
LED Display
LCD Display
Fault Name
Undertorque Detection 1
vl3
UL3
The current has fallen below the minimum value set for torque detection (L6-02) for longer than the
allowable time (L6-03).
Cause
Possible Solution
Parameter settings are not appropriate for the
Check the settings of parameters L6-02 and L6-03.
load
There is a fault on the machine side
Check the load for any problems.
LED Display
LCD Display
Fault Name
Undertorque Detection 2
vl4
UL4
The current has fallen below the minimum value set for torque detection (L6-05) for longer than the
allowable time (L6-06).
6
Cause
Possible Solution
Parameter settings are not appropriate for the
Check L6-05 and L6-06 settings
load
There is a fault on the machine side
Check the load for any problems.
LED Display
LCD Display
Fault Name
UL6
Motor Underload
vl6
Underload Det 6
The load has fallen below the underload curve defined in L6-14.
Cause
Possible Solution
265
6.3 Fault Detection
LED Display
LCD Display
Fault Name
The output current has fallen below the motor
Adjust the value set to L6-14 so that output current remains above the motor underload curve during normal
underload curve defined in L6-14 for longer
operation.
than the time set to L6-03
LED Display
LCD Display
Fault Name
DC Bus Undervoltage
One of the following conditions occurred while the drive was running:
• Voltage in the DC bus fell below the undervoltage detection level (L2-05).
Uv1
• For 200 V class: approximately 190 V (160 V for single phase drives)
vu1
• For 400 V class: approximately 380 V (350 V when E1-01 is less than 400) The fault is output only if
L2-01 = 0 or L2-01 = 1 and the DC bus voltage is under L2-05 for longer than L2-02.
The fault is output only if L2-01 is set to 0 or 1 and the DC bus voltage has fallen below the level set to
L2-05 for longer than the time set to L2-02.
Cause
Possible Solution
• The main circuit drive input power is wired incorrectly.
Input power phase loss
• Correct the wiring.
• Ensure there are no loose terminals.
One of the drive input power wiring terminals
• Apply the tightening torque specified in this manual to fasten the terminals. Refer to Wire Gauges and
is loose
Tightening Torques on page 50 for details.
• Check the voltage.
There is a problem with the voltage from the
• Correct the voltage to be within the range listed in drive input power specifications.
drive input power
• If there is no problem with the power supply to the main circuit, check for problems with the main circuit
magnetic contactor.
The power has been interrupted
Correct the drive input power.
• Check the maintenance time for the capacitors (U4-05).
The main circuit capacitors are worn
• Replace the drive if U4-05 exceeds 90%.
• Cycle power to the drive and see if the fault reoccurs.
The relay or contactor on the soft-charge
• If the problem continues, replace the drive.
bypass circuit is damaged
• Check monitor U4-06 for the performance life of the soft-charge bypass.
• Replace the drive if U4-06 exceeds 90%.
LED Display
LCD Display
Fault Name
Control Power Supply Voltage Fault
vu2
Uv2
Voltage is too low for the control drive input power.
Cause
Possible Solution
L2-02 changed from its default value in drive
that is 7.5 kW or smaller without installing a
Correct the setting to L2-02 or install an optional Momentary Power Loss Ride-Thru unit.
Momentary Power Loss Ride-Thru.
• Cycle power to the drive. Check if the fault reoccurs.
Control power supply wiring is damaged
• If the problem continues, replace the control board, the entire drive, or the control power supply. For
instructions on replacing the control board, contact Yaskawa or a Yaskawa representative.
• Cycle power to the drive. Check if the fault reoccurs.
Internal circuitry is damaged
• If the problem continues, replace the drive.
LED Display
LCD Display
Fault Name
Undervoltage 3 (Soft-Charge Bypass Circuit Fault)
vu3
Uv3
The soft-charge bypass circuit failed.
Cause
Possible Solution
• Cycle power to the drive and see if the fault reoccurs.
The relay or contactor on the soft-charge
• If the problem continues, replace the drive.
bypass circuit is damaged
• Check monitor U4-06 for the performance life of the soft-charge bypass.
• Replace the drive if U4-06 exceeds 90%.
LED Display
LCD Display
Fault Name
ult5
VLTS
Volute-Thermostat Fault
Cause
Possible Solution
266
6.3 Fault Detection
LED Display
LCD Display
Fault Name
The digital input assigned to the volute/
• Check the wiring or wait for the volute or motor to cool.
thermostat input (H1-0o = 88 or 89) is active.
• Auto-restart of this fault is controlled by parameter L5-53, Volute-TStat Retry Selection.
Both volute/thermostat inputs are
programmed simultaneously (H1-0o = 88
Program only one digital input to either H1-0o = 88 or H1-0o = 89.
and 89).
6
267
6.4 Alarm Detection
6.4
Alarm Detection
Note:
Digital operator display text is represented in the tables below using standard font for both LCD displays and LED displays. When using
the standard LED operator, however, display text will appear in 7-segment LED (ex: “
”). When the LED fault display differs from the
LCD display, the LED display text will be shown in parentheses under the LCD display text.
u Alarm Codes, Causes, and Possible Solutions
Alarms are drive protection functions that do not necessarily cause the drive to stop. After removing the cause of an alarm,
the drive will return to its previous status before the alarm occurred.
When an alarm has been triggered, the ALM light on the digital operator display blinks and the alarm code display flashes. If
a multi-function output is set for an alarm (H2-oo = 10), that output terminal will be triggered.
Note:
If a multi-function output is set to close when an alarm occurs (H2-oo = 10), it will also close when maintenance periods are reached,
triggering alarms LT-1 through LT-4 (triggered only if H2-oo = 2F).
Table 6.3 Alarm Codes, Causes, and Possible Solutions
LED Display
LCD Display
Minor Fault Name
Station Address Setting Error (CC-Link, CANopen, MECHATROLINK)
AEr
AEr
Option card node address is outside the acceptable setting range.
Cause
Possible Solution
• Set parameter F6-10 to the proper value if a CC-Link option card is used
Station number is set outside the possible
• Set parameter F6-20 to the proper value if a MECHATROLINK option card is used.
setting range.
• Set parameter F6-35 to the proper value if a CANopen option card is used.
LED Display
LCD Display
Minor Fault Name
AnalogFB Lost
Analog Feedback Lost
AfbL
Switched to Net
Analog feedback has not been detected and the network PID feedback signal is now used.
Cause
Possible Solution
Confirm that the PID feedback source is installed and working properly. If there is no feedback source,
Defective or broken analog input source.
set P9-02 to 3 so the drive will read the network PID feedback from another drive.
Set H3-0o to B if the analog input source is to be used for PID feedback.
H3-0o is not set to B (PID Feedback)
Set P9-02 to 3 if the drive does not have an analog PID feedback source.
LED Display
LCD Display
Minor Fault Name
AJA
Anti-Jam Active
Anti-Jam Alarm
Cause
Possible Solution
The drive is attempting to clear debris from
the impeller. This is only effective when
• Alarm will clear when function is complete.
P7-01, Anti-jam Operation is set to 1
• Drive response to this condition is controlled by P7-01, Anti-jam Operation Selection.
(enabled).
LED Display
LCD Display
Minor Fault Name
BAT
bAT
Digital Operator Battery Voltage Low
Cause
Possible Solution
The digital operator battery is low
Replace the digital operator battery.
LED Display
LCD Display
Minor Fault Name
Baseblock
bb
bb
Drive output interrupted as indicated by an external baseblock signal.
Cause
Possible Solution
External baseblock signal was entered via one
of the multi-function input terminals
Check external sequence and baseblock signal input timing.
(S1 to S7).
LED Display
LCD Display
Minor Fault Name
Option Communication Error
bv5
bUS
• The connection was lost after initial communication was established.
• Assign a Run command frequency reference to the option.
Cause
Possible Solution
268
6.4 Alarm Detection
LED Display
LCD Display
Minor Fault Name
• Check for faulty wiring.
Connection is broken or master controller
• Correct the wiring.
stopped communicating.
• Check for disconnected cables and short circuits. Repair as needed.
Option is damaged.
If there are no problems with the wiring and the fault continues to occur, replace the option.
The option is not properly connected to the
• The connector pins on the option are not properly lined up with the connector pins on the drive.
drive.
• Reinstall the option.
• Check options available to minimize the effects of noise.
• Take steps to counteract noise in the control circuit wiring, main circuit lines and ground wiring.
• Try to reduce noise on the controller side.
• Use surge absorbers on magnetic contactors or other equipment causing the disturbance.
A data error occurred due to noise.
• Use recommended cables or some other type of shielded line. Ground the shield to the controller side
or on the input power side.
• Separate the wiring for communication devices from the drive input power lines. Install an EMC noise
filter to the drive input power.
LED Display
LCD Display
Minor Fault Name
Serial Communication Transmission Error
cAll
CALL
Communication has not yet been established.
Cause
Possible Solution
• Check for wiring errors.
Communications wiring is faulty, there is a
short circuit, or something is not connected
• Correct the wiring.
properly.
• Check for disconnected cables and short circuits. Repair as needed.
Programming error on the master side.
Check communications at start-up and correct programming errors.
• Perform a self-diagnostics check.
Communications circuitry is damaged.
• If the problem continues, replace the drive.
Install a termination resistor at both ends of a communication line. Set the internal termination resistor
Termination resistor setting is incorrect.
switch correctly on slave drives. Place DIP switch S2 to the ON position.
LED Display
LCD Display
Minor Fault Name
MEMOBUS/Modbus Communication Error
ce
CE
Control data was not received correctly for two seconds.
Cause
Possible Solution
• Check options available to minimize the effects of noise.
• Take steps to counteract noise in the control circuit wiring, main circuit lines, and ground wiring.
• Reduce noise on the controller side.
• Use surge absorbers for the magnetic contactors or other components that may be causing the
A data error occurred due to noise.
disturbance.
• Use only recommended shielded line. Ground the shield on the controller side or on the drive input
power side.
• Separate all wiring for communication devices from drive input power lines. Install an EMC noise filter
to the drive input power supply.
• Check the H5 parameter settings and the protocol setting in the controller.
Communication protocol is incompatible.
• Ensure settings are compatible.
• Check the PLC.
The CE detection time (H5-09) is set shorter
than the time required for a communication
• Change the software settings in the PLC.
cycle to take place.
• Set a longer CE detection time using parameter H5-09.
Incompatible PLC software settings or there
• Check the PLC.
6
is a hardware problem.
• Remove the cause of the error on the controller side.
Communications cable is disconnected or
• Check the connector to make sure the cable has a signal.
damaged.
• Replace the communications cable.
LED Display
LCD Display
Minor Fault Name
no indication
Clock Not Set
Clock Not Set
Cause
Possible Solution
269
6.4 Alarm Detection
LED Display
LCD Display
Minor Fault Name
When the drive is powered up for the first
time, the time and date must be set. The HOA
keypad will display the time and date setup
Pressing the F2 (Data) key will display the setting screen again.
screen for 30 seconds. If a button is not
pressed during this time, the display will clear
and a “Clock Not Set” alarm will flash.
LED Display
LCD Display
Minor Fault Name
cr5t
CrST
Cannot Reset
Cause
Possible Solution
• Ensure that a run command cannot be entered from the external terminals or option card during fault
Fault reset was being executed when a run
reset.
command was entered.
• Turn off the run command.
LED Display
LCD Display
Minor Fault Name
MECHATROLINK Comm. Cycle Setting Error
cyc
CyC
Comm. Cycle Setting Error was detected.
Cause
Possible Solution
The controller is using a comm. cycle beyond
Set the comm. cycle for the upper controller within the allowable setting range for the MECHATROLINK
the allowable setting range for the
option unit.
MECHATROLINK option unit.
LED Display
LCD Display
Minor Fault Name
dne
dnE
Drive Disabled
Cause
Possible Solution
“Drive Enable” is set to a multi-function
contact input (H1-oo = 6A) and the contact
Check the operation sequence.
is open.
LED Display
LCD Display
Minor Fault Name
e5
E5
MECHATROLINK Watchdog Timer Error
Cause
Possible Solution
The watchdog timer expired while waiting for
Issue a DISCONNECT or ALM_CLR command, followed by a CONNECT or SYNC_SET command
data from the controller.
and move to phase 3.
LED Display
LCD Display
Minor Fault Name
Forward/Reverse Run Command Input Error
ef
EF
Both forward run and reverse run closed simultaneously for longer than 0.5 s.
Cause
Possible Solution
Check the forward and reverse command sequence and correct the problem.
Sequence error
Note:
When minor fault EF detected, motor ramps to stop.
LED Display
LCD Display
Minor Fault Name
Option Card External Fault
ef0
EF0
An external fault condition is present.
Cause
Possible Solution
An external fault was received from the PLC
with F6-03 set to 3, which allows the drive to
• Remove the cause of the external fault.
continue running after an external fault
• Remove the external fault input from the PLC.
occurs.
There is a problem with the PLC program.
Check the PLC program and correct problems.
LED Display
LCD Display
Minor Fault Name
Pump Fault (Input Terminal S1)
ef1
EF1
External fault at multi-function input terminal S1.
Pump fault (input terminal S2)
ef2
EF2
External fault at multi-function input terminal S2.
270
6.4 Alarm Detection
LED Display
LCD Display
Minor Fault Name
Pump fault (input terminal S3)
ef3
EF3
External fault at multi-function input terminal S3.
Pump fault (input terminal S4)
ef4
EF4
External fault at multi-function input terminal S4.
Pump fault (input terminal S5)
ef5
EF5
External fault at multi-function input terminal S5.
Pump fault (input terminal S6)
ef6
EF6
External fault at multi-function input terminal S6.
Pump fault (input terminal S7)
ef7
EF7
External fault at multi-function input terminal S7.
Cause
Possible Solutions
An external device has tripped an alarm
Remove the cause of the external fault and reset the multi-function input value.
function.
• Ensure the signal lines have been connected properly to the terminals assigned for external fault detection
Wiring is incorrect.
(H1-oo = 20 to 2F).
• Reconnect the signal line.
Multi-function contact inputs are set
• Check if the unused terminals have been set for H1-oo = 20 to 2F (External Fault).
incorrectly.
• Change the terminal settings.
LED Display
LCD Display
Minor Fault Name
eof
EoF
Emergency Override Forward Run
Cause
Possible Solution
The multi-function digital input for
EmergOverrideFWD (H1-oo = AF) has
Open H1-oo = AF if the emergency condition is no longer present
been closed.
LED Display
LCD Display
Minor Fault Name
eor
Eor
Emergency Override Reverse Run
Cause
Possible Solution
The multi-function digital input for
EmergOverrideREV (H1-oo = B0) has been
Open H1-oo = B0 if the emergency condition is no longer present
closed.
LED Display
LCD Display
Minor Fault Name
SI-T3 Watchdog Timer Error
E5
E5
The watchdog timed out.
Cause
Possible Solution
Execute DISCONNECT or ALM_CLR, then issue a CONNECT command or SYNC_SET command and
Data has not been received from the PLC
proceed to phase 3. Refer to the SI-T3 Option Technical Manual for more details on troubleshooting.
LED Display
LCD Display
Minor Fault Name
FAn
FAn
Internal Cooling Fan Error
Cause
Possible Solution
• Cycle power to the drive.
6
Internal cooling fan has malfunctioned
• Check for fan operation.
• If the problem continues, replace the fan.
LED Display
LCD Display
Minor Fault Name
Safe Disable Signal Input
Hbb
Hbb
The Safe Disable Input channel is open.
Cause
Possible Solutions
Check if external safety circuit tripped and disabled the drive. If the Safe Disable function is not utilized,
There is no signal at terminal H1.
check if the terminals HC, H1, and H2 are linked.
271
6.4 Alarm Detection
LED Display
LCD Display
Minor Fault Name
Internally, the Safe Disable channel is broken.
Replace the drive.
LED Display
LCD Display
Minor Fault Name
Safe Disable Signal Input
Hbbf
HbbF
The safe disable input hardware is defective.
Cause
Possible Solutions
One of the Safe Disable channels is faulty.
Replace the drive.
LED Display
LCD Display
Minor Fault Name
Feedback Loss
PID Feedback Loss
flgt
Go To Freq.
The drive will run at the speed set in b5-13, Feedback Loss Goto Frequency.
b5-13
Cause
Possible Solutions
PID feedback source is incorrectly installed
• Confirm that the PID feedback source is installed and working properly.
or is not working. Effective only when b5-12
• Drive response to this condition is controlled by b5-12, Feedback Loss 4 to 20 mA Detection Selection,
is set to 3 (Run at b5-13).
and b5-13, Feedback Loss Go To Frequency.
LED Display
LCD Display
Minor Fault Name
Feedback Loss
PID Feedback Loss
fdb-l
Wire Break
The analog input programmed for PID feedback has gone above 21 mA or fallen below 3 mA.
Cause
Possible Solutions
• Confirm that the PID feedback source is installed and working properly.
PID feedback source is incorrectly installed
or is not working. This is effective only when
• Drive response to this condition is controlled by b5-12, Feedback Loss 4 to 20 mA Detection Selection,
b5-12 Feedback Loss 4 to 20 mA Detection
and b5-13, Feedback Loss Go To Frequency.
Selection is set to 1 (alarm).
• Auto-restart of this fault is controlled by L5-42, Feedback Loss Fault Retry Selection.
LED Display
LCD Display
Minor Fault Name
Minimum Pump Frequency Reference
Freq. Ref Pump
pfref
Min (P1-06)
Drive frequency reference is set lower than P1-06, Minimum Pump Frequency.
Cause
Possible Solutions
The frequency reference is set lower than
P1-06. The frequency reference is internally
set to the P1-06 value during this time.
This will only be active when the following
conditions are true:
Increase the frequency reference to a value greater than P1-06.
• Drive is NOT in PID Mode
• Minimum Pump Frequency is enabled
(P1-06 > 0.00)
LED Display
LCD Display
Minor Fault Name
Freq. Ref
Thrust Frequency Reference
ptHrt
Thrust (P4-12)
The fixed frequency reference is set to a value lower than the P4-12, Thrust Frequency, setting.
Cause
Possible Solutions
The frequency reference is set lower than
P4-12. The frequency reference is internally
set to the P4-12 value during this time.
This will only be active when the following
Increase the frequency reference to a value greater than P4-12.
conditions are true:
• Drive is NOT in PID Mode
• Thrust bearing is enabled (P4-12 > 0.00)
LED Display
LCD Display
Minor Fault Name
Current Alarm
Hca
HCA
Drive current exceeded overcurrent warning level (150% of the rated current).
Cause
Possible Solutions
Load is too heavy.
Reduce the load for applications with repetitive operations (i.e., stops and starts), or replace the drive.
272
6.4 Alarm Detection
LED Display
LCD Display
Minor Fault Name
• Calculate the torque required during acceleration and for the inertia moment.
Acceleration and deceleration times are too
• If the torque level is not right for the load, take the following steps:
short.
• Increase the acceleration and deceleration times (C1-01 through C1-04).
• Increase the capacity of the drive.
A special-purpose motor is being used, or the
• Check the motor capacity.
drive is attempting to run a motor greater than
• Use a motor appropriate for the drive. Ensure the motor is within the allowable capacity range.
the maximum allowable capacity.
The current level increased due to Speed
The alarm will only appear briefly. There is no need to take action to prevent the alarm from occurring in
Search after a momentary power loss or while
such instances.
attempting to perform a fault restart.
LED Display
LCD Display
Minor Fault Name
High Feedback Level Alarm
High Feedback
H1fb
High FB Sensed
The feedback signal is too high.
Cause
Possible Solutions
The feedback level has risen above the level
• Decrease the feedback signal.
set in P1-11, High Feedback Level
This is only effective when P1-13, High
• Set the High Feedback alarm characteristics in P1-11 and P-12.
Feedback Selection, is set to 1 (Alarm and
• Drive response to this condition is controlled by P1-13, High Feedback Selection.
digital out).
LED Display
LCD Display
Minor Fault Name
Loss of Prime
lop
LOP
The pump has lost its prime and P1-22 is set to 1.
Cause
Possible Solution
The measured quantity of water has dropped
below the level set in P1-19, Prime Loss
Level, for the time set in P1-20, Loss of Prime
• If there is resistance in the pump, allow the system to pump water again.
Time, and the output frequency has risen
above P1-21, Prime Loss Frequency. This
• Set the Loss of Prime alarm characteristics in P1-18, P1-19, P1-20, and P1-21.
could be due to a dry well, air in the system,
• Drive response to this condition is controlled by P1-21, Loss of Prime Selection.
or no water in the system. This is effective
only when P1-22 Loss of Prime Selection is
set to 1 (alarm).
LED Display
LCD Display
Minor Fault Name
Low City
lcp
Low City Pressure
Pressure
Cause
Possible Solution
Insufficient pressure is present on the inlet to
the pump.
• Check pressure switch contact for correct operation.
Shown when P4-24 = 0 and when the digital
• Check control wiring to drive terminal strip from pressure switch contact.
input has been active (closed for P4-21 = 0,
or open for P4-21 = 1) for the time set in
• Check to make sure that suction pressure is present by means of a separate measuring device.
P4-22.
LED Display
LCD Display
Minor Fault Name
Low Feedback Level Alarm
Low Feedback
lofb
Low FB Sensed
The feedback signal is too low.
Cause
Possible Solutions
The feedback level has dropped below the
• Increase the feedback signal.
level set in P1-08, Low Feedback Level
6
This is only effective when P1-10, Low
• Set the Low Feedback alarm characteristics in P1-08 and P1-09.
Feedback Selection, is set to 1 (Alarm and
• Drive response to this condition is controlled by P1-10, Low Feedback Selection.
digital out).
LED Display
LCD Display
Minor Fault Name
Low Suction
l5p
Low Suction Pressure
Pressure
Cause
Possible Solution
273
6.4 Alarm Detection
LED Display
LCD Display
Minor Fault Name
Shown when P4-24 = 1 and when the digital input has been active (closed for P4-21 = 0, or open for P4-21
= 1) for the time set in P4-22.
Insufficient suction pressure is present.
The drive, if running, coasts-to-stop and does not run until the digital input has been inactive for the time
set in P4-22.
LED Display
LCD Display
Minor Fault Name
Low Water in
Low Water in Tank
Tank
Cause
Possible Solution
The water level in the tank is too low.
• Check pressure switch contact for correct operation.
Shown when P4-24 = 2 and when the digital
• Check control wiring to drive terminal strip from pressure switch contact.
input has been active (closed for P4-21 = 0,
• Check to make sure that suction pressure is present by means of a separate measuring device.
or open for P4-21 = 1) for the time set in
P4-22.
• Raise the water level.
LED Display
LCD Display
Minor Fault Name
Cooling Fan Maintenance Time
The cooling fan has reached its expected maintenance period and may need to be replaced.
lt-1
LT-1
Note:
An alarm output (H2-oo = 10) will only be triggered if both
(H2-oo = 2F and H2-oo = 10) are set.
Cause
Possible Solution
The cooling fan has reached 90% of its
Replace the cooling fan and set o4-03 to 0 to reset the Maintenance Monitor.
expected performance life.
LED Display
LCD Display
Minor Fault Name
Capacitor Maintenance Time
lt-2
LT-2
The main circuit and control circuit capacitors are nearing the end of their expected performance life.
Note:
An alarm output (H2-oo = 10) will only be triggered if H2-oo = 2F.
Cause
Possible Solution
The main circuit and control circuit capacitors
have reached 90% of their expected
Replace the drive.
performance lives.
LED Display
LCD Display
Minor Fault Name
Soft Charge Bypass Relay Maintenance Time
lt-3
LT-3
The DC bus soft charge relay is nearing the end of its expected performance life.
Note:
An alarm output (H2-oo = 10) will only be triggered if H2-oo = 2F.
Cause
Possible Solution
The DC bus soft charge relay has reached
Replace the drive.
90% of expected performance life.
LED Display
LCD Display
Minor Fault Name
IGBT Maintenance Time (50%)
lt-4
LT-4
IGBTs have reached 50% of their expected performance life.
Note:
An alarm output (H2-oo = 10) will only be triggered if H2-oo = 2F.
Cause
Possible Solution
IGBTs have reached 50% of their expected
Check the load, carrier frequency, and output frequency.
performance life.
LED Display
LCD Display
Minor Fault Name
NETSCAN
NETSCAN
net5c
Waiting for
Drive is waiting for a message from the master.
Master
Cause
Possible Solution
• Increase the P9-26 setting to account for network latency.
No message was received from the master
• Verify that there is a drive on the network with parameter P1-01 set to 3 and P9-27 to 0.
within the time set in P9-28.
• Check network connections and verify H5-01 and P9-25 settings for all drives on the network.
274
6.4 Alarm Detection
LED Display
LCD Display
Minor Fault Name
Not Maintaining Setpoint
not5p
NMS
The setpoint cannot be maintained and P1-17 is set to 1.
Cause
Possible Solution
When the feedback deviates from the setpoint
• Check for a blocked impeller, over cycling, or broken pipe.
at a level greater than P1-15, for a time set in
• Set the Not Maintaining Setpoint alarm characteristics in P1-16 and P1-17.
P1-16. This is effective only when P1-17 is
set to 1 (alarm).
• Drive response to this condition is controlled by P1-17, Not Maintaining Setpoint Selection.
LED Display
LCD Display
Minor Fault Name
Heatsink Overheat
oh
oH
The temperature of the heatsink exceeded the overheat pre-alarm level set to L8-02.
Cause
Possible Solution
• Check the surrounding temperature.
• Improve the air circulation within the enclosure panel.
Surrounding temperature is too high
• Install a fan or air conditioner to cool surrounding area.
• Remove anything near drive that may cause extra heat.
• Replace the cooling fan.
Internal cooling fan has stopped.
• After replacing the drive, set parameter o4-03 to 0 to reset the cooling fan operation time.
• Provide proper installation space around the drive as indicated in the manual. Refer to Installation
Orientation and Spacing on page 28 for details.
• Allow for the proper space and ensure that there is sufficient circulation around the control panel.
Airflow around the drive is restricted.
• Check for dust or other foreign materials clogging the cooling fan.
• Clear debris caught in the fan that restricts air circulation.
LED Display
LCD Display
Minor Fault Name
Drive Overheat Warning
oh2
oH2
“Drive Overheat Warning” was input to a multi-function input terminal, S1 through S7 (H1-oo= B).
Cause
Possible Solution
An external device triggered an overheat
Search for the device that tripped the overheat warning. Remove the cause of the problem.
warning in the drive.
LED Display
LCD Display
Minor Fault Name
Motor Overheat
oh3
oH3
The motor overheat signal entered to a multi-function analog input terminal exceeded the alarm level
(H3-02 or H3-10 = E).
Cause
Possible Solutions
Motor thermostat wiring is faulty (PTC
Repair the PTC input wiring.
input).
There is a fault on the machine side (e.g., the
• Check the status of the machine.
machine is locked up).
• Remove the cause of the fault.
• Check the load size, accel/decel times, and cycle times.
• Decrease the load.
• Increase accel and decel times (C1-01 to C1-04).
• Adjust the preset V/f pattern (E1-04 through E1-10). This involves reducing E1-08 and E1-10.
Note:
Refrain from lowering E1-08 and E1-10 excessively to prevent a reduction in load tolerance
Motor has overheated.
at low speeds.
• Check the motor-rated current.
6
• Enter motor-rated current on motor nameplate (E2-01).
• Ensure the motor cooling system is operating normally.
• Repair or replace the motor cooling system.
LED Display
LCD Display
Minor Fault Name
Motor Overload
ol1
oL1
The electronic motor overload protection tripped
Cause
Possible Solution
Load is too heavy
Reduce the load.
275
6.4 Alarm Detection
LED Display
LCD Display
Minor Fault Name
Cycle times are too short during acceleration
Increase the acceleration and deceleration times (C1-01 through C1-04).
and deceleration
• Reduce the load.
A general-purpose motor is driven below the
• Increase the speed.
rated speed with a high load
• If the motor is supposed to operate at low speeds, either increase the motor capacity or use a motor
specifically designed to operate in the desired speed range.
• Adjust the user-set V/f pattern (E1-04 through E1-10) by reducing E1-08 and E1-10.
The output voltage is too high
• Do not set E1-08 and E1-10 too low. This reduces load tolerance at low speeds.
• Check the motor-rated current.
The wrong motor rated current is set to E2-01
• Enter the motor rated current to parameter E2-01 as indicated on the motor nameplate.
• Check the rated frequency indicated on the motor nameplate.
The base frequency is set incorrectly
• Enter the rated frequency to E1-06 (Base Frequency).
• Check the motor characteristics.
The electrical thermal protection
characteristics and motor overload
• Correct the type of motor protection that has been selected (L1-01).
characteristics do not match
• Install an external thermal relay.
The electrical thermal relay is operating at
• Check the current rating listed on the motor nameplate.
the wrong level
• Check the value set for the motor rated current (E2-01).
• Overexcitation increases the motor loss and the motor temperature. Excessive duration of overexcitation
may cause motor damage. Prevent excessive overexcitation operation or apply proper cooling to the
Motor overheated by overexcitation
motor.
operation
• Reduce the excitation deceleration gain (n3-13).
• Set L3-04 (Stall Prevention during Deceleration) to a value other than 4.
• Check values set to Speed Search related parameters.
Parameters related to Speed Search are set
• Adjust the Speed Search current and Speed Search deceleration times (b3-02 and b3-03 respectively).
incorrectly
• After Auto-Tuning, set b3-24 to 1 to enable Speed Estimation Speed Search.
Output current fluctuation due to power
Check the power supply for phase loss.
supply loss
LED Display
LCD Display
Minor Fault Name
Drive Overload
ol2
oL2
The thermal sensor of the drive triggered overload protection.
Cause
Possible Solution
Load is too heavy
Reduce the load.
Acceleration or deceleration time is too short
Increase the settings for the acceleration and deceleration times (C1-01 through C1-04).
• Adjust the preset V/f pattern (E1-04 through E1-10) by reducing E1-08 and E1-10.
The output voltage is too high
• Do not lower E1-08 and E1-10 excessively. This reduces load tolerance at low speeds.
Drive capacity is too small
Replace the drive with a larger model.
• Reduce the load when operating at low speeds.
Overload occurred when operating at low
• Replace the drive with a model that is one frame size larger.
speeds
• Lower the carrier frequency (C6-02).
Excessive torque compensation
Reduce the torque compensation gain in parameter C4-01 until there is less current but no speed loss.
• Check the settings for all Speed Search related parameters.
Parameters related to Speed Search are set
• Adjust the current used during Speed Search (b3-03) and the Speed Search deceleration time (b3-02).
incorrectly
• After Auto-Tuning, set b3-24 to 1 to enable Speed Estimation Speed Search.
Output current fluctuation due to input phase
Check the power supply for phase loss.
loss
LED Display
LCD Display
Minor Fault Name
Overtorque Detection 1
ol3
oL3
The current has exceeded the value set for torque detection (L6-02) for longer than the allowable time
(L6-03).
Cause
Possible Solution
Parameter settings are not appropriate for the
Check L6-02 and L6-03 settings.
load
Fault on the machine side (e.g., machine is
Check the status of the load. Remove the cause of the fault.
locked up)
276
6.4 Alarm Detection
LED Display
LCD Display
Minor Fault Name
Overtorque Detection 2
ol4
oL4
The current has exceeded the value set for Overtorque Detection 2 (L6-05) for longer than the allowable
time (L6-06).
Cause
Possible Solution
Parameter settings are not appropriate for the
Check the settings of parameters L6-05 and L6-06.
load
LED Display
LCD Display
Minor Fault Name
DC Bus Overvoltage
The DC bus voltage exceeded the trip point.
ou
ov
• For 200 V class drives: approximately 410 V
• For 400 V class drives: approximately 820 V (740 V when E1-01 < 400)
Cause
Possible Solutions
• Install a DC link choke or an AC reactor.
Surge voltage present in the drive input
• Voltage surge can result from a thyristor convertor and a phase advancing capacitor operating on the
power.
same drive input power system.
The motor is short-circuited.
• Check the motor power cable, relay terminals and motor terminal box for short circuits.
Ground current has overcharged the main
• Correct grounding shorts and turn the power back on.
circuit capacitors via the drive input power.
• Review possible solutions for handling noise interference.
• Review section on handling noise interference and check control circuit lines, main circuit lines and
Noise interference causes the drive to operate
ground wiring.
incorrectly.
• If the magnetic contactor is identified as a source of noise, install a surge protector to the MC coil.
Set number of fault restarts (L5-01) to a value other than 0.
LED Display
LCD Display
Minor Fault Name
Pump Cycling
pcyc
Pump Over
Pump Over Cycle
Cycle
Cause
Possible Solution
The pump has exceeded the number of cycles
• Set the Pump Over Cycle alarm characteristics in P2-10 and P2-11.
set in P2-10 in the time set in P2-11 and P2-12
• Drive response to this condition is controlled by P2-12, Over Cycling Mode.
is set to 1 (alarm).
LED Display
LCD Display
Minor Fault Name
rdd
R-DNE-So
Remote Drive Disable
Cause
Possible Solution
Terminal So (H1-0o = 95) has been closed
for the time set in P4-26, Remote Drive
Remove conditions causing the terminal to close.
Disable On-Delay, when P4-25, Remote
Drive Disable Selection, was set to 0 (N.O.).
Terminal So (H1-0o = 95) has been open
for the time set in P4-26, Remote Drive
Remove conditions causing the terminal to open.
Disable On-Delay, when P4-25, Remote
Drive Disable Selection, was set to 1 (N.C.).
LED Display
LCD Display
Minor Fault Name
MEMOBUS/Modbus Communication Test Mode Error
5e
SE
Note:
This alarm will not trigger a multi-function output terminal that is set for alarm output
(H2-oo = 10).
6
Cause
Possible Solution
A digital input set to 67H (MEMOBUS/
Modbus test) was closed while the drive was
Stop the drive and run the test again.
running.
LED Display
LCD Display
Minor Fault Name
tde
TdE
Time Data Error
Cause
Possible Solution
277
6.4 Alarm Detection
LED Display
LCD Display
Minor Fault Name
An error has occurred in the Real-Clock
Replace the HOA keypad. For instructions on replacing the HOA keypad, contact Yaskawa or your nearest
Time function of the HOA keypad.
sales representative.
LED Display
LCD Display
Minor Fault Name
IGBT Maintenance Time (90%)
trpc
TrPC
IGBTs have reached 90% of their expected performance life.
Cause
Possible Solution
IGBTs have reached 90% of their expected
Replace the drive.
performance life.
LED Display
LCD Display
Minor Fault Name
Undertorque Detection 1
vl3
UL3
The current has fallen below the minimum value set for torque detection (L6-02) for longer than the
allowable time (L6-03).
Cause
Possible Solution
Parameter settings are not appropriate for the
Check the settings of parameters L6-02 and L6-03.
load
There is a fault on the machine side
Check the load for any problems.
LED Display
LCD Display
Minor Fault Name
Undertorque Detection 2
vl4
UL4
The current has fallen below the minimum value set for torque detection (L6-05) for longer than the
allowable time (L6-06).
Cause
Possible Solution
Parameter settings are not appropriate for the
Check L6-05 and L6-06 settings
load
There is a fault on the machine side
Check the load for any problems.
LED Display
LCD Display
Minor Fault Name
UL6
Motor Underload
vl6
Underload Det
6
The load has fallen below the underload curve defined in L6-14.
Cause
Possible Solution
The output current has fallen below the motor
Adjust the value set to L6-14 so that output current remains above the motor underload curve during normal
underload curve defined in L6-14 for longer
operation.
than the time set to L6-03
LED Display
LCD Display
Minor Fault Name
Undervoltage
One of the following conditions was true when the drive was stopped and a Run command was entered:
vu
Uv
• DC bus voltage dropped below the level specified in L2-05.
• Contactor to suppress inrush current in the drive was opened.
• Low control drive input power voltage. This alarm outputs if L2-01
0 and DC bus voltage < L2-05.
Cause
Possible Solution
Phase loss in the drive input power.
Check for wiring errors in the main circuit drive input power. Correct the wiring.
• Ensure the terminals have been properly tightened.
Loose wiring in the drive input power
• Apply the tightening torque to the terminals as specified. Refer to Wire Gauges and Tightening
terminals.
Torques on page 50 for details.
There is a problem with the drive input power
• Check the voltage.
voltage.
• Lower the voltage of the drive input power so that it is within the limits listed in the specifications.
• Check the maintenance time for the capacitors (U4-05).
Drive internal circuitry is worn.
• Replace the drive if U4-05 exceeds 90%.
The drive input power transformer is too
• Check for an alarm when the magnetic contactor, line breaker, and leakage breaker are closed.
small and voltage drops when the power is
• Check the capacity of the drive input power transformer.
switched on.
278
6.4 Alarm Detection
LED Display
LCD Display
Minor Fault Name
Air inside the drive is too hot.
Check the temperature inside the drive.
CHARGE light is broken or disconnected.
Replace the drive.
6
279
6.5 Operator Programming Errors
6.5
Operator Programming Errors
u Operator Programming Error Codes, Causes, and Possible Solutions
An Operator Programmng Error (oPE) occurs when a contradictory parameter is set or an individual parameter is set to an
inappropriate value.
The drive will not operate until the parameter or parameters causing the problem are set correctly. An oPE, however, does not
trigger an alarm or fault output. If an oPE occurs, investigate the cause and refer to Table 6.4 for the appropriate action. When
an oPE appears on the operator display, press the ENTER button to view U1-18 and see which parameter is causing the oPE.
Table 6.4 oPE Codes, Causes, and Possible Solutions
LED Display
LCD Display
Error Name
Drive Capacity Setting Fault
ope01
oPE01
Drive capacity and the value set to o2-04 do not match.
Cause
Possible Solutions
The drive model selection (o2-04) and the
Correct the value set to o2-04.
actual capacity of the drive are not the same.
LED Display
LCD Display
Error Name
Parameter Range Setting Error
ope02
oPE02
Use U1-18 to find parameters set outside the range.
Cause
Possible Solutions
Parameters were set outside the possible
Set parameters to the proper values.
setting range.
Note:
When multiple errors occur simultaneously, other errors are given precedence over oPE02.
LED Display
LCD Display
Error Name
Multi-Function Input Selection Error
ope03
oPE03
A contradictory setting is assigned to multi-function contact inputs H1-01 to H1-07.
Cause
Possible Solutions
• The same function is assigned to two
• Ensure all multi-function inputs are assigned to different functions.
multi-function inputs.
• Re-enter the multi-function settings to ensure this does not occur.
• Excludes “Not used” and “External Fault.”
The Up command was set but the Down
command was not, or vice versa (settings 10
vs. 11).
Properly set the functions that required for use in combination with other functions.
The Up 2 command was set but the Down 2
command was not, or vice versa (settings 75
vs. 76).
• Run/Stop command for a 2-wire sequence
was set (H1-oo = 42), but Forward/
Reverse command (H1-oo = 43) was not.
Properly set the functions that required for use in combination with other functions.
•
“Drive Enable” is set to multi-function
input S1 or S2 (H1-01 = 6A or H1-02 =
6A).
Two of the following functions are set
simultaneously:
• Up/Down Command (10 vs. 11)
• Check if contradictory settings have simultaneously been assigned to the multi-function input terminals.
• Up 2/Down 2 Command (75 vs. 76)
• Correct setting errors.
• Hold Accel/Decel Stop (A)
• Analog Frequency Reference Sample/
Hold (1E)
The Up/Down command (10, 11) and PID
Set b5-01 to 0 to disable control PID or disable the Up/Down command.
control (b5-01) are enabled simultaneously.
280