Lexus LC500C (2024 year). Manual in english - page 10
 

  Index      Manuals     Lexus LC500C (2024 year). Manual in english


Search            copyright infringement  


Content      ..     8      9      10      11     ..


Lexus LC500C (2024 year). Manual in english - page 10


315

5-5. Using the other interior features

5

Interio

r fe

atures

vehicle) for 2 seconds and release 
it. Repeat this sequence 
(press/hold/release) up to 3 times 
to complete programming.
If the garage door opener motor 
operates when the HomeLink

®


button is pressed, the garage door 
opener motor recognizes the 
HomeLink

®

 signal.

Enabling 2-way communication 
with a garage door (only available 
for compatible devices)

When enabled, 2-way communication 
allows you to check the status of the 
opening and closing of a garage door 
through indicators in your vehicle.
2-way communication is only available 
if the garage door opener motor used 
is a compatible device. (To check 
device compatibility, refer to 
www.homelink.com.)

1

Within 5 seconds after program-
ming the garage door opener has 
been completed, if the garage door 
opener motor is trained to 
HomeLink

®

, both garage door 

operation indicators will flash rap-
idly (green) and the light on the 
garage door opener motor will 

blink twice, indicating that 2-way 
communication is enabled.

If the indicators do not flash, perform 

2

 and 

3

 within the first 10 presses of the 

HomeLink

®

 button after programming 

has been completed.

2

Press a programmed HomeLink

®


button to operate a garage door.

3

Within 1 minute of pressing the 
HomeLink

®

 button, after the 

garage door operation has 
stopped, press the “Learn” or 
“Smart” button on the garage door 
opener motor. Within 5 seconds of 
the establishment of 2-way com-
munication with the garage door 
opener, both garage door opera-
tion indicators in the vehicle will 
flash rapidly (green) and the light 
on the garage door opener motor 
will blink twice, indicating that 2-
way communication is enabled.

Reprogramming a single 
HomeLink

®

 button

When the following procedure is per-
formed, buttons which already have 
devices registered to them can be 
overwritten:

1

With one hand, press and hold the 
desired HomeLink

®

 button.

2

When the HomeLink

®

 indicator 

starts flashing (orange), continue to 
hold the HomeLink

®

 button and 

perform “Programming 
HomeLink

®

” 

1

 (it takes 20 sec-

onds for the HomeLink

®

 indicator 

to start flashing).

316

5-5. Using the other interior features

Before programming

Install a new battery in the transmitter.

The battery side of the transmitter must 
be pointed away from the HomeLink

®

.

Press the appropriate HomeLink

®


button. The HomeLink

®

 indicator light 

should turn on.
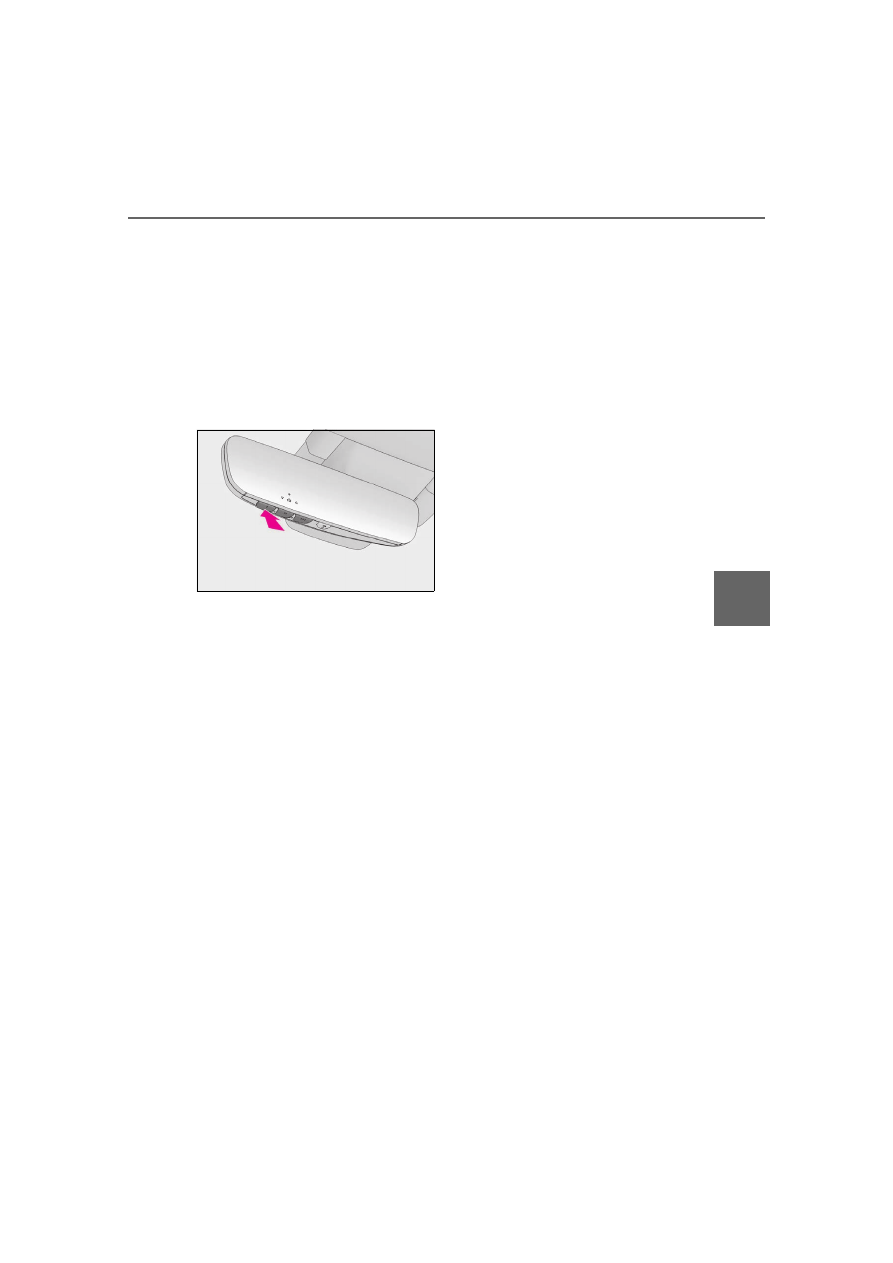
The status of the opening and closing 
of a garage door is shown by the indi-
cators.

Opening

Closing

This function is only available if the garage 
door opener motor used is a compatible 
device. (To check device compatibility, 
refer to www.homelink.com.)

The indicators can operate within 
approximately 820 ft. (250 m) of the 

garage door. However, if there are 
obstructions between the garage door 
and the vehicle, such as houses and 
trees, feedback signals from the 
garage door may not be received.
To recall the previous door operation 
status, press and release either 

HomeLink

®

 buttons 

 and 

 or 

 and 

 simulta-

neously. The last recorded status will 
be displayed for 3 seconds.

Press and hold the 2 outside buttons 
for 10 seconds until the HomeLink

®


indicator light changes from continu-
ously lit (orange) to rapidly flashing 
(green).

If you sell your vehicle, be sure to erase the 
programs stored in the HomeLink

®

 mem-

ory.

Operating HomeLink

®

Color

Status

Orange (flashing)

Currently open-

ing/closing

Green

Opening/closing 

has completed

Red (flashing)

Feedback signals 

cannot be received

A
B

Erasing the entire HomeLink

®


memory (all three codes)

317

6

6

Mai
nte

na

nc

e a

nd

 c

are

Maintenance and care

6-1. Maintenance and care

Cleaning and protecting the vehi-

cle exterior.................................

318

Cleaning and protecting the vehi-

cle interior .................................

322

Cleaning the artificial leather 

(Alcantara

®

)............................

328

6-2. Maintenance

Maintenance requirements ..

330

General maintenance..............

331

Emission inspection and mainte-

nance (I/M) programs .........

334

6-3. Do-it-yourself maintenance

Do-it-yourself service precau-

tions..............................................

335

Hood...............................................

337

Positioning a floor jack............

338

Engine compartment...............

340

12-volt battery.............................

347

Tires ................................................

349

Replacing the tire......................

356

Tire inflation pressure..............

363

Wheels...........................................

365

Air conditioning filter...............

366

Electronic key battery.............

368

Checking and replacing fuses

........................................................

370

Headlight aim..............................

373

Light bulbs....................................

374

318

6-1. Maintenance and care

6-1.Maintenance and care

Working from top to bottom, liber-
ally apply water to the vehicle body, 
wheel wells and underside of the 
vehicle to remove any dirt and dust.

Wash the vehicle body using a 
sponge or soft cloth, such as a 
chamois.

For hard-to-remove marks, use car 
wash soap and rinse thoroughly with 
water.

Wipe away any water.

Wax the vehicle when the water-
proof coating deteriorates.

If water does not bead on a clean surface, 
apply wax when the vehicle body is cool.

*

: If  equipped

Perform the following procedure to 
remove any dirt and dust.

Small dirt such as dust

Brush the soft top roof along the 
fiber, using a soft brush such as a 
horsehair brush.

Use an adhesive roller or com-

pressed air blow gun.

Severe dirt such as a stain

For information regarding cleaning, 
contact your Lexus dealer.

CFRP (Carbon Fiber Reinforced Plas-

tic) part (if equipped)

As the CFRP parts may change color if 

they are exposed to ultraviolet rays for 

extended periods of time, Lexus recom-

mends that your vehicle be stored in a 

place where it will not be exposed to 

direct sunlight.

Do not use wax that contains abrasives.

Do not use automatic car washes as they 

may scratch the CFRP parts and damage 

the paint.

Self-restoring coat

*

The vehicle body has a self-restoring coat-

ing that is resistant to small surface 

scratches caused in a car wash etc.

The coating lasts for 5 to 8 years from 

when the vehicle is delivered from the 

plant.

The restoration time differs depending on 

the depth of the scratch and outside tem-

perature.

The restoration time may become 

shorter when the coating is warmed by 

applying warm water.

Deep scratches caused by keys, coins, 

etc. cannot be restored.

Do not use wax that contain abrasives.

*

: CFRP parts (except Convertible) (if 

equipped) and the soft top roof (Con-
vertible) do not have a self-restoring 
coat.

Cleaning the areas with metal accents

Do not use baking soda (sodium bicarbon-

ate) and wax that contains abrasives.

Automatic car washes (vehicles without 

CFRP parts)

Convertible: Lexus does not recommend 

using an automatic car wash.

Cleaning and protecting the 
vehicle exterior

Perform cleaning in a manner 
appropriate to each component 
and its material.

Cleaning instructions for the 
parts other than the soft top roof

*

Cleaning instructions for the soft 
top roof (Convertible)

319

6-1. Maintenance and care

6

Mai
nte

na

nc

e a

nd

 c

are

Fold the mirrors before washing the vehi-

cle. Start washing from the front of the 

vehicle. Make sure to extend the mirrors 

before driving.

Except Convertible: Wash the vehicle 

with the active rear wing retracted. If the 

vehicle is washed with the active rear 

wing raised, depending on the type of 

automatic car wash, the brushes of the 

automatic car wash may become stuck 

on the active rear wing. In this case, the 

active rear wing may not be washed very 

well or may even be scratched or dam-

aged.

Brushes used in automatic car washes 

may scratch the vehicle surface, parts 

(wheel, etc.) and damage the paint.

When the shift position needs to be held 

in N, refer to P.193, 200

High pressure car washes

Convertible: Do not let water from the 

high-pressure washer directly hit the soft 

top roof.

As water may enter the cabin, do not 

bring the nozzle tip near the gaps around 

the doors or perimeter of the windows, or 

spray these areas continuously.

Notes for the smart access system with 

push-button start

If the door handle becomes wet while the 

electronic key is within the effective range, 

the door may lock and unlock repeatedly. In 

that case, follow the following correction 

procedures to wash the vehicle:

Place the key in a position 6 ft. (2 m) or 

more separate from the vehicle while the 

vehicle is being washed. (Take care to 

ensure that the key is not stolen.)

Set the electronic key to battery-saving 

mode to disable the smart access system 

with push-button start. (

P.139)

Wheels and wheel ornaments

Remove any dirt immediately by using a 

neutral detergent.

Wash detergent off with water immedi-

ately after use.

To protect the paint from damage, make 

sure to observe the following precau-

tions.

• Do not use acidic, alkaline or abrasive 

detergent

• Do not use hard brushes

• Do not use detergent on the wheels 

when they are hot, such as after driving or 

parking in hot weather

Brake caliper coating

When using detergent, use neutral deter-

gent. Do not use hard brushes or abra-

sive cleaners, as they will damage the 

coating.

Do not use detergent on the brake cali-

pers when they are hot.

Wash detergent off immediately after 

use.

Brake pads and calipers

Rust may form if the vehicle is parked with 

wet brake pads or disc rotors, causing them 

to stick. Before parking the vehicle after it is 

washed, drive slowly and apply the brakes 

several times to dry the parts.

Bumpers

Do not scrub with abrasive cleaners.

Front side windows water-repellent 

coating

The following precautions can extend the 

effectiveness of the water-repellent coat-

ing.

Remove any dirt, etc. from the front side 

windows regularly.

Do not allow dirt and dust to accumulate 

on the windows for a long period.

Clean the windows with a soft, damp 

cloth as soon as possible.

Do not use wax or glass cleaners that 

contain abrasives when cleaning the win-

dows.

Do not use any metallic objects to 

remove condensation build up.

Plated portions

If dirt cannot be removed, clean the parts as 

follows:

Use a soft cloth dampened with an 

approximately 5% solution of neutral 

detergent and water to clean the dirt off.

320

6-1. Maintenance and care

Wipe the surface with a dry, soft cloth to 

remove any remaining moisture.

To remove oily deposits, use alcohol wet 

wipes or a similar product.

WARNING

When washing the vehicle

Do not apply water to the inside of the 

engine compartment. Doing so may 

cause the electrical components etc. to 

catch fire.

When cleaning the windshield

Set the wiper switch to off.
If the wiper switch is in “AUTO”, the wip-

ers may operate unexpectedly in the fol-

lowing situations, and may result in hands 

being caught or other serious injuries 

and cause damage to the wiper blades.

Off

AUTO

When the upper part of the windshield 

where the raindrop sensor is located is 

touched by hand

When a wet rag or similar is held close 

to the raindrop sensor

If something bumps against the wind-

shield

If you directly touch the raindrop sen-

sor body or if something bumps into 

the raindrop sensor

A

B

Precautions regarding the exhaust 

pipes and rear bumper diffusers

As exhaust gases cause the exhaust 

pipes and rear bumper diffusers to 

become quite hot, do not touch the 

exhaust pipes and rear bumper diffusers 

while the engine is running <hybrid sys-

tem is operating> or immediately after 

the engine <hybrid system> is turned off.
When washing the vehicle, be careful not 

to touch the exhaust pipes and rear 

bumper diffusers until they have cooled 

sufficiently, as touching hot exhaust pipes 

and rear bumper diffusers can cause 

burns.

Precaution regarding the rear 

bumper with Blind Spot Monitor

If the paint of the rear bumper is chipped 

or scratched, the system may malfunc-

tion. If this occurs, consult your Lexus 

dealer.

NOTICE

Application of coatings to the vehicle 

body (vehicles with CFRP parts)

Do not apply any kind of coating to the 

vehicle body as doing so may damage 

the paint or reduce its durability.

321

6-1. Maintenance and care

6

Mai
nte

na

nc

e a

nd

 c

are

NOTICE

To prevent paint deterioration and 

corrosion on the body and compo-

nents (aluminum wheels etc.)

Wash the vehicle immediately in the 

following cases:

• After driving near the sea coast
• After driving on salted roads
• If coal tar, pollen or tree sap is present 

on the paint surface

• If dead insects, insect droppings or 

bird droppings are present on the 

paint surface

• After driving in an area contaminated 

with soot, oily smoke, mine dust, iron 

powder or chemical substances

• If the vehicle becomes heavily soiled 

with dust or mud

• If liquids such as benzene and gasoline 

are spilled on the paint surface

If the paint is chipped or scratched, 

have it repaired immediately.

To prevent the wheels from corroding, 

remove any dirt and store in a place 

with low humidity when storing the 

wheels.

To prevent damage or deterioration 

of the soft top roof (Convertible)

Immediately remove any snow that has 

accumulated on the soft top roof or 

luggage cover.

If bird droppings etc. are present on 

the soft top roof, immediately remove 

it.

When parking the vehicle, avoid direct 

sunlight as much as possible.

If parking the vehicle in a poorly venti-

lated area or a closed area, such as a 

garage, ensure that there is adequate 

ventilation.

Do not use wax.

Do not open the soft top roof with dirt 

or snow adhered.

Cleaning the soft top roof (Convert-

ible)

Do not strongly press a soft brush such 

as a horsehair brush or an adhesive roller 

to the soft top roof. Doing so may cause 

damage to the soft top roof.

Cleaning the exterior lights

Wash carefully. Do not use organic 

substances or scrub with a hard brush. 

This may damage the surfaces of the 

lights.

Do not apply wax to the surfaces of the 

lights.

Wax may cause damage to the lenses.

When using an automatic car wash

Set the wiper switch to the off position.
If the wiper switch is in “AUTO”, the wip-

ers may operate and the wiper blades 

may be damaged.

When using a high-pressure car wash

When washing the vehicle, do not let 

water from the high-pressure washer 

directly hit the camera, the area 

around the camera or inside of the 

outside door handles. Due to the 

shock from high-pressure water, it is 

possible that the device may not oper-

ate normally.

Do not spray water directly on the 

radar which is equipped behind the 

emblem. Otherwise it may cause the 

device to be damaged.

Do not bring the nozzle tip close to 

boots (rubber or resin manufactured 

cover), connectors or the following 

parts. The parts may be damaged if 

they come into contact with high-pres-

sure water.

• Traction related parts
• Steering parts
• Suspension parts
• Brake parts

322

6-1. Maintenance and care

Remove dirt and dust using a vac-
uum cleaner. Wipe dirty surfaces 
with a cloth dampened with luke-
warm water.

If dirt cannot be removed, wipe it off 
with a soft cloth dampened with 
neutral detergent diluted to approx-
imately 1%.
Wring out any excess water from 
the cloth and thoroughly wipe off 
remaining traces of detergent and 
water.

*

: If equipped

Small dirt such as dust

Use a compressed air blow gun to 
remove dust.

Severe dirt such as a stain

Dampen a small amount of water in a 
cloth similar in material and color to 
the soft top roof fiber, and wipe off the 
dirt. And then allow the soft top roof to 
dry in a shaded and ventilated area.

NOTICE

Keep the cleaning nozzle at least 11.9 

in. (30 cm) away from the vehicle 

body. Otherwise resin section, such as 

moldings and bumpers, may be 

deformed and damaged. Also, do not 

continuously hold the nozzle in the 

same place.

Do not spray the lower part of the 

windshield continuously. If water 

enters the air conditioning system 

intake located near the lower part of 

the windshield, the air conditioning 

system may not operate correctly.

Do not wash the underside of the vehi-

cle using a high pressure car washer.

Cleaning and protecting the 
vehicle interior

Perform cleaning in a manner 
appropriate to each component 
and its material.

Cleaning instructions for the 
interior parts other than the soft 
top roof

*

Cleaning instructions for the 
interior parts of the soft top roof 
(Convertible)

323

6-1. Maintenance and care

6

Mai
nte

na

nc

e a

nd

 c

are

Remove dirt, sand and dust using a 
vacuum cleaner and wash them off 
with water.

If dirt cannot be removed, remove it 
by patting with a cloth or sponge 
dampened with neutral detergent 
diluted to approximately 1%.

Shampooing the carpets

There are several commercial foaming-

type cleaners available. Use a sponge or 

brush to apply the foam. Rub in overlapping 

circles. Do not use water. Wipe dirty sur-

faces and let them dry. Excellent results are 

obtained by keeping the carpet as dry as 

possible.

Handling the seat belts

Clean with mild soap and lukewarm water 

using a cloth or sponge. Also check the 

belts periodically for excessive wear, fray-

ing or cuts.

When cleaning the carpeted portions of 

the glove box, console box, etc.

If a strong adhesive tape is used, there is a 

possibility that the surface of the carpet 

could be damaged.

CFRP (Carbon Fiber Reinforced Plas-

tic) parts (if equipped)

CFRP is used for the scuff plates. When 

cleaning the scuff plates, remove dirt using 

a water-dampened soft cloth or synthetic 

chamois, and then wipe the surface with a 

dry soft cloth to remove any remaining 

moisture.

Cleaning the floor mats (if 
equipped)

WARNING

Water in the vehicle

LC500: Do not splash or spill liquid in 

the vehicle.

Doing so may cause electrical compo-

nents etc. to malfunction or catch fire.

LC500h: Do not splash or spill liquid 

in the vehicle, such as on the floor, on 

the rear seats, in the hybrid battery 

(traction battery) air vents, and in the 

trunk. (

P.92)

Doing so may cause the hybrid bat-

tery, electrical components, etc. to 

malfunction or catch fire.

Do not get any of the SRS components 

or wiring in the vehicle interior wet. 

(

P.36)

An electrical malfunction may cause 

the airbags to deploy or not function 

properly, resulting in death or serious 

injury.

Cleaning the interior (especially 

instrument panel)

Do not use polish wax or polish cleaner. 

The instrument panel may reflect off the 

windshield, obstructing the driver’s view 

and leading to an accident, resulting in 

death or serious injury.

NOTICE

Cleaning detergents

Do not use the following types of 

detergent, as they may discolor the 

vehicle interior or cause streaks or 

damage to painted surfaces:

Except Convertible

• Non-seat portions: Organic sub-

stances such as benzene or gasoline, 

alkaline or acidic solutions, dye, and 

bleach

• Seats: Alkaline or acidic solutions, 

such as thinner, benzene, and alcohol

324

6-1. Maintenance and care

Periodically check that dust has not 
built up or clogged the hybrid battery 
(traction battery) cooling air intake 
vents to prevent a reduction in fuel 
economy.
When clogged with dust or “Mainte-
nance Required for Traction battery 
Cooling Parts See owner’s manual” is 
displayed on the multi-information dis-
play, perform the following cleaning 
procedure.

NOTICE

Convertible

• Other than the seats and soft top roof: 

Organic substances such as benzene 

or gasoline, alkaline or acidic solutions, 

dye, and bleach

• Seats: Alkaline or acidic solutions, 

such as thinner, benzene, and alcohol

• Soft top roof: Solutions

Do not use polish wax or polish 

cleaner. The instrument panel’s or 

other interior part’s painted surface 

may be damaged.

Preventing damage to leather sur-

faces

Observe the following precautions to 

avoid damage to and deterioration of 

leather surfaces:

Remove any dust or dirt from leather 

surfaces immediately.

Do not expose the vehicle to direct 

sunlight for extended periods of time. 

Park the vehicle in the shade, espe-

cially during summer.

Do not place items made of vinyl, plas-

tic, or containing wax on the uphol-

stery, as they may stick to the leather 

surface if the vehicle interior heats up 

significantly.

When cleaning the soft top roof 

(Convertible)

Do not excessively use water. Doing so 

may cause a stain on the soft top roof.

Water on the floor

Do not wash the vehicle floor with water.

Vehicle systems such as the audio sys-

tem may be damaged if water comes into 

contact with electrical components such 

as the audio system above or under the 

floor of the vehicle. Water may also 

cause the body to rust.

Cleaning the floor mats

Do not use a mat cleaning machine or 

brushes.
This may cause deformation or damage 

to the mat.

When cleaning the inside of the wind-

shield

Do not allow glass cleaner to contact the 

lens. Also, do not touch the lens. 

(

P.221)

Cleaning the inside of the rear win-

dow

Do not use glass cleaner to clean the 

rear window, as this may cause dam-

age to the rear window defogger 

heater wires or antenna. Use a cloth 

dampened with lukewarm water to 

gently wipe the window clean. Wipe 

the window in strokes running parallel 

to the heater wires or antenna.

Be careful not to scratch or damage 

the heater wires or antenna.

Cleaning the hybrid battery 
(traction battery) air intake vents 
(LC500h)

325

6-1. Maintenance and care

6

Mai
nte

na

nc

e a

nd

 c

are

Cleaning the air intake vents

Remove the dust from the air intake 
vents with a vacuum cleaner etc.
Make sure to only use a vacuum to 
suck out dust and clogs. Attempting to 
blow out dust and clogs using a com-
pressed air blow gun, etc. may push it 
into the air intake vents. (

P.327)

If dust and clogs cannot be completely 
removed with the air intake vent covers 
installed, remove the covers and clean the 
filters.

Cleaning the filters

If dust and clogs cannot be completely 
removed with the air intake vent cov-
ers installed, remove the air intake vent 
covers and clean the filters.

1

Remove the grille.

2

Remove the filter.

3

Remove dust using a vacuum 
cleaner etc. to clean the filter.

Also, remove dust on the grille as well as 

on the filter using a vacuum cleaner.

4

Install the filter in its original posi-
tion, and then install the grille.

5

If a warning message was displayed 
on the multi-information display 
before cleaning the filters, start the 
hybrid system and check that the 
message disappears.

326

6-1. Maintenance and care

It may take several minutes before the 

warning message disappears.

Scheduled maintenance of the air 

intake filters is necessary when

In some situations such as when the vehicle 

is used frequently or in heavy traffic or dusty 

areas, the air intake filters may need to be 

cleaned more regularly.

For details, refer to “Owner’s Manual Sup-

plement” or “Scheduled Maintenance”.

Air intake vents maintenance

Driving the vehicle continuously after 

dust has built up and clogged the air 

intake vents will have an adverse effect 

on hybrid battery (traction battery) cool-

ing performance. If the hybrid battery 

(traction battery) input and output is 

restricted, the driving range of the elec-

tric motor and fuel economy may be 

reduced. Periodically check and clean 

the air intake vents to prevent dust from 

building up.

Depending on the conditions under 

which the vehicle is used, the air intake 

vents may need to be cleaned more reg-

ularly.

Improper handling may result in damage 

to the air intake vent cover or filter. If you 

have any concerns about cleaning parts 

yourself, contact your Lexus dealer.

Cleaning the air intake vents

Dust in the air intake vents may interfere 

with the cooling of the hybrid battery 

(traction battery). If charging/discharg-

ing of the hybrid battery (traction battery) 

becomes limited, the distance that the 

vehicle can be driven using the electric 

motor (traction motor) may be reduced 

and the fuel economy may be reduced.

Inspect and clean the air intake vents 

periodically.

Improper handling may result in damage 

to the air intake vent covers or filters. If 

you have any concerns about cleaning 

the filters, contact your Lexus dealer.

The necessary cleaning interval of the air 

intake vents will differ according to the 

vehicle usage environment.

If “Maintenance Required for Traction 

battery Cooling Parts See owner’s man-

ual” is displayed on the multi-informa-

tion display

If this warning message is displayed on 

the multi-information display, remove the 

air intake vent covers and clean the fil-

ters. (

P.325)

After cleaning the air intake vents, start 

the hybrid system and check that the 

warning message is no longer displayed.

After the hybrid system is started, it may 

be necessary to drive the vehicle up to 

approximately 20 minutes before the 

warning message disappears. If the warn-

ing message does not disappear after 

driving for appropriately 20 minutes, 

have the vehicle inspected by your Lexus 

dealer.

WARNING

When cleaning the hybrid battery 

(traction battery) air intake vents/fil-

ters

Do not use water or other liquids to 

clean the air intake vents/filters. If 

water is applied to the hybrid battery 

(traction battery) or other compo-

nents, a malfunction or fire may occur.

When the air intake vent covers 

(under the both sides of the rear seat) 

are to be removed, make sure to turn 

the power switch off to stop the hybrid 

system.

327

6-1. Maintenance and care

6

Mai
nte

na

nc

e a

nd

 c

are

Remove dirt using a water-damp-
ened soft cloth or synthetic chamois.

Wipe the surface with a dry soft 
cloth to remove any remaining 
moisture.

Cleaning the areas with satin-finish 

metal accents

The metal areas use a layer of real metal for 

the surface. It is necessary to clean them 

regularly. If dirty areas are left uncleaned 

for long periods of time, they may be diffi-

cult to clean.

Remove dirt and dust using a vac-
uum cleaner.

Wipe off any excess dirt and dust 
with a soft cloth dampened with 
diluted detergent.

Use a diluted water solution of approxi-
mately 5% neutral wool detergent.

Wring out any excess water from 
the cloth and thoroughly wipe off all 
remaining traces of detergent.

Wipe the surface with a dry soft 

NOTICE

When cleaning the air intake vents

When cleaning the air intake vents, make 

sure to only use a vacuum to suck out 

dust and clogs. If a compressed air blow 

gun, etc. is used to blow out dust and 

clogs, the dust or clogs may be pushed 

into the air intake vents, which may affect 

the performance of the hybrid battery 

(traction battery) and cause a malfunc-

tion.

To prevent damage to the vehicle

Do not allow water or foreign matter 

to enter the air intake vents when the 

cover is removed.

Carefully handle the removed filters so 

that it will not be damaged.

If the filters are damaged, have them 

replaced with new filters by your Lexus 

dealer.

Make sure to reinstall the filters and 

cover to their original positions after 

cleaning.

Do not install anything to the air intake 

vents other than the exclusive filters for 

this vehicle or use the vehicle without 

the filters installed.

If “Maintenance Required for Trac-

tion battery Cooling Parts See 

owner’s manual” is displayed on the 

multi-information display

If the vehicle is continuously driven with 

the warning message (indicating that 

charging/discharging of the hybrid bat-

tery [traction battery] may become lim-

ited) displayed, the hybrid battery 

(traction battery) may malfunction. If the 

warning message is displayed, clean the 

air intake vents immediately.

Cleaning the areas with satin-
finish metal accents

Cleaning the leather areas

328

6-1. Maintenance and care

cloth to remove any remaining 
moisture. Allow the leather to dry in 
a shaded and ventilated area.

Caring for leather areas

Lexus recommends cleaning the interior of 

the vehicle at least twice a year to maintain 

the quality of the vehicle’s interior.

Remove dirt and dust using a vac-
uum cleaner.

Wipe it off with a soft cloth damp-
ened with neutral detergent diluted 
to approximately 1%.

Wring out any excess water from 
the cloth and thoroughly wipe off 
remaining traces of detergent and 
water.

*1

: “Alcantara

®

” is a registered trademark 

of Alcantara S.p.A.

*2

: If equipped

This maintenance is most effective if 
performed regularly (around once per 
month).

1

Soak a cloth in lukewarm water 
(approximately 104°F [40°C]), 
wring it out thoroughly and then 
wipe the entire body.

Wipe carefully so that the pile is not 

disheveled. Be sure to prepare a clean 

cloth. Once you have wiped the part with 

the cloth, rinse it until it is completely clean 

before using the cloth again.

2

Once it has dried, use a lint brush 
or the like to comb the pile.

If liquid is spilled onto the surface, 
apply tissue paper or the like to 

Cleaning the synthetic leather 
areas

Cleaning the artificial 
leather (Alcantara

®*1

)

*2

It is recommended that regular 
maintenance should be performed 
for areas that are frequently 
touched to maintain quality.

NOTICE

When driving

Areas that are frequently touched are 

more likely to attract dirt. Ensure that 

your hands are clean before touching 

anything.

Routine maintenance

When cleaning the artificial 
leather (Alcantara

®

)

329

6-1. Maintenance and care

6

Mai
nte

na

nc

e a

nd

 c

are

absorb the liquid.

If any substance such as mud or cof-
fee dries and becomes stuck to the 
surface, use a lint brush or the like to 
lightly brush the dirty area and 
remove the substance.
Then, it is recommended to clean 
the dried substance from the sur-
face using a vacuum cleaner.

For oil-based substances, use a dry 
cloth or tissue paper to wipe off the 
substance as much as possible, 
while being careful not to spread it.

If the substance still cannot be 
removed, use the following procedure 
to remove it.

1

Liquid substances: Soak a cloth in 
lukewarm water (approximately 
104°F [40°C]), wring it out thor-
oughly and then wipe the dirty area 
from the outside inward.

Wipe carefully so that the pile is not 

disheveled. Be sure to prepare a clean 

cloth and use the clean portion of it to 

clean the surface.
Oil-based substances: Dab a cloth soaked 

in benzene, lukewarm water or pure ethyl 

alcohol (for drinking) within the dirty area 

from the outside inward, and then dab a 

dry cloth on the dirty area to absorb the 

substance.

2

If the pile on the surface is dishev-
eled, use a lint brush or the like to 
lightly brush the surface, and then 
allow the surface to dry completely.

To remove substances adhered to the 

pile

To clean dust or other adhered substances, 

use a lint brush or the like to lightly brush 

the area and remove the substance. If the 

substance still cannot be removed, use 

adhesive tape to remove it.

NOTICE

To prevent damage to artificial 
leather (Alcantara

®

)

Observe the following precautions to 

avoid damage to and deterioration of 
artificial leather (Alcantara

®

):

Do not apply excessive force

Do not dig your nails into it

Do not rub it with your hands

Do not touch it if your hands are dirty

When using adhesive tape

If a strong adhesive tape is used, there is 

a possibility that the surface of the artifi-
cial leather (Alcantara

®

) could be dam-

aged.

330

6-2. Maintenance

6-2.Maintenance

Repair and replacement

It is recommended that genuine Lexus parts 

be used for repairs to ensure performance 

of each system. If non-Lexus parts are used 

in replacement or if a repair shop other than 

a Lexus dealer performs repairs, confirm 

the warranty coverage.

Allow inspection and repairs to be per-

formed by a Lexus dealer

Lexus technicians are well-trained spe-

cialists and are kept up to date with the 

latest service information. They are well 

informed about the operations of all sys-

tems on your vehicle.

Keep a copy of the repair order. It proves 

that the maintenance that has been per-

formed is under warranty coverage. If 

any problem should arise while your vehi-

cle is under warranty, your Lexus dealer 

will promptly take care of it.

General maintenance should be per-
formed on a daily basis. This can be 
done by yourself or by a Lexus dealer.

Scheduled maintenance should be 
performed at specified intervals 
according to the maintenance sched-
ule.

For details about maintenance items and 
schedules, refer to the “Warranty and Ser-
vice Guide”, “Owner’s Manual Supple-
ment” or “Scheduled Maintenance”.

Resetting the message indicating main-

tenance is required

After the required maintenance is per-

formed according to the maintenance 

schedule, please reset the message.

To reset the message, follow the procedure 

described below:

1

Press 

 or 

 of the meter control 

switches and select 

.

2

Press 

 or 

 of the meter control 

switches and select “Vehicle Settings”. 
Then press “OK”.

Maintenance requirements

To ensure safe and economical 
driving, day-to-day care and regu-
lar maintenance are essential. It is 
the owner’s responsibility to per-
form regular checks. Lexus recom-
mends the following maintenance:

WARNING

If your vehicle is not properly main-

tained

Improper maintenance could result in 

serious damage to the vehicle and possi-

ble death or serious injury.

Handling of the 12-volt battery

Engine exhaust, some of its constitu-

ents, and a wide variety of automobile 

components contain or emit chemicals 

known to the State of California to 

cause cancer and birth defects and 

other reproductive harm. Work in a 

well ventilated area.

Oils, fuels and fluids contained in vehi-

cles as well as waste produced by 

component wear contain or emit 

chemicals known to the State of Cali-

fornia to cause cancer and birth 

defects or other reproductive harm. 

Avoid exposure and wash any affected 

area immediately.

12-volt battery posts, terminals and 

related accessories contain lead and 

lead compounds which are known to 

cause brain damage. Wash your hands 

after handling. (

P.347)

General maintenance

Scheduled maintenance

331

6-2. Maintenance

6

Mai
nte

na

nc

e a

nd

 c

are

3

Press 

 or 

 of the meter control 

switches and select “Scheduled Mainte-
nance”. Then press “OK”.

4

Select “Yes” and press “OK”.

A message will be displayed when the reset 

procedure has been completed.

You can perform some maintenance 
procedures by yourself. 
Please be aware that do-it-yourself 
maintenance may affect warranty cov-
erage.

The use of Lexus repair manuals is recom-
mended.
For details about warranty coverage, refer 
to the separate “Owner’s Guide”, “War-
ranty and Service Guide”, “Owner’s Man-
ual Supplement” or “Warranty Booklet”.

Do-it-yourself maintenance

General maintenance

Listed below are the general main-
tenance items that should be per-
formed at the intervals specified in 
the “Warranty and Service Guide” 
or “Owner’s Manual Supplement”. 
It is recommended that any prob-
lem you notice should be brought to 
the attention of your Lexus dealer 
or qualified service shop for advice.

WARNING

If the engine is running <hybrid sys-

tem is operating>

Turn the engine <hybrid system> off and 

ensure that there is adequate ventilation 

before performing maintenance checks.

Engine compartment

Items

Check points

Brake fluid

Is the brake fluid at the 
correct level? 
(

P.346)

Engine coolant 
(LC500)

Is the engine coolant at 
the correct level? 
(

P.344)

Engine/power 
control unit cool-
ant (LC500h)

Is the engine/power 
control unit coolant at 
the correct level? 
(

P.344)

Engine oil

Is the engine oil at the 
correct level? 
(

P.341)

Exhaust system

There should not be 
any fumes or strange 
sounds.

332

6-2. Maintenance

Radiator/con-
denser

The radiator and con-
denser should be free 
from foreign objects. 
(

P.345)

Washer fluid

Is there sufficient 
washer fluid? 
(

P.346)

Trunk

Items

Check points

12-volt battery

Check the battery fluid 
level and connections. 
(

P.347)

Vehicle interior

Items

Check points

Accelerator 
pedal

• The accelerator 

pedal should move 
smoothly (without 
uneven pedal effort 
or catching).

Automatic trans-
mission “Park” 
mechanism 
(LC500)/Hybrid 
transmission 
“Park” mecha-
nism (LC500h)

• When  parked  on  a 

slope and the shift 
position is in P, is the 
vehicle securely 
stopped?

Items

Check points

Brake pedal

• Does  the  brake 

pedal move 
smoothly?

• Does  the  brake 

pedal have appro-
priate clearance 
from the floor?

• Does  the  brake 

pedal have the cor-
rect amount of free 
play?

Brakes

• The  vehicle  should 

not pull to one side 
when the brakes are 
applied.

• The brakes should 

work effectively.

• The brake pedal 

should not feel 
spongy.

• The brake pedal 

should not get too 
close to the floor 
when the brakes are 
applied.

Head restraints

• Do  the  head 

restraints move 
smoothly and lock 
securely?

Indicators/buzz-
ers

• Do  the  indicators 

and buzzers function 
properly?

Lights

• Do all the lights 

come on?

• Are the headlights 

aimed correctly?

Items

Check points

333

6-2. Maintenance

6

Mai
nte

na

nc

e a

nd

 c

are

Parking brake

• Move smoothly?
• When  parked  on  a 

slope and the park-
ing brake is on, is the 
vehicle securely 
stopped?

Seat belts

• Do the seat belts 

operate smoothly?

• The seat belts should 

not be damaged.

Seats

• Do the seat controls 

operate properly?

Steering wheel

• Does the steering 

wheel rotate 
smoothly?

• Does the steering 

wheel have the cor-
rect amount of free 
play?

• There  should  not  be 

any strange sounds 
coming from the 
steering wheel.

Vehicle exterior

Items

Check points

Doors/trunk

• Do the doors/trunk 

operate smoothly?

Engine hood

• Does  the  engine 

hood lock system 
work properly?

Fluid leaks

• There  should  not  be 

any signs of fluid 
leakage after the 
vehicle has been 
parked.

Items

Check points

Tires

• Is the tire inflation 

pressure correct?

• The tires should not 

be damaged or 
excessively worn.

• Have the tires been 

rotated according to 
the maintenance 
schedule?

• The wheel bolts 

should not be loose.

Windshield wip-
ers

• The wiper blades 

should not show any 
signs of cracking, 
splitting, wear, con-
tamination or defor-
mation.

• The wiper blades 

should clear the 
windshield without 
streaking or skip-
ping.

Items

Check points

334

6-2. Maintenance

The OBD system determines that a 
problem exists somewhere in the emis-
sion control system. Your vehicle may 
not pass the I/M test and may need to 
be repaired. Contact your Lexus 
dealer to service the vehicle.

When the 12-volt battery is discon-
nected or discharged
Readiness codes that are set during 
ordinary driving are erased. 
Also, depending on your driving 
habits, the readiness codes may not 
be completely set.

When the fuel tank cap is loose
The malfunction indicator lamp 
comes on indicating a temporary 
malfunction and your vehicle may 
not pass the I/M test.

The error code in the OBD system will 
not be cleared unless the vehicle is 
driven 40 or more times.

Contact your Lexus dealer to prepare 
the vehicle for re-testing.

Emission inspection and 
maintenance (I/M) pro-
grams

Some states have vehicle emission 
inspection programs which include 
OBD (On Board Diagnostics) 
checks. The OBD system monitors 
the operation of the emission con-
trol system.

If the malfunction indicator lamp 
comes on

Your vehicle may not pass the 
I/M test in the following situa-
tions:

When the malfunction indicator 
lamp still remains on after sev-
eral driving trips

If your vehicle does not pass the 
I/M test

335

6-3. Do-it-yourself maintenance

6

Mai
nte

na

nc

e a

nd

 c

are

6-3.Do-it-yourself maintenance

Do-it-yourself service pre-
cautions

If you perform maintenance by 
yourself, be sure to follow the cor-
rect procedure as given in these 
sections.

Maintenance

Items

Parts and tools

12-volt battery 
condition 
(

P.347)

• Grease
• Conventional wrench 

(for terminal clamp 
bolts)

Brake fluid 
level 
(

P.346)

• SAE J1703 or FMVSS 

No.116 DOT 3 brake 
fluid

• SAE J1704 or FMVSS 

No. 116 DOT 4 brake 
fluid (Convertible)

• Rag or paper towel
• Funnel (used only for 

adding brake fluid)

Engine coolant 
level (LC500) 
(

P.344)

• “Toyota  Super  Long 

Life Coolant” or a simi-
lar high quality eth-
ylene glycol-based 
non-silicate, non-amine, 
non-nitrite and non-
borate coolant with 
long-life hybrid organic 
acid technology
For the U.S.A.:
“Toyota Super Long 
Life Coolant” is pre-
mixed with 50% cool-
ant and 50% deionized 
water.
For Canada:
“Toyota Super Long 
Life Coolant” is pre-
mixed with 55% cool-
ant and 45% deionized 
water.

• Funnel (used only for 

adding coolant)

Items

Parts and tools

336

6-3. Do-it-yourself maintenance

Engine/power 
control unit 
coolant level 
(LC500h) 
(

P.344)

• “Toyota Super Long 

Life Coolant” or a simi-
lar high quality eth-
ylene glycol-based 
non-silicate, non-amine, 
non-nitrite and non-
borate coolant with 
long-life hybrid organic 
acid technology
For the U.S.A.:
“Toyota Super Long 
Life Coolant” is pre-
mixed with 50% cool-
ant and 50% deionized 
water.
For Canada:
“Toyota Super Long 
Life Coolant” is pre-
mixed with 55% cool-
ant and 45% deionized 
water.

• Funnel (used only for 

adding coolant)

Engine oil level 
(

P.341)

• “Toyota Genuine 

Motor Oil” or equiva-
lent

• Rag or paper towel
• Funnel (used only for 

adding engine oil)

Fuses 
(

P.370)

• Fuse with same amper-

age rating as original

Headlight aim

• Phillips-head screw-

driver

Light bulbs 
(

P.374)

Radiator and 
condenser 
(

P.345)

Items

Parts and tools

Tire inflation 
pressure 
(

P.363)

• Tire pressure gauge
• Compressed air source

Washer fluid 
(

P.346)

• Water or washer fluid 

containing antifreeze 
(for winter use)

• Funnel (used only for 

adding water or washer 
fluid)

WARNING

The engine compartment contains many 

mechanisms and fluids that may move 

suddenly, become hot, or become elec-

trically energized. To avoid death or seri-

ous injury, observe the following 

precautions.

When working on the engine com-

partment

LC500h: Make sure that the “IGNI-

TION ON” on the multi-information 

display and the “READY” indicator are 

both off.

Keep hands, clothing and tools away 

from the moving fan and engine drive 

belt.

LC500: Be careful not to touch the 

engine, radiator, exhaust manifold, etc. 

right after driving as they may be hot. 

Oil and other fluids may also be hot.

LC500h: Be careful not to touch the 

engine, power control unit, radiator, 

exhaust manifold, etc. right after driv-

ing as they may be hot. Oil and other 

fluids may also be hot.

Do not leave anything that may burn 

easily, such as paper and rags, in the 

engine compartment.

Do not smoke, cause sparks or expose 

an open flame to fuel. Fuel fumes are 

flammable.

Items

Parts and tools

337

6-3. Do-it-yourself maintenance

6

Mai
nte

na

nc

e a

nd

 c

are

1

Pull the hood lock release lever.

The hood will pop up slightly.

2

Pull up the auxiliary catch lever and 
lift the hood.

WARNING

When working near the electric cool-

ing fan or radiator grille

Be sure the engine switch <power 

switch> is off.

With the engine switch <power switch> in 

ON, the electric cooling fan may auto-

matically start to run if the air condition-

ing is on and/or the coolant temperature 

is high. (

P.345)

Safety glasses

Wear safety glasses to prevent flying or 

falling material, fluid spray, etc. from get-

ting in your eyes.

NOTICE

If you remove the air cleaner filter

Driving with the air cleaner filter 

removed may cause excessive engine 

wear due to dirt in the air.

Hood

Opening the hood

WARNING

Pre-driving check

Check that the hood is fully closed and 

locked. 

If the hood is not locked properly, it may 

open while the vehicle is in motion and 

cause an accident, which may result in 

death or serious injury.

338

6-3. Do-it-yourself maintenance

Front

Except Convertible

Convertible

Rear

Except Convertible

Positioning a floor jack

When using a floor jack, follow the 
instructions in the manual provided 
with the jack and perform the oper-
ation safely.
When raising your vehicle with a 
floor jack, position the jack cor-
rectly. Improper placement may 
damage your vehicle or cause 
injury.

Location of the jack point

339

6-3. Do-it-yourself maintenance

6

Mai
nte

na

nc

e a

nd

 c

are

Convertible

340

6-3. Do-it-yourself maintenance

LC500

Fuse box (

P.370)

Engine oil level dipstick (

P.341)

Engine coolant reservoir (

P.344)

Engine oil filler cap (

P.343)

Brake fluid reservoir (

P.346)

Washer fluid tank (

P.346)

Electric cooling fan

Condenser (

P.345)

Radiator (

P.345)

Engine compartment

Components

A
B
C
D

E
F

G

H

I

341

6-3. Do-it-yourself maintenance

6

Mai
nte

na

nc

e a

nd

 c

are

LC500h

Engine oil level dipstick (

P.341)

Power control unit coolant reservoir (

P.345)

Engine oil filler cap (

P.343)

Brake fluid reservoir (

P.346)

Fuse boxes (

P.370)

Washer fluid tank (

P.346)

Engine coolant reservoir (

P.344)

Electric cooling fan

Condenser (

P.345)

Radiator (

P.345)

12-volt battery

P.347

With the engine at operating tempera-
ture and turned off, check the oil level 
on the dipstick.

1

Park the vehicle on level ground.

LC500

After warming up the engine and turning it 
off, wait about 5 minutes for the oil to drain 
back into the bottom of the engine.

LC500h

After warming up the engine and turning 

A
B
C
D

E
F

G

H

I

J

Checking the engine oil

342

6-3. Do-it-yourself maintenance

off the hybrid system, wait about 5 minutes 
for the oil to drain back into the bottom of 
the engine.

2

Holding a rag under the end, pull 
the dipstick out.

LC500

LC500h

3

Wipe the dipstick clean.

4

Reinsert the dipstick fully.

5

Holding a rag under the end, pull 
the dipstick out and check whether 
the oil level is above low level mark.

Low level mark

The shape of the dipstick may differ 
depending on the type of vehicle or 
engine.

6

Wipe the dipstick and reinsert it 
fully.

Engine oil consumption

A certain amount of engine oil will be con-

sumed while driving. In the following situa-

tions, oil consumption may increase, and 

engine oil may need to be refilled in 

between oil maintenance intervals.

When the engine is new, for example 

directly after purchasing the vehicle or 

after replacing the engine

If low quality oil or oil of an inappropriate 

viscosity is used

When driving at high engine speeds or 

with a heavy load, or when driving while 

accelerating or decelerating frequently

When leaving the engine idling for a long 

time, or when driving frequently through 

heavy traffic

Engine oil level rise

If the vehicle is repeatedly driven without 

the engine warmed up, moisture caused by 

dew condensation inside the engine or fuel 

which did not burn mixes into the engine oil, 

resulting in a rise in engine oil level.
However, this is not a malfunction.
For example, the engine become difficult to 

be warmed up in the following situations.

When driving a short distance

When driving at a low speed

When the outside temperature is low

When checking the engine oil, make sure 

that the engine is warmed up. If the engine 

oil level exceeds the refill upper limit mark, 

contact your Lexus dealer.

A

NOTICE

To prevent serious engine damage

Check the oil level on a regular basis.

343

6-3. Do-it-yourself maintenance

6

Mai
nte

na

nc

e a

nd

 c

are

Checking the oil type and prepar-
ing the items needed

Make sure to check the oil type and 
prepare the items needed before add-
ing oil.

Engine oil selection

P.443, 444

Oil quantity (Low level mark 


Refill upper limit mark)

1.6 qt. (1.5 L, 1.3 Imp. qt.)

Item

Clean funnel

Adding engine oil

If the oil level is below or near the low 
level mark, add engine oil of the same 
type as that already in the engine.

LC500

LC500h

1

Remove the oil filler cap by turning 
it counterclockwise.

2

Add engine oil slowly, checking the 
dipstick.

Make sure that the oil level does not 

exceed the refill upper limit mark and is 

between the low level mark and refill upper 

limit mark.

Low level mark

Refill upper limit mark

The shape of the dipstick may differ 
depending on the type of vehicle or 
engine.

3

Install the oil filler cap by turning it 
clockwise.

After changing the engine oil (LC500h)

The engine oil maintenance data should be 

reset. Perform the following procedures:

1

While the vehicle is stopped, press 

 of the meter control switches.

2

Press 

 or 

 of the meter control 

switches, and select 

.

3

Press 

 or 

 of the meter control 

switches, select “Vehicle Settings”, and 
then press “OK”.

4

Press 

 or 

 of the meter control 

switches, select “Oil Maintenance”, and 
then press “OK”.

5

Select “Yes” and then press “OK”.

Adding engine oil

A
B

344

6-3. Do-it-yourself maintenance

A message will be displayed on the multi-

information display.

The coolant level is satisfactory if it is 
between the “F” and “L” lines on the 
reservoir when the engine <hybrid sys-
tem> is cold.

Engine coolant reservoir

LC500

Reservoir cap

“F” line

“L” line

If the level is on or below the “L” line, add 
coolant up to the “F” line. (

P.431)

LC500h

Reservoir cap

“F” line

“L” line

If the level is on or below the “L” line, add 
coolant up to the “F” line. (

P.433)

WARNING

Used engine oil

Used engine oil contains potentially 

harmful contaminants which may 

cause skin disorders such as inflamma-

tion and skin cancer, so care should be 

taken to avoid prolonged and 

repeated contact. To remove used 

engine oil from your skin, wash thor-

oughly with soap and water.

Dispose of used oil and filters only in a 

safe and acceptable manner. Do not 

dispose of used oil and filters in house-

hold trash, in sewers or onto the 

ground. 

Call your Lexus dealer, service station 

or auto parts store for information 

concerning recycling or disposal.

Do not leave used engine oil within the 

reach of children.

NOTICE

When replacing the engine oil

Be careful not to spill engine oil on the 

vehicle components.

Avoid overfilling, or the engine could 

be damaged.

Check the oil level on the dipstick 

every time you refill the vehicle.

Be sure the engine oil filler cap is prop-

erly tightened.

Checking the coolant

A
B
C

A
B
C

345

6-3. Do-it-yourself maintenance

6

Mai
nte

na

nc

e a

nd

 c

are

Power control unit coolant reser-
voir (LC500h)

Reservoir cap

“F”/“FULL” line

“L”/“LOW” line

If the level is on or below the “L”/“LOW” 
line, add coolant up to the “F”/“FULL” line. 
(

P.434)

Coolant selection

Only use “Toyota Super Long Life Coolant” 

or a similar high quality ethylene glycol 

based non-silicate, non-amine, non-nitrite, 

and non-borate coolant with long-life 

hybrid organic acid technology.
U.S.A.:

“Toyota Super Long Life Coolant” is a mix-

ture of 50% coolant and 50% deionized 

water. (Minimum temperature: -31°F [-

35°C])
Canada:

“Toyota Super Long Life Coolant” is a mix-

ture of 55% coolant and 45% deionized 

water. (Minimum temperature: -44°F [-

42°C])
For more details about engine coolant, con-

tact your Lexus dealer.

If the coolant level drops within a short 

time of replenishing

Visually check the radiator, hoses, 

engine/power control unit coolant reser-

voir caps, drain cock and water pump. 

If you cannot find a leak, have your Lexus 

dealer test the cap and check for leaks in 

the cooling system.

Check the radiator and condenser and 
clear away any foreign objects.
If either of the above parts is extremely 
dirty or you are not sure of their condi-
tion, have your vehicle inspected by 
your Lexus dealer.

A
B
C

WARNING

When the engine <hybrid system> is 

hot

LC500: Do not remove the engine cool-

ant reservoir cap or the coolant inlet cap. 

(

P.433)

The cooling system may be under pres-

sure and may spray hot coolant if the cap 

is removed, causing serious injuries, such 

as burns.

LC500h: Do not remove the 

engine/power control unit coolant reser-

voir caps or the coolant inlet cap. 

(

P.436)

The cooling system may be under pres-

sure and may spray hot coolant if the cap 

is removed, causing serious injuries, such 

as burns.

NOTICE

When adding coolant

Coolant is neither plain water nor 

straight antifreeze. The correct mixture 

of water and antifreeze must be used to 

provide proper lubrication, corrosion 

protection and cooling. Be sure to read 

the antifreeze or coolant label.

If you spill coolant

Be sure to wash it off with water to pre-

vent it from damaging parts or paint.

Checking the radiator and con-
denser

346

6-3. Do-it-yourself maintenance

Checking fluid level

The brake fluid level should be 
between the “MAX” and “MIN” lines 
on the tank.

LC500

LC500h

Adding fluid

Make sure to check the fluid type and 
prepare the necessary items.

Fluid type

SAE J1703 or FMVSS No.116 DOT 3 

brake fluid
SAE J1704 or FMVSS No. 116 DOT 4 
brake fluid (Convertible)

Item

Clean funnel

Brake fluid can absorb moisture from 

the air

Excess moisture in the brake fluid can 

cause a dangerous loss of braking effi-

ciency. Use only newly opened brake fluid.

If any washer does not work or “Wind-
shield Washer Fluid Low” is shown on 
the multi-information display, the 
washer tank may be empty. Add 
washer fluid.

WARNING

When the engine <hybrid system> is 

hot

Do not touch the radiator or condenser 

as they may be hot and cause serious 

injuries, such as burns.

Checking and adding the brake 
fluid

WARNING

When filling the reservoir

Take care as brake fluid can harm your 

hands and eyes and damage painted sur-

faces.

If fluid gets on your hands or in your eyes, 

flush the affected area with clean water 

immediately.
If you still experience discomfort, see a 

doctor.

NOTICE

If the fluid level is low or high

It is normal for the brake fluid level to go 

down slightly as the brake pads wear out 

or when the fluid level in the accumulator 

is high.

If the reservoir needs frequent refilling, 

there may be a serious problem.

Checking and adding the washer 
fluid


Content      ..     8      9      10      11     ..