Harley Davidson 1999-2005 Harley Dyna Models. Repair Manual - page 20
-------------------------------------------------------------------------------------------------------------------------------------------------------------
380
CHAPTER NINE
REAR WHEEL
14
Removal
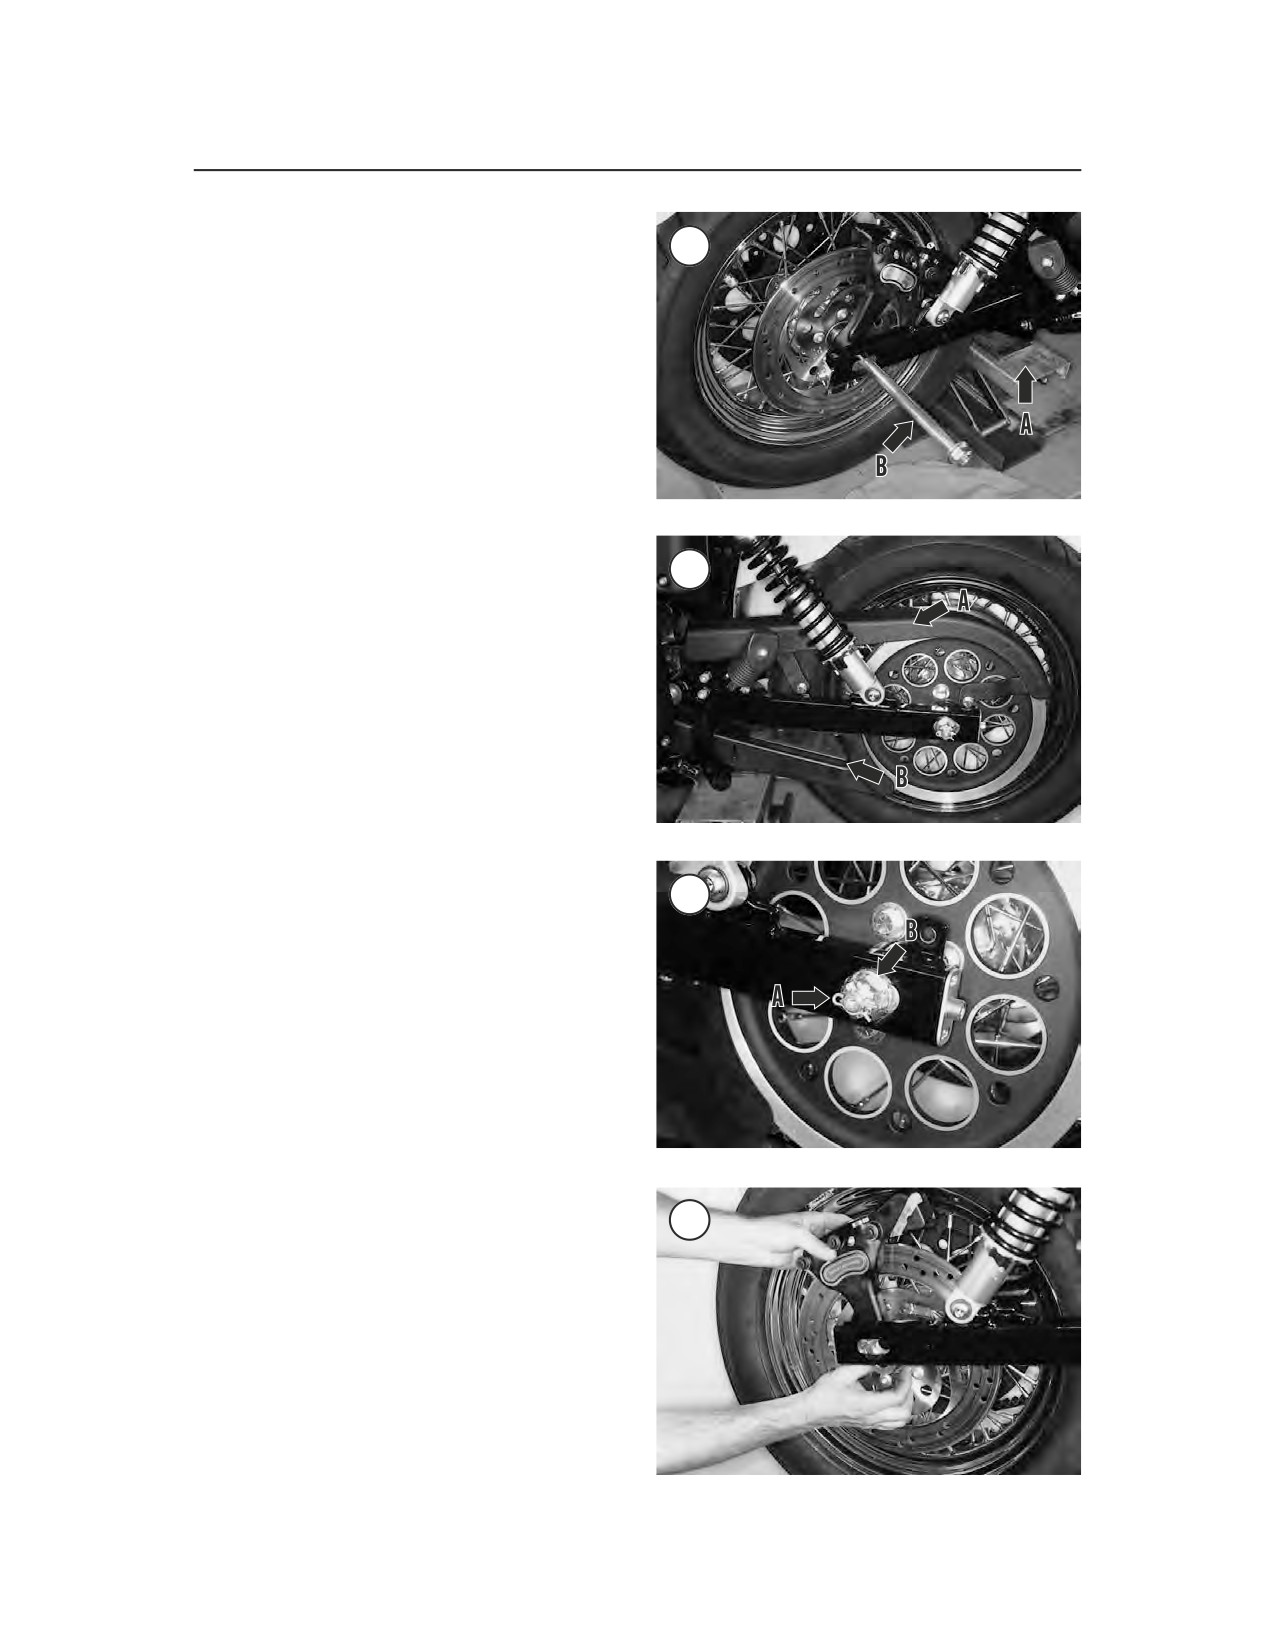
1. Support the motorcycle with the rear wheel off
the ground with an appropriate size jack (A, Figure
14).
NOTE
This procedure is shown with the com-
plete exhaust system removed to
better illustrate the steps.
2. Remove the rear cylinder’s muffler as described
in Chapter Seven.
3. Remove the bolts and nuts securing the drive
15
belt guard (A, Figure 15) and remove the guard.
4. On models with a low cut rear fender, it may be
necessary to remove the screws securing the drive
belt lower deflector (B, Figure 15) and remove it.
NOTE
The rear wheel is heavy and can be
difficult to remove. Check the
tire-to-ground clearance before re-
moving the rear axle. If necessary,
have an assistant help in the re-
moval.
5. On international models, remove the cover from
16
the rear axle nut.
6. Remove the spring clip (A, Figure 16) from the
rear axle nut and axle.
7. Loosen and remove the axle nut (B, Figure 16)
and washer.
8. From the right side, withdraw the rear axle (B,
Figure 14) while holding onto the rear wheel.
Lower the rear wheel to the ground.
9. On 2000-on models, remove the rear brake cali-
per (Figure 17) from the swing arm and tie it up to
the frame with a bungee cord or wire.
10. Remove the right side (Figure 18) and left side
17
(Figure 19) spacers from the wheel hub.
11. Lift the drive belt off the driven sprocket (A,
Figure 20) and remove the rear wheel (B).
12. On 1999 models, slide the rear brake caliper off
the locating post on the swing arm and tie it up to the
frame with a bungee cord or wire.
NOTE
Place a plastic or wooden spacer be-
tween the brake pads in place of the
disc. Then, if the brake pedal is inad-