Harley Davidson 1999-2005 Harley Dyna Models. Repair Manual - page 7
-------------------------------------------------------------------------------------------------------------------------------------------------------------
120
CHAPTER FOUR
3. Tap the cylinder head with a rubber mallet to free
it, then lift it off the cylinder block.
64
4. Remove the cylinder head gasket.
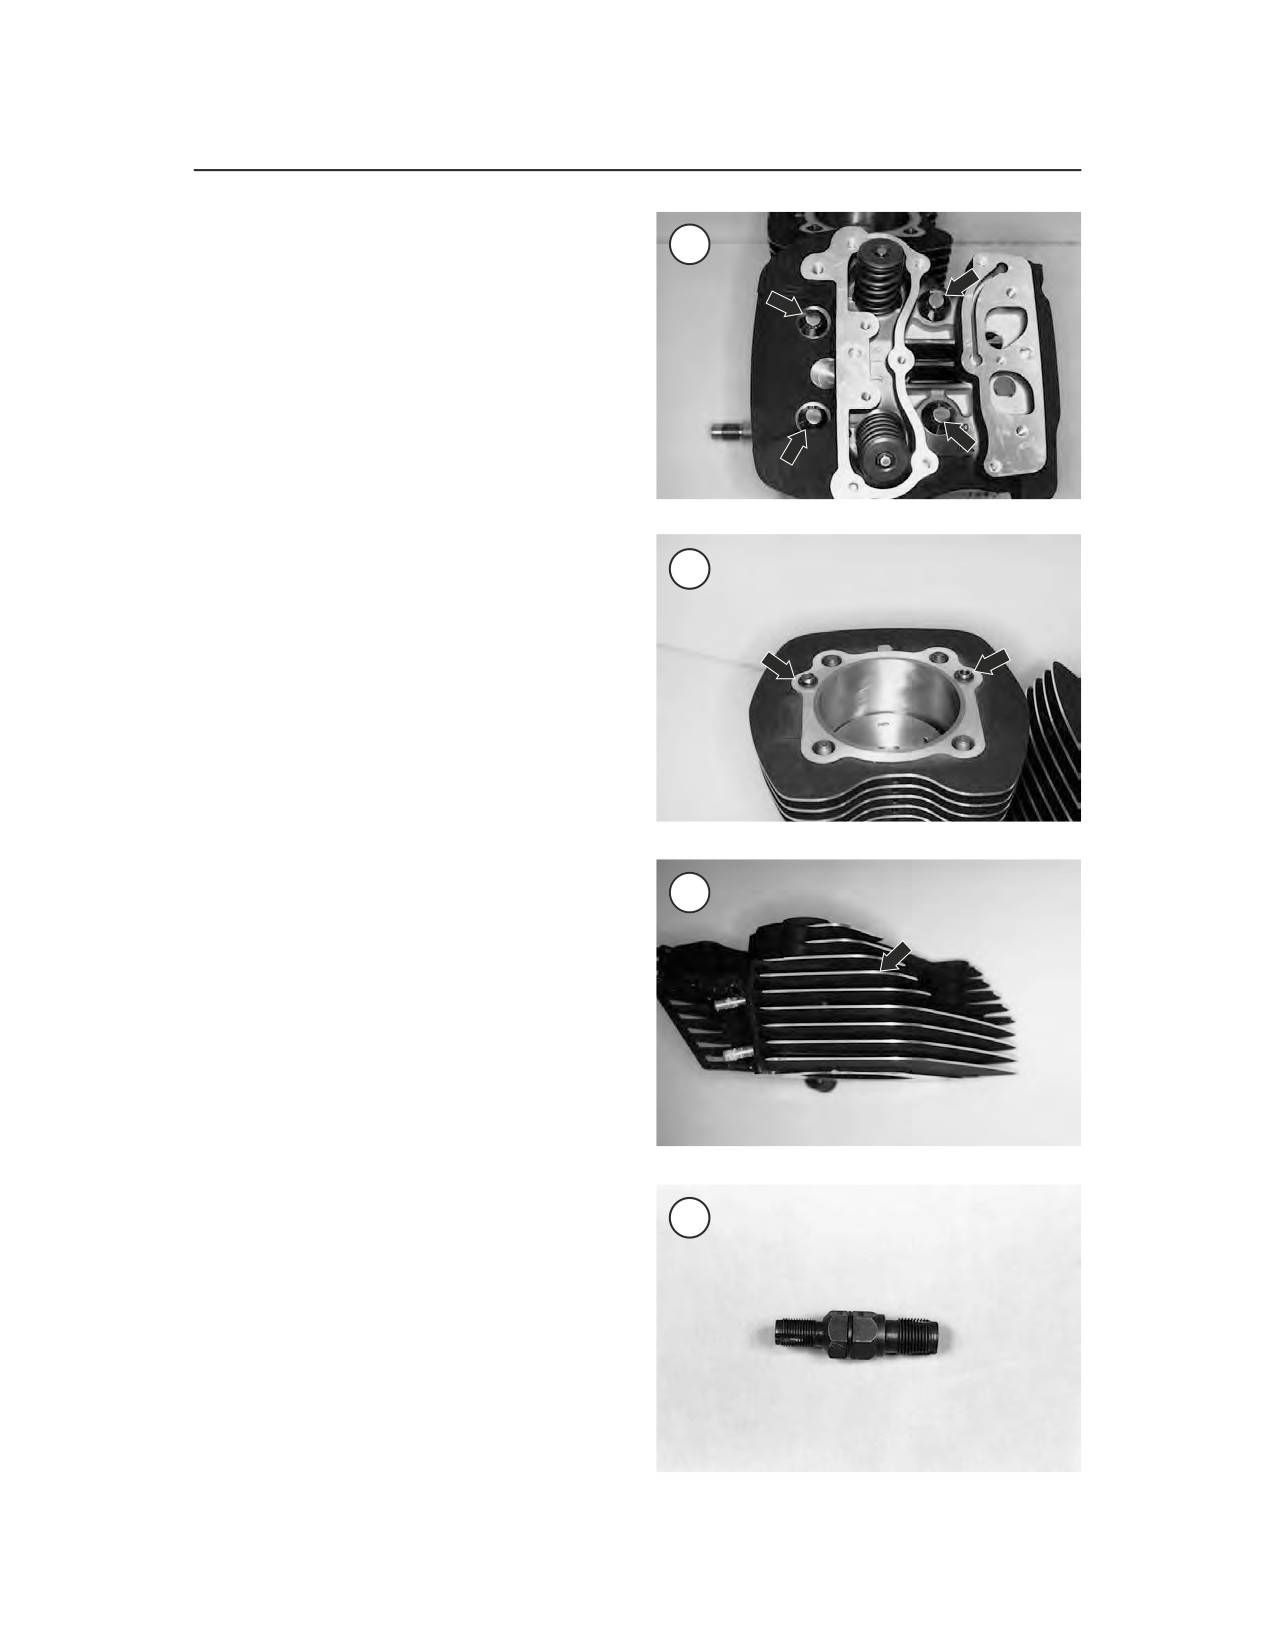
5. Remove the two O-rings and the cylinder head
dowel pins (Figure 65).
6. Repeat these steps to remove the opposite cylin-
der head.
Inspection
1. Thoroughly clean the outside of the cylinder
head. Use a stiff brush, soap and water and remove
all debris from the cooling fins (Figure 66). If nec-
65
essary, use a piece of wood and scrape away any
lodged dirt. Clogged cooling fins can cause over-
heating, leading to possible engine damage.
2. Without removing the valves, use a wire brush
to remove all carbon deposits from the combustion
chamber. Use a fine wire brush dipped in solvent
or make a scraper from hardwood. Take care not to
damage the head, valves or spark plug threads.
CAUTION
Cleaning the combustion chamber
with the valves removed can damage
the valve seat surfaces. A damaged or
even slightly scratched valve seat will
66
cause poor valve seating.
3. Examine the spark plug threads in the cylinder
head for damage. If damage is minor or if the
threads are dirty or clogged with carbon, use a spark
plug thread tap (Figure 67) to clean the threads fol-
lowing the manufacturer’s instructions. If thread
damage is severe, restore the threads by installing a
steel thread insert. Purchase thread insert kits at au-
tomotive supply stores or have them installed by a
Harley-Davidson dealership or machine shop.
NOTE
67
When using a tap to clean spark plug
threads, coat the tap with an alumi-
num tap-cutting fluid or kerosene.
NOTE
Aluminum spark plug threads are
commonly damaged due to galling,
cross-threading and over-tightening.
To prevent galling, apply an antiseize
compound on the plug threads before
installation and do not overtighten.