Harley Davidson 1999-2005 Harley Dyna Models. Repair Manual - page 5
-------------------------------------------------------------------------------------------------------------------------------------------------------------
80
CHAPTER THREE
9. When the drive belt deflection and axle align-
32
ment adjustments are correct, tighten the rear axle
nut (A, Figure 30) to the torque specification in Ta-
ble 6. Install the spring clip through the axle nut and
rear axle.
10. Lower the rear wheel to the ground.
Brake Pad Inspection
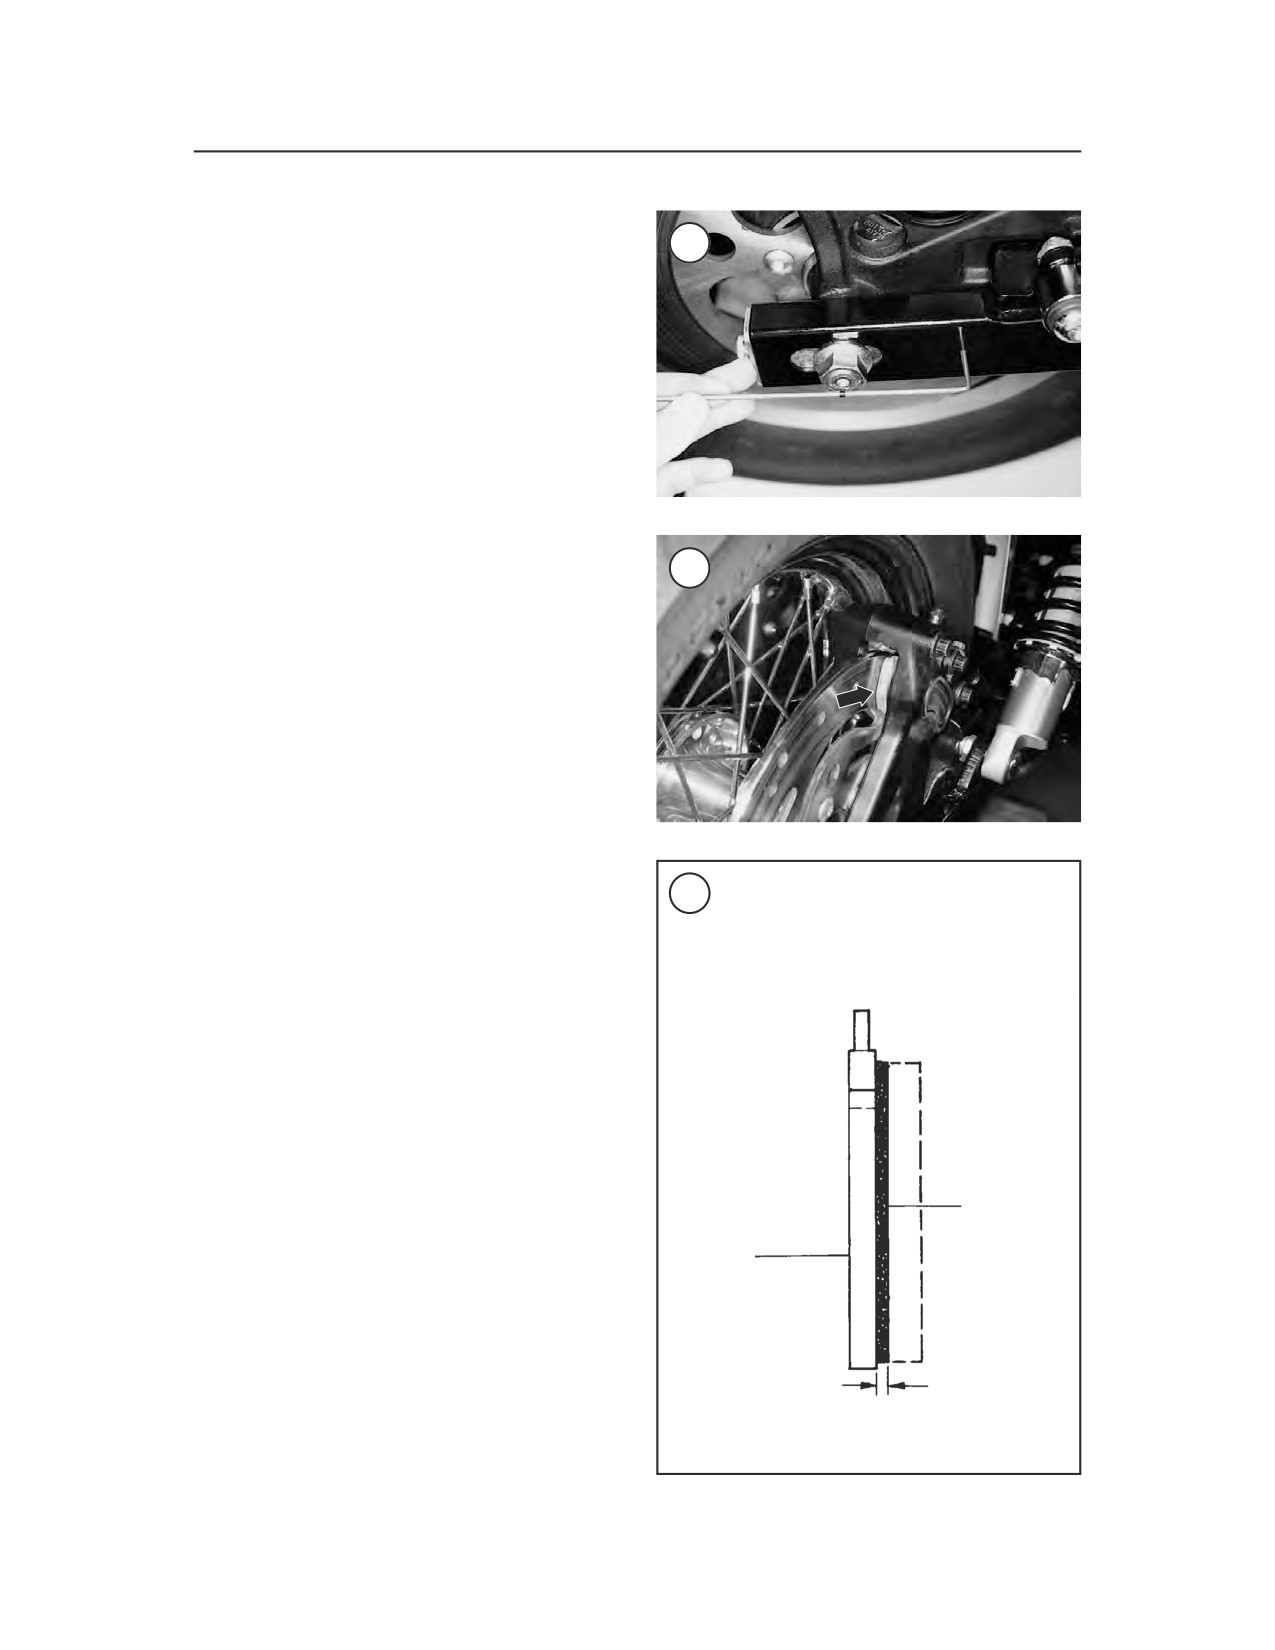
1. Without removing the front or rear brake calipers,
inspect the brake pads (Figure 33) for damage.
2. Measure the thickness of each brake pad lining
(Figure 34) with a ruler. Replace the brake pad if its
33
thickness is worn to the minimum thickness in Ta-
ble 8. Replace the brake pads as described in Chap-
ter Twelve.
Disc Brake Fluid Level
1. To check the front master cylinder, perform the
following:
a. Turn the handlebar so the master cylinder is
level.
b. Observe the brake fluid level by looking at
the sight glass (A, Figure 35) on the master
cylinder reservoir top cover. If the fluid level
34
BRAKE PAD
is correct, the sight glass will appear dark pur-
INSPECTION
ple. If the level is low, the sight glass will
have a lightened or clear appearance.
2. To check the rear master cylinder, perform the
following:
a. Support the motorcycle so that the rear master
cylinder is level.
NOTE
The rear master cylinder is partially
hidden by the exhaust system, as
shown in Figure 36, making it very
Friction
difficult to see the viewing port.
material
Backing
b. Observe the brake fluid level by looking at
plate
the sight glass on the side of the master cylin-
der reservoir. If the fluid level is correct, the
sight glass will appear dark purple. If the level
is low, the sight glass will have a lightened or
clear appearance.
Minimum thickness
c. If the fluid level can not be determined by
looking at the sight glass, remove the top cover
(Figure 37) and diaphragm as described in