Ford Mondeo (petrol engines). Manual - part 122
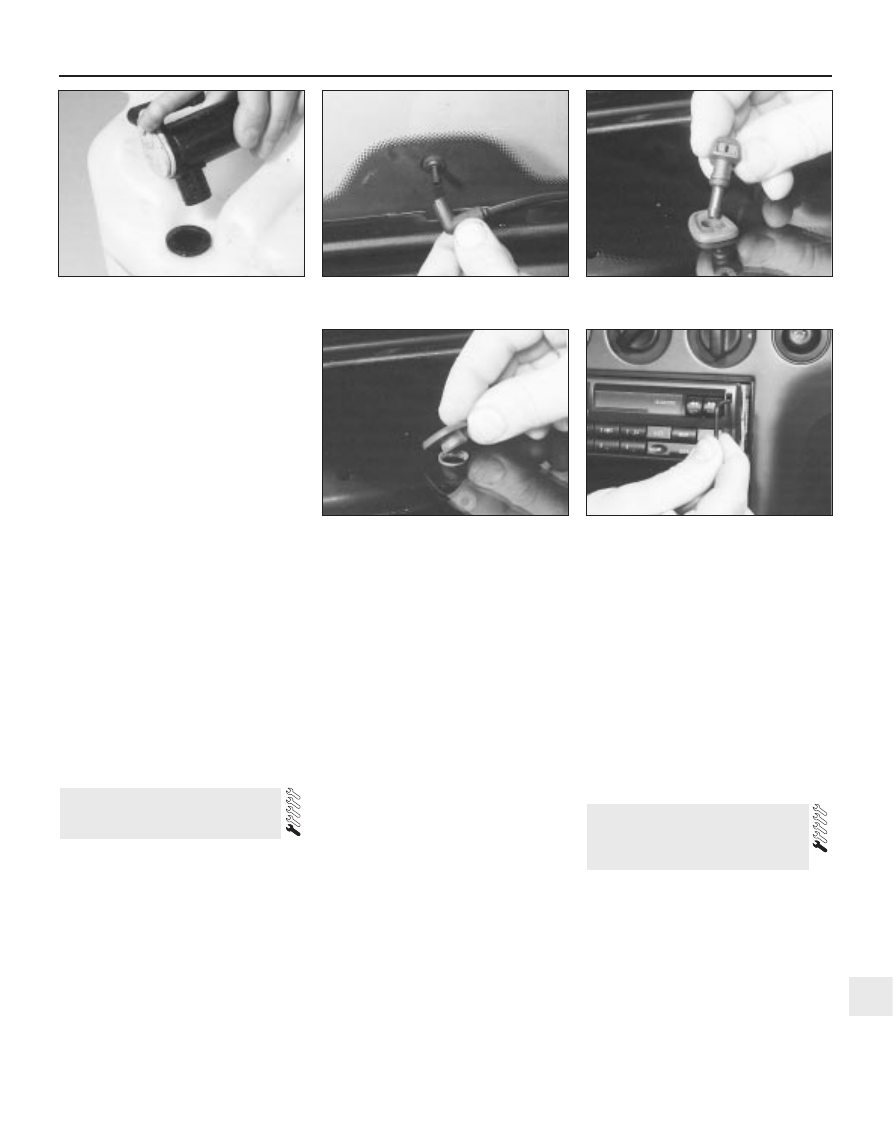
headlamp washer pump, from the reservoir
(see illustration).
7 Remove the rubber seals.
Washer nozzle (windscreen)
8 With the bonnet supported in its open
position, carefully disconnect the washer tube
from the bottom of the nozzle.
9 Using a screwdriver and working from
under the bonnet, carefully prise out the
nozzle. Where necessary, disconnect the
wiring for the nozzle heater.
Washer nozzle (rear window)
10 With the tailgate open, carefully pull off
the inner trim panel from the top of the
tailgate.
11 Pull the washer tube from the bottom of
the nozzle (see illustration).
12 Carefully prise the nozzle out of the
tailgate glass, then prise out the rubber
grommet
(see illustrations). Where
necessary, disconnect the wiring for the
nozzle heater.
Refitting
13 Refitting is a reversal of the removal
procedure. In the case of the washer nozzles,
press them in until they are fully engaged. The
rear window washer nozzle must rest against
the rubber seal.
Note: Special tools are required to remove the
radio.
Coding
1 If a Ford “Keycode” unit is fitted, and the
unit and/or the battery is disconnected, the
unit will not function again on reconnection
until the correct security code is entered.
Details of this procedure are given in the
“Ford Audio Systems Operating Guide”
supplied with the vehicle when new, with the
code itself being given in a “Radio Passport”
and/or a “Keycode Label” at the same time.
2 For obvious security reasons, the re-coding
procedure is not given in this manual - if you
do not have the code or details of the correct
procedure, but can supply proof of ownership
and a legitimate reason for wanting this
information, the vehicle’s selling dealer may
be able to help.
3 Note that these units will allow only ten
attempts at entering the code - any further
attempts will render the unit permanently
inoperative until it has been reprogrammed by
Ford themselves. At first, three consecutive
attempts are allowed; if all three are incorrect,
a 30-minute delay is required before another
attempt can be made. Each of any
subsequent attempts (up to the maximum of
ten) can be made only after a similar delay.
Removal
4 Disconnect the battery negative (earth)
lead.
5 Where fitted, prise the cover/surround from
the front of the radio/cassette player. Note
that the cover is not fitted to all models.
6 In order to release the radio retaining clips,
two U-shaped rods must be inserted into the
special holes on each side of the radio (see
illustration). If possible, it is preferable to
obtain purpose-made rods from an audio
specialist, as these have cut-outs which snap
firmly into the clips so that the radio can be
pulled out. Pull the unit squarely from its
aperture, or it may jam. If the unit proves
difficult to withdraw, remove the cassette tray
(or where applicable, the CD player) from
beneath the unit, then reach through the
aperture and ease it out from behind.
7 With the radio partly withdrawn, disconnect
the feed, earth, aerial and speaker leads.
Where applicable, also detach and remove
the plastic support bracket from the rear of
the unit.
Refitting
6 Refitting is a reversal of removal. With the
leads reconnected to the rear of the unit,
press it into position until the retaining clips
are felt to engage. Reactivate the unit by
entering the correct code in accordance with
the maker’s manuals.
Removal
1 Disconnect the battery negative (earth)
lead. See Chapter 5, Section 1.
2 Unscrew the screws and remove the lower
facia panel.
3 The radio/cassette player power amplifier is
located beneath the facia.
4 Unscrew the cross-head screws, dis-
connect the wiring and remove the amplifier.
Refitting
5 Refitting is a reversal of the removal
procedure.
24 Radio/cassette player
power amplifier -
removal and refitting
23 Radio/cassette player -
coding, removal and refitting
Body electrical system 12•21
12
22.12B . . . and prise out the rubber
grommet
23.6 Using the special U-shaped rods to
remove the radio
22.6 Pulling the windscreen washer pump
from the reservoir
22.11 Pull the washer tube from the
bottom of the nozzle
22.12A Remove the nozzle from the
tailgate glass . . .