Ford Orion. Manual - part 47
4
Front brake disc - inspection,
removal and refitting
2
Note: To prevent uneven braking, BOTH front
brake discs should be renewed or reground at
the same time.
Inspection
1 Apply the handbrake, loosen off the front
roadwheel nuts on the side concerned, then
jack up the front of the vehicle and support it
on axle stands. Remove the appropriate front
roadwheel.
2 Temporarily refit two of the wheel nuts to
diagonally-opposite studs, with the flat sides
of the nuts against the disc. Tighten the nuts
progressively, to hold the disc firmly.
3 Scrape any corrosion from the disc. Rotate
the disc, and examine it for deep scoring,
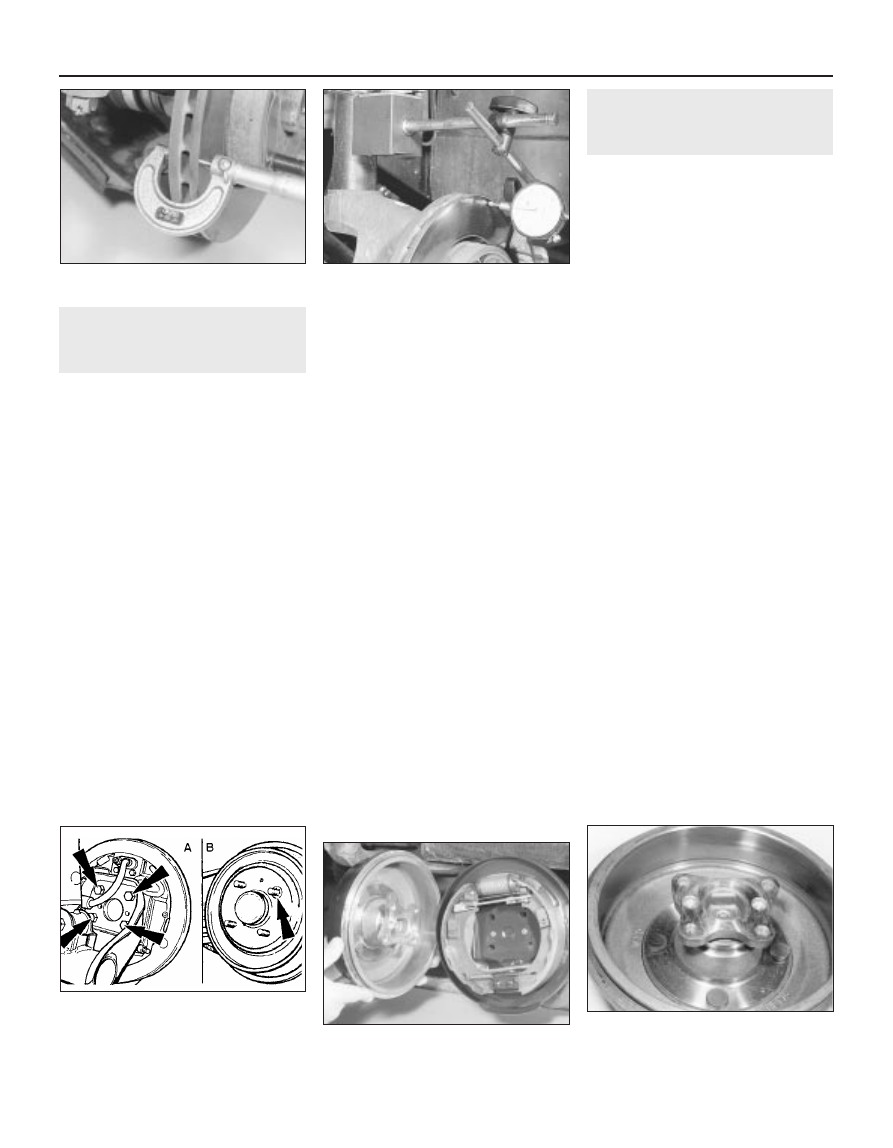
grooving or cracks. Using a micrometer,
measure the thickness of the disc in several
places (see illustration). Light wear and
scoring is normal, but if excessive, the disc
should be removed, and either reground by a
specialist, or renewed. If regrinding is
undertaken, at least the minimum thickness
must be maintained. Obviously, if the disc is
cracked, it must be renewed.
4 Using a dial gauge or a flat metal block and
feeler gauges, check that the disc run-out 10
mm from the outer edge does not exceed the
limit given in the Specifications. To do this, fix
the measuring equipment, and rotate the disc,
noting the variation in measurement as the disc
is rotated (see illustration). The difference
between the minimum and maximum
measurements recorded is the disc run-out.
5 If the run-out is greater than the specified
amount, check for variations of the disc
thickness as follows. Mark the disc at eight
positions 45
∞
apart, then using a micrometer,
measure the disc thickness at the eight
positions, 15 mm in from the outer edge. If the
variation between the minimum and maximum
readings is greater than the specified amount,
the disc should be renewed.
Removal
6 Remove the caliper and its anchor bracket
with reference to Section 3, but do not
disconnect the hydraulic brake hose.
Suspend the caliper assembly from the front
suspension coil spring, taking care to avoid
straining the brake hose.
7 Remove the wheel nuts which were
temporarily refitted in paragraph 2.
8 Using a Torx-type socket bit or driver,
unscrew the screw securing the disc to the
hub, and withdraw the disc. If it is tight, lightly
tap its rear face with a hide or plastic mallet.
Refitting
9 Refit the disc in a reversal of the removal
sequence. If new discs are being fitted, first
remove their protective coating. Ensure
complete cleanliness of the hub and disc
mating faces and tighten the screw securely.
10 Refit the caliper/anchor bracket with
reference to Section 3.
11 Refit the roadwheel, lower the vehicle to
the ground, and tighten the wheel nuts to the
specified torque wrench setting.
5
Rear brake drum - removal,
inspection and refitting
2
Note: To prevent uneven braking, BOTH rear
brake drums should be renewed at the same
time.
Removal
1 Chock the front wheels, loosen off the rear
roadwheel nuts on the side concerned, then
jack up the rear of the vehicle and support it
on axle stands. Remove the appropriate rear
roadwheel, and release the handbrake.
2 On all except Van models, undo the four
bolts securing the drum/hub to the rear axle
flange, then withdraw the drum/hub from the
axle (see illustrations). If the brake drum is
stuck on the shoes, remove the rubber access
plug from the inside face of the brake
backplate, and release the automatic brake
adjuster by levering the release catch on the
adjuster pawl through the backplate.
3 On Van models, prise free the drum
retaining clip from the wheel nut stud, then
withdraw the drum over the studs and remove
it. Note that the retaining clip must be
renewed during reassembly.
4 With the brake drum removed, brush or
wipe the dust from the drum, brake shoes,
wheel cylinder and backplate. Take great care
not to inhale the dust, as it may contain
asbestos.
5 If required, remove the hub from the drum
(where applicable) as described in Chap-
ter 10.
Inspection
6 Clean the inside surfaces of the brake drum
and hub, then examine the internal surface of
the brake drum for signs of scoring or cracks
(see illustration). If any deterioration of the
friction surface is evident, renewal of the drum
is necessary. To detach the hub from the
drum (where applicable), refer to Chapter 10.
Refitting
7 Check that the automatic brake adjuster is
fully retracted, then according to type, refit the
drum/hub to the axle. Tighten the retaining
9•6 Braking system
5.6 Examine the inside surfaces of the
brake drum for signs of excessive wear
and/or cracks
5.2B Removing the rear brake
drum/hub
5.2A Rear brake drum/hub securing
methods
A
Brake drum/hub retaining bolts
B Brake drum retaining clip on Van models
4.4 Checking the brake disc run-out using
a dial gauge
4.3 Checking the brake disc thickness
using a micrometer