Ford Orion. Manual - part 15
belt, crankshaft sprocket and thrustwasher
(Sections 10 and 11), and the sump (Sec-
tion 15).
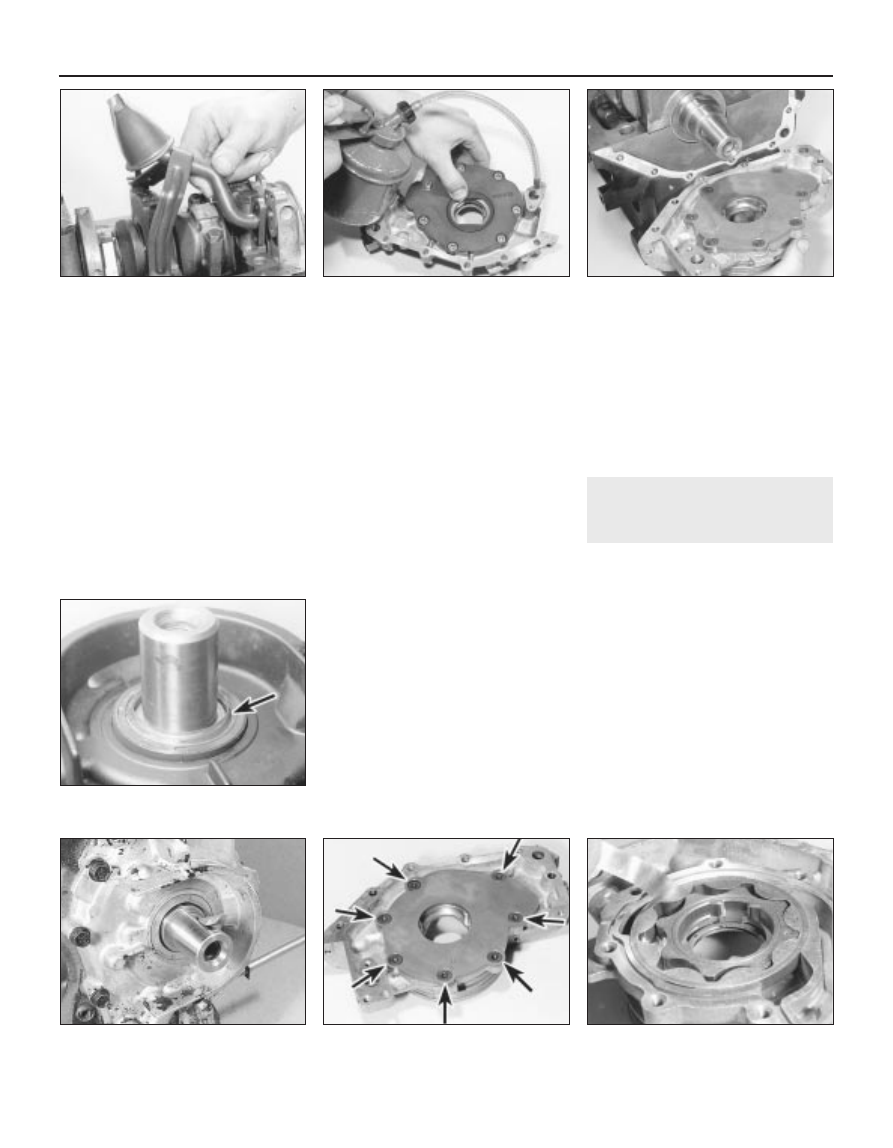
4 Unscrew the retaining nut/bolts and remove
the oil pick-up pipe (see illustration).
5 Unbolt and withdraw the oil pump from the
front face of the engine. Clean the oil pump
for inspection. Refer to Section 17 for the
inspection procedures. The oil seal in the oil
pump housing should always be renewed
(Section 18).
Refitting
6 Before refitting the oil pump and the
associated fittings, clean off the respective
mating faces. A new oil pump gasket must be
obtained, as well as the seals and gaskets for
the other associated components to be
refitted.
7 When refitting the oil pump, precautionary
measures must be taken to avoid the
possibility of damaging the new oil seal as it is
engaged over the shoulder and onto its
journal on the crankshaft. Extract the
Woodruff key from the groove in the
crankshaft, then cut a plastic guide which will
furl over and protrude beyond the shoulder of
the seal journal on the crankshaft. This will
allow the seal to ride over the step, and avoid
damaging the seal lip as it is pushed into
position on the crankshaft.
8 If a new oil pump is being fitted or the old
pump is to be re-used after cleaning and
inspection, first prime the pump by squirting
clean engine oil into it, and simultaneously
rotating the drivegear a few times (see
illustration).
9 Align the pump gear flats with those on the
crankshaft, then fit the oil pump. Check that
the sump mating faces of the oil pump and
the base of the crankcase are flush each side,
then tighten the retaining bolts to the
specified torque setting. Remove the
protective guide (see illustrations).
10 Refit the oil pick-up tube to the oil pump,
using a new gasket. Refer to the Specifi-
cations for the tightening torque details.
11 Slide the thrustwasher onto the front end
of the crankshaft, then insert the Woodruff key
into position in the groove in the crankshaft
(see illustration). The key must be located
with its flat edge parallel with the line of the
crankshaft, to ensure that the crankshaft
sprocket slides fully into position as it is being
refitted.
12 Refit the sump, crankshaft sprocket, the
timing belt, timing belt cover and drivebelt
pulley (as described in the appropriate earlier
Sections of this Chapter). Refit and adjust the
drivebelt as described in Chapter 1.
13 On completion, lower the vehicle and
reconnect the battery.
17 Oil pump - dismantling,
inspection and reassembly
3
1 The oil pump fitted is a low-friction rotor-
type, driven from the front end of the
crankshaft. Where a high-mileage engine is
being reconditioned, it is recommended that a
new oil pump is fitted.
2 To inspect the rotor assembly, first remove
the pump from the engine (Section 16), then
undo the retaining screws and remove the
cover plate (see illustration). Remove the O-
ring seal.
3 Clean the rotors and the inside of the pump
housing, then visually inspect the various
components for signs of excessive wear and
scoring. Check the pump components for
wear using feeler gauges in the same manner
as that described in Part A of this Chapter,
Section 16. Refer to the accompanying
illustrations, and to the Specifications Section
at the start of Part B (see illustrations).
2B•14 CVH engine – in-car engine repair procedures
17.3A Outer rotor-to-oil pump body
clearance check
17.2 Oil pump cover plate retaining
screws (arrowed)
16.11 Locating the Woodruff key into the
groove in the crankshaft
16.9B With the oil pump refitted, remove
the protective guide (arrowed)
16.9A Refit the oil pump
16.8 Prime the oil pump prior to fitting
16.4 Removing the oil inlet pipe