Ford Orion. Manual - part 7
27 Spark plug renewal
1
Note: Spark plug renewal at this service
interval is only necessary on the HCS and CVH
engines. On the Zetec engine, the
recommended interval for spark plug renewal
is every 30 000 miles or three years.
Spark plug check and renewal
1 It is vital for the correct running, full
performance and proper economy of the
engine that the spark plugs perform with
maximum efficiency. The most important
factor in ensuring this is that the plugs fitted
are appropriate for the engine. The suitable
type is given in the Specifications Section at
the beginning of this Chapter, on the Vehicle
Emissions Control Information (VECI) label
located on the underside of the bonnet (only
on models sold in some areas) or in the
vehicle’s Owner’s Handbook. If the correct
type is used and the engine is in good
condition, the spark plugs should not need
attention between scheduled renewal
intervals. Spark plug cleaning is rarely
necessary, and should not be attempted
unless specialised equipment is available, as
damage can easily be caused to the firing
ends.
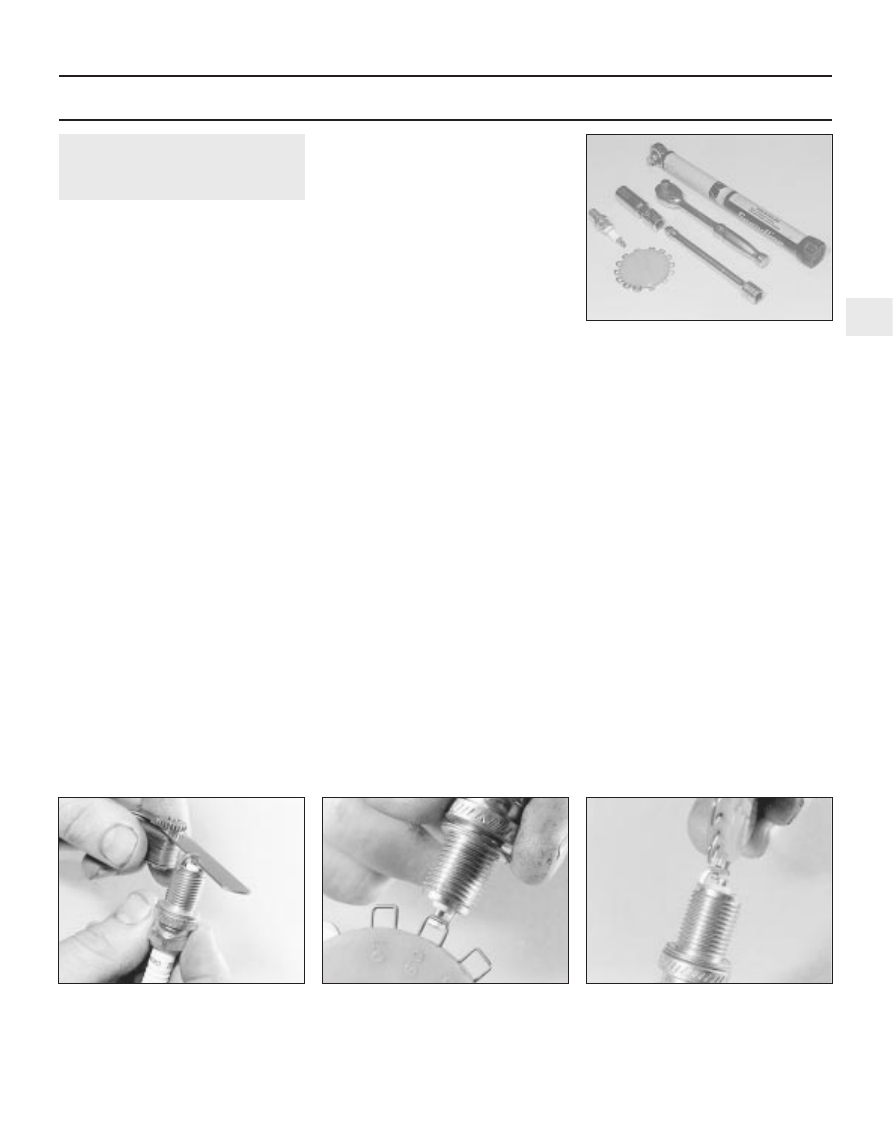
2 Spark plug removal and refitting requires a
spark plug socket, with an extension which
can be turned by a ratchet handle or similar.
This socket is lined with a rubber sleeve, to
protect the porcelain insulator of the spark
plug, and to hold the plug while you insert it
into the spark plug hole. You will also need a
set of feeler gauges, to check the spark plug
electrode gap, and a torque wrench to tighten
the new plugs to the specified torque (see
illustration).
3 To remove the spark plugs, first open the
bonnet; the plugs are easily reached at the
top of the engine. Note how the spark plug
(HT) leads are routed and secured by clips,
and on some engines, how they’re positioned
along the channel in the cylinder head cover.
To prevent the possibility of mixing up spark
plug (HT) leads, it is a good idea to try to work
on one spark plug at a time.
4 If the marks on the original-equipment
spark plug (HT) leads cannot be seen, mark
the leads 1 to 4, to correspond to the cylinder
the lead serves (No 1 cylinder is at the timing
belt/chain end of the engine). Pull the leads
from the plugs by gripping the rubber boot
sealing the cylinder head cover opening, not
the lead, otherwise the lead connection may
be fractured.
5 It is advisable to soak up any water in the
spark plug recesses with a rag, and to remove
any dirt from them using a clean brush,
vacuum cleaner or compressed air before
removing the plugs, to prevent any dirt or
water from dropping into the cylinders.
Warning: Wear eye protection when using
compressed air!
6 Unscrew the spark plugs, ensuring that the
socket is kept in alignment with each plug - if
the socket is forcibly moved to either side, the
porcelain top of the plug may be broken off. If
any undue difficulty is encountered when
unscrewing any of the spark plugs, carefully
check the cylinder head threads and tapered
sealing surfaces for signs of wear, excessive
corrosion or damage; if any of these
conditions is found, seek the advice of a Ford
dealer as to the best method of repair.
7 As each plug is removed, examine it as
follows - this will give a good indication of the
condition of the engine. If the insulator nose is
covered with light tan to greyish-brown
deposits, then the mixture is correct, and it is
likely that the engine is in good condition.
8 If the tip and insulator nose are covered
with hard black-looking deposits, then this is
indicative that the mixture is too rich. Should
the plug be black and oily, then it is likely that
the engine is fairly worn, as well as the mixture
being too rich.
9 If the insulator nose of the spark plug is
clean and white, with no deposits, this is
indicative of a weak mixture.
10 If you are renewing the spark plugs,
purchase the new plugs, then check each of
them first for faults such as cracked insulators
or damaged threads. Note also that,
whenever the spark plugs are renewed as a
routine service operation, the spark plug (HT)
leads should be checked as described below.
11 The spark plug electrode gap is of
considerable importance as, if it is too large or
too small, the size of the spark and its
efficiency will be seriously impaired. The gap
should be set to the value given in the Specifi-
cations Section of this Chapter. New plugs
will not necessarily be set to the correct gap,
so they should always be checked before
fitting.
12 The spark plug gap is correct when the
correct-size feeler gauge or wire gauge is a
firm sliding fit between the electrodes (see
illustrations).
13 To adjust the electrode gap, bend open,
or close up, the outer plug electrode until the
correct gap is achieved (see illustration). The
centre electrode should never be bent, as this
Every 20 000 miles
1•25
27.13 To change the gap, bend the outer
electrode only, and be very careful not to
crack or chip the porcelain insulator
surrounding the centre electrode
27.12B Spark plug manufacturers
recommend using a wire-type gauge when
checking the gap - if the wire or feeler gauge
does not slide between the electrodes with a
slight drag, adjustment is required
27.12A Measuring a spark plug gap with a
feeler gauge
27.2 Tools required for changing spark
plugs
1
Every 20 000 miles