Kawasaki Diesel MULE 4010 TRANS 4x4 (KAF950G9). Manual - part 78
 

  Index      Engines     Kawasaki Diesel MULE 4010 TRANS 4x4 (KAF950G9) - service manual


Search            


Content   ..  76  77  78  79   ..


Kawasaki Diesel MULE 4010 TRANS 4x4 (KAF950G9). Manual - part 78


12-34 FINAL DRIVE

Drive Shaft and Axles

Front Axle Removal

Remove:

Steering Knuckle (see Steering Knuckle Removal in the
Steering chapter)
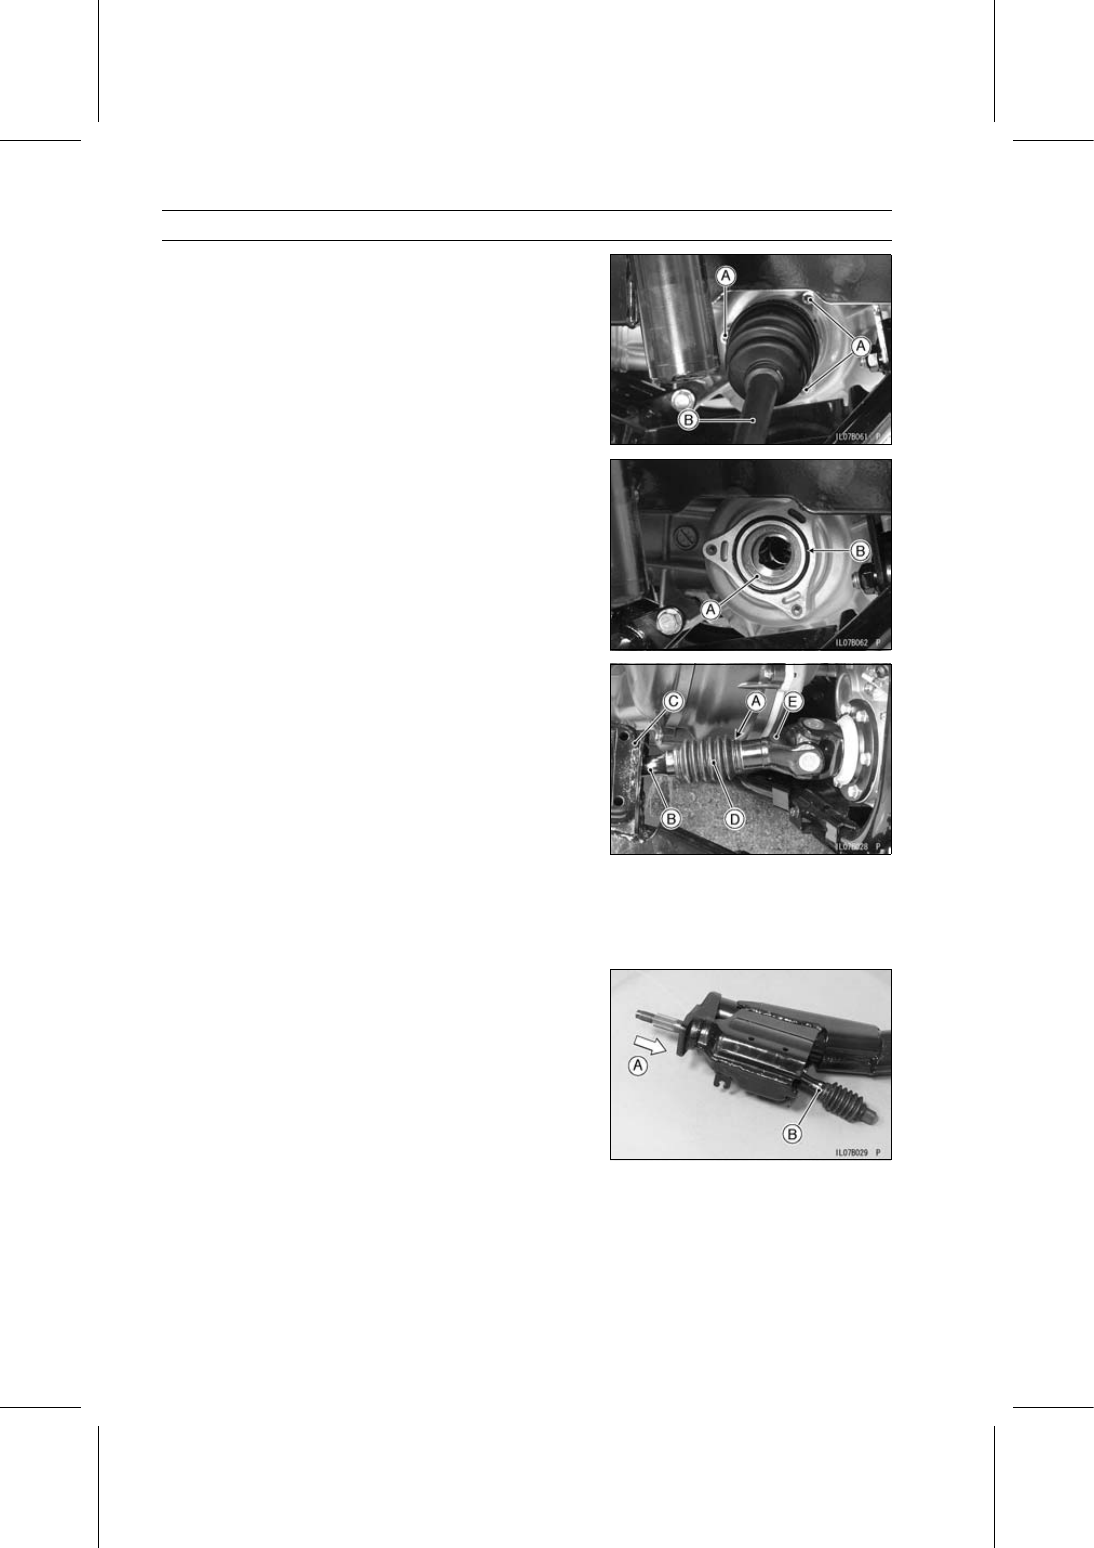
Front Axle Cap Bolts [A]
Front Axle [B]

Front Axle Installation

Wipe the old grease off the splines of the axle and cap oil
seal, and grease them.

Inspect the axle (see Drive Shaft and Axle Inspection).

Be sure to install the spacer [A] and O-ring [B] in the re-
cess of the front final gear case.

Tighten:

Torque - Front Axle Cap Bolts: 8.8 N·m (0.90 kgf·m, 78 in·lb)

Rear Drive Shaft and Axle Removal

Remove:

Rear Wheels (see Wheel Removal in the Wheels/Tires
chapter)
Rear Brake Drums (see Brake Drum Removal in the
Brakes chapter)
Rear Brake Panel Assemblies (with Brake Pipes and
Hoses)
Leaf Springs (see Leaf Spring Removal in the Suspen-
sion chapter)
Rubber Bands [A]
Axles [B] and Axle Bracket [C]

Slide the dust boots [D] from the drive shafts [E], and pull
the one of the axles from the drive shaft, and then the
other axle from the shaft.

Tap [A] the outside of the rear axle [B], and pull it out from
the inside.

FINAL DRIVE 12-35

Drive Shaft and Axles

Remove:

Drive Shaft Cap Bolts [A]
Drive Shaft [B] and Cap [C]

Set the differential shift lever into the UN-LOCK position.

Rear Drive Shaft and Axle Installation

Wipe the old grease off the splines [A] of the drive shafts,
axles, and cap oil seals, and grease them.

Inspect the drive shafts and axles (see Drive Shaft and
Axle Inspection).

Align the yoke angles of the drive shaft and axle.

Replace the drive shaft cap gasket with a new one.

If the dust boot was removed, install it on the axle so that
the small hole [A] in the boot is toward the axle side.

Adjust the transmission oil (see Transmission Oil Change
in the Periodic Maintenance chapter).

Drive Shaft and Axle Inspection

Visually inspect the splines of the drive shaft and axle.
If they are twisted, badly worn, or chipped, replace the
drive shaft and/or axle with a new one.

Check that the universal joint and/or ball joint works
smoothly without rattling or sticking.
If it does not, the bearings of the joint are damaged. Re-
place the drive shaft and/or axle with a new one.

12-36 FINAL DRIVE

Drive Shaft and Axles

Dust Boot Inspection

Visually inspect the boots [A] in accordance with the Peri-
odic Maintenance Chart or if the drive shafts or axles are
noisy during operation.
If the dust boot is torn, worn, deteriorated, or leaks
grease, replace it.

Front Axle Joint Boot Replacement

Outboard Joint Boot Removal

Remove:

Front Axle (see Front Axle Removal)

Tap the joint portion of the bands [A] with a suitable tool.

Scrap the removed boot bands.

Slide the joint boot [B] toward the inboard joint.

Tap the bearing housing [A] straight [B] with a plastic ham-
mer to separate it from the shaft.

NOTICE

Do not tap on the cage. Be careful not get hurt when
the housing comes out. If the splined portion of
shaft cracked or damaged during disassembling of
outboard joint, do not reuse the shaft.

Remove:

Circlip [A]
Boot [B]

FINAL DRIVE 12-37

Drive Shaft and Axles

Outboard Joint Boot Installation

Clean the axle shaft by wiping off the used grease on it.

Wind the tape on the splines of the axle shaft in order to
protect the joint boot.

Install:

New Small Band [A]
New Boot [B]

Apply the special grease slightly on the inside of the new
boot small diameter, and install the boot on the axle shaft.

NOTICE

Only the special grease that is included with the
boot kit can be applied to the boots.

Install:

New Circlip [C]

Place the special grease tube nozzle in the bore of the
housing and squeeze the tube [A] until the grease comes
out from the joint bearing.

Tap the shaft end [A] straight with a plastic hammer until
it is locked by the circlip.

Squeeze all of the special grease into the bearing housing
[A] and new boot [B].


Content   ..  76  77  78  79   ..