Kawasaki Diesel MULE 4010 TRANS 4x4 (KAF950G9). Manual - part 3
 

  Index      Engines     Kawasaki Diesel MULE 4010 TRANS 4x4 (KAF950G9) - service manual


Search            


Content   ..  1  2  3  4   ..


Kawasaki Diesel MULE 4010 TRANS 4x4 (KAF950G9). Manual - part 3


1-2 GENERAL INFORMATION

Before Servicing

Before starting to perform an inspection service or carry out a disassembly and reassembly oper-

ation on a vehicle, read the precautions given below. To facilitate actual operations, notes, illustra-
tions, photographs, cautions, and detailed descriptions have been included in each chapter wherever
necessary. This section explains the items that require particular attention during the removal and
reinstallation or disassembly and reassembly of general parts.

Especially note the following.

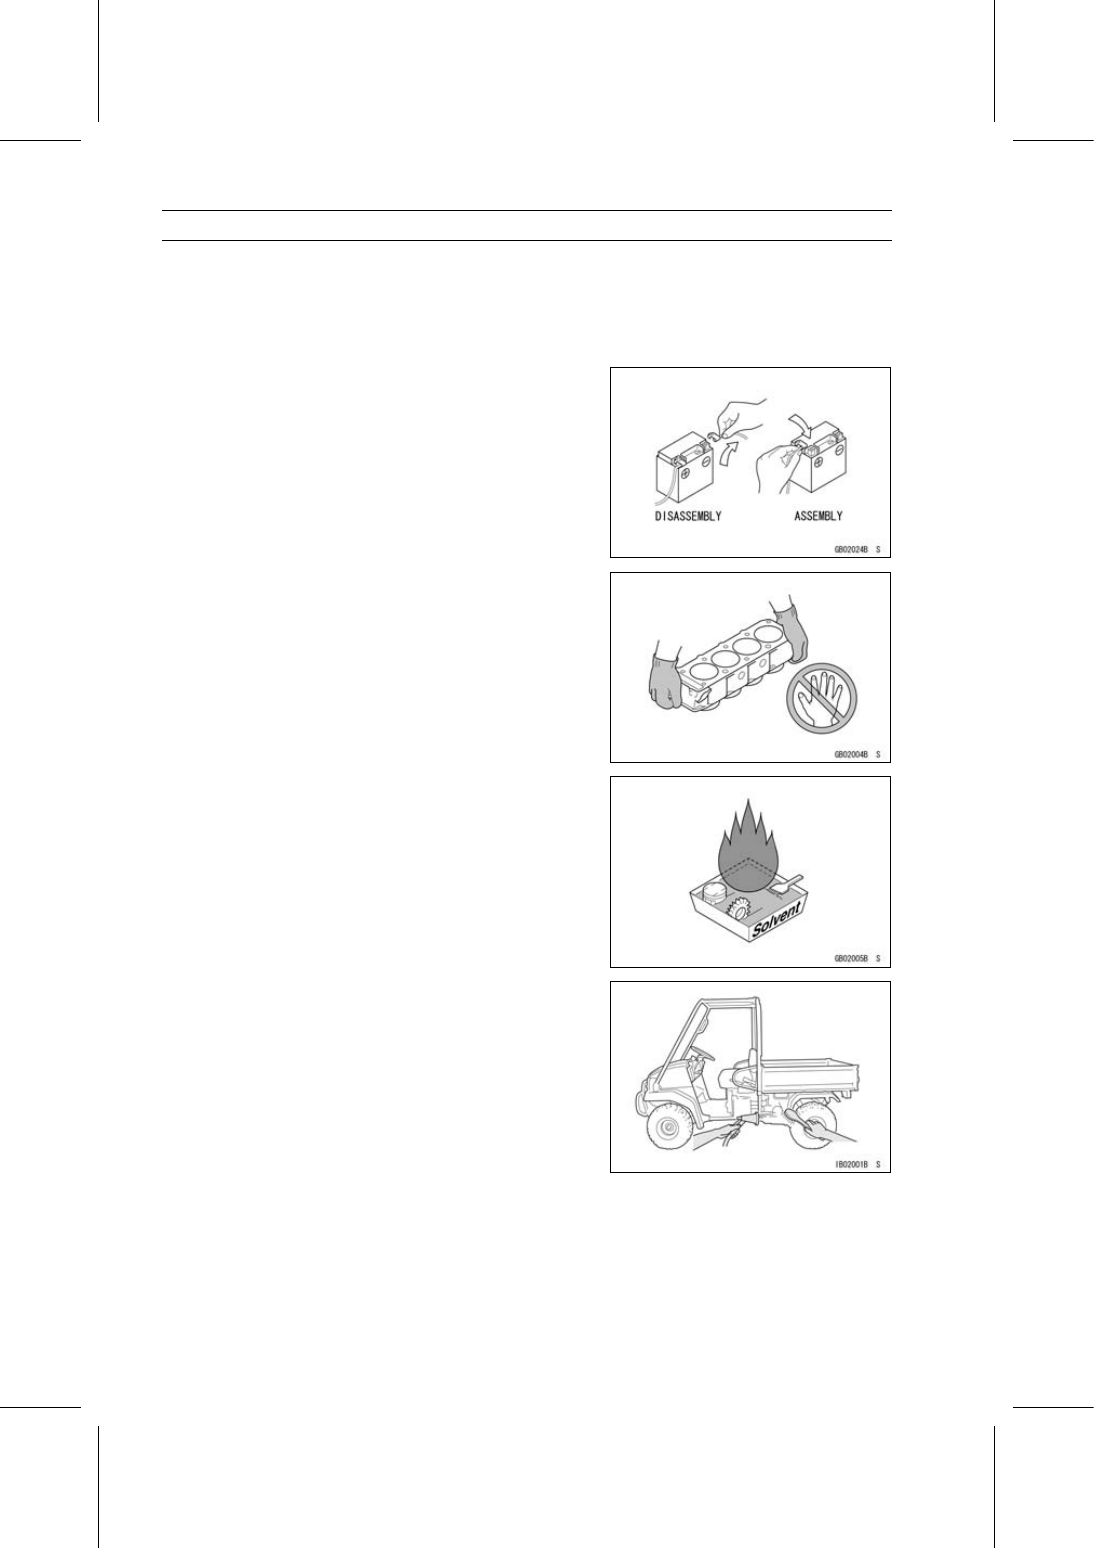
Battery Ground

Before completing any service on the vehicle, disconnect

the battery cables from the battery to prevent the engine
from accidentally turning over. Disconnect the ground cable
(–) first and then the positive (+). When completed with the
service, first connect the positive (+) cable to the positive
(+) terminal of the battery then the negative (–) cable to the
negative terminal.

Edges of Parts

Lift large or heavy parts wearing gloves to prevent injury

from possible sharp edges on the parts.

Solvent

Use a high flash-point solvent when cleaning parts. High

flash-point solvent should be used according to directions
of the solvent manufacturer.

Cleaning Vehicle before Disassembly

Clean the vehicle thoroughly before disassembly. Dirt or

other foreign materials entering into sealed areas during ve-
hicle disassembly can cause excessive wear and decrease
performance of the vehicle.

GENERAL INFORMATION 1-3

Before Servicing

Arrangement and Cleaning of Removed Parts

Disassembled parts are easy to confuse. Arrange the

parts according to the order the parts were disassembled
and clean the parts in order prior to assembly.

Storage of Removed Parts

After all the parts including subassembly parts have been

cleaned, store the parts in a clean area. Put a clean cloth
or plastic sheet over the parts to protect from any foreign
materials that may collect before re-assembly.

Inspection

Reuse of worn or damaged parts may lead to serious ac-

cident. Visually inspect removed parts for corrosion, discol-
oration, or other damage. Refer to the appropriate sections
of this manual for service limits on individual parts. Replace
the parts if any damage has been found or if the part is be-
yond its service limit.

Replacement Parts

Replacement Parts must be KAWASAKI genuine or

recommended by KAWASAKI. Gaskets, O-rings, oil seals,
grease seals, circlips, cotter pins or self-locking nuts must
be replaced with new ones whenever disassembled.

Assembly Order

In most cases assembly order is the reverse of disassem-

bly, however, if assembly order is provided in this Service
Manual, follow the procedures given.

1-4 GENERAL INFORMATION

Before Servicing

Tightening Sequence

Generally, when installing a part with several bolts, nuts,

or screws, start them all in their holes and tighten them to
a snug fit. Then tighten them according to the specified se-
quence to prevent case warpage or deformation which can
lead to malfunction. Conversely when loosening the bolts,
nuts, or screws, first loosen all of them by about a quar-
ter turn and then remove them. If the specified tightening
sequence is not indicated, tighten the fasteners alternating
diagonally.

Tightening Torque

Incorrect torque applied to a bolt, nut, or screw may

lead to serious damage. Tighten fasteners to the specified
torque using a good quality torque wrench.

Force

Use common sense during disassembly and assembly,

excessive force can cause expensive or hard to repair dam-
age. When necessary, remove screws that have a non
-permanent locking agent applied using an impact driver.
Use a plastic-faced mallet whenever tapping is necessary.

Gasket, O-ring

Hardening, shrinkage, or damage of both gaskets and

O-rings after disassembly can reduce sealing performance.
Remove old gaskets and clean the sealing surfaces thor-
oughly so that no gasket material or other material remains.
Install the new gaskets and replace the used O-rings when
re-assembling.

Liquid Gasket, Non-permanent Locking Agent

For applications that require Liquid Gasket or a

Non-permanent Locking Agent, clean the surfaces so
that no oil residue remains before applying liquid gasket or
non-permanent locking agent. Do not apply them exces-
sively. Excessive application can clog oil passages and
cause serious damage.

GENERAL INFORMATION 1-5

Before Servicing

Press

For items such as bearings or oil seals that must be

pressed into place, apply small amount of oil to the con-
tact area. Be sure to maintain proper alignment and use
smooth movements when installing.

Ball Bearing and Needle Bearing

Do not remove pressed ball or needle unless removal is

absolutely necessary. Replace with new ones whenever
removed. Press bearings with the manufacturer and size
marks facing out. Press the bearing into place by putting
pressure on the correct bearing race as shown.

Pressing the incorrect race can cause pressure between

the inner and outer race and result in bearing damage.

Oil Seal, Grease Seal

Do not remove pressed oil or grease seals unless removal

is necessary. Replace with new ones whenever removed.
Press new oil seals with manufacture and size marks facing
out. Make sure the seal is aligned properly when installing.

Apply specified grease to the lip of seal before installing

the seal.

Circlips, Cotter Pins

Replace the circlips or cotter pins that were removed with

new ones. Take care not to open the clip excessively when
installing to prevent deformation.


Content   ..  1  2  3  4   ..