Kia Rio / Rio Hatchback (2022 year). Manual in english - page 8
Features of your vehicle
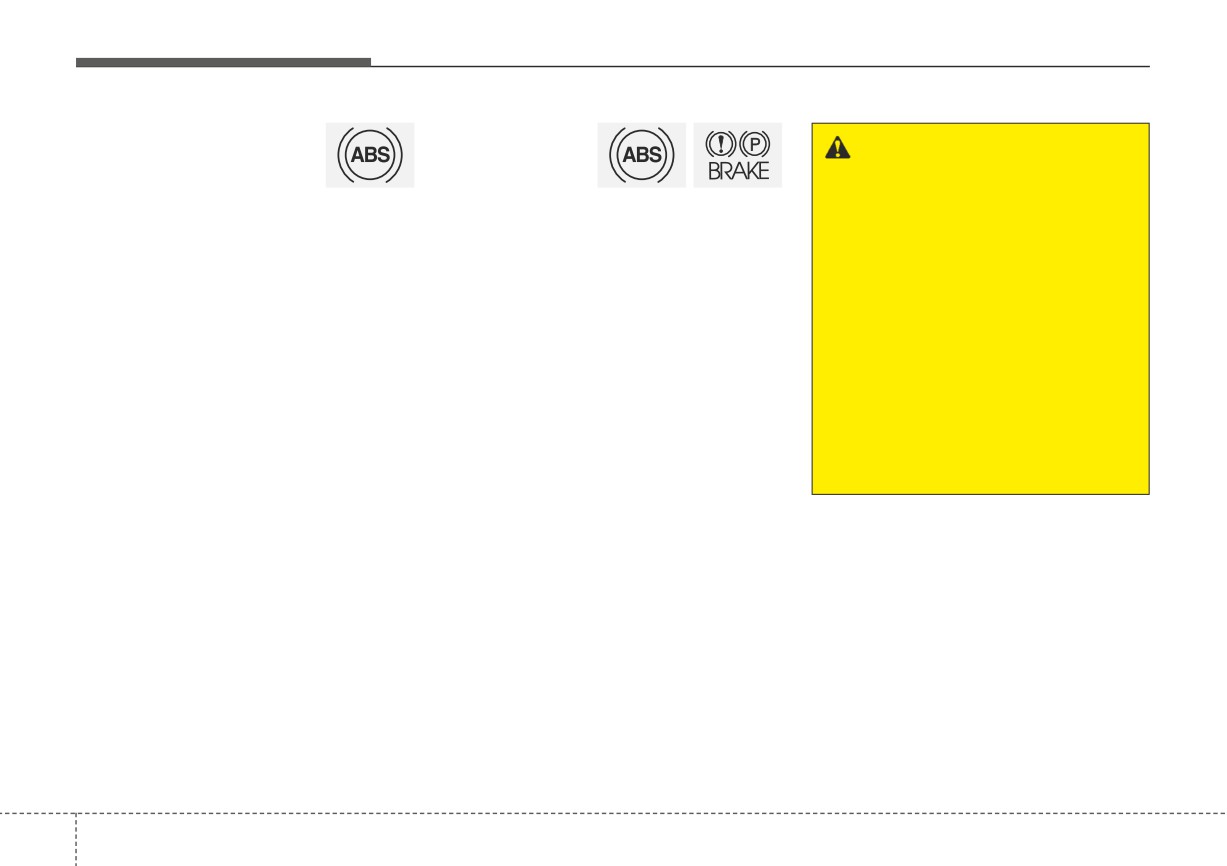
Anti-lock Brake System
Electronic
(ABS) Warning Light
Brake force
WARNING - ABS/Brake
Distribution
Light
(EBD) System
When both ABS and Parking
This warning light illuminates:
Warning Light
Brake & Brake Fluid Warning
• Once you set the ignition switch or
These two warning lights illuminate at
Lights are on, the brake system
ENGINE START/STOP button to
the same time while driving:
will not work normally and you
the ON position.
may experience an unexpected
• When the ABS and regular brake
- It illuminates for approximately 3
and dangerous situation during
system may not work normally.
seconds and then goes off.
sudden braking thereby increas-
In this case, have your vehicle
• When there is a malfunction with
ing the risk of a crash or injury.
inspected by an authorized Kia
the ABS (The normal braking sys-
In this case, avoid high speed
dealer.
tem will still be operational without
driving and abrupt braking.
the assistance of the anti-lock
Have your vehicle inspected by
brake system).
an authorized Kia dealer as
In this case, have your vehicle
soon as possible.
inspected by an authorized Kia
dealer.
4
80
Features of your vehicle
✽ NOTICE - Electronic Brake
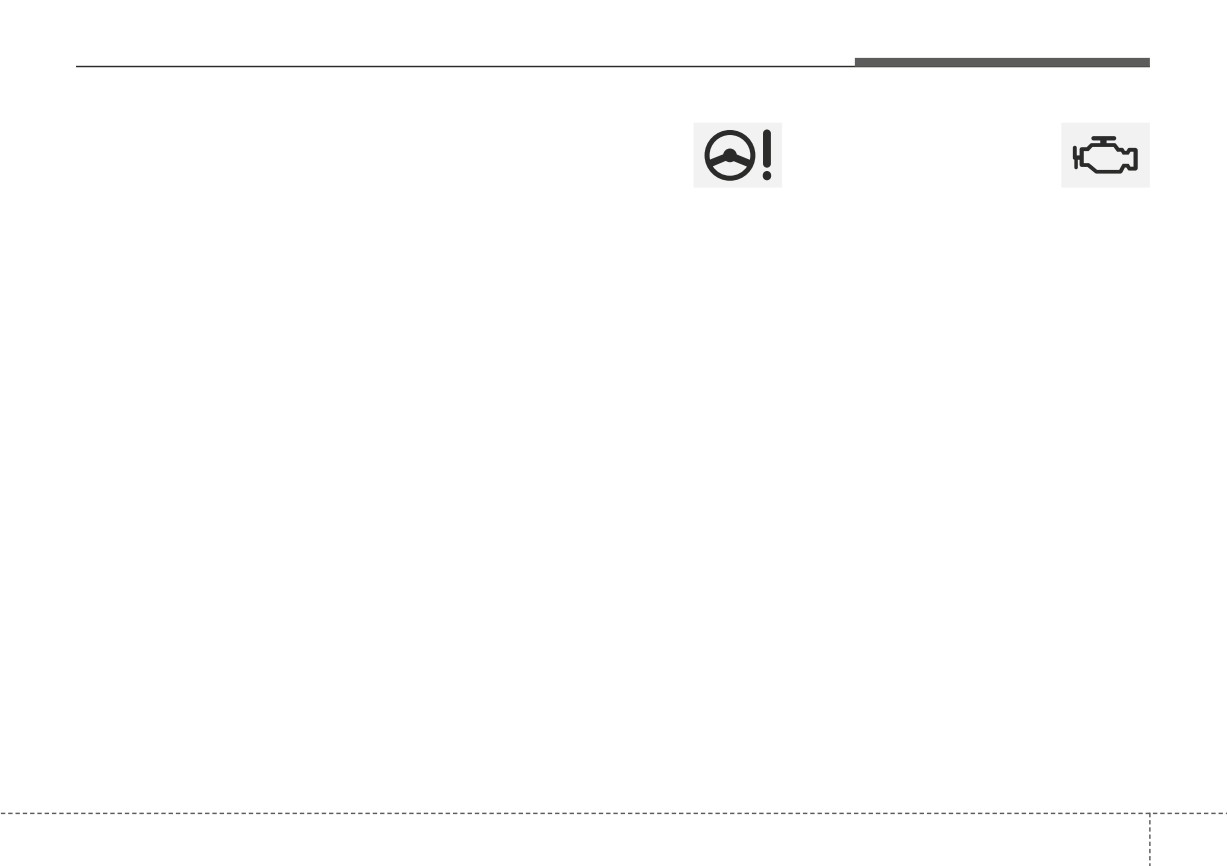
Electric Power Steering
Malfunction Indicator
force Distribution (EBD)
(EPS) Warning Light
Lamp (MIL)
System Warning Light
(if equipped)
When the ABS Warning Light is on
This warning light illuminates:
This warning light illuminates:
or both ABS and Parking Brake &
• Once you set the ignition switch or
• Once you set the ignition switch or
Brake Fluid Warning Lights are on,
ENGINE START/STOP button to
ENGINE START/STOP button to
the speedometer, odometer, or trip-
the ON position.
the ON position.
meter may not work. Also, the EPS
- It remains on until the engine is
- It remains on until the engine is
Warning Light may illuminate and
started.
started.
the steering effort may increase or
• When there is a malfunction with
• When there is a malfunction with
decrease.
the EPS.
the emission control system.
In this case, have your vehicle inspect-
ed by an authorized Kia dealer as
In this case, have your vehicle
In this case, have your vehicle
soon as possible.
inspected by an authorized Kia
inspected by an authorized Kia
dealer.
dealer.
4
81
Features of your vehicle
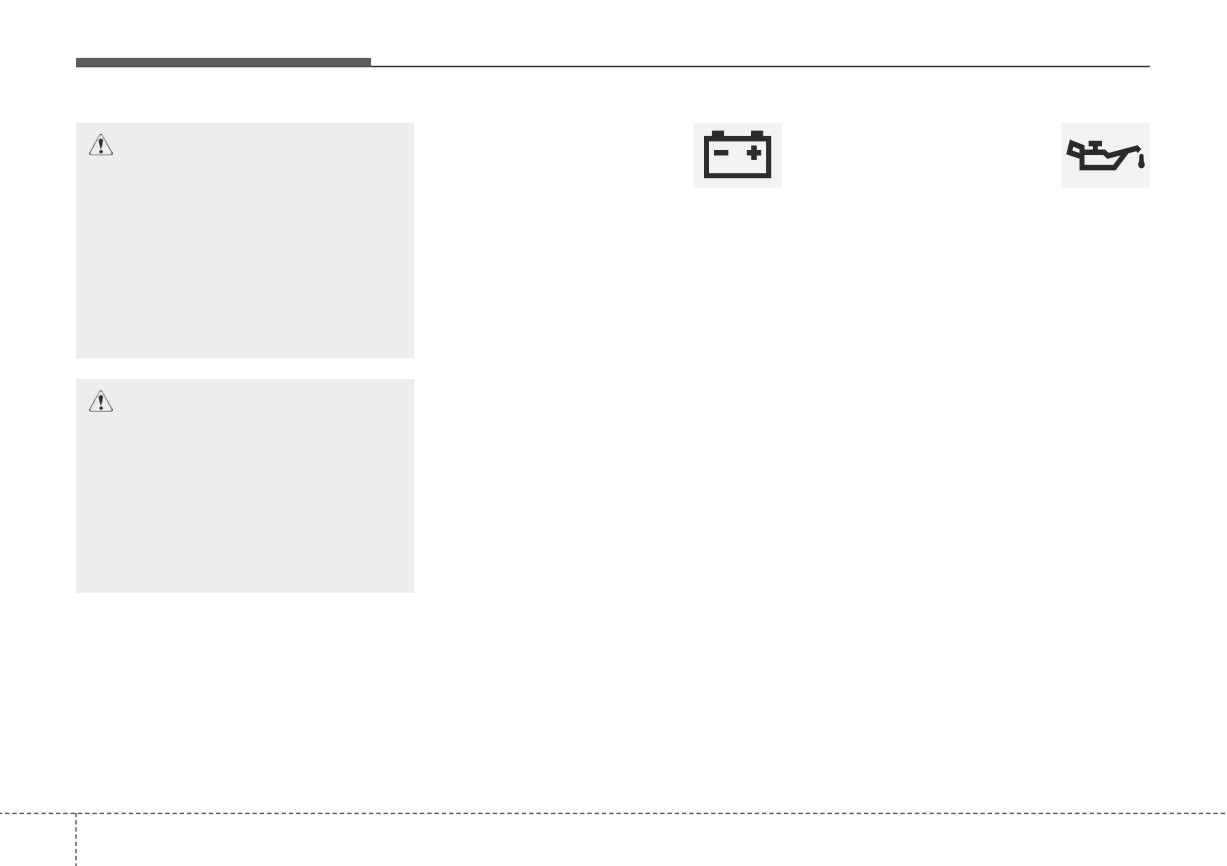
Charging System
Engine Oil Pressure
CAUTION
Warning Light
Warning Light
If the Malfunction Indicator
Lamp (MIL) illuminates, poten-
This warning light illuminates:
This warning light illuminates:
tial catalytic converter damage
is possible, which could result
• When there is a malfunction with
•
When the engine oil pressure is low.
either the alternator or electrical
in loss of engine power.
•
Drive carefully to the nearest safe
charging system.
In this case, have your vehicle
location and stop your vehicle.
inspected by an authorized Kia
•
Turn the engine off and check the
dealer as soon as possible.
If there is a malfunction with either
engine oil level (For more details,
the alternator or electrical charging
refer to “Engine Oil” in chapter 7). If
system:
the level is low, add oil as required.
CAUTION - Malfunction
1. Drive carefully to the nearest safe
•
If the warning light remains on after
Indicator Lamp (MIL)
location and stop your vehicle.
adding oil or if oil is not available,
Driving with the Malfunction
2. Turn the engine off and check the
have your vehicle inspected by an
Indicator Lamp
(MIL) on may
alternator drive belt for looseness
authorized Kia dealer as soon as
cause damage to the emission
or breakage.
possible. Continued driving with
control systems, which could
the warning light on may cause
If the belt is adjusted properly,
affect drivability and/or fuel
engine failure.
there may be a problem in the
economy.
electrical charging system.
In this case, have your vehicle
inspected by an authorized Kia
dealer as soon as possible.
4
82
Features of your vehicle
✽ NOTICE
Low Fuel Level Warning
CAUTION - Engine
Light
When engine oil pressure decreases
Overheating
due to insufficient engine oil, etc.,
Do not continue driving with the
the Engine Oil Pressure warning
This warning light illuminates:
engine overheated. Otherwise
light will illuminate.
• When the fuel tank is nearly empty.
the engine may be damaged.
Add fuel as soon as possible.
CAUTION - Engine
CAUTION - Low Fuel
damage
Level
Driving with the Low Fuel Level
If the engine is not stopped
immediately after the engine oil
warning light on or with the fuel
level below “E” can cause the
pressure warning light is illumi-
nated and stays on while the
engine to misfire and damage
the catalytic converter
(if
engine is running, serious
engine damage may result.
equipped).
4
83
Features of your vehicle
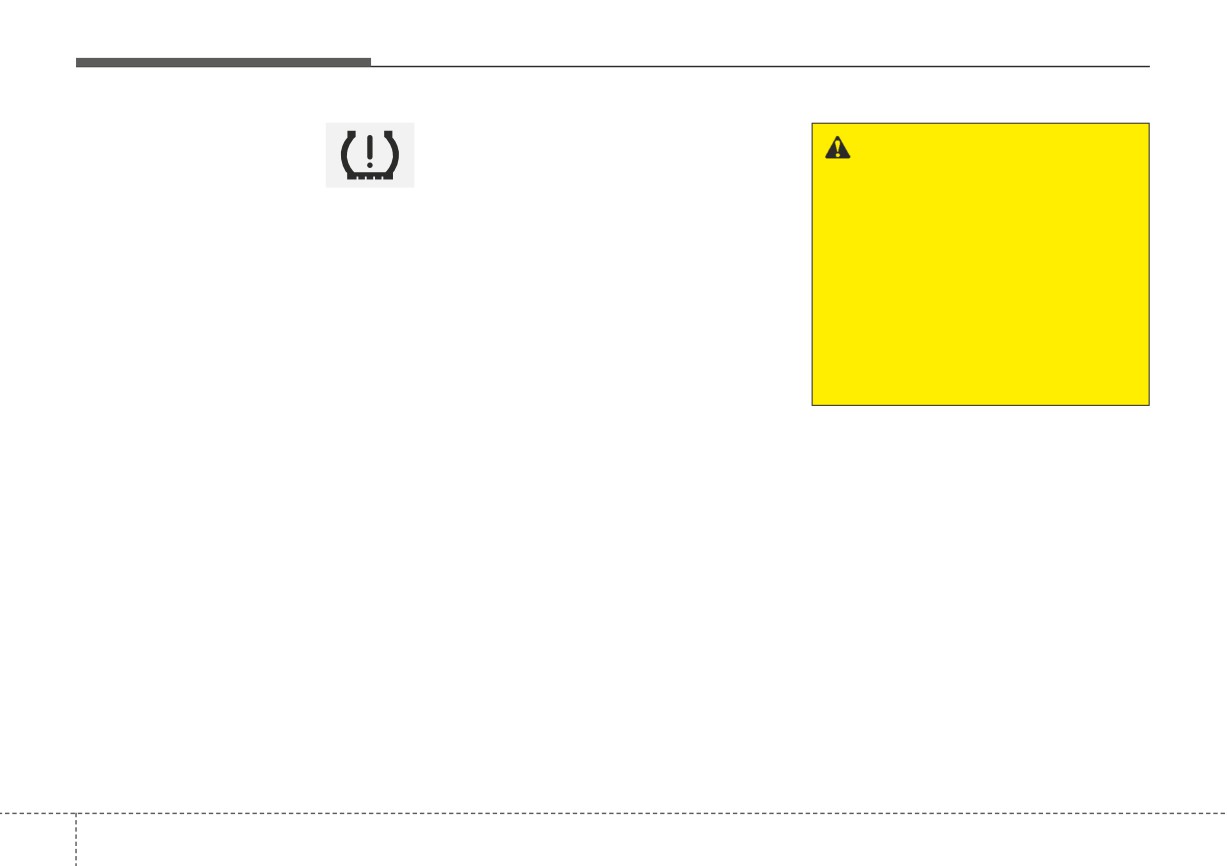
Low Tire Pressure
This warning light remains on after
Warning Light
blinking for approximately 70 seconds
WARNING
or repeats blinking on and off at inter-
- Low tire pressure
vals of approximately 3 seconds:
• Significantly low tire pressure
This warning light illuminates:
• When there is a malfunction with
makes the vehicle unstable
• Once you set the ignition switch or
the TPMS.
and can contribute to loss of
ENGINE START/STOP button to
In this case, have your vehicle
vehicle control and increased
the ON position.
braking distances.
inspected by an authorized Kia
- It illuminates for approximately 3
dealer as soon as possible.
• Continued driving on tires with
seconds and then goes off.
low tire pressure can cause the
❈For more details, refer to
“Tire
• When one or more of your tires are
tires to overheat and fail, which
significantly underinflated.
Pressure Monitoring System
may cause an accident.
(TPMS)” in chapter 6.
❈For more details, refer to
“Tire
Pressure Monitoring System
The TPMS cannot alert you to severe
(TPMS)” in chapter 6.
and sudden tire damage caused by
external factors.
If you notice any vehicle instability,
immediately take your foot off the
accelerator pedal, apply the brakes
gradually with light force, and slowly
move to a safe position off the road.
4
84
Features of your vehicle
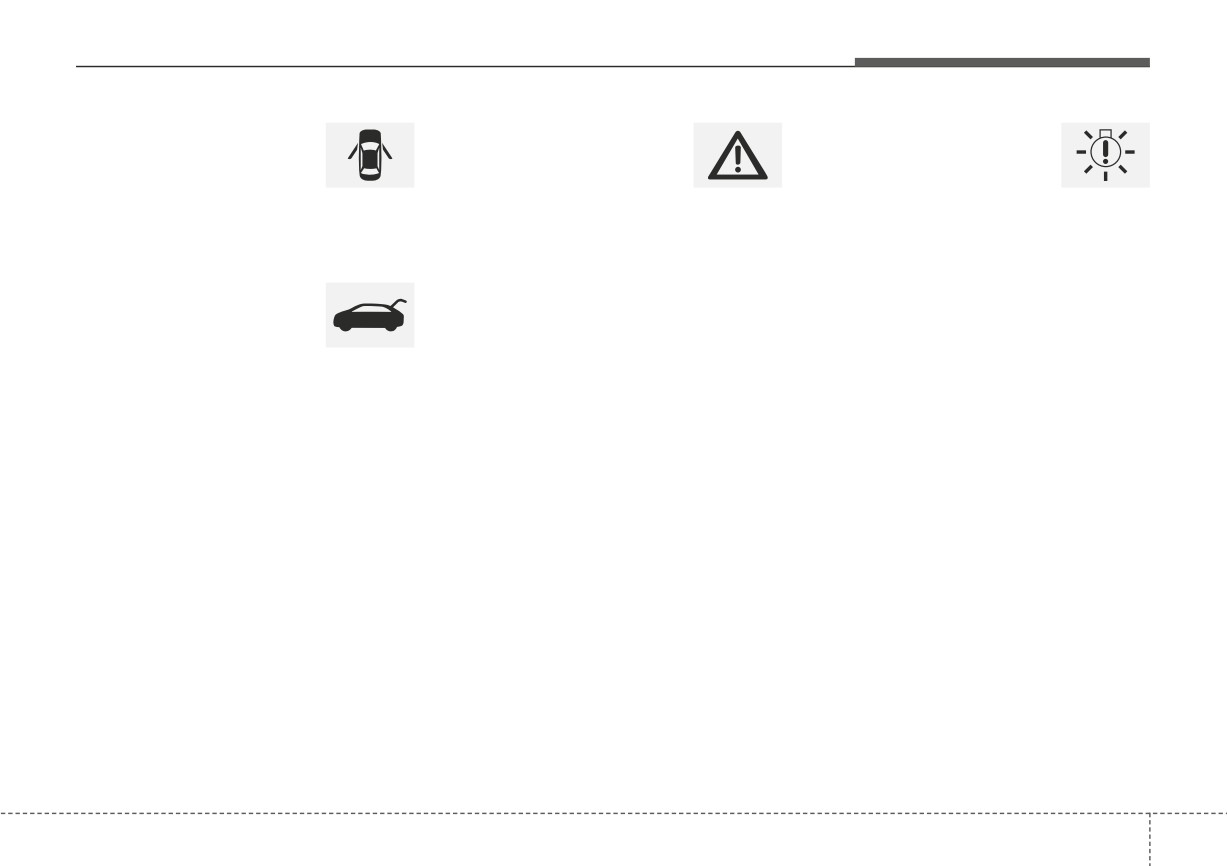
Door Ajar Warning
Master Warning Mode
LED Headlamp Warning
Light (if equipped)
(if equipped)
Light (if equipped)
This warning light illuminates:
• This warning light informs the driv-
This warning light illuminates:
er of the following situations:
When a door is not closed securely.
• When there is a malfunction with
- Forward
Collision-Avoidance
the LED headlamp.
Assist malfunction (if equipped)
In this case, have the vehicle inspect-
Trunk (liftgate) Open
- Blind-Spot Collision Warning mal-
ed by an authorized Kia dealer.
Warning Light
function (if equipped)
(if equipped)
- Blind-Spot Collision Warning
✽ NOTICE
radar blocked (if equipped)
This warning light illuminates:
Continuous driving with the LED
- High Beam Assist malfunction
Headlamp Warning Light on can
When the trunk
(liftgate) is not
(if equipped)
reduce LED headlamp (low beam)
closed securely.
- LED headlamp malfunction
life.
(if equipped)
- TPMS failure, low pressure
(if equipped), etc.
If the warning situation is solved, the
master warning light will turn off.
4
85
Features of your vehicle
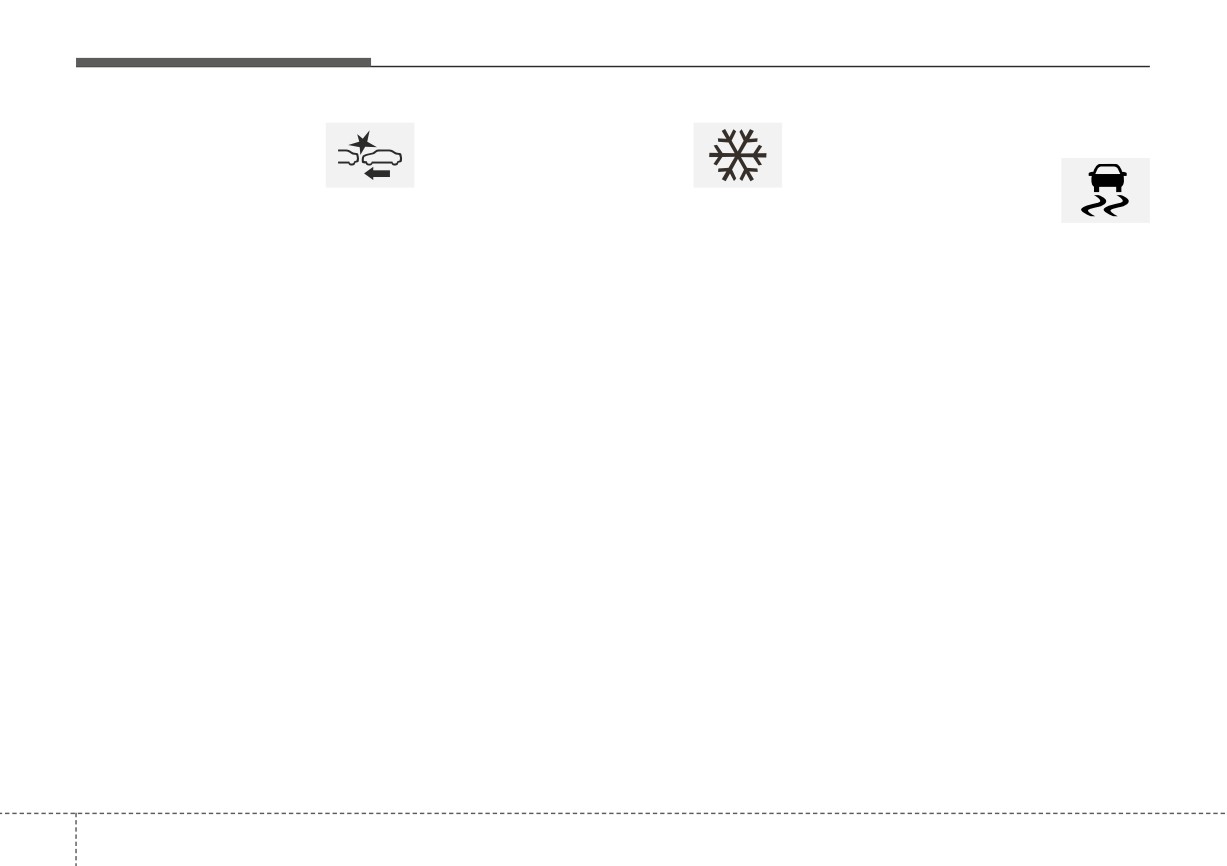
Forward Safety Warning
Ice Warning Light
Indicator Lights
light (if equipped)
(if equipped)
Electronic Stability
Control (ESC) Indicator
• When you set the Engine
Light
This warning light blinks 5 times and
Start/Stop button to the ON posi-
then illuminates, and a warning chime
This indicator light illuminates:
tion. The Forward Safety warning
also sounds 1 time:
• Once you set the ignition switch or
light illuminates for approximately 3
seconds and then goes off.
• When the temperature on the
ENGINE START/STOP button to
Outside Temperature Gauge is
the ON position.
• When there is a malfunction with
below approximately
39°F
(4°C)
Forward
Collision-Avoidance
- It illuminates for approximately 3
with the ignition switch or ENGINE
seconds and then goes off.
Assist.
START/STOP button in the ON
In this case, have your vehicle inspect-
• When there is a malfunction with
position.
ed by an authorized Kia dealer.
the ESC system.
In this case, have your vehicle
✽ NOTICE
inspected by an authorized Kia
dealer.
If the ice warning light appears
while driving, you should drive
more attentively and safely refrain-
This indicator light blinks:
ing from speeding, rapid accelera-
• While the ESC is operating.
tion, sudden braking or sharp turn-
ing, etc.
❈For more details, refer to
“Electronic Stability Control (ESC)”
in chapter 5.
4
86
Features of your vehicle
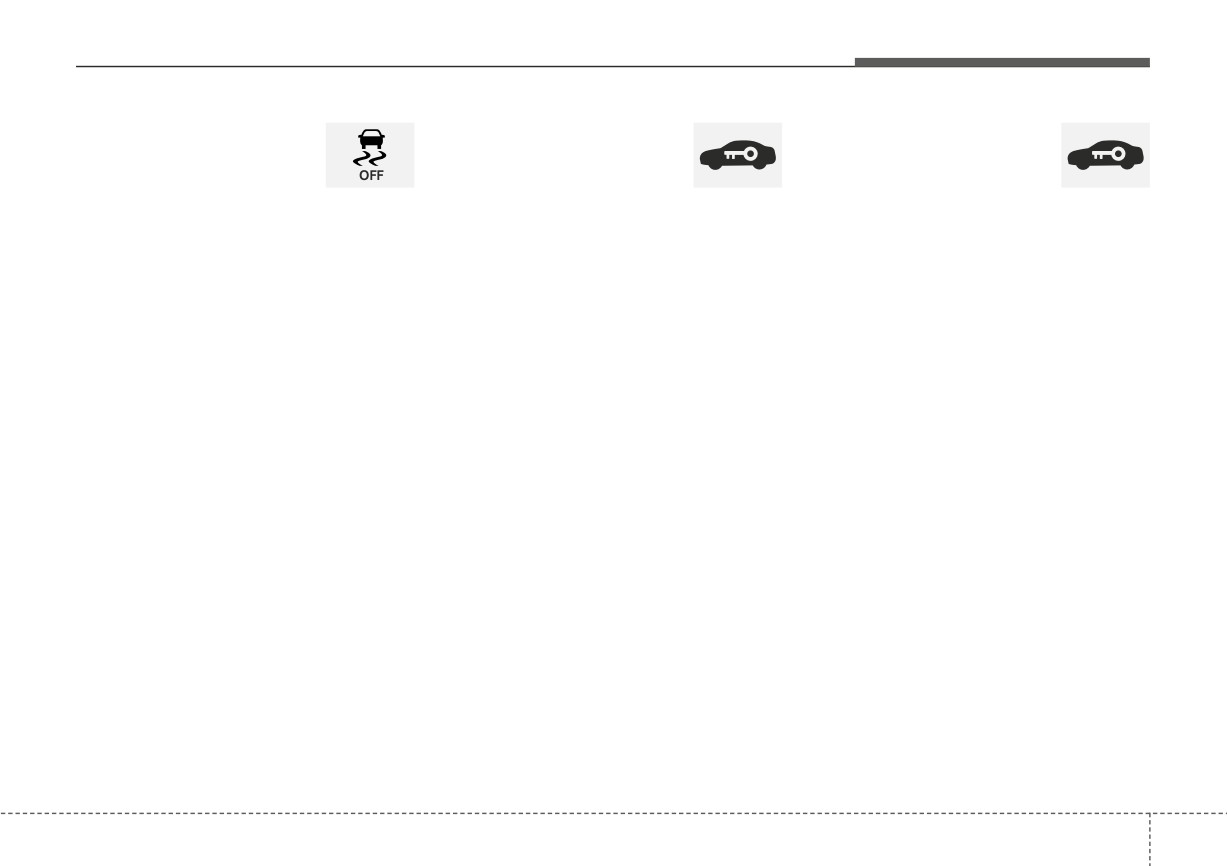
Electronic Stability
Immobilizer Indicator
Immobilizer Indicator
Control (ESC) OFF
Light (without Smart key)
Light (with Smart Key)
Indicator Light
(if equipped)
This indicator light illuminates:
This indicator light illuminates for up
• Once you set the ignition switch or
This indicator light illuminates:
to 30 seconds:
ENGINE START/STOP button to
• When the vehicle detects the
• When the vehicle detects the
the ON position.
immobilizer in your key while the
smart key in the vehicle properly
- It illuminates for approximately 3
ignition switch is ON.
while the ENGINE START/STOP
seconds and then goes off.
Button is ACC or ON.
- At this time, you can start the
• When you deactivate the ESC sys-
engine.
- At this time, you can start the
tem by pressing the ESC OFF but-
engine.
- The indicator light goes off after
ton.
starting the engine.
- The indicator light goes off after
starting the engine.
❈For more details, refer to
This indicator light blinks:
“Electronic Stability Control (ESC)”
This indicator light blinks for a few
• When there is a malfunction with
in chapter 5.
seconds:
the immobilizer system.
• When the smart key is not in the
In this case, have your vehicle
vehicle.
inspected by an authorized Kia
dealer.
- In this situation, you can not start
the engine.
4 87
Features of your vehicle
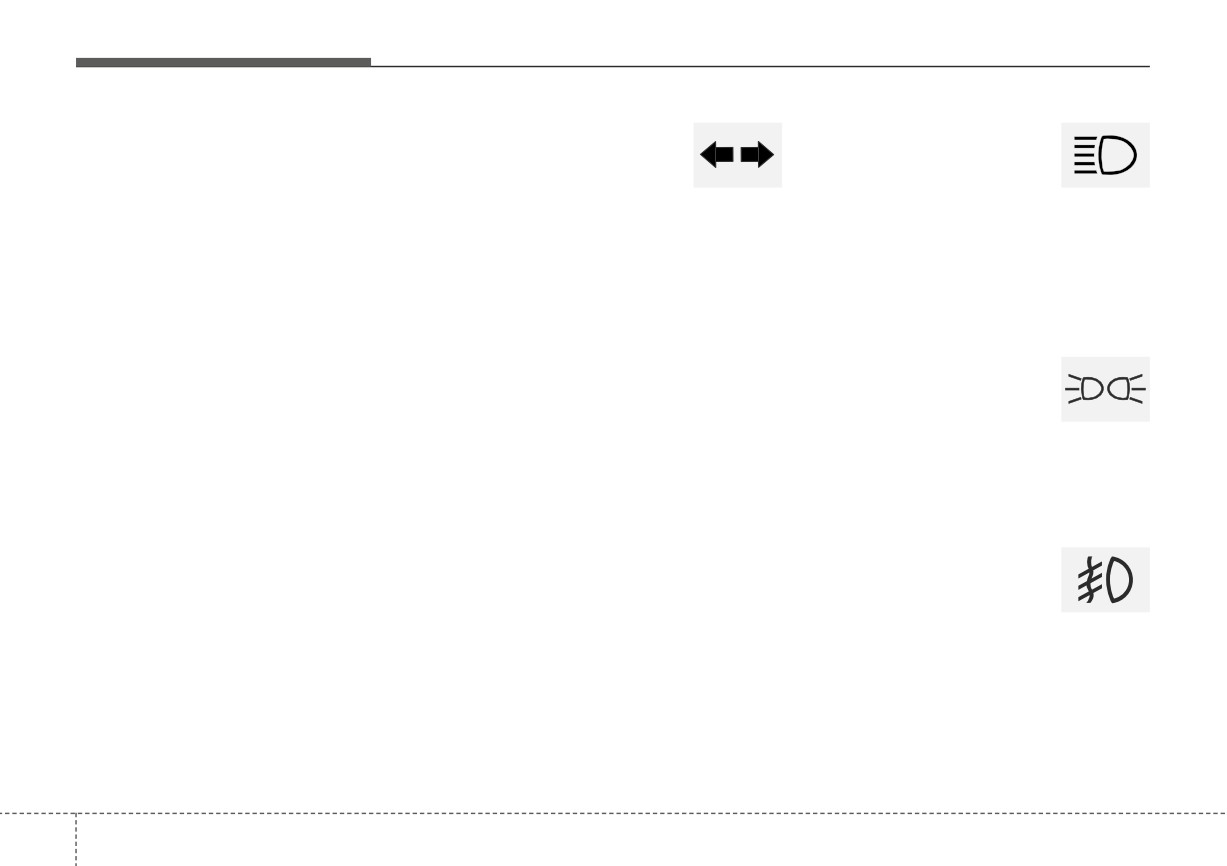
This indicator light illuminates for 2
Turn Signal Indicator
High Beam Indicator
seconds and goes off:
Light
Light
• When the vehicle can not detect a
smart key which is in the vehicle
This indicator light blinks:
This indicator light illuminates:
while the ENGINE START/STOP
• When you turn the turn signal light
• When the headlights are on and in
Button is ON.
on.
the high beam position
In this situation, have your vehicle
• When the turn signal lever is pulled
inspected by an authorized Kia
into the Flash-to-Pass position.
dealer.
If any of the following occurs, there
may be a malfunction with the turn
signal system. In this case, have your
Light ON Indicator Light
This indicator light blinks:
vehicle inspected by an authorized
• When the battery of the smart key
Kia dealer.
is weak.
- The indicator light does not blink
- In this situation, you can not start
but illuminates.
This indicator light illuminates:
the engine. However, you can
- The indicator light blinks more
• When the tail lights or headlights
start the engine if you press the
are on.
rapidly.
ENGINE START/STOP Button
- The indicator light does not illumi-
with the smart key.
(For more
nate at all.
Front Fog Indicator
details, refer to the “Starting the
Engine” section in Chapter 5.).
Light (if equipped)
• When there is a malfunction with
the immobilizer system.
This indicator light illuminates:
In this situation, have your vehicle
• When the front fog lights are on.
inspected by an authorized Kia
dealer.
4
88
Features of your vehicle
High Beam Assist
Cruise
Lane Safety indicator
Indicator Light
CRUISE
light (if equipped)
Indicator Light
(if equipped)
This warning light illuminates :
This indicator light illuminates:
This indicator light illuminates:
•
[Green] When Lane Keeping Assist
• When the high beam is on with the
light switch in the AUTO light posi-
• When Cruise Control is enabled.
operating conditions are satisfied.
tion.
•
[White] When Lane Keeping Assist
❈For more details, refer to “Cruise
• If your vehicle detects oncoming or
Control (CC)” in chapter 5.
operating conditions are not satis-
preceding vehicles, High Beam
fied.
Assist will switch the high beam to
•
[Yellow] Whenever there is a mal-
low beam automatically.
Cruise SET Indicator
function with Lane Keeping Assist.
Light (if equipped)
SET
If this occurs, have your vehicle
❈For more details, refer to
“High
inspected by an authorized Kia deal-
This indicator light illuminates:
er.
Beam Assist (HBA)” in chapter 4.
• When Cruise Control speed is set.
❈For more details, refer to “Cruise
Control (CC)” in chapter 5.
SPORT Mode Indicator
Light (if equipped)
SPORT
This indicator light illuminates:
• When you select “SPORT” mode
as drive mode.
❈For more details, refer to “Sport
Mode” in chapter 5.
4
89
Features of your vehicle
REAR VIEW MONITOR (RVM) (IF EQUIPPED)
■ Rear view camera (Type A)
Rear View Monitor will show the area
Rear View Monitor malfunction
behind the vehicle to assist you
and limitations
when parking or backing up.
Rear View Monitor malfunction
This function is a supplemental func-
•
When Rear View Monitor is not
tion that shows behind the vehicle
working properly, or the screen
through the navigation display while
flickers, or the camera image does
backing-up.
not display normally, have the func-
tion inspected by an authorized Kia
WARNING
OSC041594N
dealer.
■ Rear view camera (Type B)
This function is a supplemen-
tary function only. It is the
responsibility of the driver to
always check the inside/outside
rearview mirror and the area
behind the vehicle before and
while backing up because there
is a dead zone that can't be
seen through the camera.
OSC041595N
OYB046402
4
90
Features of your vehicle
Limitations of Rear View Monitor
(Continued)
WARNING
•
When the vehicle is stopped for a
•
Always look around your vehi-
long time in winter or when the
•
Rear View Monitor is not a
cle to make sure there are no
vehicle is parked in an indoor park-
safety device. It only serves to
objects or obstacles before
ing lot, the exhaust fumes
may
assist the driver in identifying
moving the vehicle in any
temporarily blur the image.
objects directly behind the
direction to prevent a colli-
middle of the vehicle. The
sion.
camera does not cover the
complete area behind the
•
Always pay close attention
vehicle.
when the vehicle is driven
close to objects, particularly
•
Never rely solely on the rear
pedestrians, and especially
view monitor. As there are
children.
blind spots that do not appear
on the camera while backing
•
If the camera lens is covered
up and parking, You must
with foreign material, Rear
always use methods of view-
View Monitor may not operate
ing the area behind you
normally. Always keep the
including looking over both
camera lens clean. However,
shoulders as well as continu-
do not use chemical solvents
ously checking all three rear
such as strong detergents
view mirrors.
containing high alkaline or
volatile organic solvents
(Continued)
(gasoline, acetone etc.). This
may damage the camera lens.
•
When stopping for a long time
in winter or parking in an
indoor parking lot, the image
may temporarily be blurry due
to the exhaust gas.
4
91
Features of your vehicle
LIGHTING
Battery saver function
Headlight escort function
Headlight welcome function
(if equipped)
(if equipped)
The purpose of this feature is to pre-
vent the battery from being dis-
The headlights (and/or taillights) will
When the headlight switch is in the
charged if the lights are left in the ON
remain on for approximately 5 min-
ON or AUTO position and all doors
position.
utes after the ignition key is removed
(and liftgate) are closed and locked,
The system automatically shuts off
or turned to the ACC or LOCK posi-
if you press the door unlock button
tion. However, if the driver’s door is
on the transmitter, the headlights will
the parking lights after the engine is
off and the driver's door is opened.
opened and closed, the headlights
come on for about 15 seconds.
are turned off after 15 seconds.
However, the position lamps stay ON
If the headlight switch is in the AUTO
even when the driver-side door is
The headlights can be turned off by
position, the function can only oper-
opened if the light switch is operated
pressing the lock button on the trans-
ate at night.
after the engine is turned off.
mitter twice or turning off the light
At this time, if you press the door
switch from the headlight or Auto
If necessary, to keep the lamps on
unlock button again or door lock but-
light position.
ton on the transmitter, the headlights
turn the position lamps OFF and ON
again using the headlamp switch on
If the driver gets out of the vehicle
will turn off immediately.
through other doors (except driver's
the steering column after the engine
is turned off.
door), the battery saver function
does not operate and the headlight
escort function does not turn off
automatically. Therefore, causing the
battery to be discharged. In this
case, make sure to turn off the lamp
before getting out of the vehicle.
If the headlights are not working
properly have your vehicle inspected
by an authorized Kia dealer.
Don't attempt to inspect or replace
the wiring yourself to prevent mal-
function.
4
92
Features of your vehicle
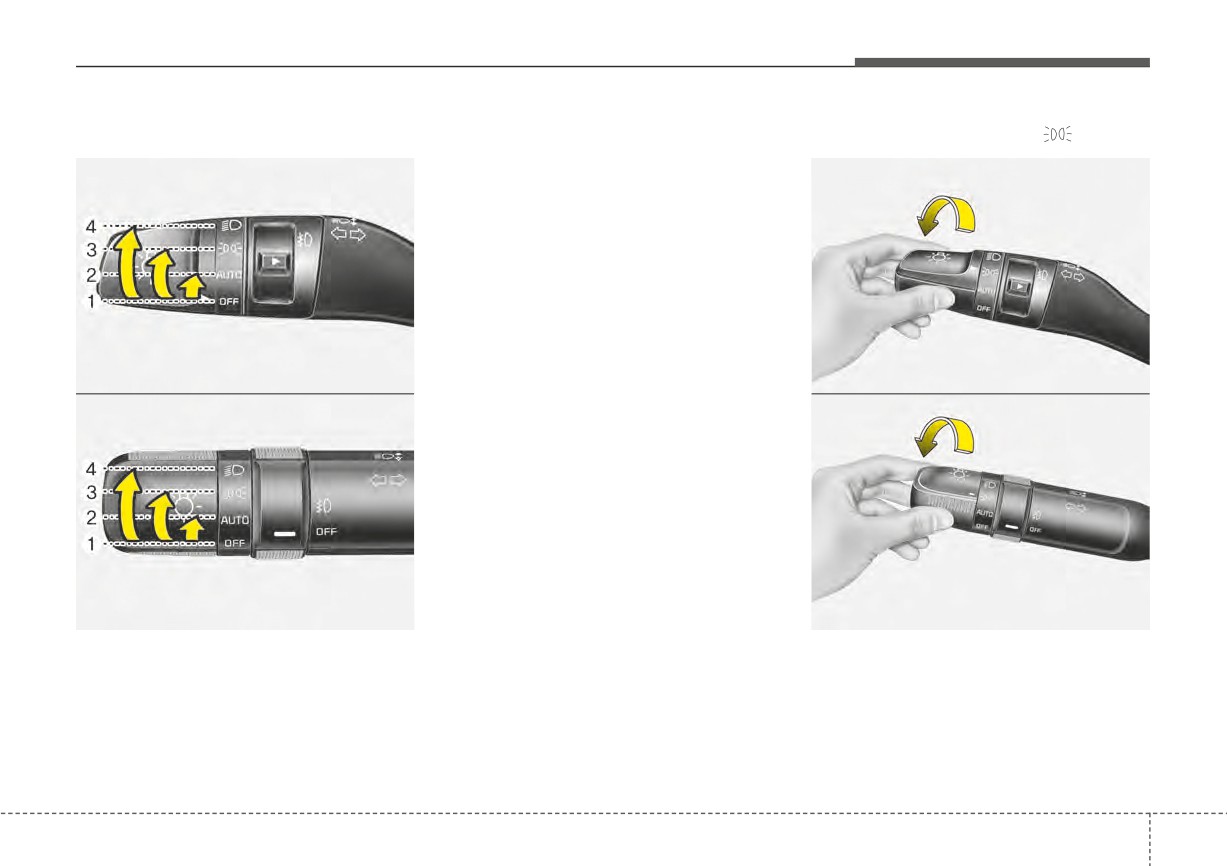
Lighting control
(1) OFF position
Parking light position (
)
(2) Auto light position
■ Type A
■ Type A
(3) Parking light position
(4) Headlight position
OSC046400
OSC047401N
■ Type B
■ Type B
OSC040414N
OSC040415N
The light switch has a Headlight and
When the light switch is in the park-
a Parking light position.
ing light position (3rd position), the
tail, position, license and instrument
To operate the lights, turn the knob at
panel lights will turn ON.
the end of the control lever to one of
the following positions:
4
93
Features of your vehicle
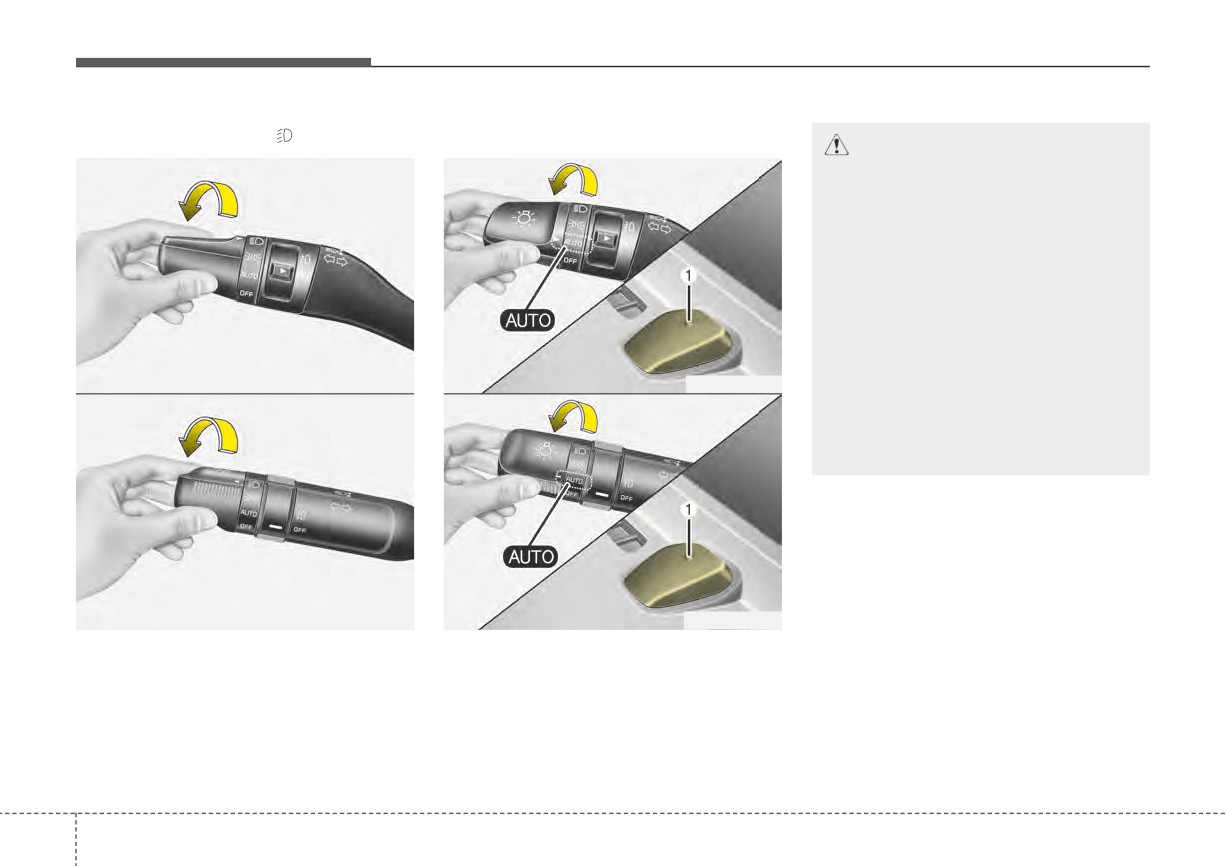
Headlight position (
)
Auto light position
CAUTION
■ Type A
■ Type A
Never place anything over the
sensor (1) located on the instru-
ment panel. This will ensure bet-
ter auto-light system control.
Do not clean the sensor using a
window cleaner, the cleaner may
leave a light film which could
interfere with sensor operation.
If your vehicle has window tint
OSC047402N
OSC047403N
or other types of metallic coat-
■
Type B
■ Type B
ing on the front windshield, the
Auto light system may not work
properly.
OSC040416N
OSC040417N
When the light switch is in the head-
When the light switch is in the AUTO
light position (4th position) the head,
light position, the taillights and head-
tail, position, license and instrument
lights will turn ON or OFF automati-
panel lights will turn ON.
cally depending on the amount of
light outside the vehicle.
The ignition switch must be in the ON
position to turn on the headlights.
4
94
Features of your vehicle
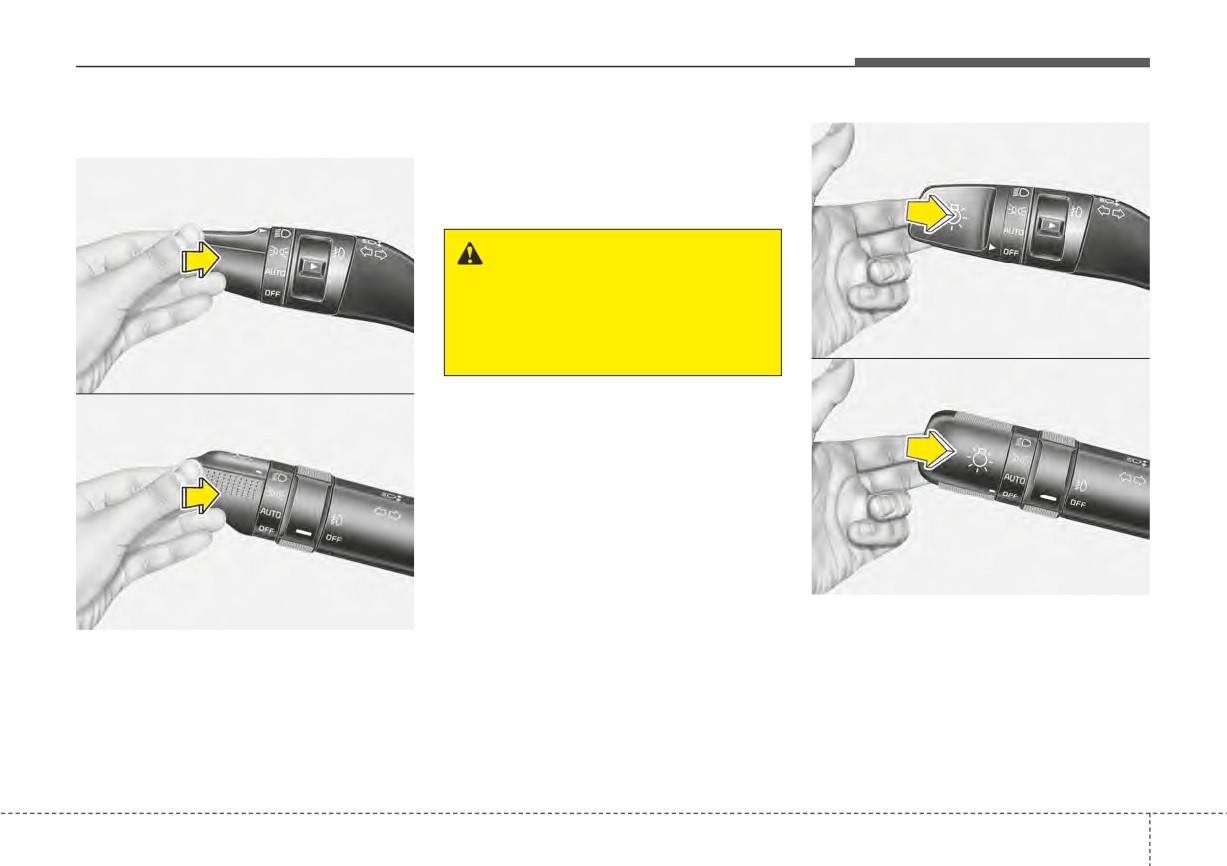
High beam operation
To prevent the battery from being
■ Type A
discharged, do not leave the lights
■ Type A
on for a prolonged time while the
engine is not running.
WARNING - High beams
Do not use high beam when
there are other vehicles. Using
high beam could obstruct the
other driver's vision.
OSC047405N
■ Type B
OSC047404N
■ Type B
OSC040419N
To flash the headlights, pull the lever
OSC040418N
towards you. It will return to the normal
To turn on the high beam headlights,
(low-beam) position when released.
push the lever away from you. Pull it
The headlight switch does not need to
back for normal (low beam) position.
be on to use this flashing feature.
The high beam indicator light will illu-
minate when the headlight high
beams are switched on.
4 95
Features of your vehicle
High Beam Assist (HBA)
Operating condition
The high beam switches to low beam
(if equipped)
in the below conditions.
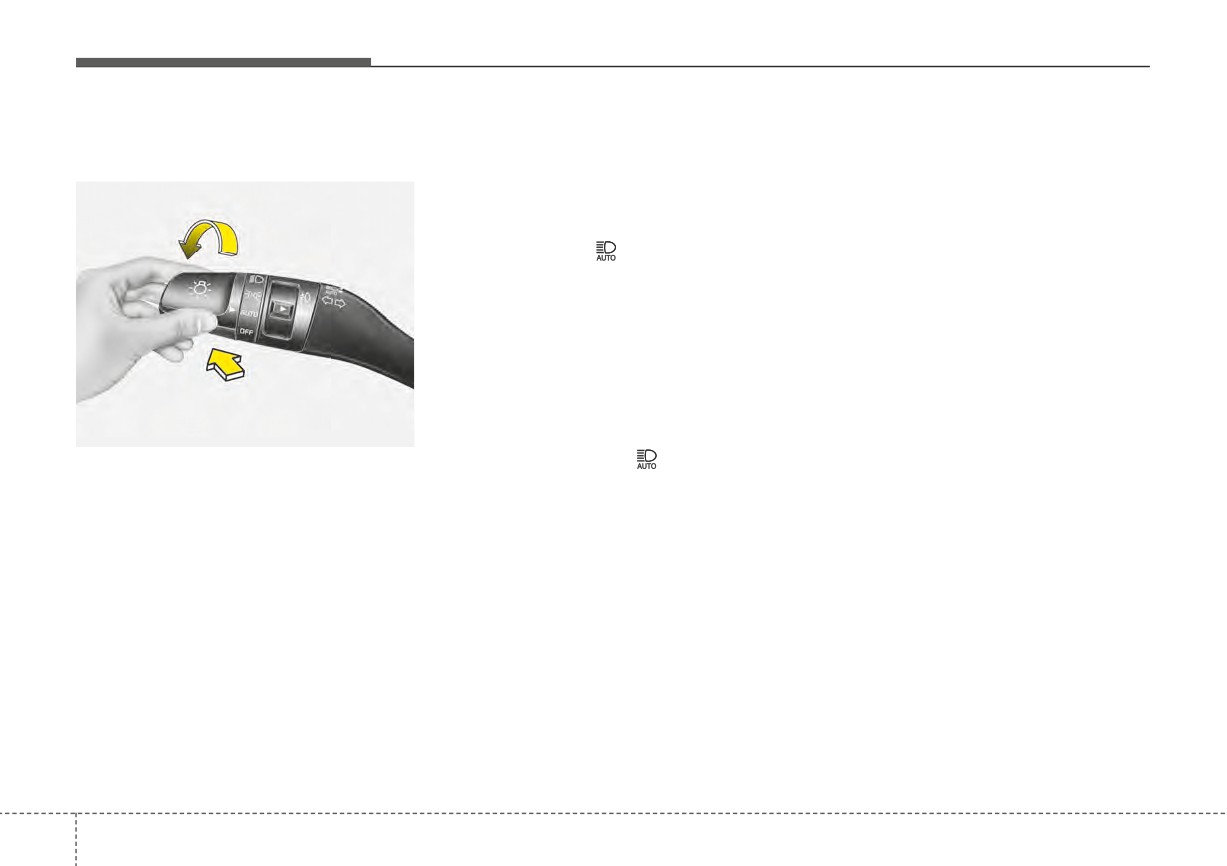
1. Place the light switch in the AUTO
position.
•
When High Beam Assist is off.
2. Turn on the high beam by pushing
•
When the light switch is not in the
the switch away from you. High
AUTO position.
Beam Assist (
) indicator will illu-
•
When the headlamp is detected
minate.
from the on-coming vehicle.
3. High Beam Assist will turn on when
•
When the tail lamp is detected
vehicle speed is above 28 mph (45
from the front vehicle.
km/h).
•
When the surrounding is bright
• If the switch is pushed away when
enough high beams are not need-
High Beam Assist is operating, High
ed.
Beam Assist will turn off and the
•
When streetlights or other lights
OSC040040N
high beam will be on continuously.
are detected.
High Beam Assist (
) indicator will
High Beam Assist is a function that
•
When vehicle speed is below 22
turn off.
automatically adjusts the headlamp
mph (35 km/h).
range (switches between high beam
• If the switch is pulled towards you
when the high beam is on with oper-
•
When headlamp / taillamp of bicy-
and low beam) according to the
ating High Beam Assist, High Beam
cle/motorcycle is detected.
brightness of other vehicles and road
conditions.
Assist will turn off.
4. If the light switch is placed to the
headlamp position, High Beam
Assist will turn off and the low beam
will be on continuously.
4
96
Features of your vehicle
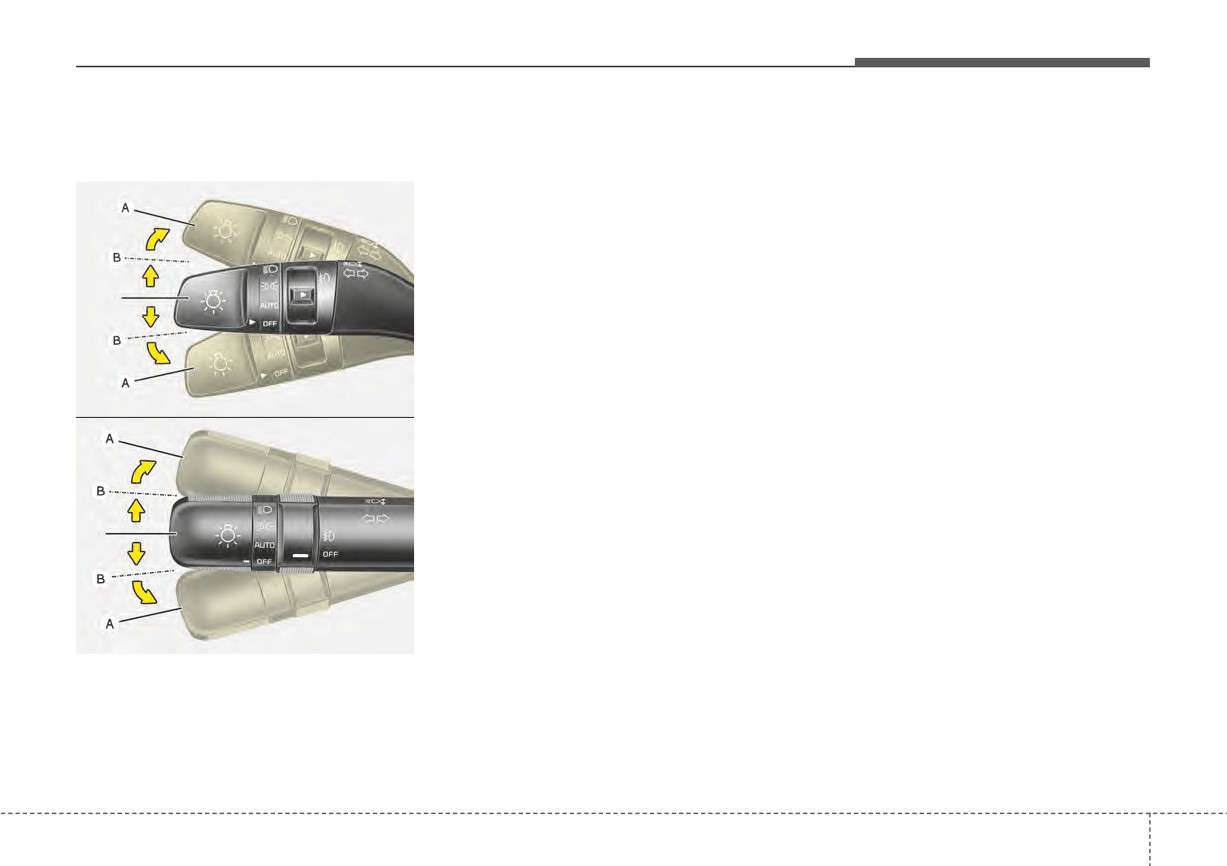
Turn signals and lane change
They will self-cancel after a turn is
One-touch lane change function
signals
completed. If the indicator continues
To activate a one-touch lane change
to flash after a turn, manually return
function, move the turn signal lever
■ Type A
the lever to the OFF position.
slightly and then release it. The lane
To signal a lane change, move the
change signals will blink 3, 5 or 7
turn signal lever slightly and hold it in
times.
position (B). The lever will return to
You can choose one-touch lane
the OFF position when released.
change blinking function in
“One
If an indicator stays on and does not
touch turn signal” of “User setting”.
flash or if it flashes abnormally, one of
Refer to “User setting” in chapter 4.
the turn signal bulbs may be burned
(if equipped)
out and will require replacement.
OSC047406N
✽ NOTICE
■ Type B
If an indicator flash is abnormally
quick or slow, the bulb may be
burned out or have a poor electrical
connection in the circuit.
OSC040420N
The ignition switch must be on for the
turn signals to function. To turn on
the turn signals, move the lever up or
down (A). The green arrow indicators
on the instrument panel indicate
which turn signal is operating.
4
97
Features of your vehicle
Front fog light (if equipped)
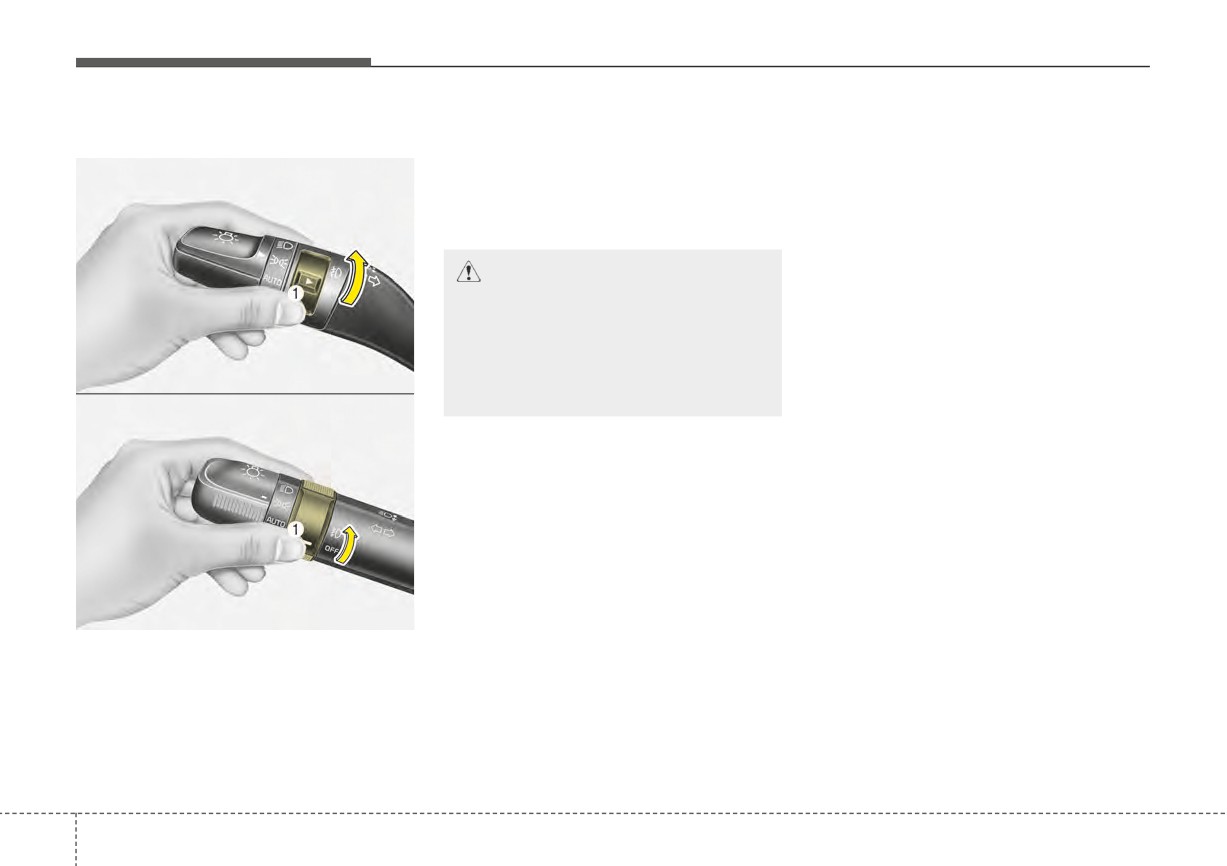
The fog lights will turn on when the
fog light switch (1) is turned on after
■ Type A
the parklight is turned on.
To turn off the fog lights, turn the fog
light switch (1) to the OFF position.
CAUTION
When in operation, the fog
lights consume large amounts
of vehicle electrical power. Only
use the fog lights when visibility
OSC040041N
is poor.
■ Type B
OSC040473N
Fog lights are used to provide
improved visibility when visibility is
poor due to fog, rain or snow, etc.
4
98
Features of your vehicle
WIPERS AND WASHERS
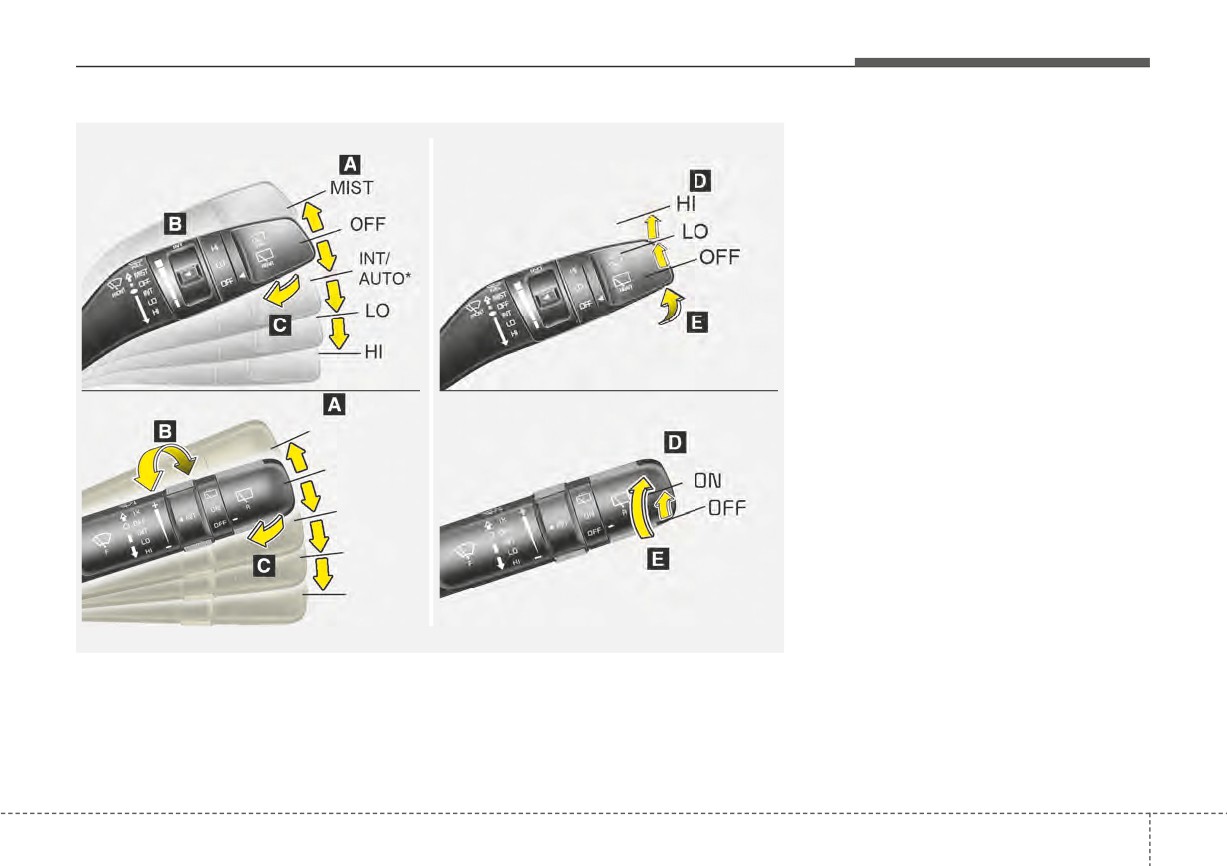
A : Wiper speed control (front)
Front
Rear (5 Door, if equipped)
■ Type A
■ Type A
· HI - High wiper speed
· LO - Low wiper speed
· INT - Intermittent wipe
· AUTO* - Automatic control wipe
· OFF - Off
· MIST - Single wipe
B : Intermittent control wipe time
adjustment
C : Wash with brief wipes (front)*
■ Type B
■ Type B
D : Rear wiper/washer control
· O/OFF - Off
· HI - High wiper speed
· ON/LO - Low wiper speed
E : Wash with brief wipes (rear)
* : if equipped
OSC040428N/OSC040422N/OSC047427N/OSC040446N
4
99
Features of your vehicle
Windshield wipers
✽ NOTICE
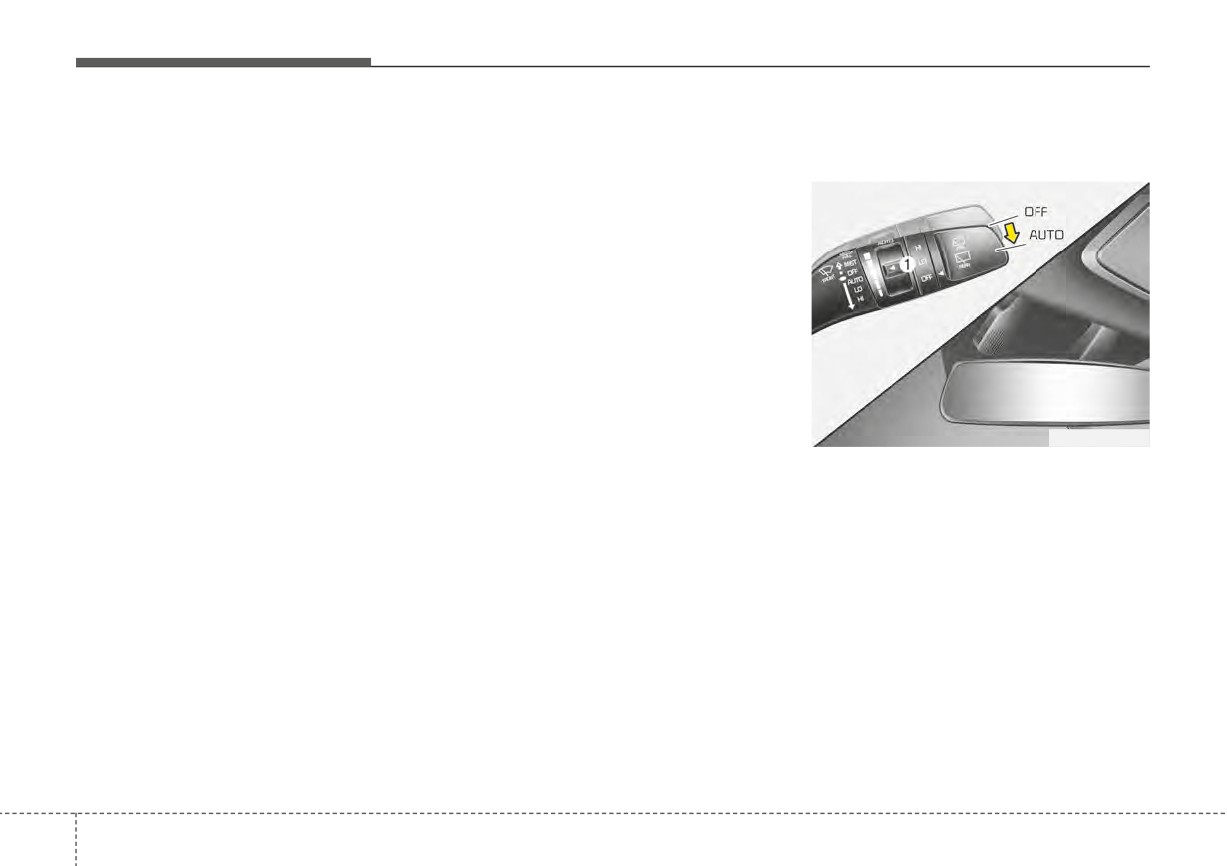
AUTO (Automatic) control
If there is heavy accumulation of
(if equipped)
Operates as follows when the igni-
tion switch is turned ON.
snow or ice on the windshield,
defrost the windshield for about 10
MIST : For a single wiping cycle,
minutes, or until the snow and/or ice
push the lever upward and
is removed, before using the wind-
release it. The wipers will
shield wipers in order to ensure
operate continuously if the
proper operation.
lever is held in this position.
If you do not remove the snow
OFF : Wiper is not in operation
and/or ice before using the wiper
INT : Wiper operates intermittently at
and washer, the wiper and washer
the same wiping intervals. Use
system may be damaged.
this mode in a light rain or mist.
To vary the speed setting, turn
OSC040411N
the speed control knob.
ON/LO : Normal wiper speed
The rain sensor located on the upper
HI : Fast wiper speed
end of the windshield glass senses
the amount of rainfall and controls the
wiping cycle for the proper interval.
The more it rains, the faster the wiper
operates. When the rain stops, the
wiper stops.
4
100
Features of your vehicle
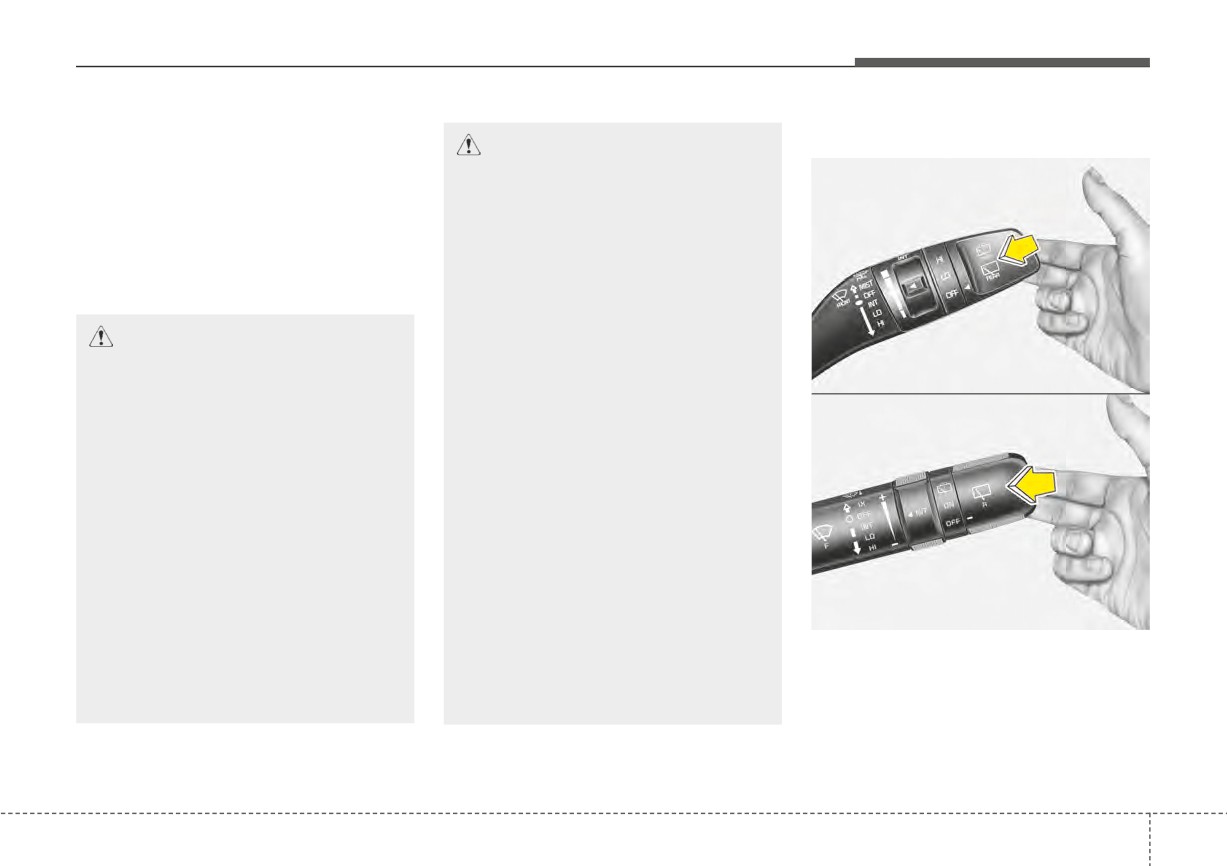
To vary the speed setting, turn the
Windshield washers (front)
speed control knob (1).
CAUTION
■ Type A
If the wiper switch is set in AUTO
When washing the vehicle, set
mode when the ignition switch is ON,
the wiper switch in the off posi-
the wiper will operate once to per-
tion to stop the auto wiper oper-
form a self-check of the system. Set
ation.
the wiper to off position when the
The wiper may operate and be
wiper is not in use.
damaged if the switch is set in
the AUTO mode while washing
CAUTION
the vehicle.
Do not remove the sensor cover
When the ignition switch is ON
located on the upper end of the
OSC047429N
and the windshield wiper switch
passenger side windshield
■ Type B
is placed in the AUTO mode, use
caution in the following situa-
glass. Damage to system parts
could occur and may not be
tions to avoid any injury to the
hands or other parts of the
covered by your vehicle warran-
ty.
body:
• Do not touch the upper end of
When starting the vehicle in
winter, set the wiper switch in
the windshield glass facing
the rain sensor.
the off position. Otherwise,
wipers may operate and ice may
• Do not wipe the upper end of
damage the windshield wiper
the windshield glass with a
OSC040424N
blades. Always remove all snow
damp or wet cloth.
and ice and defrost the wind-
In the OFF
position,
pull the lever
• Do not put pressure on the
shield properly prior to operat-
gently toward you to spray washer
windshield glass.
ing the windshield wipers.
fluid on the windshield and to run the
wipers 1-3 cycles.
Use this function when the wind-
shield is dirty.
4
101