Suzuki Grand Vitara JB416 / JB420 / JB419. Service manual - part 495
 

  Index      Suzuki     Suzuki Grand Vitara JB416 / JB420 / JB419 - service and repair manual 2007 year


Search            copyright infringement  


Content   ..  493  494  495  496   ..


Suzuki Grand Vitara JB416 / JB420 / JB419. Service manual - part 495


9D-6 Wipers / Washers: 

3) Remove cowl top garnish referring to “Cowl Top 

Components in Section 9K”.

4) Disconnect coupler from windshield wiper motor.
5) Remove bolts (1), and remove windshield wiper 

assembly (2).

Installation

1) Install windshield wiper assembly (1), and tighten 

bolts (“1” – “3”) according to numerical order as 
shown in figure.

Tightening torque
Windshield wiper bolt (a):  8.5 N·m (0.85 kgf-m, 
6.5 lb-ft)

2) Connect coupler to windshield wiper motor.
3) Install cowl top garnish referring to “Cowl Top 

Components in Section 9K”.

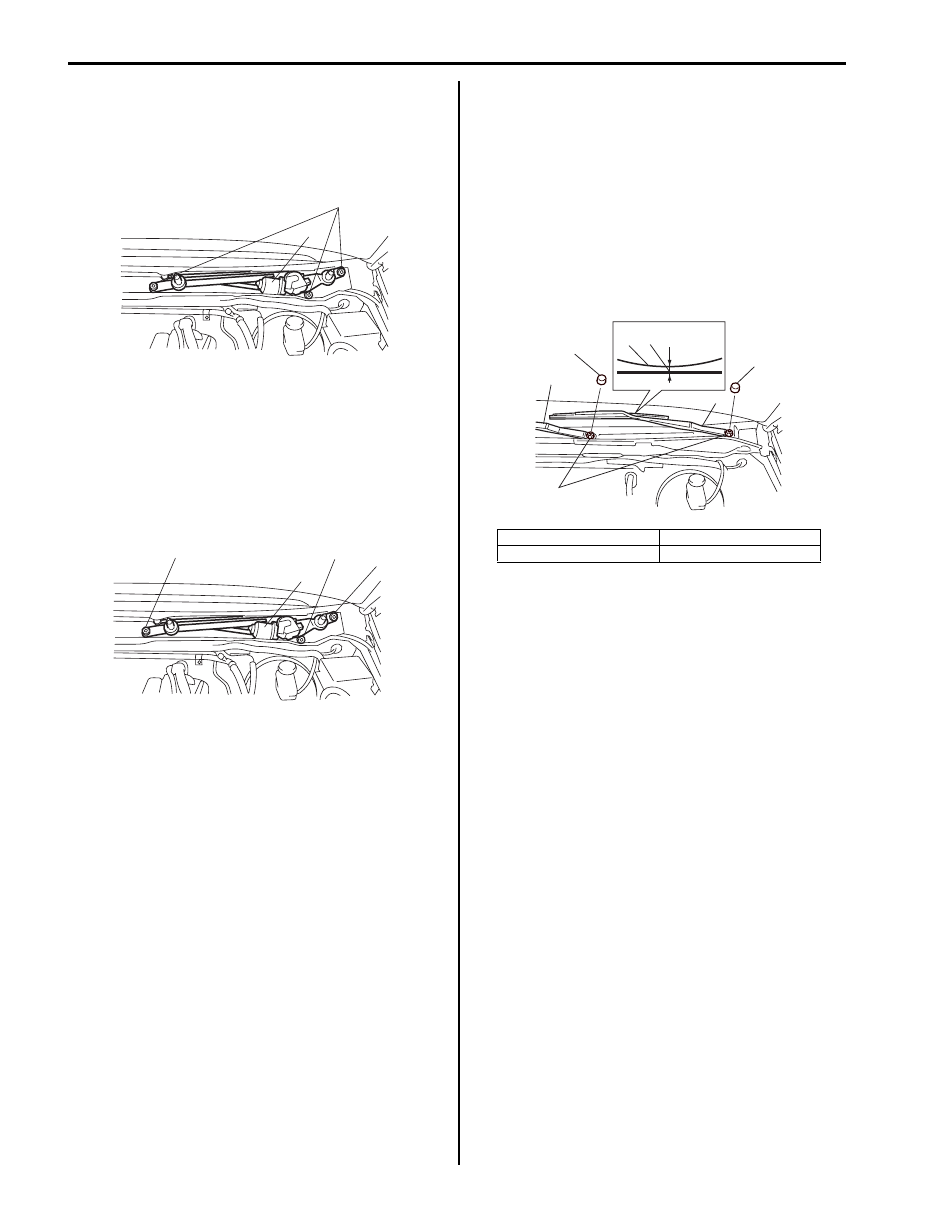
4) Install windshield wiper arms with wiper blades (1) to 

specified position as shown in figure, and then 
tighten windshield wiper nuts to specified torque.

Tightening torque
Windshield wiper arm nut (a):  14 N·m (1.4 kgf-
m, 10.5 lb-ft)

5) Install wiper pivot caps (2) to windshield wiper arm 

nuts

6) Connect negative (–) cable to battery.

2

1

I5JB0A940008-01

1

(a), “1”

(a), “3”

(a), “2”

I5JB0A940026-01

“a”: 5 mm (0.20 in.)

4. Wiper blade center

3. Ceramic line

1

1

(a)

2

2

3

4

“a”

I5JB0A940009-01

Wipers / Washers:  9D-7

Windshield Wiper Motor Inspection

S6JB0A9406005

NOTE
Make sure that battery voltage is 12 V or 
more.


1) Disconnect negative (–) cable at battery.
2) Remove windshield wiper arms with wiper blades 

referring to “Windshield Wiper Removal and 
Installation”.

3) Remove cowl top garnish referring to “Cowl Top 

Components in Section 9K”.

4) Disconnect coupler from windshield wiper motor.
5) Reinstall windshield wiper arms with wiper blade. For 

details, refer to Step 4) of “Installation” in “Windshield 
Wiper Removal and Installation”.

6) Check windshield wiper motor for operation as 

follows
• For motor operation in low speed

a. Connect battery positive (+) terminal to 

terminal “1” and its negative (–) terminal to 
terminal “5”.

b. Check if wiper arm reciprocation speed is as 

specification. If check result is not as 
specified, replace motor.

Specification
44 – 52 r/min (rpm)

• For motor operation in high speed

a. Connect battery positive (+) terminal to “2” 

and its negative (–) terminal to terminal “5”.

b. Check if motor revolution speed is as 

specification. If check result is not as 
specified, replace motor.

Specification
64 – 78 r/min (rpm)

[A]: Left-hand steering vehicle
[B]: Right-hand steering vehicle

[B]

[A]

1

5

1

5

I5JB0A940010-01

[A]: Left-hand steering vehicle
[B]: Right-hand steering vehicle

[B]

[A]

2

5

2

5

I5JB0A940011-01

9D-8 Wipers / Washers: 

• For automatic stop operation

a. Connect battery positive (+) terminal to 

terminal “1” and its negative (–) terminal to 
terminal “5” and let the motor turn.

b. Disconnect terminal “1” from battery positive 

(+) terminal, and let the motor stop.

c. Connect terminals “1” and “3” with a jumper 

wire, and connect terminal “4” to battery 
positive (+) terminal.
Observe the motor turns once again then 
stops at a specified position as shown.

d. Repeat Step 1) to 3) several times and check 

that the motor stops at the specified position 
every time.
If check result is not satisfied, replace motor.

Rear Wiper Removal and Installation

S6JB0A9406006

Removal

1) Disconnect negative (–) cable at battery.
2) Remove arm cover (1), rear wiper arm nut (2) and 

rear wiper arm with blade assembly (3).

3) Remove rear end door trim referring to “Rear End 

Door Lock Assembly Removal and Installation in 
Section 9F”.

4) Disconnect coupler from rear wiper motor.
5) Remove rear wiper motor.

Installation

1) Install rear wiper motor (1) and tighten rear wiper 

motor mounting bolts to specified torque.

Tightening torque
Rear wiper motor mounting bolt (a):  7 N·m (0.7 
kgf-m, 5.0 lb-ft)

[A]: Left-hand steering vehicle

2. Windshield wiper arms with 

wiper blades

[B]: Right-hand steering vehicle

6. Ceramic line

“a”: 5 mm (0.20 in.)

7. Wiper blade center

[B]

[A]

4

5

5

6

7

2

2

1

3

4

1

3

“a”

I5JB0A940012-01

3

1

2

I5JB0A940013-02

(a)

1

I5JB0A940014-01

Wipers / Washers:  9D-9

2) Connect coupler to rear wiper motor
3) Install rear end door trim referring to “Rear End Door 

Lock Assembly Removal and Installation in Section 
9F”.

4) Install rear wiper arm with blade assembly (1) to 

specified position as shown in figure.

5) Tighten rear wiper arm nut to specified torque, and 

then install arm cover (1).

Tightening torque
Rear wiper arm nut (a):  8 N·m (0.8 kgf-m, 6.0 lb-
ft)

6) Connect negative (–) cable to battery.

Rear Wiper Motor Inspection

S6JB0A9406007

NOTE
Make sure that battery voltage is 12 V or 
more.


1) Make a mark (1) on rear wiper motor (2) stop 

position as shown.

2) Check rear wiper motor for operation as follows.

• For motor operation

a. Connect battery positive terminal to terminal 

“1” and its negative terminal to body ground.

b. Check motor revolution speed as 

specification. If check result is not as 
specified, replace motor.

Specification
33 – 43 r/min (rpm)

2. Rear wiper blade
3. Defogger wire

1

3

3

2

a = b

a

b

I5JB0A940015-01

(a)

1

I5JB0A940016-01

1

2

I5JB0A940017-01

1

I5JB0A940018-01


Content   ..  493  494  495  496   ..