Renault Megane (2018 year). Manual - part 6
 

  Index      Renault     Renault Megane - service manual 2018 year in english


Search            


Content   ..  4  5  6  7   ..


Renault Megane (2018 year). Manual - part 6


1.82

VEHICLE SETTINGS CUSTOMISATION MENU 

(1/2)

Adjusting the settings

Select the function to modify:
a) Free wheel in ECO mode; 

  (please refer to the information on 

“Driving advice, ECO-driving” in 

Section 2)

b) Auto door lock while driving;

c) Use handsfree card: open/close;

d) Indicator sound volume;

e) Internal welcome sound;

f) External welcome;

g) Automatic Cabin Light;

h) Rear wiper when rear gear engaged;

i)  Driving style indicator.
Depending on the function, select “ON" 

or "OFF" to activate or disable it, and 

"+" or "-" to adjust the volume of the in-

dicators.

Depending on the vehicle equipment, 

this function allows you to activate/de-

activate and adjust some of the vehi-

cle’s functions.

Vehicles fitted with a 

multimedia system

Accessing the settings menu
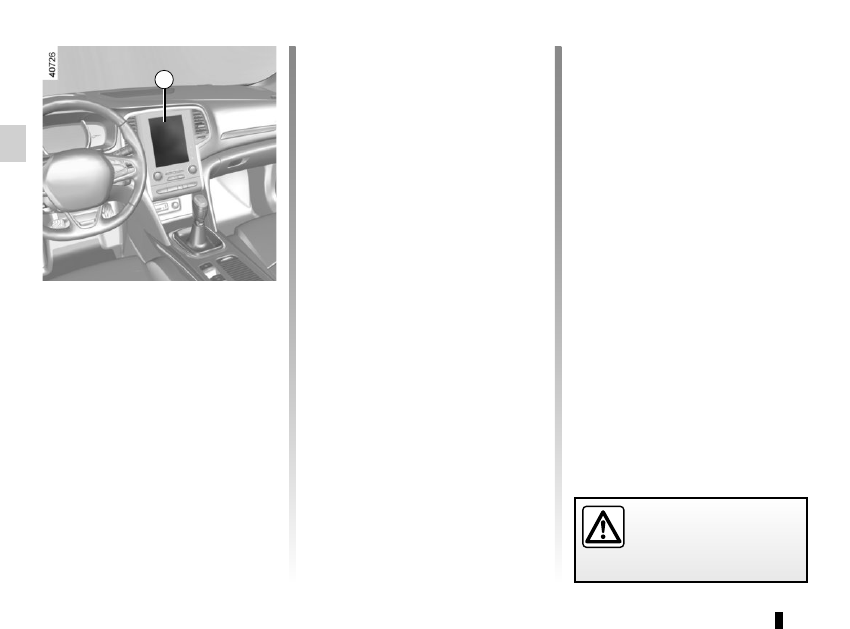
With the vehicle at a standstill, using the 

multimedia screen 1, select “Vehicle”, 

“User settings” to access the various 

settings.

1

For safety reasons, carry 

out any adjustments when 

the vehicle is stationary.

1.83

VEHICLE SETTINGS CUSTOMISATION MENU 

(2/2)

3

4

Once a line has been selected, press 

the switch 3 OK to adjust the function.
If you select either “PARKING ASSIST 

VOLUME” or “LANGUAGE”, you will 

have to make a further selection (sound 

volume of the parking distance control 

or instrument panel language). In this 

case, make your selection and con-

firm it by holding the switch 3 OK – the 

selected value is shown by a 

~

 in 

front of the line.

To exit the menu, press the control 4 

upwards or downwards. It may be nec-

essary to carry out this operation sev-

eral times.
For further explanations of the Free 

wheel in ECO mode function refer to 

the information on “Driving Advice, 

ECO driving” in section 2.

Vehicles not fitted with a 

multimedia system

Accessing the settings menu on 

display 2
With the vehicle at a standstill, press 

and hold the switch 3 OK to access the 

settings menu.

Adjusting the settings
Browse using the control 4 to select the 

function to adjust:
a) Free wheel in ECO mode; 

  (please refer to the information on 

“Driving advice, ECO-driving” in 

Section 2)

b) Auto door lock while driving;

c) Unlock driver door only;

d) Rear wiper when rear gear engaged;

e) Front park assist;

f)  Automaticmain beam lights;

g) Lane departure warning : VOLUME;

h) Lane departure warning : Sensitivity;

i)  Rear park assist;

j) PARKING ASSIST VOLUME;

k) LANGUAGE;

l) Units;

m) Style;

n) Colour.

=

 function activated

<

 function deactivated

2

The vehicle settings personalisation menu cannot be used when driving. At speed 

exceeding 12 mph (20 km/h), the instrumental panel display switches automati-

cally back to trip computer and warning system mode.

1.84

POWER-ASSISTED STEERING

Power-assisted steering

Variable power-assisted steering
The variable power assisted steering 

system is equipped with an electronic 

control system which alters the level of 

assistance to suit the vehicle speed.
Steering is made easier during parking 

manoeuvres (for added comfort) while 

the force needed to steer increases 

progressively as the speed rises (for 

enhanced safety at high speeds).

Special feature of Stop and Start
Depending on the vehicle, when the 

engine switches to standby, the steer-

ing assistance may no longer be opera-

tional. In this case it returns to its origi-

nal state when the engine is restarted 

or when the speed moves above 

0.62  mph (1 km/h) (hill, slope, etc.).

Never leave the steering wheel at 

full lock while stationary.

Do not switch off the engine 

when driving downhill and, 

as a general rule, when 

driving (the power-assisted 

steering and brake cannot operate 

normally).

With the engine switched off, or if 

there is a system fault, it is still pos-

sible to turn the steering wheel. The 

force required will be greater.

1.85

External temperature 

indicator

Special note:
When the exterior temperature is be-

tween –3 °C and +3 °C, the characters 

°C flash and the message “Risk of 

black ice” is displayed on the instru-

ment panel 1.

The time and/or external tempera-

ture are displayed on the multifunc-

tion screen 2
Refer to the handbook for the equip-

ment.

CLOCK AND EXTERIOR TEMPERATURE

External temperature 

indicator
As ice formation is related 

to climatic exposure, local 

air humidity and temperature, the 

external temperature alone is not 

sufficient to detect ice.

1

In the event of a break in the elec-

tric power supply (battery discon-

nected, cut feed wire, etc.), depend-

ing on the vehicle:
– the clock is reset automatically 

after a few minutes as soon as the 

system is able to receive the GPS 

information.
or
– the clock must be reset. We rec-

ommend that you do not adjust 

these settings while driving.

2

1.86

Welcome and goodbye function

(depending on vehicle)
From the multimedia screen, select the 

“Vehicle” menu, then “User settings”, 

“External welcome” and activate or de-

activate the function (ON or OFF).
Depending on the selected choice, the 

door mirrors will fold out:
–  when the ignition is next switched on 

(function deactivated);

–  upon detecting the RENAULT card 

or upon unlocking the vehicle (func-

tion activated).

Folding rear view mirrors

The door mirrors automatically fold in 

when the vehicle is locked (switch 3 in 

position B).
In any case, you can make the door 

mirrors fold in (switch 3 in position C) or 

fold out (switch 3 in position A).
Automatic mode is then deactivated. To 

reactivate it, position switch 3 to B.

REAR VIEW MIRRORS 

(1/2)

Exterior rear view mirrors

Adjustment
Select the door mirror using switch 2

then use button 1 to adjust it to the de-

sired position.

Heated door mirrors
Mirror de-icing is carried out at the 

same time as rear screen de-icing.
Please refer to the “Manual air condi-

tioning” and “Automatic climate control” 

paragraphs.

Objects observed in the 

door mirror glass are actu-

ally closer than they appear. 

For your safety, take this 

into account in order to correctly 

assess the distance before any ma-

noeuvre.

For safety reasons, carry 

out any adjustments when 

the vehicle is not being 

driven.

A

B

C

1

2

3

1.87

Interior rear view mirror

Rear view mirror with lever 4
When driving at night, to avoid being 

dazzled by the headlights of the vehicle 

behind, depress the little lever located 

behind rear view mirror 4.

Rear view mirror without lever 4
The rear-view mirror automatically 

darkens when you are being followed 

by a vehicle using main beam head-

lights or in very bright lighting.

REAR VIEW MIRRORS 

(2/2)

Special feature:
When the rear-view mirror has been 

manually deployed or folded back, it is 

possible to reset it to a usage position. 

To do this, position the switch 3 to C

A mechanical noise from the rear-view 

mirror unit will be heard.
If it is not the case, place switch 3 to A 

and then place switch 3 to C until the 

mechanical noise of the rear-view 

mirror is heard.

A

C

3

Information regarding the activation 

and deactivation of the front pas-

senger airbag is displayed on the in-

terior rear view mirror (please refer 

to the information on "Child safety: 

front passenger airbag deactivation/

activation" in Section 1).

4

1.88

Halogen bulb versions

HEADLIGHT BEAM ADJUSTMENT 

(1/2)

On vehicles fitted with this function, 

control A allows you to adjust the height 

of the beams according to the load.
Turn control A downwards to lower the 

headlights and upwards to raise them.

Examples of positions for adjusting 

control A according to the load

5 doors

Estate

4 doors

Driver alone or with front 

passenger

0

0

0

All seats occupied

1 or 2

1

1

Driver with passengers and 

luggage (or load) reaching the 

maximum permissible all-up 

weight

2 or 3 or 4*

2 or 3*

3

Driver without passengers and 

luggage (or load) reaching the 

maximum permissible all-up 

weight

4

3 or 4*

4

* depending on the vehicle

A

For vehicles not fitted with a con-

trol  A, the headlight adjustment is 

automatic, depending on the vehi-

cle load.

1.89

LED versions

HEADLIGHT BEAM ADJUSTMENT 

(2/2)

Examples of positions for adjusting 

control A according to the load

5 doors

Estate

4 doors

Driver alone or with front 

passenger

0

0

0

All seats occupied

1

1

1

Driver with passengers and 

luggage (or load) reaching the 

maximum permissible all-up 

weight

2 or 3*

2 or 3*

3

Driver without passengers and 

luggage (or load) reaching the 

maximum permissible all-up 

weight

3 or 4*

3

3 or 4*

* depending on the vehicle

1.90

á

Main beam headlights

With the dipped beam 

headlights lit, push stalk 1. This indica-

tor light on the instrument panel comes 

on.
To return to the dipped headlight posi-

tion, pull the stalk 1 towards you again.

EXTERIOR LIGHTING AND SIGNALS 

(1/6)

š

Side lights

Turn ring 3 until the symbol is 

opposite mark 2. This indicator light on 

the instrument panel comes on.

k

Dipped beam 

headlights

Manual operation

Turn ring 3 until the symbol is opposite 

mark 2. This indicator light on the in-

strument panel comes on.

Automatic operation

Turn the ring 3 until the AUTO symbol 

is opposite the mark 2: with the engine 

running, the dipped beam headlights 

switch on or off automatically depend-

ing on the brightness of the light out-

side, without any action on stalk 1.

Before driving at night: 

check that the electrical 

equipment is operating cor-

rectly. As a general precau-

tion, check that the lights are not 

obscured (by dirt, mud, snow or ob-

jects being transported).

1

3

2

When driving on the left in a left-

hand drive vehicle (or vice versa), 

drivers must readjust their lights 

throughout their stay (see “Adjusting 

headlight beams” in Section 1).

1

In mode AUTO, with the main beam 

headlights on, you can still return to 

dipped beam by pulling stalk 1 to-

wards you.

1.91

Automatic main beam 

headlights

Depending on the vehicle, this system 

switches the main beam headlights on 

and off automatically. The function uses 

a camera located behind the interior 

rear-view mirror to detect vehicles that 

are following and coming in the oppo-

site direction.
The main beam headlights come on au-

tomatically if:

–  exterior light is weak;

–  no other vehicles or lighting are de-

tected;

–  the vehicle speed is above approxi-

mately 25 mph (40 km/h).

If any of the above conditions are not 

fulfilled, the system switches to dipped 

beam headlights.

The “automatic main beam 

headlights” system should 

under no circumstances be 

used to replace driver atten-

tion and responsibility with regard 

to vehicle lighting and adapting to 

light, visibility and traffic conditions.

The system may encounter difficul-

ties under certain conditions, inclu-

ding:

–  extreme weather conditions (rain, 

snow, fog, etc.);

–  obstruction in front of the wind-

screen or camera;

–  when a following or oncoming ve-

hicle has weak or hidden lighting;

–  incorrect settings for the front 

headlights;

– reflective systems;

– ...

EXTERIOR LIGHTING AND SIGNALS 

(2/6)

Switching on

Vehicles fitted with a multimedia 

system
From the multimedia screen 4, select 

the “Vehicle” menu, “Driving assist-

ance”, “Automaticmain beam lights” 

then choose “ON" or "OFF".

4

1.92

3

2

EXTERIOR LIGHTING AND SIGNALS 

(3/6)

1

5

6

Vehicles not fitted with a multimedia 

system
– With the vehicle at a standstill, press 

and hold the switch 5 OK to access the 

settings menu;
– repeatedly press the control 6 up or 

down until you reach the “Driving as-

sistance” menu. Press the switch 5 OK;

– repeatedly press the control 6 up or 

down until you reach the Automaticmain 

beam lights menu, then press the 

switch 5 OK.
– press the switch 5 OK again to acti-

vate or deactivate the function:

Activation/deactivation

To activate automatic main beam 

headlights:
– turn the ring 3 until the AUTO symbol 

is opposite the mark 2
– push the stalk 1.

Warning light 

 comes on the in-

strument panel.

To deactivate automatic main beam 

headlights:
– pull the stalk 1 towards you;
– or turn the ring 3 to a position other 

than AUTO;

Warning light 

 goes out on the in-

strument panel.
Note: make sure the windscreen is not 

obscured (dirt, mud, snow, condensa-

tion etc.).

1.93

Automatic main beam 

headlights (continued)

Operating faults
When the message “Check auto light-

ing” appears on the instrument panel, 

the system is deactivated.

Consult an approved dealer.

EXTERIOR LIGHTING AND SIGNALS 

(4/6)

Operating faults

When the message “Check lighting” 
with warning light 

©

 is displayed 

and warning light 

k

 flashes on the 

instrument panel, this indicates that 

there is a lighting fault.

Consult an approved dealer.

Switching off the lights

There are two possibilities:

–  manually, move ring 3 to position 0;

–  automatically, the lights will go out 

when the engine is switched off, the 

driver’s door is opened or the vehicle 

is locked. In this case, the next time 

the engine is started the lights will be 

switched back on according to the 

position of the ring 3.

Lights-on reminder buzzer

A warning beep sounds when the dri-

ver’s door is opened to warn you that 

the lights are still on.

Daytime running lights 

function

The daytime running lights come on 

automatically with no action on stalk 1 

when the engine is started, and they go 

off once the engine is switched off.

3

1

Using the portable naviga-

tion system at night in the 

windscreen area below the 

camera may disturb the op-

eration of the “automatic main beam 

headlights” system (risk of reflection 

on the windscreen).

1.94

“See-me-home lighting” 

function

This function allows you to briefly switch 

on the dipped beam headlights (to pro-

vide light when opening a gate, etc.).
With the engine and lights switched 

off and the ring 3 in position 0 or AUTO

pull the stalk 1 towards you: the dipped 

beam headlights come on for approxi-

mately thirty seconds. To increase this 

duration, you may pull the stalk up to 

four times (total time restricted to two 

minutes). The message “Follow-me 

home for _ _ _” along with the time the 

lights will be on for is displayed on the 

instrument panel to confirm this action. 

You can then lock your vehicle.
To switch off the lights before they go 

out automatically, turn ring 3 to any po-

sition, then return it to the AUTO posi-

tion .

EXTERIOR LIGHTING AND SIGNALS 

(5/6)

Welcome and goodbye 

function

(depending on the vehicle)
Once the function is activated, the day-

time running lights and the rear side 

light light up automatically upon detect-

ing the RENAULT card or when the ve-

hicle is unlocked.
They switch off automatically:
–  approximately one minute after li-

ghting up;

–  when starting the engine based on 

the position of the lighting stalk;

or
–  upon locking the vehicle.

Welcome lighting under the door 

mirrors
With the function activated, the lights 

located under the door mirrors come 

on automatically upon detection of the 

RENAULT card, upon unlocking the 

vehicle or when opening a door.
They switch off automatically:
–  approximately one minute after li-

ghting up;

–  upon starting the engine;
or
–  upon locking the vehicle.

Activating/deactivating the function
From the multimedia screen, select 

“Vehicle”, “User settings”, “External 

welcome”. Choose “ON" or “OFF" to 

activate or deactivate the function.

1.95

EXTERIOR LIGHTING AND SIGNALS 

(6/6)

f

Rear fog lights

Turn centre ring 7 on the stalk 

until the symbol faces mark 2, then re-

lease it.
Operation of the fog lights depends on 

the exterior lighting selected, and an in-

dicator light will light up on the instru-

ment panel.
Do not forget to switch off the fog lights 

when they are no longer needed, to 

avoid inconveniencing other road 

users.

Switching off the lights

Turn the ring 7 again until the mark 2 

is opposite the symbol for the fog light 

that you wish to switch off. The corre-

sponding indicator light on the instru-

ment panel goes out.
The fog lights switch off when the exte-

rior lights are switched off.

When driving in fog or snow, or 

when transporting objects which are 

higher than the roof, the headlights 

do not come on automatically.
Switching on the fog lights remains 

the responsibility of the driver: the 

indicator lights on the instrument 

panel inform you whether the fog 

lights are lit (indicator light on) or not 

(indicator light not on).

7

2

g

Front fog lights

Turn centre ring 4 on stalk 1 

until the symbol faces mark 2, then re-

lease it.
Operation of the fog lights depends on 

the exterior lighting position selected, 

and an indicator light will light up on the 

instrument panel.

1

1.96

Special note

When driving the vehicle, the wiping 

speed slows down whenever the ve-

hicle stops. For example, fast wiping 

speed will slow to normal wiping speed. 

As soon as the vehicle moves off, 

wiping will return to the speed originally 

selected.

If stalk 1 is operated, it overrides and 

cancels the automatic function.

Vehicle fitted with intermittent 

windscreen wipers

  A single sweep

A short push will trigger one sweep 

of the wipers.

  B stop

  C intermittent wiping

The wipers will pause for several 

seconds between sweeps. It is 

possible to change the time be-

tween sweeps by turning ring 2.

  D  slow continuous wiping

  E  fast continuous wiping

WINDSCREEN WASH, WIPE 

(1/6)

1

1

A

B

C

D

2

Positions AC and D are accessible 

with the ignition on. Position E is 

accessible only when the engine is 

running.

E

Efficiency of a wiper blade

Check the condition of the wiper 

blades. How long they last depends 

on you:
–  it must remain clean: clean the 

blade and the screen regularly 

with soapy water;

–  do not use it when the screen is 

dry;

–  free it from the screen when it has 

not been used for a long time.

In all cases, replace it as soon as 

it begins to lose efficiency: approx-

imately once a year. Refer to the 

“Wiper blades: replacement” para-

graph in Section 5.

Precaution for using the 

wipers

– in freezing or snowy weather, 

clear the screen before starting 

the wipers (risk of motor over-

heating);

–  ensure that no objects are ob-

structing the travel of the blade.

1.97

WINDSCREEN WASH, WIPE 

(2/6)

1

F

2

Vehicle fitted with front 

windscreen wiper rain sensor

The rain sensor is located on the winds-

creen, in front of the interior rear-view 

mirror.

  A single sweep

A short push will trigger one sweep 

of the wipers.

  B stop

  C  automatic wiper function

When this position is selected, the 

system detects water on the wind-

screen and triggers the wipers at a 

suitable wiping speed. It is possi-

ble to change the triggering thresh-

old and the time sweeps by turning 

ring 2:

–  F : minimum sensitivity

–  G : maximum sensitivity

The higher the sensitivity, the quic-

ker the wipers will react and the 

faster the wipe.

When activating automatic wiping or 

when increasing sensitivity, one sweep 

of the blades is performed.
Note: 
–  

the rain sensor is only intended as a 

driving aid. In the event of reduced 

visibility, the driver should manually 

activate the wipers. In foggy weather 

or during snowfalls, wiping is not au-

tomatically triggered and remains 

under the driver’s control;

–  

in the event of temperatures below 

zero, automatic wiping is not acti-

vated when the vehicle is started. It 

is automatically activated as soon as 

the vehicle exceeds a certain speed 

(approximately 5 mph (8 km/h));

–  

do not activate automatic wiping in 

dry weather; 

–  

fully de-ice the windscreen before 

activating automatic wiping.

G

1

A

B

C

D

E


Content   ..  4  5  6  7   ..