Renault Alaskan (2017 year). Manual - part 3
5. Shorten the rigid attachment to have the child
restraint firmly tightened; press downward
➄
and rearward
➅
firmly in the centre of the child
restraint with your knee to compress the vehicle
seat cushion and seatback. Adjustable
seatbacks should be positioned to ensure full
contact between child restraint and seatback.
6. If the child restraint is equipped with a top tether
strap, route the top tether strap and secure the
tether strap to the tether anchor point. (See
“Child restraint anchorage (where fitted)” earlier
in this section.)
If the child restraint is equipped with other anti-
rotation devices such as support legs, use them
instead of (or together with) the top tether strap
following the child restraint manufacturer’s in-
structions.
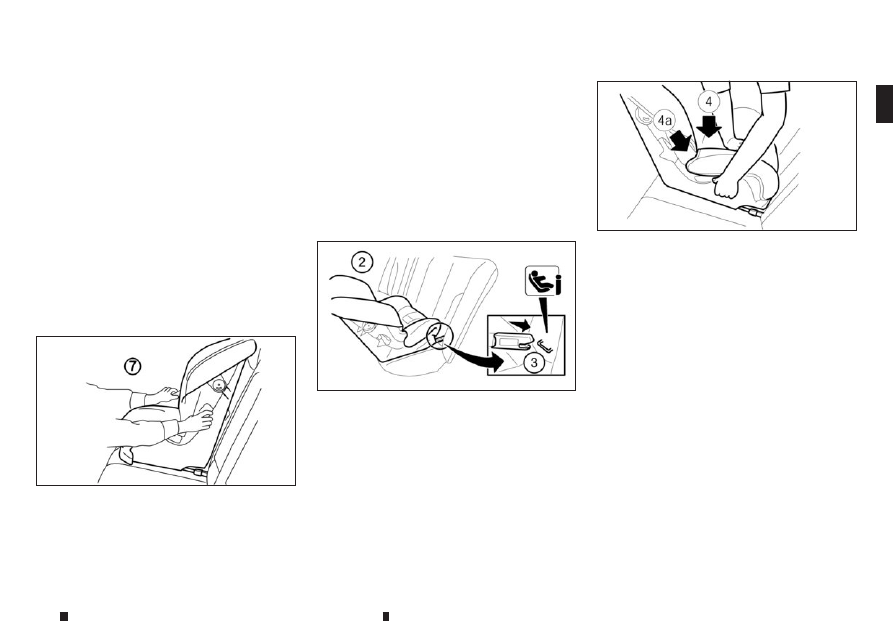
7. Test the child restraint before you place the child
in it
➆
. Push the child restraint from side to side
and tug it forward to make sure that it is held
securely in place.
8. Check to make sure that the child restraint is
properly secured prior to each use. If the child
restraint is loose, repeat steps 1 through 7.
Rear-facing child restraints:
Be sure to follow the child restraint manufacturer’s
instructions for the proper use of your child restraint.
Follow these steps to install a rear-facing child re-
straint on the second row outboard seats using
ISOFIX:
1. Remove the head restraint on the seat.
2. Position the child restraint on the seat
➁
.
3. Secure the child restraint anchor attachments to
the ISOFIX lower anchors
➂
.
4. Shorten the rigid attachment to have the child
restraint firmly tightened. To compress the ve-
hicle seat cushion and seatback, firmly press
downward
➃
and rearward
j
4a in the centre of
the child restraint with your hand.
If there is any contact between the child restraint
and the front seat, slide the front seat forward
until contact no longer occurs.
If the child restraint is equipped with other anti-
rotation devices such as support legs, use them
following the child restraint manufacturer’s in-
structions.
NIC2413
Step 7
NPA1525
Step 2, and 3
NPA1409
Step 4
Safety — seats, seat belts and supplemental restraint system
1-23