Peugeot 308 CC (2014 year). Manual - part 6
 

  Index      Peugeot     Peugeot 308 CC - service manual 2014 year in english


Search            


Content   ..  4  5  6  7   ..


Peugeot 308 CC (2014 year). Manual - part 6


5

!

AUTO

79

VISIBILITY

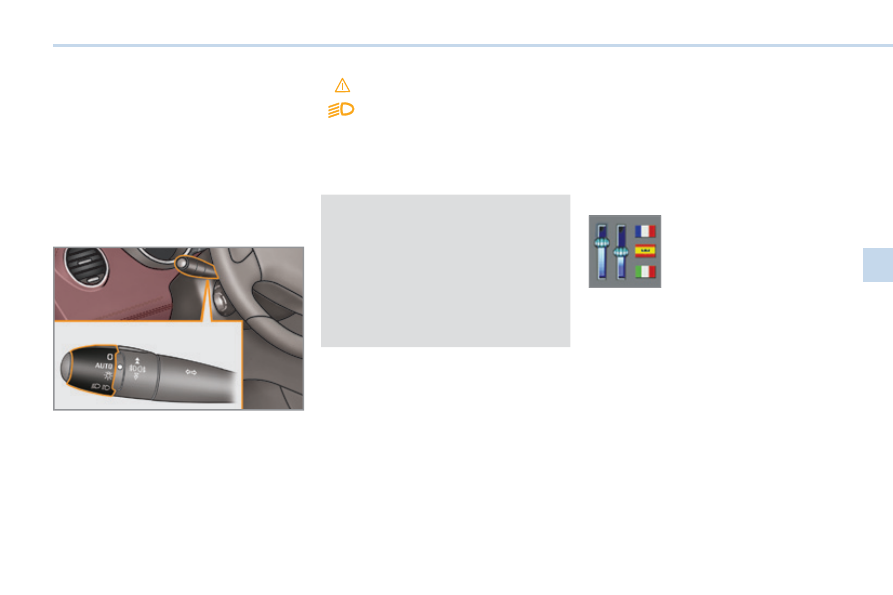
             Automatic illumination of headlamps 

 When a low level of ambient light is de-

tected by a sunshine sensor, the num-

ber plate lamps, sidelamps and dipped 

beam headlamps are switched on auto-

matically, without any action on the part 

of the driver. They can also come on if 

rain is detected, at the same time as 

automatic operation of the windscreen 

wipers. 

 As soon as the brightness returns to a 

suffi cient  level  or  after  the  windscreen 

wipers are switched off, the lamps are 

switched off automatically. 

  Activation 
      Turn the ring to the  

"AUTO"   posi-

tion. The activation of the function 

is accompanied by the display of a 

message in the screen.   

  Deactivation 
    

 Turn the ring to another position. 

Deactivation of the function is ac-

companied by the display of a mes-

sage in the screen.   

 In fog or snow, the sunshine sen-

sor  may  detect  suffi cient  light.  In 

this case, the lighting will not come 

on automatically. 

 Do not cover the sunshine sensor, 

coupled with the rain sensor and 

located in the centre of the wind-

screen behind the rear view mirror; 

the associated functions would no 

longer  be  controlled.   

  Operating  fault 

  Automatic  "guide-me-home" 

lighting 


When the automatic illumination of 

headlamps function is activated (light-

ing control stalk in the " 

AUTO "  posi-

tion), under low ambient light the dipped 

beams headlamps come on automati-

cally when the ignition is switched off.  

 In the event of a malfunction of 

the sunshine sensor, the lighting 

comes on, this warning lamp is 

displayed in the instrument panel 

and/or a message appears in the screen, 

accompanied by an audible signal. 

 Contact a PEUGEOT dealer or a qualifi ed 

workshop. 

  Programming 

 Activation or deactivation, 

as well as the duration of 

the guide-me-home light-

ing, is set in the vehicle 

confi guration menu.   

5

i

i

!

80

VISIBILITY

EXTERIOR WELCOME 

LIGHTING 

  The remote switching on of the light-

ing and side spotlamps makes your 

approach to the vehicle easier in poor 

light. It is activated in accordance with 

the light intensity detected by the bright-

ness sensor. 

  Switching  on 
      Press the open padlock on the re-

mote  control.  

  The dipped beam headlamps and 

the sidelamps come on, as well as 

the side spotlamps, located in the 

exterior mirrors; your vehicle is also 

unlocked.   

  The welcome lighting duration is 

associated with and identical to 

that of the automatic guide-me-

home  lighting.   

       MANUAL  ADJUSTMENT  OF 

HALOGEN HEADLAMPS 

 Initial setting is position 

 "0" . 

 To avoid dazzling other road users, the 

height of the halogen bulb headlamps 

must be adjusted according to the load 

in the vehicle. 


0.


 1 or 2 people in the front seats. 

  -.


 3  people. 


1.


 4  people. 

  -.


 Intermediate  setting. 


2.


4 people + maximum authorised 

loads. 

  -.


 Intermediate  setting. 


3.


 Driver + maximum authorised loads. 

  Switching  off 
 The exterior welcome lighting switches 

off automatically after a set time, when 

the ignition is switched on or on locking 

the  vehicle.  

AUTOMATIC ADJUSTMENT OF 

XENON HEADLAMPS 

 Do not touch the xenon headlamp 

bulbs. 

 Contact a PEUGEOT dealer or a 

qualifi ed workshop. 

 In order to avoid causing a nuisance to 

other road users, this system corrects 

the height of the xenon headlamp beams 

automatically and when stationary, in re-

lation to the load in the vehicle. 


If a malfunction occurs, this 

warning lamp is displayed on 

the instrument panel, accom-

panied by an audible signal and 

a message in the screen. 

 The system then places your headlamps 

in the lowest position. 

5

i

i

81

VISIBILITY

DIRECTIONAL LIGHTING 

 When the dipped or main beam head-

lamps are on, this function enables the 

light beams to provide improved lighting 

of the side of the road when cornering. 

 The use of this function, from approxi-

mately 12 mph (20 km/h) and associ-

ated with the xenon headlamps only, 

considerably improves the quality of 

your lighting when cornering. 


with directional lighting  


without directional lighting  

  Programming 

  Operating  fault 

 The function is activated or 

deactivated via the vehicle 

confi guration menu.  

 If a fault occurs, this warning 

lamp  fl ashes  in  the  instrument 

panel, accompanied by a mes-

sage in the screen. 

 Contact a PEUGEOT dealer or a quali-

fi ed workshop. 

 When stationary or moving at very 

low speed or when reverse gear is 

engaged, the function is inactive. 

 The status of the function remains 

in the memory when the ignition is 

switched  off.  

   Travelling  abroad 
 If using your vehicle in a country 

that drives on the other side of the 

road, the headlamps must be ad-

justed to avoid dazzling on-coming 

drivers. 

 Contact a PEUGEOT dealer or a 

qualifi ed workshop.   

5

82

VISIBILITY

WIPER CONTROLS 

 Control stalk for the various windscreen 

wiping modes for clearing rain and 

cleaning the windscreen. 

  Manual operation of the 

windscreen wipers 

 Fast (heavy rain). 

 Normal (moderate rain). 


Intermittent (proportional to 

the speed of the vehicle). 

 Park.   

  Programming 

 An automatic mode is also available, 

providing automatic rain sensitive wind-

screen  wipers.  

  This control stalk allows selection of the 

most suitable wiping speed according 

to the weather conditions. 

        Automatic, then single 

wipe (see the corre-

sponding  section).   

          Windscreen and headlamp 

wash 

      Pull the windscreen wiper stalk to-

wards you. The windscreen wash 

then the windscreen wipers operate 

for a fi xed period.  


The headlamp washers only operate 

when  

the dipped or main beam head-

lamps are on  , with the vehicle moving . 

  To reduce the consumption of the fl uid 

by the headlamp washers, they oper-

ate only with every seventh use of the 

screenwash or every 25 miles (40 km) 

during a given journey.   

5

!

i

83

VISIBILITY

           Screenwash/headlamp wash low 

 In  the  case  of  vehicles  fi tted 

with headlamp washers, when 

the minimum level of the res-

ervoir is reached, this warning 

lamp and/or the service warning lamp 

is displayed in the instrument panel, ac-

companied by an audible signal and a 

message in the screen. 

 Next time you stop, fi ll the screenwash / 

headlamp wash fl uid reservoir. 

 The warning lamp is displayed when 

the ignition is switched on, or every time 

the stalk is operated, until the reservoir 

is fi lled.   

             Automatic rain sensitive 

windscreen wipers 

 The windscreen wipers operate automati-

cally, without any action on the part of the 

driver, if rain is detected (sensor behind 

the rear view mirror), adapting their speed 

to the intensity of the rainfall. 

  Activation 
 This is controlled manually by the driver 

by pushing the stalk downwards to the 


"AUTO"   position. 

 It is accompanied by a message in the 

screen.  

 Do not cover the rain sensor, linked 

with the sunshine sensor and locat-

ed in the centre of the windscreen 

behind the rear view mirror. 

 Switch off the automatic rain sen-

sitive wipers when using an auto-

matic car wash. 

 In winter, to avoid damaging the 

wiper blades, it is advisable to wait 

until the windscreen is completely 

clear of ice before activating the 

automatic rain sensitive wipers.   

 The automatic rain sensitive wipers 

must be reactivated if the ignition has 

been off for more than one minute, by 

pushing the stalk downwards.  

  Switching  off 
 This is controlled manually by the driver 

by moving the stalk upwards then re-

turning it to position  

"0" . 

 It is accompanied by a message in the 

screen. 

  Operating  fault 
 If an automatic wiping malfunction oc-

curs, the wipers will operate in intermit-

tent mode. 

 Have it checked by a PEUGEOT dealer 

or a qualifi ed workshop. 

5

i

i

84

VISIBILITY

          Special position of the 

windscreen wipers 


This position permits release of the 

windscreen wiper blades. 

 It is used for cleaning or replacement 

of the blades. It can also be useful, in 

winter, to detach the blades from the 

windscreen. 

  To maintain the effectiveness of the 

"fl at-blade" type of wiper blades, it 

is advisable to: 

   -  

handle  them  with  care, 

  -  

clean  them  regularly  using 

soapy water, 

  -   avoid using them to retain card-

board on the windscreen, 

  -   replace them at the fi rst signs of 

wear.    

COURTESY LAMPS 


1.    Front courtesy lamp  


2.    Map reading lamp  


3.    Rear courtesy lamp   

  Front and rear courtesy lamps 


In this position, the courtesy 

lamp comes on gradually: 

 In permanent lighting mode, different 

lighting times are available: 

   -  

with  the  ignition  off,  approxi-

mately ten minutes, 

  -   in energy economy mode, ap-

proximately thirty seconds, 

  -  

with the engine running, unlimited.   

   -  

when  the  vehicle  is  unlocked, 

  -   when the key is removed from the 

ignition, 


  when the remote control locking 

button is activated, in order to locate 

your  vehicle.  

 Permanently  off. 

 Permanent  lighting. 

  Map  reading  lamps 

      With the ignition on, press the cor-

responding  switch.   

 It switches off gradually: 

   -  

when  the  vehicle  is  locked, 

  -   when the ignition is switched on, 


  30 seconds after the last door is 

closed.  

       Any action on the wiper stalk in the 

minute after switching off the igni-

tion places the blades vertically on 

the screen. 

     To park the blades again, switch on 

the ignition and operate the wiper 

stalk.   

5

i

VISIBILITY

INTERIOR MOOD LIGHTING 

 Different lighting times are available: 

   -   when the ignition is off, approxi-

mately ten minutes, 

  -   in energy economy mode, ap-

proximately thirty seconds, 

  -   when the engine is running, no 

limit.  

 Your  vehicle  is  fi tted  with  two  boot 

lamps; one in the left-hand boot side 

trim and a second in the boot lid interior 

trim. 

 They come on automatically when the 

boot is opened and switch off automati-

cally when the boot is closed. 

 They cannot be deactivated manually. 

INTERIOR WELCOME LIGHTING  BOOT LIGHTING 

 The remote switching on of the passen-

ger compartment lighting makes your 

entry into the vehicle easier in poor 

light. It is activated in accordance with 

the light intensity detected by the bright-

ness sensor. 

  Switching  on 

      Press the open padlock on the re-

mote  control.  

 The front door sill lighting, the footwell 

lighting and the courtesy lamps come 

on; your vehicle is also unlocked.  

  Switching  off 

 The interior welcome lighting switches 

off automatically after a certain time, 

when one of the doors is opened or the 

ignition is switched on.  

 The dimmed passenger compartment 

lighting improves visibility in the vehicle 

when the light is poor. 

  Switching  on 

 At night, the footwell lighting and the 

front courtesy mood lamp come on 

automatically when the sidelamps are 

switched  on.  

  Switching  off 

 The interior mood lighting switches off 

automatically when the sidelamps are 

switched  off.  

  Programming 

 The function is activated or 

deactivated via the vehicle 

confi guration menu. 


This function is activated 

by  default.  

6

86

FITTINGS

INTERIOR FITTINGS 


1.    Sun visor   


(see details on following page) 


2.    Storage compartment  
  

3.    Storage   for oddments  
  

4.    Bag hook   


(see details on following page) 


5.    Lockable, refrigerated glove box   


(see details on following page) 


6.    Large door    pockets  
  

7.    Small door    pockets  
  

8.    Illuminated ashtray   


(see details on following page) 


9.    Storage compartment with

non-slip carpet  


10.    12 V   accessory   socket   


(see details on following page) 


11.    Lockable front armrest   


(see details on following page) 


12.    Storage box   


(see details on following page)  

6

87

FITTINGS

LOCKABLE, REFRIGERATED 

GLOVE BOX 

 This has areas for storing a bottle of 

w ater, the vehicle's handbook pack... 

 Its lid has areas for storing a pen, a pair 

of spectacles, tokens, cards, a can... 

 It is also locked or unlocked when the 

vehicle is locked or unlocked using the 

remote control or the key. 

    

 To open the glove box, raise the 

handle.  

 The lighting comes on when the lid is 

opened. 

 The glove box is fi tted with an air vent  

A , 

which can be opened or closed. It dis-

tributes the same conditioned air as the 

vents in the passenger compartment. 

 Component which protects against sunlight 

from the front or the side, also equipped with 

an illuminated courtesy mirror. 

      With the ignition on, raise the con-

cealing fl ap; the mirror is lit automat-

ically.  

 This sun visor is also equipped with a 

ticket holder. 

 BAG  HOOK 

      Press the lower part of the hook to 

unfold it. 

     Hang the strap of your bag on the 

hook to secure it.  

6

88

FITTINGS

LOCKABLE FRONT ARMREST 

 Comfort and storage for the driver and 

front passenger. 


The height and longitudinal position 

of the armrest lid can be adjusted for 

greater comfort. 

 Its compartment is also locked or unlocked 

when the vehicle is locked or unlocked us-

ing the remote control or the key. 

  Storage 

 It can hold up to 6 CDs. 

      Raise the lever  

1 . 

     Raise  the  lid  fully.   

      Slide the lid fully forwards or rear-

wards.   

      Raise the lid to the required position 

(low, intermediate or high). 

     If you raise the lid slightly beyond 

the high position, guide it when low-

ering it to the low position.   

  Longitudinal  adjustment 

  Height  adjustment 

PEUGEOT CONNECT USB 


This connection box, consisting of a 

USB port, is located in the front armrest. 

 It permits the connection of a portable 

device, such as an iPod 

®

  digital audio 

player of generation 5 or later or a USB 

stick. 

 It  reads  the  audio  fi le  formats  (mp3, 

ogg, wma, wav...) which are transmitted 

to your audio equipment and played via 

the vehicle's speakers. 

 You  can  manage  these  fi les  using  the 

steering wheel controls or the audio 

equipment control panel and display 

them in the multifunction screen.  


When in use connected to the USB 

port, the portable equipment charges 

automatically.  
  For more information on the use of this 

equipment, refer to the "Audio equip-

ment and telematics" section.  

6

89

FITTINGS

STORAGE BOX 

 Storage area, built into the rear of the 

front armrest, for the rear passengers. 

    

 To empty the box, after opening, 

press the tab and remove it.  

12 V ACCESSORY SOCKET 

      To connect a 12 V accessory (max 

power: 120 W), lift the cover and 

connect a suitable adaptor.  

ILLUMINATED ASHTRAY 

     Pull the drawer for access to the 

ashtray. 

     To empty the ashtray, after opening, 

press the tab and remove the ashtray.  

6

!

90

FITTINGS

  To avoid any risk of jamming of the 

pedals: 

   -   only use mats which are suited 

to the fi xings already present in 

the  vehicle;  these  fi xings  must 

be used, 

  -   never fi t one mat on top of an-

other.  

 The use of mats not approved by 

PEUGEOT may interfere with ac-

cess to the pedals and hinder the 

operation of the cruise control / 

speed limiter. 

 The mats approved by PEUGEOT 

have two fi xings located below the 

seat.   

MATS 

 Removable carpet protection. 

  Refitting 

 To refi t the mat on the driver's side: 

      position the mat correctly, 

     refi t the fi xings by pressing, 

     check that the mat is secured cor-

rectly.  

  Fitting 

 When  fi tting  the  mat  for  the  fi rst  time, 

on the driver's side use only the fi xings 

provided in the wallet attached. 

 The other mats are simply placed on 

the  carpet.  

  Removal 

 To remove the mat on the driver's side: 

      move the seat as far back as possible, 

     unclip the fi xings, 

     remove  the  mat.   

6

91

FITTINGS

BOOT FITTINGS 


1.    Stowing rings  


2.    Luggage retaining net     


(see details on following page) 


3.    Boot screen     


(see details on following page) 


4.    Storage net  


5.    Luggage retaining strap  


6.    Storage box (version fi tted with a 

temporary tyre repair kit)     


(see details on following page)  


or     


Tool  box  (version  fi tted  with  a 

standard spare wheel)     


(refer to the "Practical information - 

Changing a wheel" section)  

6

i

FITTINGS

 Hooked onto the stowing rings, this en-

ables you to secure your luggage.  

       Luggage retaining net 

      Raise the boot carpet to gain access 

to the storage box. 

     Hook the boot carpet on the boot 

seal using its handle.  

 This has areas for storing the windstop 

and two warning triangles. 

 By removing this box you gain access 

to the temporary tyre repair kit and the 

vehicle  tools.  

                Storage box 

                Boot screen 

 In the "cabriolet" confi guration, this de-

fi nes the luggage space in the boot. 

      When the boot screen is unfolded, 

check that the luggage:  

   -   never  raises  it, 

  -   is never placed on top of it.  

  The load space cover must always 

be unfolded before a roof opening 

manoeuvre is triggered (refer to 

"Familiarisation - Opening" section).   

7

i

i

93

SAFETY

DIRECTION INDICATORS 

 If you forget to cancel the direc-

tion indicators for more than twenty 

seconds, the volume of the audible 

signal will increase if the speed is 

above 40 mph (60 km/h). 

      Left: lower the lighting stalk passing 

the point of resistance. 

     Right: raise the lighting stalk passing 

the point of resistance.  

       HAZARD  WARNING  LAMPS 

 A visual warning by means of the direc-

tion indicators to alert other road users to 

a vehicle breakdown, towing or accident. 

      Press this button, the direction indi-

cators fl ash.  

 They can operate with the ignition off. 

             Automatic operation of hazard 

warning lamps 


When braking in an emergency, de-

pending on the deceleration, the hazard 

warning lamps come on automatically. 

 They  switch  off  automatically  the  fi rst 

time you accelerate. 

    

 You can also switch them off by 

pressing  the  button.   

HORN 

      Press one of the spokes of the steering 

wheel.  

 Use the horn moderately and only 

in the following cases: 

   -  

immediate  danger, 

  -   overtaking a cyclist or pedes-

trian, 

  -  

when  approaching  an  area 

where there is no visibility.   

  Audible warning to alert other road us-

ers to an imminent danger. 

7

!

i

!

94

SAFETY

BRAKING ASSISTANCE 

SYSTEMS 

 Group of supplementary systems which 

help you to obtain optimum braking in 

complete safety in emergency situations: 

   -  

anti-lock  braking  system  (ABS), 

  -  

electronic  brake  force  distribution 

(EBFD), 

  -  

emergency  braking  assistance  (EBA).  

  Anti-lock  braking  system 

and electronic brake force 

distribution 

 Linked systems which improve the sta-

bility and manoeuvrability of your vehi-

cle when braking, in particular on poor 

or slippery surfaces. 


When braking in an emergency, 

press very fi rmly without releasing 

the  pressure.  

  When replacing wheels (tyres and 

rims), ensure that they conform to 

the manufacturer's recommenda-

tions.   

  Operating  fault 

 If this warning lamp comes on, 

accompanied by an audible 

signal and a message in the 

screen, it indicates a malfunc-

tion of the anti-lock braking system 

which could result in loss of control of 

the vehicle when braking. 

 If this warning lamp comes on, 

together with the  

STOP   and 


ABS  warning lamps, accompa-

nied by an audible signal and 

a message in the screen, it indicates a 

malfunction of the electronic brake force 

distribution which could result in loss of 

control of the vehicle when braking. 

          Emergency braking assistance 


System which, in an emergency, en-

ables you to obtain the optimum braking 

pressure more quickly, thus reducing the 

stopping distance. 

  Activation 
 

The anti-lock braking system comes 

into operation automatically when there 

is a risk of wheel lock. 

 Normal operation of the ABS may make 

itself felt by slight vibration of the brake 

pedal.  

  Activation 
 It is triggered by the speed at which the 

brake pedal is pressed. 

 The effect of this is a reduction in the 

resistance of the pedal and an increase 

in braking effi ciency. 


When braking in an emergency, 

press  fi rmly  without  releasing  the 

pressure.   


You must stop as soon as it is safe 

to do so.  


In either case, contact a PEUGEOT 

dealer or a qualifi ed workshop.  

EMERGENCY OR ASSISTANCE 

CALL 


This system allows you to make an 

emergency or assistance call to the 

emergency services or to the dedicated 

PEUGEOT service. 

  For more information on the use of this 

function, refer to the "Audio equipment 

and  telematics"  section.   


Content   ..  4  5  6  7   ..