Nissan Qashqai (2007-2010). Manual - part 500
EX-6
< ON-VEHICLE REPAIR >
[HR16DE]
EXHAUST SYSTEM
INSTALLATION
Note the following, and install in the reverse order of removal.
CAUTION:
• Always replace seal bearings with new ones when reassembling.
• Discard any heated oxygen sensor 2 which has been dropped onto a hard surface such as a con-
crete floor; use a new one.
• Before installing a new heated oxygen sensor 2, clean exhaust system threads using the heated oxy-
gen sensor thread cleaner and apply anti-seize lubricant (commercial service tool).
• Never over torque heated oxygen sensor 2. Doing so may cause damage to the heated oxygen sen-
sor 2, resulting in the “MI” coming on.
• Remove deposits from the sealing surface of each connection. Connect them securely to avoid gas
leakage.
• When installing each mounting rubber, avoid twisting or unusual extension in up/down and right/left
directions.
• Temporarily tighten mounting nuts and bolts. Check each part for unusual interference, and then
tighten them to the specified torque.
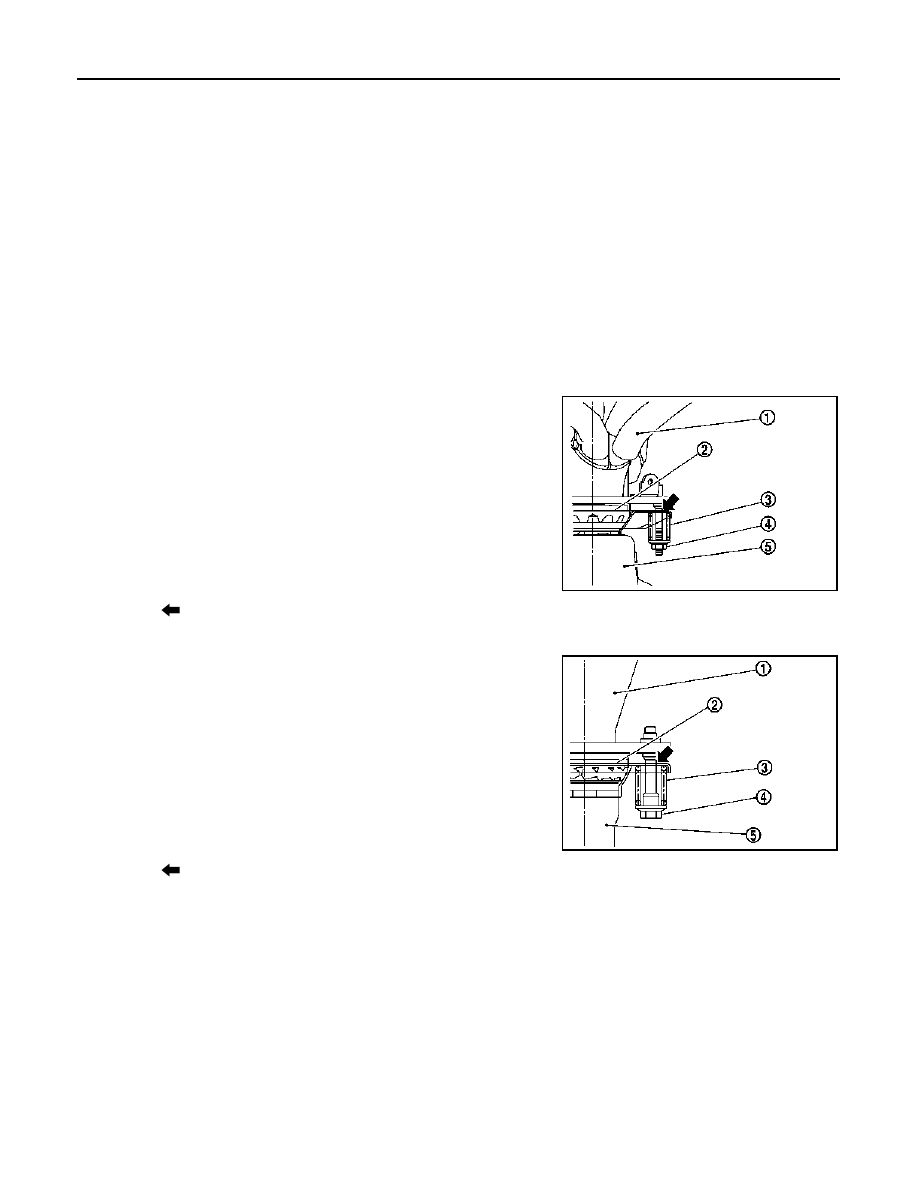
Exhaust Manifold to Exhaust Front Tube
1.
Securely insert seal bearing (2) into exhaust manifold (1) side in
the direction shown in figure.
CAUTION:
Be careful not to damage seal bearing surface when install-
ing.
2.
With spring, tighten mounting nut.
• Be careful that mounting nut does not interfere with flanged
area (
), and tighten it.
Exhaust Front Tube to Main Muffler
1.
Securely insert seal bearing (2) into exhaust front tube (1) side
in the direction shown in figure.
CAUTION:
Be careful not to damage seal bearing surface when install-
ing.
2.
With spring, tighten mounting bolt.
• Be careful that mounting bolt does not interfere with flanged
area (
), and tighten it.
Inspection
INFOID:0000000000905776
INSPECTION AFTER INSTALLATION
• Make sure clearance between tail tube and rear bumper is even.
• With engine running, check exhaust tube joints for gas leakage and unusual noises.
• Ensure that mounting brackets and mounting rubbers are installed properly and free from undue stress.
Improper installation could result in excessive noise and vibration.
3
: Spring
4
: Mounting nut
5
: Exhaust front tube
PBIC3797E
3
: Spring
4
: Mounting bolt
5
: Main muffler
PBIC3798E