Lexus RZ (2023 year). Manual in english - page 6
 

  Index      Manuals     Lexus RZ (2023 year). Manual in english


Search            copyright infringement  


Content      ..     4      5      6      7     ..


Lexus RZ (2023 year). Manual in english - page 6


185

3

3-4. Driving when the windows or mirrors are fogged up

Dri
vin

g ac
co

rd

ing to th

e cond

ition
s

3-4.Driving when the windows or mirrors are fogged up

Press the windshield defogger switch.
The dehumidification function will 
operate and the air flow will increase.

Set the outside/recirculated air mode 
switch to outside air mode if the recir-
culated air mode is used. (It may switch 
automatically.)
To defog the windshield and the side 
windows quickly, turn the air flow and 
temperature up.
To return to the previous mode, press 
the windshield defogger switch again 
when the windshield is defogged.

Fogging up of the windows

The windows will easily fog up when the 

humidity in the vehicle is high.

Pressing “A/C” button or selecting “A/C” 
will dehumidify the air from the outlets and 
defog the windshield effectively.

If you turn “A/C” off, the windows may fog 

up more easily.

The windows may fog up if the recircu-

lated air mode is used.

Defog the windshield

Defoggers are used to defog the 
windshield and front side windows.

WARNING

Do not use the windshield defogger in 

extremely humid areas when the air 

conditioning system is set to a low tem-

perature.

The difference between the temperature 

of the outside air and that of the wind-

shield can cause the outer surface of the 

windshield to fog up, blocking your 

vision.

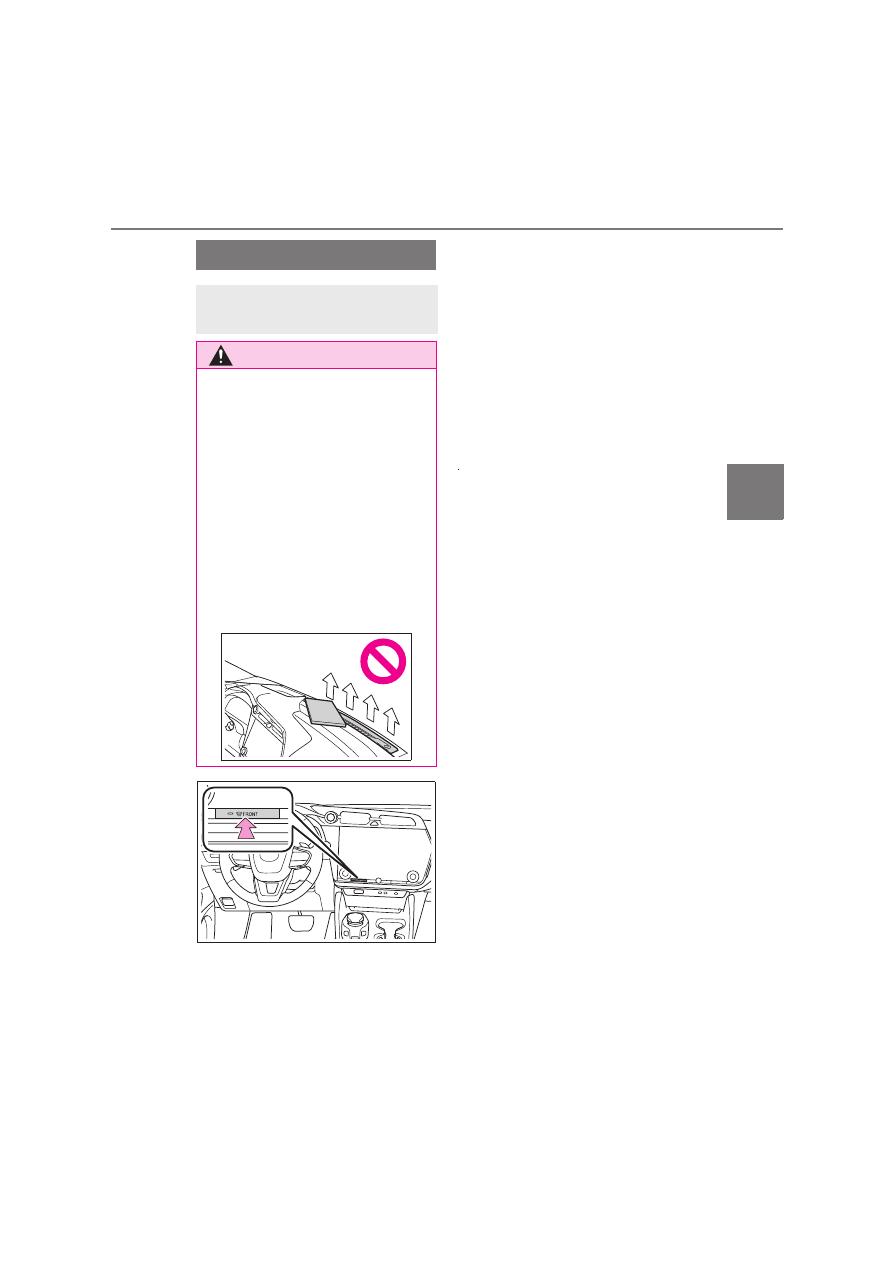
Do not place anything on the instru-

ment panel which may cover the air 

outlets.

Otherwise, air flow may be obstructed, 

preventing the windshield defoggers 

from defogging.

186

3-4. Driving when the windows or mirrors are fogged up

Press the rear windshield and outside 
rear view mirror defogger switch.
The rear window defogger and outside 
rear view mirror defoggers will operate 
and defog the rear window and outside 
rear view mirrors.
The defoggers will automatically turn 
off after a period of time.

Press the rear windshield and outside 
rear view mirror defogger switch.
The rear window defogger and outside 
rear view mirror defoggers will operate 
and defog the rear window and outside 
rear view mirrors.
The defoggers will automatically turn 
off after a period of time.

Defog the rear window

WARNING

Do not touch the surface of the outside 

rear view mirrors when the rear window 

defogger and outside rear view mirror 

defoggers are operating, as the surface 

of the mirrors will become extremely hot 

and may cause burns.

Defog the outside rear view 
mirrors

WARNING

Do not touch the surface of the outside 

rear view mirrors when the rear window 

defogger and outside rear view mirror 

defoggers are operating, as the surface 

of the mirrors will become extremely hot 

and may cause burns.

187

3

3-5. Driving when it is cold

Dri
vin

g ac
co

rd

ing to th

e cond

ition
s

3-5.Driving when it is cold

Use fluids that are appropriate to 
the prevailing outside temperatures.

• Power control unit coolant
• Heater coolant
• Washer  fluid

Have a service technician inspect 
the condition of the 12-volt battery.

Have the vehicle fitted with four winter 
tires.
Ensure that all tires are the specified 
size and brand.

Install the tire chains to the front two 
tires.

*

Make sure to use tire chains which 
match the tire size.

*

: Tire chains cannot be mounted on 

20-inch tires.

Observe the following precautions when 

installing, removing, and handling tire 

chains:

Install and remove tire chains in a safe 

location.

Install tire chains to the front tires only.

Do not install tire chains to the rear tires.

Install tire chains following the instruc-

tions provided with the tire chains.

Install tire chains to the front tires as 

tightly as possible. Retighten the chains 

after driving 0.5 - 1.0 km (1/4 - 1/2 mile).

Preparing for cold weather

Carry out the necessary prepara-
tions and inspections before driving 
the vehicle in cold weather. Always 
drive the vehicle in a manner 
appropriate to the prevailing 
weather conditions.

Necessary inspection items

Mounting winter tires

WARNING

Observe the following precautions when 

winter tires are mounted to the vehicle.

Failure to do so may lead to loss of con-

trol of the vehicle.

Use tires of the specified size.

Maintain the recommended level of air 

pressure.

Do not drive at speeds in excess of the 

speed limit or the speed limit specified 

for the winter tires mounted.

When using winter tires, mount them 

to all four wheels.

NOTICE

When having winter tires repaired or 

replaced, contact any authorized Lexus 

retailer or Lexus authorized repairer, or 

any reliable repairer or legitimate tire 

retailer.

This is because the removal and mount-

ing of winter tires affects the operation of 

the tire pressure warning valves and 

transmitters.

When using tire chains

WARNING

Observe the following precautions when 

tire chains are installed to the vehicle.

Failure to do so may lead to the vehicle 

not being able to be driven safely.

188

3-5. Driving when it is cold

Selecting tire chains

Use the correct tire chain size when 
mounting the tire chains. Chain size is 
regulated for each tire size.

Vehicles with 18-inch tires

Side chain (3 mm [0.12 in.] in diam-

eter)
Side chain (10 mm [0.39 in.] in 
width)
Side chain (25 mm [0.98 in.] in 
length)
Cross chain (4 mm [0.16 in.] in 
diameter)
Cross chain (14 mm [0.55 in.] in 
width)
Cross chain (25 mm [0.98 in.] in 
length)

Vehicles with 20-inch tires

Tire chains cannot be mounted on the 
20-inch tires.
Snow tires should be used instead.

Regulations on the use of tire 
chains

Regulations regarding the use of tire 
chains vary depending on location and 
type of road. Always check local regu-
lations before installing chains.

WARNING

Do not drive in excess of the speed 

limit specified for the tire chains being 

used, or 50 km/h (30 mph), which-

ever is lower.

Avoid driving on bumpy road surfaces 

or over potholes.

Avoid sudden acceleration, abrupt 

steering, sudden braking and shifting 

operations that cause sudden regen-

erative braking.

Slow down sufficiently before entering 

a curve to ensure that vehicle control is 

maintained.

Do not use LTA (Lane Tracing Assist).

Do not use LDA (Lane Departure 

Alert).

NOTICE

Fitting tire chains

The tire pressure warning valves and 

transmitters may not function correctly 

when tire chains are fitted.

A

B

C

D

E

F

189

3

3-5. Driving when it is cold

Dri
vin

g ac
co

rd

ing to th

e cond

ition
s

Perform the following according to the 
driving conditions:

Do not try to forcibly open a window 
or move a wiper that is frozen. Pour 
warm water over the frozen area to 
melt the ice. Wipe away the water 
immediately to prevent it from 
freezing.

To ensure proper operation of the 
climate control system fan, remove 
any snow that has accumulated on 
the air inlet vents in front of the 
windshield.

Check for and remove any excess 
ice or snow that may have accumu-
lated on the exterior lights, outside 
rear view mirrors, windows, vehicle’s 
roof, chassis, around the tires or on 
the brakes.

Remove any snow or mud from the 
bottom of your shoes before getting 
in the vehicle.

When the outside door opener 
switch becomes stiff, it may be diffi-
cult to press on it. Open the door 
while pressing the door opener 
switch slightly harder.

Accelerate the vehicle slowly, keep a 

safe distance between you and the 
vehicle ahead, and drive at a reduced 
speed suitable to road conditions.

Turn automatic mode of the parking 
brake off. Otherwise, the parking 
brake may freeze and not be able to 
be released automatically.

Also, avoid using the following as the park-
ing brake may operate automatically, even 
if automatic mode is off.
• Brake hold system
• Advanced Park (Remote Controlled) (if 

equipped)

Park the vehicle and shift the shift 
position to P without setting the 
parking brake. The parking brake 
may freeze up, preventing it from 
being released. If the vehicle is 
parked without setting the parking 
brake, make sure to block the 
wheels.

Failure to do so may be dangerous 
because it may cause the vehicle to move 
unexpectedly, possibly leading to an acci-
dent.

When the parking brake is in auto-
matic mode, release the parking 
brake after change the shift position 
to P.

If the vehicle is parked without set-
ting the parking brake, confirm that 
the shift position cannot be moved 
out of P.

If the vehicle is left parked with the 

Cold weather driving tips

Things to check before driving in 
cold weather

Precautions for driving in cold 
weather

Precautions for parking in cold 
weather

190

3-5. Driving when it is cold

brakes damp in cold temperatures, 
there is a possibility of the brakes 
freezing.

Linked mirror function when reversing

When used in cold weather during reverse 

driving, the door mirror could be frozen and 

may not automatically point the mirror sur-

face downward. In this event, remove any 

ice and snow from the mirror surface.

Use the windshield wiper de-icer to 
help prevent the windshield wiper 
blades from freezing to the windshield.
Select the “Deicer” switch on the 
option screen.
The windshield wiper de-icer will auto-
matically turn off after a period of time.

Warming the windshield to allow 
frozen wipers to be moved (if 
equipped)

WARNING

Do not touch the lower part of the wind-

shield or parts along the front pillars 

when the windshield wiper de-icer is on, 

as they will be hot and may cause burns.

191

3

3-6. Driving in low visibility conditions

Dri
vin

g ac
co

rd

ing to th

e cond

ition
s

3-6.Driving in low visibility conditions

*

: If  equipped

1

Turn the headlight switch to the 

 or 

 position.

2

Turn the switch ring to the 

 posi-

tion.

When the switch is released, it returns to 

.

When the Multi Weather Lights system is 

enabled, the Multi Weather Lights indica-

tor on the meter will illuminate.

Turn the switch ring to the 

 position 

again to disable the system.

Operating conditions

The cornering lights will illuminate when the 

Multi Weather Lights are enabled and both 

of the following conditions are met:

The headlights are on

The vehicle speed is lower than approxi-

mately 45 km/h (28 mph).

When the vehicle speed increases to 
approximately 45 km/h (28 mph) or 
higher, the lights will be temporarily turned 
off. The lights will turn on again when the 
vehicle speed becomes lower than 
approximately 35 km/h (22 mph).

Rear fog lights

When the Multi Weather Lights system is 

enabled, the rear fog lights may also be illu-

minated. (

P.192)

Customization

Enabling of the Multi Weather Lights sys-

tem when the rear fog lights are enabled 

can be turned on/off. (

P.610)

Multi Weather Lights

*

 illumi-

nation

The Multi Weather Lights is a sys-
tem that illuminates the cornering 
lights to ensure visibility when driv-
ing in inclement weather, such as 
rain or fog.

Using the Multi Weather Lights

192

3-6. Driving in low visibility conditions

1

Turn the headlight switch to the 

 or 

 position.

2

Turn the switch ring to the 

 posi-

tion.

When the switch is released, it returns to 

.

When the rear fog lights are enabled, the 

rear fog light indicator on the meter will 

illuminate.

Turn the switch ring to the 

 position 

again to disable the rear fog lights.

Illumination conditions

When enabled, the rear fog lights oper-

ate when the headlights are illuminated.

When illuminated, the rear fog lights will 

remain on until the tail lights are turned 

off.

Using the rear fog lights

Use the rear fog lights only when necessary. 

If the rear fog lights are used when visibility 

is not poor, they may impede the visibility of 

drivers in following vehicles.

Rear fog lights

When the rear fog lights are on, the rear 

fog light indicator will illuminate in amber.

Use the rear fog lights when driving in 

poor visibility conditions, such as rain or 

fog, to make your vehicle more visible to 

following vehicles. If the rear fog lights 

are used when visibility is not poor, they 

may impede the visibility of drivers in fol-

lowing vehicles. Use the rear fog lights 

only when necessary.

Multi Weather Lights

*

 system-linked 

operation

*

: If equipped

When the rear fog lights are illuminated, the 

Multi Weather Lights system may also 

operate. (

P.191)

Customization

Enabling of the Multi Weather Lights sys-

tem when the rear fog lights are enabled 

can be turned on/off. (

P.610)

Rear fog lights illumination

When driving in inclement weather, 
such as rain or fog, the rear fog 
lights can be used to make your 
vehicle more visible to following 
vehicles.

Using the rear fog lights

NOTICE

To prevent 12-volt battery discharge, do 

not leave the lights on longer than neces-

sary when the EV system is off.

193

3

3-6. Driving in low visibility conditions

Dri
vin

g ac
co

rd

ing to th

e cond

ition
s

Press on or close to the 

 mark.

Sounding the horn

194

3-7. Utility vehicle precautions

3-7.Utility vehicle precautions

Specific design characteristics give 
it a higher center of gravity than 
ordinary passenger cars. This vehi-
cle design feature causes this type 
of vehicle to be more likely to 
rollover. Utility vehicles have a sig-
nificantly higher rollover rate than 
other types of vehicles.

An advantage of the higher ground 
clearance is a better view of the 
road allowing you to anticipate 
problems.

It is not designed for cornering at 
the same speeds as ordinary pas-
senger cars any more than 
low-slung sports cars designed to 
perform satisfactorily under 
off-road conditions. Therefore, 
sharp turns at excessive speeds may 
cause rollover.

Your vehicle is not designed to be 
driven off-road. However, in the event 
that off-road driving cannot be 
avoided, please observe the following 
precautions to help avoid the areas 
prohibited to vehicles.

Drive your vehicle only in areas 
where off-road vehicles are permit-
ted to travel.

Respect private property. Get 

Utility vehicle precautions

This vehicle belongs to the utility 
vehicle class, which has higher 
ground clearance and narrower 
tread in relation to the height of its 
center of gravity.

Utility vehicle feature

WARNING

Utility vehicle precautions

Always observe the following precau-

tions to minimize the risk of death or seri-

ous injury or damage to your vehicle:

In a rollover crash, an unbelted person 

is significantly more likely to die than a 

person wearing a seat belt. Therefore, 

the driver and all passengers should 

always fasten their seat belts.

Avoid sharp turns or abrupt maneu-

vers, if at all possible. Failure to operate 

this vehicle correctly may result in loss 

of control or vehicle rollover causing 

death or serious injury.

Vehicles with roof rails: Loading cargo 

on the roof luggage carrier will make 

the center of the vehicle gravity higher. 

Avoid high speeds, sudden starts, 

sharp turns, sudden braking or abrupt 

maneuvers, otherwise it may result in 

loss of control or vehicle rollover due 

to failure to operate this vehicle cor-

rectly.

Always slow down in gusty crosswinds. 

Because of its profile and higher 

center of gravity, your vehicle is more 

sensitive to side winds than an ordinary 

passenger car. Slowing down will allow 

you to have better control.

Do not drive horizontally across steep 

slopes. Driving straight up or straight 

down is preferred. Your vehicle (or any 

similar off-road vehicle) can tip over 

sideways much more easily than for-

ward or backward.

Off-road driving

195

3

3-7. Utility vehicle precautions

Dri
vin

g ac
co

rd

ing to th

e cond

ition
s

owner’s permission before entering 
private property.

Do not enter areas that are closed. 
Honor gates, barriers and signs that 
restrict travel.

Stay on established roads. When 
conditions are wet, driving tech-
niques should be changed or travel 
delayed to prevent damage to 
roads.

Avoid driving on very steep, slippery 
roads and other surfaces, such as 
sand, where the tires are liable to 
lose traction. Your vehicle may not 
perform as well as conventional 
AWD on-road vehicles on these 
surfaces.

WARNING

Off-road driving precautions

Always observe the following precau-

tions to minimize the risk of death or seri-

ous injury or damage to your vehicle:

Drive carefully when off the road. Do 

not take unnecessary risks by driving in 

dangerous places.

Do not grip the steering wheel spokes 

when driving off-road. A bad bump 

could jerk the wheel and injure your 

hands. Keep both hands and especially 

your thumbs on the outside of the rim.

Always check your brakes for effec-

tiveness immediately after driving in 

sand, mud, water or snow.

After driving through tall grass, mud, 

rock, sand, water, etc., check that there 

is no grass, bush, paper, rags, stone, 

sand, etc. adhering or trapped to the 

underbody. Clear off any such matter 

from the underbody. If the vehicle is 

used with these materials trapped or 

adhering to the underbody, a break-

down or fire could occur.

When driving off-road or in rugged 

terrain, do not drive at excessive 

speeds, jump, make sharp turns, strike 

objects, etc. This may cause loss of 

control or vehicle rollover causing 

death or serious injury. You are also 

risking expensive damage to your 

vehicle’s suspension and chassis.

NOTICE

To prevent water damage

Take all necessary safety measures to 

ensure that water damage to the traction 

battery, EV system or other components 

does not occur.

Water entering the motor compart-

ment may cause severe damage to the 

EV system.

Water entering the transmission will 

cause deterioration in transmission 

quality. The malfunction indicator may 

come on, and the vehicle may not be 

drivable.

Water can wash the grease from wheel 

bearings, causing rusting and prema-

ture failure, and may also enter the 

transaxle case, reducing the gear oil’s 

lubricating qualities.

When you drive through water

If driving through water, such as when 

crossing shallow streams, first check the 

depth of the water and the bottom of the 

riverbed for firmness. Drive slowly and 

avoid deep water.

196

3-7. Utility vehicle precautions

NOTICE

Inspection after off-road driving

Sand and mud that has accumulated 

around brake discs may affect braking 

efficiency and may damage brake sys-

tem components.

Always perform a maintenance 

inspection after each day of off-road 

driving that has taken you through 

rough terrain, sand, mud, or water.

197

3

3-8. Changing the driving characteristics

Dri
vin

g ac
co

rd

ing to th

e cond

ition
s

3-8.Changing the driving characteristics

Normal mode

Suitable when driving in the city, for 
good electricity consumption effi-
ciency, silence, and drive-ability.

Eco drive mode

In contrast with Normal mode, torque 
generation is slower when stepping on 
the accelerator pedal, air conditioning 
operations (heating/cooling) are 
restrained, and driving becomes suited 
for improved electricity consumption.

Range mode

When in range mode, the driving con-
trols is changed to those for improved 
electric consumption, in terms of the 
vehicle speed limits, the maximum 
driving force limits, the optimized 
front-rear allocation of the driving 
force, etc., along with turning off of the 
air conditioning system (heating/cool-
ing). This mode is suitable for maximiz-
ing the driving distance.

Sport mode

Helps to ensure steering feel and 
accelerator response by controlling 
the EV system and transmission. Suita-
ble for sporty, fun driving, such as when 

driving on mountain roads.

Custom mode

Driving is possible by setting the 
desired function for power train con-
trol, chassis control or air conditioning 
operations. Custom mode settings can 
only be changed on the drive mode 
customization display of the center dis-
play. (

P.616)

Operation of the air conditioning sys-

tem in Eco drive mode

In the Eco drive mode, the air condition-

ing system is controlled as follows to pri-

oritize electricity consumption efficiency.

• Heating/cooling capacity is restricted

• Fan speed restricted when automatic 

mode is selected

To improve air conditioning performance, 

perform the following operations:

• Adjust the fan speed

• Adjust the temperature setting

• Turn  off  Eco  drive  mode

When the driving mode is set to Eco 

drive mode, the air conditioning system 

may automatically change to Eco mode. 

To cancel eco mode, press “Eco 

heat/cool”.

Operation of the air conditioning sys-

tem in range mode

In range mode, the air conditioning sys-

tem will turn off automatically.

Turning the air conditioning system on 

manually will operate it in the setting used 

before range mode was selected.

Suggestion message to change to range 

mode

When the remaining charge of the traction 

battery reaches a certain level, a message 

suggesting to change drive modes to range 

mode will be displayed. (

P.262)

Driving modes

The following driving modes can be 
used according to the driv-
ing/usage conditions.

Characteristics of each driving 
mode

198

3-8. Changing the driving characteristics

1

Select 

 on the center display.

2

Select “Drive mode”.

3

Select driving mode.

1

Normal mode

2

Sport mode

When the Sport mode is selected, Sport 
mode indicator will comes on.

3

Eco drive mode

When the Eco drive mode is selected, Eco 
drive mode indicator comes on.

4

Range mode

When the Range mode is selected, Range 
mode indicator comes on.

5

Custom mode

When the Custom mode is selected, Cus-
tom mode indicator comes on.
To change custom mode settings, select 

.

Canceling Range/Sport/Custom mode

Range mode, Sport mode and Custom 

mode will be canceled automatically 

when the power switch is turned off.

Normal mode and Eco drive mode will 

not be canceled automatically until 

another driving mode is selected, even if 

the power switch is turned off.

Display of the multi-information display 

according to selected driving mode

According to the driving mode selected, 

the gauges displayed on the multi-informa-

tion display may change.

Changing the driving mode

199

3

3-9. Brake hold system

Dri
vin

g ac
co

rd

ing to th

e cond

ition
s

3-9.Brake hold system

The brake hold system keeps the brake 
applied when the shift position is in D 
or N with the system on and the brake 
pedal has been depressed to stop the 
vehicle. The system releases the brake 
when the accelerator pedal is 
depressed with the shift position in D to 
allow smooth start off.
Turns the brake hold system on
The brake hold standby indicator 

(green) comes on. While the system is 
holding the brake, the brake hold oper-
ated indicator (yellow) comes on.

Brake hold system operating conditions

The brake hold system cannot be turned on 

in the following conditions:

The driver’s door is not closed.

The driver is not wearing the seat belt.

The parking brake is engaged.

If any of the conditions above are detected 

when the brake hold system is enabled, the 

system will turn off and the brake hold 

standby indicator light will go off. In addi-

tion, if any of the conditions are detected 

while the system is holding the brake, a 

warning buzzer will sound and a message 

will be shown on the multi-information dis-

play. The parking brake will then be set 

automatically.

Brake hold function

If the brake pedal is left released for a 

period of about 3 minutes after the sys-

tem has started holding the brake, the 

parking brake will be set automatically. In 

this case, a warning buzzer sounds and a 

message is shown on the multi-informa-

tion display.

To turn the system off while the system is 

holding the brake, firmly depress the 

brake pedal and press the button again.

The brake hold function may not hold the 

vehicle when the vehicle is on a steep 

incline. In this situation, it may be neces-

sary for the driver to apply the brakes. A 

warning buzzer will sound and the 

Brake hold system

WARNING

When the vehicle is on a steep incline

Take care when using the brake hold sys-

tem on a steep incline, exercise caution. 

The brake hold function may not hold 

brakes in such situations. Also, the sys-

tem may not activate depending on the 

angle of the slope.

When stopped on a slippery road

The system cannot stop the vehicle when 

the gripping ability of the tires has been 

exceeded. Do not use the system when 

stopped on a slippery road.

NOTICE

When parking the vehicle

The brake hold system is not designed 

for use when parking the vehicle for a 

long period of time. Turning the power 

switch off while the system is holding the 

brake may release the brake, which 

would cause the vehicle to move. When 

operating the power switch, depress the 

brake pedal, shift the shift position to P 

and set the parking brake.

Turns the brake hold system on

200

3-9. Brake hold system

multi-information display will inform the 

driver of this situation. If a warning mes-

sage is shown on the multi-information 

display, read the message and follow the 

instructions.

When do not wish for the parking brake 

to operate automatically, press and hold 

the brake hold switch until the standby 

indicator (green) turns off, and then turn 

the power switch off.

When the parking brake is set automati-

cally while the system is holding the 

brakes

Perform any of the following operations to 

release the parking brake.

Depress the accelerator pedal. (The 

parking brake will not be released auto-

matically if the seat belt is not fastened.)

Operate the parking brake switch with 

the brake pedal depressed.

Make sure that the parking brake indicator 

light goes off. (

P.165)

When an inspection at any authorized 

Lexus retailer or Lexus authorized 

repairer, or any reliable repairer is nec-

essary

When the brake hold standby indicator 

(green) does not illuminate even when the 

brake hold switch is pressed with the brake 

hold system operating conditions met, the 

system may be malfunctioning.
Have the vehicle checked by any author-

ized Lexus retailer or Lexus authorized 

repairer, or any reliable repairer immedi-

ately.

If “Brake Hold Malfunction” is displayed 

on the multi-information display

The system may be malfunctioning.
Have the vehicle checked by any author-

ized Lexus retailer or Lexus authorized 

repairer, or any reliable repairer immedi-

ately.

Warning messages and buzzers

Warning messages and buzzers are used to 

indicate a system malfunction or to inform 

the driver of the need for caution. If a warn-

ing message is shown on the multi-informa-

tion display, read the message and follow 

the instructions.

If the brake hold operated indicator 

flashes

P.509

4

201

4

In

te

rior f
ea

ture
s

Interior features

.

4-1. Favorite settings

My Settings..................................

202

4-2. Adjusting the preferred driving 

position

Enabling easier driver entry and 

exit (Power easy access system)
........................................................

204

Driving position registra-

tion/recall/deletion...............

205

4-3. Adjusting the temperature/envi-

ronment inside the vehicle

Comfortable condition to be 

maintained without adjusting 
each system (Lexus Climate 
Concierge) ...............................

208

Air conditioning controls.......

209

Heated steering wheel ............

216

Seat heaters/Radiant heaters

.........................................................

217

Seat ventilators............................

219

Using the panoramic fixed moon 

roof with one-touch frosted glass 
control.........................................

220

4-4. Illuminating the interior

Using the interior lights ..........

222

4-5. Using the interior features

Location of the storage features

........................................................

225

Convenient interior features

........................................................

228

4-6. Using the luggage compartment

Using the cargo hooks............

238

Using the cargo net hooks....

238

Using the grocery bag hooks

.......................................................

239

Deck board .................................

239

Stowing the luggage cover...

240

202

4-1. Favorite settings

4-1.Favorite settings

An individual can be identified using 
the following authentication devices:

Electronic key

An individual is identified when the smart 
entry & start system detects their elec-
tronic key. (

P.87)

Face authentication system

An individual is identified at the open-
ing/closing of the door when face informa-
tion registered using the driver monitor 
camera is identified. (

P.283)

Individual identification by face authentica-
tion is prioritized than by electronic key, if 

the latter has identified with another regis-
tered driver.

Bluetooth

®

 devices

An individual can be identified if the same 
Bluetooth

®

 device that was used as a 

hands-free phone the last time the vehicle 
was entered is connected to the audio sys-
tem.
If an individual is identified by detecting an 
electronic key, identification by Bluetooth

®


device will not be performed.

When an individual is identified from 
an authentication device, settings for 
the following functions are recalled:

Driving position (memory recall 
function)

*1

After an individual is identified, the driving 
position that was set when driving was last 
completed (with shift position set to P) is 
recalled when the following operation is 
performed.
• When an individual is identified from an 

electronic key: Unlocking the doors 
using the smart entry & start system or 
wireless remote control

• When an individual is identified from the 

face authentication system: After the 
driver monitor identifies face informa-
tion, turning the power switch to ACC or 
ON.

Meter displays

*2

, head-up dis-

play

*1,2

, and center display

*2

When an individual is identified, the vehicle 
settings used when the power switch was 
last turned off are recalled.

My Settings

By identifying an individual through 
a device, such as an electronic key, 
the driving position and vehicle set-
tings recorded for that driver can 
be recalled when the vehicle is 
entered.

By assigning an authentication 
device to a driver in advance, the 
driver can enter the vehicle with 
their preferred settings.

Settings for up to 3 drivers can be 
recorded by My Settings.

For details on how to assign/delete 
electronic keys, set driver names, 
perform initialization, change driv-
ers manually, or delete a driver, 
refer to the “MULTIMEDIA 
OWNER’S MANUAL”.

Types of assigned authentication 
devices

Recalled functions

203

4

4-1. Favorite settings

In

te

rior f
ea

ture
s

Safe driving support function

*2

When an individual is identified, the vehicle 
settings used when the power switch was 
last turned off are recalled.

Vehicle settings available on the 
center display

*2

When an individual is identified, the vehicle 
settings used when the power switch was 
last turned off are recalled.

*1

: If equipped

*2

: Some settings are excluded

204

4-2. Adjusting the preferred driving position

4-2.Adjusting the preferred driving position

*

: If  equipped

When all of the following have been 
performed, the driver’s seat and steer-
ing wheel are automatically adjusted to 
a position that allows driver to enter 
and exit the vehicle easily.

The shift position has been shifted to 
P.

The power switch has been turned 
off.

The driver’s seat belt has been 
unfastened.

When any of the following has been 
performed, the driver’s seat and steer-
ing wheel automatically return to their 
original positions.

The power switch has been turned 
to ACC or ON.

The driver’s seat belt has been fas-

tened.

Operation of the power easy access sys-

tem

When exiting the vehicle, the power easy 

access system may not operate if the seat is 

already close to the rearmost position, etc.

Jam protection function

While the power easy access system is 

operating, if an object is stuck behind the 

front seat, the front seat will stop and then 

slightly move forward. When the jam pro-

tection function operates, the seat stops at a 

position other than the set seat position. 

Check the seat position.

Enabling easier driver entry 
and exit (Power easy access 
system)

*

WARNING

Never use any part of your body to inten-

tionally activate the jam protection func-

tion.

205

4

4-2. Adjusting the preferred driving position

In

te

rior f
ea

ture
s

*

: If  equipped

1

Check that the shift position is in P.

2

Turn the power switch to ON.

3

Adjust the driver’s seat, steering 
wheel, outside rear view mirrors 
and head-up display (if equipped) 
to the desired positions.

4

While pressing the “SET” button, or 
within 3 seconds after the “SET” 
button is pressed, press button “1”, 
“2” or “3” until the buzzer sounds.

If a driving position has already been regis-

tered to the selected button, the previously 

registered position will be overwritten.

Seat positions that can be memorized

The adjusted positions other than the posi-

tion adjusted by lumbar support switch can 

be recorded.

In order to correctly use the driving 

position memory function

If a seat position is already in the furthest 

possible position and the seat is operated in 

the same direction, the registered position 

may be slightly different when it is recalled.

1

Check that the shift position is in P.

2

Turn the power switch to ON.

Driving position registra-
tion/recall/deletion

*

This feature automatically adjusts 
the positions of the driver’s seat, 
steering wheel, outside rear view 
mirrors and head-up display (if 
equipped) to make entering and 
exiting the vehicle easier or to suit 
your preferences.

Up to 3 different driving positions 
can be recorded for each the driver 
and guest that have been regis-
tered for My Settings. When elec-
tronic key (including a card key) 
assignment is registered for My 
Settings, the driving position for 
each driver can be recalled (mem-
ory recall function).

Registering a driving position 
into memory (position memory 
function)

WARNING

Take care during seat adjustment so that 

the seat does not contact a rear passen-

ger or squeeze your body against the 

steering wheel.

Recalling a driving position 
(position memory function)

WARNING

Never use any part of your body to inten-

tionally activate the jam protection func-

tion.

206

4-2. Adjusting the preferred driving position

3

Press one of the buttons for the 
driving position you want to recall 
until the buzzer sounds.

To stop the position recall operation 

part-way through

Perform any of the following:

Press the “SET” button.

Press button “1”, “2” or “3”.

Operate any of the seat adjustment 

switches (only cancels seat position 

recall).

Operate the tilt and telescopic steering 

control switch (only cancels steering 

wheel position recall).

Operating the driving position memory 

after turning the power switch off

Registered seat positions can be recalled 

up to 180 seconds after the driver’s door is 

opened and another 61 seconds after it is 

closed again.

When the recorded seat position can-

not be recalled

The seat position may not be recalled in 

some situations when the seat position is 

recorded in a certain range.
For details, contact any authorized Lexus 

retailer or Lexus authorized repairer, or any 

reliable repairer.

Jam protection function

While the driving position is recalled or the 

power easy access system is operating, if an 

object is stuck behind the front seat, the 

front seat will stop and then slightly move 

forward. When the jam protection function 

operates, the seat stops at a position other 

than the set seat position. Check the seat 

position.

Recalling a driving position

Take care so that a head restraint does not 

contact the ceiling or a sun visor.

Using the voice control system

*

*

: If equipped

The following operations can be performed 

using the voice control system:

Driving position registration

Driving position recall (only when the 

shift position is in P)

For details, refer to the “MULTIMEDIA 

OWNER’S MANUAL”

Identifying a driver with the elec-
tronic key assigned and registered 
in My Settings

The driving positions can be automati-
cally recalled for each registered 
driver by registering electronic key 
assignments in My Settings.

Driving position registration proce-
dure

When the shift position is shifted to P after 
driving the vehicle, the current driving 
position will be recorded.

Driving position recall procedure

1

Carry only the key that has been 
assigned and registered in My Set-
tings, and then unlock and open the 
driver’s door using the smart entry 

Registering/canceling/recall a 
driving position to an electronic 
key (memory recall function) 
(driver’s side only)

207

4

4-2. Adjusting the preferred driving position

In

te

rior f
ea

ture
s

& start system or wireless remote 
control.

The driving position other than the steering 

wheel and head-up display (if equipped) 

will move to the recorded position. How-

ever, the seat will move to a position slightly 

behind the recorded position in order to 

make entering the vehicle easier.
If the driving position is in a position that 

has already been recorded, the driving 

position will not move.

2

Turn the power switch to ACC or 
ON.

The seat, steering wheel and head-up dis-

play (if equipped) (only when the power 

switch is in ON) will move to the recorded 

position.

Memory recall function cancelation 
procedure

Initialize the driver registered settings in 
My Settings.
For information on initializing driver regis-
tered settings, refer to the “MULTIMEDIA 
OWNER’S MANUAL”.

Identifying a driver with face infor-
mation assigned and registered in 
My Settings

The driving positions can be automati-
cally recalled for each registered 
driver by registering face information 
in the face authentication system and 
registering the face information assign-
ment in My Settings.

Driving position registration proce-
dure

When the shift position is shifted to P after 
driving the vehicle, the current driving 
position will be recorded.

Driving position recall procedure

Turn the power switch to ACC or ON.
After face authentication is performed 
successfully, the seat, steering wheel, and 
head-up display will move to the registered 
driving position (only when the power 
switch is turned on). They will not move if 
already in the registered driving position.
If the driving position is in a position that 
has already been recorded, the driving 
position will not move.

Memory recall function cancelation 
procedure

Delete face information from the face 
authentication system.
For information on deleting fingerprint 
information, refer to the “MULTIMEDIA 
OWNER’S MANUAL”.

Recalling the driving position using the 

memory recall function

Different driving positions can be regis-

tered for each electronic key. Therefore, the 

driving position that is recalled may be dif-

ferent depending on the key being carried.

Jam protection function

While the driving position is recalled or the 

power easy access system is operating, if an 

object is stuck behind the front seat, the 

front seat will stop and then slightly move 

forward. When the jam protection function 

operates, the seat stops at a position other 

than the set seat position. Check the seat 

position.

Customization

Some functions can be customized. 

(

P.608)

208

4-3. Adjusting the temperature/environment inside the vehicle

4-3.Adjusting the temperature/environment inside the vehicle

Lexus Climate Concierge operates in 
conjunction with AUTO of the air con-
ditioning system.

1

Select the option screen 
switch.

P.210

2

Select the “Climate concierge” 
switch.

3

Turn the “AUTO” switch on.

Automatic air conditioning sys-
tem

P.209

Operation of the air conditioning system is 
performed automatically according to the 
temperature setting for the driver's 
side/front passenger's side.

Seat heaters

P.217

Operation of the seat heaters is performed 
automatically according to the tempera-

ture setting for the driver's side/front pas-
senger's side.
Operation will automatically change 
between the seat heaters and seat ventila-
tors according to the temperature setting 
of the air conditioning system, outside tem-
perature, etc.

Seat ventilators

P.219

Operation of the seat ventilators is per-
formed automatically according to the 
temperature setting for the driver's 
side/front passenger's side.
Operation will automatically change 
between the seat heaters and seat ventila-
tors according to the temperature setting 
of the air conditioning system, outside tem-
perature, etc.

Heated steering wheel

P.216

Operation of the heated steering wheel is 
performed automatically according to the 
temperature setting of the air conditioning 
system, outside temperature, etc.

Passenger detection functions

When a passenger is detected in the 

front passenger seat, the seat heater and 

ventilator will operate automatically.

When the seat heater/seat ventilator 

switch is set to AUTO, the passenger 

detection function will not operate.

Rear seat heater operation (if 

equipped)

The rear seat heaters are not controlled by 

the Lexus Climate Concierge.

Comfortable condition to be 
maintained without adjust-
ing each system (Lexus Cli-
mate Concierge)

Operation of the seat heaters and 
seat ventilators of the front seats 
and the heated steering wheel (if 
equipped) is performed automati-
cally according to the temperature 
setting of the air conditioning sys-
tem, outside temperature, temper-
ature inside the vehicle, etc.

Lexus Climate Concierge

Automatically controllable func-
tions

209

4

4-3. Adjusting the temperature/environment inside the vehicle

In

te

rior f
ea

ture
s

When the outside temperature exceeds 

24°C (75°F) and the air conditioning 

system is on

In order to reduce the air conditioning 

power consumption, the air conditioning 

system may switch to recirculated air 

mode automatically.

Recirculated air mode is selected as a 

default mode when the power switch is 

turned to ON.

It is possible to switch to outside air mode 

at any time by pressing the outside/recir-

culated air mode switch.

When driving on dusty roads

Close all windows. If dust thrown up by the 

vehicle is still drawn into the vehicle after 

closing the windows, it is recommended 

that the air intake mode be set to outside air 

mode and the fan speed to any setting 

except off.

When the outside temperature is low

The dehumidification function may not 

operate even when “A/C” is selected.

Ventilation and air conditioning odors

To let fresh air in, set the air conditioning 

system to the outside air mode.

During use, various odors from inside and 

outside the vehicle may enter into and 

accumulate in the air conditioning sys-

tem. This may then cause odor to be 

emitted from the vents.

To reduce potential odors from occur-

ring:

• It is recommended that the air condition-

ing system be set to outside air mode 

prior to turning the vehicle off.

• The start timing of the blower may be 

delayed for a short period of time imme-

diately after the air conditioning system is 

started in automatic mode.

When parking, the system automatically 

switches to outside air mode to encour-

age better air circulation throughout the 

vehicle, helping to reduce odors that 

occur when starting the vehicle.

Air conditioning controls

When the “AUTO” switch is on, the 
air outlets and fan speed will auto-
matically be changed according to 
the set temperature.

The button positions and shapes will 
differ for right-hand drive vehicles. 
Also, the display and button posi-
tions will differ depending on the 
type of the system.

NOTICE

To prevent 12-volt battery discharge

Do not leave the air conditioning system 

on longer than necessary when the EV 

system is off.

Humidity sensor

In order to detect fog on the wind-

shield, a sensor which monitors the 

temperature of the windshield, the sur-

round humidity, etc., is installed.

Follow these points to avoid damaging 

the sensor:

• Do not disassemble the sensor

• Do not spray the glass cleaner on the 

sensor or subject it to strong impacts

• Do not stick anything on the sensor

210

4-3. Adjusting the temperature/environment inside the vehicle

Changing of the air outlets while in 

automatic mode

When in automatic mode, if the humidity 

sensor detects fog on the inside of the wind-

shield, the air outlets will automatically be 

controlled to defog the windshield.

Using the voice control system (if 

equipped)

Air conditioning system can be operated 

using voice controls. For details, refer to the 

“MULTIMEDIA OWNER’S MANUAL”.

Customization

Functions that are linked to automatic mode 

(when the “AUTO” switch is on) can be set 

through “Vehicle customise” on the center 

display. (

P.616)

Left-hand side temperature control switch
Airflow mode control switch
Option screen switch
Shortcut screen switch

Select to display shortcut icons for various functions.

“SYNC” switch
Right-hand side temperature control switch
“A/C” switch
Outside/recirculated air mode switch
Fan speed control switch
“OFF” switch
“AUTO” switch

Adjusting the temperature

Turn temperature control dial clock-
wise to increases the temperature and 
turn the dial counterclockwise to 

decreases the temperature.
When the indicator on the “SYNC” 
switch is illuminated, the temperature 
setting for the front passenger’s side 

Option screen switch

A
B
C
D

E
F

G

H

I

J

K

211

4

4-3. Adjusting the temperature/environment inside the vehicle

In

te

rior f
ea

ture
s

will match the setting for the driver’s 
side.
When the indicator on the “SYNC” 
switch is off, turning the “SYNC” switch 
on will illuminate the “SYNC” switch 
indicator and the temperature setting 
for the front passenger’s side will 
become the same as that for the 
driver’s side.

When the front passenger’s side tempera-
ture adjustment switch is operated, the 
indicator on the “SYNC” switch will turn 
off and the temperature setting for the 
front passenger’s side will be able to be 
adjusted.
When the indicator on the “A/C” switch is 
off, the blower and heater can be used.

Setting the fan speed

To increase the fan speed, select the 
“+” fan speed adjustment switch or 
slide the icon of the fan speed adjust-
ment switch right. To decrease the fan 
speed, select the “-” fan speed adjust-
ment switch or slide the icon of the fan 
speed adjustment switch left.

Select the “OFF” switch to turn the fan off.
The fan can also be stopped by touching 
and holding the “-” fan speed adjustment 
switch or sliding the icon of the fan speed 
adjustment switch to the leftmost position 
and holding it.

Changing the air flow mode

Select the airflow mode control switch.

The airflow mode changes each time the 
switch is selected.
The air outlets and air volume changes 
according to the selected air flow mode.

 : Air flows to the upper body

 : Air flows to the upper body 

and feet

 : Air flows to the feet

 : Air flows to the feet and the 

windshield defogger operates

Location of air outlets

Switching between outside air and 
recirculated air modes

Temporarily changing the air mode to 
recirculated air mode is recommended 
to prevent dirty air from entering the 
vehicle, such as when in a tunnel or 
heavy traffic, and to help cool the inte-
rior when the outside air temperature 
is high.
Select the outside/recirculated air 
mode switch.

The air mode changes between outside air 
mode and recirculated air mode each time 
the switch is selected. When recirculated 
air mode is selected, the indicator will illu-
minate.

212

4-3. Adjusting the temperature/environment inside the vehicle

The air mode may change automatically 
depending on the temperature setting, 
temperature inside the vehicle, etc.

Front seat concentrated airflow 
mode (S-Flow)

This function automatically controls the 
airflow of the air conditioning system to 
prioritize airflow to the front seats. 
Unnecessary air conditioning is sup-
pressed, contributing to increased 
electricity consumption efficiency.
Front seat concentrated airflow mode 
operates in the following situations.

No passengers are detected in the 
rear seats

The windshield defogger is not 
operating

The S-Flow switch is 

 (ON) on 

the option screen.
In front seat concentrated airflow mode, 
directing airflow to the front seats only and 
to all seats can be switched via switch 
operation. When the mode has been 
switched manually, automatic airflow con-
trol stops operating.

1

Select the option screen switch. 
(

P.210)

2

Select the “S-Flow” switch.

Indicator illuminated: Airflow to the 
front seats only

Indicator off: Airflow to all the seats

Operation of automatic airflow control

In order to maintain a comfortable inte-

rior, airflow may be directed to seats 

without passengers immediately after the 

EV system is started and at other times 

depending on the outside temperature.

After the EV system is started, if passen-

gers move around inside or enter/exit the 

vehicle, the system cannot accurately 

detect the presence of passengers and 

automatic airflow control will not oper-

ate.

Operation of manual airflow control

Even if the function is manually switched to 

directing airflow to only the front seats, 

when a rear seat is occupied, it may auto-

matically direct airflow to all seats.

To return to automatic airflow control

1

With the indicator off, turn the power 

switch off.

2

After 60 minutes or more elapse, turn 

the power switch to ON.

Setting the fan speed in auto mode

When the “AUTO” switch is on, the 
automatically adjusted fan speed can 
be adjusted to suit your preference.

1

Select the option screen switch. 
(

P.210)

2

Select the “FAST/ECO” switch.

“FAST”: Use when the effects of the 
air conditioning system want to be 
felt quickly

“NORMAL”: Normal control

“ECO”: Use to enhance electricity 
economy during air conditioning 
system operation

Warming the interior quickly (Max 
heat)

When “MAX heat” is turned on, in 
order to warm the interior quickly, the 
settings of the air conditioning system 
will be changed immediately.

213

4

4-3. Adjusting the temperature/environment inside the vehicle

In

te

rior f
ea

ture
s

1

Touch the shortcut screen switch 

 on the center display. 

(

P.210)

2

Select the “MAX heat” switch.

The temperature setting of the air 
conditioning system will be set to 
“Hi” and the “AUTO” switch will be 
turned on.

Seat heaters will be set to Hi. (vehi-
cles with seat heaters)

Heated steering wheel will be set to 
Hi. (vehicles with heated steering 
wheel)

In the following situations, the front 
passenger’s side seat heater/seat 
ventilator will be set to “AUTO”.

• When “Climate concierge” is on
• When the system determines that a pas-

senger is in the front passenger seat

When the indicator on the “SYNC” 
switch is illuminated, the tempera-
ture setting for the front passenger’s 
side will also be set to “Hi”.

“MAX heat”

The “MAX heat” switch cannot be used 

to turn the setting off.

After the “MAX heat” switch has been 

operated, the temperature setting can be 

adjusted using the temperature control 

switches of the air conditioning system.

When “Climate concierge” is on, if the 

“AUTO” switch is turned on, the seat 
heaters

*

 and seat ventilators of the front 

seats

*

, and the heated steering wheel

*


will be operated automatically according 

to the temperature setting.

Each function can also be adjusted to the 

desired setting.

*

: If equipped

Cooling the interior quickly (Max 
cool)

When “MAX cool” is turned on, in 
order to cool the interior quickly, the 
settings of the air conditioning system 
will be changed immediately.

1

Touch the shortcut screen switch 

 on the center display. 

(

P.210)

2

Select the “MAX cool” switch.

The temperature setting of the air 
conditioning system will be set to 
“Lo” and the “AUTO” switch will be 
turned on.

Seat ventilators will be set to Hi.

In the following situation, the heated 
steering wheel will be set to 
“AUTO”. (vehicles with heated 
steering wheel)

• When “Climate concierge” is on

In the following situations, the front 
passenger’s side seat heater/seat 
ventilator will be set to “AUTO”. 
(vehicles with seat heaters)

• When “Climate concierge” is on
• When the system determines that a pas-

senger is in the front passenger seat

When the indicator on the “SYNC” 
switch is illuminated, the tempera-
ture setting for the front passenger’s 
side will also be set to “Lo”.

“MAX cool”

The “MAX cool” switch cannot be used 

to turn the setting off.

214

4-3. Adjusting the temperature/environment inside the vehicle

After the “MAX cool” switch has been 

operated, the temperature setting can be 

adjusted using the temperature control 

switches of the air conditioning system.

When “Climate concierge” is on, if the 

“AUTO” switch is turned on, the seat 
heaters

*

 and seat ventilators of the front 

seats

*

, and the heated steering wheel

*


will be operated automatically according 

to the temperature setting.

Each function can also be adjusted to the 

desired setting.

*

: If  equipped

nanoe™ X system

*1

 (if equipped)

The air conditioning system adopts 
nanoe™ generator. This helps to fill the 
cabin with refreshing air by emitting 
slightly acidic nanoe™ coated with 
water particles through the window 
side air outlet of the driver’s seat

*2

.

1

Select the option screen switch. 
(

P.210)

2

Select the “nanoe™X” switch.

When the fan is turned on and 
“nanoe™X” on the option control 
screen is selected, the nanoe™ X 
system is activated.

When the fan is operated in the fol-
lowing conditions, system perfor-
mance will be maximized. If the 
following conditions are not met, 
performance will be limited.

• The upper body, upper body and feet or 

feet air outlets are being used.

• The center air outlet of the driver’s seat is 

open.

When nanoe™ is generated, a small 
amount of ozone is emitted and may 

be faintly smelled in some situations. 
However, this is approximately the 
same as the amount that already 
exists in nature, such as in forests, 
and it has no affect on the human 
body.

A slight noise may be heard during 
operation. This is not a malfunction.

*1

: nanoe™ and the nanoe™ mark are 

trademarks of Panasonic Corporation.

*2

: According to temperature and humidity 

conditions, fan speed and direction of 
the air flow, the nanoe™ X system may 
not operate at full capacity.

nanoe™ X system

This vehicle incorporates a biocidal prod-

uct.
Ionised air generated by a device incorpo-

rated in the vehicle purifies the air in the 

cabin by suppressing bacteria.
Active substance: Free radicals generated 

in situ from ambient air or water
nanoe™ helps to provide purified air by 

emitting electrically charged water parti-

cles through the front center vent on the 

driver’s side. 

P.214

WARNING

nanoe™ X

Do not disassemble or repair the genera-

tor because it contains high voltage 

parts. Contact any authorized Lexus 

retailer or Lexus authorized repairer, or 

any reliable repairer if the generator 

needs repair.

215

4

4-3. Adjusting the temperature/environment inside the vehicle

In

te

rior f
ea

ture
s

Adjusting the position of and open-
ing and closing the air outlets

To adjust the position of and opening 
and closing the air outlets, perform the 
following operations:

Front center

Direct air flow to the left or right, up or 
down

Turn the knob to open or close the vent

1

Open the outlet

2

Close the outlet

Front side

Direct air flow to the left or right, up or 
down

Turn the knob to open or close the vent

1

Close the outlet

2

Open the outlet

Rear

1

Direct air flow to the left or right, up 
or down

2

Turn the knob to open or close the 
vent

NOTICE

To prevent damage to the nanoe™ X

Do not insert anything into the driver’s 

side vent, attach anything to it, or use 

sprays around the driver’s side vent. 

These things may cause the generator 

not to work properly.

Air outlet layout and operations

216

4-3. Adjusting the temperature/environment inside the vehicle

*

: If  equipped

Operating conditions

When the power switch is ON.

Select 

 on the center display.

Each time the switch is selected, the 
operation condition changes as fol-
lows.
AUTO

Hi (2 segments lit)

Lo (1 

segment lit)

Off

The level indicator (red) lights up dur-
ing operation. AUTO indicator lights 
up during automatic operation.

Customization

The temperature setting of the heated 

steering wheel can be set through “Vehicle 

customise” on the center display. (

P.616)

Heated steering wheel

*

Warm up the grip of the steering 
wheel.

WARNING

Care should be taken if anyone in the fol-

lowing categories comes in contact with 

the steering wheel when the heater is on:

Babies, small children, the elderly, the 

sick and the physically challenged

Persons with sensitive skin

Persons who are fatigued

Persons who have taken alcohol or 

drugs that induce sleep (sleeping 

drugs, cold remedies, etc.)

NOTICE

Do not use the functions when the EV 

system is off.

Turn the steering heater 
ON/OFF


Content      ..     4      5      6      7     ..