Harley Davidson 1999-2005 Harley Dyna Models. Repair Manual - page 25
-------------------------------------------------------------------------------------------------------------------------------------------------------------
480
CHAPTER TWELVE
top of the caliper bore. Make sure the retaining ring
seats in the groove and pushes against the piston
93
dust boot.
10. Install the brake pads as described in this chap-
ter.
REAR BRAKE CALIPER
(2000-ON MODELS)
Removal/Installation
CAUTION
Do not spill any brake fluid on the
rear wheel. Wash brake fluid off any
94
painted, plated or plastic surfaces im-
mediately, as it will damage most sur-
faces it contacts. Use soapy water and
rinse completely.
1. If the caliper assembly is going to be disassem-
bled for service, perform the following:
NOTE
By performing Steps 1b and 1c, com-
pressed air may not be necessary for
piston removal during caliper disas-
sembly.
4.
Refer
to
Rear
Wheel
Removal/Installation
in
Chapter Nine and follow the procedure until the rear
a. Remove the brake pads as described in this
axle is removed sufficiently to allow removal of the
chapter.
rear caliper assembly as shown in Figure 94. After
CAUTION
removal of the caliper assembly, push the rear axle
Do not allow the pistons to travel out
back into place and install the nut on the other side.
far enough to come in contact with the
5. If necessary, disassemble and service the caliper
brake disc. If this happens the pistons
assembly as described in this chapter.
may scratch or gouge the disc during
6. Install by reversing these removal steps while
caliper removal.
noting the following:
a. Carefully install the caliper assembly onto the
b. Slowly apply the brake lever to push the pis-
disc, being careful not to damage the leading
tons part way out of caliper assembly for ease
edge of the brake pads.
of removal during caliper service.
b. Refer to Chapter Nine and complete the in-
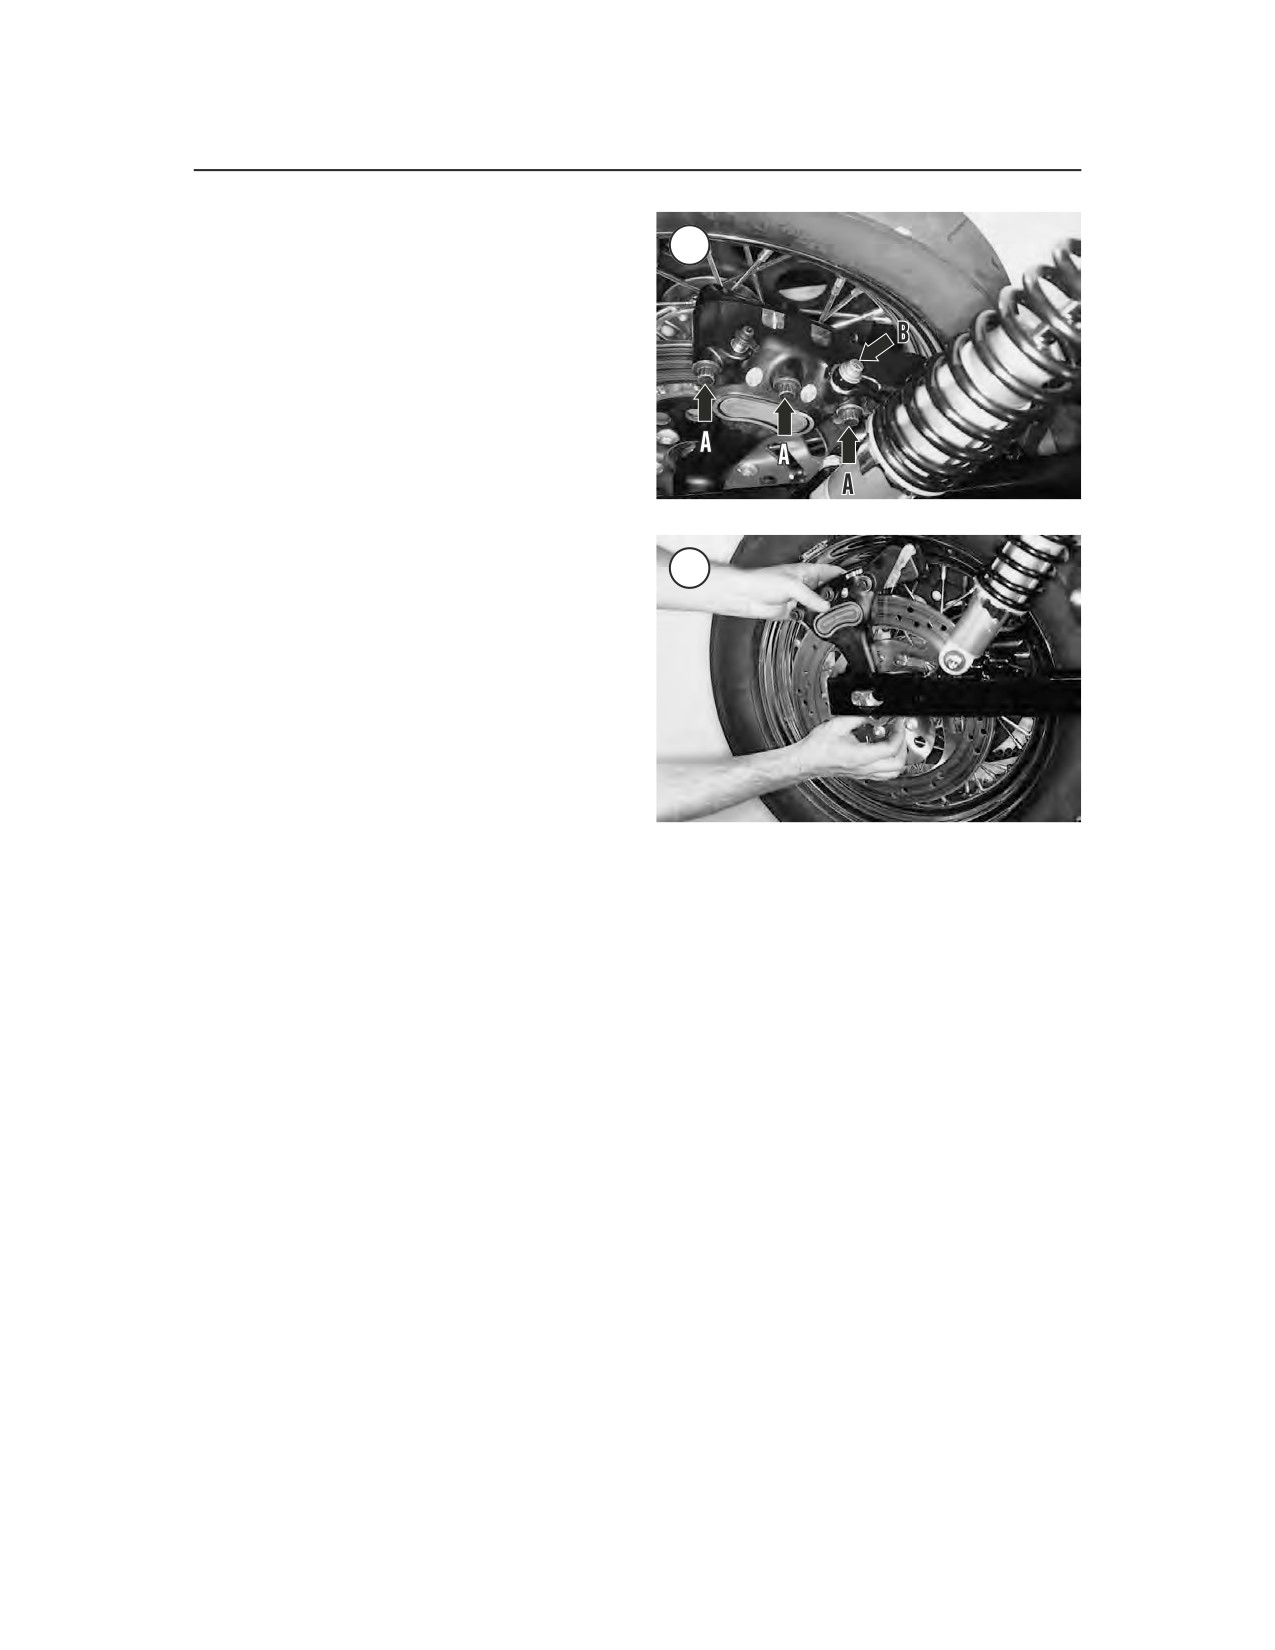
c. Loosen the three body mounting bolts (A,
stallation of the rear axle.
Figure 93).
c. Apply clean DOT5 brake fluid to the rubber
d. Loosen the brake hose banjo bolt (B, Figure
portions of the new sealing washers prior to
93).
installation.
2. Remove the banjo bolt and sealing washers (B,
d. Install a new sealing washer on each side of
Figure 93) attaching the brake hose to the caliper
the brake hose fitting and install the banjo
assembly.
bolt (B, Figure 93). Tighten the banjo bolt to
3. Place the loose end of the brake hose in a
the specification in Table 2.
reclosable plastic bag to prevent the entry of debris
e. If disassembled, tighten the three caliper
and prevent any residual brake fluid from leaking
body bolts (A, Figure 93) to the specification
out.
in Table 2.