Harley Davidson Sportster Models 2009. Service Repair Manual - page 37
3.
. Insert license plate lamp harness (6) into
fender harness clip (1) on left side of fender.
4.
Feed harness through feed-through hole (5) on left side
of rear fender.
5.
. Plug in license plate lamp connector [40].
After installing seat, pull upward on seat to be sure it is
locked in position. While riding, a loose seat can shift
causing loss of control, which could result in death or
serious injury. (00070b)
6.
Install seat.
7.
Install rear wheel. See
. Make certain rear
wheel is properly aligned and rear drive belt is properly
tensioned. See
.
8.
Plug in main fuse. See
9.
Remove vehicle from lift.
Be sure headlamp, tail and stop lamp and turn signals are
operating properly before riding. Poor visibility of rider to
other motorists can result in death or serious injury.
(00478b)
10. Turn ignition switch ON. Verify that license plate lamp
module is operating properly. Turn ignition switch OFF.
REMOVAL (HDI ONLY)
. The XL 1200N built for international markets
incorporates a center-mounted license plate holder and lamp
assembly.
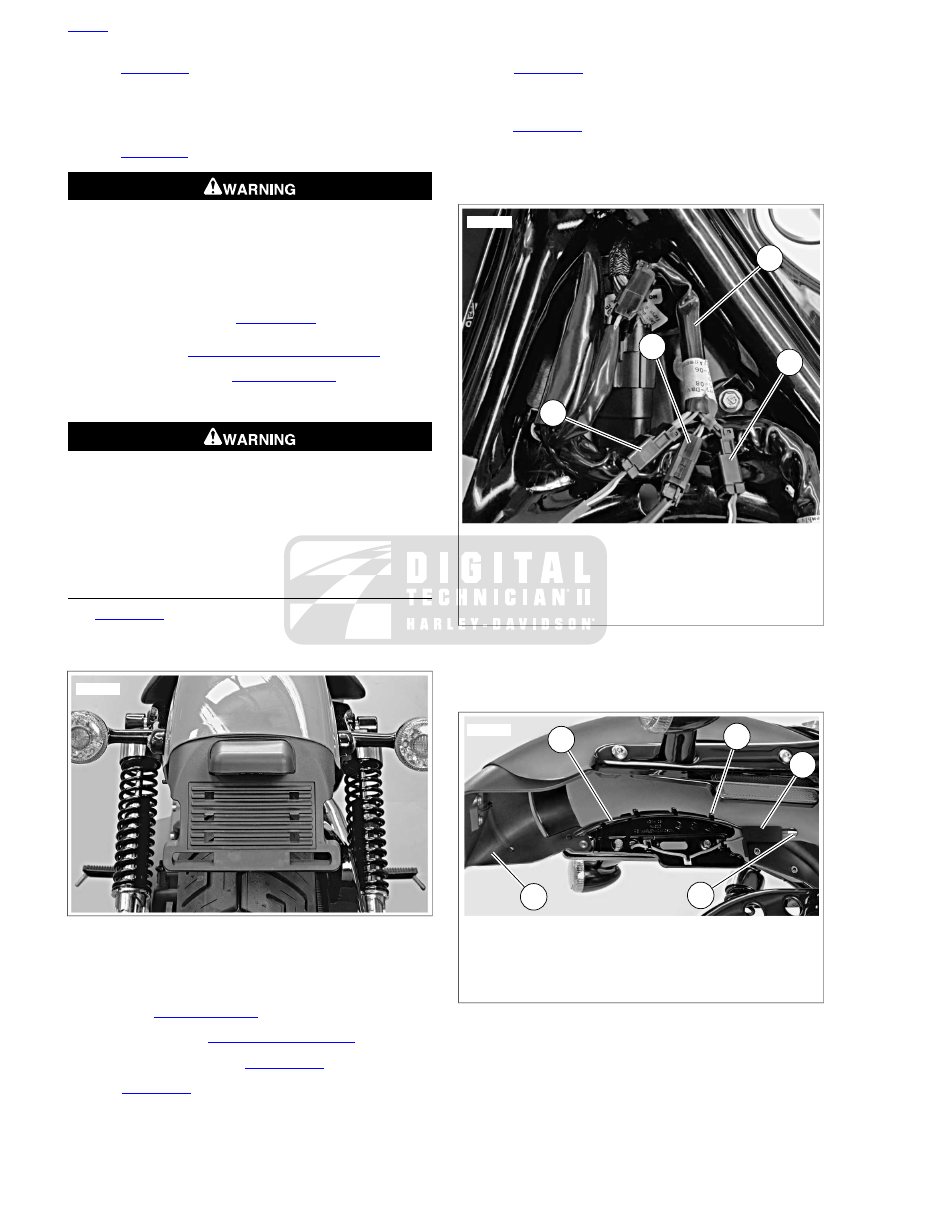
sm03732
Figure 6-83. License Plate Holder and Lamp Assembly: XL
1200N (HDI)
1.
Position vehicle upright on a suitable lift. Unplug main
fuse. See
2.
Remove seat. See
3.
Remove rear wheel. See
.
4.
See
. Unplug license plate lamp harness con-
nector [40] (2).
5.
See
. Remove license plate lamp harness (3)
from harness bracket (1) and three harness clips (2). Feed
harness and connector in through hole in rear fender.
6.
. Remove two fender support screws with
washers (4). Remove screw with washer (5) securing rear
fender to fender brace (2). Remove fender brace and
license plate holder assembly (1) from vehicle.
1
2
4
3
sm03733
1.
Interconnect harness
2.
License plate lamp harness connector [40]
3.
Right turn signal/brake/tail lamp harness con-
nector [19]
4.
Left turn signal/brake/tail lamp harness con-
nector [18]
Figure 6-84. Rear Lighting Interconnect Harness: XL 1200N
(HDI)
4
3
2
1
5
sm03734
1.
Harness bracket
2.
Harness clip (3)
3.
License plate lamp harness
4.
License plate holder
5.
Feedthrough hole
Figure 6-85. License Plate Holder and Lamp Harness
Mounting: XL 1200N (HDI)
6-66 2009 Sportster Service: Electrical