Harley Davidson Softail 2000-2005. Service manual - page 38
Inspection
It is not necessary to remove the disc from the wheel to
inspect it. Small nicks and marks on the disc are not im-
portant, but radial scratches deep enough to snag a finger-
nail reduce braking effectiveness and increase brake pad
wear. If these grooves are present, and the brake pads are
wearing rapidly, replace the disc.
The specifications for the standard and wear limits are
in Table 1. Each disc is also marked with the minimum
(MIN) thickness. If the specification marked on the disc
differs from the one in Table 1, use the specification on
the disc.
When servicing the brake discs, do not have the discs
surfaced to compensate for warp. The discs are thin, and
grinding will only reduce their thickness, causing them to
warp rapidly. A warped disc may be caused by the brake
pads dragging on the disc, due to a faulty caliper, and
overheating the disc. Overheating can also be caused by
unequal pad pressure on the disc.
Three main causes of unequal brake pad pressure are:
1. The brake caliper piston seals are worn or damaged.
2. The master cylinder’s small relief port is plugged.
3. The primary cup on the master cylinder piston is worn
or damaged.
NOTE
It is not necessary to remove the wheel to
measure the disc thickness. The measure-
ment can be performed with the wheel in-
stalled or removed from the motorcycle.
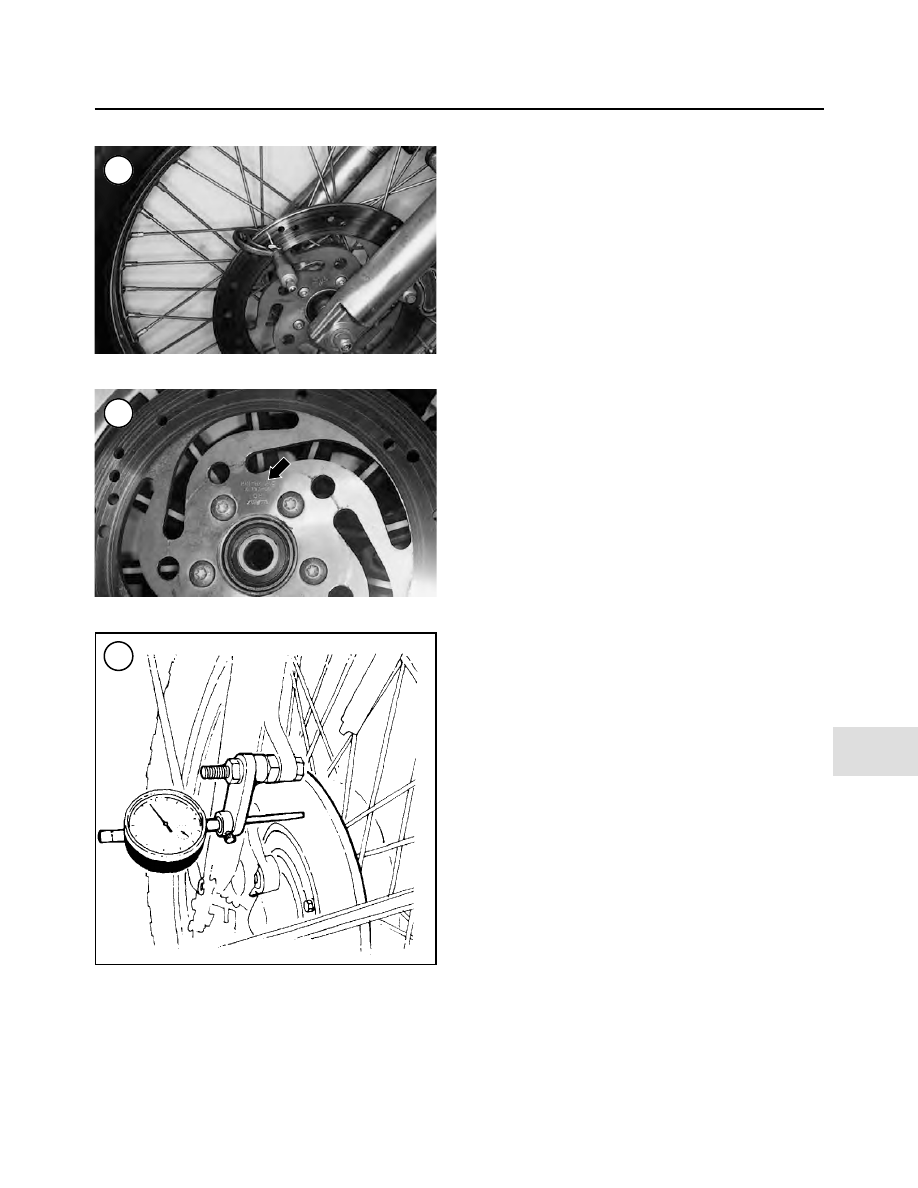
4. Measure the thickness of the disc at several locations
around the disc with a vernier caliper or a micrometer
(Figure 146). Replace the disc if the thickness in any area
is less than the MIN dimension on the disc (Figure 147).
5. Make sure the disc mounting bolts are tight prior to
running this check. Check the disc runout with a dial indi-
cator as shown in Figure 148.
NOTE
When checking the front disc, turn the han-
dlebar all the way to one side, then to the
other side.
6. Slowly rotate the wheel and watch the dial indicator. If
the runout exceeds the specification in Table 1, replace
the disc.
7. Clean the disc of any rust or corrosion and wipe it clean
with brake cleaner. Never use an oil-based solvent that
may leave an oil residue on the disc.
Removal/Installation
1. Remove the front or rear wheel as described in Chapter
Nine.
2. Remove the Torx bolts (Figure 149) securing the brake
disc to the hub and remove the disc.
BRAKES
517
13
146
147
148