Harley Davidson 2009 Dyna Models. Service manual - page 11
6.
Remove pivot pin (15) and brake hand lever (17).
7.
Carefully remove wiper (2) with pick or similar tool.
8.
Remove piston cap (3).
9.
Remove piston (5) with O-ring (4) and primary cup (6).
10. Remove spring (7).
11. Remove both screws (13), cover (11) and the cover gasket
(10).
1
2
sm03168
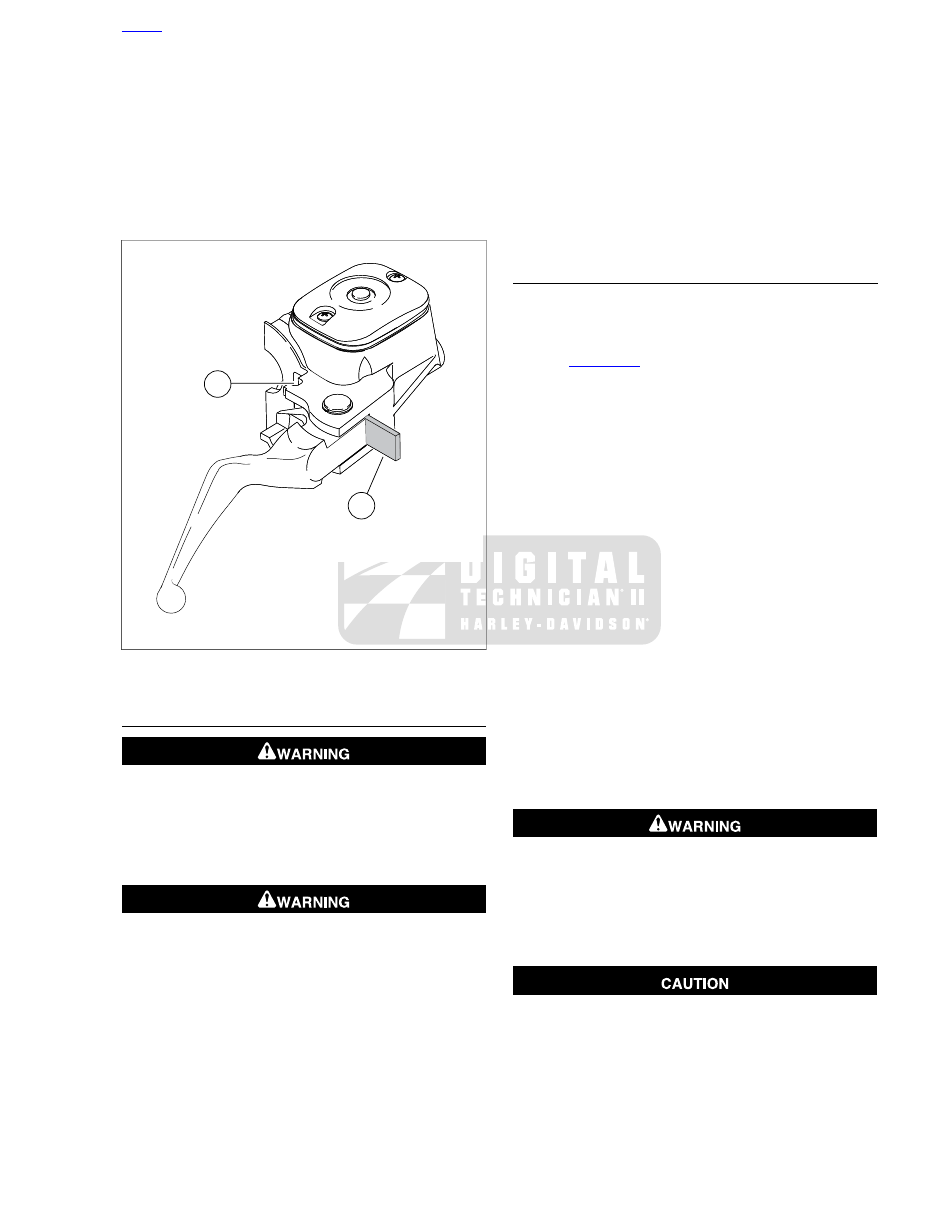
1.
Groove
2.
5/32 in. (4 mm) thick cardboard insert
Figure 2-64. Cardboard Insert
CLEANING AND INSPECTION
Use denatured alcohol to clean brake system components.
Do not use mineral-based solvents (such as gasoline or
paint thinner), which will deteriorate rubber parts even
after assembly. Deterioration of these components can
cause brake failure, which could result in death or serious
injury. (00291a)
Compressed air can pierce the skin and flying debris from
compressed air could cause serious eye injury. Wear
safety glasses when working with compressed air. Never
use your hand to check for air leaks or to determine air
flow rates. (00061a)
1.
Clean all parts with denatured alcohol or D.O.T. 4 BRAKE
FLUID. Do not contaminate with mineral oil or other
solvents. Wipe dry with a clean, lint free cloth. Blow out
drilled passages and bore with a clean air supply. Do not
use a wire or similar instrument to clean drilled passages
in bottom of reservoir.
2.
Carefully inspect all parts for wear or damage and replace
as necessary.
3.
Inspect the piston bore in the master cylinder housing for
scoring, pitting or corrosion. Replace the housing if any
of these conditions are found.
4.
Inspect the outlet port that mates with the brake line fitting.
As a critical sealing surface, replace the housing if any
scratches, dents or other damage is noted.
5.
Inspect the cover gasket for cuts, tears or general deteri-
oration. Replace as necessary.
ASSEMBLY AND INSTALLATION
NOTE
Always reassemble the master cylinder using new parts from
the correct repair kit.
1.
. Fit o-ring (4) into groove on outboard
side of piston (5) (pin side).
2.
Fit primary cup (6) over lip on inboard side of piston, so
that closed side (smaller OD) contacts shoulder.
3.
Coat piston bore of master cylinder reservoir with special
lubricant (1) supplied in the service parts kit. Also apply
the lubricant to OD of installed o-ring (4) and primary cup
(6).
4.
Insert spring (7) into piston bore, so that it seats against
counterbore (recess) at bottom.
5.
Slide piston over spring.
6.
Fit wiper (2) over piston cap (3) so that flat side of wiper
contacts cap shoulder.
7.
Fit piston cap over piston pin (5).
8.
Press down on wiper until it contacts the counterbore.
Larger OD of wiper must be completely seated in groove
on outlet side of piston bore.
9.
Install the master cylinder reservoir cover (11). Secure
with two screws, but do not tighten at this time.
10. Align hole in brake hand lever (17) with hole in master
cylinder bracket. From the top of the assembly, slide pivot
pin (15) through bracket and hand lever.
Wear safety glasses or goggles when removing or
installing retaining rings. Retaining rings can slip from the
pliers and could be propelled with enough force to cause
serious eye injury. (00312a)
11. Install new retaining ring (18) in pivot pin groove. Verify
that retaining ring is completely seated in groove.
Do not remove or install the master cylinder assembly
without first positioning a 5/32-inch (4 mm) thick insert
between the brake lever and lever bracket. Removing or
installing the master cylinder assembly without the insert
in place may result in damage to the rubber boot and
plunger on the front stoplight switch. (00324a)
2009 Dyna Service: Chassis 2-39