Harley Davidson 1986-2003 XL/XLH Sportster. Service Manual - page 42
Disassembly
1. Remove the caliper as described in this section.
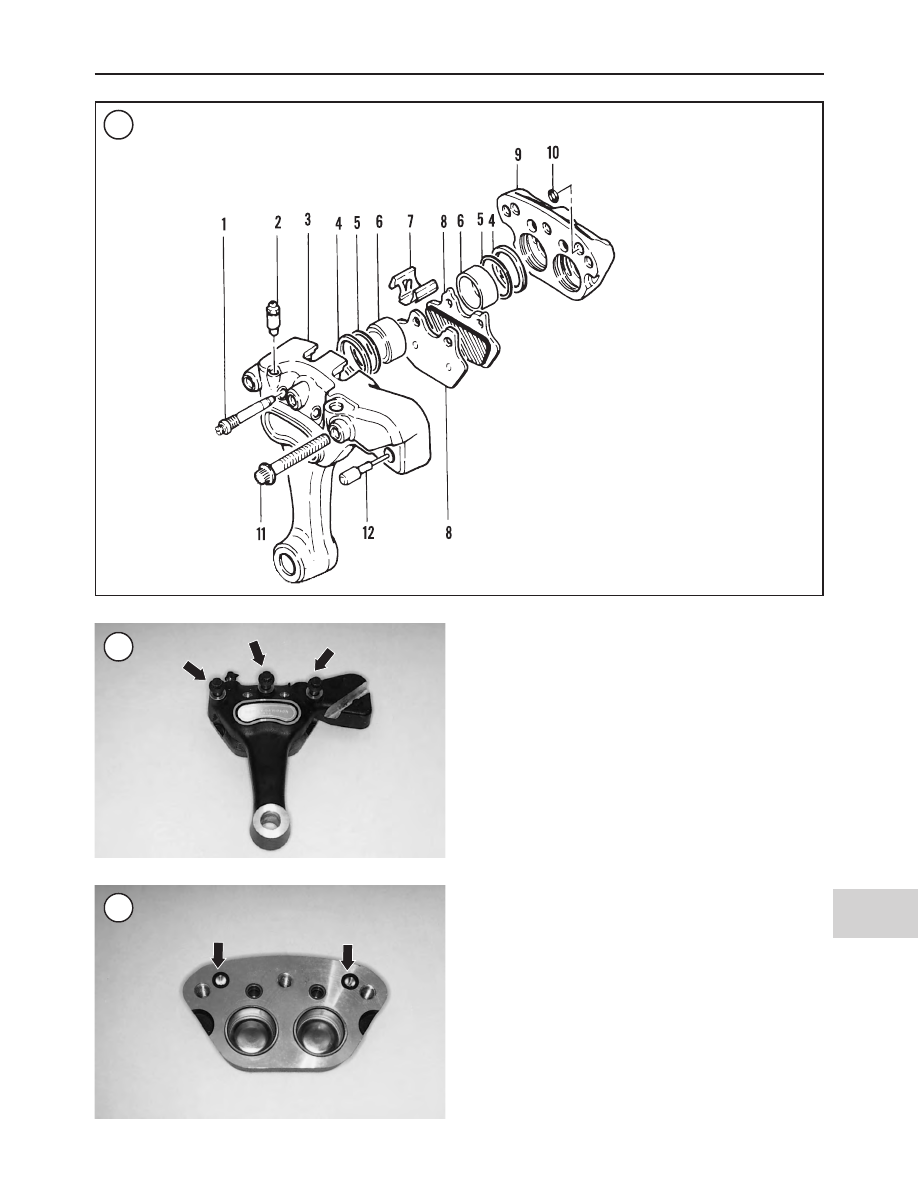
2. Remove the caliper body bolts (Figure 140) loosened
during the removal procedure.
3. Separate the caliper body halves. Remove the O-rings
(Figure 141). New O-rings must be installed every time the
caliper is disassembled.
NOTE
If the pistons were partially forced out of the
caliper body during removal, steps 4-6 may
not be necessary. If the pistons or caliper
bores are corroded or very dirty, a small
amount of compressed air may be necessary
to completely remove the pistons from the
body bores.
4. Place a piece of soft wood and a folded shop cloth over
the end of the pistons and the caliper body. Turn the assem-
bly over and place it on the workbench with the pistons fac-
ing down.
WARNING
Compressed air forces the pistons out of the
caliper body under considerable force. Do
not block the piston by hand as injury will
occur.
BRAKES
573
16
139
REAR BRAKE CALIPER (2000-2003 MODELS)
1. Pad pin
2. Bleed valve
3. Outboard caliper body
4. Piston seal
5. Dust seal
6. Piston
7. Anti-rattle spring
8. Brake pad
9. Inboard caliper body
10. O-ring
11. Bridge bolt
12. Rubber bumper
140
141