Harley Davidson 1986-2003 XL/XLH Sportster. Service Manual - page 29
New tires provide significantly less adhesion until they
are broken in. Do not subject new tires to high speed or high
cornering forces for at least 60 mile (100 km). Be especially
careful when encountering wet conditions with new tires.
Removal
CAUTION
To avoid damage when removing the tire,
support the wheel on two wooden blocks, so
the brake disc or the driven sprocket does not
contact the floor.
NOTE
To make tire removal easier, warm the tire to
make it softer and more pliable. Place the wheel
and tire assembly in the sun. If possible, place
the wheel assembly and the new tire in a com-
pletely closed automobile parked in the sun.
Take special care with tire irons when changing a tire to
avoid scratches and gouges to the outer rim surface. Insert
pads between the tire iron and the rim to protect the run
from damage.
All original equipment cast or disc wheels are designed
for use with tubeless tires only. All laced wheels use a tube
and tire combination.
When removing a tubeless tire, take care not to damage
the tire beads, inner liner of the tire or the wheel rim
flange. Use tire levers or flat handle tire irons with
rounded heads.
1. Remove the front or rear wheel as described in this chapter.
2. If not already marked by the tire manufacturer, mark the
valve stem location on the tire, so the tire can be installed in
the same location for easier balancing.
3. Remove the valve cap and unscrew the core from the
valve stem and deflate the tire or tube.
CAUTION
The inner rim and tire bead areas are the
sealing surfaces on tubeless tires. Do not
scratch the inside of the rim or damage the
tire bead.
NOTE
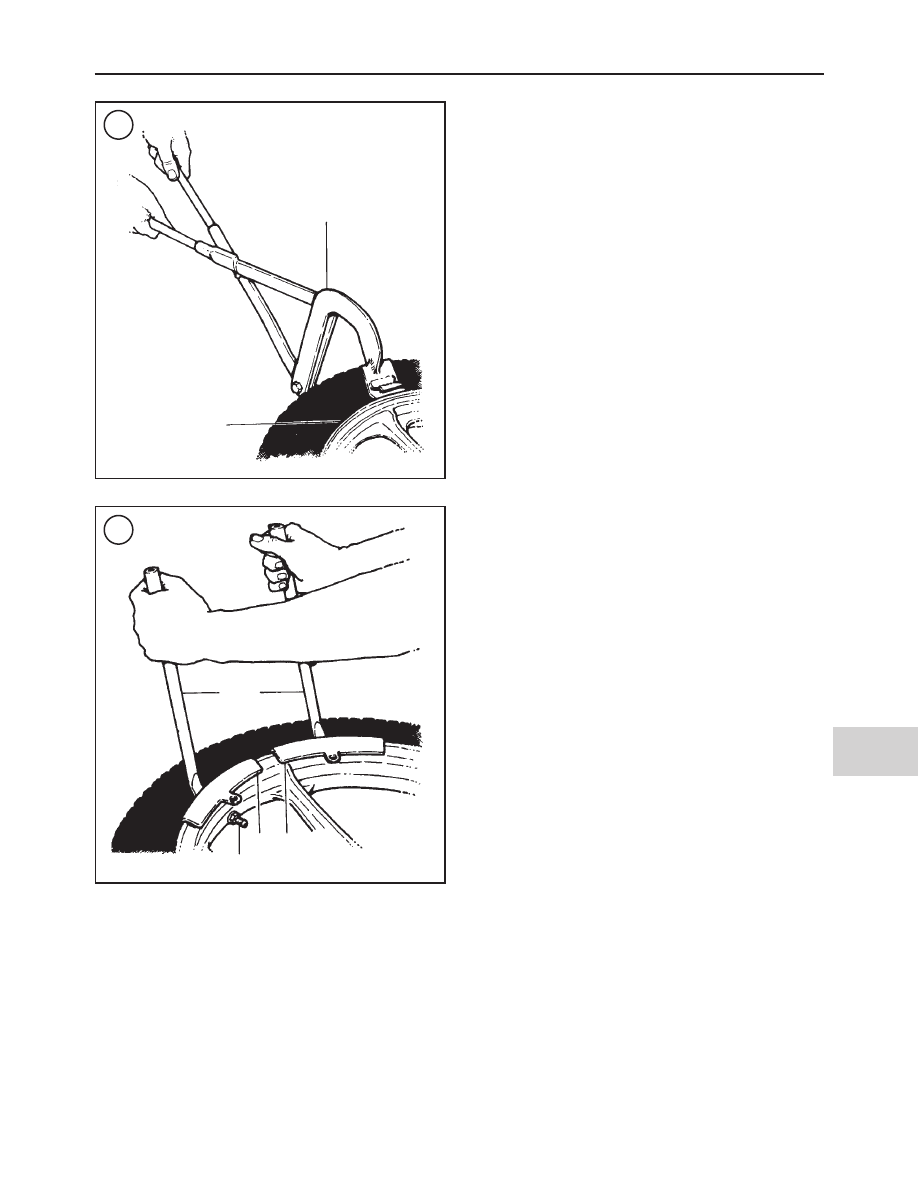
Removal of tubeless tires from their rims can
be difficult because of the tight tire bead-
to-rim seal. Breaking the bead seal may re-
quire a special tool (
Figure 70
). If unable to
break the seal loose, take the wheel to a deal-
ership and have them break it loose on a tire
changing machine.
4. Press the entire bead on both sides of the tire away from
the rim and into the center of the rim. If the bead it tight, use
a bead breaker.
5. Lubricate both beads with soapy water.
CAUTION
Use rim protectors (
Figure 71
, typical) or in-
sert scraps of leather between the tire iron and
the rim to protect the rim from damage.
CAUTION
Use only tire irons without sharp edges. If
necessary, file the ends of the tire irons to re-
move rough edges.
6. Insert a tire iron under the top bead next to the valve
stem (Figure 72). Force the bead on the opposite side of the
tire into the center of the rim and pry the bead over the rim
with the tire iron.
WHEEL, TIRES AND SECONDARY DRIVE
491
13
70
Bead breaker
Rim
71
Tire
irons
Valve stem
Rim protectors