Ford Mondeo (petrol engines). Manual - part 83
the nuts are self-locking, and must therefore
be renewed whenever they are disturbed.
Unscrew the centre bolt to dismantle the
mounting, if necessary to renew components.
15 On refitting, renew the self-locking nuts,
and do not allow the mounting to twist as the
nuts are tightened (see illustration). Tighten
all fasteners to the specified torque wrench
settings.
Rear mounting
16 Where the vehicle is fitted with automatic
transmission, a separate damper may be
fitted beneath the subframe, which must be
unbolted to reach the mounting’s fasteners
(see illustration).
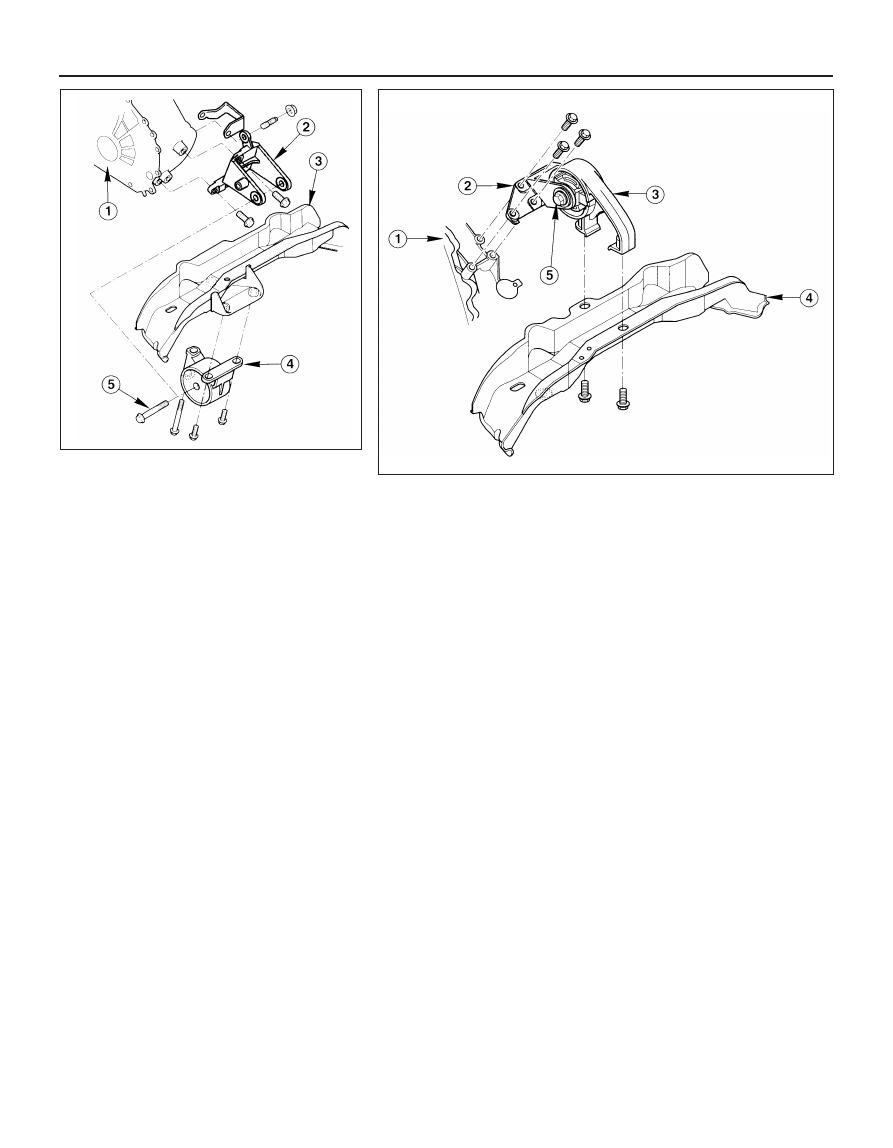
17 Unbolt the mounting from the subframe,
then unscrew the mounting’s centre bolt. If
required, unbolt the mounting’s bracket from
the transmission (see illustrations).
18 On refitting, ensure that the mounting-to-
transmission bolts are securely tightened,
then refit the mounting. Tighten first the
mounting-to-subframe bolts, noting that
these are to be tightened in two stages to the
final specified torque wrench setting. Finally
tighten the mounting’s centre bolt, again to
the specified torque wrench setting.
2A•26 In-car engine repair procedures
22.17A Engine/transmission rear mounting -
manual transmission type
1 Transmission
4 Mounting
2 Mounting bracket
5 Mounting centre bolt
3 Front suspension subframe
22.17B Engine/transmission rear mounting - automatic transmission type
1 Transmission
3 Mounting
5 Mounting centre bolt
2 Mounting bracket
4 Front suspension subframe