Traktor kontrol F1. Manual in english (2015) - page 2
Tutorials and Workflows
Making Your Own Remix Set
3.6.3
Name Your Set!
So far, so good. But we need a name. This is one thing the F1 can't do for us so we'll need to
use the mouse and keyboard:
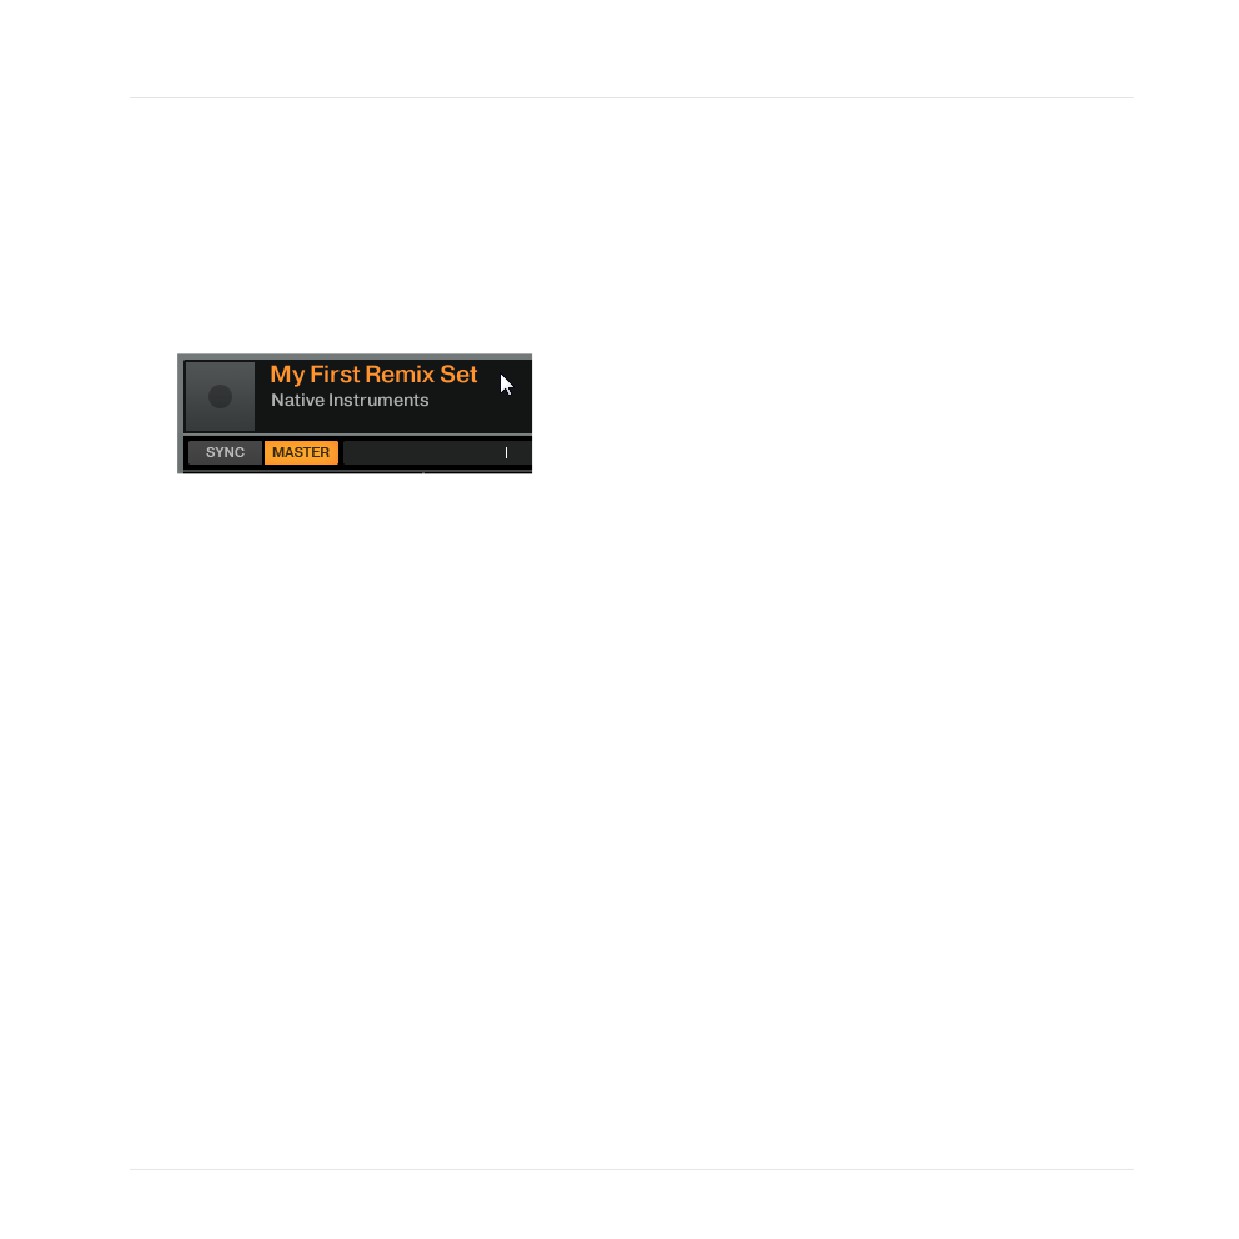
1. Double-click on the name "New Remix Set" in the header of the Remix Deck.
2. Type something like "My First Remix Set" and then hit [Enter]/[Return] on your computer
keyboard.
3.6.4
Save!
Although you have named your set, you have not yet entered it into your Collection, so it is not
yet saved. To do this:
1. Navigate to the "All Remix Sets" folder in your Tree (you can use the F1 in Browse mode
for this; remember, SHIFT + encoder knob navigates the Collection Tree).
2. In the TRAKTOR software, click and hold the name of your Remix Set at the top of the
Remix Deck and drag it down into the list.
→ Your new Remix Set is now saved in your Collection.
► Press the BROWSE (MIDI) button to exit Browse mode.
3.6.5
Delete Samples and Pages
As we saw in ↑3.6.1, Preparations, you need to press and hold SHIFT and CAPTURE (DELETE)
in order to remove material from the deck. You remain in this mode only as long as you are
holding at least one of the two buttons. This is to prevent you from accidentally deleting Sam-
ples or pages.
Sample Deletion
Deleting a Sample from a pad is very easy:
TRAKTOR KONTROL F1 - Manual - 47
Tutorials and Workflows
Making Your Own Remix Set
1. Press and hold the SHIFT + CAPTURE (DELETE) buttons.
2. While continuing to hold either one of the buttons, hit the pad that you want to "unload"
(delete containing Sample). That's it!
Page Deletion
To delete an entire page from your Remix Set:
1. Press and hold the SHIFT + CAPTURE (DELETE) buttons.
2. While continuing to hold either one of the buttons, turn the encoder knob until the display
shows "d" followed by the page number you want to delete. In other words, "d1" will delete
page one and "d2" will delete page two of the Sample Grid, and so on.
3. Pressing the encoder knob will clear the currently active page of the Sample Grid from all
Samples.
3.6.6
Copying and Editing Samples
One powerful feature of TRAKTOR's Remix Decks is that when you copy Samples from one pad
to another, you are actually using the same audio material in different places. This keeps your
hard drive from getting bloated with duplicates, but also lets you get into some creative remix-
ing.
► Select and load the Sample "OctaveUp Perc" into an empty cell. If you have already filled
a page, you should start a new page because you'll want to have some extra, free pads for
the next steps.
Copying
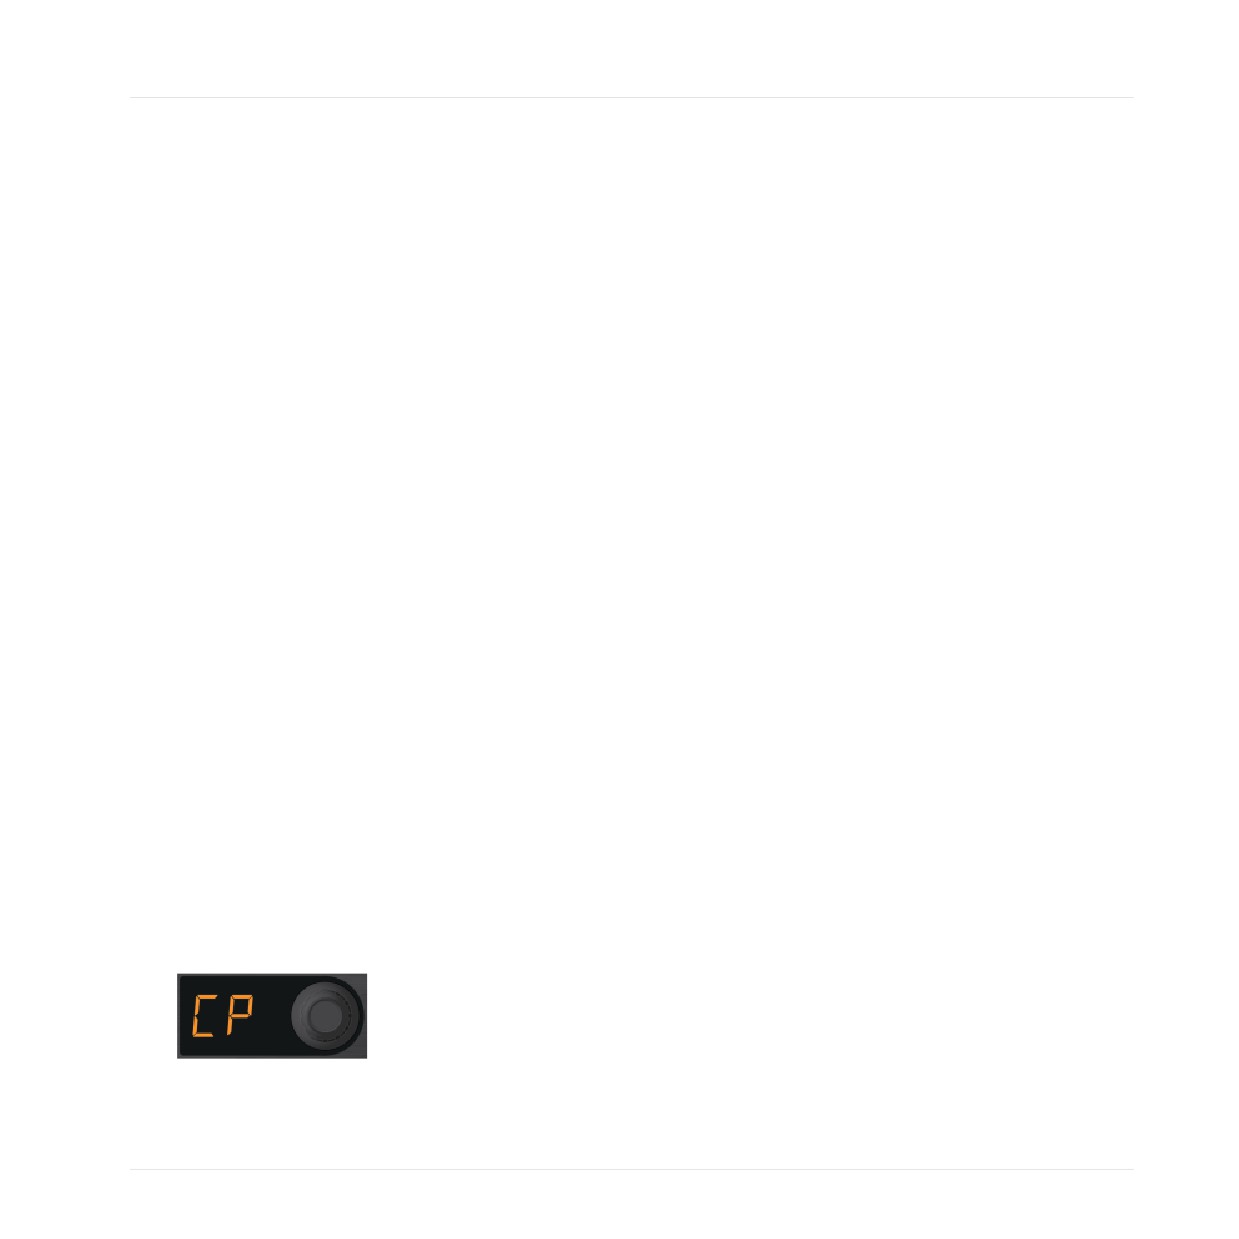
1. Press SHIFT + QUANT (EDIT). Both buttons start blinking. The display should show "CP"
for "Copy and Paste."
2. Turn the encoder knob clockwise, one notch at a time. Notice that after "CP," there is also
"Ct" (Cut and Paste), "OF" for "Offset," and "nU" for "Nudge." Turn back to "CP" to return
to Copy and Paste mode.
TRAKTOR KONTROL F1 - Manual - 48
Tutorials and Workflows
Making Your Own Remix Set
3. While still in Edit mode (and in the Copy and Paste sub-mode) hit the pad containing "Oc-
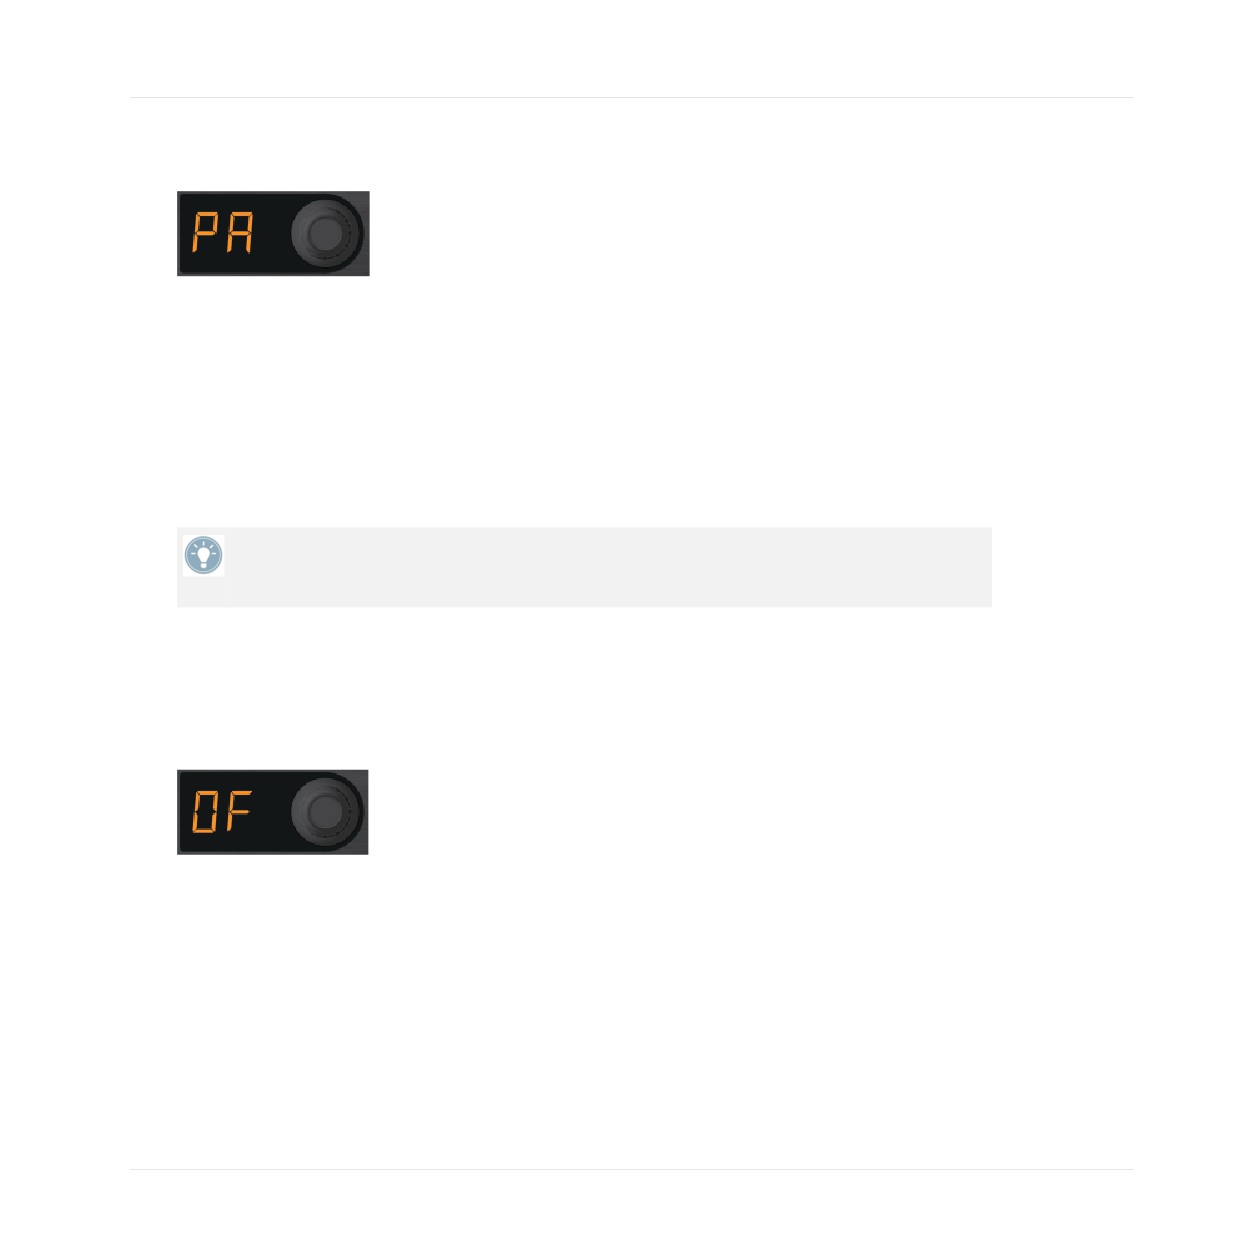
taveUp Perc." The pad now flashes and the display indicates "PA" for "Paste."
4. Hit an empty pad (for example, just under the pad containing our Sample). A copy of the
Sample is pasted here.
5. To make further copies, just repeat the process (hit the source pad, then the target pad).
For our example, make a whole column of four identical Samples in the same Sample Slot
on one page (on pads C1, C2, C3, and C4, for example).
6. Exit the Edit mode by pressing the QUANT (EDIT) button.
7. Now you can trigger the different pads you just copied onto the same slot, but there
should be no difference in sound when you trigger them.
Copying Samples can be a very powerful way of varying parts in your remix. For example,
you can copy a vocal Sample across several pads and then tune the pads up or down with
Pitch mode to create some tonal variety.
Offsetting Sample Playback
Offset moves the starting position of a Sample in 16th note steps. To offset a Sample:
1. Re-enter Edit mode, as described above, with SHIFT + QUANT (EDIT).
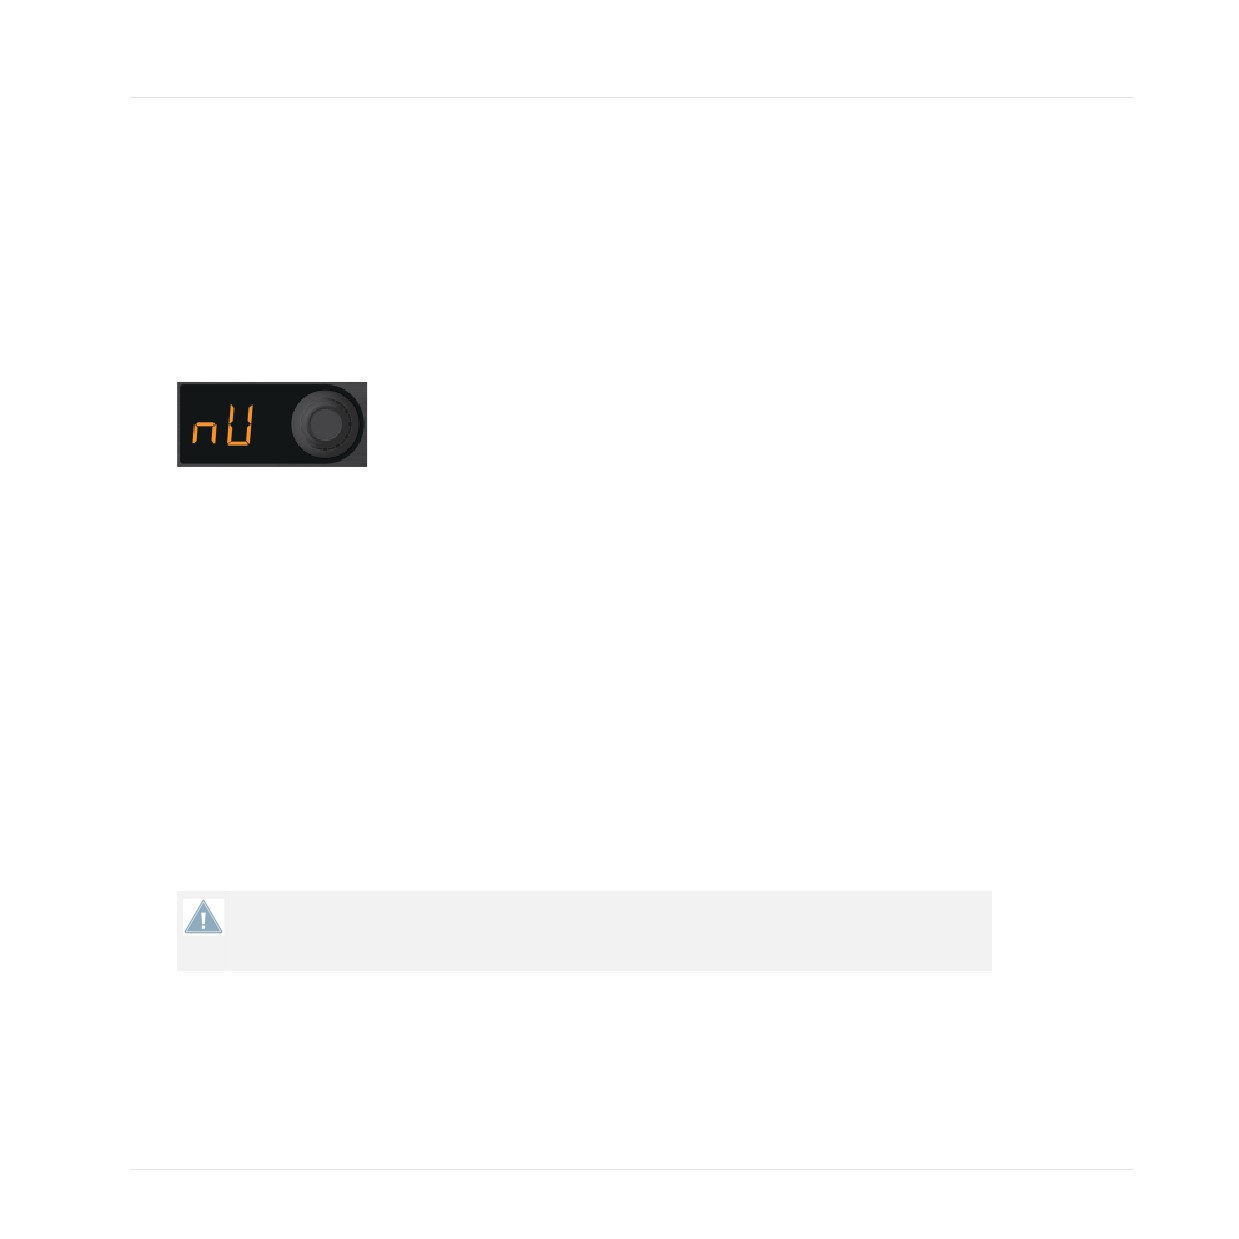
2. Turn the encoder knob until you see "OF" in the display to enter the Offset sub-mode.
3. Push and hold one of the pads that you just copied which is playing. Notice the display
should indicate "00," meaning that there is no offset on the Sample; playback starts right
at the beginning of the Sample.
4. While holding the pad, slowly rotate the encoder knob. On the TRAKTOR software, you'll
see the start marker of the playback move inside the Slot Player as you move the encoder
knob. The white bar indicates the point where playback will begin when you trigger the
Sample with this pad.
5. Continue changing the offsets on the other pads where you just copied the Sample.
TRAKTOR KONTROL F1 - Manual - 49
Tutorials and Workflows
Making Your Own Remix Set
6. Exit Edit mode by pressing QUANT (EDIT).
7. Play the Samples to get a feel for the shifting feeling you've created.
Nudge
Nudge is similar to Offset, only you are moving the starting position of the Sample by fractions
of a 16th note. This is excellent for fixing small timing problems between Samples in your Set.
1. Re-enter Edit mode, as described above.
2. Turn the encoder knob until you see "nU" for "Nudge."
3. While holding the pad you want to nudge, rotate the encoder knob. This moves the Sam-
ple start position.
3.6.7
Capturing Samples From Other Decks
Remixing with the F1 takes on a new dimension with live capture: you can quickly and easily
capture from tracks playing in other Track Decks or the Loop Recorder and, thereby, create a
Remix Deck (and, of course, a remix) on-the-fly.
Preparations
First of all, you'll need to load a track into a Track Deck. We'll use the "TechHouse 1" track for
this tutorial.
► Load "TechHouse 1" from the "All Tracks" folder of the "Track Collection" node into Deck
A (we are using Deck B as our Remix Deck), and start playback of the Deck.
The capture source Deck doesn't need to be playing — you can sample from a stopped
Deck just as easily as from one that is playing. However, when the Deck is playing, you
hear the material will capture (see below).
Determining the Capture Source
1. Press and hold the CAPTURE (DELETE) button on your F1.
TRAKTOR KONTROL F1 - Manual - 50
Tutorials and Workflows
Making Your Own Remix Set
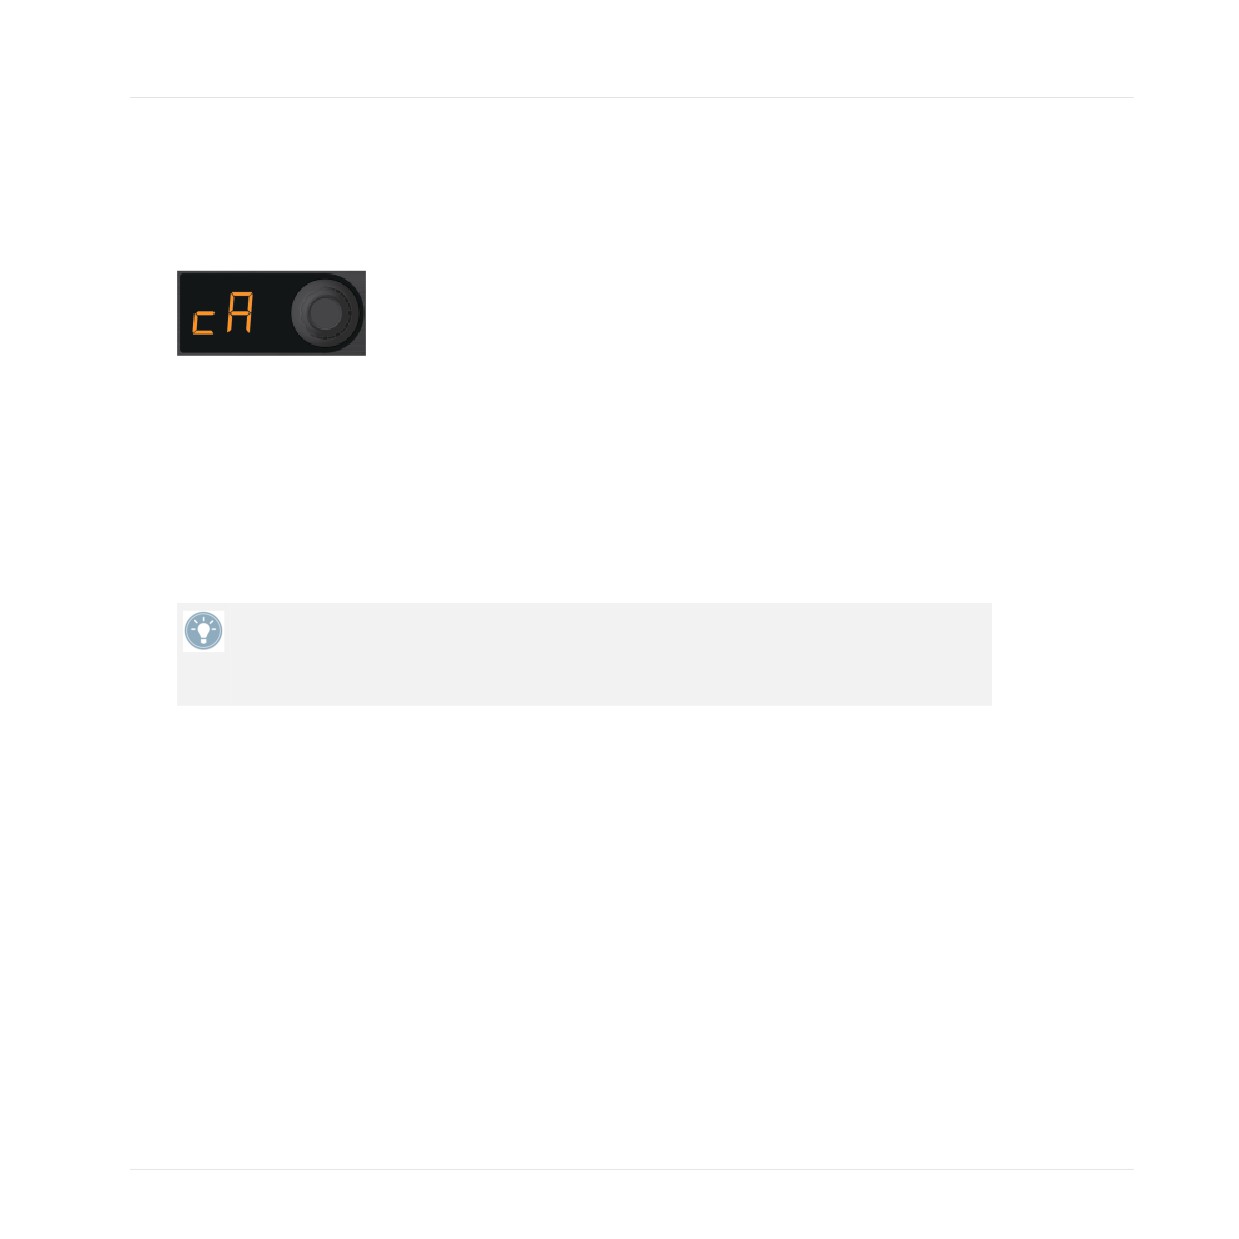
2. While continuing to hold the CAPTURE (DELETE) button, rotate the encoder knob. You
will see a Pad Matrix animation that will graphically indicate which of the four decks (or
the Loop Recorder) will be the focus. At the same time, the display indicates the source
names as well ("cA" for capture Deck A, "cB" for capture Deck B, and "cL" for capture
Loop Recorder). Make sure the display reads "cA."
3. When releasing the CAPTURE (DELETE) button, the controller remains in Capture mode.
You can now set the capture length as explained in the next section.
Determining the Capture Length
Notice the number in the display.
► Turn the encoder knob until you see "4." This means that four beats will later be captured
from the capture source Deck.
When pressing the encoder knob at this point, a loop of the specified length will be activat-
ed in the capture source Deck. Pressing the encoder knob again will deactivate the loop.
Activating a loop inside the Track Deck before capturing can be handy for transitions be-
tween elements of a Remix, or between track transitions in your mix.
Capturing into a Pad
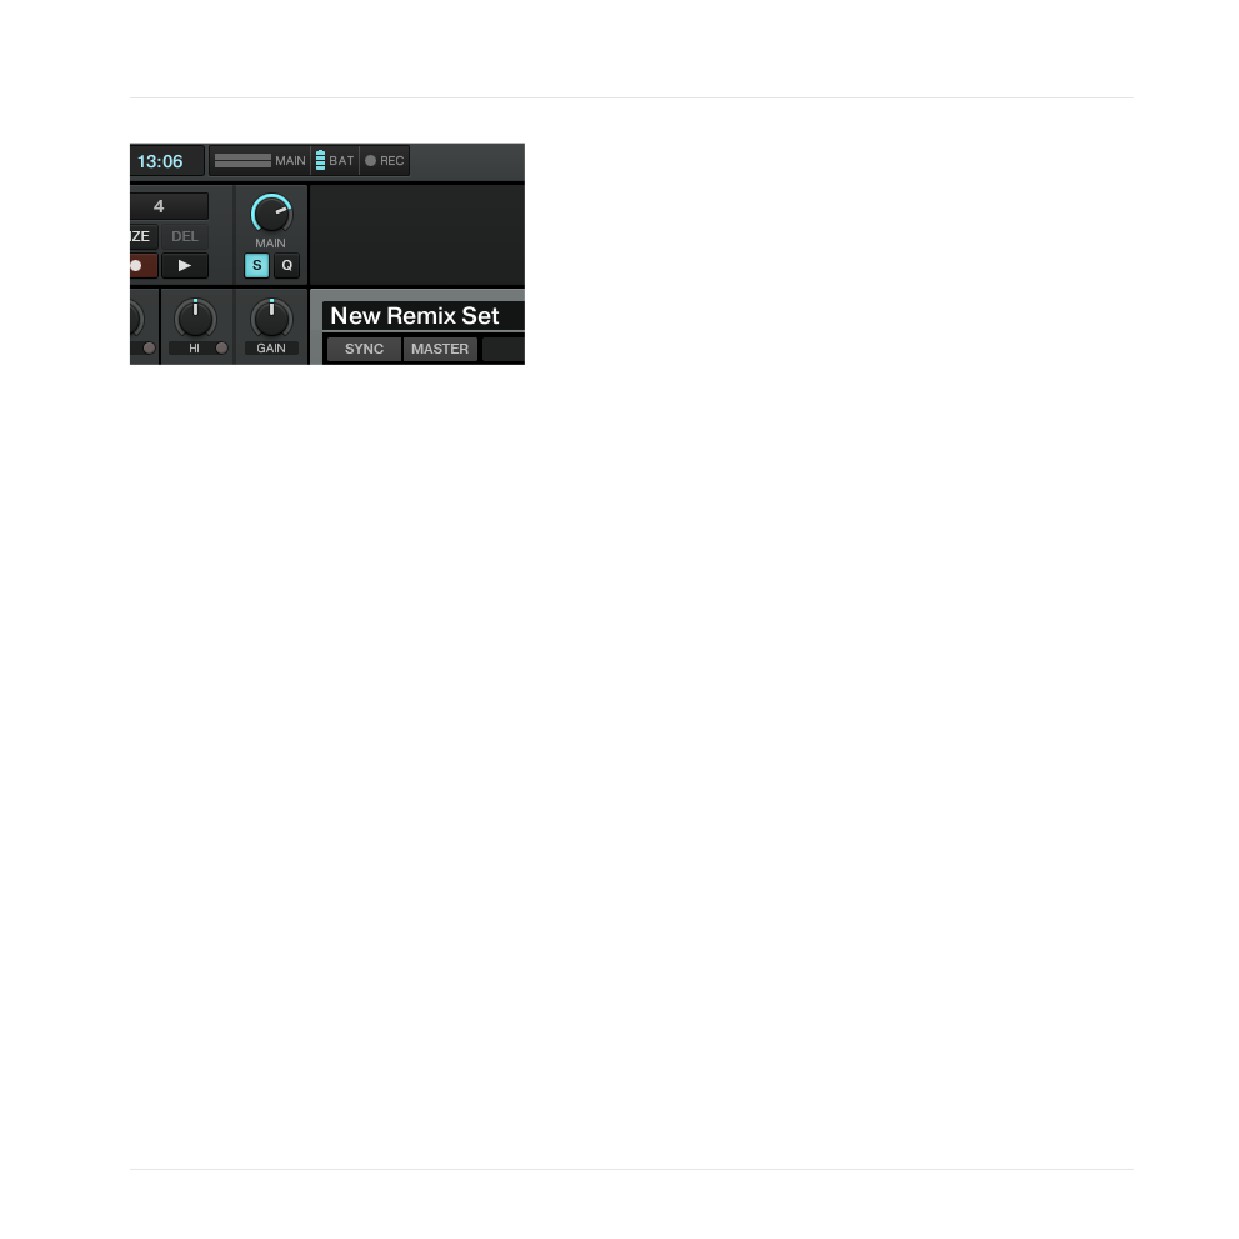
If you want the Sample start to snap to the capture source Deck's Beatgrid, make sure the
Snap function (S) is active in the software's Main section. We recommend to have the Snap
function always active when capturing Samples.
TRAKTOR KONTROL F1 - Manual - 51
Tutorials and Workflows
Importing Remix Sets to TRAKTOR
Making sure Snap (S) is active in the MAIN area of the software.
Wait for a moment shortly before a downbeat in the track of the capture source Deck, then:
► Push the pad where you want to capture the loop.
→ A Sample of the previously specified length will now be captured from the Track Deck in-
to the pad.
1. Push CAPTURE (DELETE) to exit Capture mode.
2. Now hit the target pad to get it to start playing.
3. Repeat the process (from "Determining Capture Length" to "Capturing into a Pad") several
times, with different loop lengths and from different parts of the track — enjoy!
→ Congratulations! If you have worked through these simple tutorials, you will be on your
way to becoming an F1 expert! The next chapter, ↑4, TRAKTOR KONTROL F1 Reference,
covers every aspect of the F1 from start to finish.
3.7
Importing Remix Sets to TRAKTOR
Importing Remix Sets to TRAKTOR is as easy as this:
► Drag and drop the file containing the Remix Set and its Samples (.trak file) onto TRAK-
TOR's Collection in the Browser. TRAKTOR will then unpack the contents of the .trak file
and place the Samples and Remix Set into your Collection. Depending on the size of the
Remix Set, this process could take a few moments. Once import is complete, you can de-
lete the .trak file or store it somewhere for safe keeping.
TRAKTOR KONTROL F1 - Manual - 52
Tutorials and Workflows
Using F1 for Stem Deck Control
Make sure to check the website from time to time for additional Remix Sets provided by
Native Instruments!
3.8
Using F1 for Stem Deck Control
In this tutorial you will learn how to load and play back a Stem File, and how to perform on
Stem Decks.
Stem Files allow you to interact with four different musical elements of a track independently
while DJing. The four stems of a track can be modified individually to create spontaneous in-
strumentals, remixes, or mashups. You can create transitions between elements stem-by-stem,
or apply effects and EQ to just to a specific stem instead of the entire track. To get really crea-
tive, try swapping elements across multiple Stem Decks, for example, you could take the vo-
cals from one track and mix it with the beat from another. Utilizing your F1, in combination
with TRAKTOR, you can mix music at a deeper level.
Stem Files
A Stem File is a track in the file format .stem.mp4 that contains four audio tracks (Stem
Parts). Each Stem Part represents one of the key elements e.g. drums, percussions, synths, vo-
cals, of the entire track. By default when a Stem File is played back in TRAKTOR all Stem
Parts are audible and result in an entire track.
Stem files must be analyzed before loading and playback. Due to the large amount of data
that must be read from a Stem File, it is currently necessary that Stem Files are analyzed
before loading into a Stem Deck. It is not possible to load and play a Stem File before it
has been analyzed. For more information on how to analyze tracks or Stem Files, refer to
the TRAKTOR Manual.
Stem Deck control on the F1
In the TRAKTOR software the Stem Deck looks identical to a conventional Track Deck. Only
the TRAKTOR KONTROL S8 and the TRAKTOR KONTROL D2 are able to additionally show the
four waveforms of the Stem Parts on their displays.
TRAKTOR KONTROL F1 - Manual - 53
Tutorials and Workflows
Using F1 for Stem Deck Control
When a Stem File is played back using the F1 controller, the Pads will function as level meters
for visualizing the output volumes of the Stem Channels: as the Stem Channels become louder
the more the Pads will illuminate. If a Stem Channel provides no audio signal the Pads remain
unlit. In addition, the Slot Volume faders and Filter knobs of the F1 control the four Stem
Channels of the Stem Deck.
3.8.1
Loading a Stem File into the Stem Deck
Before you can load a Stem File into a Deck you need to set the Deck Flavor to Stem Deck in
the TRAKTOR software.
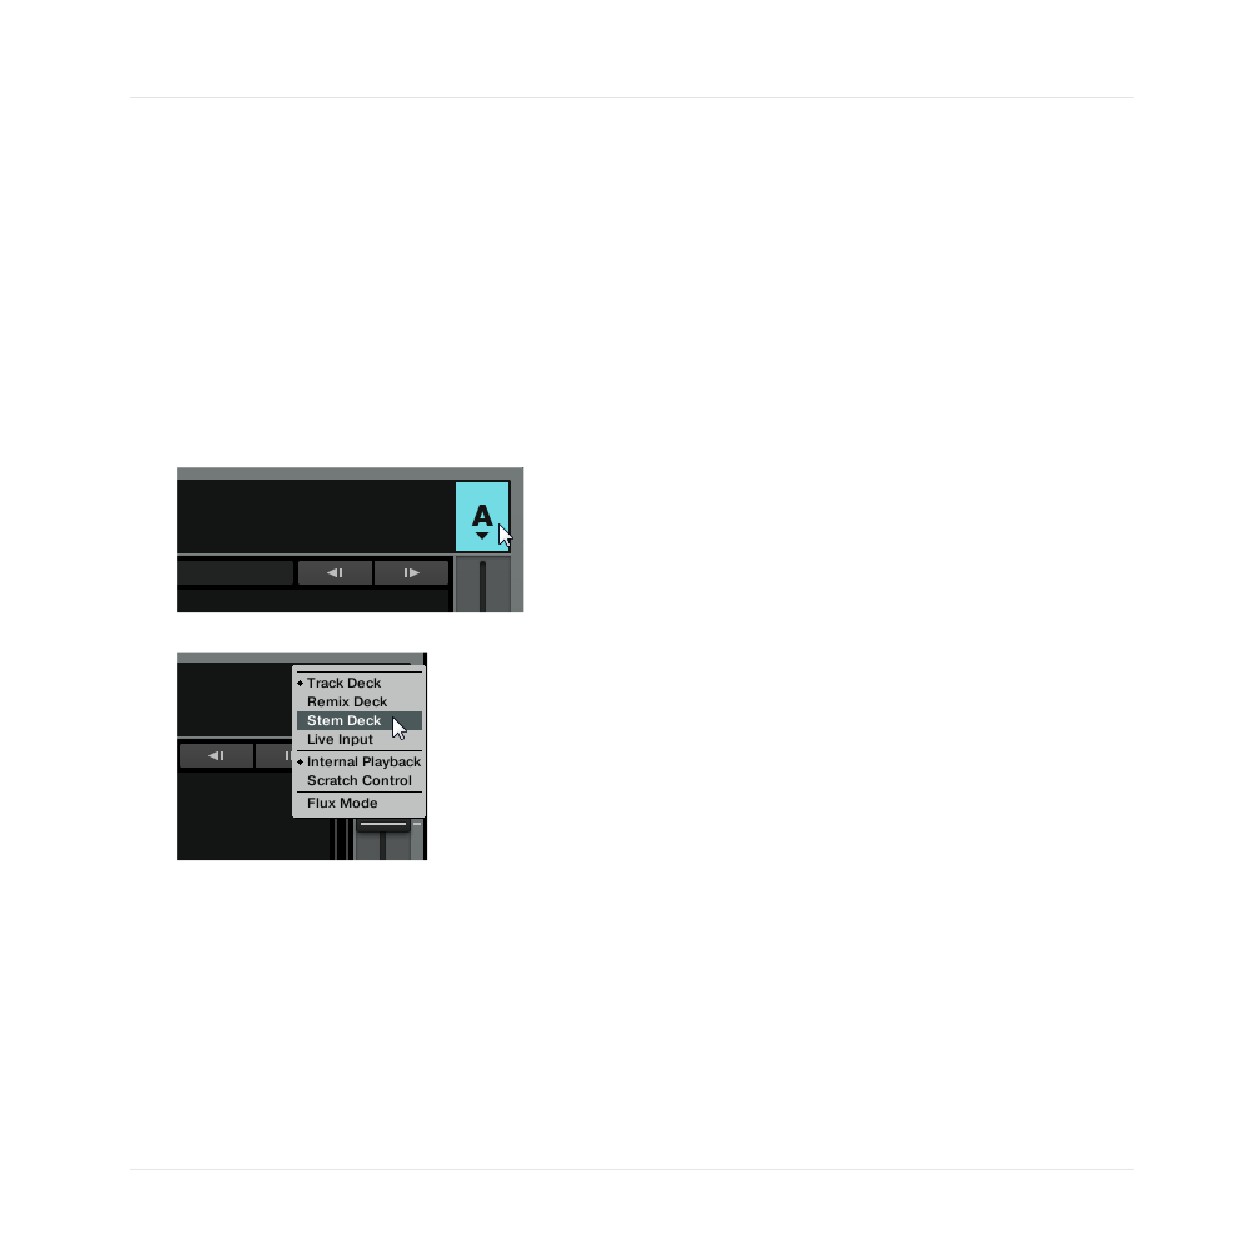
On the Deck controlled by your F1 controller:
1. Click on the Deck Focus “Icon” to display the Deck Flavor context menu.
2. Select Deck Flavor Stem Deck.
→ The Deck is set to Stem Deck and is ready for loading a Stem File.
On your F1 controller:
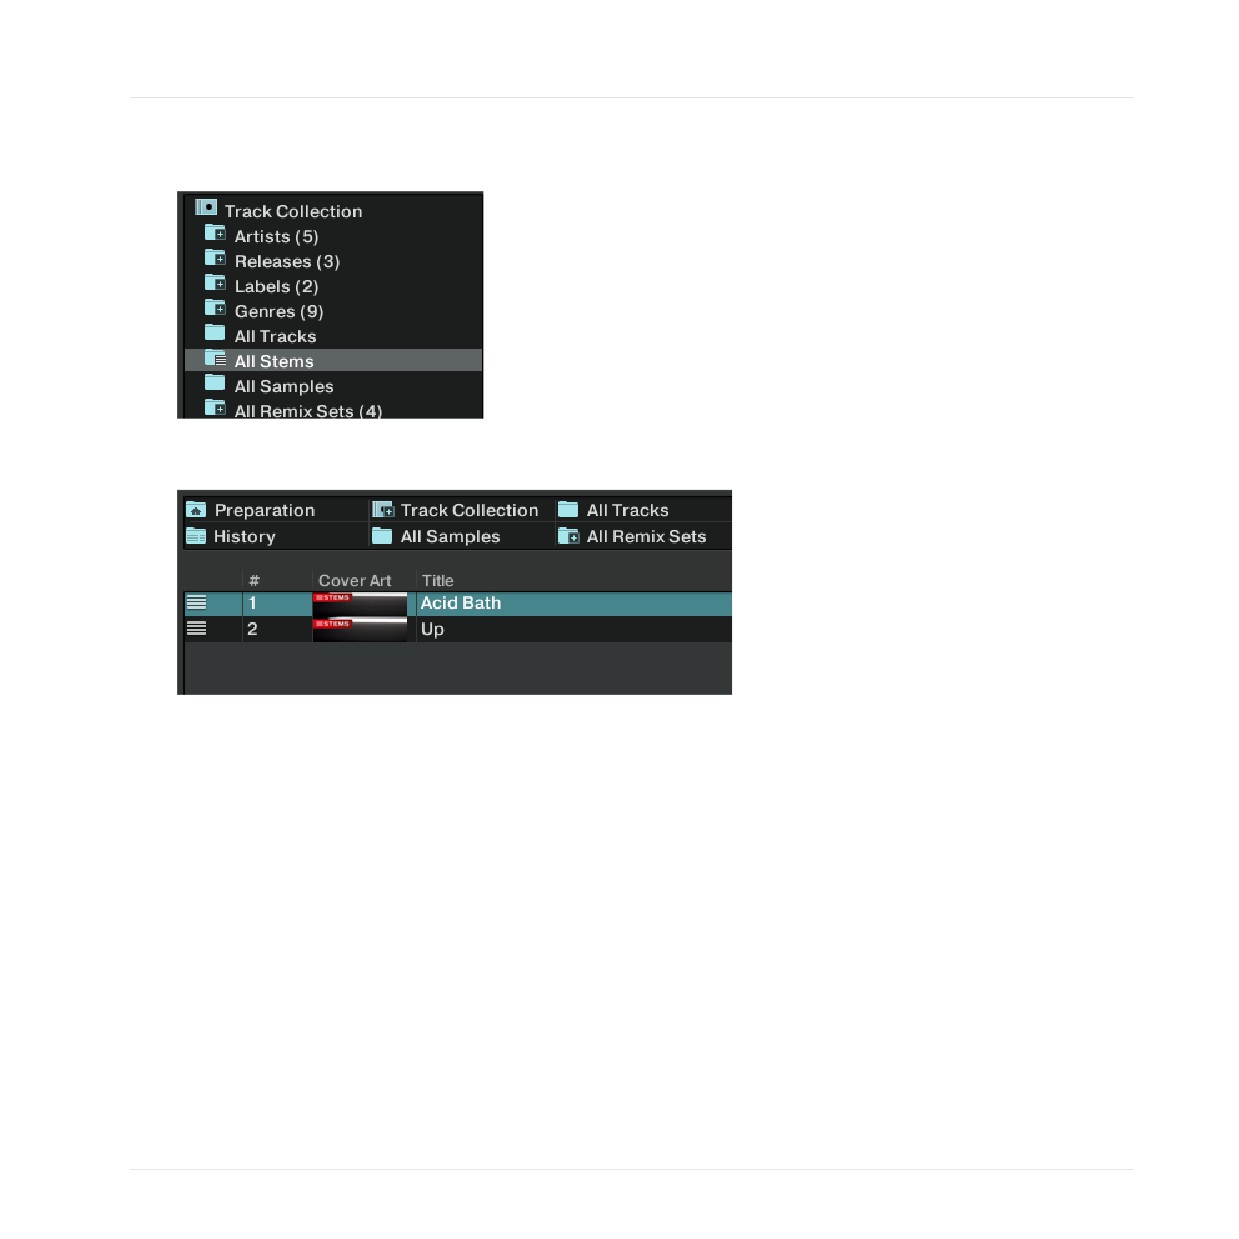
1. Push the BROWSE button to enable Browse mode.
TRAKTOR KONTROL F1 - Manual - 54
Tutorials and Workflows
Using F1 for Stem Deck Control
2. Hold the SHIFT button and rotate the encoder for navigating along the Browser Tree and
select the All Stems folder.
3. Release the SHIFT button.
4. Rotate the encoder for navigating within the Browser List and select a Stem File.
5. Push the encoder to load the Stem File into the Stem Deck.
6. Push the BROWSE button to leave Browse mode.
→ The Stem File is now loaded into the Stem Deck.
3.8.2
Controlling the Stem Deck
Compared to a Remix Deck where the playback is started as soon a Pad is triggered, you can-
not start the playback of the Stem Deck with the F1 controller.
Starting Playback
To start playback of the Stem Deck:
► In the TRAKTOR software click Play of the Stem Deck.
TRAKTOR KONTROL F1 - Manual - 55
Tutorials and Workflows
Using F1 for Stem Deck Control
→ The Stem File is now playing back similar to a conventional track in a Track Deck. During
playback you will notice the Pads light up indicating the output level volumes of the
Stem Parts.
Adjusting Volumes of Stem Parts
To adjust the volumes of key elements from the music:
► Move the four Slot Volume Faders downwards or upwards.
→ You will hear the several volumes of key elements change. According to the Volume fad-
ers’ positions and the resulting output volume, the Pads will display the current output
volume level.
Muting Stem Parts
To completely remove key elements from the music:
► Press the STOP (MUTE) buttons.
→ The volumes of the Stem Parts will be completely removed from the music and the Pads
of the Stem Channel are dimmed.
Applying FILTER on Stem Parts
To apply the FILTER on Stem Parts:
► Rotate the Filter knobs to apply the hi-pass or low-pass Filter to the Stem Channels.
→ You will hear the applied Filter on the Stem Channels output.
The usage of the Filter FX in combination with TRAKTOR’s EQ let you mix more precisely and
with more flexibility.
3.8.3
Applying FX SEND to Stem Channels
You can apply the FX of FX Unit 2 to any of the Stem Channels.
TRAKTOR KONTROL F1 - Manual - 56
Tutorials and Workflows
Using F1 for Stem Deck Control
Preparation
1. Route FX Unit 2 to the Stem Deck.
2. Enable FX Unit 2 in the TRAKTOR software.
Applying FX SEND
On the F1 controller:
1. Hold the SHIFT button. The four Pads with the FX parameter light up.
2. Now press one of these Pads. You now hear the FX of FX Unit 2 applied to the Stem
Channel.
TRAKTOR KONTROL F1 - Manual - 57
TRAKTOR KONTROL F1 Reference
Introduction
4
TRAKTOR KONTROL F1 Reference
4.1
Introduction
This chapter is your go-to reference for using the F1 to control your Remix Decks in TRAKTOR.
For learning how to use the F1 in everyday situations, please see ↑3, Tutorials and Workflows.
If you are "diving right in" with this chapter, you still might want to work through the tutori-
als in ↑3, Tutorials and Workflows. There you will learn the very basics of loading and play-
ing the Remix Decks.
4.1.1
A Word on Modes
The F1 is a compact and ergonomically-designed piece of hardware made to fit on your table
with whatever gear you use. With a relatively small number of knobs and buttons, you can con-
trol just about every aspect of the Remix Decks, including loading and saving Remix Sets,
changing Pitch, Speed, Size, and direction of Sample playback, setting up Sample Sync, Key-
lock, Monitoring and FX routing, and much, much more!
In order to accomplish all of this, the F1 architecture is based on a number of modes, all of
which we will describe in this chapter.
Activating the Modes
Each Mode button (REVERSE (COLOR); TYPE (PITCH); SIZE (SPEED); etc.) grants access to
two modes:
• Press the Mode button directly to activate its "primary" mode. Here, the mode's name is
written on the button.
• Press SHIFT + the Mode button concerned to activate the "secondary" mode. Here, the
mode's name is written below the button.
TRAKTOR KONTROL F1 - Manual - 58
TRAKTOR KONTROL F1 Reference
Introduction
In this Manual, we always refer to the buttons with both mode names. The primary mode is
written without brackets, and the secondary mode with brackets. For example, the top-left but-
ton in the middle section of the F1 is the SYNC (MASTER) button. The secondary function
(Master mode) is always achieved by pressing SHIFT + the Mode button.
4.1.2
A Word on Sample Slot Parameters
Each Sample Slot has four parameters, which you can change directly with pads while pressing
SHIFT. The parameter names appear on both sides of the F1's Pad Matrix. The buttons are,
from top to bottom on the F1:
• KEYLOCK: Toggles the Keylock function so that a Sample Slot's pitch will not change
when speed is changed.
• FX: Engages or disengages routing the Sample Slot's sound through the effects assigned
to the Deck. See the TRAKTOR 2 Manual for further information on FX routing.
• MONITOR: Toggles headphone monitoring, independent of Sample Slot volume.
• PUNCH: Maintains musical phrasing when switching between Samples. Each Sample
takes over the playback position from the previous Sample with this parameter engaged,
thus, allowing you to "punch in" new Samples without having them play from their begin-
nings.
For more information on the Sample Slot parameters, please see ↑4.13, Sample Slot Pa-
rameters.
TRAKTOR KONTROL F1 - Manual - 59
TRAKTOR KONTROL F1 Reference
Introduction
You can toggle the four Sample Slot parameters for each Sample Slot on and off using the SHIFT button.
The Sample Slot parameters also become visible in the Remix Deck when pressing SHIFT on the controller.
TRAKTOR KONTROL F1 - Manual - 60
TRAKTOR KONTROL F1 Reference
Performance Mode
4.2
Performance Mode
Performance mode is the "default mode" for the KONTROL F1. It is where you navigate the
Sample Grid, trigger Samples, mute and stop Sample Slot playback, edit Sample Slot parame-
ters, and adjust the Volume faders and Filter knobs. You will certainly be spending most of
your time in Performance mode, so it's a good place to start.
Within this chapter, we describe how all the controller elements work when the controller is in
Performance mode. The only elements unaffected by the various other controller modes are the
Filter knobs and the Volume faders; they always have the same function.
This is the longest section in this manual, and probably the most important in terms of using
the F1 on a day-to-day basis.
4.2.1
Filter Knobs
At the very top of the TRAKTOR KONTROL F1, are the four Filter knobs which are two-way
(low-pass and hi-pass) controls for the Filters on each Sample Slot of the Remix Deck currently
in focus.
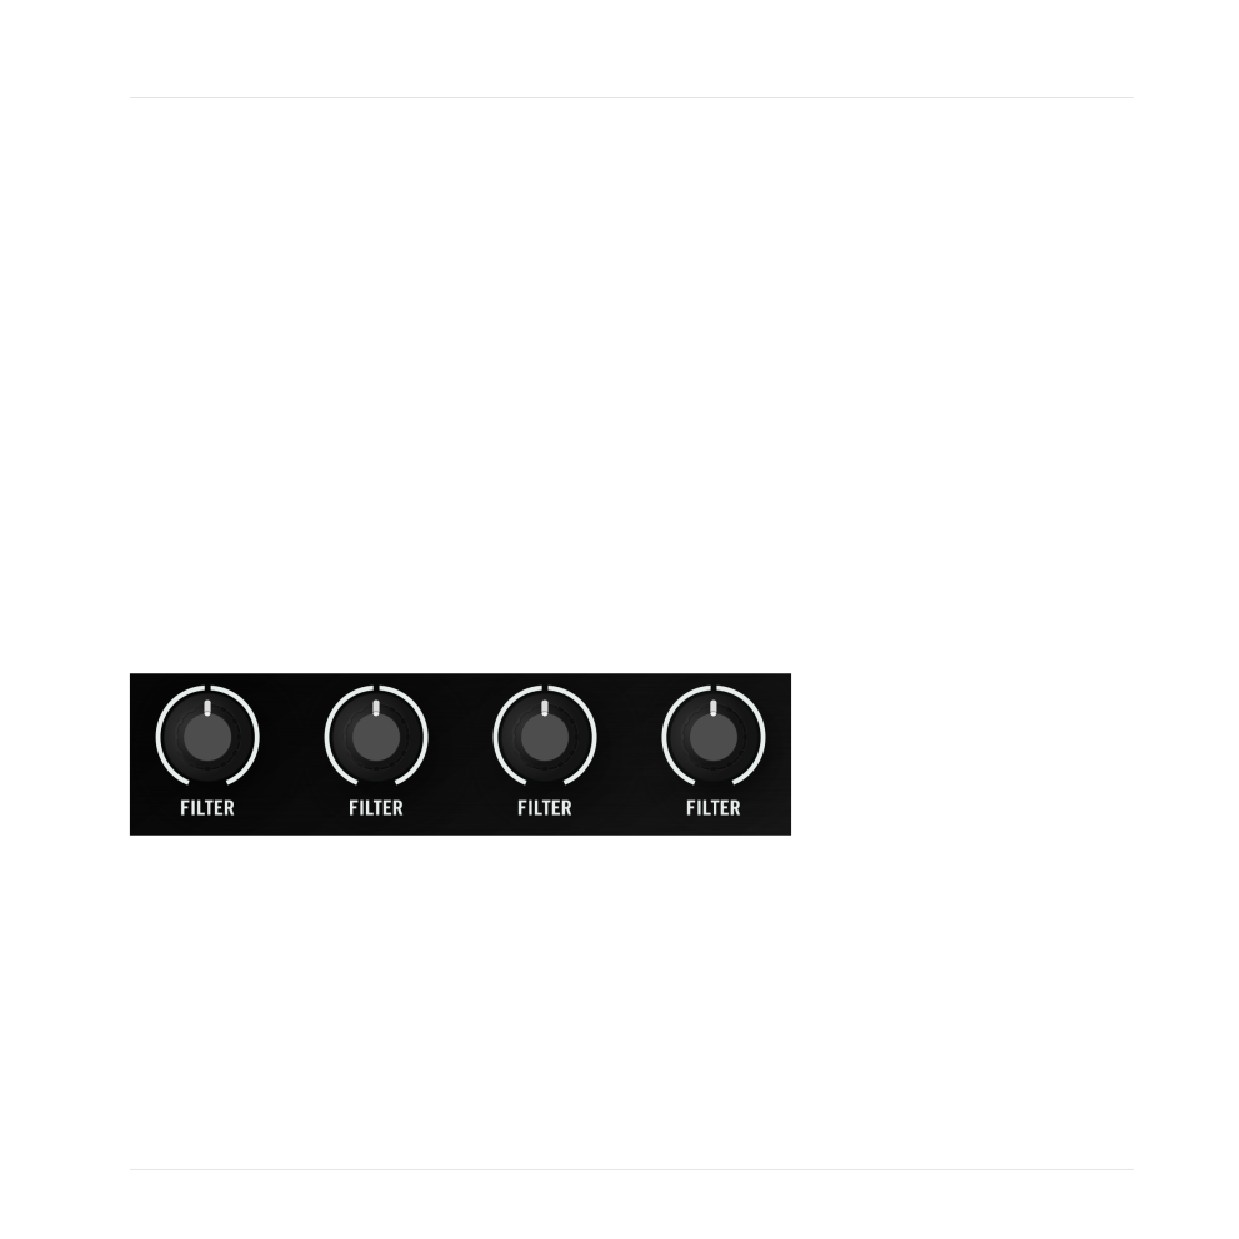
The F1's Filter knobs control single-action, two-way filters for each Sample Slot.
The knobs have a center detent indicating the point where no filtering takes place. If you turn
the knobs counterclockwise from 12 o'clock, the cutoff frequency of a low-pass filter will be
lowered (letting lower-pitched sounds through and filtering out high-pitched ones). Turning the
knobs clockwise from 12 o'clock raises the cutoff frequency of a high-pass filter (letting high-
er-pitched sounds through and filtering out lower ones).
The filters can be activated (by deviating either direction from the neutral 12 o'clock position)
in any mode.
TRAKTOR KONTROL F1 - Manual - 61
TRAKTOR KONTROL F1 Reference
Performance Mode
The F1's Filter knobs are always active and work independently of the mode the F1 hap-
pens to be in.
► Rotate the Filter knobs to the left (counterclockwise) for low-pass filtering and to the
right for high-pass filtering.
Notice that the Filter controls on the software move as you move the F1's Filter knobs. If
the Filter controls on the software user interface have been moved so that they don't match
the position of the F1's Filter knobs, when you move the knobs on the F1, the controls on
the software will snap to the hardware controls' positions.
4.2.2
Volume Faders
Under the four Filter knobs are the four Volume faders, corresponding to the four Sample Slots
of the Remix Deck currently being controlled (in focus) by the F1.
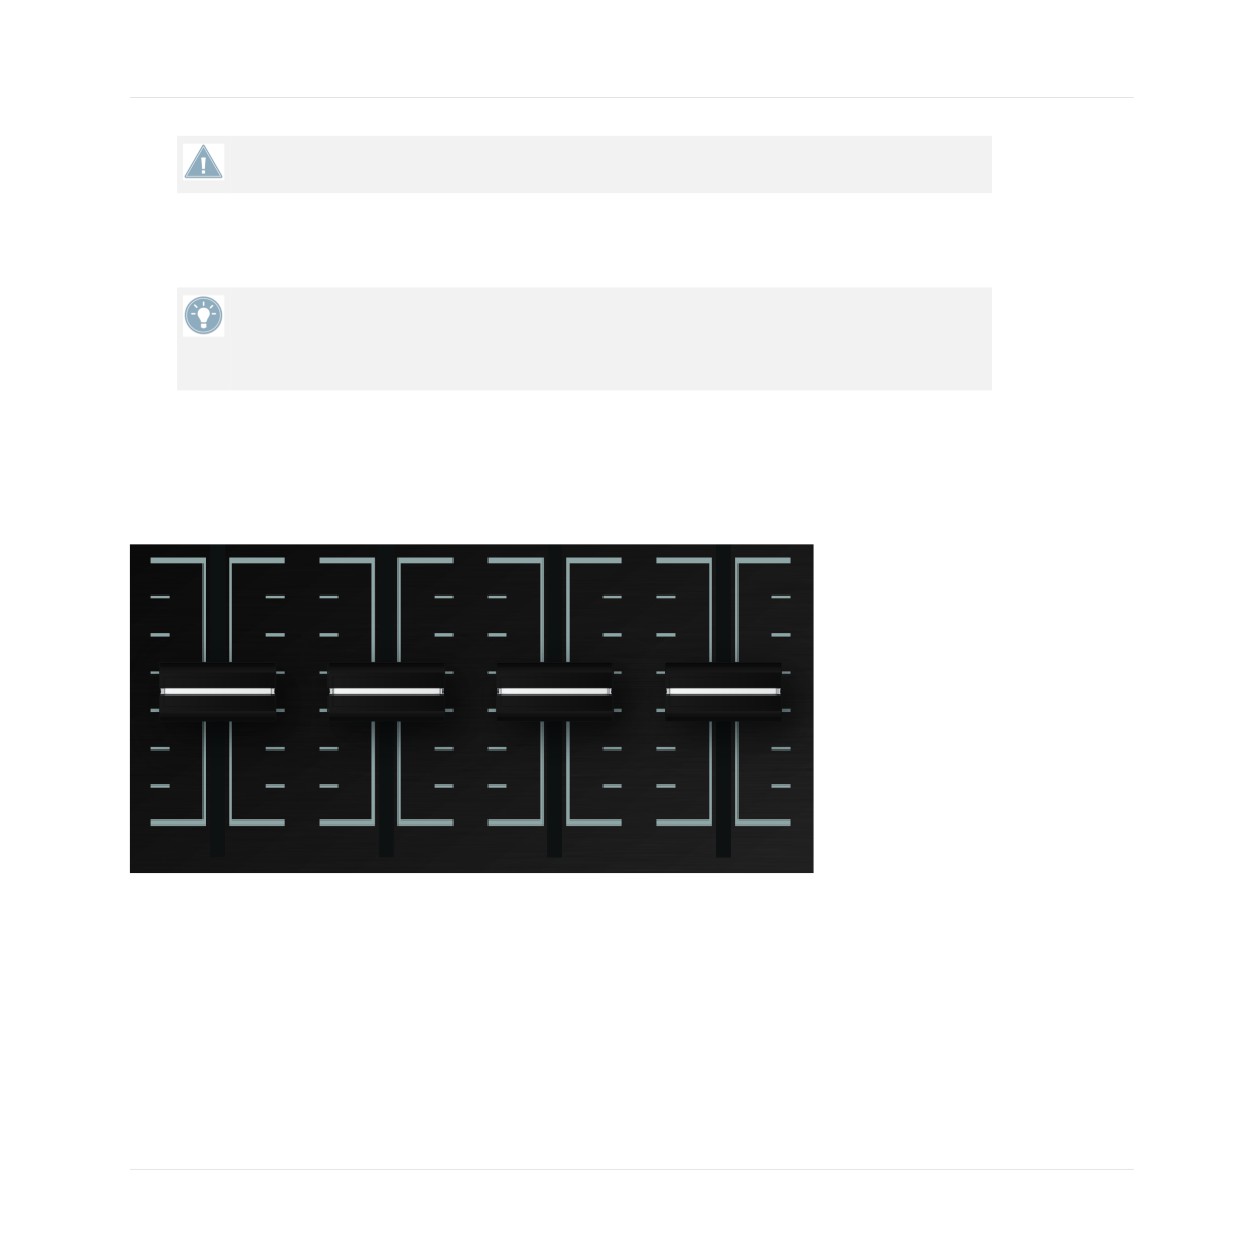
The F1's Volume faders.
Like the Filter knobs, the Volume faders work independently of the other Remix Deck modes. If
you are playing with the Reverse mode, for example, you still have full control of both Sample
Slot volume and filtering through the Filter knobs and Volume faders.
► Pull the Volume faders up to increase Sample Slot volume and down to decrease it.
TRAKTOR KONTROL F1 - Manual - 62
TRAKTOR KONTROL F1 Reference
Performance Mode
The F1's Volume faders behave just like the Filter knobs and control the corresponding Re-
mix Deck faders on the software's user interface. If the Volume faders in the software have
been moved so that they don't match the position of the F1's Volume faders, when you
move the faders on the F1, the faders on the software will snap to the hardware faders' po-
sitions.
Adjusting the Gain of a Sample as Opposed to its Volume
When performing with a number of Samples in a Remix Set, you will almost certainly encoun-
ter a situation where the gain (audio volume) of one Sample is not "matched" with the gain of
the other Samples.
Now here's the solution: when the Volume fader is moved while holding SHIFT, the Sample Slot's
volume is adjusted as normal, but an opposite adjustment is applied to the Sample's gain at the
same time. The net effect of this operation is that the output level of the Sample Slot does not
change — any attenuation applied to the Sample Slot's volume is applied as an amplification
to the Sample's gain, or vice versa.
Although this might sound confusing, it is a very useful feature! Two examples illustrate situa-
tions where you would do this:
Example 1: In Sample Slot 1 there is a Sample which is too loud compared to the other Samples,
while all Volume faders are at their maximum (all the way up) position.
1. Use the Volume fader to bring the level of Sample Slot 1 down to the right volume.
2. Then, holding SHIFT, move the Volume fader back up to the maximum.
→ Because TRAKTOR attenuates the gain of the Sample while the volume is turned up, the
Sample will still be at the same quieter volume, even though the Volume fader is now all
the way up. The gain is now set correctly for that Sample Cell.
The Sample gain adjustment (using SHIFT + Volume fader) only adjusts the gain for the
currently playing Sample Cell. The other Sample Cells in the same Sample Slot (column)
will not be affected!
Example 2: Let's say that in Sample Slot 3 you have the opposite problem: the Sample is too
quiet, even with the Volume fader for Slot 3 all the way up.
1. Press and hold SHIFT while pulling the Volume fader for Sample Slot 3 down a bit. Re-
member: you won't hear any changes because the gain of the Sample is being increased
by the same amount that the Sample Slot volume is decreased.
TRAKTOR KONTROL F1 - Manual - 63
TRAKTOR KONTROL F1 Reference
Performance Mode
2. When the Sample is loud enough, release SHIFT and move the Volume fader back up to
increase the output level of the Sample Slot.
The important thing here is to realize that when moving the Volume faders with SHIFT pressed,
you are moving the Sample Cell volume in the opposite direction of the actual gain of the Sam-
ple. You don't hear any difference in volume while moving the Volume faders while pushing
SHIFT because the gain of the Sample Cell is compensated by the change in the actual Sam-
ple gain!
It is a good idea to load a Remix Set and practice changing Sample Gain in various Sample
Cells to get the feel for this! Once you feel comfortable doing this, you'll find that it's a
quick an easy way to balance the Samples playing in your Remix Decks.
4.2.3
SYNC (MASTER) Button
This button sets the SYNC and MASTER states for the Remix Deck you are controlling with the
F1. The Sync function syncs the Remix Deck to the TRAKTOR Deck currently set to Master.
The Master function sets the Remix Deck itself to operate as Master.
In this manual, we will only cover the Sync and Master states in as far they are relevant for
operating the Remix Decks with your F1. For more in-depth information on Sync and Master
states, please refer to the TRAKTOR 2 Manual.
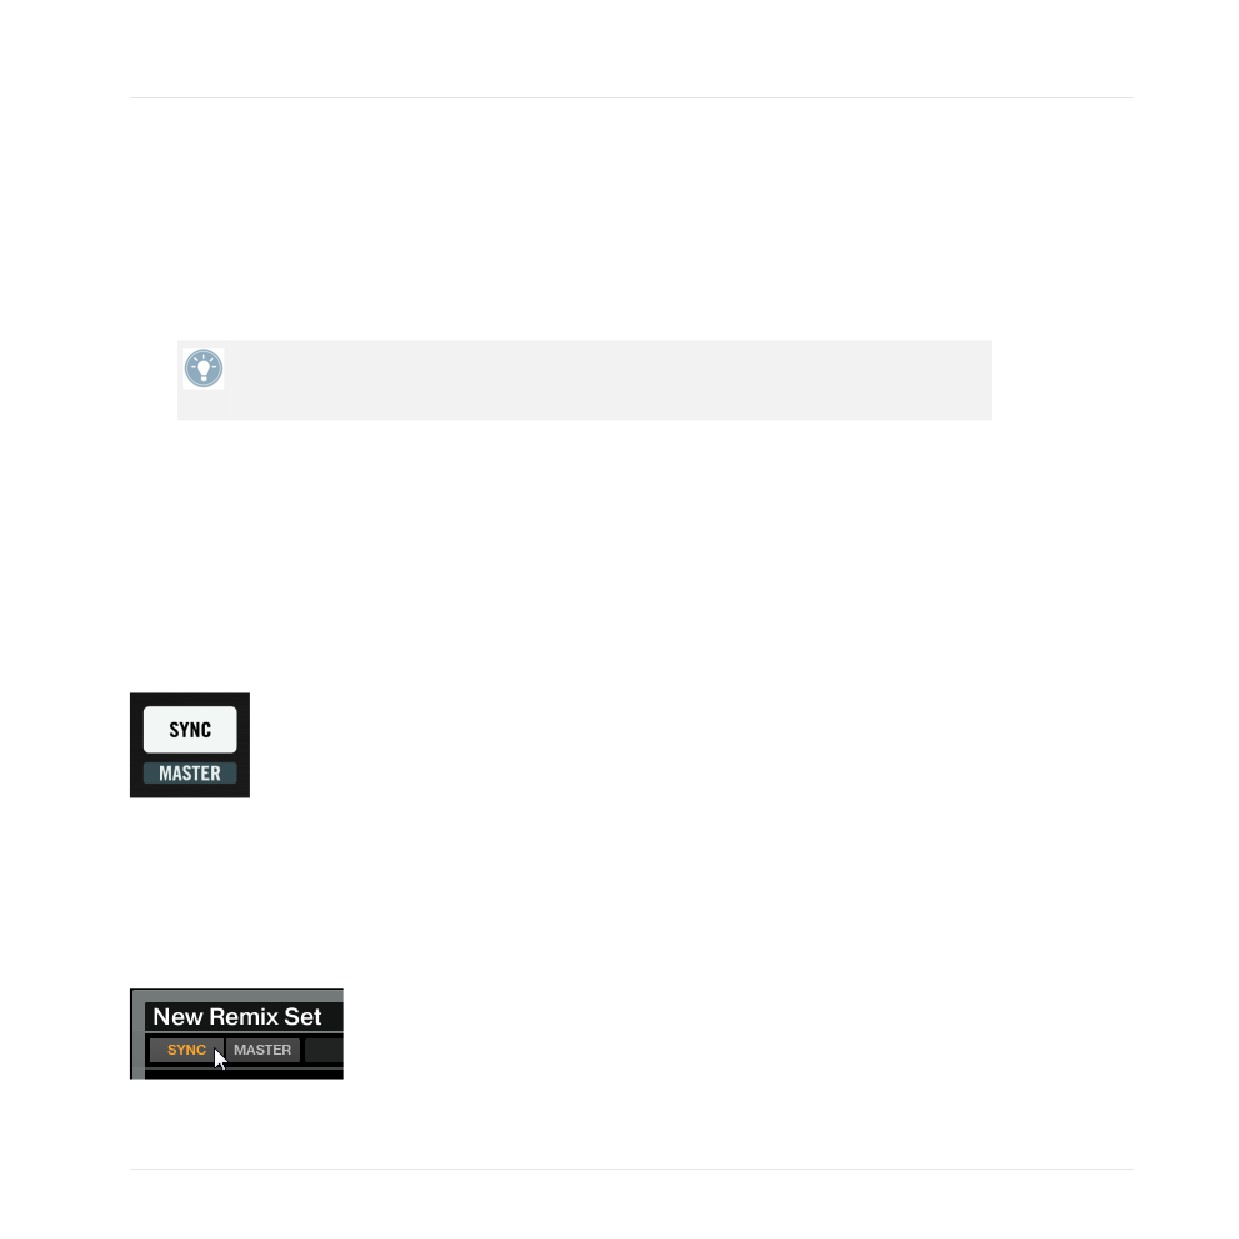
The SYNC (MASTER) button on the F1.
Sync
By pressing the SYNC (MASTER) button without pressing SHIFT you will toggle the Sync state
of the Deck. The SYNC (MASTER) button reflects (and controls) the state of the SYNC button
on the TRAKTOR software.
A Deck's SYNC button in the software.
TRAKTOR KONTROL F1 - Manual - 64
TRAKTOR KONTROL F1 Reference
Performance Mode
When the Deck's Sync is engaged, the SYNC (MASTER) button (and therefore the correspond-
ing button on the software) will be lit up. When Sync is turned off (either by pressing the but-
ton on the F1 or by clicking on the SYNC button on the TRAKTOR GUI) the button will be un-
lit.
► Press SYNC (MASTER) to toggle the Sync state of the Remix Deck.
Master
To find out if the Remix Deck controlled by your F1 is TRAKTOR's Master Deck or not, press
and hold SHIFT. The SYNC (MASTER) button will be lit if the Deck is set to Master, otherwise
the button will be unlit.
To toggle the state of the Remix Deck, hold SHIFT while pressing the SYNC (MASTER) button.
As with Sync, the state shown on the MASTER button on the TRAKTOR software and the state
shown on the SYNC (MASTER) when SHIFT is pressed (e.g., lit up or dim) are the same.
► Press SHIFT + SYNC (MASTER) to toggle the Master state of the Remix Deck.
4.2.4
QUANT (EDIT) Button
The primary function of the QUANT (EDIT) button is to enable, disable, or change the value of
the Deck's Quantize characteristics. The secondary mode, which is the Edit mode, is activated
by pressing SHIFT + QUANT (EDIT). We will talk about the Edit mode separately in ↑4.11, Ed-
it Mode.
The QUANT (EDIT) button.
Quantize
Quantizing is important for aligning the timing of the Samples you trigger with your F1. This
timing is called the Quantize Value and ranges from a single sixteenth-note to 32 beats (8
bars). From shortest to longest, these values are: quarter-beat
(sixteenth-note), half-beat
(eighth-note), 1 beat (quarter note), 2 beats, 4 beats, 8 beats, 16 beats, and 32 beats.
TRAKTOR KONTROL F1 - Manual - 65
TRAKTOR KONTROL F1 Reference
Performance Mode
In most cases, you'll want your Samples to be triggered in tight synchronization to the rest of
the tracks and probably also the other Samples playing in one or more Remix Decks. Quantize
is the way to do this.
Note that the Quantize Value does not represent the amount of beats it will take before a
Sample starts playing, therefore, it is not a "delay" value; the Quantize Value represents a
mark in the Remix Deck's internal timeline (such as a bar line on a sheet of music). E.g.,
when the Quantize Value is set to 4, a Sample you hit will start playing with the next 4/4
bar of the Remix Deck's internal timeline!
For example, if the Quantize Value is set to 4 beats and you trigger a Sample by hitting a pad,
the Sample won't start playing until the next downbeat (beat one of the next bar) of the Remix
Deck's internal timeline. Similarly, if you set the Quantize Value to 1 the Sample starts playing
on the next beat. Depending on the kind of Samples in your Remix Decks and the style of mu-
sic you are playing, even longer (or shorter!) Quantize Values can be used. For example, if your
Samples are parts of four-bar musical phrases which you want to harmonize nicely together,
you might consider setting the Quantize Value to 16, which would be 16 beats = 4 bars. For
glitchier styles, set Quantize Value to eighth-note or sixteenth-note values.
With Quantize turned off, your Samples will begin playing as soon as you trigger them. In some
live-performance situations, this might be just what you want to have much more timing free-
dom when you manually fire off a series of one-shots, for example.
Activate Quantize to get seamless Sample changes in the Remix Deck.
Toggling Quantize On and Off
If you press and release the QUANT (EDIT) button for less than one second without interacting
with any other controls, then the state of Quantize will be toggled upon release of the button.
The QUANT (EDIT) button will light up when Quantize is on.
► Briefly press the QUANT (EDIT) button to toggle the Remix Deck's Quantize.
Viewing the Current Quantize Value
If you press and hold the QUANT (EDIT) button for longer than one second, the F1 will tell you
the current Quantize Value in two different ways:
TRAKTOR KONTROL F1 - Manual - 66
TRAKTOR KONTROL F1 Reference
Performance Mode
• On the 7-segment Display, you will see the Quantize Values of a quarter-beat (sixteenth-
note) to 32 beats; when the Quantize Value is between 1 and 32 beats, only the numbers
will show on the display. For lower values, a decimal point appears at the upper left cor-
ner of the display followed by a number. For a half-beat (eighth-note) value, you'll see a
"2" preceded by a decimal point in the upper left corner of the display and for a quarter-
beat (sixteenth-note) value, a "4" preceded by a decimal point will be displayed.
• On the pads, you'll see a color pattern on the left half of the Pad Matrix (eight pads for
the eight possible values) with the current Quantize Value highlighted.
When you press and hold the QUANT (EDIT) button, the pad color pattern gives you an in-
tuitive way of seeing the Quantize Value: The first column of pads — from red to yellowish-
orange — represents the values that are less than one bar long. The second column — go-
ing from yellowish-green to green — show values that are one bar or longer.
Changing the Quantize Value
To change the Quantize Value of the Remix Deck with the F1, press and hold QUANT (EDIT)
for more than one second. The F1 will now display the current Quantize Value on both the
pads and on the 7-segment display (see above). While you continue to hold the QUANT (EDIT)
you can change the Quantize Value in either of two ways:
• Pads: The pads will show a color pattern corresponding to the Quantize Value. Pressing a
pad will select the value associated with that pad. The newly-pressed pad will become
bright, showing you that you have successfully changed the Quantize Value. You'll also
see the new value on the 7-segment display.
• Encoder: You can step through the different values by turning the encoder knob. As you
change values with the encoder knob, you'll also see the corresponding pads (representing
the Quantize Value) light up.
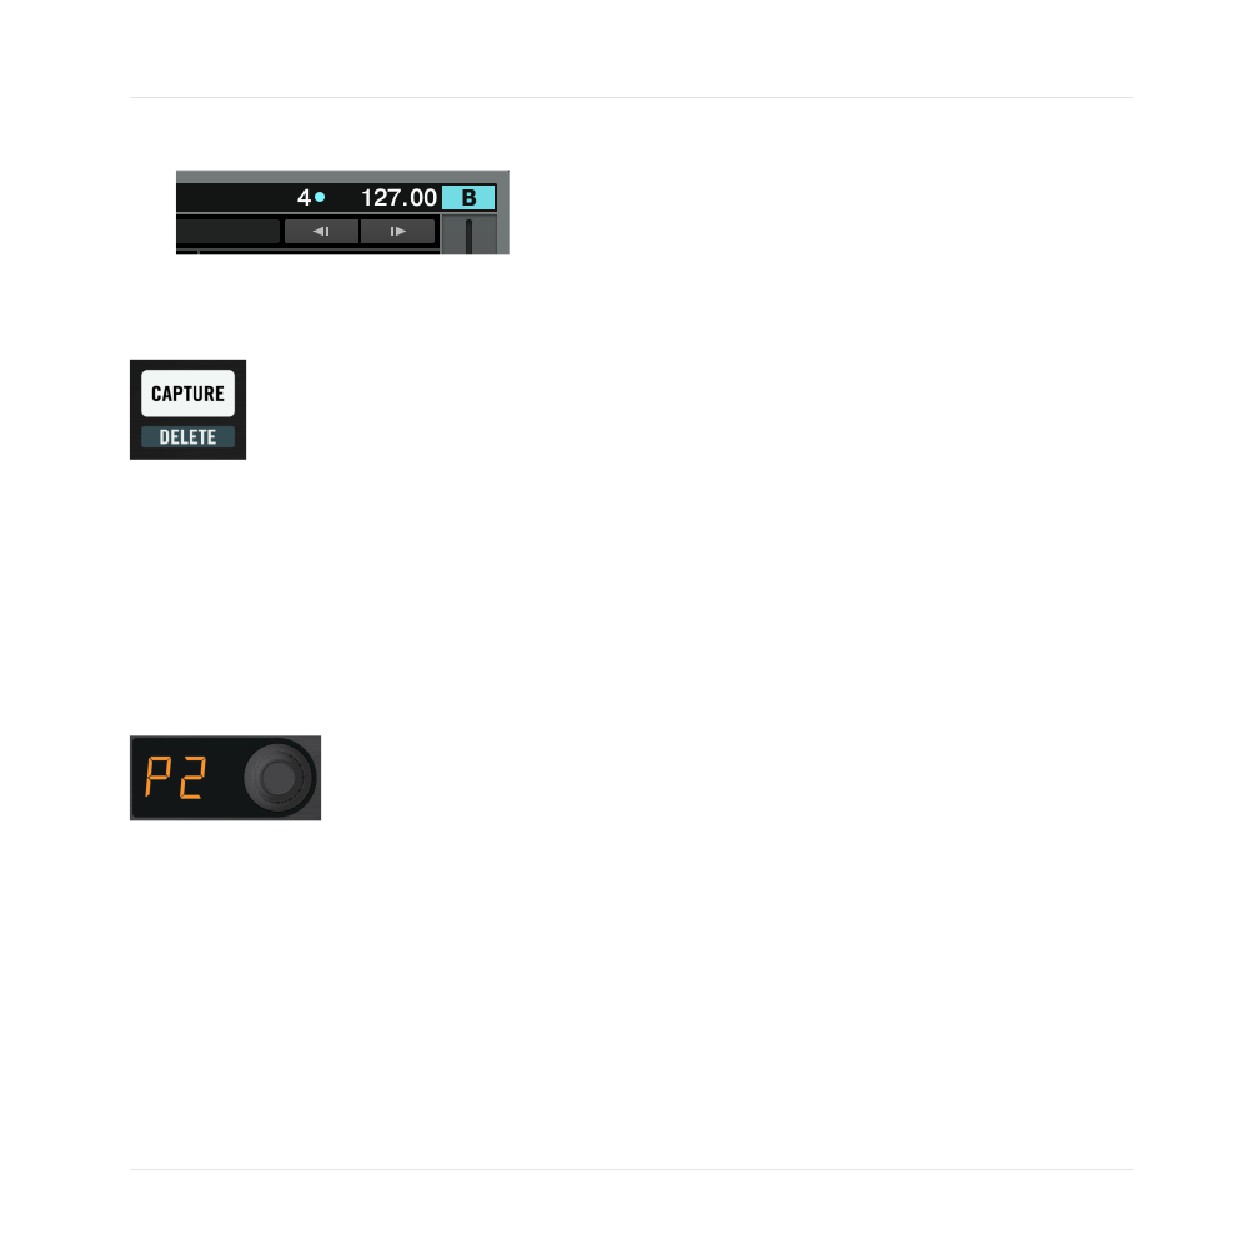
In addition to the visual feedback on the F1, you'll also see the Quantize Value on the
TRAKTOR software GUI.
► Press and hold the QUANT (EDIT) button, and turn the encoder knob to change a Remix
Deck's Quantize Value.
TRAKTOR KONTROL F1 - Manual - 67
TRAKTOR KONTROL F1 Reference
Performance Mode
→ The Quantize Value will also be displayed next to the Deck tempo in the software.
4.2.5
CAPTURE (DELETE) Button
The CAPTURE (DELETE) button on the F1.
Press the CAPTURE (DELETE) button to enter Capture mode, and SHIFT + CAPTURE (DE-
LETE) button to enter Delete mode. For further information, please refer to sections ↑4.4, Cap-
ture Mode, and ↑4.5, Delete Mode.
4.2.6
The 7-Segment Display
In the default state, the 7-segment display shows the Sample Grid page currently visible on
the Remix Deck on the TRAKTOR software.
The 7-segment display next to the encoder knob on the F1.
The page number is preceded by "P" (for "page"). Each Sample Grid page contains 16 Sample
Cells. Since each Remix Deck contains 64 Sample Cells, there are four pages. For example, if
you see "P2" on the display, then the pads on the F1 represent the second page of the current
Remix Deck.
4.2.7
Encoder Knob
In Performance mode, the F1's encoder knob has two different functions depending on wheth-
er you turn it or press it.
TRAKTOR KONTROL F1 - Manual - 68
TRAKTOR KONTROL F1 Reference
Performance Mode
The encoder knob next to the F1's display.
Turn the Encoder to Scroll Through the Sample Grid
By rotating the encoder knob, you can scroll up and down through the four pages of the Sam-
ple Grid, with each click changing the page up or down, depending on which direction you turn
the encoder knob. Each time you change pages, the F1's pads will be animated to clearly show
the change.
Push and Hold the Encoder for Overview
To have a quick birds-eye overview of what is playing in your Remix Deck, press and hold the
encoder knob. Each row of the Pad Matrix will then represent one page. The first page of the
Remix Deck's Sample Grid will be represented by the first row, the second page by the second
row, and so on.
If all four Sample Slots have Samples playing and all of the Sample Cells are on one page,
then the corresponding row will light up and all other pad rows will be dark. If, however, one or
more Sample Cells on other pages are currently playing, then you will also see the correspond-
ing pad rows indicating that Samples are playing.
This Remix Deck Overview function is very useful to get a quick idea of what is going on in
a Remix Deck. Since you might have Samples playing over several pages of the Remix
Deck's Sample Grid, it's easy to loose track of where the sound is coming from if you are
just looking at a single page. Pressing and holding the encoder knob is a great way to keep
on top of what's going on in your Remix Decks.
You can combine the Remix Deck overview with a page change: Press and hold the encoder
knob and then press any pad in rows 1 through 4, representing Sample Grid pages 1
through 4. For example, if you hit a pad in row 3 (while pressing and holding the encoder
knob) and then release the encoder knob, the pads will then be on page 3 of the Remix
Deck's Sample Grid. Try this to get a feel for how it could fit into your workflow!
When you press and hold the encoder knob for the Remix Deck Overview, the pads will not
trigger Samples.
TRAKTOR KONTROL F1 - Manual - 69
TRAKTOR KONTROL F1 Reference
Performance Mode
Toggling Waveform and Grid Views
If the current Remix Deck is in Small Size mode on the TRAKTOR software, you can toggle
between Waveform View and Grid View by just pressing and releasing the encoder knob once.
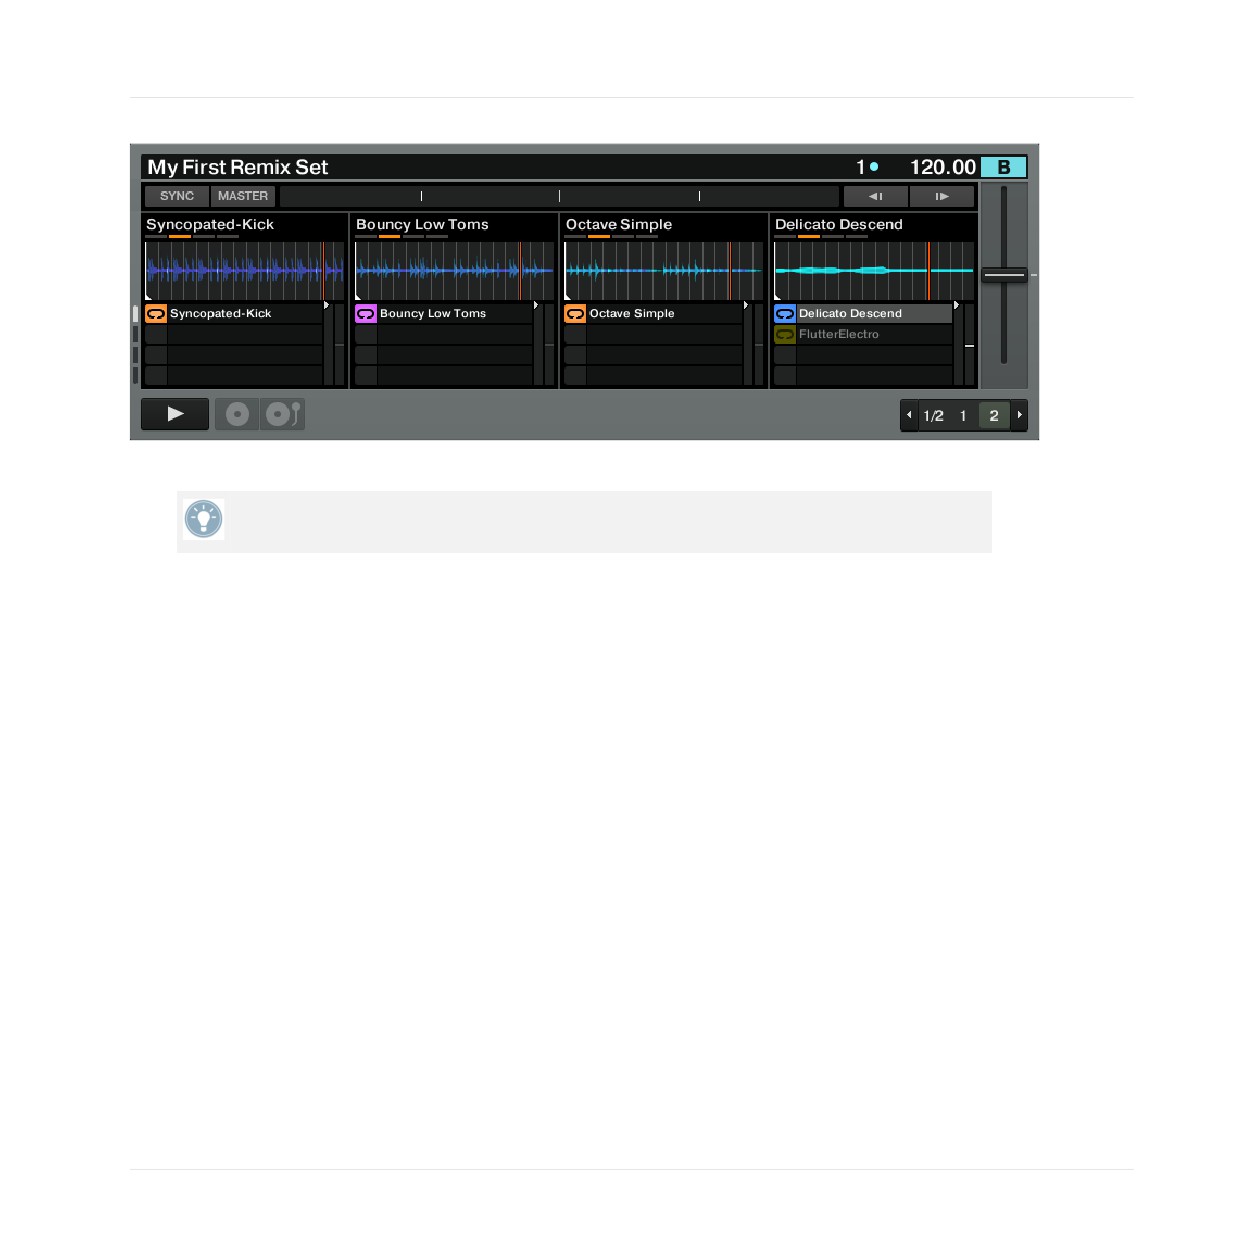
A Remix Deck in Small Size mode with Waveform View active.
A Remix Deck in Small Size mode with Grid View active.
When the Remix Deck is in the Large Size mode on the software, pressing the encoder knob
does not affect the software, since the Sample Grid is already visible.
TRAKTOR KONTROL F1 - Manual - 70
TRAKTOR KONTROL F1 Reference
Performance Mode
A Remix Deck in Large Size mode.
Double-click the upper border of the Deck in the software to skip through the Viewing
modes.
► Press and release the encoder knob once to toggle between Waveform and Grid View in
the software (works only when the Remix Deck is in Small Size mode).
Saving a Remix Set
If you have made changes to the Remix Set loaded into the active Remix Deck and you want to
save those changes:
► Hold SHIFT and press the encoder knob.
If you are saving a pre-existing Remix Set, you will then be given the option to Overwrite, Re-
name, or Cancel on the TRAKTOR software. You can choose your desired option using the en-
coder knob:
► Press the encoder knob to activate your selected option.
On the other hand, if the contents of the Remix Deck were not loaded from a Remix Set (in
other words, the content of the Remix Deck was sampled on the fly or populated with individu-
al files from the Collection), then a new Remix Set will be saved when you trigger this function.
The Remix Set will have the following name: "Remix Set" followed by the date and time stamp,
indicating exactly when you save the Remix Set.
TRAKTOR KONTROL F1 - Manual - 71
TRAKTOR KONTROL F1 Reference
Performance Mode
Assigning the F1 to a Different Remix Deck / Changing the Focus on the Controller
You can change the Remix Deck controlled by the F1 with the encoder knob:
► Hold SHIFT and rotate the encoder knob.
Note that this is only possible if there are two or more Decks set to Remix Deck. When holding
SHIFT and rotating the encoder knob, the F1 indicates which Remix Deck is being controlled
in two ways:
•
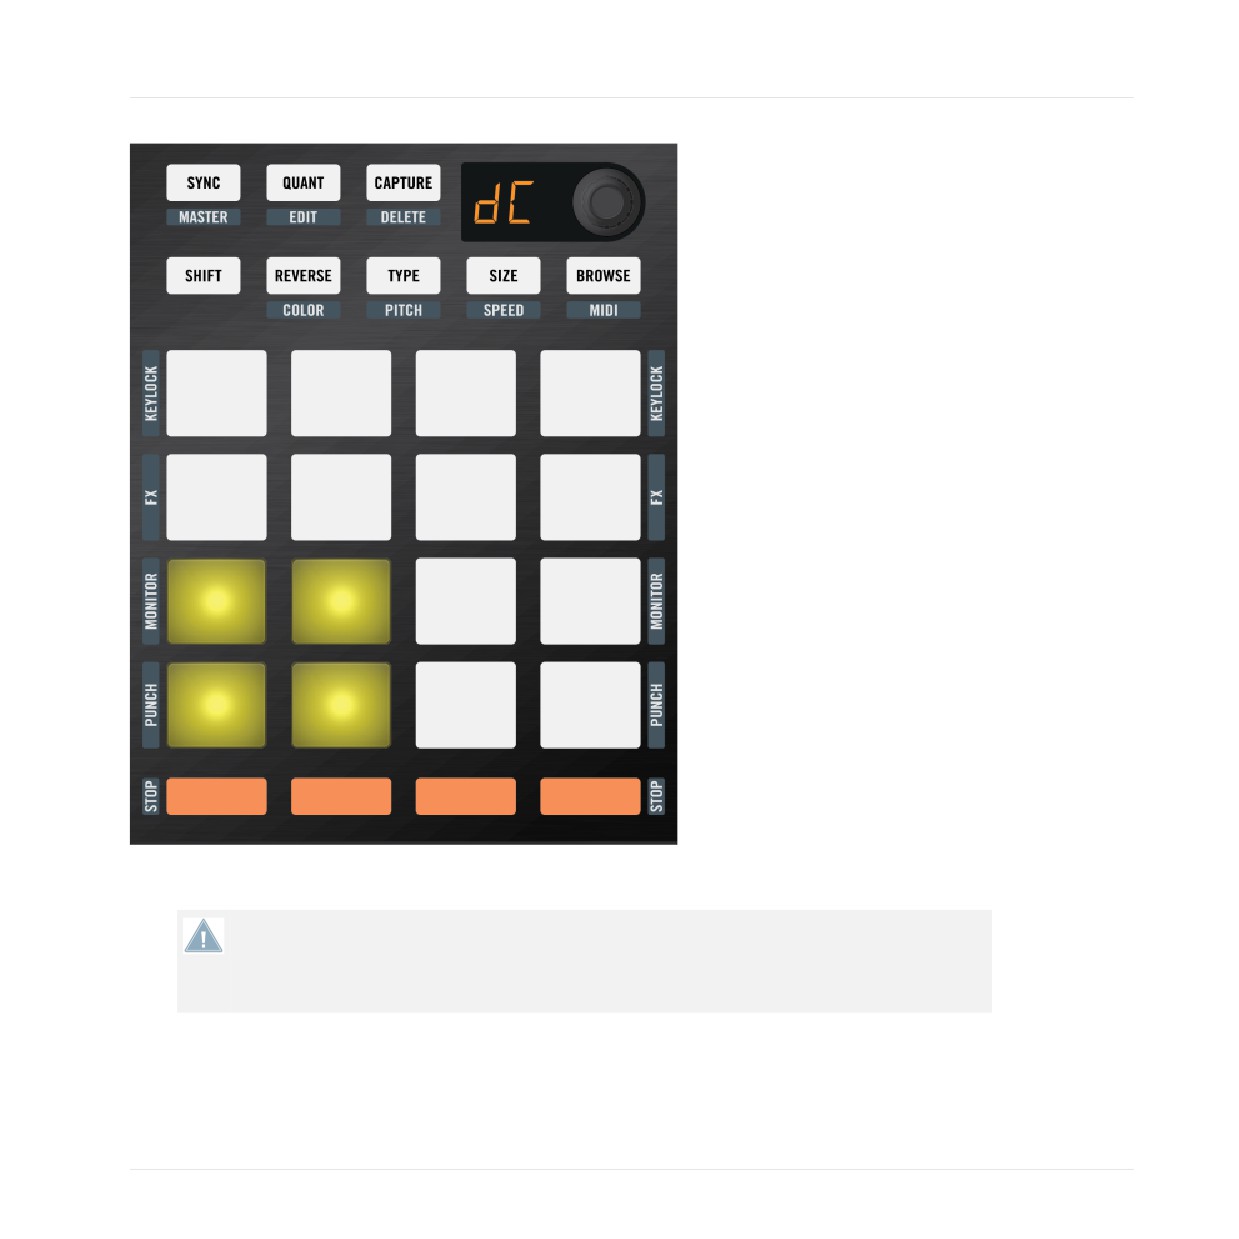
7-segment display: The display shows the name of the controlled Deck by showing the let-
ter "d" followed by the letter of the Deck. For example, when controlling Deck C, "dC" will
be shown in the display. When controlling Deck D, "dd" will be shown.
• Pads: You can readily see which Deck is the controlled Remix Deck by glancing at the
F1's pads. The 16 pads are divided into four 2x2 squares. Each square represents a Deck.
The four upper-left pads, for example, indicate Deck A, the four upper-right show Deck B,
and so on. When you change the Deck assignment with the encoder knob, the quadrant
corresponding to the newly-selected Deck will begin to flash rapidly.
TRAKTOR KONTROL F1 - Manual - 72
TRAKTOR KONTROL F1 Reference
Performance Mode
The 7-segment display, and the lower-left quadrant of the F1 indicating that Deck C is the Remix Deck currently controlled
by the F1.
Note that a pad quadrant will only flash if the corresponding Deck is a Remix Deck. If
you've set Deck C to be a Track Deck, for example, then the lower-left quadrant of the Pad
Matrix will not light up when you rotate the encoder knob. This is because the F1 can only
control Remix Decks.
After releasing SHIFT, the F1 will now show the status of the newly assigned Remix Deck. Of-
ten, the Volume faders and Filter knobs will not match those of the new Deck. For example, if
you had all Volume faders all the way up in the previous Remix Deck, whereas the Volume fad-
TRAKTOR KONTROL F1 - Manual - 73
TRAKTOR KONTROL F1 Reference
Performance Mode
er of Sample Slot 2 is halfway down in newly selected Remix Deck, the "full on" position of the
physical fader won't represent the actual value in the Remix Deck. In this case, the software
controls will snap to the position of their counterparts on the F1 once that you move those.
Which Deck Is the F1 Controlling When TRAKTOR Launches?
When you first launch TRAKTOR with your F1 connected, or when you connect an F1 while
TRAKTOR is already running, the F1 will indicate which Remix Deck it is currently set to con-
trol by the two ways described above. When launched, the corresponding 2x2 Pad Matrix quad-
rant will flash. To stop the flashing, just press any pad or button on the F1.
4.2.8
SHIFT Button
Pressing the SHIFT button along with another function button lets you access the secondary
functions.
The SHIFT Button.
The names of these functions appear just below the F1's buttons in grey letters. These secon-
dary functions will be explained in the following sections about the various buttons and pads
on the F1.
4.2.9
REVERSE (COLOR) Button
The primary function of the REVERSE (COLOR) button is, as its name implies, to access Re-
verse functions. The secondary function, Color mode (activated when SHIFT is pressed at the
same time), will be discussed in ↑4.6, Color Mode.
The REVERSE (COLOR) button.
TRAKTOR KONTROL F1 - Manual - 74
TRAKTOR KONTROL F1 Reference
Performance Mode
With the F1, you can activate reverse Sample playback either as a temporary, gated action (in
other words, as long as you press the Sample Cell's pad), or as a "permanent," latched action
(in other words, the reverse playback continues even after releasing the Sample Cell's pad).
Reversing a Sample Temporarily
For a gated (temporary) reversal of Sample playback:
1.
Press and hold the REVERSE (COLOR) button.
2.
While holding the button, press and hold a pad where a Sample is playing.
3.
Release the pad. The Sample returns to its normal playback direction.
4.
Release the REVERSE (COLOR) button.
If you want to trigger Sample playback reversal on other Sample Cells, you can continue
holding the REVERSE (COLOR) button and then press another pad.
TRAKTOR's Remix Decks employ an "intelligent" Sample reversal technique: If you trigger a
Sample playback reversal, and then release the pad as described above, the Sample re-
sumes playback at the point where it would be, if the reversal had not occurred. This
means that when you temporarily "gate" a reverse effect, you will keep the phrasing of your
Samples!
TRAKTOR's Remix Decks employ an "intelligent" Sample reversal technique: If you trigger a
Sample playback reversal, and then release the pad as described above, the Sample re-
sumes playback at the point where it would be, if the reversal had not occurred. This
means that when you temporarily "gate" a reverse effect, you will keep the phrasing of your
Samples!
Reversing a Sample Permanently
For a latched (permanent) reversal of Sample playback:
1. Press and hold the REVERSE (COLOR) button.
2. While holding the button, press and hold a pad where a Sample is playing.
3. Release the REVERSE (COLOR) button before releasing the pad.
→ The difference in triggering temporary Sample reversal and permanent Sample reversal is
just a matter of whether you release the pad first (temporary) or the REVERSE (COLOR)
button first (permanent).
TRAKTOR KONTROL F1 - Manual - 75
TRAKTOR KONTROL F1 Reference
Performance Mode
You can hold more than one pad in order to reverse the direction of multiple Samples.
4.2.10
TYPE (PITCH), SIZE (SPEED), BROWSE (MIDI) Buttons
These buttons allow you to enter their respective modes, depending on whether you press them
alone, or in conjunction with the SHIFT button. They will be discussed later in this chapter un-
der their respective headings (↑4.7, Type Mode and ↑4.8, Pitch Mode, ↑4.9, Size Mode and
↑4.10, Speed Mode, and ↑4.3, Browse Mode).
4.2.11
The Pads
The pads are the main performance interface on your F1. Most of the time, you'll be using the
pads in their primary mode — Performance mode — to trigger your Samples.
In addition to their main function of triggering Samples, the pads also have secondary func-
tions for toggling various Sample Slot parameters, which we'll describe below.
The F1's colorful pads are designed to give you quick and intuitive visual orientation, giving
you clear feedback for operations like navigation and loading. Using a clever combination
of color-coding and pad animation, the Pad Matrix makes it easy and pleasant to build and
perform Remix Sets with the F1.
Triggering Samples
In Performance mode, pressing the pads will trigger Samples and light the pads accordingly. If
you have a relatively long Quantize Value set (see also ↑4.2.4, QUANT (EDIT) Button), the trig-
gered pads will "pulse" (blink) until playback actually begins. This shows you that the Sample
is "armed," or "standing by" before it begins playing. Once playing, the triggered pads will be
continuously brightly lit.
The 4x4 Grid of pads corresponds to a single page of the Sample Grid, which contains 4 rows
and 4 columns of Samples. The pad LEDs illuminate in the same colors as the Samples locat-
ed on their respective Sample Slots on the page in the software. This helps you see which
Sample will be triggered when you press a pad.
TRAKTOR KONTROL F1 - Manual - 76
TRAKTOR KONTROL F1 Reference
Performance Mode
It's a good idea to stick to a single color-coding scheme for the Samples in your Remix
Sets. The choice of colors is, of course, entirely up to you. Some users prefer to use colors
to indicate basic parts to a track: Bass might be red, drums might be yellow, leads may be
blue, and one-shots and crescendos green. Or, you might want to use cooler colors (blues
and greens) for lower sounds and warmer colors for higher-pitched sounds. If you develop
and stick to a system that makes sense to you, your performance flow will certainly benefit!
As soon as a Sample stops playing, the pad illumination will change to its dim level, showing
you that the Sample Cell is occupied, but not playing.
You can adjust the brightness of both the bright and dim states in the TRAKTOR Preferen-
ces via the File menu in the software. Click on the TRAKTOR KONTROL F1 tab, located
towards the bottom of the Preferences window in TRAKTOR. Under LEDs, the two sliders
let you adjust the On State Brightness and the Dim State Percentage.
Except for Samples set to One-shot mode (see section below), there are therefore three pad il-
lumination states for Sample Cells containing Samples (empty Sample Cells are not lit):
• Pad is dimmed: Sample Slot is occupied by a Sample, but not playing that Sample.
• Pad is pulsing: Sample is about to start playing at a time determined by the Quantize Val-
ue (see also ↑4.2.4, QUANT (EDIT) Button).
• Pad is bright: Sample is currently playing.
Special Case: One-shot Samples
As described above, the pads have three different illumination states for all types of Samples
except for Samples in One-shot mode. Samples in One-shot mode are special so that you can
trigger a One-shot and scratch it — most scratching routines will cause playback to go before
the start of the Sample or play past its end, but you will expect the Sample to still be there
when you wind your records back to the original location of the Sample in the Deck's internal
timeline. So in addition to the three pad illumination states listed above, Samples in One-shot
mode also have three additional illumination states:
• Pad is white: The Sample has already played.
• Pad is dim white: Playback is located after the Sample. Rewinding the Deck to the position
of the Sample in the Deck's internal timeline will cause it to play again.
• Pad is pulsing white: Playback is located before the Sample. Playing the Deck will cause
the Sample to play again once its position is reached.
TRAKTOR KONTROL F1 - Manual - 77
TRAKTOR KONTROL F1 Reference
Performance Mode
See ↑4.7.3, Changing the Sample Play Type for more information on One-shot and Loop mode.
Notice that Samples in One-shot mode behave differently, depending on whether or not
Punch is activated on the corresponding Sample Slot. When Punch is not activated, a Sam-
ple in One-shot mode can be re-triggered at any time to fix it to a new position in the
Deck's internal timeline. But with Punch activated, the Sample stays "pinned" to its posi-
tion so that when another Sample is triggered from the same Sample Slot, it will be put in
the position of the old one. See also ↑4.13.6, Punch.
Viewing and Setting Sample Slot Parameters
The Sample Slots of the Remix Deck have four parameter buttons that govern their behaviors.
These buttons are, from top to bottom on the F1: KEYLOCK, FX, MONITOR, and PUNCH.
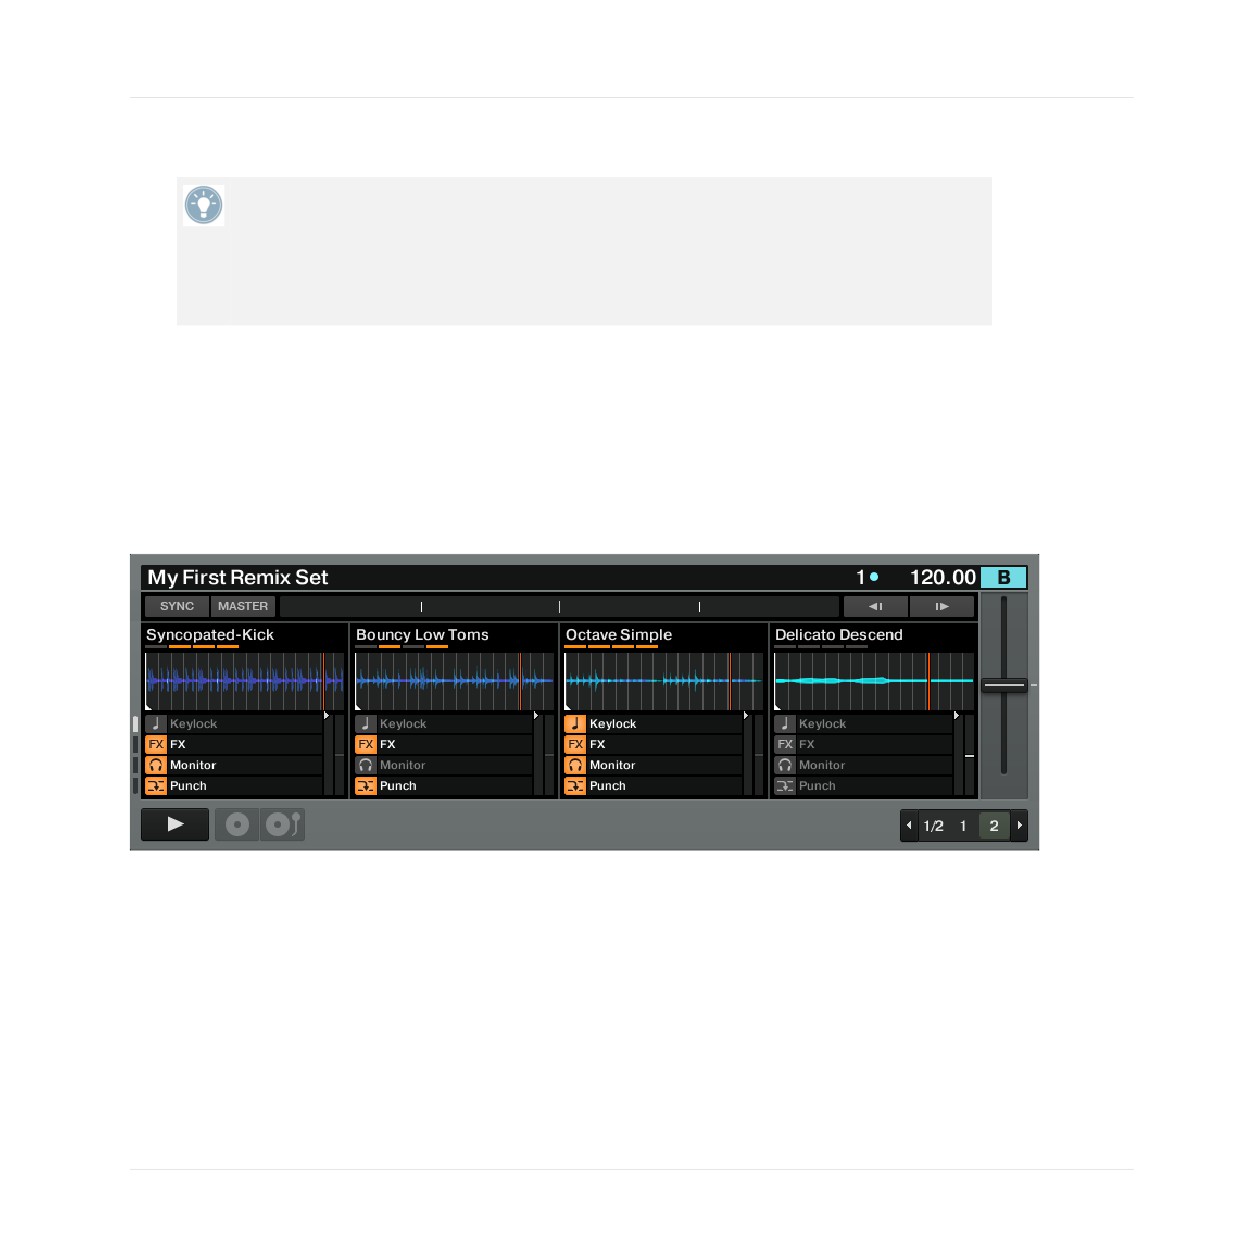
On the TRAKTOR software, you can see these parameters when hovering over the Sample
name or waveform area at the top of the Remix Decks. They are represented as icons going
from left to right.
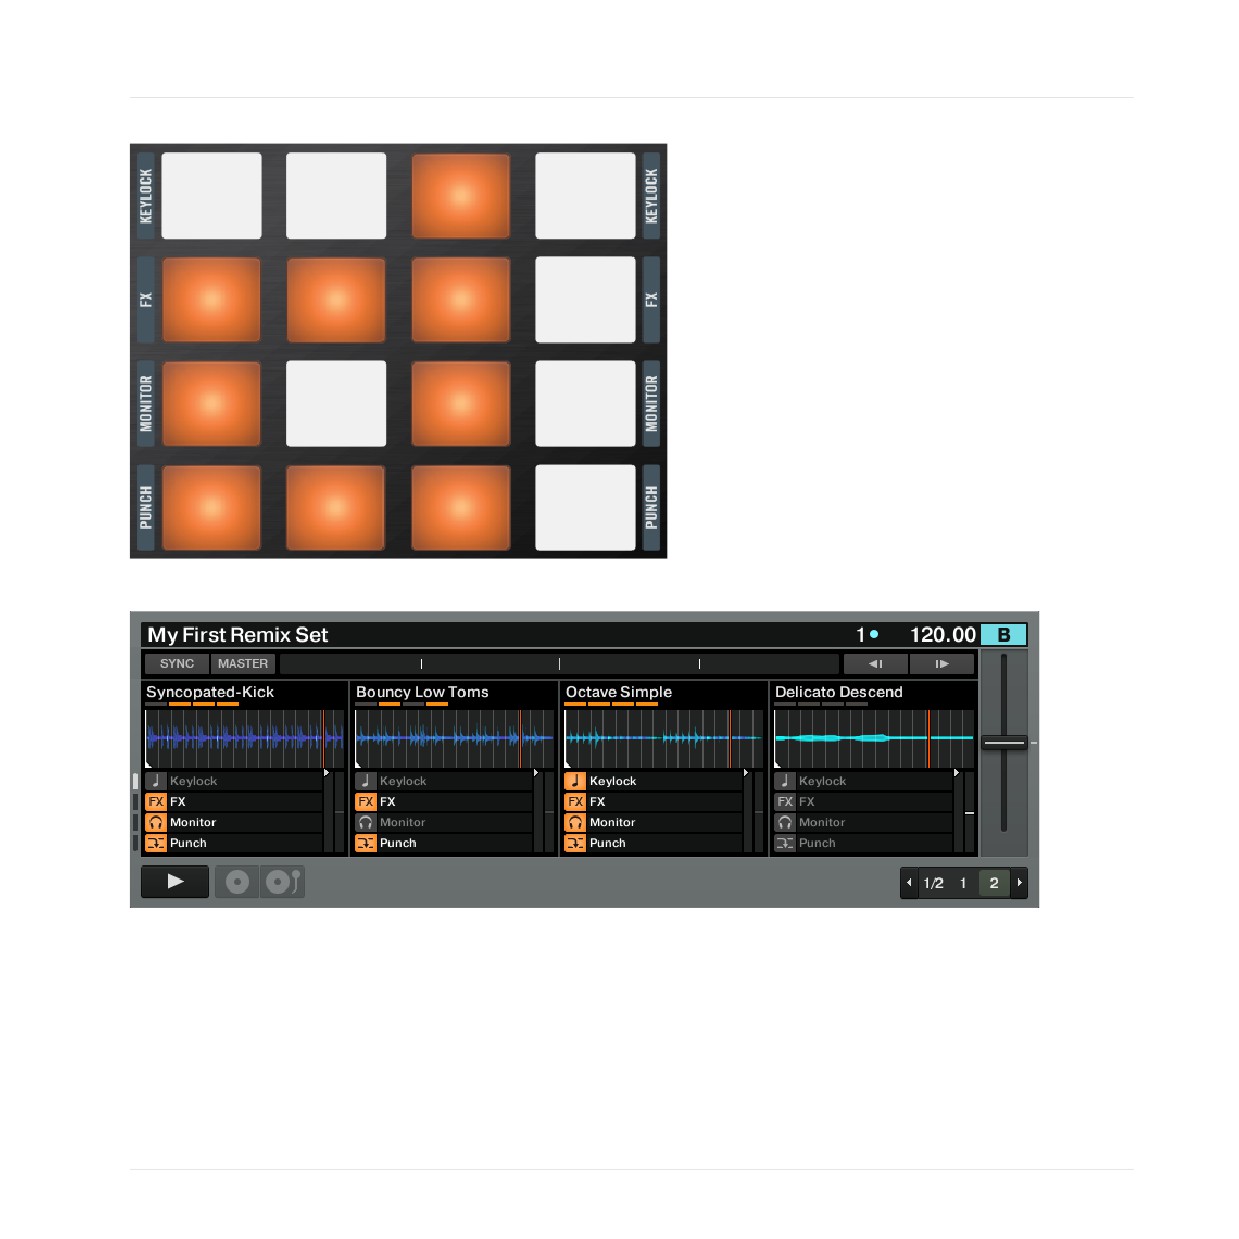
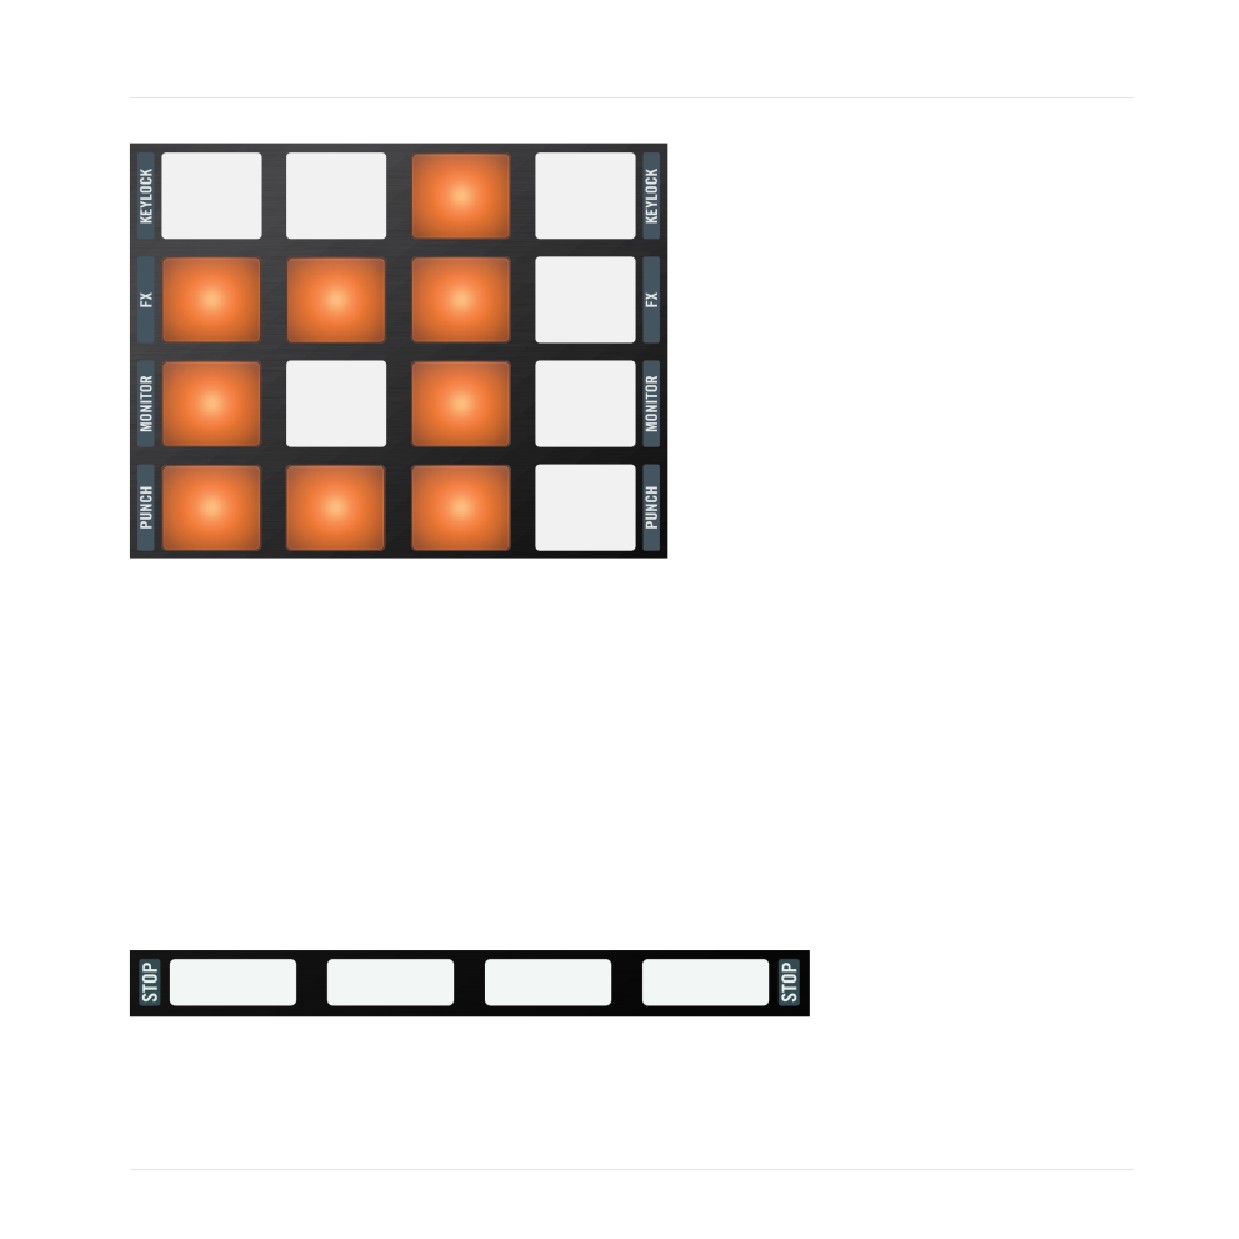
In this screenshot, Keylock, Monitor, and Punch are activated in the first Sample Slot — FX is not active. In the second
Slot, only FX and Punch are activated. All four parameters are active in Slot 3 and none in Slot 4.
You can quickly see the state of all the Sample Slot parameters of a Remix Deck:
► Press and hold SHIFT.
The active parameters are orange, while the inactive parameters are not lit.
TRAKTOR KONTROL F1 - Manual - 78
TRAKTOR KONTROL F1 Reference
Performance Mode
The same Sample Slot parameter settings shown in the previous illustration are also visible here on the F1. The active pa-
rameters are orange.
With SHIFT held, the top row of pads will show if Keylock is enabled on each of the four Sam-
ple Slots. The same is true for FX, Monitor, and Punch.
To change the parameter status:
► Just tap a pad while holding SHIFT.
Each time you press a pad, the parameter state (active or inactive) will be toggled. When you
release SHIFT, the Pad Matrix shows the contents of the current page of the Sample Grid.
4.2.12
Mute (STOP) Buttons
Below the F1's Pad Matrix is a row of buttons for muting and stopping Sample Slots.
The F1's Mute (STOP) buttons below the Pad Matrix.
TRAKTOR KONTROL F1 - Manual - 79
TRAKTOR KONTROL F1 Reference
Performance Mode
Muting and Unmuting Sample Slots
To mute a Sample Slot:
► Press the Mute (STOP) button at the bottom of the corresponding Sample Slot column.
When the Sample Slot is muted, the button will be dim. Unmuted Sample Slots display bright-
ly lit Mute (STOP) buttons.
Stopping Sample Slots
Pressing the Mute (STOP) button only mutes the Sample Slot player. The "playhead" of the
Sample continues, so that when you unmute, the Sample continues to play where it would
have been if you hadn't muted it.
To actually stop Sample playback in a Sample Slot and reset the playhead to the Sample's
start position:
► Press SHIFT + Mute (STOP).
Latching Sample Slots for Gated Samples
You can use the Mute (STOP) button to temporarily latch the playback of a gated Sample (see
also ↑4.7, Type Mode). Here's how:
1. While holding the pad of a gated Sample, press the Mute (STOP) button.
2. Now release both buttons and the Sample will continue to play.
This is only a temporary override of the normal, programmed behavior for the Sample Cell.
Subsequently pressing the pad will result in the normal gated behavior of the Sample.
When you perform this type of latch, the Mute state of the Sample Slot will not be
changed. In other words, the Sample Slot's Mute function will stop working if you are hold-
ing the pad of a gated Sample while pressing Mute (STOP), even if the Sample has already
been latched by a previous press of Mute (STOP).
TRAKTOR KONTROL F1 - Manual - 80
TRAKTOR KONTROL F1 Reference
Browse Mode
4.3
Browse Mode
Using the TRAKTOR KONTROL F1's Browse mode gives you a great deal of control over TRAK-
TOR's Browser so that you can locate and load Samples and saved Remix Sets from the Collec-
tion.
As with most of the F1's various modes, you can use the Browse mode either in temporary or in
latched mode. The temporary behavior is great for being able to quickly load a Sample or Re-
mix Set from the current location in the Browser Tree. The latched behavior gives you full ac-
cess to the Browser and the Browser Tree.
Several performance-critical controls are not affected when Browse mode is activated:
• Filter knobs
• Volume faders
• Mute (STOP) buttons
Other controls are disabled in Browse mode. You can readily see this because their LEDs are
turned off completely when Browse mode is active:
• SYNC (MASTER)
• QUANT (EDIT)
• CAPTURE (DELETE)
• REVERSE (COLOR)
• TYPE (PITCH)
• SIZE (SPEED)
• MIDI
4.3.1
Activating Browse Mode
To activate Browse mode:
► Press and release the BROWSE (MIDI) button.
TRAKTOR KONTROL F1 - Manual - 81
TRAKTOR KONTROL F1 Reference
Browse Mode
When Browse mode is active, the BROWSE (MIDI) button flashes on and off. To exit Browse
mode, push the BROWSE (MIDI) button again. When not active, the button is dim.
The BROWSE (MIDI) button.
4.3.2
Navigating the Browser List
When Browse mode is active, you can move the selection highlight up and down in the Browser
List of the Browser by turning the encoder knob.
4.3.3
Navigating the Browser Tree
► By holding SHIFT, you can now navigate through the Browser Tree. Turning the encoder
knob moves the selection highlight up and down through the Tree. If the selection is ex-
pandable (or collapsible), pressing the encoder knob will expand or collapse the selected
node in the Tree.
► Releasing SHIFT returns the encoder knob to navigating the Browser's File List.
Make sure the Browse mode is active — the BROWSE (MIDI) button is blinking — before
you push SHIFT to navigate the Browser Tree. Pressing SHIFT + BROWSE (MIDI) from the
Performance mode activates the MIDI mode of the controller!
4.3.4
Loading a Sample to a Pad
Once you have selected the desired Sample in the Browser List, press one of the pads to load
the Sample into the Sample Cell associated with that pad. If the Sample Cell was already oc-
cupied, the new Sample will replace the previous one.
When you load a new Sample, a random color is assigned to it. When either loading a Sample
to an empty Sample Cell or to a Sample Cell which already contains a Sample, you'll also see a
Pad Matrix animation when the Cell is loaded, giving you a kind of visual feedback.
TRAKTOR KONTROL F1 - Manual - 82
TRAKTOR KONTROL F1 Reference
Browse Mode
4.3.5
Auto-Loading a Sample into the Sample Grid
You can also load Samples by simply pushing the encoder knob. In this case, the selected
Sample will be loaded into the next available Cell in the Sample Grid. The next available Cell
is defined by the first empty Sample Cell, starting at the top left of the Sample Grid and then
going from left to right, starting from the first row.
Depending on how well-organized your Samples are (for example, in your "All Samples"
folder), you can build Remix Sets very quickly from scratch by using the Auto-load mode.
Practice building some simple Remix Sets in this way to get a feel for how it works — it
can be a lot of fun!
When the next available Cell is not on the currently displayed Sample Grid page, the F1 produ-
ces a Pad Matrix animation where the Sample Grid will automatically scroll to the appropriate
page, highlight the location of the new Sample, and then scroll back to its original position.
4.3.6
Loading a Remix Set into the Remix Deck
If you have selected a Remix Set in the Browser List, you can load the entire Set into the Re-
mix Deck by pressing the encoder knob. This will overwrite the entire contents of the Remix
Deck; however, if you have checked the Preference Auto-Save Edited Remix Sets (File > Pref-
erences > Remix Decks > Saving), then TRAKTOR will attempt to save the current contents of
the Remix Deck before loading the new Remix Set.
If you load a Remix Set into a Remix Deck, all of the contents of that Deck will be overwrit-
ten by the new Set!
4.3.7
Quick Browse
Quick Browse lets you navigate "on the fly":
► Just press and hold the BROWSE (MIDI) button and then rotate the encoder knob to
scroll through the Browser List. As soon as you release the BROWSE (MIDI) button, you'll
be back in Performance mode.
TRAKTOR KONTROL F1 - Manual - 83
TRAKTOR KONTROL F1 Reference
Browse Mode
4.3.8
Quick Load for Samples
With Quick Load, you can very quickly and easily load one or more Samples without having to
first enter Browse mode (by pushing and releasing the BROWSE (MIDI) button). To perform the
Quick Sample Load:
1. Press and hold the BROWSE (MIDI) button.
2. Turn the encoder knob to move the selection in the Browser List to the Sample you want
to load.
3. Hit the pad where you want the Sample to load. The selection highlight in the Browser
List will move down one file automatically each time a Sample is loaded in Quick Load
mode.
4. Hit another pad where you want the new Sample to load.
5. When you are finished loading Samples, release the BROWSE (MIDI) button.
Quick Load With Automatic Selection Progression
If you continue to hold down the BROWSE (MIDI) button, the selection will automatically
move down one line. You can then hit another pad and load that Sample into the designat-
ed pad.
4.3.9
Quick Load for Remix Sets
Just like with individual Samples, you can also quickly load Remix Sets, without having to first
enter Browse mode. This will save you some button pushing and will help you maintain an effi-
cient workflow:
1. Push and hold the BROWSE (MIDI) button.
2. While continuing to hold the BROWSE (MIDI) button, turn the encoder knob to move the
selection in the Browser List to the Remix Set you want to load.
3. Press the encoder knob.
4. Release the BROWSE (MIDI) button.
TRAKTOR KONTROL F1 - Manual - 84
TRAKTOR KONTROL F1 Reference
Capture Mode
For extra speed and flexibility, you can also navigate through the Browser Tree (to get to
the Remix Set folder, for example) by holding the SHIFT button once you have pressed
(and are holding) the BROWSE (MIDI) button. You can then release the SHIFT button once
you have navigated to the desired folder and then continue to navigate for files (Samples or
Remix Sets) in the File List.
4.4
Capture Mode
Capture mode is a great way to create new Samples by capturing from other Decks in TRAK-
TOR (Track Decks and the Loop Recorder). As with most of the modes on the F1, activating
Capture mode will not affect all controls. Those that are not affected by Capture mode are:
• Filter knobs
• Volume faders
• Mute (STOP) buttons
• SYNC (MASTER)
The following controls are not available when Capture mode is active:
• QUANT (EDIT)
• DELETE
• REVERSE (COLOR)
• TYPE (PITCH)
• SIZE (SPEED)
• BROWSE (MIDI)
4.4.1
Selecting the Capture Source Deck
When capturing Samples into the Remix Deck, you need to designate the capture source Deck:
1. Press and hold the CAPTURE (DELETE) button (you can do this either in Performance
mode or Capture mode).
TRAKTOR KONTROL F1 - Manual - 85
TRAKTOR KONTROL F1 Reference
Capture Mode
2. While holding the button, the Display will show the current Source Deck with the letter "c"
followed by the selected Deck name (a, b, c, or d). If you select Loop Recorder, you'll see
"cL" on the Display.
3. Release the CAPTURE (DELETE) button to return the F1 to the previous mode (either Per-
formance or Capture mode).
4.4.2
Activating Capture Mode
To enter and leave Capture mode, press the CAPTURE (DELETE) button, which blinks when
Capture mode is active. In Capture mode, the display will show the Loop Size of the capture
source Deck. The numbers represent the loop length to be captured in beats.
Press CAPTURE (DELETE) to activate Capture mode.
7-segment display
Beats
Bars/Note Lengths
32
32 beats
8 bars
16
16 beats
4 bars
8
8 beats
2 bars
4
4 beats
1 bar
2
2 beats
Half-note
1
1 beat
Quarter-note
.2
Half-beat
Eighth-note
.4
Quarter-beat
Sixteenth-note
.8
Eighth-beat
Thirty-second-note
.16
Sixteenth-beat
Sixty-fourth-note
The Loop Size is the same as the capture length. In other words, if the Display shows "4" (Loop
Size = one bar) when you capture to a pad, that pad will then contain 4 beats (one bar) from
the Source Track.
TRAKTOR KONTROL F1 - Manual - 86
TRAKTOR KONTROL F1 Reference
Capture Mode
4.4.3
Setting the Capture Size
Once you have activated Capture mode, you can change the capture length with the encoder
knob:
► With Capture mode active, rotate the encoder knob to set the capture size.
When pressing the encoder knob at this point, a loop of the specified length will be activat-
ed in the capture source Deck. Pressing the encoder knob again will deactivate the loop.
Activating a loop inside the Track Deck before capturing can be handy for transitions be-
tween elements of a Remix, or between track transitions in your mix.
The available capture length values can be seen on the table above. The Display shows the
current capture length value.
4.4.4
The SYNC (MASTER) Button in Capture Mode
When Capture mode is active, the SYNC (MASTER) button will both control and indicate the
Sync and Master states of the capture source Deck. This is mostly for the case where you real-
ize that the capture source Deck is not synced to the Master. It gives you an opportunity to
sync the Deck without having to take your hands of the controller; for example, if Sync is on for
the Remix Deck but Sync is off for the capture source Deck, the SYNC (MASTER) button will
turn dim when you activate Capture mode — this shows you that the capture source Deck is
not synced to the Master.
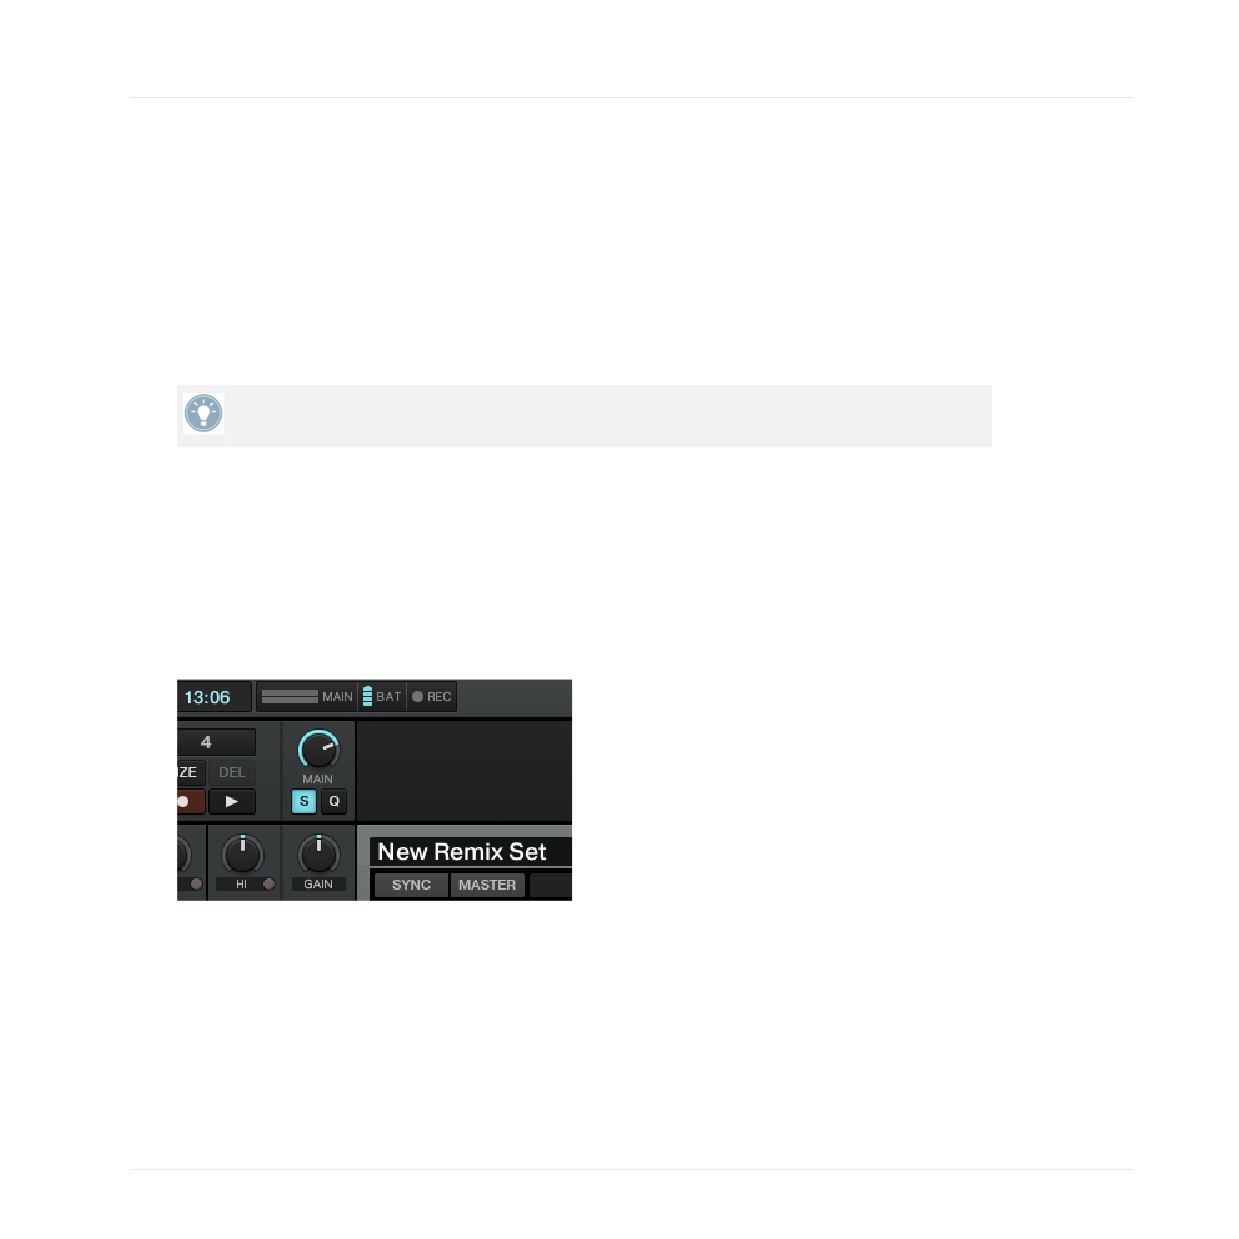
► If you press the SYNC (MASTER) button, Sync will be enabled on the capture source
Deck and the button will light up brightly.
► Using the SHIFT button, you can do the same with the Master state of the capture source
Deck: in Capture mode, the SYNC (MASTER) button will be dim if the capture source
Deck is not the Master. By pressing the button (while holding SHIFT), you can toggle the
Master state of the capture source Deck.
4.4.5
Activating a Loop on the Capture Source Deck
► By pressing the encoder knob, you can activate or deactivate the Loop.
When the Loop is active, the Loop Size will blink on and off on the display.
TRAKTOR KONTROL F1 - Manual - 87
TRAKTOR KONTROL F1 Reference
Capture Mode
4.4.6
Loop Move and Beat Jump on Capture Source Deck
► By rotating the encoder knob while the Loop is engaged, you change the Loop size by
moving the Loop Out marker. In addition, by holding SHIFT while rotating the encoder
knob, you can move the Loop in increments of the Loop Size.
► With a deactivated loop, by holding SHIFT and rotating the encoder knob you can per-
form a beat jump in the amount of the Loop Size.
With the loop deactivated (the Display is not blinking), you can quickly find the part of the
Source Track you want to capture by holding SHIFT and turning the encoder knob.
4.4.7
Capturing a Sample into a Cell
Capturing a Sample into a new Sample Cell is very easy:
1. Make sure Capture mode is active (CAPTURE (DELETE) button flashing).
2. If you want the Sample start to snap to the capture source Deck's Beatgrid, make sure the
Snap function (S) is active in the software's Main section. We recommend to always have
the Snap function active when capturing Samples.
3. Press the pad where you want the Sample to be captured to.
You'll see a quick pad animation to confirm that the Sample has been created. If the pad al-
ready contained a Sample, the old Sample will be replaced with the new one.
TRAKTOR KONTROL F1 - Manual - 88
TRAKTOR KONTROL F1 Reference
Capture Mode
You can quickly and easily capture the same material into any number of Sample Cells on
the Remix Deck in rapid succession. This can be useful for capturing, say, a short riff. You
can then re-pitch the different pads (using TYPE (PITCH), see ↑4.8, Pitch Mode), effective-
ly creating a number of pitched variations of the same Loop.
The capture source Deck does not have to be playing in order to capture Samples into the
Remix Deck.
4.4.8
Auto-capturing a Sample
Auto-capture is a great way to very quickly populate your Remix Deck with captured Samples.
To perform Auto-Capture:
► With Capture mode active, press and hold CAPTURE (DELETE), then press the encoder
knob. The new Sample will be placed in the first available Sample Cell.
The F1 determines the first available Cell by examining the Sample Grid, starting in the top
left of the first page and then checking each row from left to right, top to bottom.
If the first available Sample Cell is not located on the current (visible) page, the Sample Grid
automatically scrolls to the appropriate page and a pad animation will show the location of the
new Sample. The Sample Grid then scrolls back to the original position.
Note that Auto-Capture only works if there are empty Cells in the Sample Grid. If there are
no unoccupied Cells in the Sample Grid, Auto-Capture will not work and no new Samples
will be loaded.
4.4.9
Quick-Capturing Into a Cell
With Quick-capture, you can capture a new Sample with a minimal amount of button presses.
You don't have to switch the F1 into Capture mode with Quick-capture:
1. Press and hold the CAPTURE (DELETE) button.
2. While continuing to hold the CAPTURE (DELETE) button, hit the destination pad.
3. A new Sample will be created on the pad you specified using the capture source Deck's
Loop Size. You'll also see a pad animation, confirming the action.
TRAKTOR KONTROL F1 - Manual - 89
TRAKTOR KONTROL F1 Reference
Capture Mode
4. If desired, press additional pads to capture more Samples, or release the CAPTURE (DE-
LETE) button to return the F1 to Performance mode.
4.4.10
Quick Auto-Capture
Quick Auto-capture combines Auto-capture with Quick-capture. To perform a Quick Auto-cap-
ture:
► Press and hold the CAPTURE (DELETE) button, and then press the encoder knob.
Like Auto-capture, Quick Auto-capture places the captured Sample on the next available Sam-
ple Cell and will create a pad animation confirming the capture.
4.5
Delete Mode
Delete mode can only be activated by continuously pressing the CAPTURE (DELETE) button. If
you stop holding the button, Delete mode will no longer be active. In other words, there is no
way to toggle Delete mode on and off. This is to prevent you from unintentionally deleting
Samples. The controls which are not affected by activating Delete mode are:
• The Filter knobs
• The Volume faders
In Delete mode, the following controls will be disabled, and their illumination state will be off:
• SYNC (MASTER)
• QUANT (EDIT)
• CAPTURE
• REVERSE (COLOR)
• TYPE (PITCH)
• SIZE (SPEED)
• BROWSE (MIDI)
• Mute (STOP)
TRAKTOR KONTROL F1 - Manual - 90
TRAKTOR KONTROL F1 Reference
Delete Mode
4.5.1
Activating Delete Mode
To activate Delete mode:
► Press and hold SHIFT, then press and hold the CAPTURE (DELETE) button.
Both buttons flash when Delete mode is active. In addition, the display changes to show the
current Sample Grid page, preceded by the letter "d." For example, "d3" indicates the third
page of the Sample Grid.
Press SHIFT and the CAPTURE (DELETE) button together to enter Delete mode.
When you enter Delete mode (by holding SHIFT, then holding the CAPTURE (DELETE) but-
ton), you can release either the SHIFT button or the CAPTURE (DELETE) button without
leaving Delete mode. This makes it a little easier to carry out a "one-handed deletion" of a
Sample without twisting your fingers too much!
To leave Delete mode:
► Release both the SHIFT and the CAPTURE (DELETE) buttons.
4.5.2
Deleting a Single Sample
To delete a single Sample:
► Press the desired pad while in Delete mode. The Sample Cell will immediately be
cleared.
4.5.3
Deleting a Page of Samples
To delete an entire page of Samples:
► Press the encoder knob while in Delete mode.
→ You'll see an animation showing the entire page being obliterated.
TRAKTOR KONTROL F1 - Manual - 91