D200 Semi Integrated Pinpad (v1.00.00). GUIDE MANUAL - part 1
Table of Contents
TABLE OF CONTENTS
TABLE OF CONTENTS
I
REVISION HISTORY
IV
1.
GENERAL INFORMATION
1
1.1
THE PURPOSE OF THIS DOCUMENT
1
1.2
DOCUMENT CONVENTION
2
1.3
DOCUMENT STRUCTURE
3
1.4
AUTHORIZED USE PERMISSION
4
1.5
DOCUMENT REFERENCE
5
2.
PAX D200 PINPAD OVERVIEW
6
2.1
GENERAL TERMINAL LAYOUT
6
2.2
POS TERMINAL COMMUNICATION OPTIONS
7
2.3
PINPAD KEYPAD LAYOUT
8
2.3.1 Key Definitions
8
2.3.2 Key Assignments
8
2.3.3 Keypad Layout
9
3.
HOW TO LOAD APPLICATION
10
4.
HOW TO DO TRANSACTIONS
11
4.1
CREDIT TRANSACTION
11
4.1.1 Credit Sale
11
4.1.2 Credit Return
15
4.1.3 Credit Auth
16
4.1.4 Credit PostAuth
17
4.1.5 Credit Void Sale
22
4.1.6 Credit Void Return
24
4.1.7 Credit Void Post-Auth
26
4.1.8 Credit Void Forced
28
4.2
DEBIT TRANSACTION
30
4.2.1 Debit Sale
30
4.2.2 Debit Return
32
4.3
EBT TRANSACTION
34
4.3.1 EBT Sale
34
4.3.2 EBT Return
36
4.3.3 EBT Balance Inquiry
37
4.4
GIFT TRANSACTION
38
4.4.1 Gift Sale
38
4.4.2 Gift Return
39
4.4.3 Gift Add Value
40
4.4.4 Gift Issue
41
4.4.5 Gift Void
42
4.4.6 Gift Balance Inquiry
43
4.5
COMMERCIAL CARDS
44
5.
MAIN MENU
46
5.1
ACCESSING THE MAIN MENU
46
5.2
MAIN MENU OPTIONS
47
5.3
DISPLAY TRANSACTIONS
48
5.4
MERCHANT SETTINGS
50
5.4.1 Authorizations
51
5.4.1.1
Trans. Types
51
5.4.1.2
Card Types
53
5.4.1.3
Debit Prompt
54
5.4.2 Security Settings
55
5.4.2.1
User Password
56
5.4.2.2
Batch Security
57
i
Table of Contents
5.4.2.3
Secure Card
58
5.4.2.4
Card Manual Entry
59
5.4.3 Merchant Fee
60
5.4.4 Set Surcharge Fee
61
5.4.5 Set Batch Time
62
5.4.6 Additional Prompts
63
5.4.6.1
CashBack Prompt
63
5.4.6.2
Tax Prompt
64
5.4.6.3
Order No. Prompt
65
5.4.6.4
Table Mode
66
5.4.6.5
Guest No. Mode
67
5.5
OPERATION SETTINGS
68
5.5.1 Buzzer Setup
68
5.5.2 Operation Mode
69
5.5.3 Operation Mode
70
5.5.4 Halo Setup
71
5.5.5 Peripherals
72
5.5.6 Language Setup
73
5.6
HOST SETTINGS
74
5.6.1 Host Parameters
74
5.6.2 Host URL Parameters
75
5.6.3 AutoDial Setup
76
5.6.4 Host Register
77
5.6.5 Batch Close
78
5.7
SYSTEM SETTINGS
80
5.7.1 Date/Time Setup
80
5.7.2 Batch Number
81
5.7.3 Working Mode
82
5.7.3.1
EDC Tip
82
5.7.3.2
Fraud Control Option
83
5.7.3.3
MOTO
89
5.7.4 Database
90
5.7.4.1
Clear Database
90
5.7.4.2
Clear Reversal
91
5.7.5 Key Injection
92
5.7.6 Application Management
93
5.7.6.1 Activate
94
5.7.6.2 App Update
95
5.7.6.3 Configuration
96
5.7.6.4 Terminal SN
97
5.7.7 TDES Key Injection
98
5.7.8 POS Register
99
5.8 COMMUNICATIONS
100
5.8.1 Main Communication
100
5.8.2 Backup Communication
101
5.8.3 Maximum Tries
102
5.8.4 Connect Timeout
103
5.8.5 Receive Timeout
104
5.8.6 Wireless Parameters
105
5.8.6.1 APN
105
5.8.6.2 User Name
106
5.8.6.3 Password
107
5.8.6.4 Provision
108
5.8.6.5 IP Address
109
5.8.6.6 Subnet Mask
110
5.8.6.7 Gateway IP
111
5.8.6.8 DNS IP
112
5.8.6.9 PING
113
ii
Table of Contents
5.8.7 WiFi Parameters
114
5.8.7.1 SSID
115
5.8.7.2 Security
116
5.8.7.3 Password
117
5.8.7.4 DHCP Type
118
5.8.7.5 IP Address
119
5.8.7.6 Subnet Mask
120
5.8.7.7 Gateway IP
121
5.8.7.8 DNS IP
122
5.8.7.9 PING
123
5.8.7.10 Switch Router
124
5.8.8 Bluetooth
125
5.8.8.1 Device Name
126
5.8.8.2 Pin Code
127
5.8.9 ECR Com Type
128
iii

Revision History
Revision History
Description of
Date
Version
By
Contact
Change
2015/09/15
V1.00.00
B.McDonald
Initial Release
support@pax.us
iv
Chapter 2
PAX D200 Pinpad Overview
1. General Information
Note
This section explains the general information in this document and will
give you an overview of this document.
1.1 The Purpose of This Document
This document provides a detailed description of all user functions, which can be
performed on the D200 Pinpad. The document is intended for use by the Software
Engineers developing and maintaining the Payment Application design for the US
Payment Card Industry, also for use by customer and Independent Sells Organization
(ISO). The document should be maintained along with the application itself.
It is required that this document is stored in a safe place for future reference and
modifications.
1

Chapter 2
PAX D200 Pinpad Overview
1.2 Document Convention
Warning - Failure to follow specific procedures and practices may result in personal
injury.
Caution - Failure to follow specific procedures and practices may result in damage to
the POS terminal device or other equipment.
Note
- Helpful hints and other important information about the use of the Pinpad.
CHART FOR STEP # - Due to keyboard differences, actions will differ with from one
POS terminal model to another. Make sure to match the action
with the correct model of the POS terminal being used.
- Denotes a definition or explanation of the User Function in the step/action table
that follows.
- Denotes an example of when, and why and a User Function should be
performed.
- Denotes a warning note to the User that the operation can cause serious
issues.
2
Chapter 2
PAX D200 Pinpad Overview
1.3 Document Structure
This Document is intended to be a Generic Users Manual for the PAX D200 Pinpad.
Some of the features and instructions listed in this manual may not be supported by all
processors. Please contact PAX Technical Support with any questions about feature
availability.
3
Chapter 2
PAX D200 Pinpad Overview
1.4 Authorized Use Permission
Unless explicitly stated otherwise all content included on this document, such as but not
limited to text, images, logos, and slogans, is the property of PAX and is protected by
U.S. and international copyright laws.
Any other use, including the reproduction, modification, display or distribution, of the
content on this system is strictly prohibited. No portion of this system may be
reproduced, duplicated, copied, sold, resold, or otherwise exploited for any purpose.
4

Chapter 2
PAX D200 Pinpad Overview
1.5 Document Reference
NO.
Title
Date
Version
1
2
3
5
Chapter 2
PAX D200 Pinpad Overview
2. PAX D200 Pinpad Overview
2.1 General Terminal Layout
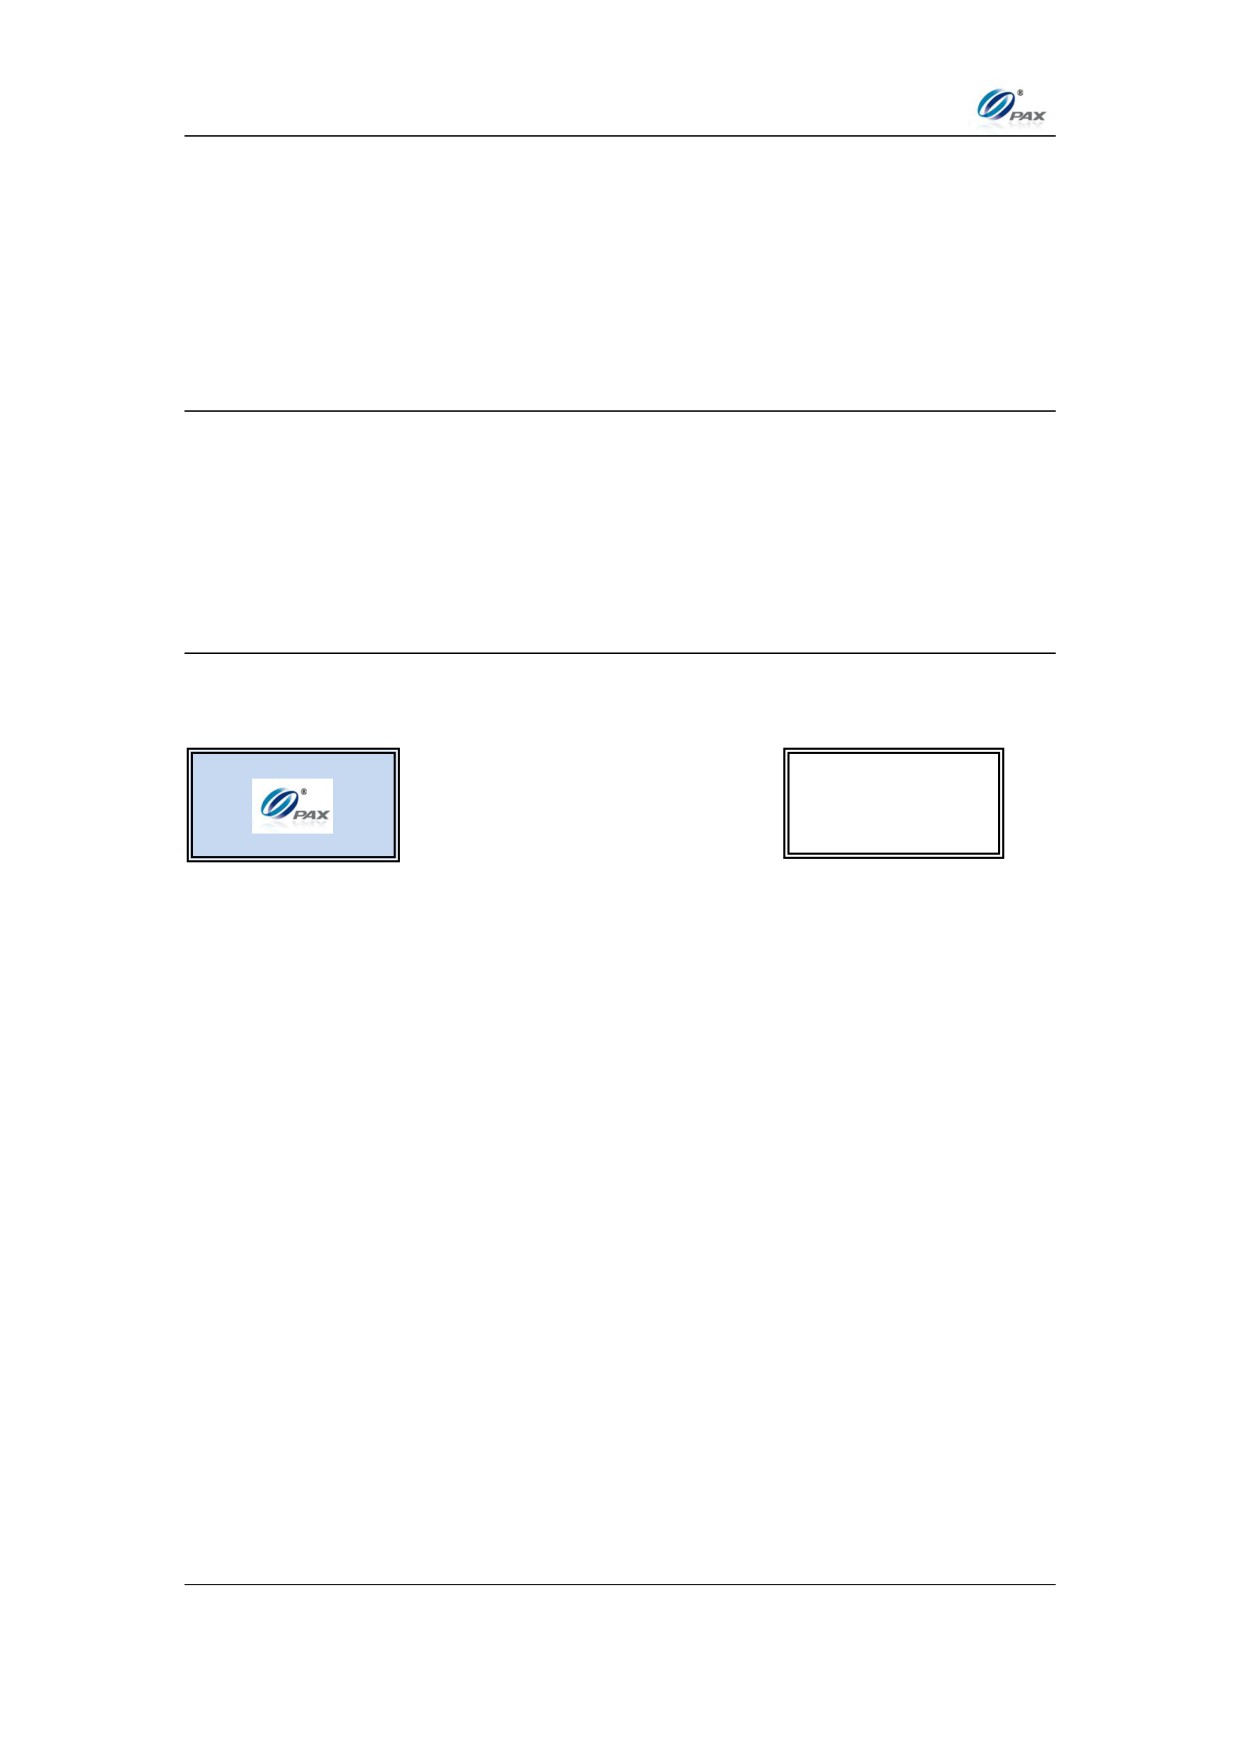
The Screen representations shown in this manual are general screens. The following
is an example of the idle and Main Menu screens.
A standard screen and font format should accommodate 21 characters per line and
up to 5 lines of text.
Screen Display
Idle Prompt Screen:
Main Menu Screen:
MAIN MENU
1.Display Trans
2.Merchant Settings
3.Operation Settings
4.Hosts Settings
6

Chapter 2
PAX D200 Pinpad Overview
2.2 POS Terminal Communication Options
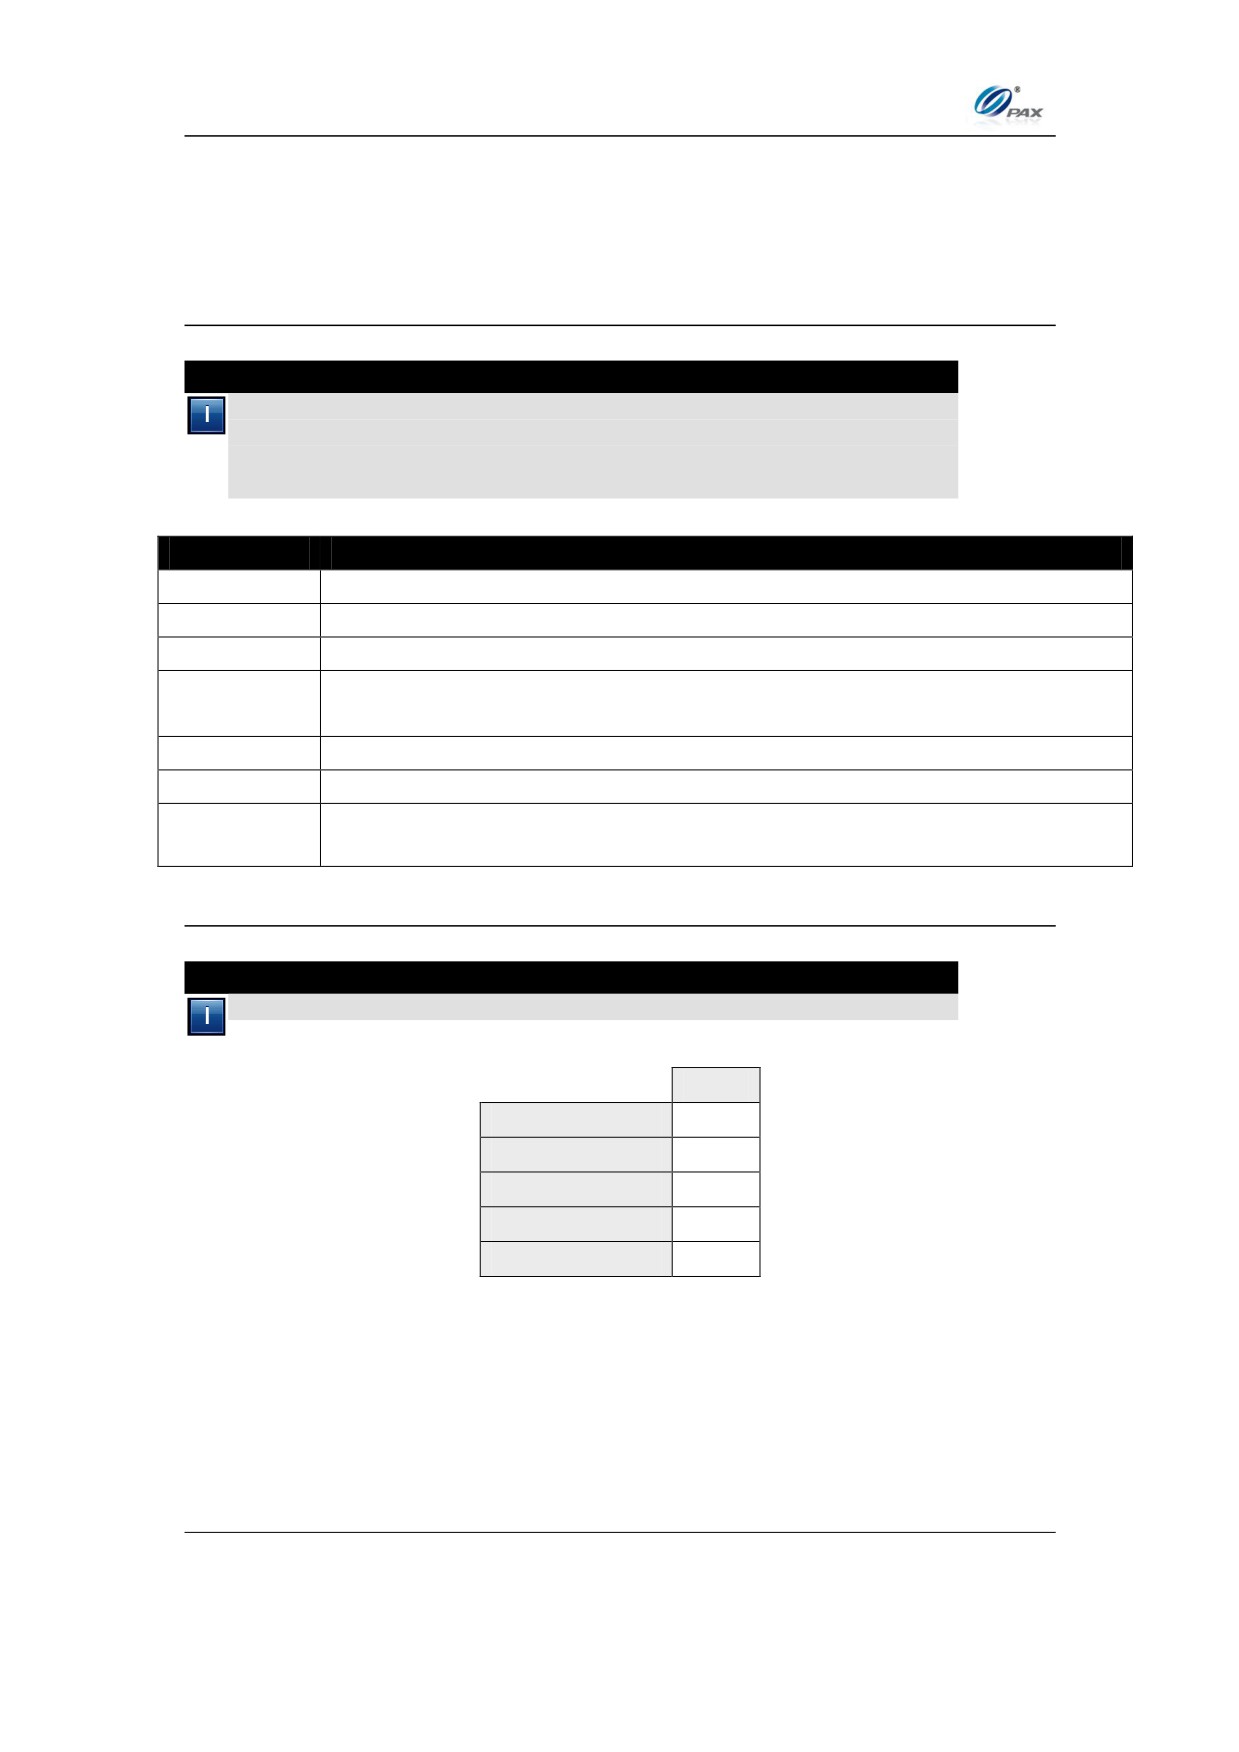
The following chart summarizes the information regarding the different POS terminal
model communication options.
LAND
MODEL
GPRS
CDMA
ETHERNET
WI-FI
LINE
D200
√
7
Chapter 2
PAX D200 Pinpad Overview
2.3 Pinpad Keypad Layout
All POS terminals have a number of keys in common. These keys are the same and
perform the same function regardless of the POS Terminal model. Other keys are
unique to either one model or a series of models.
2.3.1 Key Definitions
Note
All POS terminals have a number of keys in common. These keys are
the same and perform the same function regardless of the POS
Terminal model. Other keys are unique to either one model or a series
of models.
KEY
FUNCTION
ON / OFF
Powers the terminal On & Off.
F1
On the Menu Screen functions as the Up Arrow key
F2
On the Menu Screen functions as the Down Arrow key
1-0 Number
Enter amounts, account numbers, dates and any numeric value.
Keys
Subsequent presses of the key will cycle through the letters.
<
Clear key. In the menu this key will erase the leftmost letter/number.
X
Cancel key. In the menu this will take you back one menu, it also functions as No.
O
Accepts entered information. Executes the current function. Also functions as Yes.
2.3.2 Key Assignments
Note
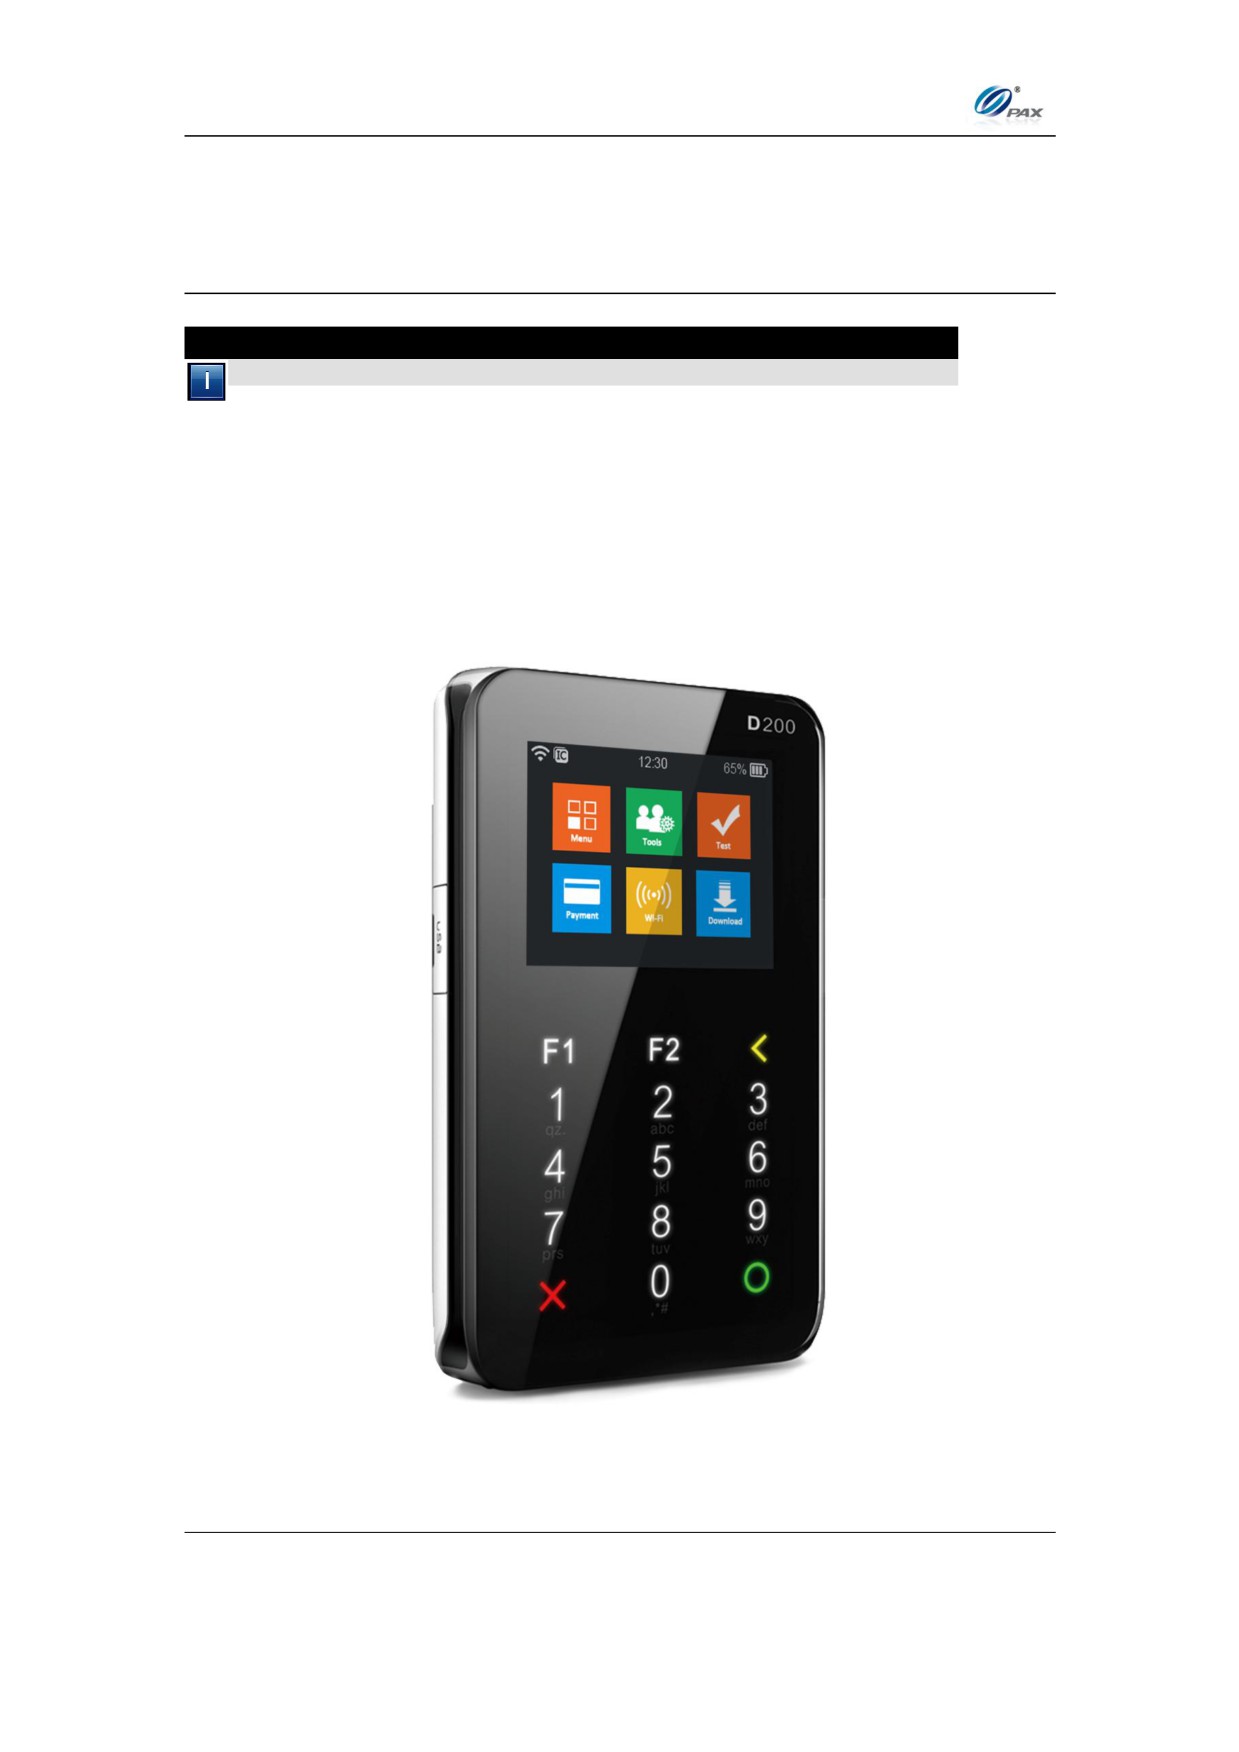
Use the table below to identify the keys on your POS Terminal model.
D200
ON/OFF
9
# 0-9
9
Cancel
9
Clear
9
Enter
9
8
Chapter 2
PAX D200 Pinpad Overview
2.3.3 Keypad Layout
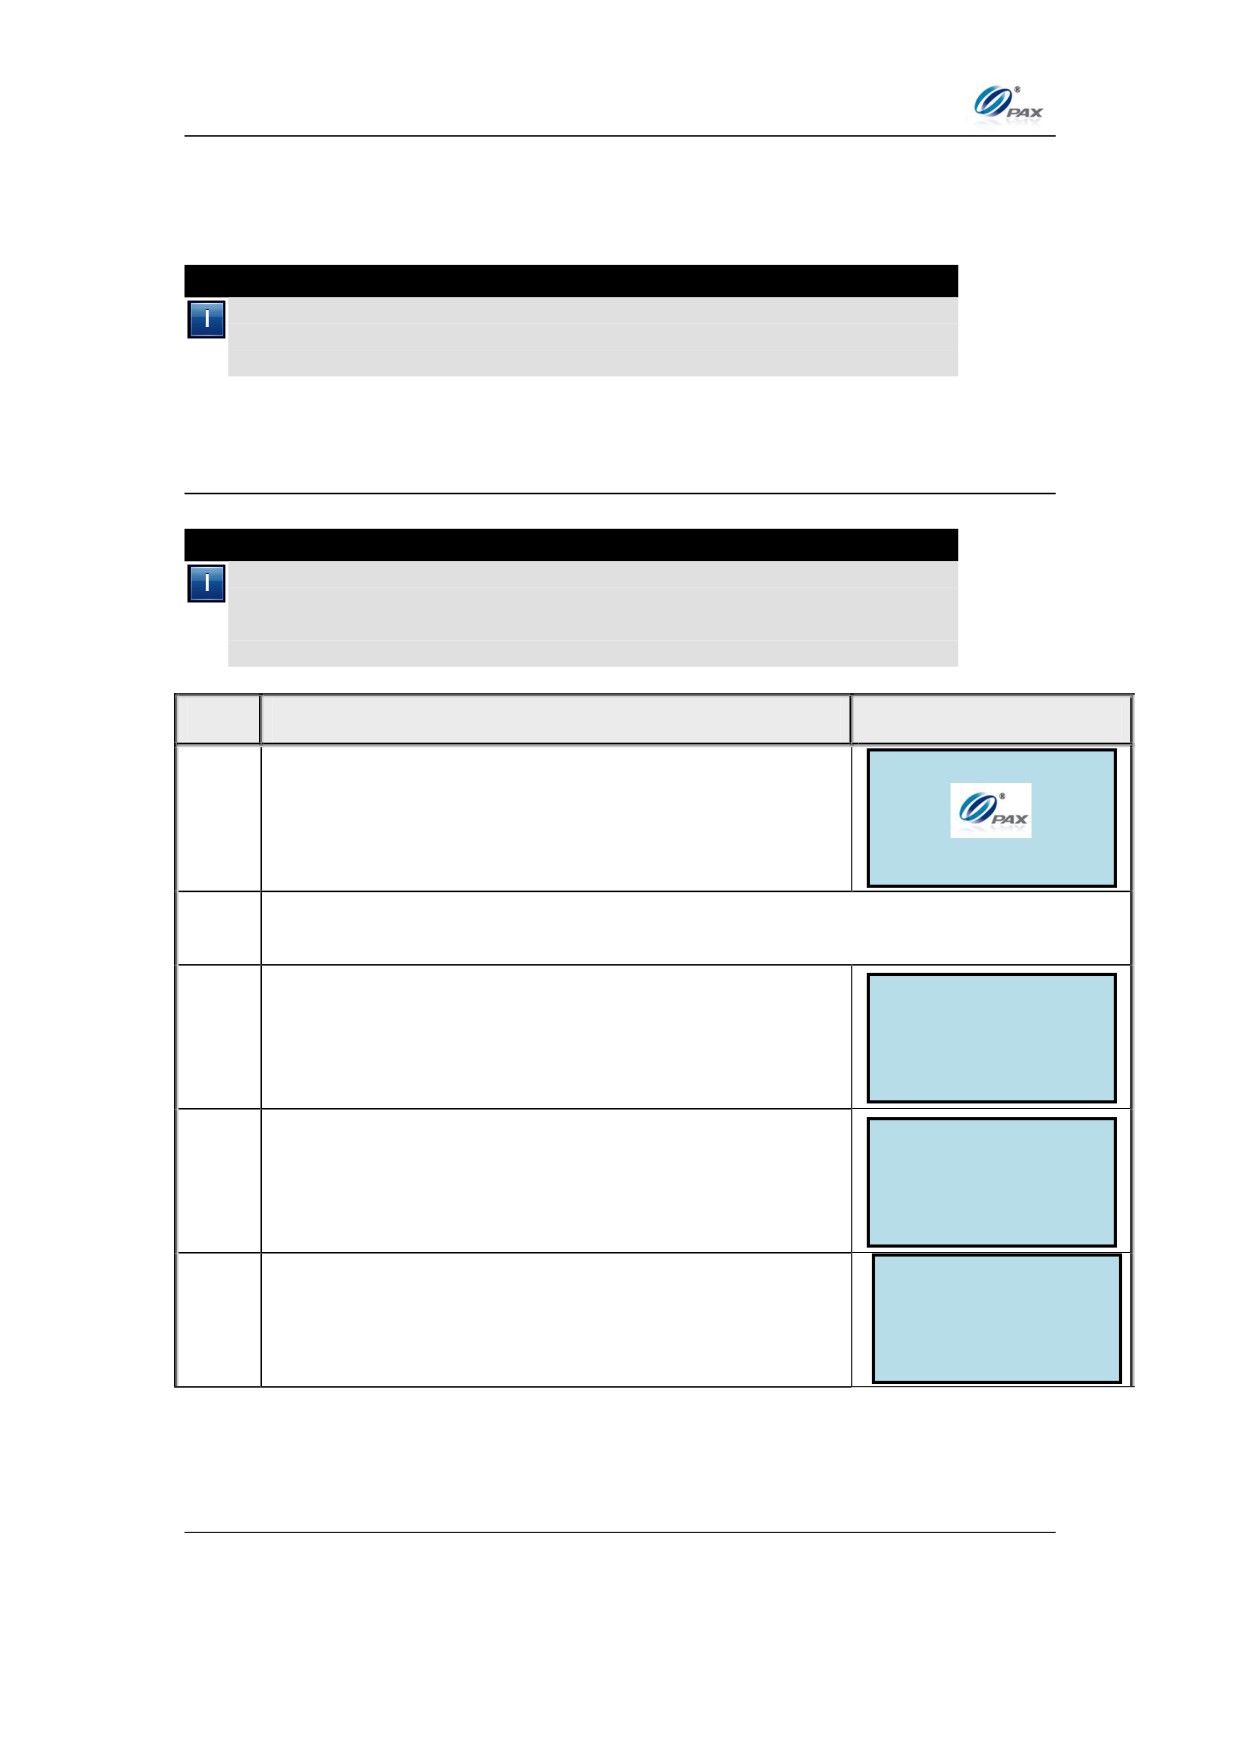
Note
Below is an example of the keypad layout of the D200.
9
Chapter 3
PAX D200 Application Load Instructions
3. How to Load Application
Note
This section explains the instructions for loading the applications as well
as its parameters to the terminal.
Rebuilding the file system is recommended before loading new
applications.
For Details on how to load the application, please refer to BroadPOS Users Manual
10
Chapter 5
PAX D200 Menu Options
4. How to Do Transactions
Note
This section explains the steps required for processing the different
types of transactions.
Note: Exact transaction types are subject to Host Specific features.
4.1 Credit Transaction
4.1.1 Credit Sale
Note
A Credit Card Sale can be performed either by swiping, tapping,
inserting, or manually entering the account number and expiration date
embossed on the front of the card. Bank rates should be checked
before manually entering transactions.
STEP
ACTION
DISPLAY
1.
Be sure the terminal is at the Idle Prompt
The ECR sends the transaction message, including the EDC type,
2.
Transaction type and Transaction amount to the D200.
Swipe/Tap/Insert the card, or manually input the
SWIPE/INSERT CARD
2.1
account number and expiration date. (Steps 2.2-2.4
are for manual entry only)
If the security for Card Manual Entry is on, the
ENTER PASSWORD:
terminal will prompt for the manager password.
2.2
When prompted, enter the password and then
press [ENTER].
CREDIT
SALE
Manually key in the full account number then press
5555
2.3
[ENTER]. The account number must be between
13-16 digits.
11

Chapter 5
PAX D200 Menu Options
_____________________
Exp. Date:
Enter the four-digit expiration date in MMYY format
2.4
MMYY
then press [ENTER].
If the card that was swiped or inserted is a Debit
card and the Debit Prompt is turned, the user is
CREDIT/DEBIT?
given the chance to choose between Credit and
3.
1.CREDIT
Debit.
2.DEBIT
Press [1] for a Credit transaction or [2] for a Debit
transaction.
If the Secure Card feature is turned on, the terminal
___________________
will prompt for the Last 4 digits of the card number.
Last 4 Digits:
4.
___________________
When prompted, enter the corresponding digits
then press [ENTER].
If no transaction amount was sent to the terminal it
CREDIT
SALE
will prompt for the transaction amount. Input the
AMOUNT
0.00
5.
dollar amount of the transaction then press
[ENTER]
If the Invoice Mode option is enabled, the terminal
___________________
will prompt for the invoice number.
ENTER INVOICE #:
6.
___________________
When prompted, enter the invoice No. then press
[ENTER].
If the Clerk/Server ID Mode feature is turned on
___________________
the terminal will prompt for the Clerk/Server ID.
ENTER CLERK ID:
7.
___________________
When prompted, enter the clerk/server ID then
press [ENTER].
___________________
If the Table Mode option is enabled the terminal
ENTER TABLE NO:
8.
will prompt for the table number. When prompted,
___________________
enter the table number then press [ENTER].
If the Guest No. Mode option is enabled; the
___________________
terminal will prompt for number of guests. When
NUMBER OF GUESTS
9.
___________________
prompted, enter the number of guests then press
[ENTER].
12
Chapter 5
PAX D200 Menu Options
If tips are enabled, and are set to Tip In Transaction
Enter TIP1:
mode, the terminal will prompt for the tip amount to
AMOUNT
0.00
10.
be entered. Input the amount for tip on the Keypad
then press [ENTER].
If the account number was manually entered, the terminal will ask if the card
11.
is present. Depending on the user’s response the terminal will prompt for
V-code and other AVS settings*.
* Dependent upon Fraud Control settings.
Press [1] if the card is present.
IS CARD PRESENT?
1. Yes
12.
OR
2. No
Press [2] if the card is not present.
_________________
Enter the V-code from the back of the credit card
13.
ENTER CVV2:
then press [ENTER].
_________________
14.
___________________
Enter the street address then press [ENTER].
Street Address:
i.e.: If billing address is 123 Main St., enter 123.
___________________
15.
_________________
Enter the ZIP Code then press [ENTER].
Enter Zip Code:
i.e.: If billing address ZIP code is 12345-0123., enter 12345.
_________________
If Commercial Card Support is enabled, the
_________________
terminal will prompt for the Customer Code. Input
16.
Cust. Code?
the code then press [ENTER]. Or press Enter to
_________________
bypass.
If Tax amount is enabled, or Commercial Card
Support is enabled, the terminal will prompt for the
TAX Amount
17.
Tax amount to be input. When prompted, enter the
AMOUNT
0.00
Tax Amount then press [ENTER]. Or press Enter to
bypass.
13
Chapter 5
PAX D200 Menu Options
The terminal contacts the Host Processor for an approval and forwards the
18.
information to the POS system. The POS System will then print the receipt.
19.
The terminal will go back to the idle screen.
20.
Stop.
CVC
CVV
CID
CARD TYPE
CODE
CODE
CODE
VISA
√
MasterCard
√
AMEX
√
Discover
√
14
Chapter 5
PAX D200 Menu Options
4.1.2 Credit Return
Note
A Credit RETURN is the reversal of an approved and settled
transaction. A RETURN issues credit to the customer’s credit card. If
the transaction has not already been settled, a VOID should be
processed.
STEP
ACTION
DISPLAY
1.
Be sure the terminal is at the Idle Prompt.
The POS system will send the “Return” transaction message to the
2.
Terminal for processing. The POS may or may not send the amount if it
does not, you must follow Step 3 below, if it does, skip to step 4.
Input the amount of the Return then Press
CREDIT RETURN
3.
[ENTER].
AMOUNT
0.00
* If the original transaction included a tip amount then the
total amount should be entered as the return amount.
SWIPE/TAP/INSERT
Swipe/Tap/Insert the card or Manually enter the
4.
CARD
account number and expiration date.
If the account number was manually entered, the terminal will ask if the card
5.
is present. Depending on the user’s response the terminal will prompt for
V-code and other AVS settings*.
* Dependent upon Fraud Control settings.
The terminal will send the Return to the Host processor for an approval, and
6.
then deliver the Host response to the POS system. The POS system will
print the receipt.
7.
The terminal will return to the idle screen.
8.
Stop.
15
Chapter 5
PAX D200 Menu Options
4.1.3 Credit Auth
Note
An Auth transaction represents a pre-authorization that does NOT
charge the credit card. It reserves the requested amount and places a
hold on the customer’s open-to-buy. To charge the card after an AUTH
a POSTAUTH transaction must be completed.
STEP
ACTION
DISPLAY
1.
Make sure the terminal is at the Idle Screen
The POS system will send the EDC type and Transaction Type message to
2.
the Terminal.
Swipe/Insert/Tap or manually enter the card
TAP/SWIPE/INSERT
3.
CARD
number when prompted.
4.
If the account number was manually entered, the terminal will ask if the card
is present. Depending on the user’s response the terminal will prompt for
V-code and other AVS settings*.
* Dependent upon Fraud Control settings.
Press [1] if the card is present.
IS CARD PRESENT?
1. Yes
5.
OR
2. No
Press [2] if the card is not present.
_________________
Enter the V-code from the back of the credit card
ENTER CVV2:
6.
then press [ENTER].
_________________
7.
___________________
Enter the street address then press [ENTER].
Street Address:
i.e.: If billing address is 123 Main St., enter 123.
___________________
16
Chapter 5
PAX D200 Menu Options
8.
_________________
Enter the ZIP Code then press [ENTER].
Enter Zip Code:
i.e.: If billing address ZIP code is 12345-0123., enter 12345.
_________________
The terminal will contact the Host Processor for an approval and return the
9.
message to the POS System.
10.
The Terminal will return to the Idle Screen.
11.
Stop.
4.1.4 Credit PostAuth
Note
When authorization has previously been obtained via an AUTH
transaction, a PostAuth can be performed to complete the transaction
and receive payment.
STEP
ACTION
DISPLAY
1.
Make sure the terminal is at the Idle Screen.
2.
The POS system sends the Transaction message to the Terminal
Swipe/Insert/Tap or manually enter the card
TAP/SWIPE/INSERT
3.
number when prompted.
CARD
17
Chapter 5
PAX D200 Menu Options
___________________
Enter Trans #:
4.
Input the transaction # to be completed.
12
______________________
The terminal searches the database for an AUTH transaction that matches
the criteria. Once found, the terminal processes the transaction.
5.
If the terminal does not find the transaction, it displays “TRANS NOT
FOUND!” and reverts back to the main screen.
CREDIT POSTAUTH
Input the dollar amount of the transaction then
AMOUNT
0.00
6.
press [ENTER]
This prompt occurs when the Invoice Mode feature
___________________
is turned on.
ENTER INVOICE #:
7.
When prompted, enter the invoice No. then press
___________________
[ENTER].
This prompt occurs when the Clerk/Server ID
___________________
Mode feature is turned on.
ENTER CLERK ID:
8.
___________________
When prompted, enter the clerk/server ID then
press [ENTER].
This prompt occurs when the Tip Option feature is
Enter TIP1:
turned on.
AMOUNT
0.00
9.
Input the amount for tip on the Keypad then press
[ENTER].
This prompt occurs when the Card Present Mode
feature is turned on.
IS CARD PRESENT?
Press [1] if the card is present.
1. Yes
10.
2. No
OR
Press [2] if the card is not present.
18
Chapter 5
PAX D200 Menu Options
_________________
This is a feature of Commercial Cards.
Cust. Code?
11.
Enter the additional information required for
_________________
commercial cards then press [ENTER].
TAX Amount
When prompted, enter the TAX Amount then press
12.
AMOUNT
0.00
[ENTER].
TEAR SLIP
---->
Press any key for the second receipt to be printed.
Press any Key …
13.
If a second receipt is not wanted, press [CANCEL].
Press [ENTER] for no receipt.
ARE YOU SURE?
ENTR=YES, CANC=NO
14.
OR
Press [CANCEL] to print the second receipt.
15.
Stop.
19
Chapter 5
PAX D200 Menu Options
Credit Forced
Note
When authorization has previously been obtained via an AUTH
transaction or via Voice Authorization, a Forced Sale must be
performed to complete the transaction and receive payment.
STEP
ACTION
DISPLAY
1.
Ensure the terminal is at the idle prompt.
2.
The ECR system will send the transaction message to the terminal.
TAP/SWIPE/INSERT
Swipe/Insert/Tap or manually enter the card
3.
CARD
number when prompted.
___________________
Input the authorization number previously obtained
ENTER AUTH #:
4.
then press [ENTER].
___________________
This prompt occurs when the Invoice Mode feature
___________________
is turned on.
ENTER INVOICE #:
5.
When prompted, enter the invoice No. then press
___________________
[ENTER].
This prompt occurs when the Clerk/Server ID
___________________
Mode feature is turned on.
ENTER CLERK ID:
6.
___________________
When prompted, enter the clerk/server ID then
press [ENTER].
20
Chapter 5
PAX D200 Menu Options
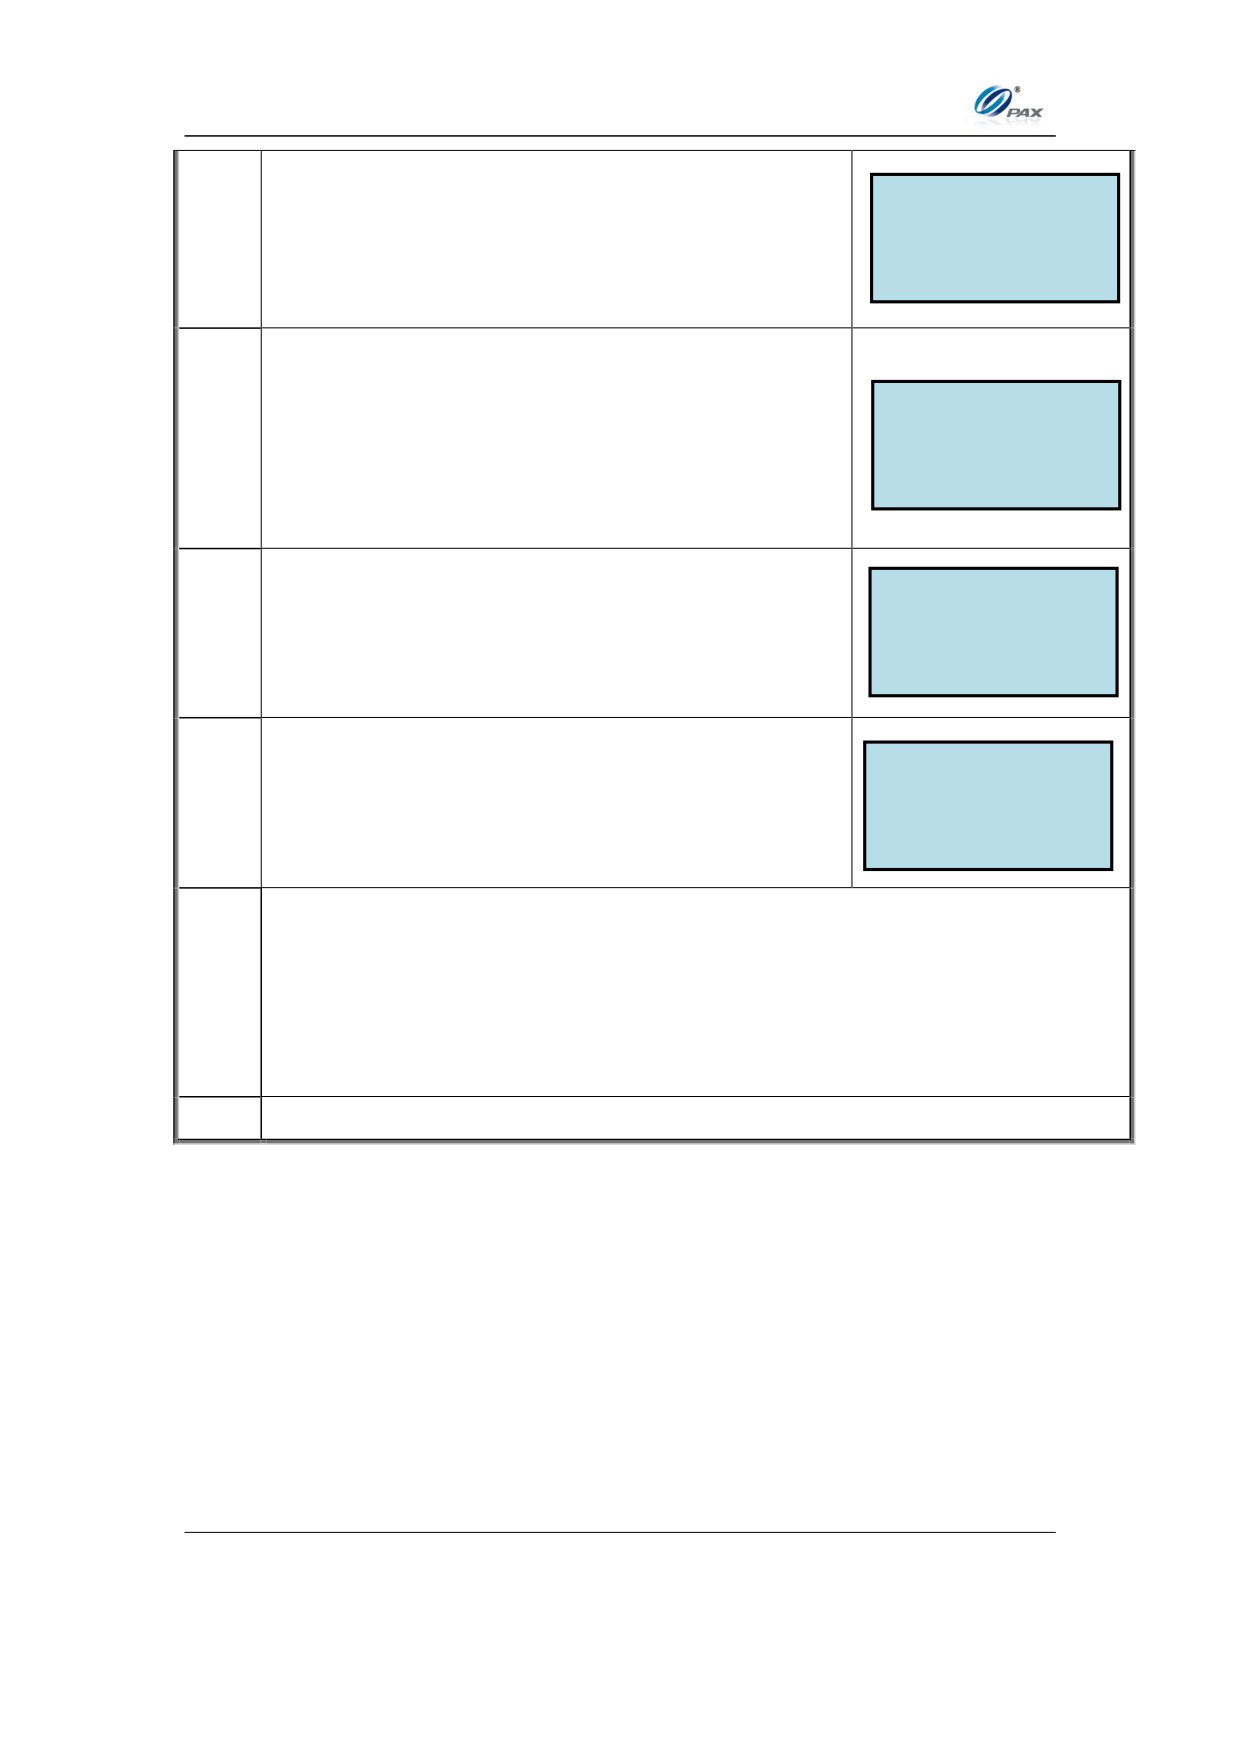
This prompt occurs when the Tip Option feature is
Enter TIP1:
turned on.
AMOUNT
0.00
7.
Input the amount for tip on the Keypad then press
[ENTER].
This prompt occurs when the Card Present Mode
feature is turned on.
IS CARD PRESENT?
Press [1] if the card is present.
1. Yes
8.
2. No
OR
Press [2] if the card is not present.
This is a feature of Commercial Cards.
_________________
Cust. Code?
9.
Enter the additional information required for
_________________
commercial cards then press [ENTER].
TAX Amount
When prompted, enter the TAX Amount then press
10.
AMOUNT
0.00
[ENTER].
If it is an online transaction, the terminal contacts the Host Processor for an
approval and delivers the message to the ECR, and the ECR will print the
receipt.
11.
OR
If it is an offline transaction, the terminal will store the information of the
transaction and deliver the message to ECR, ECR will print the receipt.
12.
Stop.
21
Chapter 5
PAX D200 Menu Options
4.1.5 Credit Void Sale
Note
To void a sale is to nullify an approved transaction, one that has already
been authorized but not settled. If the transaction has already been
settled, a RETURN must be processed. A VOID does not remove the
hold on the customer’s open-to-buy.
STEP
ACTION
DISPLAY
1.
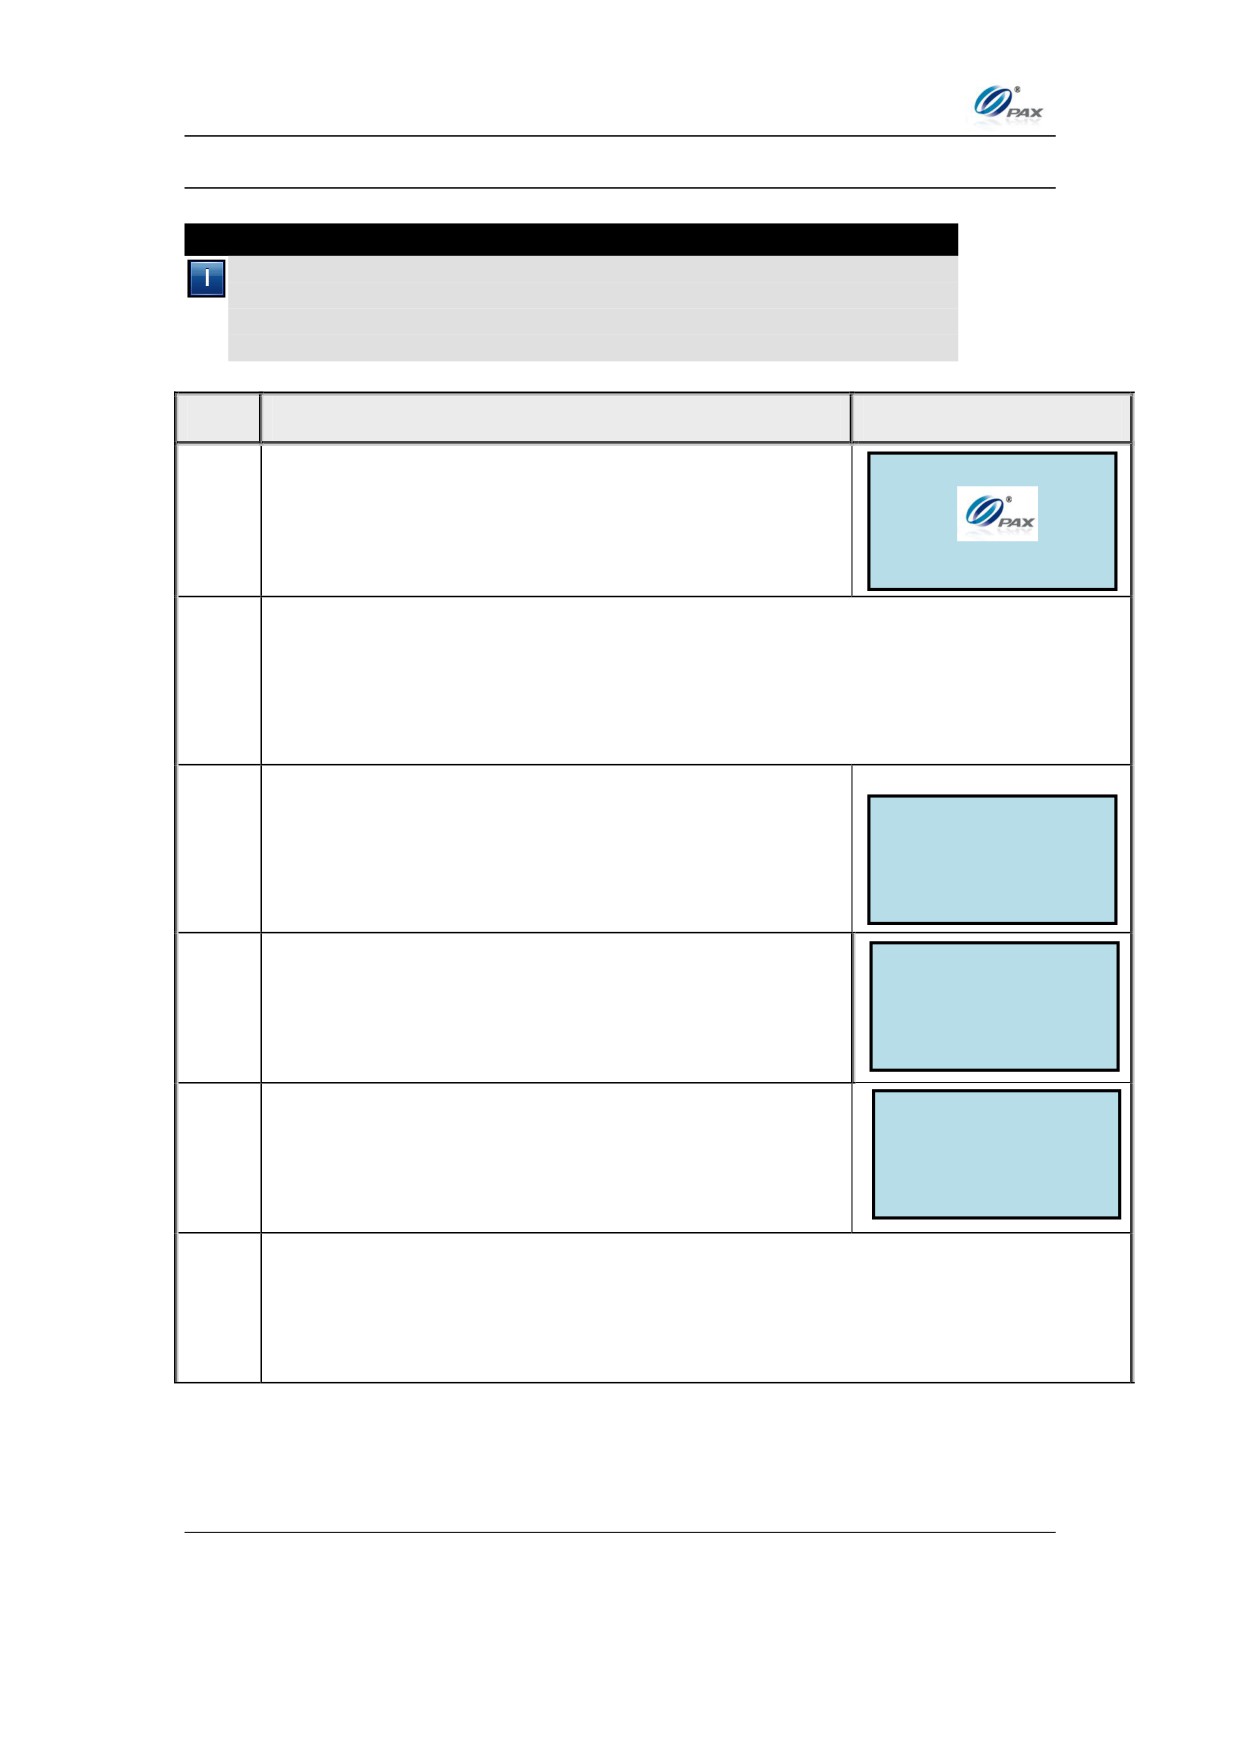
Make sure the terminal is at the idle screen.
1.1
The ECR system will send the transaction message to the terminal.
If Void Sale is password protected, the terminal will
ENTER PASSWORD:
prompt for the manager password. When
1.2
prompted, enter the password and then press
[ENTER].
Swipe/Insert/Tap or manually enter the card
TAP/SWIPE/INSERT
2.
CARD
number when prompted.
___________________
Enter Trans #:
3.
Input the transaction # to be voided.
12
______________________
The terminal searches the database for a Sale transaction that matches the
criteria. Once found, the terminal processes the transaction.
4.
If the terminal does not find the transaction, it displays “TRANS NOT
FOUND!” and reverts back to the main screen.
22

Chapter 5
PAX D200 Menu Options
#0001
SALE
View the transaction on the display to verify it is the
AMT:
2.00
correct transaction then
5.
Press [ENTER]
************4996
This prompt occurs when the Clerk/Server ID
___________________
Mode feature is turned on.
ENTER CLERK ID:
6.
___________________
When prompted, enter the clerk/server ID then
press [ENTER].
The terminal contacts the Host Processor for an approval (If necessary) and
7.
then sends the message to the ECR. The ECR will then print the receipt.
8.
Stop.
23
Chapter 5
PAX D200 Menu Options
4.1.6 Credit Void Return
Note
A RETURN transaction processed in error can be VOIDED if the
RETURN has not been batched out. This will nullify the RETURN
previously done in the same batch.
STEP
ACTION
DISPLAY
1.
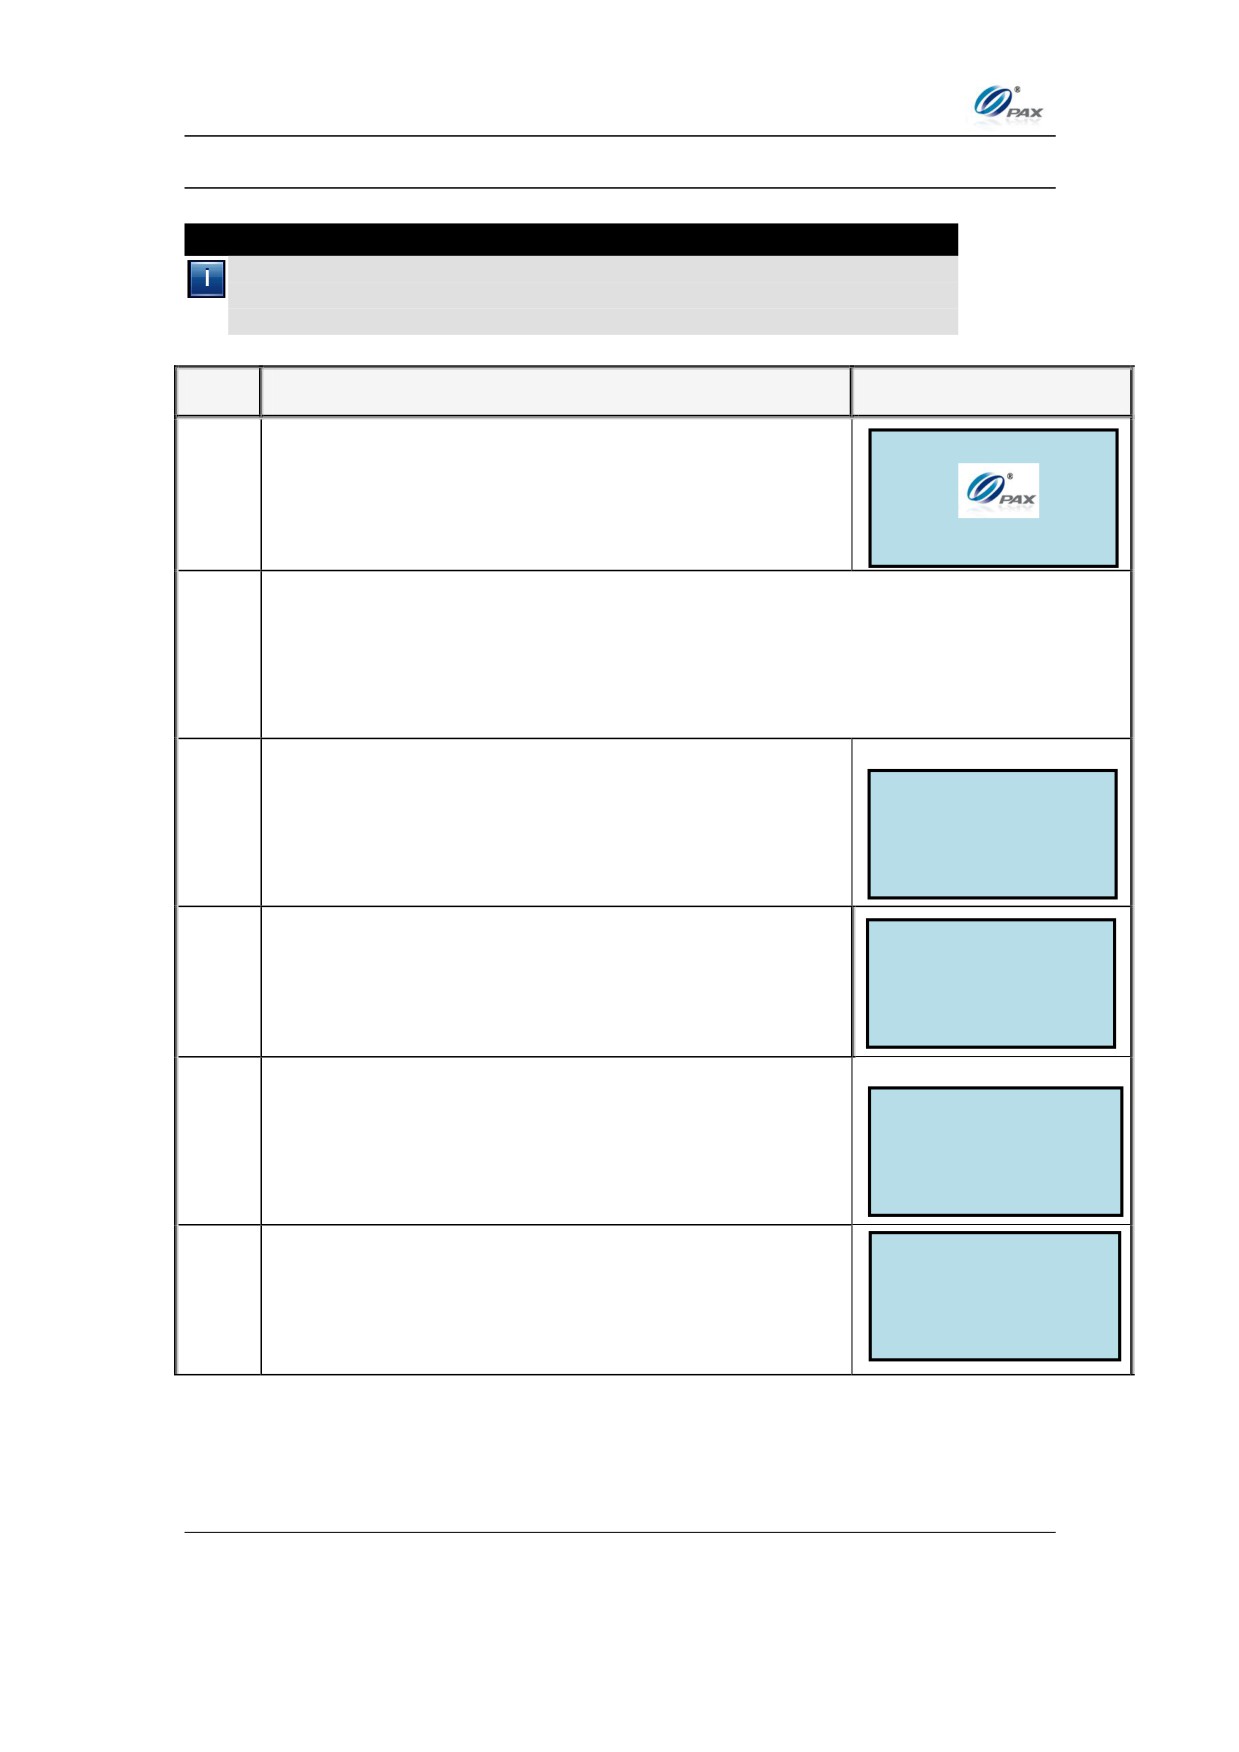
Ensure the terminal is at the idle screen.
1.1
The ECR system will send the transaction message to the terminal.
If Void Return is password protected, the terminal
ENTER PASSWORD:
will prompt for the manager password. When
1.2
prompted, enter the password and then press
[ENTER].
Swipe/Insert/Tap or manually enter the card
TAP/SWIPE/INSERT
2.
CARD
number when prompted.
If the security for Card Manually Entry is on, the
2.1
ENTER PASSWORD:
terminal will prompt for the manager password.
When prompted, enter the password and then
press [ENTER].
____________________
Enter Trans #:
3.
Input the transaction # to be voided.
12
______________________
24

Chapter 5
PAX D200 Menu Options
The terminal searches the database for a Return transaction that matches
the criteria. Once found, the terminal processes the transaction.
4.
If the terminal does not find the transaction, it displays “TRANS NOT
FOUND!” and reverts back to the main screen.
#0001
RTRN
View the transaction on the display to verify it is the
AMT:
2.00
correct transaction then
5.
Press [ENTER]
************4996
This prompt occurs when the Clerk/Server ID
___________________
Mode feature is turned on.
ENTER CLERK ID:
6.
___________________
When prompted, enter the clerk/server ID then
press [ENTER].
If it is an online transaction, the terminal contacts the Host Processor for an
approval and deliver the message to ECR, ECR will print the receipt
7.
OR
If it is an offline transaction, the terminal will store the information of the
transaction and deliver the message to ECR, ECR will print the receipt
8.
Stop.
25
Chapter 5
PAX D200 Menu Options
4.1.7 Credit Void Post-Auth
Note
A Post-Auth sale can be VOIDED if the transaction is in the current
open batch. A VOID/POST-AUTH does remove any hold on the
customer’s open-to-buy.
STEP
ACTION
DISPLAY
1.
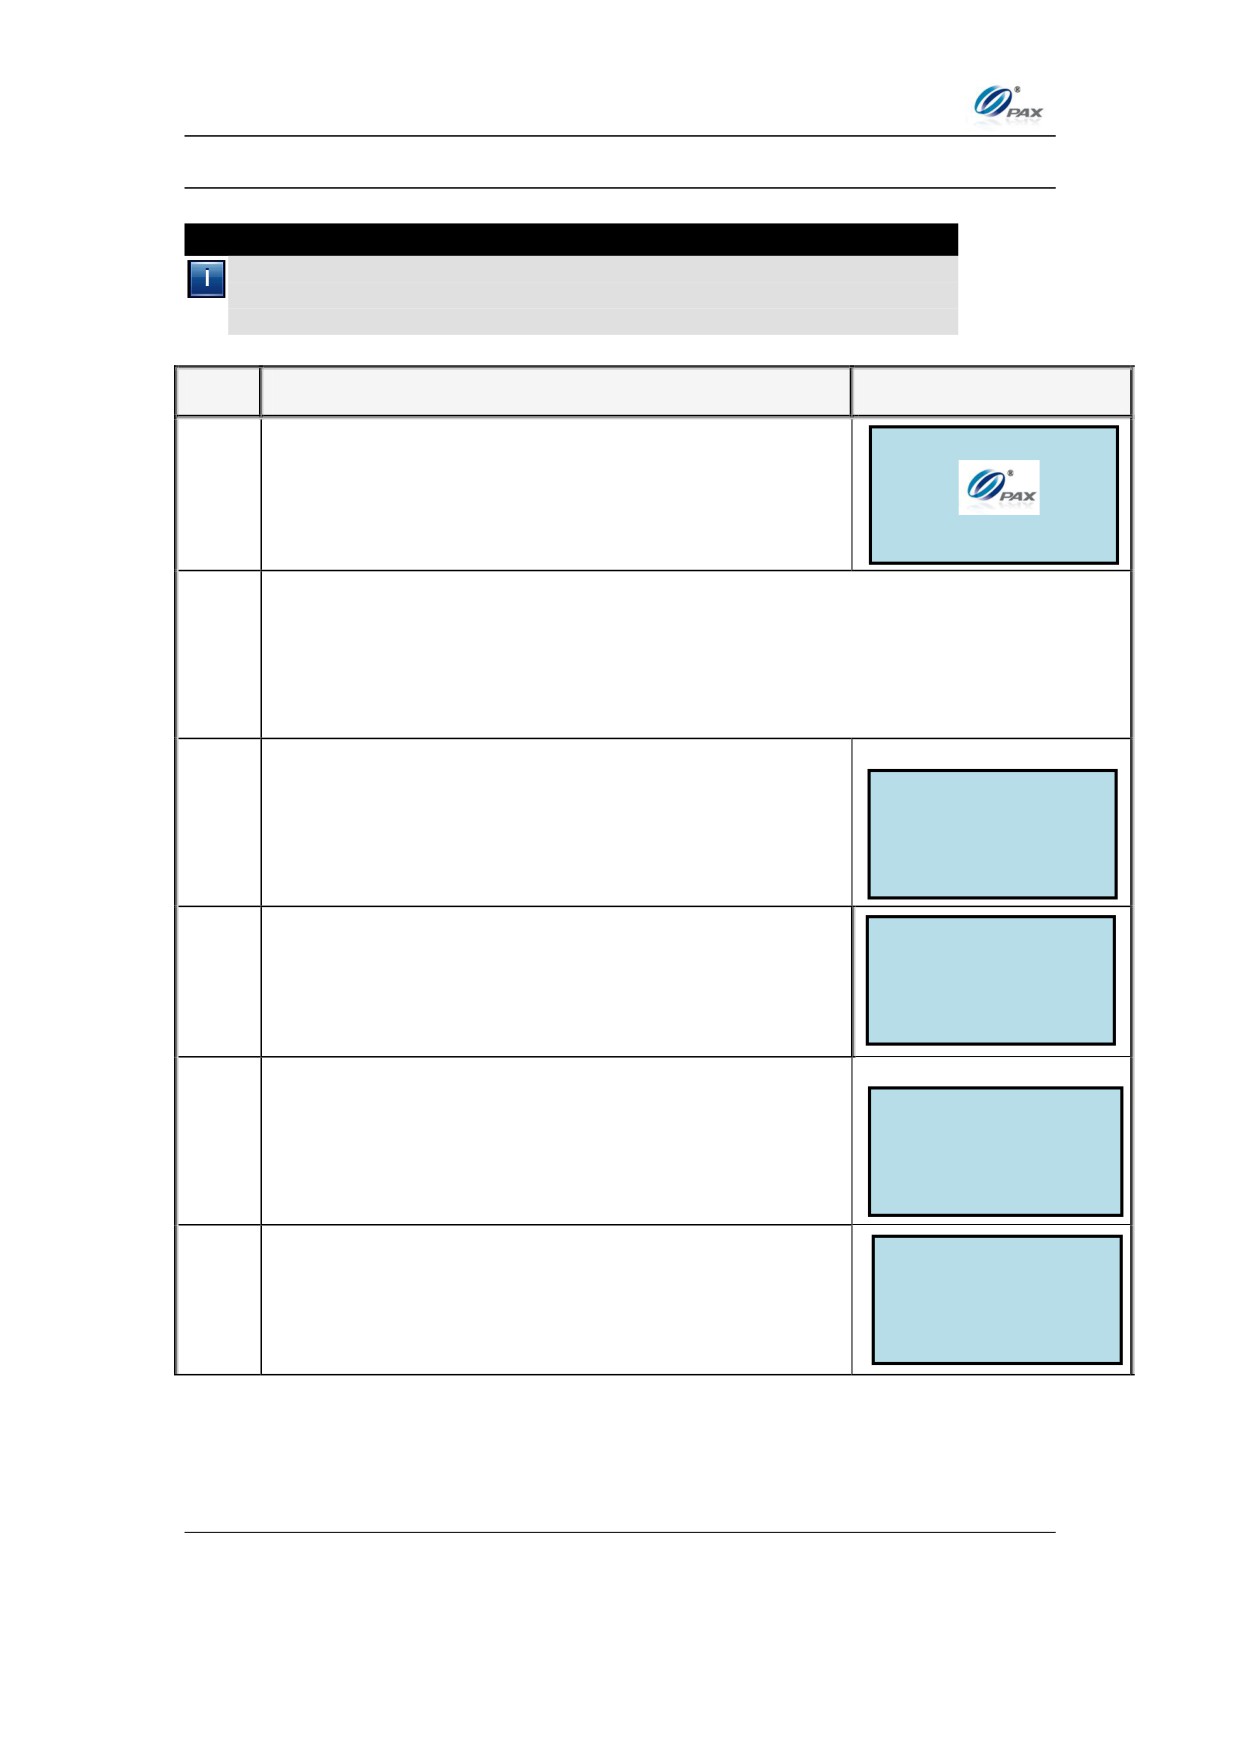
Ensure the terminal is at the idle screen.
1.1
The ECR system will send the transaction message to the terminal.
If Void Forced is password protected, the terminal
ENTER PASSWORD:
will prompt for the manager password. When
1.2
prompted, enter the password and then press
[ENTER].
TAP/SWIPE/INSERT
Swipe/Insert/Tap or manually enter the card
2.
CARD
number when prompted.
If the security for Card Manually Entry is on, the
2.1
ENTER PASSWORD:
terminal will prompt for the manager password.
When prompted, enter the password and then
press [ENTER].
____________________
Enter Trans #:
3.
Input the transaction # to be voided.
12
______________________
26

Chapter 5
PAX D200 Menu Options
The terminal searches the database for a Forced transaction that matches
the criteria. Once found, the terminal processes the transaction.
4.
If the terminal does not find the transaction, it displays “TRANS NOT
FOUND!” and reverts back to the main screen.
#0001
POST
View the transaction on the display to verify it is the
AMT:
2.00
correct transaction then
5.
Press [ENTER]
************4996
___________________
This prompt only occurs when the Clerk/Server ID
ENTER CLERK ID:
6.
Mode feature is turned on. When prompted, enter
___________________
the clerk/server ID then press [ENTER].
If it is an online transaction, the terminal contacts the Host Processor for an
approval and deliver the message to ECR, ECR will print the receipt
7.
OR
If it is an offline transaction, the terminal will store the information of the
transaction and deliver the message to ECR, ECR will print the receipt.
8.
Stop.
27
Chapter 5
PAX D200 Menu Options
4.1.8 Credit Void Forced
Note
A FORCED sale can be VOIDED if the transaction is in the current open
batch. A VOID/FORCED does remove any hold on the customer’s
open-to-buy.
STEP
ACTION
DISPLAY
1.
Ensure the terminal is at the idle screen.
1.1
The ECR system will send the transaction message to the terminal.
If Void Forced is password protected, the terminal
ENTER PASSWORD:
will prompt for the manager password. When
1.2
prompted, enter the password and then press
[ENTER].
Swipe/Insert/Tap or manually enter the card
TAP/SWIPE/INSERT
2.
CARD
number when prompted.
If the security for Card Manually Entry is on, the
2.1
ENTER PASSWORD:
terminal will prompt for the manager password.
When prompted, enter the password and then
press [ENTER].
____________________
Enter Trans #:
3.
Input the transaction # to be voided.
12
______________________
28

Chapter 5
PAX D200 Menu Options
The terminal searches the database for a Forced transaction that matches
the criteria. Once found, the terminal processes the transaction.
4.
If the terminal does not find the transaction, it displays “TRANS NOT
FOUND!” and reverts back to the main screen.
#0001
FRCD
View the transaction on the display to verify it is the
AMT:
2.00
correct transaction then
5.
Press [ENTER]
************4996
This prompt occurs when the Clerk/Server ID
___________________
Mode feature is turned on.
ENTER CLERK ID:
6.
___________________
When prompted, enter the clerk/server ID then
press [ENTER].
If it is an online transaction, the terminal contacts the Host Processor for an
approval and deliver the message to ECR, ECR will print the receipt
7.
OR
If it is an offline transaction, the terminal will store the information of the
transaction and deliver the message to ECR, ECR will print the receipt.
8.
Stop.
29
Chapter 5
PAX D200 Menu Options
4.2 Debit Transaction
4.2.1 Debit Sale
Note
A Debit Card Sale must be completed by swiping the customer’s debit
card through the card reader. Manually entered debit transactions are
not allowed.
STEP
ACTION
DISPLAY
1.
Be sure the terminal is at the idle screen.
2.
The ECR system will send the transaction message to the terminal.
Swipe/Insert/ or Tap the card. Please note the Debit
TAP/SWIPE/INSERT
3.
CARD
transactions can never be manually input.
This prompt occurs when the Invoice Mode feature is
__________________
turned on.
ENTER INVOICE #:
4.
When prompted, enter the invoice No. then press
__________________
[ENTER].
This prompt occurs when the Clerk/Server ID Mode
__________________
feature is turned on.
ENTER CLERK ID:
5.
When prompted, enter the clerk/server ID then press
__________________
[ENTER].
This prompt occurs when the Table Mode feature is
___________________
turned on.
ENTER TABLE NO:
6.
___________________
When prompted, enter the table number then press
[ENTER].
This prompt occurs when the Guest No. Mode feature is
___________________
turned on.
NUMBER OF GUESTS
7.
___________________
When prompted, enter the number of guests then press
[ENTER].
30
Chapter 5
PAX D200 Menu Options
This prompt occurs when the Tip Option feature is
Enter TIP1:
turned on.
AMOUNT
0.00
8.
Input the amount for tip on the Keypad then press
[ENTER].
This prompt occurs when the CashBack Prompt is
Cash Back:
turned on.
AMOUNT
0.00
9.
Input the amount for cash back on the Keypad then
press [ENTER].
AMT $2.00
Enter PIN:
10.
Input the PIN on the Keypad then press [ENTER].
****
The terminal contacts the Host Processor for an approval and passes that to the
11.
ECR. The ECR Prints the receipts.
12.
Stop
31
Chapter 5
PAX D200 Menu Options
4.2.2 Debit Return
Note
A debit transaction cannot be voided but it can be returned. Just like a
Debit Sale, the card must be swiped to perform a Debit RETURN.
STEP
ACTION
DISPLAY
1.
Be sure the terminal is at the idle screen.
2.
The ECR system will send the transaction message to the terminal.
Swipe/Insert/ or Tap the card. Please note the
TAP/SWIPE/INSERT
3.
Debit transactions can never be manually input.
CARD
This prompt occurs when the Invoice Mode
___________________
feature is turned on.
ENTER INVOICE #:
4.
When prompted, enter the invoice No. then press
___________________
[ENTER].
This prompt occurs when the Clerk/Server ID
___________________
Mode is turned on.
ENTER CLERK ID:
5.
___________________
When prompted, enter the clerk/server ID then
press [ENTER].
This prompt occurs when the Table Mode feature
___________________
is turned on.
ENTER TABLE NO:
6.
___________________
When prompted, enter the table number then
press [ENTER].
This prompt occurs when the Guest No. Mode
___________________
feature is turned on.
NUMBER OF GUESTS
7.
___________________
When prompted, enter the number of guests then
press [ENTER].
32

Chapter 5
PAX D200 Menu Options
AMT $2.00
Enter PIN:
Input the PIN on the Keypad then press [ENTER].
8.
****
The terminal contacts the Host Processor for an approval and passes that
9.
to the ECR. The ECR Prints the receipts.
10.
Stop.
33
Chapter 5
PAX D200 Menu Options
4.3 EBT Transaction
4.3.1 EBT Sale
Note
EBT or Electronic Benefits Transfer is an electronic system that
authorizes the issuant to use their government provided benefits to
purchase food items or make use of the Cash Benefits feature. EBT
transactions can be swiped or manually entered.
STEP
ACTION
DISPLAY
1.
Be sure the terminal is at the idle screen.
2.
The ECR system will send the transaction message to the terminal.
TAP/SWIPE/INSERT
Swipe/Insert/Tap or manually enter the card
2.1
CARD
number when prompted.
If the security for Card Manual Entry is on, the
2.2
ENTER PASSWORD:
terminal will prompt for the manager password.
When prompted, enter the password and then
press [ENTER].
2.3
Manually keying the full account number then press
EBT
SALE
[ENTER]. The account number must be between
5555
8-19 digits.
This prompt occurs when Invoice Mode feature is
__________________
5.
turned on. When prompted, enter the invoice No.
ENTER INVOICE #:
then press [ENTER].
__________________
34
Chapter 5
PAX D200 Menu Options
This prompt occurs when the Clerk/Server ID
__________________
6.
Mode feature is turned on. When prompted, enter
ENTER CLERK ID:
the clerk/server ID then press [ENTER].
__________________
If Selected
Then
Proceed to #9, & then skip
Food Stamp
to step #12.
7.
Proceed to #8 & #9 & then
Cash Benefit
skip to #12.
Voucher
Skip to step #11.
Cash Back:
The terminal will now Prompt you to enter a Cash
8.
AMOUNT
0.00
Back amount or press [ENTER] to bypass.
AMT $2.00
Enter PIN:
9.
Input the PIN on the Keypad then press [ENTER].
****
__________________
10.
Enter the Voucher number then press [ENTER].
Voucher Number:
__________________
___________________
Enter the Authorization number then press
11.
Enter Auth #:
[ENTER].
___________________
The terminal contacts the Host Processor for an approval and passes that to
12.
the ECR. The ECR Prints the receipts.
13.
Stop.
35
Chapter 5
PAX D200 Menu Options
4.3.2 EBT Return
Note
An EBT RETURN is the reversal of an approved and settled
transaction. A RETURN refunds back to the customer’s EBT card, if the
transaction has not already been settled. EBT return is only for Food
Stamps.
STEP
ACTION
DISPLAY
1.
Ensure the terminal is at the idle screen.
2.
The ECR system will send the transaction message to the terminal.
TAP/SWIPE/INSERT
Swipe/Insert/Tap or manually enter the card
3.
CARD
number when prompted.
This prompt occurs when Clerk/Server ID Mode
___________________
feature is turned on.
ENTER CLERK ID:
4.
___________________
When prompted, enter the clerk/server ID then
press [ENTER].
AMT $2.00
Enter PIN:
5.
Input the PIN on the Keypad then press [ENTER].
****
The terminal contacts the Host Processor for an approval and passes that
8.
to the ECR. The ECR Prints the receipts.
9.
Stop.
36
Chapter 5
PAX D200 Menu Options
4.3.3 EBT Balance Inquiry
Note
Balance Inquiry transaction is used for inquiring about the available
balance of an EBT account.
STEP
ACTION
DISPLAY
1.
Be sure the terminal is at the idle screen.
2.
The ECR system will send the transaction message to the terminal.
Swipe/Insert/Tap or manually enter the card
TAP/SWIPE/INSERT
3.
CARD
number when prompted.
Select EBT Type:
Press [1] for Food Stamp
1. FoodStamp
2. CashBenefit
4.
OR
Press [2] for Cash Benefit
This prompt occurs when the Clerk/Server ID
___________________
Mode is turned on.
ENTER CLERK ID:
5.
___________________
When prompted, enter the clerk/server ID then
press [ENTER].
AMT $0.00
Enter PIN:
6.
Input the PIN on the Keypad then press [ENTER].
****
The terminal contacts the Host Processor for an approval and passes that to
7.
the ECR. The ECR Prints the receipts.
8.
Stop.
37
Chapter 5
PAX D200 Menu Options
4.4 Gift Transaction
4.4.1 Gift Sale
Note
Gift Cards are cards that are sponsored by individual Merchants. They
allow the customer to purchase items or services using the card as
payment.
STEP
ACTION
DISPLAY
1.
Ensure the terminal is at the idle screen.
2.
The ECR system will send the transaction message to the terminal.
TAP/SWIPE/INSERT
2.1
Swipe/Tap/Insert the Gift Card.
CARD
If the security for Card Manual Entry is on, the
2.2
ENTER PASSWORD:
terminal will prompt for the manager password.
When prompted, enter the password and then
press [ENTER].
GIFT
SALE
Manually keying the full account number then press
5555
2.3
[ENTER]. The account number must be between
13-16 digits.
This prompt occurs when the Invoice Mode feature
__________________
3.
is turned on. When prompted, input the invoice
ENTER INVOICE #:
number on the Keypad then press [ENTER].
__________________
This prompt occurs when the Clerk/Server ID
__________________
Mode feature is turned on. When prompted, input
4.
ENTER CLERK ID:
the Clerk/Server ID on the Keypad then press
__________________
[ENTER].
38
Chapter 5
PAX D200 Menu Options
This prompt occurs when the Tip Option feature is
Enter TIP1:
5.
turned on.
AMOUNT
0.00
Input the amount for tip on the Keypad then press
[ENTER].
The terminal contacts the Host Processor for an approval and passes that to
6.
the ECR. The ECR Prints the receipts.
7.
Stop.
4.4.2 Gift Return
Note
A Gift RETURN is the reversal of an approved and settled Gift Card
transaction.
STEP
ACTION
DISPLAY
1.
Ensure the terminal is at the idle screen.
2.
The ECR system will send the transaction message to the terminal.
TAP/SWIPE/INSERT
Swipe/Tap/Insert the Gift Card.
CARD
3.
This prompt occurs when the Invoice Mode
___________________
feature is turned on.
ENTER INVOICE #:
4.
___________________
When prompted, enter the invoice No. then press
[ENTER].
39
Chapter 5
PAX D200 Menu Options
This prompt occurs when the Clerk/Server ID
___________________
Mode feature is turned on.
ENTER CLERK ID:
5.
___________________
When prompted, enter the clerk/server ID then
press [ENTER].
The terminal contacts the Host Processor for an approval and passes that
6.
to the ECR. The ECR Prints the receipts.
7.
Stop.
4.4.3 Gift Add Value
Note
Use the Add Value function to add credit to the available balance of an
active Gift Card.
STEP
ACTION
DISPLAY
1.
Ensure the terminal is at the idle screen.
2.
The ECR system will send the transaction message to the terminal.
TAP/SWIPE/INSERT
3.
Swipe/Tap/Insert the Gift Card.
CARD
This prompt occurs when the Invoice Mode feature
___________________
is turned on.
ENTER INVOICE #:
4.
When prompted, enter the invoice No. then press
___________________
[ENTER].
40
Chapter 5
PAX D200 Menu Options
This prompt occurs when the Clerk/Server ID
___________________
Mode feature is turned on.
ENTER CLERK ID:
5.
___________________
When prompted, enter the clerk/server ID then
press [ENTER].
The terminal contacts the Host Processor for an approval and passes that to
6.
the ECR. The ECR Prints the receipts.
7.
Stop.
4.4.4 Gift Issue
Note
Use the Issue function to issue a gift card.
STEP
ACTION
DISPLAY
1.
Ensure the terminal is at the idle screen.
2.
The ECR system will send the transaction message to the terminal.
TAP/SWIPE/INSERT
3.
Swipe/Tap/Insert the Gift Card.
CARD
This prompt occurs when the Invoice Mode feature
___________________
is turned on.
ENTER INVOICE #:
4.
When prompted, enter the invoice No. then press
___________________
[ENTER].
41
Chapter 5
PAX D200 Menu Options
This prompt occurs when the Clerk/Server ID
___________________
Mode feature is turned on.
ENTER CLERK ID:
5.
___________________
When prompted, enter the clerk/server ID then
press [ENTER].
The terminal contacts the Host Processor for an approval and passes that to
6.
the ECR. The ECR Prints the receipts.
7.
Stop.
4.4.5 Gift Void
Note
To do a Gift Void is to nullify an approved Gift transaction, including Gift
Sale, Gift Return, Gift Add Value and Gift Issue.
STEP
ACTION
DISPLAY
1.
Ensure the terminal is at the idle screen.
2.
The ECR system will send the transaction message to the terminal.
TAP/SWIPE/INSERT
3.
Swipe/Tap/Insert the Gift Card.
CARD
The terminal searches the database for a Sale transaction that matches the
criteria. Once found, the terminal processes the transaction.
4.
If the terminal does not find the transaction, it displays “TRANS NOT
FOUND!” and reverts back to the main screen.
42
Chapter 5
PAX D200 Menu Options
View the transaction on the display to verify it is the
#0001
SALE
AMT:
2.00
correct transaction then
5.
Press [ENTER].
************4996
This prompt occurs when the Clerk/Server ID
___________________
Mode feature is turned on.
ENTER CLERK ID:
6.
___________________
When prompted, enter the clerk/server ID then
press [ENTER].
The terminal contacts the Host Processor for an approval (if necessary) and
7.
passes that to the ECR. The ECR Prints the receipts.
8.
Stop.
4.4.6 Gift Balance Inquiry
Note
The Balance Inquiry transaction is used for inquiring about the balance
of Gift Cards.
STEP
ACTION
DISPLAY
1.
Ensure the terminal is at the idle screen.
2.
The ECR system will send the transaction message to the terminal.
TAP/SWIPE/INSERT
3.
Swipe/Tap/Insert the Gift Card.
CARD
43
Chapter 5
PAX D200 Menu Options
This prompt occurs when the Clerk/Server ID
___________________
Mode is turned on.
ENTER CLERK ID:
4.
___________________
When prompted, enter the clerk/server ID then
press [ENTER].
The terminal will contact the Host Processor for the balance available on the
5.
card and then passes it to the ECR. The ECR will print the receipt.
6.
Stop.
4.5 Commercial Cards
Note
Depending upon the Credit Host processor and preloaded BIN range
table, Commercial credit cards will prompt for additional information
when processing.
STEP
ACTION
DISPLAY
1.
Be sure the terminal is at the idle screen.
2.
The ECR system will send the transaction message to the terminal.
TAP/SWIPE/INSERT
3.
Swipe/Insert/ or Tap the card.
CARD
If the account number was manually entered, the terminal will ask if the card
is present. Depending on the user’s response the terminal will prompt for
4.
V-code and other AVS settings.
Enter the information for all AVS and V-Code prompts.
44

Chapter 5
PAX D200 Menu Options
Enter the Customer Code then press [ENTER].
___________________
5.
OR
Cust. Code ?
___________________
Press [ENTER] to bypass.
Enter the Tax Amount then press [ENTER].
OR
TAX AMOUNT:
6.
Press [ENTER] to bypass.
AMOUNT
0.00
Continue to next step if tax amount was entered or skip to
Step #9 if tax amount was bypassed.
If the entered tax amount exceeds the user input
7.
TAX EXCEED AMT.
amount the terminal will display the warning.
Enter the correct tax amount then press [ENTER].
OR
TAX AMOUNT
8.
Press [CANCEL] to cancel transaction
0.00
OR
Press [ENTER] to bypass.
The terminal contacts the Host Processor for an approval and passes that to
9.
the ECR. The ECR Prints the receipts.
10.
Stop.
45
5. Main Menu
Note
Your POS Terminal menu options allow you to control some terminal
settings without the inconvenience of reprogramming. You can
choose the options that work best for your business. The menus are
divided into main menu options, which have submenu options. You
can access your terminal’s menu by pressing the [MENU] button.
5.1
Accessing the Main Menu
STEP
ACTION
DISPLAY
1.
From the Idle Prompt press [O].
ENTER PASSWORD
Terminal will prompt for the System Password.
2.
Input the password to access the menu.
Use the [F1] & [F2] keys to scroll through the
MAIN MENU:
options then press [O] to select.
1. Reports
2. Merchant Settings
3.
OR
3. Operation Settings
4. Hosts Settings
Press the number on the keypad that corresponds
with your selection.
4.
Press [] to return to the Idle Prompt.
5.
Stop.
46
Chapter 5
PAX D200 Menu Options
5.2
Main Menu Options
Note
The items available in the terminal’s main menu are:
NO.
NAME
DESCRIPTION
1
Display Trans.
Allows you to view transactions on the terminal.
2
Merchant Settings
Set security, authorization, receipt header and
trailer, etc.
Set receipt printing options, Store & Forward
3
Operation Settings
settings, connected peripherals, etc.
View or modify merchant and terminal IDs,
4
Hosts Settings
authorization and batch phone numbers, print EDC
Report.
Time & Date, PIN Pad options, Encryption keys,
5
System Settings
Fraud Control, etc.
6
Communications
Configure communication parameters and settings.
47
Chapter 5
PAX D200 Menu Options
5.3
Display Transactions
5.3.1
Review
The Review menu option allows the user to see all of the transactions recorded on
the D200. Transactions are separated by EDC type and the user can also view the
total amount
STEP
ACTION
DISPLAY
1.
From the Idle Prompt press [O].
Terminal will prompt for the System Password.
ENTER PASSWORD
2.
Input the password to access the menu.
Use the [F1] & [F2] keys to scroll through the
MAIN MENU:
1. Display Trans
options then press [ENTER] to select.
2. Merchant Settings
3.
OR
3. Operation Settings
4. Hosts Settings
Press 1 to select Display Transactions
Use the [F1] & [F2] keys to scroll through the
Display Trans
options then press [ENTER] to select.
1. Review
4.
2. Find
OR
Press 1 to select Review
Terminal will prompt for the System Password.
ENTER PASSWORD
5.
Input the password to access the menu.
48
Chapter 5
PAX D200 Menu Options
Scroll Totals <>
Scroll through the EDC Type options then press [O]
1. Credit
250.00
to select.
2. Debit
75.00
6.
OR
3. Gift
125.00
4. Totals
450.00
Press the number corresponding with your selection.
#0001
SALE
View details of transactions. Use the [F1] & [F2] keys
7.
AMT:
125.00
to scroll to a different transaction.
************1212
8.
Press [X] to go back
9.
Stop.
5.3.2
Find
The find option is used to find information on specific transactions.
Transactions are looked up using the last four digits of the card.
STEP
ACTION
DISPLAY
1.
From the Idle Prompt press [O].
Terminal will prompt for the System Password.
ENTER PASSWORD
2.
Input the password to access the menu.
Use the [F1] & [F2] keys to scroll through the
MAIN MENU:
1. Display Trans
options then press [ENTER] to select.
2. Merchant Settings
3.
OR
3. Operation Settings
4. Hosts Settings
Press 1 to select Display Transactions
49

Chapter 5
PAX D200 Menu Options
Use the [F1] & [F2] keys to scroll through the
Display Trans
options then press [ENTER] to select.
1. Review
4.
2. Find
OR
Press 2 to select Find
Terminal will prompt for the System Password.
ENTER PASSWORD
5.
Input the password to access the menu.
Last 4 Digits
Input the Last 4 digits of the card the user wants to
6.
view.
#0001
SALE
7.
The Terminal will display the transaction requested
AMT:
125.00
************1212
8.
Press [X] to go back
9.
Stop.
5.4
Merchant Settings
This menu contains six different functions that can be changed manually, if
necessary. They are:
Authorizations
Security Settings
Merchant Fee
Credit Surcharge
Set Batch Time
Additional Prompts
50
Chapter 5
PAX D200 Menu Options
5.4.1 Authorizations
5.4.1.1
Trans. Types
Note
This function enables, disables or sets password protection for
specific transaction types, such as Voids, Returns, Forced Sales, etc.
For all EDC Types the Sale transaction cannot be disabled or
password protected. Some transaction types are disabled by the Host
and cannot be enabled.
STEP
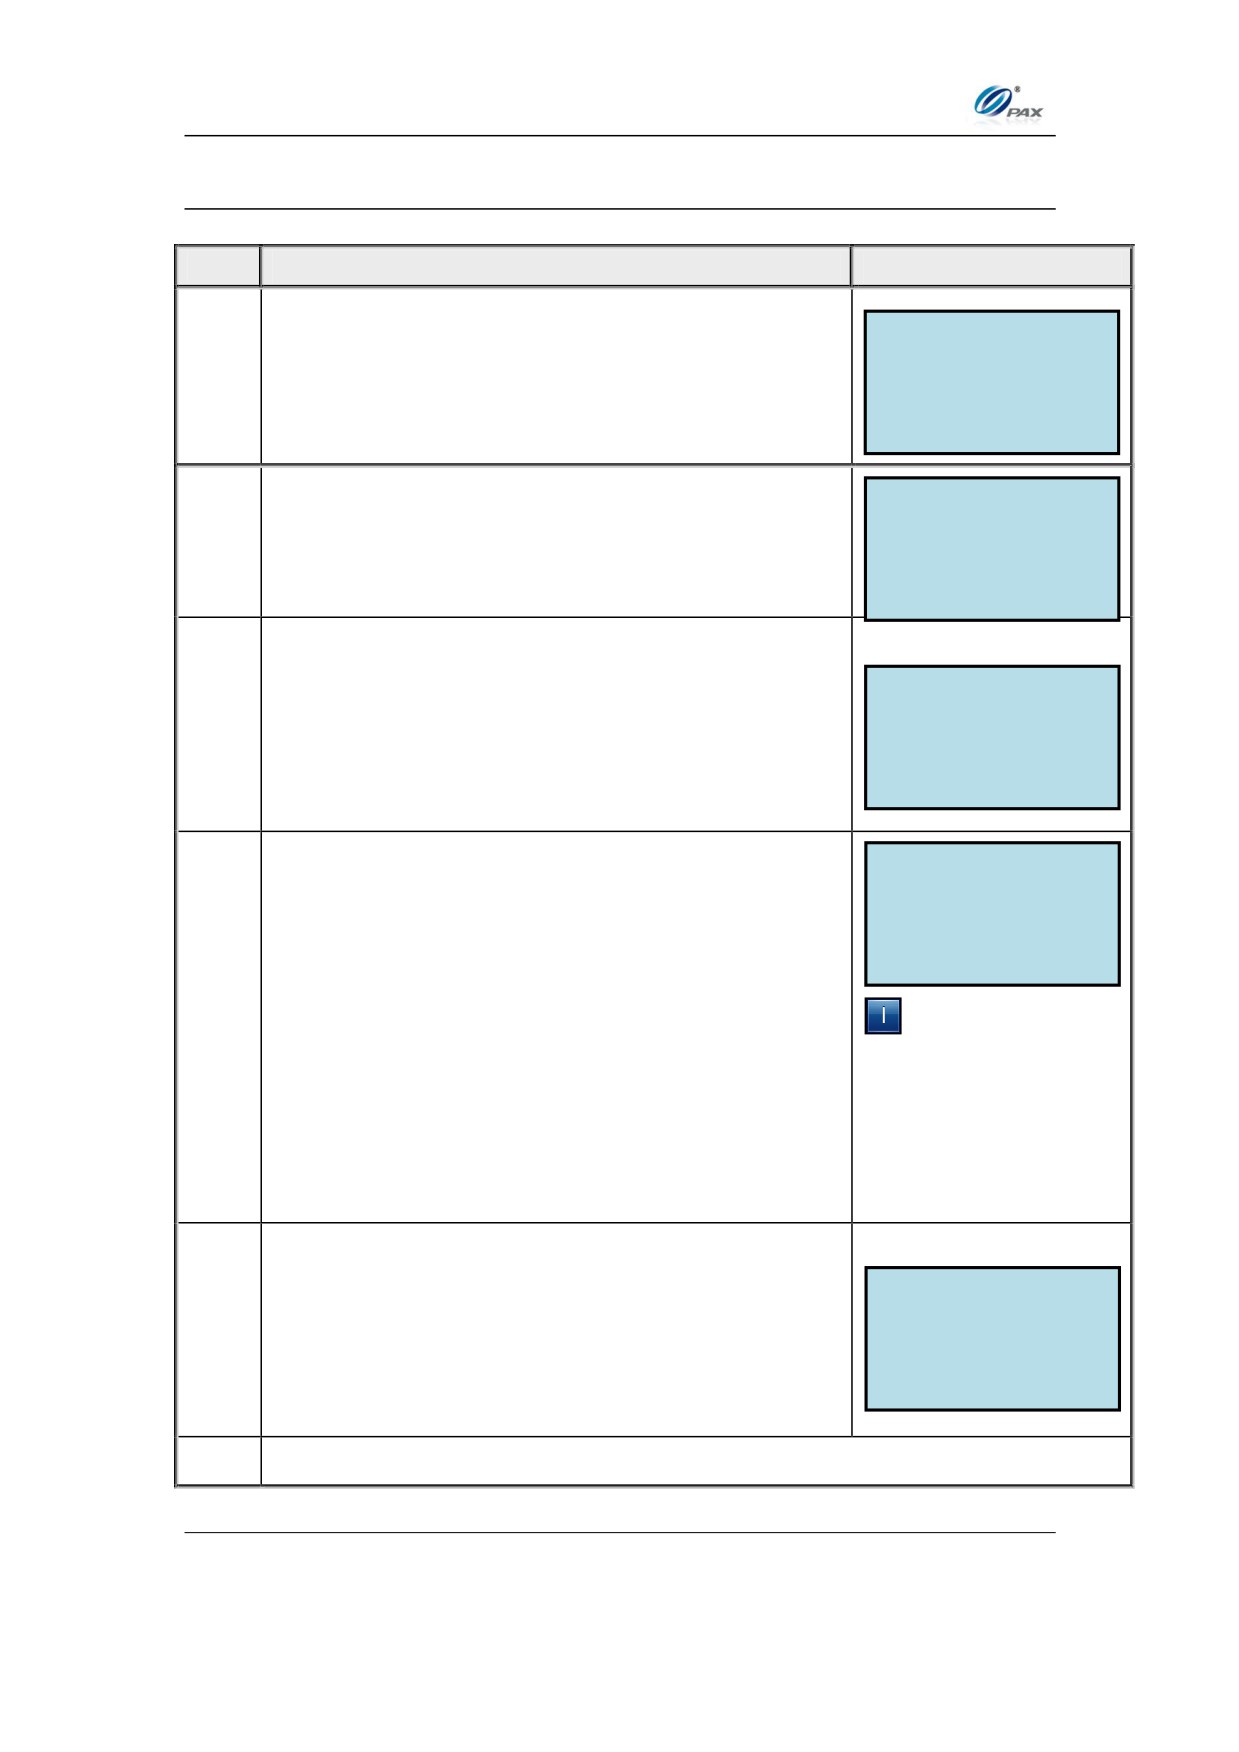
ACTION
DISPLAY
MAIN MENU:
1. Reports
From the Main Menu press [2] to access Merchant
1.
2. Merchant Settings
Settings
3. Operation Settings
4. Hosts Settings
MERCHANT PARAMS:
1. Authorizations
2.
Press [1] to access Authorization
2. Security Settings
3. Edit Header
4. Edit Trailer
51
Chapter 5
PAX D200 Menu Options
Transaction Type, Continued
STEP
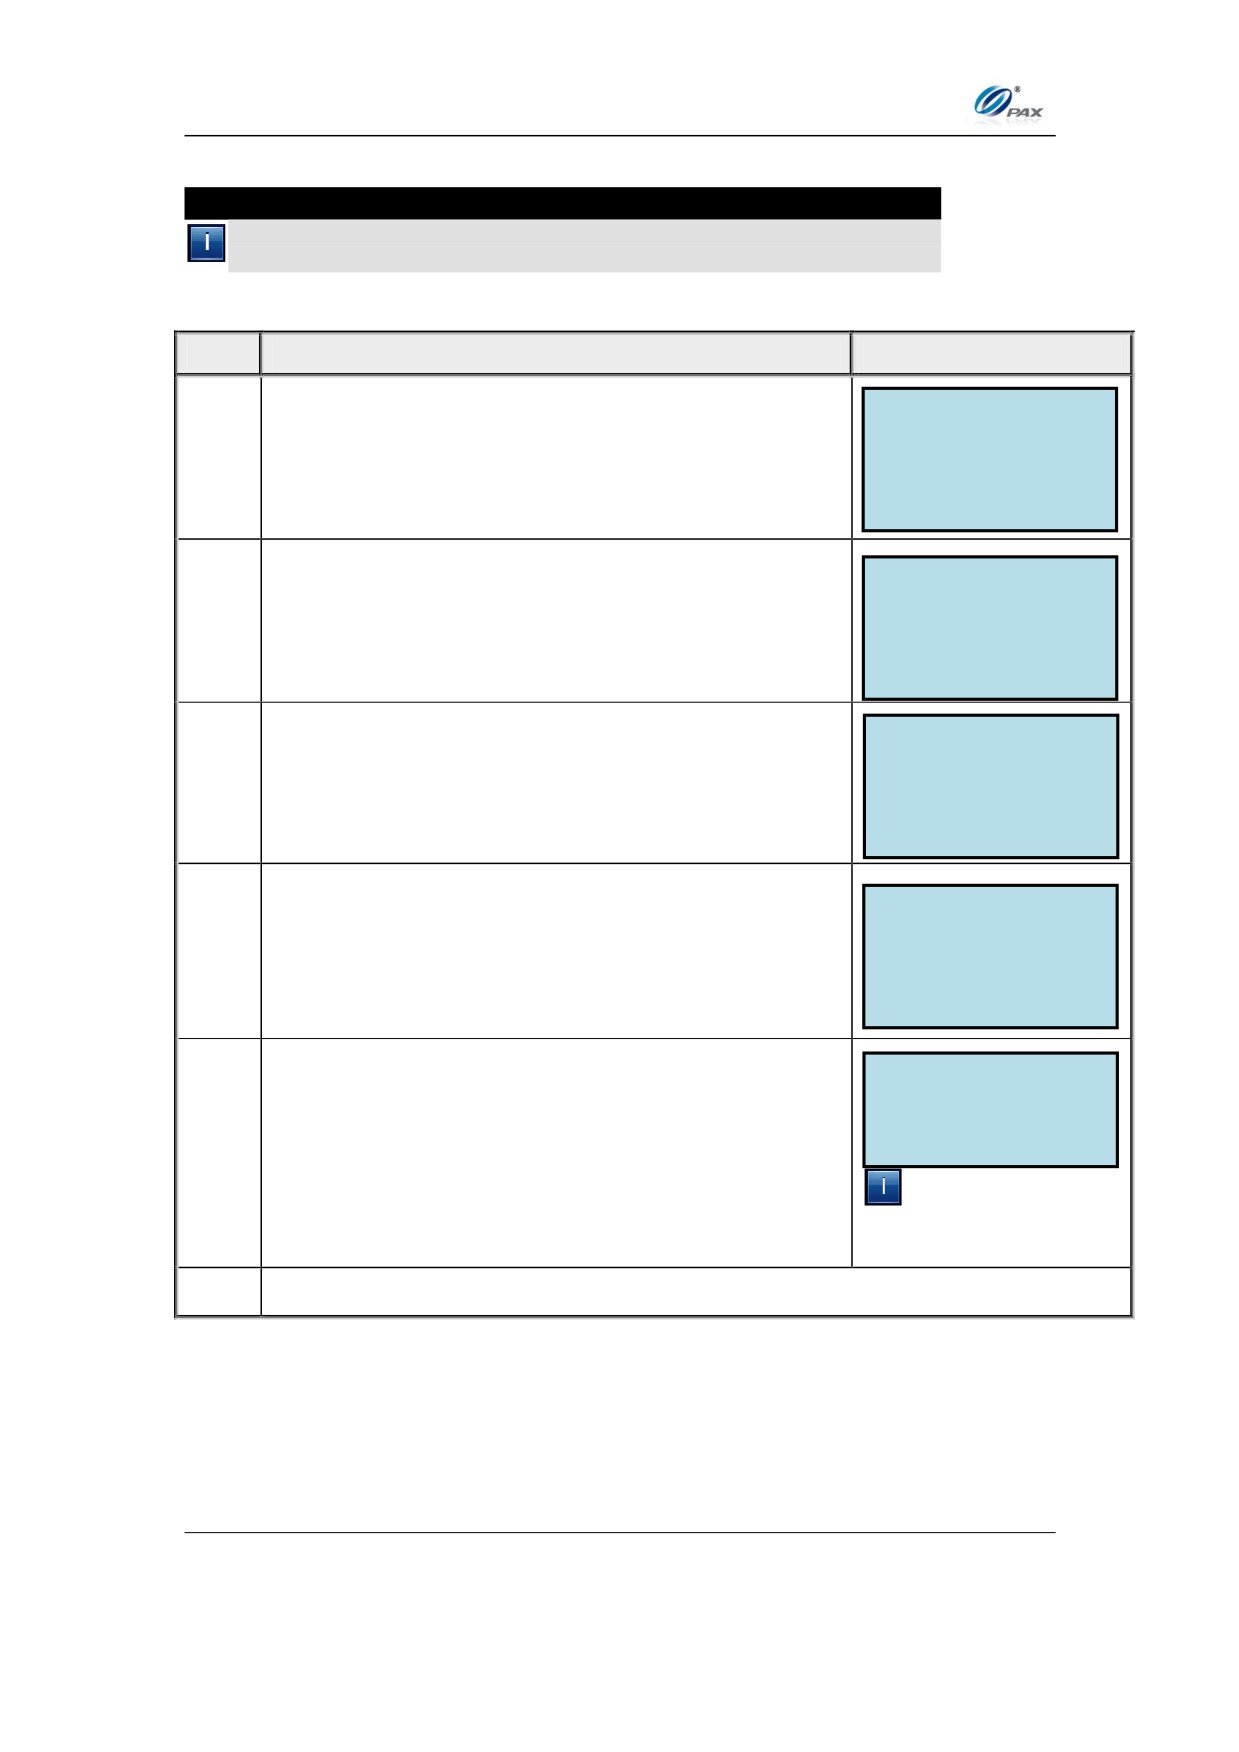
ACTION
DISPLAY
ENTER PASSWORD:
Input the Password and press [O]
3.
AUTHORIZATION
Press [1] to edit authorization for Transaction
1. Trans. Types
4.
2. Card Types
Types
3. Debit Prompt
Use the [F1] & [F2] keys to scroll through the EDC
Type options then press [O] to select.
SELECT PMT TYPE:
1. CREDIT
5.
OR
2. DEBIT
3. EBT
Press the number corresponding with your
4. GIFT
selection.
CREDIT
1. FORCED (EN)
2. AUTH (EN)
3. RETURN (EN)
Scroll to select the Transaction Type then press
4. VOID/SALE (EN)
[O].
6.
OR
Information in the
Press the number corresponding with your
parenthesis is the current
selection.
setting
EN - Always Enabled
DIS - Disabled
MGR - Password Protected
Scroll to select Enable, Disable or Manager Only
for the Transaction Type then press [O].
CREDIT FORCED
1. Disabled
7.
OR
2. Always Enabled
3. Pswd Protected
Press the number corresponding with your
selection.
8.
Stop.
52
Chapter 5
PAX D200 Menu Options
5.4.1.2
Card Types
Note
This function allows the user to enable or disable specific card types,
such as Visa, MasterCard and American Express.
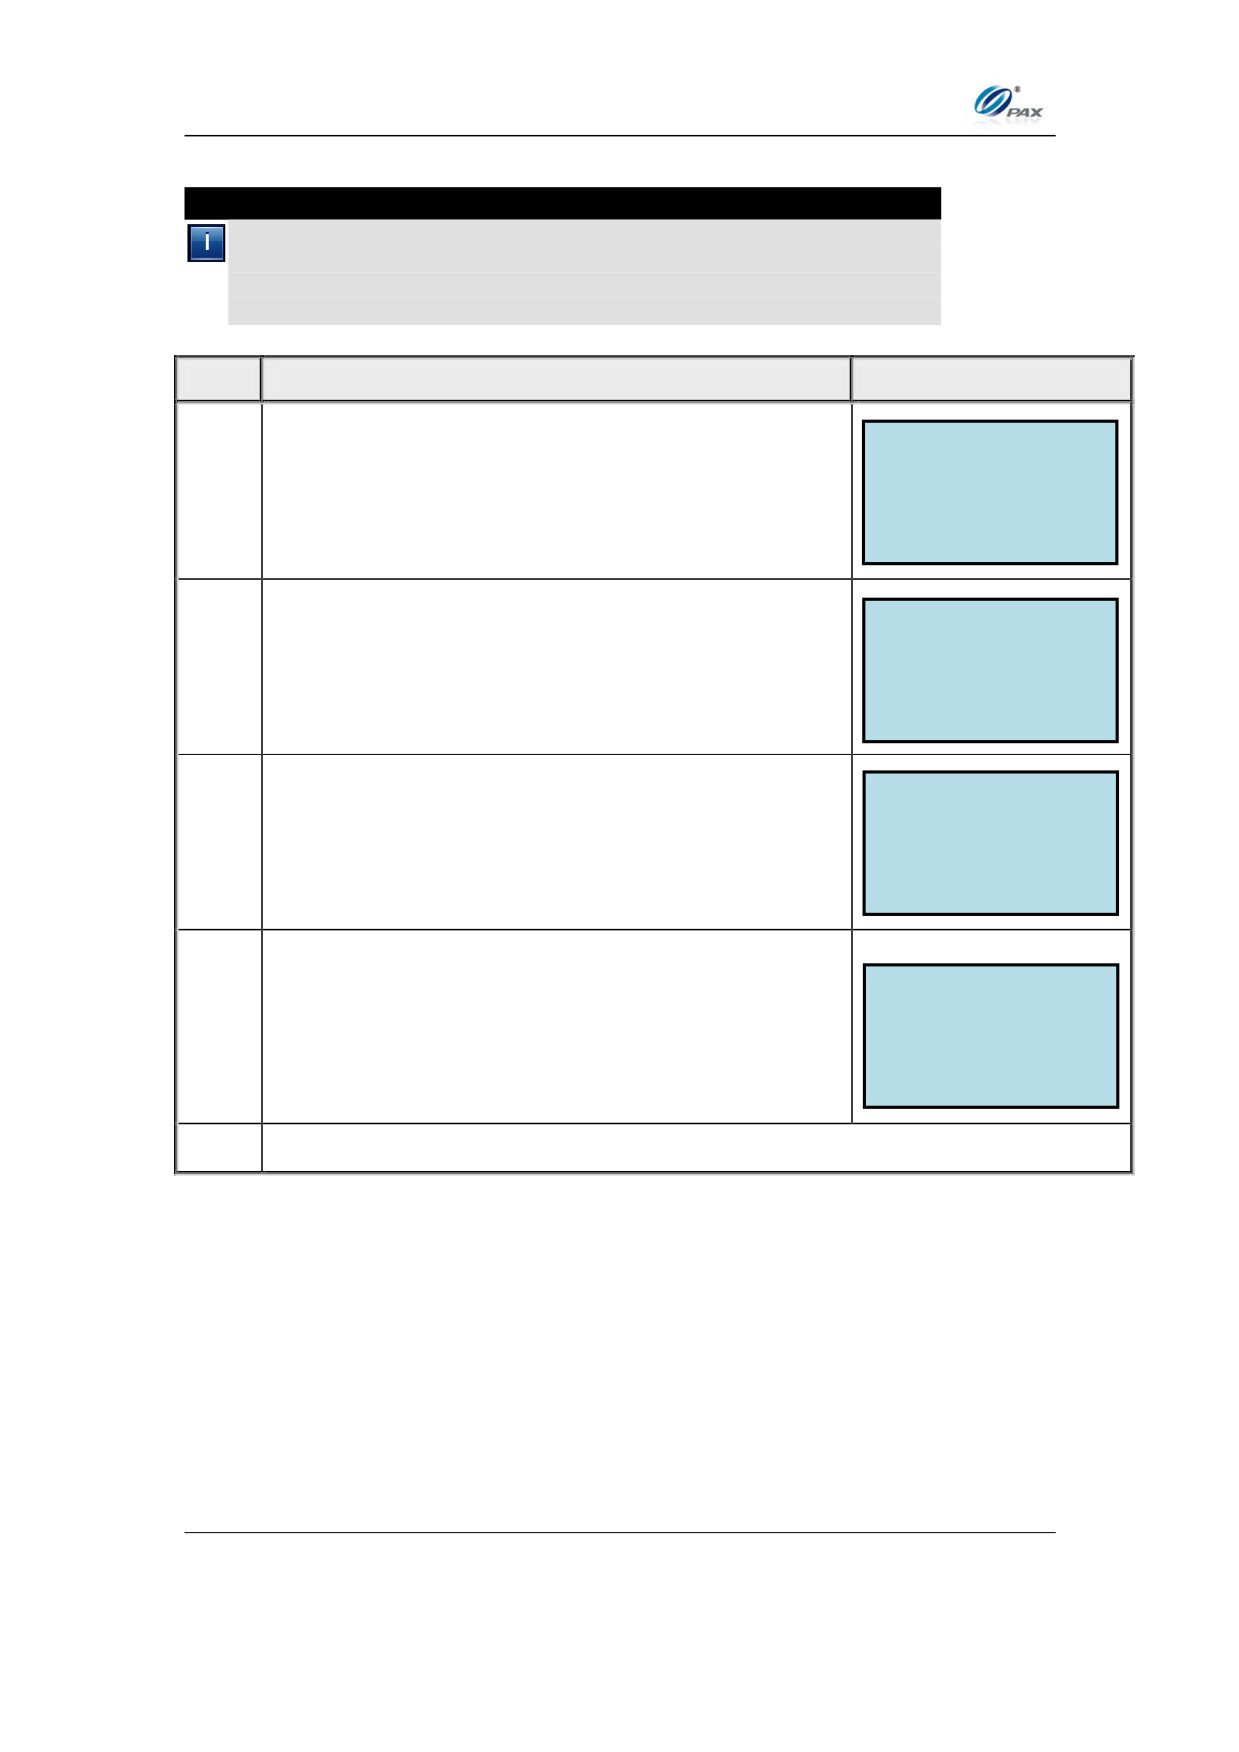
STEP
ACTION
DISPLAY
MERCHANT PARAMS:
1. Authorizations
From the Merchant Settings menu, press [1] to
2. Security Settings
1.
access Authorizations
3. Edit Header
4. Edit Trailer
ENTER PASSWORD:
Input the Password and press [O]
2.
AUTHORIZATION
1. Trans. Types
3.
Press [2] to edit authorization for Card Types
2. Card Types
3. Debit Prompt
Use the [F1] & [F2] keys to select the Card Type
Choose Card Type
then press [O].
1. Visa +
4.
2. MasterCard +
OR, Press the number corresponding with your
3. AMEX +
4. DCI-DISC +
selection
Scroll to select Enable or Disable for Card Type
Visa +
1. Disabled
then press [O].
2. Always Enabled
OR
* A ‘+’ indicates the
5.
Press the number corresponding with your
card type is enabled and a
selection.
‘-‘indicates disabled.
6.
Stop.
53
Chapter 5
PAX D200 Menu Options
5.4.1.3
Debit Prompt
Note
When this function is enabled the terminal will prompt the user to
select CREDIT or DEBIT when a card is swiped. It will only prompt the
user to make a selection when the payment type is CREDIT. And it
will be invalid for choosing debit when it is in on paper mode.
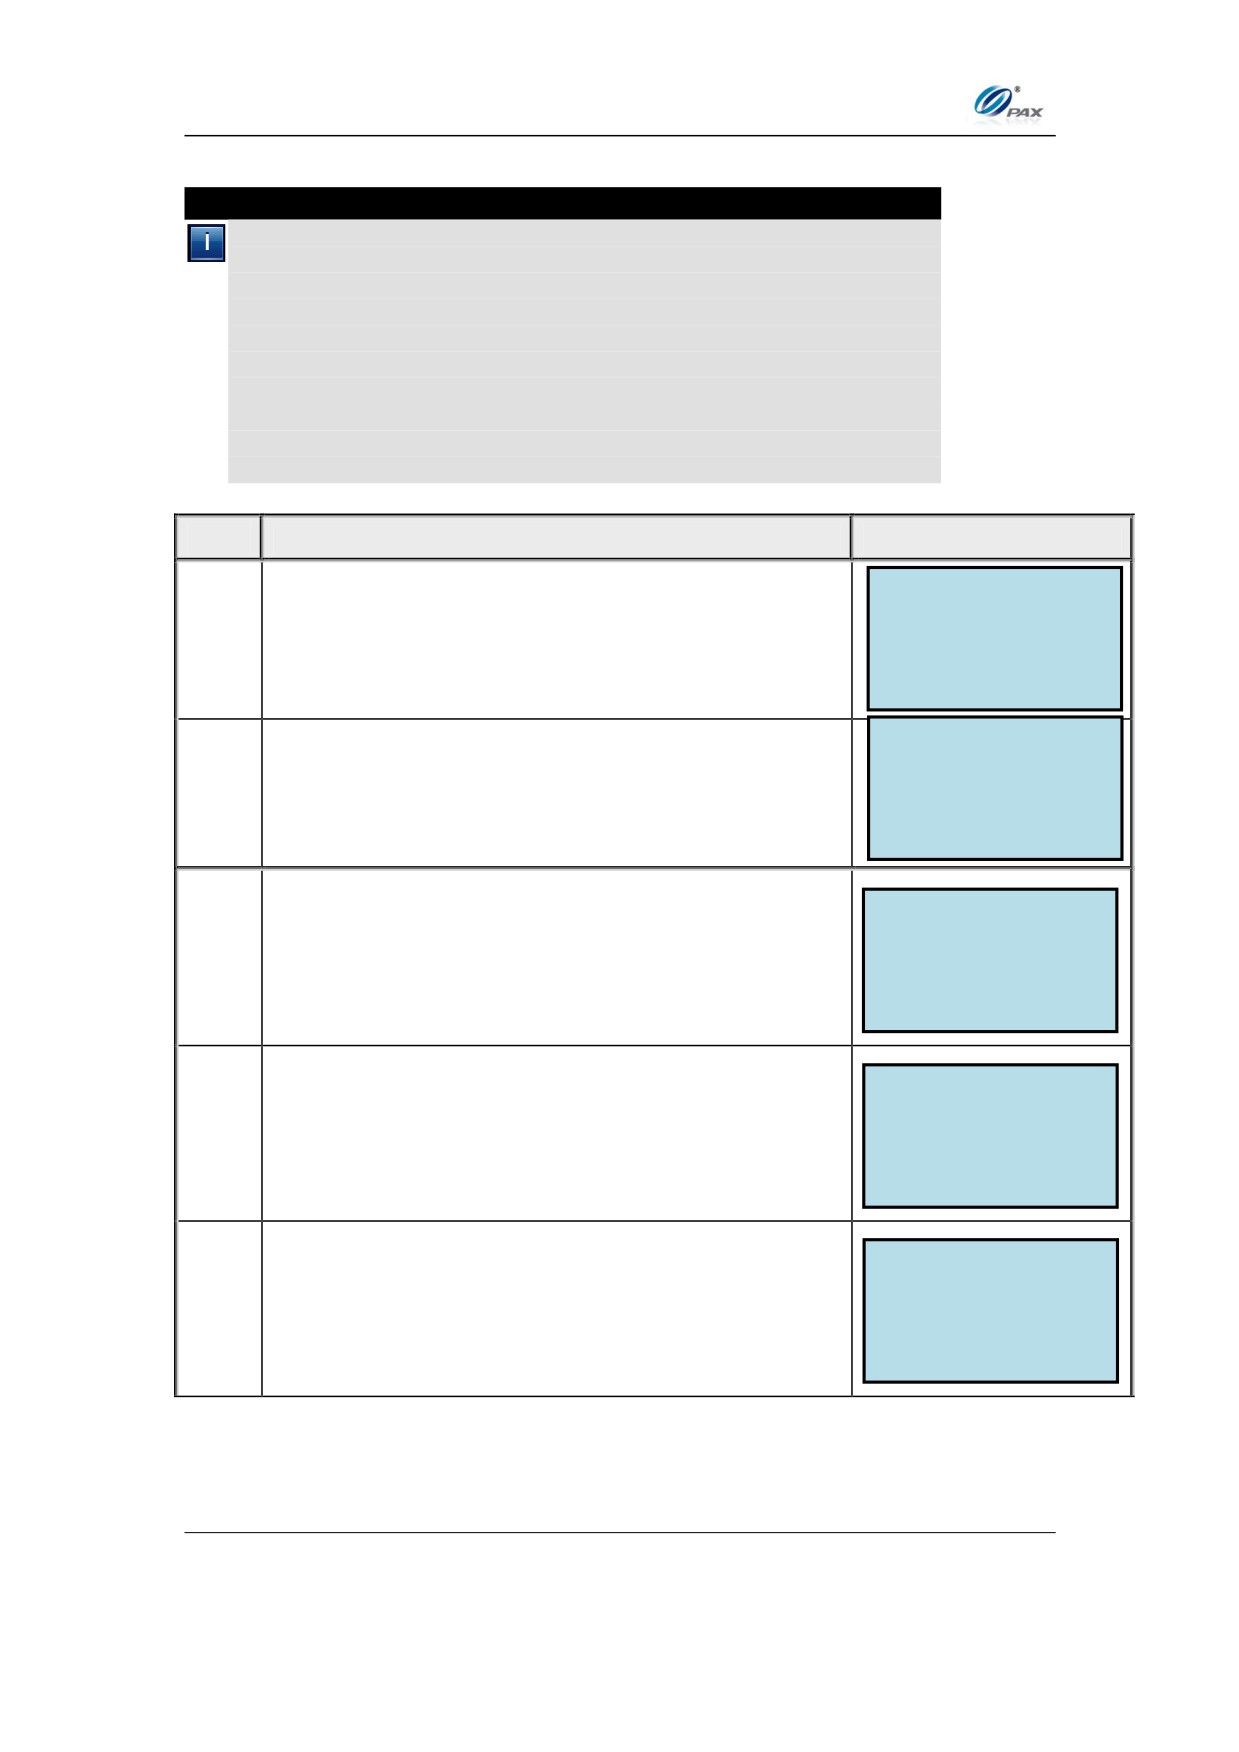
STEP
ACTION
DISPLAY
MERCHANT PARAMS:
1. Authorizations
From the Merchant Settings menu, press [1] to
2. Security Settings
1.
access Authorizations
3. Edit Header
4. Edit Trailer
ENTER PASSWORD:
Input the Password and press [O]
2.
AUTHORIZATION
1. Trans. Types
Press [3] to select Debit Prompt
2. Card Types
3.
3. Debit Prompt
Current setting is displayed in the first line.
DEBIT PROMPT: 1
Press [1] to turn Debit Prompt OFF.
1. OFF
4.
OR
2. ON
Press [2] to turn Debit Prompt ON.
5.
Stop.
54

Chapter 5
PAX D200 Menu Options
5.4.2 Security Settings
The Security settings menu has four sub-menus. See the chart below option
information.
z User Password
z Batch
z Secure Card
z Card Manual Entry
FUNCTION
OPTIONS
User Password
Set the User to set a defined password
Always Enabled
Batch
Password Protected (Manager Only)
No Security
Last 4 Digits - Manually enter last four digits of account
number and to be compared with the last four digits
swiped(Default setting)
All Digits - Manually enter the complete account number and
to be compared with the account number swiped
Display Account - Account number swiped is displayed on
screen and to be compared against the embossed account
number by the user
Secure Card
Last 4 Digits & Display Account - Manually enter last four
digits of account number, to be compared with the last four
digits swiped, and, Account number swiped is displayed on
screen and to be compared against the embossed account
number by the user
All Digits & Display Account - Manually enter the complete
account number, to be compared with the account number
swiped, and, Account number swiped is displayed on screen
and to be compared against the embossed account number
by the user
Disabled
Card Manual Entry
Always Enabled(Default setting)
Password Protected
55
Chapter 5
PAX D200 Menu Options
5.4.2.1
User Password
Note
This function allows you to set a user specified password. The POS
Terminal POS terminal password defaults to the current date
(MMDDYYYY). This password changes daily.
It is advised that this default password be changed upon receipt
of the terminal. The new password should be a series of eight
non-sequential numbers that can be easily remembered. Using
birthdays or anniversaries is not advised as unauthorized
persons can easily discover these passwords.
If the new User Password is forgotten, you must redownload the
Parameters to re-establish the default password.
STEP
ACTION
DISPLAY
MERCHANT PARAMS:
1. Authorizations
From the Merchant Settings menu press [2] for
2. Security Settings
1.
3. Edit Header
Security Settings.
4. Edit Trailer
SECURITY SWITCH:
1. User Password
2. Batch
2.
Press [1] for User Password.
3. Secure Card
Change Password?
ENTR=YES, CANC=NO
Press [O] to change the password.
3.
Old Password:
The password is anything other than the default
4.
password (MMDDYYYY), enter the OLD password
then press [O].
ENTER PASSWORD:
Enter the NEW password then press [O].
****************
5.
Note: The password must be one to sixteen digits in length.
56
Chapter 5
PAX D200 Menu Options
REENTER PASSWORD
****************
6.
Re-enter the NEW password then press [O].
7.
Stop.
5.4.2.2
Batch Security
Note
Use this sub-menu to secure the Batch function.
STEP
ACTION
DISPLAY
MERCHANT PARAMS:
1. Authorizations
From the Merchant Settings menu, press [2] to
2. Security Settings
1.
access Security Settings.
3. Edit Header
4. Edit Trailer
SECURITY SWITCH:
1. User Password
Press [2] to secure the Batch function.
2.
2. Batch
3. Secure Card
Press [1] to Password Protect the function
Batch:1
3.
1. Pswd Protected
OR
2. Always Enabled
Press [2] to enable the function.
4.
Stop.
57
Chapter 5
PAX D200 Menu Options
5.4.2.3
Secure Card
Note
Use this sub-menu to change the settings to help you to verify that the
account number swiped matches the number on the front of the card.
STEP
ACTION
DISPLAY
MERCHANT PARAMS:
1. Authorizations
From the Merchant Settings menu, press [2] to
2. Security Settings
1.
access Security Settings.
3. Edit Header
4. Edit Trailer
SECURITY SWITCH:
1. User Password
Press [4] for Secure Card.
2. Batch
2.
3. Secure Card
Secure Card: 1
The current setting is displayed in the first line.
1. No Security
3.
2. Last 4 Digits
Scroll to select the option then press [O].
3. All Digits
4. Display Account
4.
Stop.
58
Chapter 5
PAX D200 Menu Options
5.4.2.4
Card Manual Entry
Note
Use this sub-menu to enable, disable or password protect manual
entry of a credit transaction.
STEP
ACTION
DISPLAY
MERCHANT PARAMS:
1. Authorizations
From the Merchant Settings menu, press [2] to
1.
2. Security Settings
access Security Settings.
3. Edit Header
4. Edit Trailer
SECURITY SWITCH:
2. Batch
Press [4] for Card manual Entry.
3. Secure Card
2.
4. Card Man. Entry
Press [1] for all EDC types.
SELECT PMT TYPE:
1. ALL
OR
3.
2. CREDIT
3. EBT
Select the specific EDC type.
4. CHECK
ENTER PASSWORD:
4.
Enter the password then press [ENTER].
Card Man. Entry:2
1. Disabled
Scroll to select the option then press [ENTER].
5.
2. Always Enabled
3. Pswd Protected
6.
Stop.
59
Chapter 5
PAX D200 Menu Options
5.4.3 Merchant Fee
Note
This Menu option allows you to set a fee for credit or debit card
processing.
STEP
ACTION
DISPLAY
MERCHANT PARAMS:
From the Merchant Setting Menu use the [F1] &
1. Authorizations
2. Security Settings
1.
[F2] to navigate to Merchant Fee. Or press the
3. Merchant Fee
number 3 and then [O] to access the menu option.
4. Credit Surcharge
ENTER PASSWORD
2.
Input the System Password and press [O]
Merchant Fee:
Enter the amount you want added to transactions
0.00
3.
and press [O]
New Rate:
0.50
Are you Sure? Enter = Yes
Press [O] to accept the amount or [X] to cancel the
Cancel = No
4.
change
Select if you want the Fee to apply to Cash back
Cash Back Only?; 2
only or all transactions.
1. Yes
5.
2. No
Note the number after the colon describes how
that option is currently configured.
6.
Stop.
60
Chapter 5
PAX D200 Menu Options
5.4.4 Set Surcharge Fee
Note
This option allows you to configure Credit Surcharge settings. It
includes the ability to set either a flat fee or a percentage, allows for
the choice of whichever is higher, and allows for a confirmation
prompt to be enabled.
STEP
ACTION
DISPLAY
MERCHANT PARAMS:
1. Authorizations
From the Merchant Settings menu, press [4] to
2. Security Settings
1.
3. Merchant Fee
enter the sub menu.
4. Credit Surcharge
ENTER PASSWORD:
Input the Password and press [O]
2.
Scroll to the option you wish to modify and press
SURCHARGE FEE
1. Mode
[O].
2. Flat Fee
3.
3. Percentage
4. Surcharge Name
5. Surcharge Prompt
Mode - Determines how the surcharge will be applied. Options are; Flat Fee,
Percentage, and Highest.
Flat Fee -- Adds a set amount to each transaction.
Percentage -- Adds a percentage of the transaction to each transaction.
Highest -- Chooses whichever is going to be the largest amount (Percentage
4.
or Flat Fee) and applies that to the transaction.
Surcharge Name - This option allows you to change what the fee is called.
Surcharge Prompt - This option if enabled prompts the user whether or not
to accept the additional surcharge.
5.
Stop.
61
Chapter 5
PAX D200 Menu Options
5.4.5 Set Batch Time
Note
This function sets the specific time the terminal prints a batch report
and clears its memory for the next day. Set Batch Time is for Host
Based Auto Batch EDC types only. The Host is not contacted during
this process. Please note the batched transactions are cleared from
memory with the first transaction of the new batch.
STEP
ACTION
DISPLAY
MERCHANT PARAMS:
2. Security Settings
From the Merchant Settings menu, press [5] to set
3. Edit Header
1.
4. Edit Trailer
the batch time.
5. Set Batch Time
ENTER PASSWORD:
2.
Input the Password and press [ENTER]
If AutoBatch is
Then
3.
supported by Host
Proceed to #5,
not supported by Host
Than skip to #7.
AUTO BATCH:1
1. OFF
Select whether to enable auto batch
2. ON
4.
SET BATCH TIME:
Input the desired time in military (24-hour) time and
5.
05:30
press [ENTER]
62
///////////////////////////////////////