Can-Am Defender MAX Series and Traxter MAX Series. OPERATOR’S GUIDE (2024) - page 1
OPERATOR’S GUIDE
Covered Models
Defender MAX HD7
Defender MAX DPS HD7
Defender MAX HD9
Defender MAX DPS HD9
Defender MAX XT HD9
Defender MAX DPS HD10
Defender MAX Limited HD10
Defender MAX Lone Star HD10
Defender MAX Lone Star CAB HD10
Defender MAX XT HD10
Traxter MAX DPS HD9
Traxter MAX XU HD10
In Canada, products are distributed and serviced by Bombardier Recreational
Products Inc. (BRP).
In the USA, products are distributed and serviced by BRP US Inc.
In the European Economic Area (which is comprised of the member states of the
European Union plus the United Kingdom, Norway, Iceland and Liechtenstein),
the Commonwealth of the Independent States (including Ukraine and Turkmeni-
stan) and Turkey, products are distributed and serviced by BRP European Distri-
bution S.A. and other affiliates or subsidiaries of BRP.
For all other countries, products are distributed and serviced by Bombardier Rec-
reational Products Inc. (BRP) or its affiliates.
2
TABLE OF CONTENTS
GENERAL INFORMATION
GENERAL INFORMATION
10
Know Before you Go
10
Safety Messages
10
About this Operator’s Guide
11
SAFETY INFORMATION
GENERAL PRECAUTIONS
14
Avoid Carbon Monoxide Poisoning
14
Avoid Gasoline Fires and Other Hazards
14
Avoid Burns from Hot Parts
14
Accessories and Modifications
14
SAFE OPERATION - RESPONSIBILITIES
16
Owner - Be Responsible
16
Operator - Be Qualified and Responsible
16
Riding Carefully
17
Occupant Restraint System
18
Terrain Condition
18
PRE-RIDE INSPECTION
19
Pre-Ride Inspection Check List
19
PREPARE TO RIDE
23
Before you Ride
23
Riding Gear
23
AVOID ACCIDENTS
26
Avoid Rollovers and Tipovers
26
Avoid Collisions
27
RIDING YOUR VEHICLE
28
Practice Exercises
28
Off-Road Operation
29
General Riding Techniques
29
MOVING LOADS AND DOING WORK
35
Working with Your Vehicle
35
Carrying Loads
35
Hauling a Load
38
Pulling a Trailer
39
IMPORTANT ON-PRODUCT LABELS (CANADA/UNITED STATES)
40
Safety Hang Tag
40
Safety Labels
41
Molded Safety Pictogram
53
Compliance HangTag
54
IMPORTANT ON-PRODUCT LABELS (ALL COUNTRIES EXCEPT CANA-
DA/UNITED STATES)
55
Safety Pictogram
55
Molded Safety Pictogram
70
3
TABLE OF CONTENTS
REPORTING SAFETY DEFECTS
71
VEHICLE INFORMATION
PRIMARY CONTROLS
74
Steering Wheel
75
Accelerator Pedal
75
Brake Pedal
75
Shift Lever
75
SECONDARY CONTROLS
77
Ignition Switch and Keys
79
2WD/4WD Switch
81
2WD/4WD/Front Diff Lock Switch
81
Rear Differential Lock Switch
82
Keypad
82
Climate Controls
82
Horn Switch (On applicable models)
83
Winch Switch
83
Headlight Dimmer Switch
83
Headlight Dimmer Switch (700 Engine)
84
Power Window Switches (If Equipped)
84
Wiper / Windshield Washer Switch
84
Audio ON/OFF Switch
85
EQUIPMENT
86
Tilt Steering
86
Cup Holders
86
Passengers Handhold
87
Storage Compartments
87
Tool Kit
89
Footrests
89
Side Nets
89
Shoulder Guards
90
Seat Belts
90
Driver's Seat
91
Passenger Seats
91
Fuel Reservoir Cap
91
Winch
92
Cargo Box
92
Cargo Box Tilt
92
Anchoring Hooks
93
Tailgate
93
Trailer Hitch
93
12-Volt Power Outlets
94
USB Power Outlet
94
Rock Sliders
94
Front Bumper
94
Brake Holding Mechanism
94
Full Doors With Electric Windows
95
Windshield with Wiper
95
Climate Control System
96
Rear Deflector
99
Audio System
100
4
TABLE OF CONTENTS
4.5” DIGITAL DISPLAY
103
Multifunction Display
103
Warning Lamps and Indicators
104
Settings
105
7.6" DIGITAL DISPLAY
107
Multifunction Display
107
Indicator Lamps
108
Settings
109
FUEL
111
Fuel Requirements
111
Vehicle Fueling Procedure
111
BREAK-IN PERIOD
113
Operation During Break-In
113
BASIC PROCEDURES
114
Starting the Engine
114
Operating the Shift Lever
114
Choosing the Correct Range (Low or High)
114
Stopping the Engine and Parking the Vehicle
115
Tips for Maximizing Drive Belt Durability
115
SPECIAL PROCEDURES
116
Fuel Flooded Engine
116
What to do if Water is Suspected to be in the CVT
116
What to do if Battery is Drained Out
116
What to Do if Vehicle Rolled Over
116
What to do if Vehicle is Submerged
117
TUNE YOUR RIDE
118
Suspension Adjustment Guidelines
118
Suspension Factory Settings
118
Suspension Adjustments
118
DPS Function
119
TRANSPORTING THE VEHICLE
120
Using Vehicle Power to Climb Onto Trailering Equipment
121
Using a Winch to Pull Vehicle Onto Trailering Equipment
121
Securing Vehicle for Transport
122
Getting Vehicle Out of Trailer
123
LIFTING AND SUPPORTING THE VEHICLE
124
Front of Vehicle
124
Rear of Vehicle
124
MAINTENANCE
MAINTENANCE SCHEDULE
126
EPA Regulation - Canadian and USA Vehicles
126
Air Filter Maintenance Guideline
126
Severe Duty Use
127
Deep Mud / Water Use
127
Maintenance Schedule
128
Maintenance Records
139
MAINTENANCE PROCEDURES
144
ENGINE AIR FILTER
144
CVT Air Filter
145
Evaporative Emission System Pre-Filter (If Equipped)
146
5
TABLE OF CONTENTS
ENGINE OIL
147
Oil Filter
150
RADIATOR
152
ENGINE COOLANT
153
Heating/Air Conditioning Air Filter (if equipped)
155
Air Conditioning Compressor Belt
156
EXHAUST SYSTEM
157
GEARBOX
158
FRONT DIFFERENTIAL
160
Rear Final Drive (Mono Cylinder Models Only)
162
CVT COVER
163
Drive Belt
164
Drive and Driven Pulleys
166
SPARK PLUGS
166
Battery
167
Fuses and Fusible Links
168
LIGHTS
171
Drive Shaft Bellow and Protector
171
Wheel Bearing
172
Wheels and Tires
172
Suspensions
173
Brakes
174
SEAT BELTS
175
Doors
175
Cage
175
VEHICLE CARE
177
Vehicle Cleaning and Protection
177
STORAGE AND PRESEASON PREPARATION
178
TECHNICAL INFORMATION
VEHICLE IDENTIFICATION
180
Vehicle Identification Number
180
Engine Identification Number (EIN)
180
Technical Information Label
181
Compliance Label
183
EVAPORATIVE EMISSION CONTROL SYSTEM
185
NOISE EMISSION CONTROL SYSTEM REGULATION
186
NOISE EMISSION AND VIBRATION VALUES (MACHINERY DIRECTIVE
2006/42/EC COMPLIANCE MODELS)
187
DECLARATION OF CONFORMITY
188
EU Declaration of Conformity
188
UK Declaration of Conformity
189
6
TABLE OF CONTENTS
EAC DECLARATION OF CONFORMITY
190
TECHNICAL SPECIFICATIONS
TECHNICAL SPECIFICATIONS
192
TROUBLESHOOTING
TROUBLESHOOTING GUIDELINES
206
AUDIO SYSTEM – TROUBLESHOOTING
210
DIGITAL DISPLAY MESSAGES
212
WARRANTY
BRP LIMITED WARRANTY FOR CANADA AND USA: 2024 CAN-AM®
SSV
214
1) Scope of the Limited Warranty
214
2) Limitations of Liability
214
3) EXCLUSIONS - Are Not Warranted
214
4) Warranty Coverage Period
215
5) Conditions to Have Warranty Coverage
215
6) What to Do to Obtain Warranty Coverage
216
7) What BRP Will Do
216
8) Transfer
216
9) Consumer Assistance
216
US EPA EMISSION - RELATED WARRANTY
217
Emission-Related Warranty Period
217
Components Covered
217
Limited Applicability
218
CALIFORNIA EVAPORATIVE EMISSIONS CONTROL WARRANTY
STATEMENT
220
Your Warranty Rights And Obligations
221
OHRV Manufacturer’s Warranty Coverage
221
Owner’s Warranty Responsibilities
222
BRP LIMITED WARRANTY FOR INTERNATIONAL: 2024 CAN-AM®
SSV
223
1) Scope of the Limited Warranty
223
2) Limitation of Liability
223
3) EXCLUSIONS - Are Not Warranted
224
4) Warranty Coverage Period
224
5) For Products Sold In Australia Only
225
6) Conditions to Have Warranty Coverage
225
7) What to Do to Obtain Warranty Coverage
226
8) What BRP Will Do
226
9) Transfer
226
10) Consumer Assistance
226
BRP LIMITED WARRANTY FOR THE EUROPEAN ECONOMIC AREA,
THE COMMONWEALTH OF THE INDEPENDENT STATES AND TURKEY:
2024 CAN-AM® SSV
228
1) Scope of the Limited Warranty
228
2) Limitations of Liability
228
7
TABLE OF CONTENTS
3) EXCLUSIONS - Are Not Warranted
229
4) Warranty Coverage Period
230
5) For Products Sold In France Only
230
6) Conditions to Have Warranty Coverage
230
7) What to Do to Obtain Warranty Coverage
231
8) What BRP Will Do
231
9) Transfer
232
10) Consumer Assistance
232
CUSTOMER INFORMATION
DATA PRIVACY INFORMATION
234
CONTACT US
236
Asia Pacific
236
Europe, Middle East and Africa
236
Latin America
237
North America
237
CHANGE OF ADDRESS AND OWNERSHIP
238
8
GENERAL INFORMATION
9
GENERAL INFORMATION
Congratulations on your purchase of a new Can-Am® side-by-side vehicle. It's
backed by the BRP limited warranty and a network of authorized Can-Am Off--
road dealers ready to provide the parts, accessories or service you may require.
At delivery, you were informed of the warranty coverage and signed the Pre-de-
livery Check List to ensure your new vehicle was prepared to your entire
satisfaction.
Your dealer is committed to your satisfaction. If you need more information,
please ask your dealer.
Know Before you Go
To learn how to reduce the risk of accident for you or bystanders, read this Oper-
ator's Guide before you operate the vehicle.
Also, read all safety labels on your vehicle and watch the Safety Video located
at:
https://can-am.brp.com/off road/safety
Or use the following QR code.
This vehicle is for off-road use only. It is mainly for general recreational use but it
may also be used for utility purposes.
Failure to follow the warnings contained in this Operator's Guide can result in
SERIOUS INJURY or DEATH.
Safety Messages
The types of safety messages, what they look like and how they are used in this
guide are explained as follows:
The safety alert symbol
indicates a potential injury hazard.
WARNING
Indicates a potential hazard which, if not avoiided, coulld result iin seriious
i
injury or death.
CAUTION
Indicates a hazardous situatiion which, if not avoided, could resullt iin mi-
nor or moderate injjury.
10
GENERAL INFORMATION
NOTICE
Indiicates an iinstructiion which, iif not folllowed, could resullt in severely
damaged vehiicle components or other property.
About this Operator’s Guide
This Operator's Guide has been prepared to acquaint the owner/operator of a
new vehicle with the various vehicle controls, maintenance and safe operating in-
structions. It is indispensable for the proper use of the product.
Keep this Operator's Guide in the vehicle as you can refer to it for things such as
maintenance, troubleshooting and instructing others.
Note that this guide is available in several languages. In the event of any discrep-
ancy, the English version shall prevail.
If you want to view and/or print an extra copy of your Operator's Guide, simply
visit the following website:
The information contained in this document is correct at the time of publication.
BRP, however, maintains a policy of continuous improvement of its products
without imposing upon itself any obligation to install them on products previously
manufactured. Due to late changes, some differences between the manufactured
product and the descriptions and/or specifications in this guide may occur. BRP
reserves the right at any time to discontinue or change specifications, designs,
features, models or equipment without incurring any obligation upon itself.
This Operator's Guide should remain with the vehicle when it is sold.
11
GENERAL INFORMATION
This page is intentionally blank
12
SAFETY INFORMATION
SAFETY INFORMATION
13
GENERAL PRECAUTIONS
Avoid Carbon Monoxide Poisoning
All engine exhaust contains carbon monoxide, a deadly gas. Breathing carbon
monoxide can cause headaches, dizziness, drowsiness, nausea, confusion and
eventually death.
Carbon monoxide is a colorless, odorless, tasteless gas that may be present
even if you do not see or smell any engine exhaust. Deadly levels of carbon mon-
oxide can collect rapidly, and you can quickly be overcome and unable to save
yourself. Also, deadly levels of carbon monoxide can linger for hours or days in
enclosed or poorly ventilated areas. If you experience any symptoms of carbon
monoxide poisoning, leave the area immediately, get fresh air and seek medical
treatment.
To prevent serious injury or death from carbon monoxide:
- Never run the vehicle in poorly ventilated or partially enclosed areas such as
garages, carports or barns. Even if you try to ventilate engine exhaust with
fans or open windows and doors, carbon monoxide can rapidly reach danger-
ous levels.
- Never run the vehicle outdoors where engine exhaust can be drawn into a
building through openings such as windows and doors.
Avoid Gasoline Fires and Other Hazards
Gasoline is extremely flammable and highly explosive. Fuel vapors can spread
and be ignited by a spark or flame many feet away from the engine. To reduce
the risk of fire or explosion, follow these instructions:
- Use only an approved gasoline container to store fuel.
- Never fill the gasoline container in the vehicle cargo box or on the vehicle - an
electrical static discharge may ignite the fuel.
- Strictly adhere to instructions in Vehicle fueling procedure.
- Never start or operate the engine if the fuel cap is not properly installed.
Gasoline is poisonous and can cause injury or death.
- Never siphon gasoline by mouth.
- If you swallow gasoline, get any in your eye(s), or inhale gasoline vapor, see
a doctor immediately.
If gasoline spills on you, wash with soap and water and change your clothes.
Avoid Burns from Hot Parts
Certain components like brake rotors and exhaust components become hot dur-
ing operation. Avoid contact with those parts during and shortly after operation to
avoid burn wounds.
Accessories and Modifications
Any modifications or addition of accessories approved by BRP may affect the
handling of your vehicle. It is important to take the time to get familiar with the ve-
hicle once modifications are made to understand how to adapt your driving be-
havior accordingly.
14
SAFETY INFORMATION
GENERAL PRECAUTIONS
Avoid installing equipment not specifically approved by BRP for the vehicle and
avoid unauthorized modifications. These modifications and equipment have not
been tested by BRP and may create hazards. For example, they could:
- Create a loss of control and increase risk of crash
- Cause overheating or short circuits increasing the risk of fire or burn injuries
- Affect the protection features provided by the vehicle.
- Affect the behavior of the trailer when the vehicle is transported
- Cause a risk of losing objects on the road when transported.
Your vehicle may also become illegal to ride.
Ask your authoriized BRP dealler for suiitablle avaiilablle accessoriies for your
vehiiclle.
SAFETY INFORMATION
15
SAFE OPERATION - RESPONSIBILITIES
This is a high performance off-road vehicle. Operators must be responsible and
use care to avoid rollovers, tipovers, collisions, and other accidents. Even with
vehicle safety features (such as protective structure, seat belts, side nets, doors)
and protective gear (such as a helmet), there is always a risk of injury or death in
these accidents. To reduce the risk of serious injury or death, follow the rules in
this section.
Owner - Be Responsible
Read this Operator's Guide and watch the Safety Video. Refer to the link at the
beginning of the Operator's Guide.
Always inspect and confirm the safe operating condition of your vehicle prior to
ride. Always follow the maintenance schedule described in this Operator's Guide.
Never allow anyone to operate your vehicle unless they are responsible and can
be trusted with a high performance vehicle. Consider supervising new or young
operators and setting rules and limits (e.g., whether they can carry passengers,
what they may do with the vehicle, where they may ride, etc.) for anyone using
your vehicle.
If equipped wiith optional D.E.S.S. keys, select the appropriate key (see Igni-
tion Switch and Keys) based on the operator's experience, vehicle use and
environment.
Discuss the safety information with anyone who will be using the vehicle. Be sure
that all operators and passengers meet the qualifications below and agree to fol-
low the safety information. Help users become familiar with the vehicle.
We encourage you to have an Annual Safety Inspection of your vehicle. Please
contact an authorized BRP dealer for further details. Though not required, it is
recommended that an authorized BRP dealer performs the preseason prepara-
tion of your vehicle. Each visit to your authorized BRP dealer is a great opportu-
nity for your dealer to verify if your vehicle is included in any safety campaign.
We also urge you to visit your authorized BRP dealer in a timely manner if you
become aware of any safety related campaigns.
See an authorized BRP dealer for available accessories you may require.
Operator - Be Qualified and Responsible
Read this Operator's Guide and watch the SAFETY video. Refer to the link at the
beginning of the Operator's Guide.
Become completely familiar with the operational controls and the general opera-
tion of the vehicle.
Take a training course if available (contact an authorized Can-Am dealer to find
out about training course availability as well as on the internet at http://www.roh-
va.org/), and perform the practice exercises in Practice Exercises section. Prac-
tice driving in a suitable area free of hazards and feel the response of each
control. Drive at low speeds. Higher speeds require greater experience, knowl-
edge and suitable riding conditions.
Be at least 16 years of age.
16
SAFETY INFORMATION
SAFE OPERATION - RESPONSIBILITIES
Be tall enough to be properly seated: back against the backrest with the seat belt
fastened, to hold the steering wheel with both hands and still be able to reach the
full stroke of brake and accelerator pedals with the right foot and to firmly plant
left foot on the footrest.
Have a proper driver's license in accordance with local laws.
Never use this vehicle with drugs or alcohol, or if tired or ill. These slow reaction
time and impair judgment.
Carrying Passengers
Only carry a maximum of five (5) passengers. The passengers must be properly
seated in the cockpit.
The passengers must be tall enough to always be properly seated: back against
the backrest with seat belt fastened, holding the handhold, and feet firmly planted
- for the front RH passenger, with right foot on the footrest and the left foot on the
vehicle floor, for the central passenger and the three rear passengers, with both
feet firmly planted on the floor.
Never carry passengers who have used drugs or alcohol, or are tired or ill. These
slow reaction time and impair judgment.
Instruct the passengers to read the vehicle’s safety labels.
Never carry passengers if you judge their ability or judgement insufficient to con-
centrate on the terrain conditions and adapt accordingly. More specifically for
side-by-side vehicles, the passenger must also pay constant attention to the ter-
rain ahead and be able to brace for bumps.
Riding Carefully
- This vehicle handles differently from other vehicles. A collision or rollover can
occur quickly, during abrupt maneuvers such as doing sharp turns, accelera-
tion or deceleration and driving on hills or over obstacles, if you fail to take
proper precautions.
- Never operate at excessive speeds. Always go at a speed that is proper for
the terrain, visibility, and operating conditions, and your experience.
- Never attempt jumps, side slides, donuts or any other stunts.
- Never attempt rapid acceleration or deceleration when performing a sharp
turn. This may result in a roll over.
- Never attempt skidding or sliding. If vehicle starts to skid or slide, counter
steer in the direction of skidding or sliding. On extremely slippery surfaces,
such as ice, go slowly and be very cautious in order to reduce the chance of
skidding out of control.
- Always be sure there are no obstacles or people behind the vehicle when you
operate in reverse. Pay attention to blind spots. When it is safe to proceed in
reverse, go slowly.
- Never exceed the stated load limits for this vehicle. Cargo must be properly
secured. Reduce speed, allow for greater braking distance and follow other
instructions in Moving Loads and Doing Work.
- Always remember that this vehicle is heavy! Its pure weight alone may entrap
you should it tip or rollover.
SAFETY INFORMATION
17
SAFE OPERATION - RESPONSIBILITIES
Occupant Restraint System
- This vehicle is designed to carry one driver and up to five (5) passengers, all
wearing proper protective gears (refer to Riding Gear in this section).
- All occupants must latch the doors or the side nets and wear the seat belts at
all times when riding.
Terrain Condition
-
This vehicle is not designed to ride on paved surfaces; if you must shortly use
the vehicle on such surfaces, avoid abrupt inputs to steering wheel, accelera-
tor and brake pedals.
-
Always go slowly and be extra careful when operating on unfamiliar terrain.
Always be alert to changing terrain conditions when operating this vehicle.
Take the time to learn how the vehicle performs in different environments.
-
Never operate on excessively rough, slippery or loose terrain until you have
learned and practiced the skills necessary to control this vehicle on such ter-
rain. Always be especially cautious on these kinds of terrain.
-
Never operate this vehicle on hills too steep for the vehicle or your abilities.
Practice on small inclines.
-
Always follow proper procedures for climbing or going down hills as described
in Riding Your Vehicle. Check the terrain carefully before you start up or down
any hill. Never climb or descend hills with excessively slippery or loose surfa-
ces. Never go over the top of any hill at high speed.
-
Never attempt steep hills or side hilling when pulling a trailer.
–
Always check for obstacles before operating in a new area. Always follow
proper procedures when operating over obstacles as described in Riding
Your Vehicle.
-
Never operate this vehicle in fast flowing water or in water deeper than speci-
fied in Riding Your Vehicle. Remember that wet brakes may have reduced
stopping ability. Test your brakes after leaving water. If necessary, apply them
several times to let friction dry out the brakes.
-
Always ensure to properly park the vehicle on the flattest terrain section avail-
able. Put shift lever in PARK, stop engine and remove key before leaving the
vehicle.
-
If parking on a slope is inevitable, Placing a large rock or similar object behind
a wheel to block it from moving is recommended.
-
Never assume that the vehicle will go everywhere safely. Sudden changes in
terrain caused by holes, depressions, banks, softer or harder “ground” or oth-
er irregularities may cause the vehicle to topple or become unstable. To avoid
this, slow down and always observe the terrain ahead. If the vehicle does be-
gin to topple or rollover, the best advice is to immediately steer in the direction
of the rollover! Never attempt to prevent a rollover with your arms or legs. You
should keep your limbs inside the cage or ROPS (rollover protective
structure).
18
SAFETY INFORMATION
PRE-RIDE INSPECTION
Always inspect and confirm the safe operating condition of your vehicle prior to
ride.
Always follow the maintenance schedule described in this Operator's Guide.
WARNING
Perform a pre-riide inspection before each ride to detect any potentiiall
probllem that coulld occur duriing operatiion. The pre-ride inspection can
help you moniitor component wear and deterioratiion before they become
a probllem. Correct any probllem that you discover to reduce the risk of a
breakdown or crash.
Before using this vehicle, the operator should always perform the following pre--
ride inspection check list.
Refer to Maintenance Procedures for details.
Pre-Ride Inspection Check List
What to Do Before Starting the Engiine (Key OFF)
Items to Be
Inspection to Perform
ü
Inspected
Engine oil
Check engine oil level.
(V-Twin engines)
Coolant
Check coolant level.
Brake fluid
Check brake fluid level.
Inspect the engine air filter, clean or replace if
Engine air filter
needed (service more often when riding in dusty
conditions).
Inspect and clean the CVT air filter (when riding in
CVT air filter
dusty conditions).
Heater air filters
Inspect heater air filters, clean if needed (service
(if equipped)
more often when riding in dusty conditions).
Brake holding
Apply brake holding mechanism and check if it
mechanism
operates properly.
(If equipped)
Radiator
Check cleanliness of the radiator.
Front grille
Inspect front grille for cleanliness.
If not already done, clean the area surrounding the
exhaust system, especially if during the last ride the
Exhaust system
vehicle was used in a swamp, bog, hay or dead
leaves.
SAFETY INFORMATION
19
PRE-RIDE INSPECTION
Items to Be
Inspectiion to Perform
ü
Inspected
Drive shaft
Check drive shaft bellows and protectors condition.
bellows
Check tire pressure and condition. Refer to the Tire
Tires
Pressure Label and adjust according to load.
Check wheels for damage and for abnormal play.
Make sure that lug nuts are tightened. Refer to
Wheels
Wheels and Tires in Maintenance Procedures for
torque specification.
Cargo Load: If you transport a cargo, respect the
maximum loading capacity. Refer to Loading the
Cargo Box. Ensure cargo is properly secured to the
rear cargo box.
Cargo and load
Vehicle Load: Ensure that total load on the vehicle
(including operator, passengers, cargo, tongue
weight and added accessories) does not exceed
specifications. Refer to Carrying Loads.
Check if the cargo box and the tailgate are properly
Rear cargo box
latched.
If you are pulling a trailer or another equipment:
- Check hitch and trailer ball condition.
- Respect the tongue capacity and towing capacity
Hitch
as indicated on the label affixed to the hitch or
refer to Technical Specifications.
- Ensure trailer is properly secured to hitch.
Check underneath vehicle for any debris on chassis
Chassis and
or suspension components (upper and lower arms,
suspension
wheels, shock absorber, springs) and clean them
properly
Check all doors for any damage. Have the doors
Doors
replaced if any damage is found.
Close all doors and confirm that they latch securely.
What to Do Before Startiing the Engine (Key ON)
ITEMS TO BE
INSPECTION TO PERFORM
ü
INSPECTED
Check operation of indicator lamps in digital
display(during first few seconds of key ON).
Digital display
Check for messages in gauge.
20
SAFETY INFORMATION
PRE-RIDE INSPECTION
ITEMS TO BE
INSPECTION TO PERFORM
ü
INSPECTED
Check operation and cleanliness of:
- Headlights (High and Low)
Lights
- Taillights
- Brake lights.
Check if seats are properly latched.
Seats and seat
belts
Check seat belts for any damage. Fasten seat belts
and confirm that they latch securely.
Check side nets for any damage. Have the nets
replaced if any damage is found.
Fasten both side nets and confirm that they latch
Side nets
securely.
Use the adjustment strap to tighten the net as
required.
Press on the accelerator pedal a few times to ensure
Accelerator pedal
it operates freely and it returns to the rest position
when released.
Press down on the brake pedal and make sure you
Brake pedal
feel firm resistance and that it fully returns to position
when released.
Fuel level
Check the fuel level.
Mirror(s)
Adjust mirror(s) to your preferences.
(if equipped)
Horn
Check horn operation.
(if equipped)
Check operation of heater fan.
Heater fan
Check air flows out of every louver (dash-mounted
(CAB models)
and heater-mounted).
What to Do After the Engine is Started
ITEMS TO BE
INSPECTION TO PERFORM
ü
INSPECTED
Check if steering wheel operates freely by
Steering
completely turning it from side to side.
Turn the ignition switch to OFF to verify if engine will
Ignition switch
shut down.
Restart engine.
SAFETY INFORMATION
21
PRE-RIDE INSPECTION
ITEMS TO BE
INSPECTION TO PERFORM
ü
INSPECTED
Shift lever
Check operation of shift lever (P, R, N, H and L).
2WD/4WD
Check operation of 2WD/4WD selector.
selector
Drive forward slowly a few feet and apply brakes.
The brake pedal must feel firm when applied. The
Brakes
pedal must return to rest position when released.
The brakes must respond adequately to the driver's
input.
Winch
Check operation of winch.
(If equipped)
Engine oil
(Mono-Cylinder
Check engine oil level.
Engines)
22
SAFETY INFORMATION
PREPARE TO RIDE
Before you Ride
Perform pre-ride inspection to confirm the safe operating condition of your ve-
hicle. Refer to Pre-Ride Inspection.
Driver and passengers must:
- Be properly seated.
- Latch nets or doors.
- Fasten seat belt.
- Wear appropriate riding gear. Refer to Riding Gear.
Riding Gear
It is important that the operator and passengers always wears appropriate pro-
tective clothing and apparel, including:
- An approved helmet
- Eye protection
- Boots
- Gloves
- A long sleeved shirt or jacket
- Long pants.
Depending on conditions, anti-fogging goggles may be required.
RIDING GEAR
1. Approved helmet
2. Eye and face protection
3. Long sleeves shirt or jacket
4. Gloves
5. Long pants
6. Boots (over-the-ankle footwear)
Weather conditions should help you decide how to dress. To maximize comfort
and avoid frostbites in winter, dress for the coldest weather expected. Thermal
underwear next to the skin also provides good insulation.
Never wear any loose clothing that may get entangled in the vehicle or on tree
branches and shrubs.
SAFETY INFORMATION
23
PREPARE TO RIDE
Helmets and Eye Protection
Helmets protect the head and brain from injury. Even with the vehicle's cage and
side nets, objects can enter the cockpit and strike the head, or the head can
strike the cage itself or objects outside the vehicle. Even the best helmet is no
guarantee against injury, but statistics indicate that helmet use significantly re-
duces the risk of brain injury. So, be safe and always wear a helmet while riding.
Choosing a Hellmet
Helmets should be manufactured to meet the appropriate standard in your state,
province or country and should fit properly.
A helmet with face protection is a better choice as it protects also against frontal
impacts. It can also protect against debris, stones, insects, the elements, etc.
An open-face helmet does not offer the same protection for the face and chin. If
you wear an open-face helmet, you should use a snap-on face shield and/or a
pair of goggles. Ordinary glasses or sunglasses are not sufficient eye protection
for riders. They can shatter or fly off, and they allow wind and airborne objects to
reach the eyes.
For winter riding conditions, a stocking type cap, balaclava and face mask should
always be carried or worn.
Use tinted face shields or goggles in the daytime only; do not use them at night
or in poor illumination. Do not use them if they impair your ability to discern color.
Other Riidiing Gear
Footwear
Always wear closed toe footwear. Sturdy over-the-ankle boots with non-slip soles
offer more protection and allow you to plant your foot properly on footrest.
Avoid long shoelaces that can be tangled in the accelerator or brake pedals.
For winter riding conditions, rubber soled boots with either a nylon or leather
uppers, with removable felt liners are best suited.
Avoid rubber boots. Rubber boots may get trapped behind or between pedals,
impairing the proper operation of brake and accelerator pedals.
Glloves
Full-fingered gloves protect hands from the wind, sun, heat, cold and flying ob-
jects. Gloves that fit snugly will improve grip on the steering wheel and help re-
duce hand fatigue. Sturdy, reinforced motorcycle or ATV gloves help protect
hands better in the event of an accident or a rollover. If gloves are too bulky, it
may be difficult to operate the controls.
For winter riding conditions, hands should be protected by a pair of snowmobile
gloves which have sufficient insulation and allow use of thumbs and fingers for
operation of controls.
Jackets, Pants and Riiding Suiits
Wear a jacket or a long sleeved shirt and long pants, or a full riding suit. Quality
ATV-type protective gear will provide comfort, and it can help you avoid being
24
SAFETY INFORMATION
PREPARE TO RIDE
distracted by adverse environmental elements. In case of a crash, good quality
protective gear made of sturdy material may prevent or reduce injury.
In cool-weather riding, protect yourself against hypothermia. Hypothermia, a con-
dition of low body temperature, can cause loss of concentration, slowed reac-
tions and loss of smooth, precise muscle movement. In cool conditions, proper
protective gear like a windproof jacket and insulated layers of clothing are essen-
tial. Even while riding at moderate temperatures, you can feel very cold due to
the wind.
Protective gear that is appropriate for cold-weather riding may be too hot when
stopped. Dress in layers so that clothing can be removed as desired. Topping the
protective gear with a windproof outer layer can prevent cold air from reaching
the skin.
Raiin Gear
If you must ride in wet weather, a rain suit or a waterproof riding suit is recom-
mended. On long rides, it is a good idea to carry rain gear. A dry rider will be
much more comfortable and alert.
Hearing Protectiion
Long-term exposure to wind and engine noise when riding can cause permanent
hearing loss. Properly worn hearing protective devices such as earplugs can help
prevent hearing loss. Check local laws before using any hearing protective
devices.
SAFETY INFORMATION
25
AVOID ACCIDENTS
Avoid Rollovers and Tipovers
Side-by-side vehicles handle differently from other vehicles. Side-by-side ve-
hicles are designed to handle off-road terrain (for example, their wheel base and
track width, ground clearance, suspension, drivetrain, tires, etc.), and, as a result,
can overturn in situations where vehicles designed for use primarily on paved or
smooth terrain may not.
A rollover or other accident can occur quickly during abrupt maneuvers such as
sharp turns or hard acceleration or deceleration when turning, or when driving on
hills or over obstacles. Abrupt maneuvers or aggressive driving can cause roll-
overs or loss of control even in flat open areas. If the vehicle rolls over, any part
of your body (such as arms, legs, or head) outside of the cockpit can be crushed
and trapped by the cage or ROPS or other parts of the vehicle. You can also be
injured by impact with the ground, cockpit or other objects.
To reduce the risk of rollovers:
- Use care when turning.
- Do not turn the steering wheel too far or too fast for your speed and envi-
ronment. Adjust steering inputs according to your speed and environment.
- Slow down before entering a turn. Avoid hard braking during a turn.
- Avoid sudden or hard acceleration when turning, even from a stop or low
speed.
- Never attempt donuts, skids, slides, fishtails, jumps, or other stunts. If vehicle
starts to skid or slide, steer in the direction of the skid or slide. Never slam the
brakes and lock the wheels.
- Avoid paved surfaces. This vehicle is not designed to operate on paved surfa-
ces and is more likely to roll over. If you must drive on pavement, turn gradu-
ally, go slowly, and avoid abrupt acceleration and braking.
This vehicle can roll over sideways or tip over forward or backwards on slopes or
uneven terrain.
- Avoid side hilling (driving along the slope rather than up or down a hill). When
possible, drive straight up and down inclines rather than across them. If you
must side hill, use extreme caution and avoid slippery surfaces, objects, or
depressions. If you feel the vehicle start to rollover or slide sideways, steer
downhill if possible.
- Avoid steep hills and follow procedures in this guide for climbing and de-
scending hills.
- Sudden changes in terrain such as holes, depressions, banks, softer or hard-
er ground or other irregularities may cause the vehicle to tip or become unsta-
ble. Observe the terrain ahead and slow down in areas of uneven terrain.
This vehicle will handle differently when carrying or pulling a load.
- Reduce speed and follow instructions in this manual for carrying cargo or pull-
ing a trailer.
- Avoid hills and rough terrain.
- Allow more distance to stop.
Be Prepared in Case of Rolllover
- Fasten side nets and fasten seat belt to help you avoid sticking out arms or
legs.
26
SAFETY INFORMATION
AVOID ACCIDENTS
- Never grab the cage or ROPS while riding. Hands can be crushed between
the cage or ROPS and the ground in a rollover. Keep hands on the steering
wheel or handholds.
- Never try to stop a rollover using your arms or legs. If you think that the ve-
hicle may tip or roll, the driver should keep both hands on the steering wheel
and the left foot firmly planted on the footrest. The passengers should keep
both hands on the handhold and both feet firmly planted on the floor.
Avoid Collisions
This vehicle can reach high speeds. At higher speeds, there is an increased risk
of losing control, particularly in challenging off-road conditions, and the risk of in-
jury in a collision is greater. Never operate at excessive speeds. Always go at a
speed that is proper for the terrain, visibility, and operating conditions, and your
experience. Consider reserving use of the performance key for situations in
which full speed and acceleration capability are appropriate.
Never operate this vehicle on any public street, road or highway, even dirt or
gravel ones. Riding your vehicle on roads or highways could result in a collision
with another vehicle. This vehicle is not designed for operation on roads. For ex-
ample, it does not meet motor vehicle safety standards that apply to automobiles.
In many jurisdictions it is not legal to operate this vehicle on public roads.
This vehicle does not have the same kind of protection for collisions as a car; for
example, there are no air bags, the cockpit is not fully enclosed, and it is not de-
signed for collisions with other vehicles. Therefore, it is particularly important to
fasten seat belts and side nets and wear an approved helmet.
SAFETY INFORMATION
27
RIDING YOUR VEHICLE
Practice Exercises
Before you go out for a ride, it is very important to familiarize yourself with the
handling of your vehicle by practicing in a controlled environment. If possible, it is
also a very good idea to take a more formal training course to sharpen your skills
and increase your knowledge of the vehicle.
Find a suitable area to practice and perform the following exercises. It should be
at least 45 m (150 ft) by 45 m (150 ft) free of obstacles like trees and rocks. Once
you’ve selected a suitable permitted location, proceed with the following
exercises.
Turning Exercises
Turning is one of the most frequent causes of accidents. It is easier for the ve-
hicle to lose traction or rollover if you turn too sharply, or go too fast. Slow down
when you approach a turn.
- First learn how to perform slight right turns at very low speeds. Release the
throttle before turning and slowly reapply the throttle when turning.
- Repeat turning exercise but this time maintain the throttle at the level while
turning.
- Finally, repeat turning exercise while accelerating slowly.
- Practice exercises turning on the other side.
Note how your vehicle reacts in these different exercises. We recommend releas-
ing the throttle before entering a turn to help initiate directional change. You will
feel the lateral force increasing with the speed and with your steering input. The
lateral force should be maintained as low as possible to make sure it does not
cause the vehicle to roll over.
U Turn Exerciises
Practice doing U turns.
- Accelerate slowly and while remaining at low speed, then gradually turn the
steering wheel to the right until you have completed the U turn.
- Repeat U turn exercise with different steering inputs and always at a very low
speed.
- Repeat U turn exercise on the other side.
As mentioned before in this guide, do not ride on paved surfaces as the vehicle
behavior will not be the same, increasing the risk of rollover.
Braking Exercises
Practice braking to get familiar with the brake response.
- Do it at low speed first, then increase the speed.
- Practice braking in straight line at different speeds and different braking force.
- Practice emergency braking; optimal braking is obtained in straight line, with
high force applied, without locking the wheels.
Remember, braking distance depends on vehicle speed, load and the type of
surface. Also, the tires and brakes conditions play a major role.
Reverse Exerciises
The next step involves using the reverse.
28
SAFETY INFORMATION
RIDING YOUR VEHICLE
- Install 1 cone marker on both sides of the vehicle beside each rear wheel.
Move the vehicle forward until you can see the cone markers, then stop the
vehicle. Acknowledge the distance required to see obstacles behind you.
- Learn how the vehicle handles itself in reverse and reacts with steering
inputs.
- Always perform this reverse exercise at slow speeds.
Emergency Engine Stoppiing Exerciise
Learn how to stop your engine quickly in an emergency situation.
- While running at low speed, simply turn the key to the off position.
This is to familiarize you with the vehicle’s reaction when the engine is turned off
while driving and to develop this reflex.
It is also important to be able to stop and exit the vehicle quickly.
- Immobilize the vehicle.
- Detach the seat belt and the net to exit the vehicle.
Off-Road Operation
The very nature of off-road operation is dangerous. Any terrain, which has not
been specially prepared to carry vehicles, presents an inherent danger where
terrain substance, shape and steepness are unpredictable. The terrain itself
presents a continual element of danger, which must be knowingly accepted by
anyone venturing over it.
An operator who takes a vehicle off-road should always exercise the utmost care
in selecting the safest path and keeping close watch on the terrain ahead of him.
The vehicle should never be operated by anyone who is not completely familiar
with the driving instructions applicable to the vehicle, nor should it be operated
on steep or treacherous terrain.
General Riding Techniques
General Driiviing Tips
Care, caution, experience and driving skill are the best precautions against the
hazards of vehicle operation.
Whenever there is the slightest doubt that the vehicle can safely negotiate an ob-
stacle or a particular piece of terrain, always choose an alternate route.
In off-road operation, power and traction, not speed, are important. Never drive
faster than visibility and your own ability to select a safe route permit. Always go
slowly and be extra careful when operating on unfamiliar terrain. Always be alert
to changing terrain conditions when operating this vehicle. Be especially cautious
on excessively rough, slippery, icy or loose terrain.
Constantly watch the terrain ahead for sudden changes in slopes or obstacles,
such as rocks or stumps, that may cause loss of stability, resulting in tip over or
rollover.
Never operate the vehicle if the controls do not function normally. See an author-
ized Can-Am Off-road dealer.
SAFETY INFORMATION
29
RIDING YOUR VEHICLE
To maintain proper control it is strongly advised that you keep your hands on the
steering wheel and within easy reach of all controls. The same holds true for your
feet. To minimize the possibility of any leg or foot injury, keep your left foot on the
footrest and right foot on the floor at all times. Staying completely within the cock-
pit will also help keep you from striking objects outside the vehicle.
Watch for and avoid branches and other objects that could enter the passenger
compartment and strike you or your passengers.
Operatiing iin Reverse
When operating in reverse, check that the path behind the vehicle is free of peo-
ple or obstacles. Pay attention to blind spots. When it is safe to proceed in re-
verse, go slowly and avoid sharp turns.
WARNING
Steeriing iinputs in reverse operation increase the riisk of rolllover.
NOTE:
In reverse operation, the engine RPM is limited thus limiting the vehicle reverse
speed.
WARNING
When driiving downhilll iin reverse, graviity can increase the vehiicle speed
above safe reverse speed.
Crossing Roads
If you have to cross a road, ensure to have complete visibility on both sides for in-
coming traffic and decide on exit point on other side of road. Drive in a straight
line toward that point. Do not make sharp direction changes or abrupt accelera-
tions as it may result in a rollover situation. Do not travel on sidewalks or bicycle
trails as they are designated specifically for those uses.
Ridiing on Paved Surfaces
Avoid paved surfaces. This vehicle is not designed to operate on paved surfaces
and is more likely to roll over. If you must drive on pavement, turn gradually, go
slowly, and avoid abrupt acceleration and braking.
Shalllow Water Crossiing
Water can be a unique hazard. If it is too deep the vehicle may “float” and topple.
Check the water depth and current before you attempt to cross any water. Water
depth should not exceed the center of the wheels for vehicle to safely cross the
obstacle. Beware of slippery surfaces such as rocks, grass, logs, etc., both in the
water and on its banks. A loss of traction may occur. Do not attempt to enter the
water at high speed.
Water will affect the braking ability of your vehicle. Make sure you dry the brakes
by applying them several times after the vehicle leaves the water.
30
SAFETY INFORMATION
RIDING YOUR VEHICLE
Mud or marsh lands may be encountered near water. Be prepared for sudden
“holes” or changes in depth. Similarly so, be watchful of hazards such as rocks,
logs, etc., partially covered by vegetation.
Riiding on Snow or Ice
When performing pre-ride inspection, pay special attention to locations on the ve-
hicle where snow and/or ice accumulations may obstruct visibility of the tail lamp,
clog ventilation openings, block the radiator and fan, and interfere with the move-
ment of controls. Before starting with your vehicle, check the steering, accelera-
tor and brake pedals for interference free operation.
Whenever this vehicle is ridden on a snow covered drive path, the tire grip is gen-
erally reduced causing the vehicle to react differently to control inputs from the
operator. On low grip surfaces, the steering responses are not as crisp and pre-
cise, stopping distances are lengthened and acceleration is also affected. Slow
down and be gentle on the accelerator. This will only result in spinning of the tires
and possibly in an over steering slide of the vehicle. Avoid hard braking. This will
possibly result in a straight line slide of the vehicle. Again, the best advice is to
safely reduce speed in anticipation of a maneuver to give yourself time and dis-
tance in order to keep control of the vehicle.
As you drive your vehicle over a loose snow covered surface, snow dust will be
picked up in the wake turbulence of the moving vehicle and transported to con-
tact and accumulate or melt on some exposed components including rotating
parts like brake discs. Water, snow or ice may affect the response time of the
brake system of your vehicle. Even when not required to reduce vehicle speed
apply brakes frequently to prevent ice or snow accumulation and to dry brake
pads and discs. While doing so in low risk driving situations you will test for grip
level and keep yourself alerted to how the vehicle reacts to your control inputs.
Always keep brake and accelerator pedals and floor boards free of snow and ice.
Frequently wipe snow off seat, steering wheel, headlights and tail lamps.
The depth of the snow cover may hide rocks, tree stumps or other objects and if
it is wet may totally impede the drivability as the vehicle becomes bogged down
or completely looses traction in slushy snow. Look far ahead and always be
watchful of any visible clues that might indicate the presence of such obstacles.
In doubt steer clear. Avoid driving on any frozen waterways before checking that
the ice will safely support the vehicle, its riders and its load of cargo.
At the end of each ride it is a good practice to clean the vehicle and all moving
components (brakes, steering components, drivelines, controls, radiator fan etc.)
from any snow or ice accumulations. Wet snow will turn to ice during the shut
down period and become more difficult to remove at the next pre-ride inspection.
Riiding on Sand
Sand and riding on sand dunes is another unique experience but there are some
basic precautions that should be observed. Wet, deep or fine sand may create a
loss of traction and cause the vehicle to slide, drop off or become “bogged” down.
If this occurs look for a firmer base. Again, the best advice is to slow down and
be watchful of the conditions.
SAFETY INFORMATION
31
RIDING YOUR VEHICLE
When riding in sand dunes it is advisable to equip the vehicle with an antenna
type safety flag. This will help make your location more visible to others over the
next sand dune. Proceed carefully should you see another safety flag ahead.
Ridiing on Gravell, Loose Stones or Other Sliippery Surfaces
Riding on loose stones or gravel is very similar to riding on ice. They will affect
the steering of vehicle, possibly causing it to slide and tip over especially at high
speeds. In addition, braking distance may be affected. Remember that “gunning”
the throttle or sliding may cause loose stones to be ejected rearwards into the
path of another rider's way. Never do it deliberately.
If you do get into a slide or skid, it may help to turn the steering wheel into the di-
rection of the skid until you regain control. Never jam the brakes and lock the
wheels.
Crossing Obstacles
Use the low range (L) for crossing obstacles.
Obstacles on the “trail” should be traversed with caution. This includes rocks, fall-
en trees, and depressions. You should avoid them whenever possible. Remem-
ber that some obstacles are too large or dangerous to cross and should be
avoided. As a guideline, never attempt to cross an obstacle higher than the
ground clearance of the vehicle. Small rocks or small fallen trees may be safely
crossed - approach obstacle at low speed and as much as possible at a right an-
gle. Adjust speed without losing momentum and do not accelerate abruptly. Pas-
sengers must grasp handhold firmly and brace feet on the floor. Hold steering
firmly without closing your fists around it and proceed. Be aware that the obstacle
may be slippery or may move while crossing.
Hilll Driiviing Condiitions
When driving on hills or slopes, two things are highly important: be prepared for
slippery surfaces or terrain variations and obstacles and brace yourself properly
inside vehicle. If you climb or descend a hill that is too slippery or has too loose a
surface, you can lose control. If you go over the top of a hill at high speed, you
may not have time to prepare for the terrain on the other side. Avoid parking on a
slope. Always put the shift lever in PARK when stopped or parked, especially on
an incline, to avoid rolling. If you must park on a steep incline, block the wheels
using rocks or bricks.
Uphiilll Driving
Use the low range (L) for uphill driving.
Due to its configuration, this vehicle has very good traction even while climbing,
so much so that tip over is possible before traction is lost. For example, it is com-
mon to encounter terrain situations where the top of the hill has eroded to a point
that the hill peak rises very sharply. This vehicle is not designed to negotiate such
a condition. Take an alternate route.
It is also wise to know the terrain condition on the other side of the hill or bank. All
too often there exists a sharp drop-off that is impossible to negotiate or descend.
32
SAFETY INFORMATION
RIDING YOUR VEHICLE
If you feel that the slope is getting too steep to climb, apply brakes to immobilize
vehicle. Put shift lever in reverse (R), and back down the hill, barely releasing
brakes to remain at low speed. Do not attempt to turn around. Never coast down
hill while vehicle is in neutral. Do not perform hard braking as it increases the risk
of tipover.
Downhiilll Driving
This vehicle can climb steeper slopes than it can descend safely. Therefore, it is
essential to assure that a safe route exists to descend a slope before you climb
it.
Decelerating while negotiating a slippery downhill slope could “toboggan” the ve-
hicle, causing it to slide. Maintain steady speed and/or accelerate slightly to re-
gain control. Never slam brakes and lock the wheels.
Siide Hillliing
Whenever possible, side hilling (driving across a slope rather than up or down it)
should be avoided. If necessary, do so with extreme caution. Side hilling on steep
inclines could result in rollover. In addition, slippery or unfirm surfaces could re-
sult in uncontrollable side sliding. Avoid all objects or depressions that will inten-
sify the raising of one side of the vehicle higher than the other, thus causing
rollover. If you feel the vehicle start to rollover or slide sideways, steer downhill if
possible.
WARNING
Be carefull when loading and transporting liiquiid reservoiirs. They can af-
fect vehiiclle stabillity when side hiillling by pullliing downhiilll and iincreasing
the riisk of a rolllover.
Drop-Offs
This vehicle is not designed to negotiate drop-offs. It will “bottom-out” and usually
stop if either the front or rear wheels are driven over a drop-off. If the drop is
sharp or deep, the vehicle will nose dive and tip over.
Avoid negotiating drop-offs. Reverse and select an alternate route.
Recreatiionall, Group and Distance Riiding
Respect the rights and limitations of others. Stay away from areas designated for
other types of off road use. This includes snowmobile trails, equestrian trails,
cross country ski trails, mountain bike trails, etc. Never assume there are no oth-
er users on the trail. Always stay to the right of the trail and do not zig zag to one
side of the trail then the other. Be prepared to stop or pull off to the side if another
trail user appears in front of you.
Join a local side-by-side vehicle club. It will provide you with a map and advice or
inform you where you can ride. If a club does not exist in your area, help to start
one. Group riding and club activities provide a pleasurable, social experience.
Never use this vehicle with drugs or alcohol, or tired or ill.
Always keep a safe distance from other riders. Your judgment of speed, terrain
conditions, weather, mechanical condition of your vehicle and the
“trust in
SAFETY INFORMATION
33
RIDING YOUR VEHICLE
judgment” you have in others around you will help you make a better choice of
appropriate safe distance. This vehicle, like any other motorized vehicle, cannot
stop “on a dime”.
Before you ride, tell someone where you are planning to travel and your expected
time of return.
Depending on the length of your ride, carry additional tools or emergency equip-
ment. Find out where you can get additional gasoline. Be prepared for the possi-
ble conditions you may encounter. An emergency first aid kit should always be a
consideration.
Environment
One of the benefits of this vehicle is that it can take you off the beaten path away
from most communities. However, you should always respect nature and the
rights of others to enjoy it. Do not ride in environmentally sensitive areas. Do not
drive over forest crops or shrubs, nor cut down trees or take down fencing, nor
spin your wheels and destroy the terrain. “Tread Lightly”.
This vehicle can cause OHV wildfires if debris builds up near the exhaust or other
engine hot spots and ignites then falls off into dry grass. Avoid riding in wet
areas, through muskeg or tall grass, where debris can build up. Should you ride
in those areas, inspect and remove all debris from your engine and hot spots. Re-
fer to Vehicle Care for details.
Chasing wildlife is in many areas illegal. Wildlife can die of exhaustion after being
chased by a motorized vehicle. If you encounter animals on the trail, stop and ob-
serve quietly and with caution. It will be one of the better memories of your life.
Observe the rule “what you take in, carry out”. Do not litter. Do not start campfires
unless you have permission to do so, and then only away from dry areas. The
hazards you may create on the trail may cause injury to others or yourself, even
at a later date.
Respect farm lands. Always obtain the permission of the landowner before riding
on private land. Respect crops, farm animals and property lines.
Finally, do not pollute streams, lakes or rivers and do not modify the engine or ex-
haust system, or remove any of its components as it will alter the vehicle
emissions.
34
SAFETY INFORMATION
MOVING LOADS AND DOING WORK
Working with Your Vehicle
Your vehicle can help you perform a number of different LIGHT tasks ranging
from snow removal to pulling wood or carrying cargo. A variety of accessories
are available from your authorized Can-Am Off-road dealer. To prevent possible
injury, follow the instructions and warnings that accompany the accessory. Al-
ways respect the load limits of the vehicle. Overloading the vehicle can over-
stress the components and cause failure. Avoid overexerting yourself if you lift or
pull heavy loads or manually push the vehicle.
WARNING
Mounted machiinery must be llowered on the ground before leaving the
vehiiclle.
Carrying Loads
WARNING
Make sure alll accessories, cargo and lloose objjects inside the vehicle are
properlly secured, or remove iit to prevent from failling on the road and cre-
ating a hazard for folllowiing vehicles.
Any load carried on the vehicle will affect the handling, stability and braking dis-
tance of the vehicle. Do not exceed the load limits of the vehicle, including the
weight of operator, passengers, cargo, accessories and trailer tongue weight.
Always be aware that the “load” may slide or fall off and cause an accident.
Must use low gear if total payload is greater than 390 kg (860 lb).
Maxiimum Payload Liimit of the Vehiiclle
Californian models
612 kg (1 349 lb)
Limited models
555 kg (1 225 lb)
Lone Star models
748 kg (1 650 lb)
Includes occupants,
cargo, tongue weight
Lone Star CAB models
535 kg (1 180 lb)
and added accessories
Models under the
680 kg (1 499 lb)
NRMM compliance
All other models
771 kg (1 700 lb)
The following is an example of suitable total vehicle payload distribution:
SAFETY INFORMATION
35
MOVING LOADS AND DOING WORK
Example of suitable payloads
Models with a 771 kg (1 700 lb) payload limit, adjust according to your model
load limit.
Operator and
Cargo Box
Tongue
Total Vehicle
Accessories
Passengers
Load
Weight
Load
330 kg
333 kg
40 kg
68 kg
771 kg
(728 lb)
(734 lb)
(88 lb)
(150 lb)
(1 700 lb)
To reduce the risk to lose control or the load carried, follow these
recommendations.
Vehiiclle Settiings When Carryiing Load
When carrying heavy loads or passengers readjust suspension accordingly.
When carrying heavy loads in cargo box or pulling a trailer operate with the shift
lever in L (low range).
WARNING
Must use LOW GEAR if totall payload is greater than 390 kg (860 lb).
Loadiing the Cargo Box
NOTICE
When loading or unlloadiing, do not exceed the maximum cargo capaciity
on taillgate. Always close taiilgate before operatiing to reduce the riisk of
l
loss of load.
Load cargo as low as possible - a higher load can raise the vehicle’s center of
gravity, which can reduce stability. Position cargo toward the front and center of
the cargo box and as evenly distributed as possible.
Secure the load to the tie down hooks inside cargo box. Use only the tie down
hooks on the bottom of the cargo box; do not secure cargo to the cage or other
part of the vehicle. If it is not properly secured, a load may slide or fall off, possi-
bly striking occupants or bystanders; or it may shift during riding, affecting the
handling of the vehicle.
Objects that are higher than the walls of the cargo bed may affect visibility for the
driver and may act as projectiles in case of an accident. Loads that protrude side-
ways can get snagged or caught in bush, branches or other obstacles. Avoid cov-
ering and obstructing the brake lights with the cargo. Ensure no cargo protrudes
outside the box and that cargo will not interfere with your visibility or control of the
vehicle.
Do not overload cargo box.
Close tailgate before operating.
36
SAFETY INFORMATION
MOVING LOADS AND DOING WORK
WARNING
Never operate the vehiicle with an open taiilgate.
Model
Maximum Cargo Load
Californian
Evenly distributed
272 kg (600 lb)
models
and safely
secured. Loaded
Cargo box
as low as
possible to
All other models
454 kg (1,000 lb)
reduce height of
center of gravity.
Only while
loading cargo into
All models
Tailgate
113 kg (250 lb)
cargo box. Never
operate with
tailgate open.
Operating Whiile Carryiing a Load
Reduce your speed when carrying cargo and turn gradually. Avoid hills and
rough terrain. Allow more distance for braking. This vehicle may require addition-
al stopping distance if carrying heavy loads, especially on inclined surfaces.
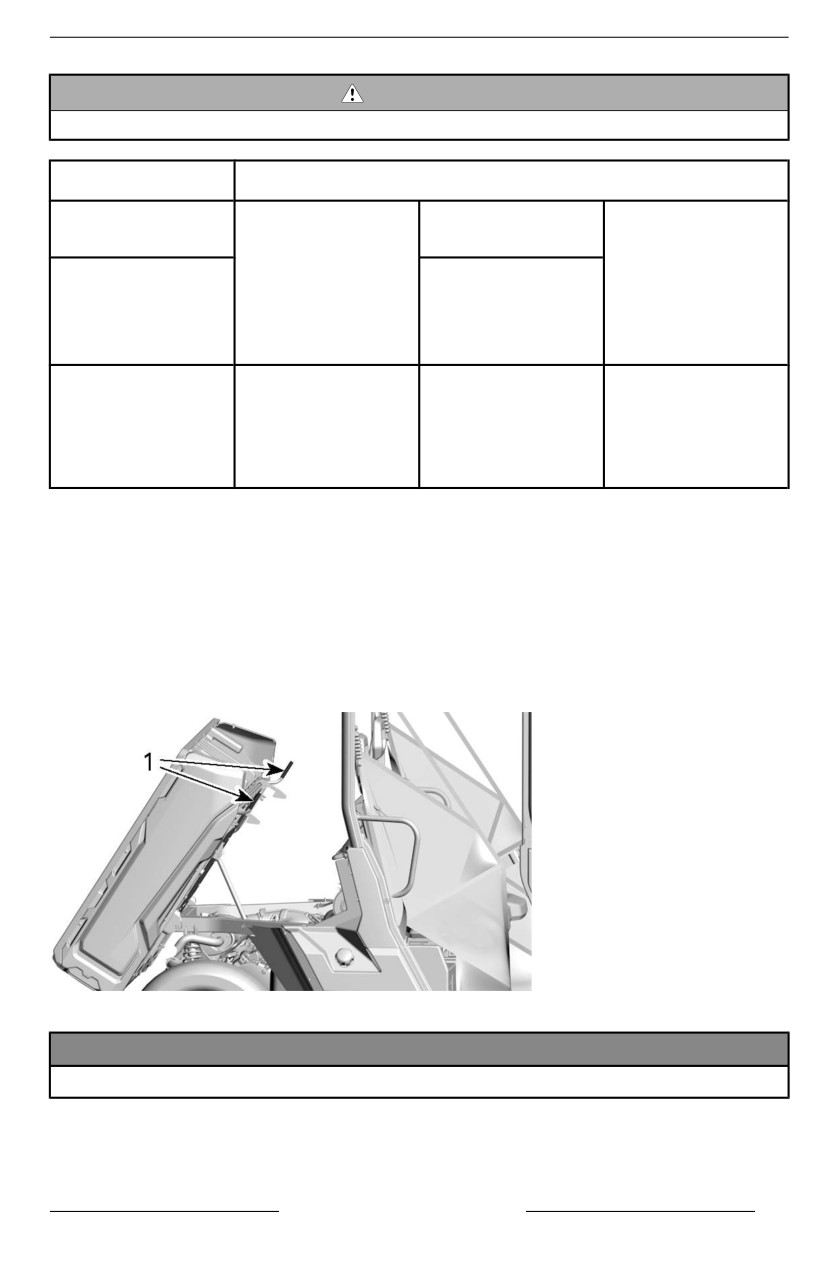
Tillting the Cargo Box
The cargo box can be tilted to ease unloading. Use release handles on either
side of cargo box.
1. Release handles
NOTICE
Allways turn off engine when tilltiing the cargo box.
SAFETY INFORMATION
37
MOVING LOADS AND DOING WORK
WARNING
– Allways ensure no one is standing behiind the cargo box before you ac-
tuate the release handle.
– The load weiight may affect the operatiion of the cargo box tillting fea-
ture (tilting or lowering).
– Some accessoriies assemblled on the cargo box may affect his behav-
ior during the opening and closure. Always pay attention during thiis
operation.
Be very careful with the operation of the tailgate and the cargo box as the load
may have moved during transport.
To lower the cargo box, simply push it down into place.
WARNING
– Keep yoursellf and others clear of the cargo box and vehiiclle frame
junctiion when loweriing cargo box.
– Ensure to properlly llatch the cargo box and the taiilgate before riiding.
– Make sure you do not lleave objjects between llifted cargo box and ve-
hicle frame to ensure proper latchiing of the cargo box when lowered.
Hauling a Load
NOTICE
A BRP approved rear hiitch must be properlly installled on the vehiclle for
hauliing traiilers.
Never pull a load by attaching it to the cage or any other accessories; this can
cause the vehicle to tip over. Use only the trailer hitch (if installed) or winch (if in-
stalled) to pull a load.
In an emergency situation, use the recovery hook to recover a stuck vehicle.
When pulling loads with a chain or cable, ensure that there is no slack before
starting and maintain tension while pulling.
When pulling loads with a chain or cable, be sure to brake progressively. The in-
ertia of the load could lead to an impact.
When hauling a load, respect the maximum hauling capacity. See Pulling a
Trailer below.
WARNING
A slack iin the chaiin or cable can cause iit to break and snap back.
When pulling another vehicle, be sure that someone is controlling the pulled ve-
hicle. They must brake and steer to prevent the vehicle from going out of control.
Before pulling loads with a winch, refer to the winch manufacturer’s instructions.
38
SAFETY INFORMATION
MOVING LOADS AND DOING WORK
Reduce your speed when hauling a load and turn gradually. Avoid hills and rough
terrain. Never attempt steep hills. Allow more distance for braking, especially on
inclined surfaces and when a passenger is on board. Be careful not to skid or
slide.
Pulling a Trailer
NOTICE
A BRP approved rear hitch must be properly iinstallled on the vehicle for
haulling traillers.
Riding this vehicle with a trailer substantially increases the risk of toppling, espe-
cially on inclined slopes. If a trailer is used behind the vehicle make sure that its
hitch is compatible with the one on the vehicle. Make sure the trailer is horizontal
with the vehicle. (In some instances a special extension may have to be installed
on the vehicle hitch). Use security chains or cables to secure the trailer with the
vehicle.
Reduce your speed when pulling a trailer and turn gradually. Avoid hills and
rough terrain. Never attempt steep hills. Allow more distance for braking, espe-
cially on inclined surfaces and when a passenger is on board. Be careful not to
skid or slide.
Improperly loading a trailer may cause loss of control.
Always make sure load is evenly distributed and safely secured on the trailer; an
evenly balanced trailer is easier to control.
Always put the shift lever to L (low range) for hauling a trailer - in addition to pro-
viding more torque, operating in low range helps account for the increased load
on the rear tires.
When stopped or parked, block the vehicle and trailer wheels from possible
movement.
Use caution when disconnecting a loaded trailer; it or its load may topple on you
or others.
When hauling a trailer, respect the maximum tongue weight and towing capacity
indicated on the label affixed to the hitch.
Make sure there is at least some weight on the tongue.
SAFETY INFORMATION
39
IMPORTANT ON-PRODUCT LABELS (CANADA/
UNITED STATES)
Safety Hang Tag
This vehicle comes with a hang tag and labels containing important safety
information.
Any person who rides this vehicle should read and understand this information
before riding.
THIS VEHICLE IS INTENDED FOR RECREATIONAL USE
AND SECONDARY GENERAL UTILITY APPLICATIONS
Tilt Table
NO OPERATOR UNDER AGE 16
TRAINING COURSES TO TEACH ROV DRIVING
Test Result
ARE AVAILABLE. FOR INFORMATION CONTACT
YOUR DEALER.
Read the Operator's Guide and Safety Labels
and Watch the Safety Video.
Follow All Instructions and Warnings.
BOMBARDIER RECREATIONAL PRODUCTS INC.
VEHICLE MODEL
CHECK WITH YOUR DEALER TO FIND OUT ABOUT
TILT TABLE RESULT
STATE OR LOCAL LAWS REGARDING ROV OPERATION.
Cause Severe Injury or Death
Be Prepared
Measurement of lateral stability, in degrees, of a
• Fasten seat belts and make sure nets or doors
sample, standard condition vehicle (with an
are securely latched in place.
operator and a passenger load - 430 pounds) as
measured by the manufacturer in accordance with
the tilt table lateral stability test in the ANSI/ROHVA
standard for Recreational Off-Highway Vehicles.
completely inside the vehicle.
Vehicle modification, accessories, and loading can
Drive Responsibly
affect lateral stability.
Avoid loss of control and rollovers:
Training courses to teach ROV driving are available.
never do donuts.
For information contact your dealer and/or
rohva.org.
terrain. Avoid paved surfaces.
Check with your dealer to find out about state or
local laws regarding ROV operation.
Rollovers have caused severe injuries and death,
THIS HANG TAG IS NOT TO BE REMOVED BEFORE SALE.
Be Sure Riders Pay Attention and Plan Ahead
If you think or feel the vehicle may tip or roll,
reduce your risk of injury :
VEHICLE MODEL NAME:
and brace yourself.
ENGINE DESCRIPTION:
vehicle for any reason.
Require Proper Use of Your Vehicle
EPA CERTIFIED
- Do your part to prevent injuries:
NER (NORMALIZED EMISSION RATE) =
ON 0 TO 10 SCALE, 0 BEING THE CLEANEST.
BOMBARDIER RECREATIONAL PRODUCTS INC
*NO TO BE REMOVED PRIOR SALE.
card
Vehicle seating capacity:
Occupants
THIS HANG TAG CAN’T BE REMOVED BEFORE SALE.
40
SAFETY INFORMATION
IMPORTANT ON-PRODUCT LABELS (CANADA/UNITED STATES)
Safety Labels
free of charge. See an authorized
Can-Am Off-road dealer.
Read and understand all the safety la-
bels on your vehicle.
Upon replacement of parts that have
warnings on them, make sure to order
These labels are affixed to the vehicle
(free of charge) the applicable safety
for the safety of the operator, passen-
warnings if not already installed on the
gers or bystanders.
replacement part.
The following labels are on your ve-
NOTE:
hicle, and they should be considered
In the event of any discrepancy be-
permanent parts of the vehicle. They
tween this guide and the vehicle, the
need to be clean and visible at all
safety labels on the vehicle have
times. If missing or damaged, they
precedence over the labels in this
need to be replaced. Safety labels are
guide.
SAFETY INFORMATION
41
IMPORTANT ON-PRODUCT LABELS (CANADA/UNITED STATES)
42
SAFETY INFORMATION
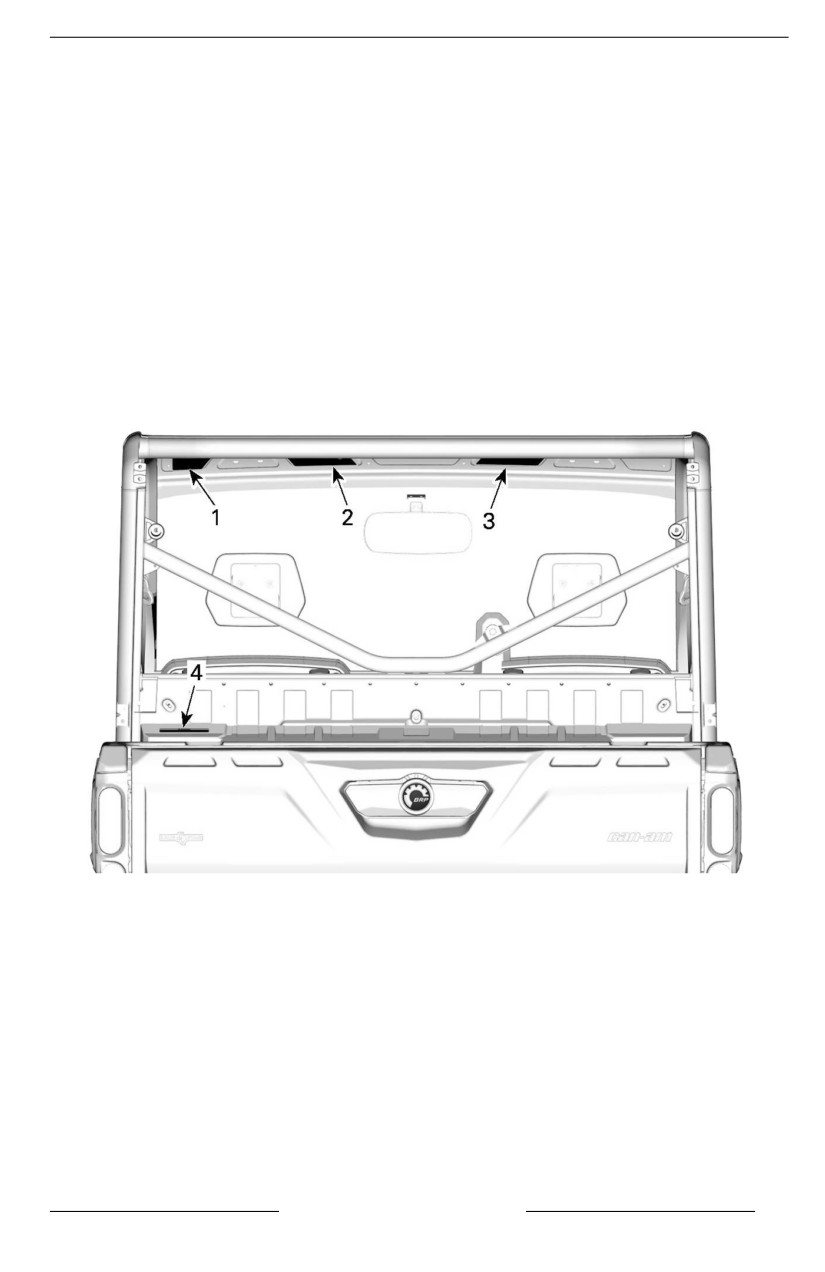
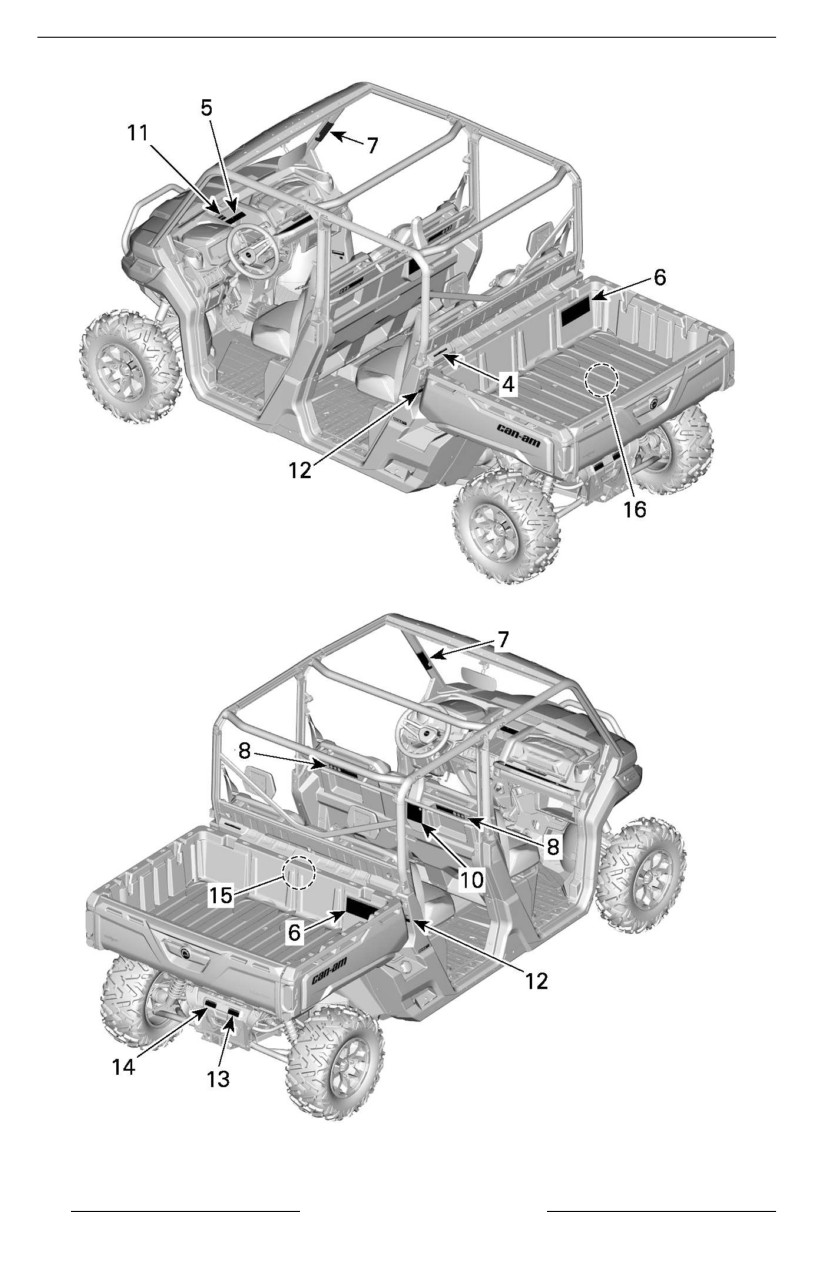
IMPORTANT ON-PRODUCT LABELS (CANADA/UNITED STATES)
1. General warning
2. General operating warning
3. Passenger warning
4. Pulling a load using the cage
5.
2WD/4WD/Front
Diff
Lock
selection
6. Tire pressure and maximum load
7. Rollover
8. Rear Passenger Rollover
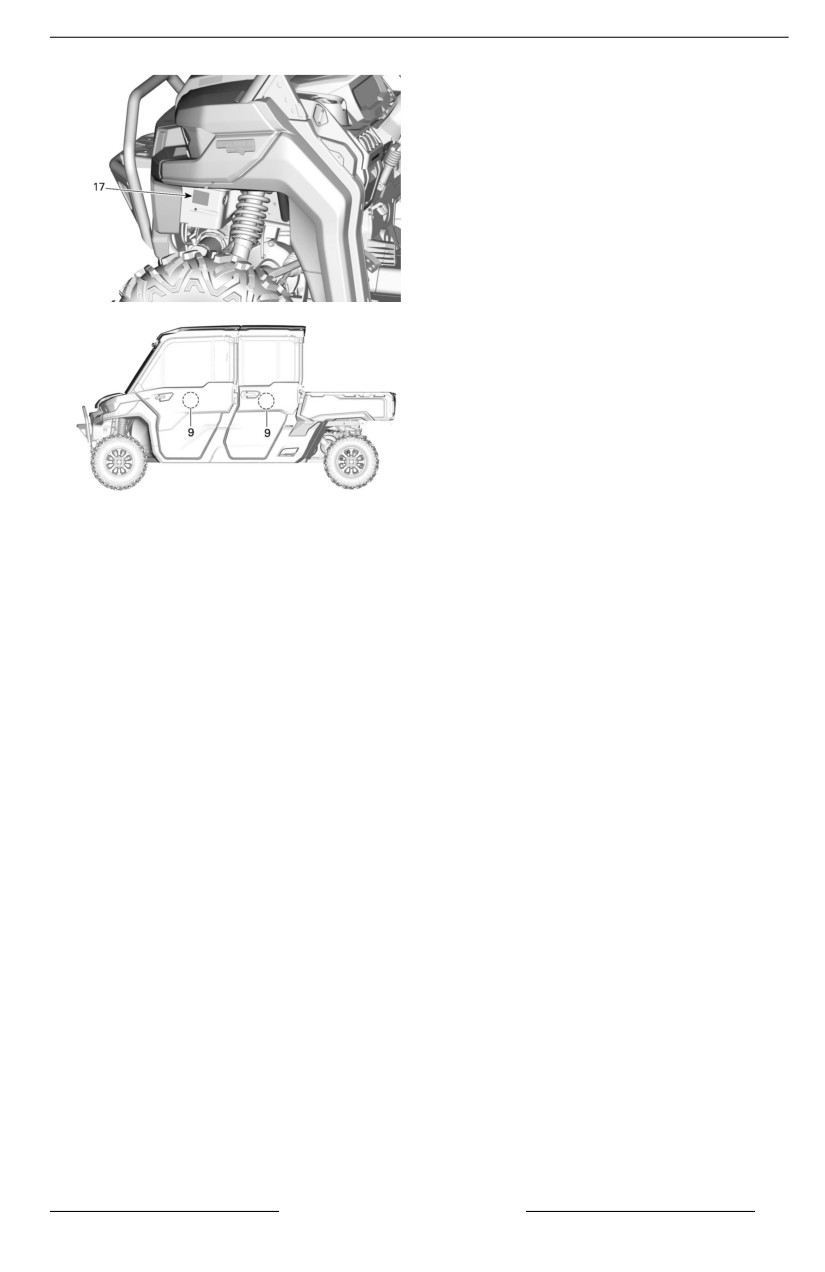
9. Door warning
10. Rear Passenger Warning
11. Off-road usage
12. Cargo box pinch point
13. Pulling a trailer
14. Towing and tongue weight
15. Coolant hot
16. Exhaust
17. Winch installation
SAFETY INFORMATION
43
IMPORTANT ON-PRODUCT LABELS (CANADA/UNITED STATES)
Generall Operating Warniing Label
Models Without CAB
Be Prepared
• Fasten seat belts and make sure nets or doors are securely latched in place.
Stay completely inside the vehicle.
Drive Responsibly
Avoid loss of control and rollovers:
stop.
changes in traction and terrain.
Avoid paved surfaces.
Models With CAB
Improper Use of O -Highway Vehicles Can Cause
Severe Injury or Death
Be Prepared
• Fasten seat belts and make sure nets or doors are securely latched in place.
• Wear an approved helmet and protective gear.
• Each rider must be able to sit with back against seat, foot at on the oor or
on footrest, and hands on steering wheel or handholds. Stay completely inside
the vehicle.
Drive Responsibly
Avoid loss of control and rollovers:
• Avoid abrupt maneuvers, sideways sliding, skidding or !shtailing, and never do
donuts.
• Avoid hard acceleration when turning, even from a stop.
• Slow down before entering a turn.
• Plan for hills, rough terrain, ruts, and other changes in traction and terrain.
Avoid paved surfaces.
• Avoid side hilling (riding across slopes).
44
SAFETY INFORMATION
IMPORTANT ON-PRODUCT LABELS (CANADA/UNITED STATES)
General Warning Labell
Models Without CAB
R
Be Sure Riders Pay Attention and Plan Ahead
If you think or feel the vehicle may tip or roll, reduce your risk of injury :
Require Proper Use of Your Vehicle - Do your part to prevent injuries:
occupants.
Can-am web site before operation.
MAX
Models With CAB
SAFETY INFORMATION
45
IMPORTANT ON-PRODUCT LABELS (CANADA/UNITED STATES)
Passenger Warniing Label
Models Without CAB
PASSENGER(S)
Improper Use of this Vehicle Can Cause Severe Injury or Death
Be Prepared
• Fasten seat belt and make sure net or door is securely latched in place.
• Wear an approved helmet and protective gear.
Y
and hands on handholds. Stay completely inside the vehicle.
Be Sure Riders Pay Attention and Plan Ahead
If you think or feel the vehicle may tip or roll, reduce your risk of injury:
•
• Do not put any part of your body outside of the vehicle for any reason.
PASSENGER QUALIFICATIONS AND RESPONSIBILITIES
• Do not ride after using drugs or alcohol.
• Ask the operator to slow down or stop if you feel uncomfortable when riding.
Models With CAB
PASSENGER(S)
Improper Use of this Vehicle Can Cause Severe Injury or Death
Be Prepared
• Fasten seat belt and make sure net or door is securely latched
in place.
• Wear an approved helmet and protective gear.
You must be able to sit with back against seat, foot at on the oor or on footrest,
and hands on handholds. Stay completely inside the vehicle.
Be Sure Riders Pay Attention and Plan Ahead
If you think or feel the vehicle may tip or roll, reduce your risk of injury:
• Keep a !rm grip on handholds and brace yourself.
• Do not put any part of your body outside of the vehicle for any reason.
PASSENGER QUALIFICATIONS AND RESPONSIBILITIES
• Do not ride after using drugs or alcohol.
• Ask the operator to slow down or stop if you feel uncomfortable when riding.
46
SAFETY INFORMATION
IMPORTANT ON-PRODUCT LABELS (CANADA/UNITED STATES)
Rolllover — Warning Labells
LH side
RH Side
Be prepared in case of
Be prepared in case of
rollover
rollover
If the vehicle rolls over,
If the vehicle rolls over,
any part of your body
any part of your body
(such as arms, legs, or
(such as arms, legs, or
head) outside of the
head) outside of the
cockpit can be crushed
cockpit can be crushed
by the cage or other
by the cage or other
parts of the vehicle.
parts of the vehicle.
Fasten seat belt and
Fasten seat belt and
make sure net and/or
make sure net and/or
door is securely latched
door is securely latched
in place to help you
in place to help you
avoid sticking out arms
avoid sticking out arms
or legs.
or legs.
hold the
hold the
cage while riding.
cage while riding.
try to stop
try to stop
a rollover using
a rollover using
your arm or leg.
your arm or leg.
9028
9030
SAFETY INFORMATION
47
IMPORTANT ON-PRODUCT LABELS (CANADA/UNITED STATES)
Rear Passenger Rolllover — Warniing Labels
LH side
Be prepared in case of rollover
If the vehicle rolls over, any part of your body (such as arms, legs, or head) outside of the
cockpit can be crushed by the cage or other parts of the vehicle.
Fasten seat belt and make sure net and/or door is securely latched in place to help you
avoid sticking out arms or legs.
hold the cage while riding.
try to stop a rollover using your arm or leg.
RH Side
Be prepared in case of rollover
If the vehicle rolls over, any part of your body (such as arms, legs, or head) outside of the
cockpit can be crushed by the cage or other parts of the vehicle.
Fasten seat belt and make sure net and/or door is securely latched in place to help you
avoid sticking out arms or legs.
hold the cage while riding.
try to stop a rollover using your arm or leg.
48
SAFETY INFORMATION
IMPORTANT ON-PRODUCT LABELS (CANADA/UNITED STATES)
2WD/4WD Selection — Warning Labell
Put the Shift
Stop the vehicle and
Must use Low Gear if total payload is greater than
Lever to PARK (P)
apply the Brake before
390 kg (860 lb).
before exiting
using the Shift Lever,
vehicle.
the 2WD/4WD Switch
Total payload includes weight of
The vehicle can
operator, passenger, cargo, accessories
roll if not in PARK.
Switch.
and trailer tongue weight if applicable.
8126
Tire Pressure and Maximum Load — Warning Labell
WARNING
NEVER carry passenger in cargo box or on gate.
Improper tire pressure or overloading can cause loss of control.
NEVER place gasoline container inside cargo box
Loss of control can result in severe injury or death.
when filling it. This can lead to an explosion.
An underinflated tire can come off the rim.
NEVER exceed the vehicle load capacity (see table),
To reduce the risk of loss of control or loss of load:
including weight of operator, passenger, cargo,
When loading cargo:
When carrying a load:
accessories and trailer tongue weight if applicable.
Position cargo towards
Reduce your speed
NEVER exceed REAR LOAD CAPACITY (Refer to label
front and center ans as
and turn gradually.
below), evenly distributed
low as possible.
Avoid hills and rough terrain.
(including trailer tongue weight if applicable).
Latch tail gate.
Allow more distance to stop.
ALWAYS secure the load.
3 OCCUPANTS
6 OCCUPANTS
PACKAGE
XMR
OTHERS
XMR
LTD
LONESTAR
OTHERS
NO DOOR
DOORS
NO DOOR
DOORS
---
NO DOOR
DOORS
---
COLD TIRE
FRONT: kPa (psi)
97 ( 14 )
97 ( 14 )
103 ( 15 )
110 ( 16 )
110 ( 16 )
131 ( 19 )
103 ( 15 )
138 ( 20 )
152 ( 22 )
PRESSURE
REAR: kPa (psi)
124 ( 18 )
124 ( 18 )
110 ( 16 )
138 ( 20 )
138 ( 20 )
165 ( 24 )
152 ( 22 )
172 ( 25 )
165 ( 24 )
MAX LOAD CAPACITY:
kg
( lb )
545 ( 1200 )
612 ( 1350 )
612 ( 1350 )
555 ( 1225 )
612 ( 1350 )
535 ( 1180 )
612 ( 1350 )
CALIFORNIA
MAXIMUM CARGO LOAD:
kg
( lb )
272 ( 600 )
272 ( 600 )
MAX LOAD CAPACITY:
kg
( lb )
680 ( 1500 )
680 ( 1500 )
545 ( 1200 )
703 ( 1550 )
646 ( 1425 )
555 ( 1225 )
748 ( 1650 )
535 ( 1180 )
771 (1700 )
OTHERS
MAXIMUM CARGO LOAD:
kg
( lb )
454 ( 1000 )
454 ( 1000 )
Refer to your Operator’s Guide for more information about cargo box use.
Pullling a Load Using the Cage – Warniing Label
NEVER attach to the cage to pull a load.This can cause the vehicle
to tip over. Use only the trailer hitch to pull a load.
8188
SAFETY INFORMATION
49
IMPORTANT ON-PRODUCT LABELS (CANADA/UNITED STATES)
Door Warning Labell
WARNING
Do NOT put your arm outside of the vehiclle, there iis a risk of SEVERE
INJURY.
LH Side
RH Side
8036
8944
50
SAFETY INFORMATION
IMPORTANT ON-PRODUCT LABELS (CANADA/UNITED STATES)
Rear Passenger – Warning Labell
Cargo Box Piinch Poiint - Warning
Labell
PASSENGER(S)
Improper Use of this Vehicle Can Cause
Severe Injury or Death.
Be prepared
• Fasten seat belt and make sure net and/or door is securely latched in
place.
• Wear an approved helmet and protective gear.
You
footrest, and hands on handholds. Stay completely inside the vehicle.
Be sure riders pay attention and plan ahead
If you think or feel the vehicle may tip or roll, reduce your risk of injury:
•
• Do not put any part of your body outside of the vehicle for any reason.
PASSENGER QUALIFICATIONS AND RESPONSIBILITIES
Pinch point. Keep
• Do not ride after using drugs or alcohol.
• Ask the operator to slow down or stop if you feel uncomfortable when
clear when lowering
riding.
cargo box.
Off–Road Usage – Warning Label
Towing and Tongue Weiight -
Warniing Label
intended for use on public roads
Improperly loading a trailer may cause
Ce véhicule est conçu pour un
loss of control. Evenly balance the load.
usage hors route et n'est pas
MAXIMUM TOWING WEIGHT:
1134 kg
2500 lb
destiné aux voies publiques
7881
MAXIMUM TONGUE WEIGHT:
114 kg
250 lb
Pullliing a Traiiler – Warniing Label
When pulling a trailer:
• Set the shift lever to low gear range (L).
• Reduce your speed and turn gradually.
• Avoid hills and rough terrain.
• Allow more distance to stop.
SAFETY INFORMATION
51
IMPORTANT ON-PRODUCT LABELS (CANADA/UNITED STATES)
Winch Installlation - Warniing Label
Exhaust — Hot Part Pictogram
WARNING
CAUTION
Always use the battery post to
Do not touch when hot.
ground the winch. Doing
otherwise may induce an
undesired power steering signal
resulting in an unintended steering
input. In certain circumstances,
some unintended steering input
could lead to a loss of vehicle
control increasing the
risk of a crash.
Coollant Hot - Warning Labell
WARNING
Do not open when HOT.
52
SAFETY INFORMATION

IMPORTANT ON-PRODUCT LABELS (CANADA/UNITED STATES)
Molded Safety Pictogram
Molded Taillgate Piictogram
WARNING
Never carry passengers iin car-
go box or on taiilgate. Max
weight on taillgate duriing load-
i
ing iis 113 kg (250 llb)
SAFETY INFORMATION
53

IMPORTANT ON-PRODUCT LABELS (CANADA/UNITED STATES)
Compliance HangTag
Caliifornia Proposition 65 Warniing -
Hang Tag
. Operating, servicing and
WARNING
maintaining an off-road vehicle can expose
you to chemicals including engine exhaust,
carbon monoxide, phthalates, and lead,
which are known to the State of California
to cause cancer and birth defects or other
reproductive harm.
To minimize exposure, avoid breathing
exhaust, do not idle the engine except as
necessary, service your vehicle in a
well-ventilated area and wear gloves or wash
your hands frequently when servicing your
vehicle.
For more information go to
passenger-vehicle
704906872
54
SAFETY INFORMATION
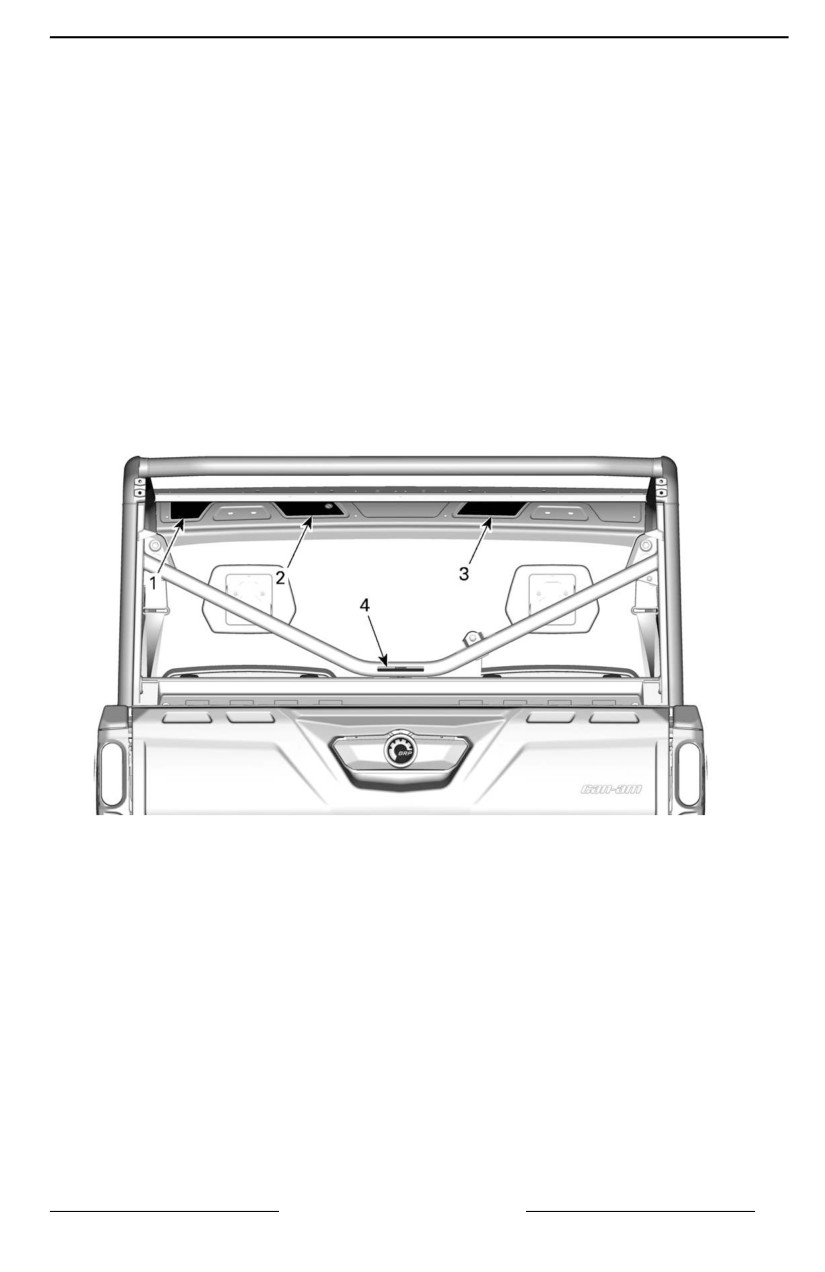
IMPORTANT ON-PRODUCT LABELS (ALL
COUNTRIES EXCEPT CANADA/UNITED STATES)
Safety Pictogram
free of charge. See an authorized
Can-Am Off-road dealer.
Read and understand all the safety la-
bels on your vehicle.
Upon replacement of parts that have
warnings on them, make sure to order
These labels are affixed to the vehicle
(free of charge) the applicable safety
for the safety of the operator, passen-
warnings if not already installed on the
gers or bystanders.
replacement part.
The following labels are on your ve-
hicle, and they should be considered
NOTE:
permanent parts of the vehicle. They
In the event of any discrepancy be-
need to be clean and visible at all
tween this guide and the vehicle, the
times. If missing or damaged, they
safety labels on the vehicle have
need to be replaced. Safety labels are
precedence over the labels in this
guide.
TYPICAL
SAFETY INFORMATION
55
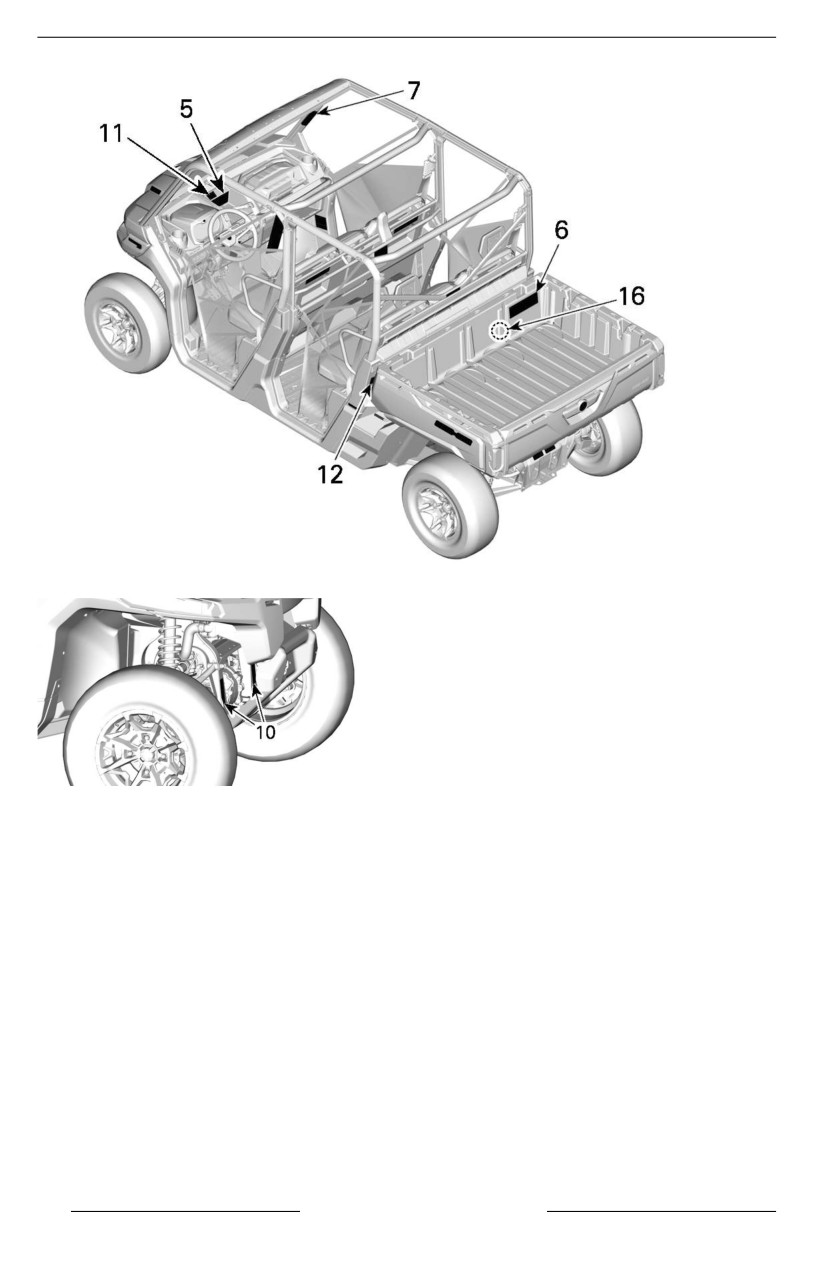
IMPORTANT ON-PRODUCT LABELS (ALL COUNTRIES EXCEPT CANADA/UNITED STATES)
TYPICAL
1. General warning
2. General operating warning
3. Passenger warning
4. Pulling a load using the cage
5.
2WD/4WD selection
6. Tire pressure and maximum load
7. Rollover
8. Rear Passenger Rollover
9. Rear Passenger Warning
10. Winch installation
11. Off-road usage
12. Cargo box pinch point
13. Pulling a trailer
14. Towing and tongue weight
15. Coolant hot
16. Exhaust
56
SAFETY INFORMATION

IMPORTANT ON-PRODUCT LABELS (ALL COUNTRIES EXCEPT CANADA/UNITED STATES)
Operator Warning Labell
WARNING
– Read and understand alll safety labells, llocate and read operator''s
guiide.
– Always wear an approved hellmet and protective gear.
– Fasten seat bellts and make sure net or door iis securelly latched in
pllace.
– Always wear ear protection.
– Each riider must be ablle to sit with back agaiinst seat, feet fllat on the
flloor or on footrest, and hands on steeriing wheell or handholds.
– If you think or feell the vehiicle may tiip or rolll, reduce your riisk of in-
jury : Keep a firm griip on the steering wheel or handhollds and brace
yoursellf. Do not put any part of your body outsiide of the vehicle for
any reason.
– Always stay completelly inside the vehiicle.
Models Without CAB
7947
SAFETY INFORMATION
57

IMPORTANT ON-PRODUCT LABELS (ALL COUNTRIES EXCEPT CANADA/UNITED STATES)
Models With CAB
7948
58
SAFETY INFORMATION

IMPORTANT ON-PRODUCT LABELS (ALL COUNTRIES EXCEPT CANADA/UNITED STATES)
General Operatiing Warning Labell
WARNING
– Make sure operators are 16 or older with a vallid driver''s liicense.
– Do not exceed seatiing capacity: 6 occupants.
– Do not llet people drive or ride after using alcoholl or drugs.
– Avoiid loss of control and rolllovers:
– Avoid abrupt maneuvers, siideways sliiding, skidding or fishtaiil-
ing, and never do donuts.
– Avoid hard acceleratiion when turning, even from a stop.
– Sllow down before entering a turn.
– Pllan for hillls, rough terraiin, ruts, and other changes in traction
and terrain.
– Avoid paved surfaces.
– Avoid side hillliing (riiding across sllopes).
– Rollovers have caused severe injuriies and death, even on flat, open
areas.
– Do not alllow operation on publiic roads (unlless desiignated for off--
hiighway vehiclle access) – colllisiions with cars and trucks can occur.
– Watch the safety video usiing the QR code llink or visit Can-am web
siite before operatiion.
Models Without CAB
16+
6
max
8004
SAFETY INFORMATION
59

IMPORTANT ON-PRODUCT LABELS (ALL COUNTRIES EXCEPT CANADA/UNITED STATES)
Models With CAB
60
SAFETY INFORMATION

IMPORTANT ON-PRODUCT LABELS (ALL COUNTRIES EXCEPT CANADA/UNITED STATES)
Passenger Warning Piictogram
WARNING
– Always wear an approved hellmet and protective gear.
– Always wear ear protection.
– Fasten seat bellts, and make sure net or door is securely llatched iin
pllace.
– Each riider must be ablle to sit with back agaiinst seat, feet fllat on the
flloor or on footrest, and hands on handholds.
– If you think or feell the vehiicle may tiip or rolll, reduce your riisk of
injury:
– Keep a fiirm grip on the steeriing wheel or handholds and brace
yourself.
– Do not put any part of your body outsiide of the vehiicle for any
reason.
– Always stay completelly inside the vehiicle.
– Do not llet people drive or ride after using alcoholl or drugs.
Models Without CAB
7951
SAFETY INFORMATION
61

IMPORTANT ON-PRODUCT LABELS (ALL COUNTRIES EXCEPT CANADA/UNITED STATES)
Models With CAB
7952
62
SAFETY INFORMATION

IMPORTANT ON-PRODUCT LABELS (ALL COUNTRIES EXCEPT CANADA/UNITED STATES)
Tire Pressure and Maximum Load – Warning Piictogram
WARNING
– Locate and read operator''s guiide. Improper tire pressure or over-
loadiing can cause loss of control, resullting in SEVERE INJURY or
DEATH.
– Always maiintain proper tiire pressure as shown.
– NEVER exceed the vehiiclle load capaciity, iincludiing weight of opera-
tor, passenger, cargo, accessories and trailler tongue weight if
appliicablle.
– Do not overload cargo box.
– NEVER place gasoliine contaiiner iinsiide cargo box when fillliing iit.
This can llead to an explosion.
– NEVER carry passenger iin cargo box or on taiilgate.
kPa (psi)
< kg (lb)
< kg (lb)
3x
97 ( 14 )
124 ( 18 )
680 ( 1500 )
454 ( 1000 )
3x LTDCAB
103 (15)
110 (16)
545 (1200)
454 (1000)
3x
PRO
138 ( 20 )
152 ( 22 )
712 ( 1570 )
454 ( 1000 )
6x
152 ( 22 )
165 ( 24 )
771 ( 1700 )
454 ( 1000 )
3x
6 x 6 DPS
110 (16)
110 (16)
771 (1700)
454 (1000)
INT
SAFETY INFORMATION
63

IMPORTANT ON-PRODUCT LABELS (ALL COUNTRIES EXCEPT CANADA/UNITED STATES)
Rolllover – Warning Labells
WARNING
– Never try to stop a rolllover using your arm or lleg.
– Never hold the cage whille ridiing.
– Fasten seat belts and make sure net or door is securely latched iin
place.
LH side
RH Side
LH
RH
64
SAFETY INFORMATION

IMPORTANT ON-PRODUCT LABELS (ALL COUNTRIES EXCEPT CANADA/UNITED STATES)
Rear Passenger Warniing Pictogram
WARNING
– Always wear an approved hellmet and protective gear.
– Always wear ear protection.
– Fasten seat bellts and nets.
– Each riider must be ablle to sit with back agaiinst seat, feet fllat on the
flloor or on footrest, and hands on handholds.
– If you think or feell the vehiicle may tiip or rolll, reduce your riisk of
injury:
– Keep a fiirm grip on the steeriing wheel or handholds and brace
yourself.
– Do not put any part of your body outsiide of the vehiicle for any
reason.
– Always stay completelly inside the vehiicle.
– Do not llet people drive or ride after using alcoholl or drugs.
8651
SAFETY INFORMATION
65

IMPORTANT ON-PRODUCT LABELS (ALL COUNTRIES EXCEPT CANADA/UNITED STATES)
2WD/4WD Sellection – Warniing Pictogram
WARNING
– Stop the vehiicle and apply the brake before using the shiift lever and
the 2WD/4WD switch.
– When the weight of occupant(s), cargo and tongue iis above 390 kg
(860 lb), set the shift lever to llow gear range (L).
– Put the shift lever to PARK (P) before exiting vehiicle. The vehicle
can rolll iif not in PARK.
!
STOP
> 390 kg (860 lb)
!
STOP
L
8894
66
SAFETY INFORMATION

IMPORTANT ON-PRODUCT LABELS (ALL COUNTRIES EXCEPT CANADA/UNITED STATES)
Towiing and Tongue Weight - Warning Labell
WARNING
– MAXIMUM towiing capaciity: 1134 kg (2500 lb).
– MAXIMUM tongue weiight: 114 kg (250 llb).
– When pullliing a trailler, set the shift lever to low gear range (L).
– Reduce your speed and turn graduallly.
– Avoiid hillls and rough terrain.
– Alllow more diistance to stop.
< 1134 kg (2500 lb) 11121 N
< 114 kg (250 lb) 1112 N
Cargo Box Piinch Poiint - Warniing
Pullliing a Load Using the Cage –
Label
Warniing Label
WARNING
WARNING
– Pinch poiint. Keep clear
– NEVER attach to the cage to
when loweriing cargo box.
pulll a load. Thiis can cause
the vehicle to tiip over. Use
only the trailler hiitch or re-
covery hook to pulll a load.
7956
SAFETY INFORMATION
67

IMPORTANT ON-PRODUCT LABELS (ALL COUNTRIES EXCEPT CANADA/UNITED STATES)
Winch Installlation - Warniing Label
Coolant Hot - Warniing Label
WARNING
WARNING
– Never use the frame near
Do not open when HOT.
this locatiion to ground any
electricall component such
as a wiinch.
– When iin use, the electriicall
component may iinduce an
undesired power steeriing
signal resullting in an uniin-
tended steering input.
– In certain circumstances,
some uniintended steeriing
i
input could llead to a loss of
vehiiclle control iincreasiing
the riisk of seriious INJURY or
DEATH.
7689
Cool Starting - Warniing Label
This label is located in the front serv-
ice compartment.
!"#$% '()*!+,-. "/) +,1",/!+#/,
2%/#4!56,9
$/,': ;)4, 1);#$ 30 °= ;,
*!/!;+)/#,+$.. ?#@;29 !(!/)9;:9 A!"#$%
'()*!+,-. ;, "/,'#$12+/,;.
8730
IN EURASIAN UNION ONLY
68
SAFETY INFORMATION

IMPORTANT ON-PRODUCT LABELS (ALL COUNTRIES EXCEPT CANADA/UNITED STATES)
Exhaust – Hot Part Pictogram
CAUTION
Do not touch when hot.
SAFETY INFORMATION
69

IMPORTANT ON-PRODUCT LABELS (ALL COUNTRIES EXCEPT CANADA/UNITED STATES)
Molded Safety Pictogram
Mollded Taiilgate Pictogram
WARNING
Never carry passengers in car-
go box or on taillgate. Max
weiight on taiilgate during lload-
ing is 113 kg (250 lb)
70
SAFETY INFORMATION

REPORTING SAFETY DEFECTS
In Canada, if you believe that your vehicle has a defect which could cause a
crash or could cause injury or death, you should immediately inform Transport
Canada in addition to notifying Bombardier Recreational Products Inc.
If Transport Canada receives similar complaints, it may open an investigation,
and if it finds that a safety defect exists in a group of vehicles, it may order a re-
call and remedy campaign. However, Transport Canada cannot become involved
in any individual problems between you, your dealer or Bombardier Recreational
Products Inc.
To contact Transport Canada:
819-994-3328 (Gatineau-Ottawa area or internationally)
Toll free : 1 800-333-0510 (in Canada)
Transport Canada - ASFAD
330 Sparks Street
Ottawa, ON
K1A 0N5
SAFETY INFORMATION
71

SAFETY INFORMATION
This page is intentionally blank
72
SAFETY INFORMATION

VEHICLE INFORMATION
73
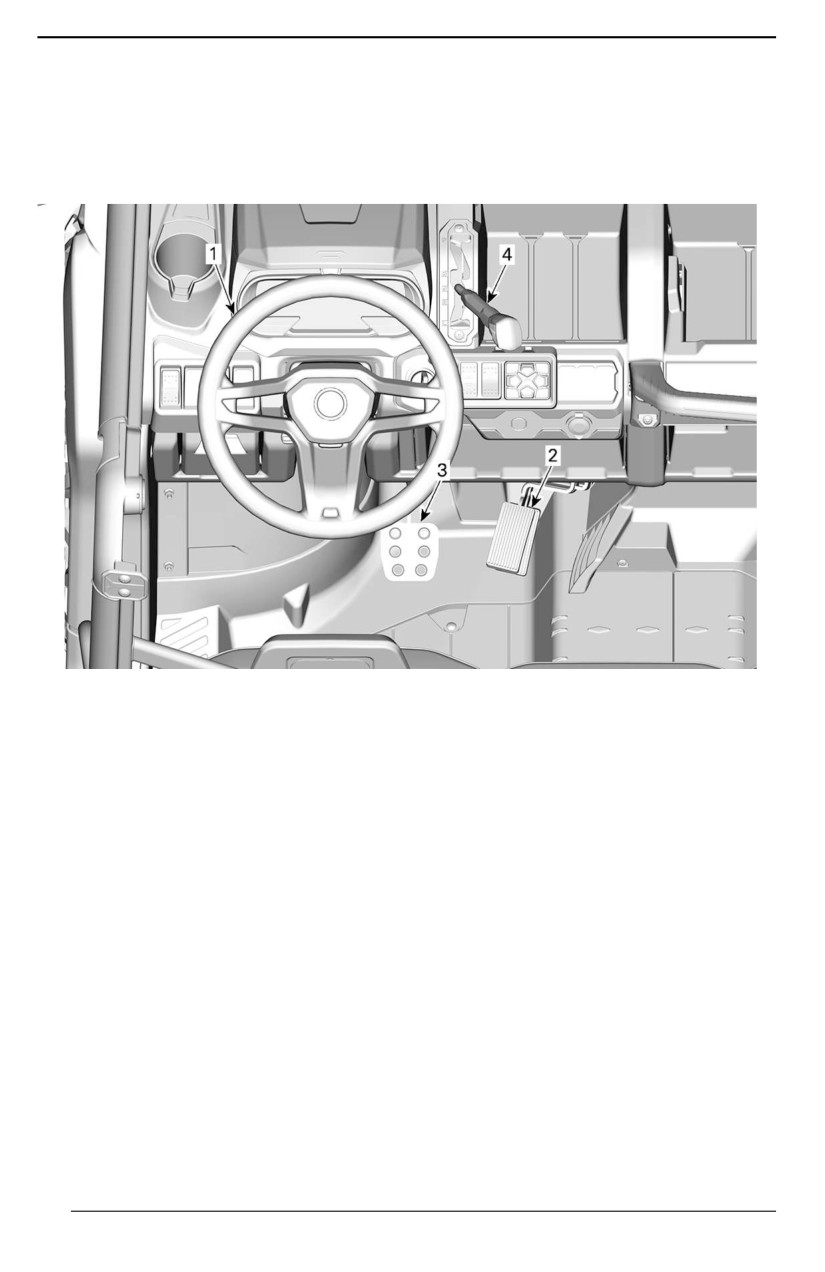
PRIMARY CONTROLS
It is important to know the location and
NOTE:
operation of all controls, and to devel-
Some vehicle safety labels are not
op and practice smooth and coordi-
shown on illustrations. For information
nated use of them.
on vehicle safety labels, refer to Im-
portant on-product labels.
1. Steering wheel
2. Accelerator pedal
3. Brake pedal
4. Shifter
74
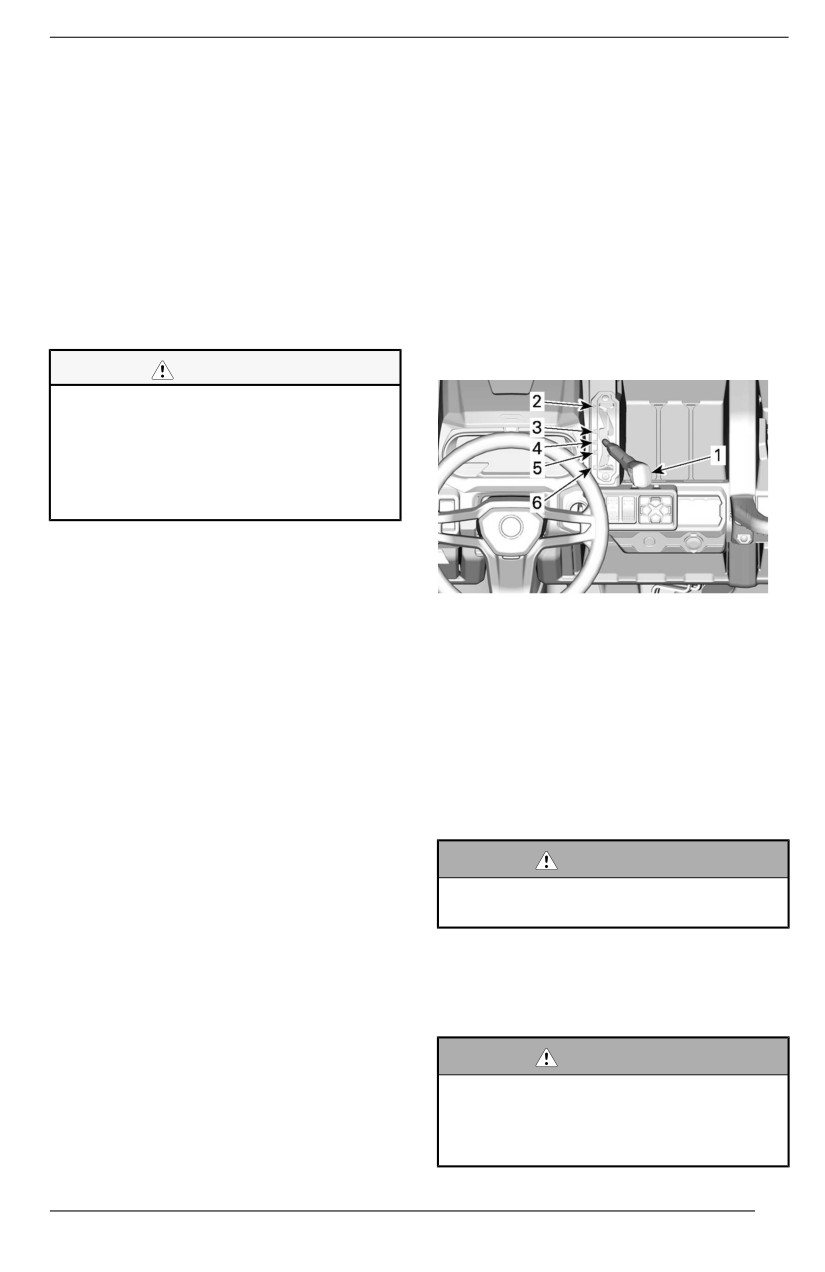
PRIMARY CONTROLS
Steering Wheel
To decrease vehicle speed or to stop
vehicle, press down the brake pedal
The steering wheel is located in front
with your right foot.
of the driver's seat.
The brake pedal is spring loaded and
The steering wheel steers the vehicle
should return to rest position when not
to the left or right.
pressed.
Turn the steering wheel in the direc-
tion you want to go.
Shift Lever
The shift lever is located on the upper
Grip the steering wheel with both
console to the right of steering wheel.
hands, without having thumbs rolled
around the steering wheel.
The shift lever is used to change the
gearbox position.
CAUTION
Under rough traill condiitiions or
when crossing an obstaclle, the
steeriing wheell coulld suddenlly
j
jerk on one side, causing hand or
wrist injuriies iif the thumbs are
rollled around the steering wheell.
A dynamic power steering (DPS) re-
duces the effort to turn the steering
wheel.
TYPICAL
1. Shift lever
Accelerator Pedal
2. Park
The accelerator pedal is located on
3. Reverse
the right side of the brake pedal.
4. Neutral
5. High range (forward)
The accelerator pedal controls the en-
6. Low range (forward)
gine speed.
The vehicle must be
stopped
and
To increase or maintain vehicle
brakes applied prior to selecting any
speed, press on the accelerator pedal
gear.
with your right foot.
To decrease vehicle speed, release
WARNING
the accelerator pedal.
Thiis gearbox iis not desiigned to
shift whiile vehiicle is moving.
The accelerator pedal is spring loaded
and should return to rest position (idle)
when not pressed.
Park
The park position locks the gearbox to
Brake Pedal
help prevent vehicle movement.
The brake pedal is located on the left
side of the accelerator pedal.
WARNING
The brake pedal function is to slow
Always use the PARK (P) posiitiion
down or stop the vehicle.
when the vehiiclle is not iin opera-
tiion. The vehiiclle can rolll if the
shift lever is not set to P (PARK).
75

PRIMARY CONTROLS
Reverse
The reverse position allows the ve-
hicle to go backwards.
Depending upon your particular ve-
hicle configuration, a back-up alarm
may be equipped on the vehicle. It
goes on automatically when the re-
verse gear is selected.
NOTE:
In reverse operation, the engine RPM
is limited thus limiting the vehicle re-
verse speed.
WARNING
When driiving downhilll iin reverse,
gravity can iincrease the vehicle
speed above safe reverse speed.
Neutral
The neutral position disengages the
gearbox.
High Range (Forward)
This position selects the high speed
range of the gearbox. It is the normal
driving speed range. It allows the ve-
hicle to reach its maximum speed.
Low Range (Forward)
This position selects the low speed
range of the gearbox. It allows the ve-
hicle to move slowly with maximum
torque at the wheels.
NOTICE
Use the llow speed range to pulll a
trailer, carry heavy cargo, go over
obstacles or drive uphiilll and
downhiilll.
76
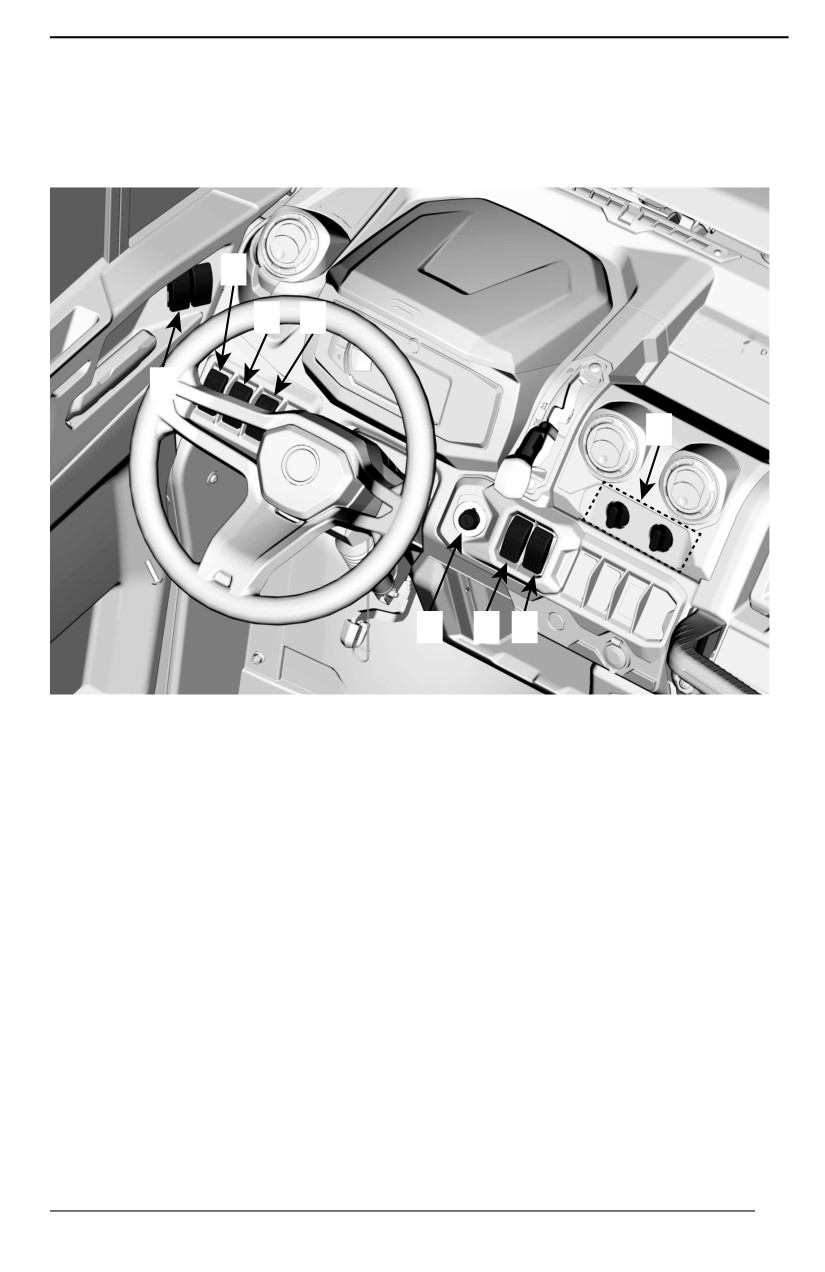
SECONDARY CONTROLS
Some features may not apply to your
For information on vehicle safety la-
model or could be optional.
bels, refer to Important On-Product
labels.
Some vehicle safety labels are not
shown on illustrations.
8
7
6
9
5
1
2
3
TYPICAL - CAB MODEL WITH HEATING SYSTEM SHOWN
77
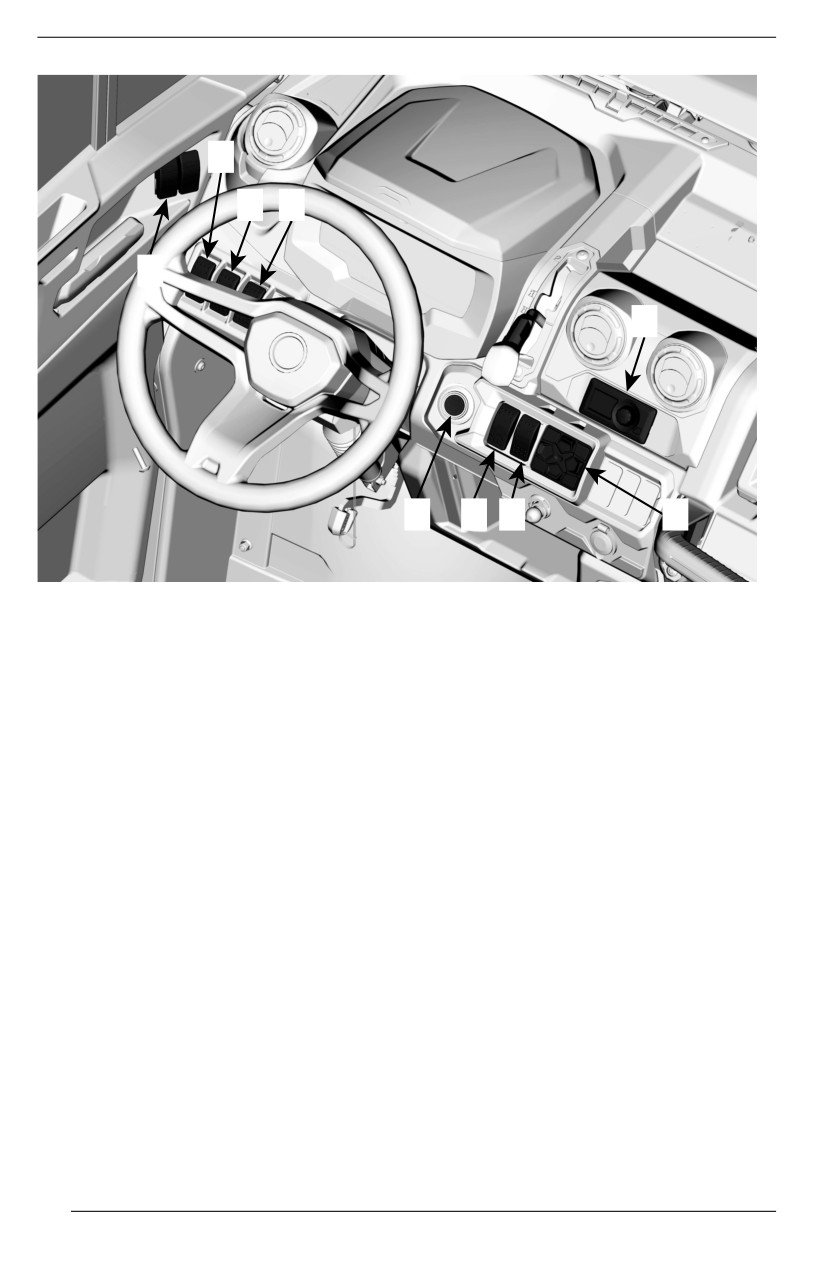
SECONDARY CONTROLS
8
7
6
9
5
1
2
3
4
TYPICAL - CAB MODEL WITH HEATING AND A/C SHOWN
1. Ignition switch or Start/Stop Button
2.
2WD/4WD/Smart-Lok Switch
3. Rear differential switch
4. Keypad
(use with
7.6” digital
display)
5. Climate control
6. Horn switch
(on applicable
models)
7. Winch switch
8. Headlight dimmer switch
9. Power window switches
78
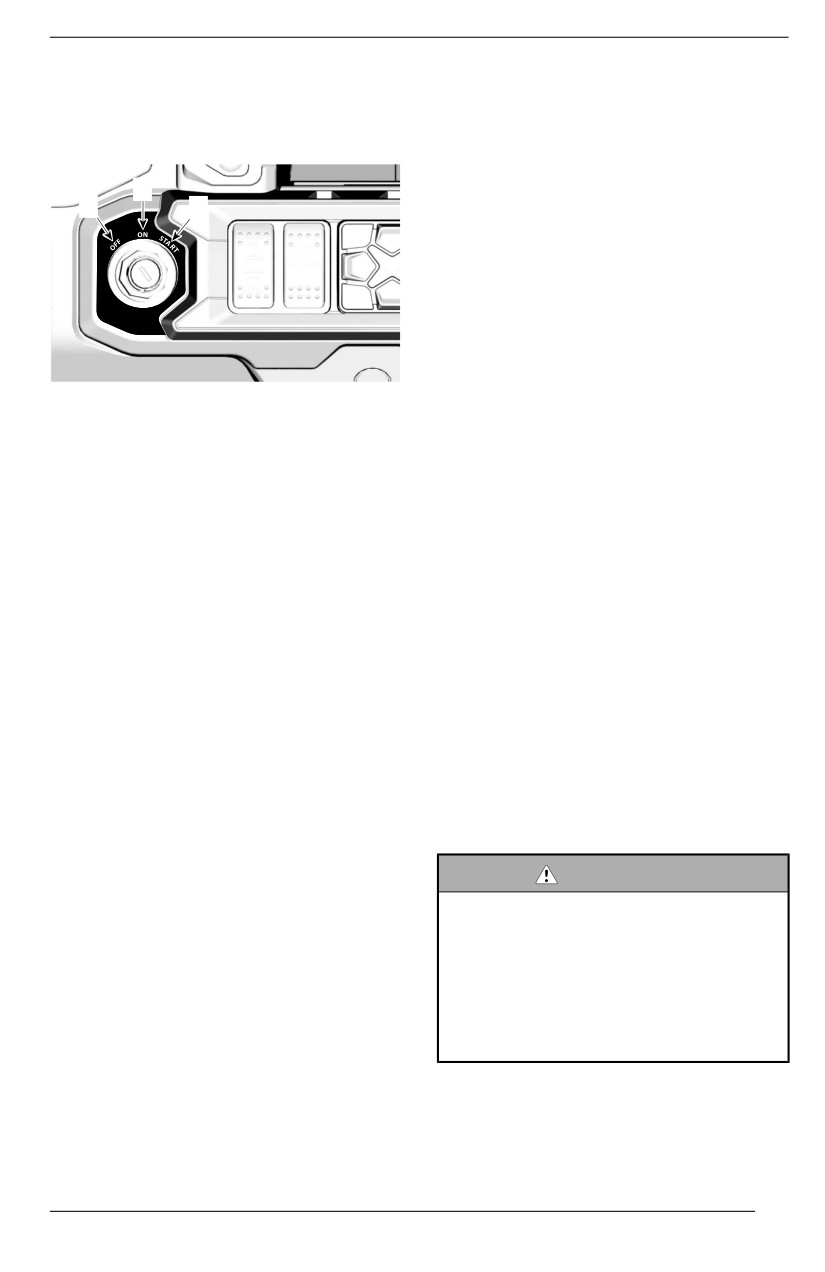
SECONDARY CONTROLS
Ignition Switch and Keys
Keys
The ignition switch is located on the
Basic Key
upper console area.
The vehicle is delivered with 2 basic
key.
2
1
3
Those 2 mechanical keys do not have
speed or torque restrictions.
D.E.S.S. Key (Avaiilable as an
optiion)
For all D.E.S.S. related option, see an
authorized Can-Am Off-road dealer
for information.
Digiitallly Encoded Securiity System
1. OFF
(D.E.S.S.)
2. ON
3. START
The ignition keys contain an electronic
circuit that gives it a unique electronic
OFF
serial number.
The key can be inserted or removed in
The D. E. S. S. system reads the key
this position only.
code and allows engine starting for
In OFF position, the electrical system
keys it recognizes.
of the vehicle is disabled.
This vehicle can be operated using 3
The engine is shut down by turning
different types of key programming:
the ignition switch to OFF position.
- Work
- Normal
ON
- Performance
When the key is turned in this position,
Refer to your dealer for complete
the electrical system of the vehicle is
information.
activated.
NOTE:
The gauge should wake-up.
Additional keys are available from
The vehicle lights are turned on.
your dealer as an accessory.
The engine can be started.
WARNING
START
Rolllovers, tiipovers, colllisions and
l
loss of control resullting in serious
This position starts the engine.
i
injury or death are possiible with
NOTE:
the performance or normal key.
If the ignition switch is left ON for more
Using the normal key is not a sub-
than 30 minutes, engine will not start
stitute for the operator being pre-
unless ignition switch is turned OFF,
pared, qualiified, and operating
then ON again.
wiith care.
Performance Key
79
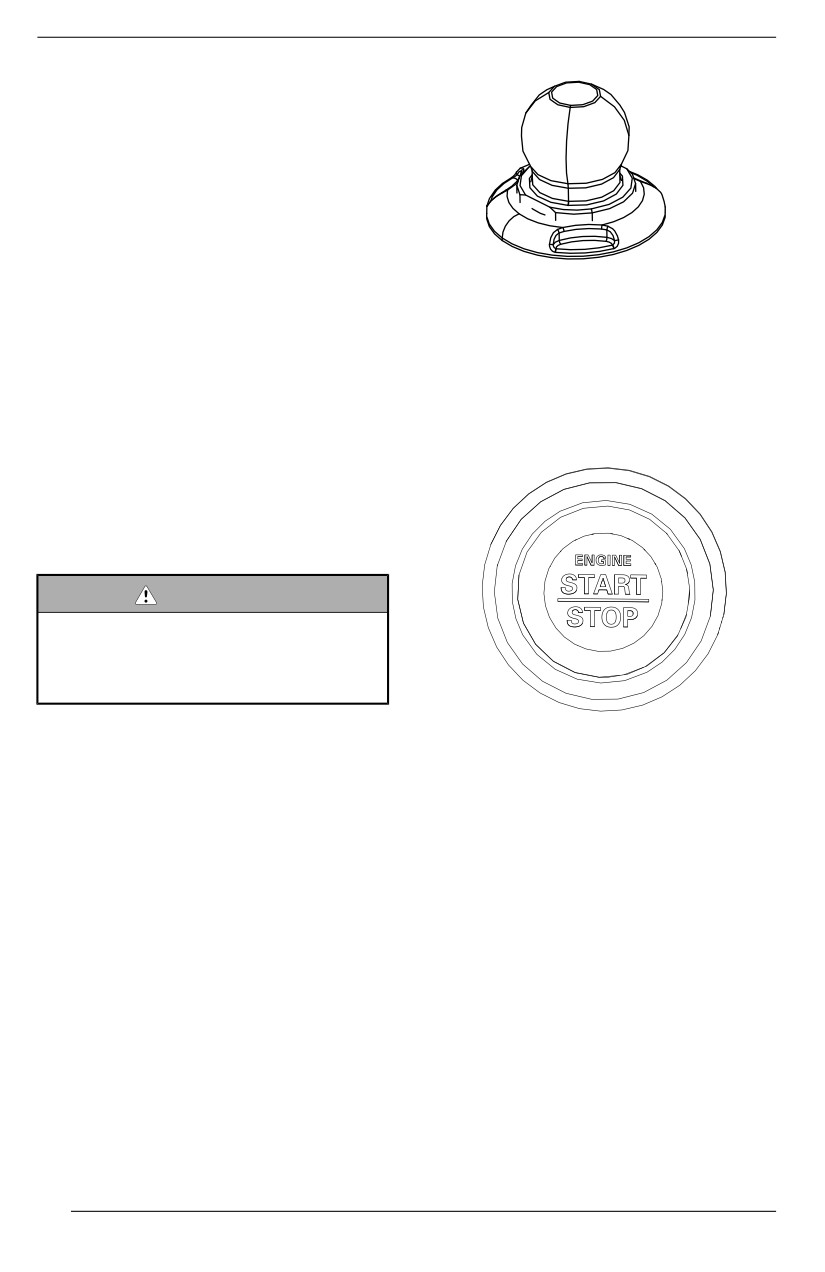
SECONDARY CONTROLS
The performance key allows the user
to access the full torque of the engine
as well as the top speed of the
vehicle.
This may be useful for riders who pre-
fer crisper throttle response, and for
environments where higher speeds
and greater acceleration are appropri-
ate. For example, in wide-open
straight trails, operators may prefer
the performance key.
Normal Key
Engine Start/Stop Button
The normal key limits the vehicle
speed to 70 km/h (43 MPH) and ap-
The engine start / stop button is lo-
plies a torque reduction.
cated on the upper console, at the
right of the steering wheel.
Work key
The work key allows for usage of
100% of maximum engine torque but
limits vehicle speed to 40 km/h (25
MPH).
WARNING
On steep downhillls, the engine
speed llimiter may not prevent the
vehicle from accelerating beyond
this speed.
This key may be useful for riders who
When pressed and held, it starts the
prefer more gradual acceleration, or
engine.
for riding in environments where full
speed and high acceleration are not
If
the engine is running, when
desirable. For example, in narrow,
pressed, it stops the engine.
winding trails, operators may prefer a
normal key.
NOTE:
The RF D.E.S.S. key must be installed
RF D.E.S.S. Post
on the RF D. E. S. S. post to allow en-
The D. E. S. S. post is located on the
gine start.
upper console.
To power up the electrical system
without starting the engine, refer to
Waking Up the Electrical System.
D.E.S.S. Fllexiibillity
The D. E. S. S. of your vehicle can be
programmed by your authorized Can--
Am Off-road dealer to accept up to 8
different keys.
80
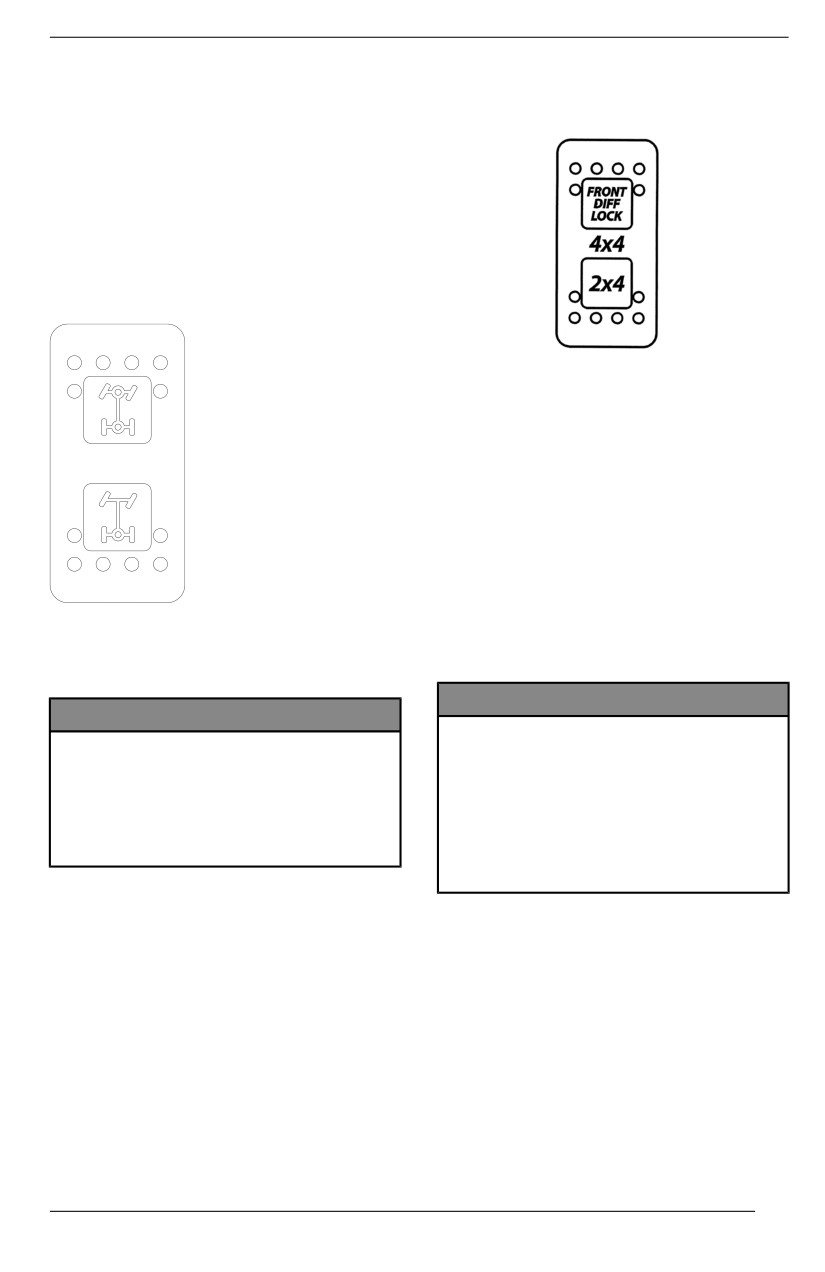
SECONDARY CONTROLS
If you have more than one D. E. S. S.
The 2WD/4WD/Front Diff Lock switch
equipped your vehicle, each can be
is located on the upper console.
programmed by your authorized Can--
Am Off-road dealer to accept the other
vehicle D.E.S.S. keys.
2WD/4WD Switch
Modells wiithout Smart-Lok
The 2WD/4WD switch is located on
the upper console.
This switch selects 2 wheel drive or 4
wheel drive mode when the vehicle is
stopped.
Once the vehicle 4WD mode is en-
gaged, the front diff lock can be acti-
vated when the switch is pushed
upwards.
The front diff. lock can be activated on
the fly, no need to stop the vehicle to
engage. To deactivate, push again on
the switch. When the engine is
This switch selects 2 wheel drive, or 4
stopped, the front diff. lock will be
wheel drive mode when the vehicle is
deactivated.
stopped.
NOTICE
NOTICE
The vehicle must be stopped to
The vehiiclle must be stopped to
engage or disengage the 2WD/
engage or disengage 2WD/4WD
4WD switch.
swiitch.
Mechaniicall damage may occur if
Mechaniicall damage may occur if
switch iis engaged or diisengaged
swiitch iis engaged or disengaged
whille driving.
whiile driiviing.
Always unlock the front diff. be-
fore disengaging 4WD.
The 4WD mode is engaged when the
switch is pushed upwards.
The front differential is fully locked
when the switch is pushed upward. It's
The 2WD mode is engaged when the
a momentary position. When the front
switch is pushed downwards. The ve-
diff. is locked, the switch light will illu-
hicle is then rear wheel drive only.
minate and a message will appear in
the cluster for 2 seconds to say "DIFF
2WD/4WD/Front Diff Lock
LOCK". A padlock pictogram will ap-
Switch
pear inside the 4x4 logo. The light will
turn off when the differential is un-
Modells wiith Smart-Lok
locked and a message in the cluster
will appear and show "SMART-LOK",
81
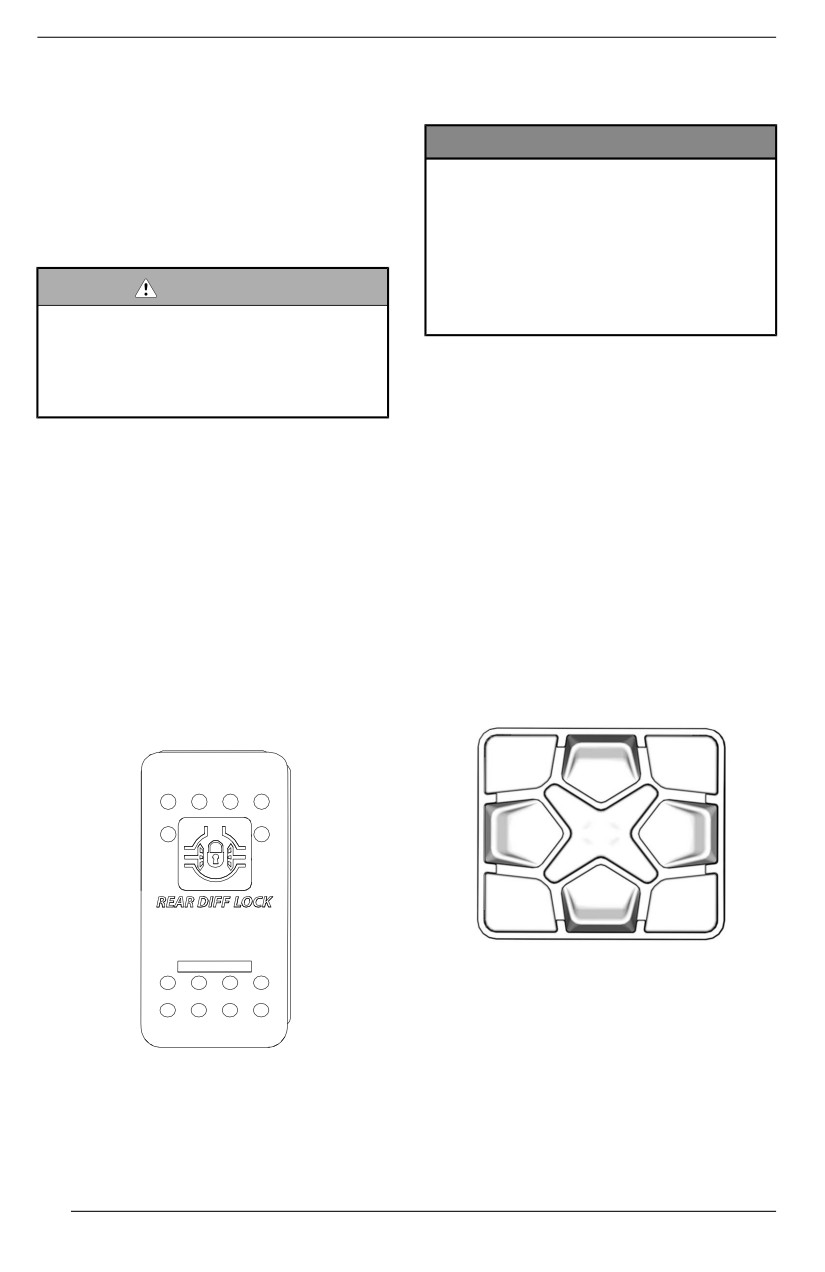
SECONDARY CONTROLS
meaning that you are back in the auto-
This switch enables locking of rear
matic mode. For all models with Smar-
differential.
t-Locker, the AUTO pictogram will lit
above the 4x4 logo in the cluster.
NOTICE
The vehiclle must be stopped to
When the front differential is locked,
engage or diisengage the differen-
the effort to turn the steering wheel
tial switch.
might be higher and the response
The vehiclle must be in gear (not
might be slower.
in Park) to proceed
Mechanical damage may occur iif
WARNING
swiitch is engaged or disengaged
Abruptly changiing direction can
whiile driviing.
cause lloss of controll or injjury.
Never engage Front Diff Lock be-
The rear differential is locked when
fore entering a turn or when
the switch is pushed upwards and un-
turning.
locked when the switch is pushed
downwards.
The front differential is locked and the
If the vehicle is in Park and the switch
4WD mode is engaged when the
is pushed downwards, the rear differ-
switch is pushed upwards.
ential will stay locked.
The 4WD mode is engaged when the
switch is in the middle.
Keypad
The 2WD mode is engaged when the
The keypad is used to navigate
switch is pushed downwards. The ve-
through various menus and options
hicle is then rear wheel drive only.
when the
7.6" Digital Display is
installed.
Rear Differential Lock Switch
The keypad is located on the upper
The rear differential lock switch is lo-
console.
cated on the upper console.
Climate Controls
CAB Modells Onlly
The climate controls unit are located
in center of the upper console.
They control the flow and the temper-
ature of the air circulated in the
vehicle.
82
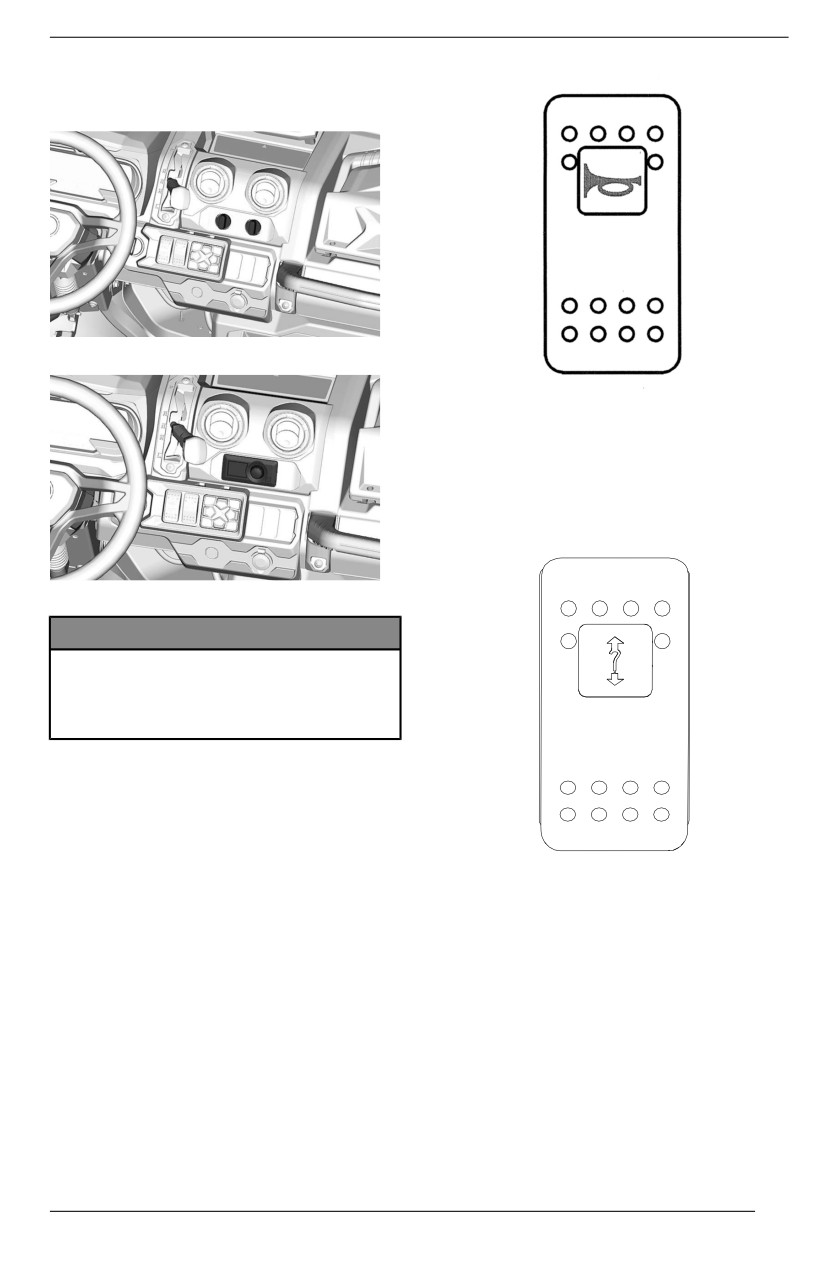
SECONDARY CONTROLS
Refer to Climate Control System in
Equipment for operation instructions.
MODELS WITHOUT A/C
Winch Switch
The winch can be controlled from in-
side and outside the vehicle with the
winch control switch located in the
upper console.
A/C EQUIPPED MODELS
NOTICE
The cliimate control module iin-
stallled in the Liimiited models is
not waterproof nor water
resistant.
Horn Switch (On applicable
models)
To activate the horn, push on the
switch.
Refer to your Winch Guide included
with your vehicle for proper winch
operation.
Headlight Dimmer Switch
The headlight dimmer switch is lo-
cated on the upper console.
83
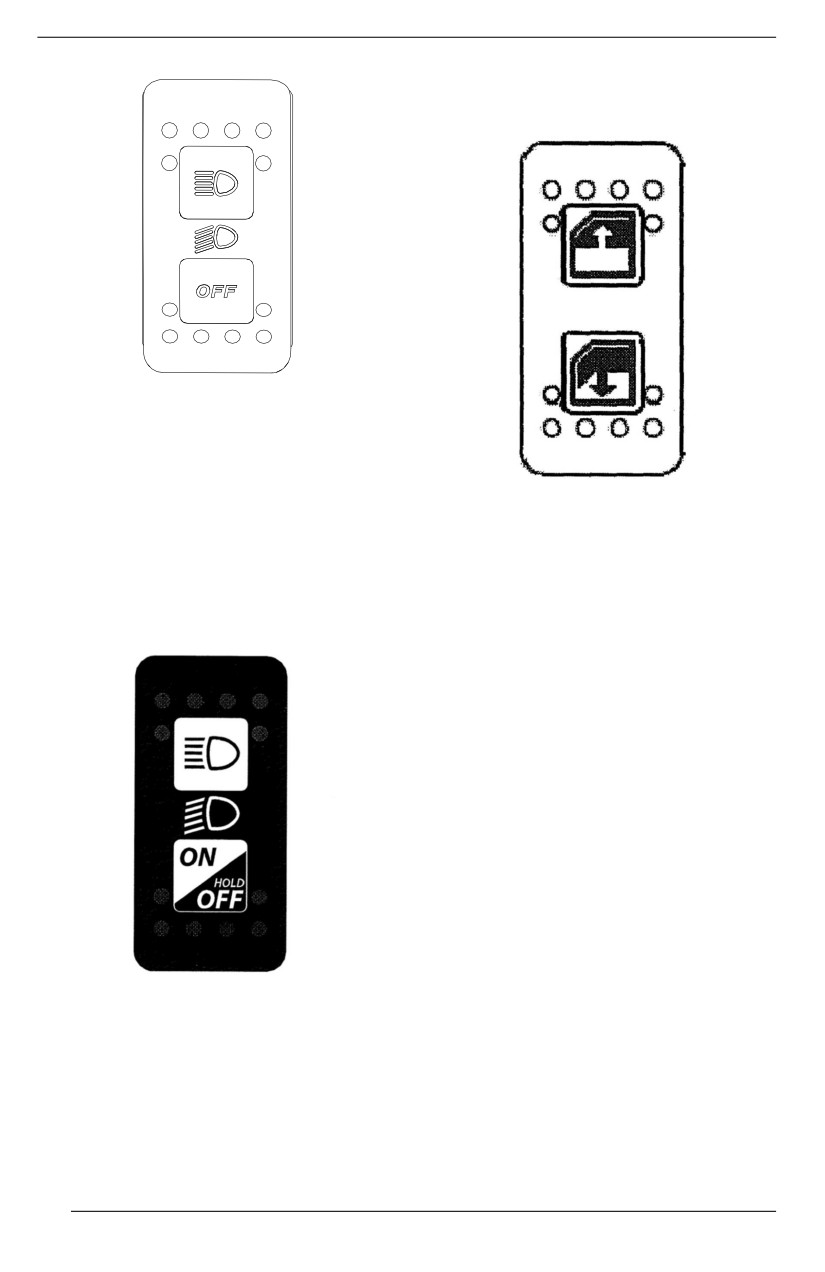
SECONDARY CONTROLS
on the driver side and one on the pas-
senger side.
This switch is used to select either the
headlights OFF position, low or high
beams.
Headlight Dimmer Switch
(700 Engine)
1. Press the switch to open the
window.
The headlight dimmer switch is lo-
2. Lift the switch to close the window.
cated on the upper console.
This switch is used to select either the
Wiper / Windshield Washer
headlights low or high beams.
Switch
The wiper / windshield washer switch
is located overhead, to the left of the
central mirror.
Press and hold to turn on or off the
headlights.
Power Window Switches (If
Equipped)
The power window switches are lo-
cated on the door panel. Two switches
84
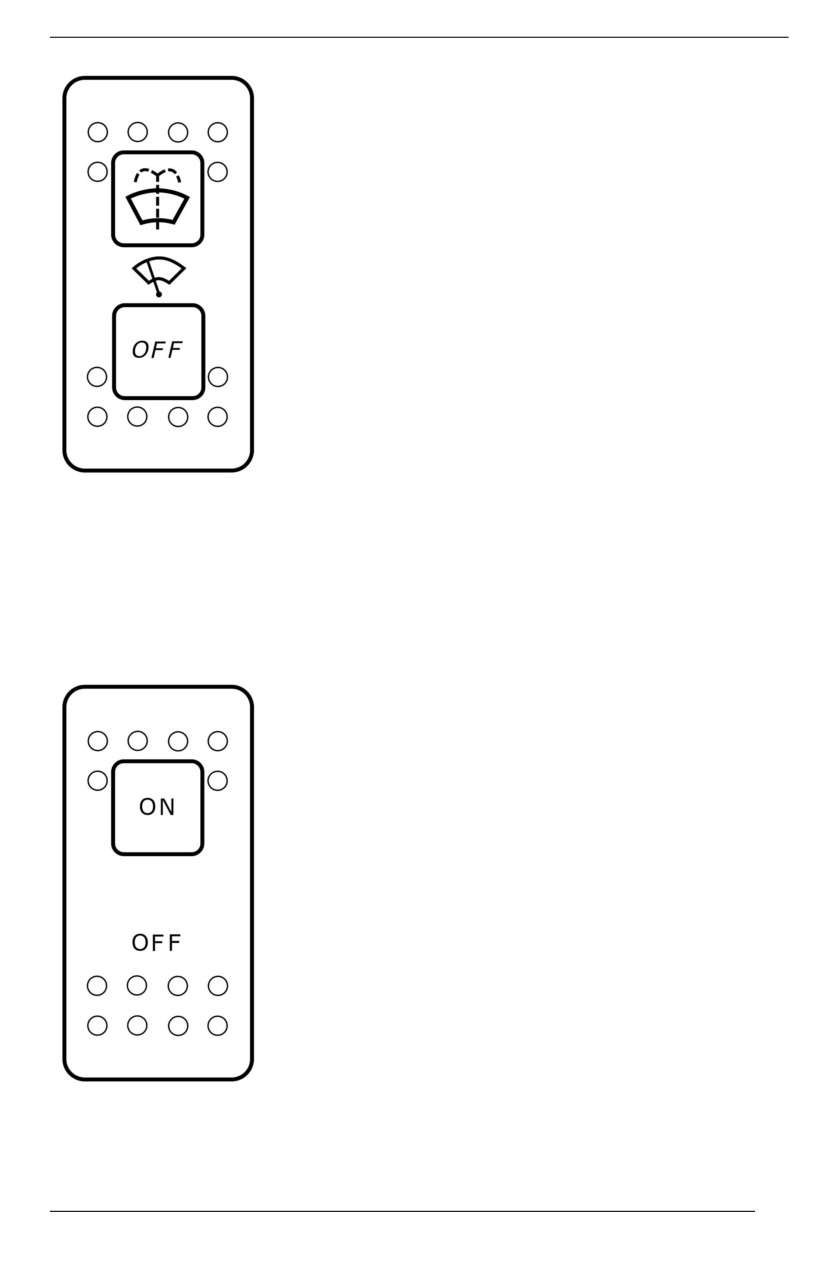
SECONDARY CONTROLS
This switch is used to select either the
OFF, wipe or wash-and-wipe
positions.
Audio ON/OFF Switch
The audio switch is located at the front
of the audio roof, to the left of the head
unit.
This switch is used to activate (ON) or
deactivate (OFF) the audio roof.
85
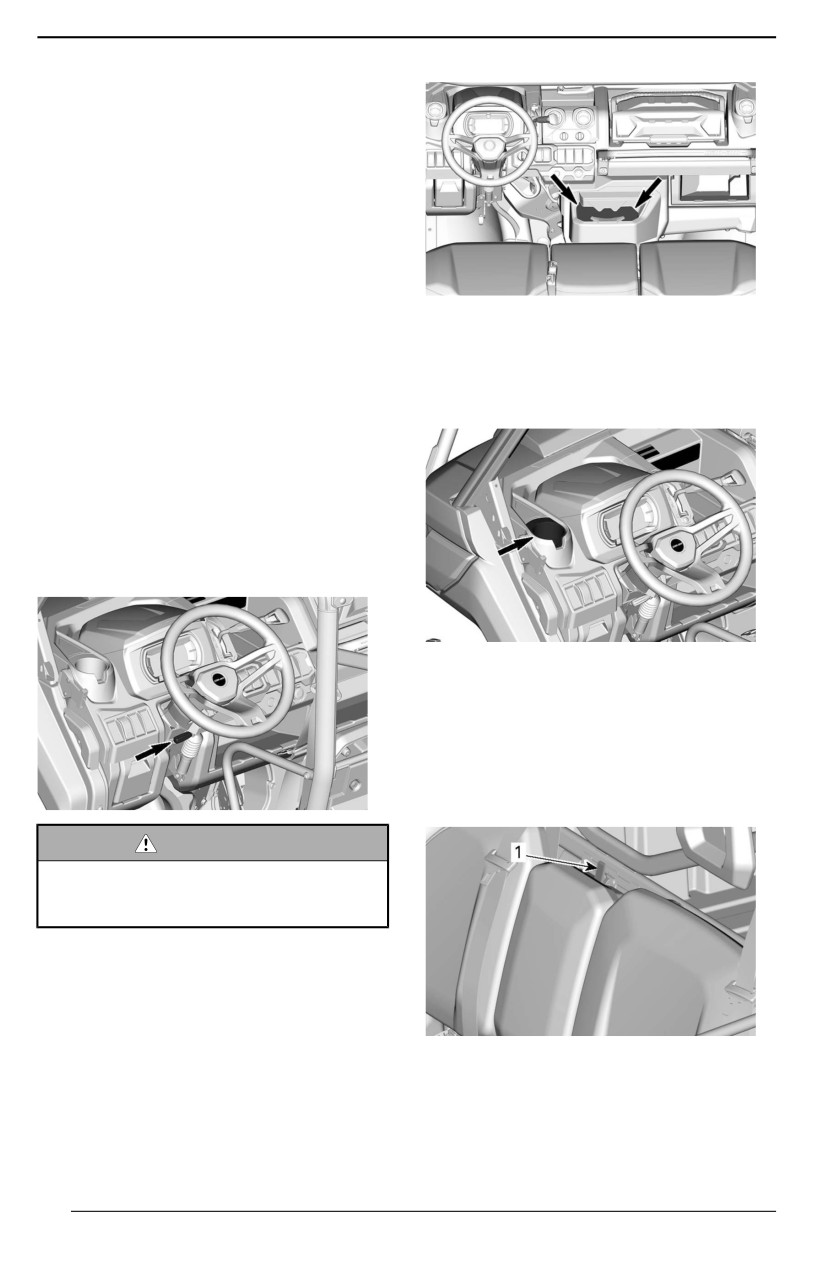
EQUIPMENT
Some features may not apply to your
model or could be optional.
Some on-product labels are not
shown on illustrations.
For information concerning the safety
labels, refer to Important On-Product
Labels.
Tilt Steering
The steering wheel height is
Alll except CAB modells
adjustable.
Two cup holders are located on each
Adjust the steering wheel height to
side of the dash near the side nets at-
face your chest, not your head.
tachment points.
To adjust steering wheel height:
1. Unlock steering by pulling the tilt
lever toward you.
2. Move steering wheel to the desired
position.
3. Release tilt lever to lock steering
wheel in position.
Alll models
Two additional cup holders are avail-
able on the back of the central pas-
sengers seat backrest.
To access them, lower the seat
backrest.
WARNING
Never adjjust the steeriing wheell
heiight whiile riiding. You may llose
controll.
Cup Holders
CAB modells
Two cup holders are located on the
central console.
TYPICAL
1. Backrest clip locking mechanism
86
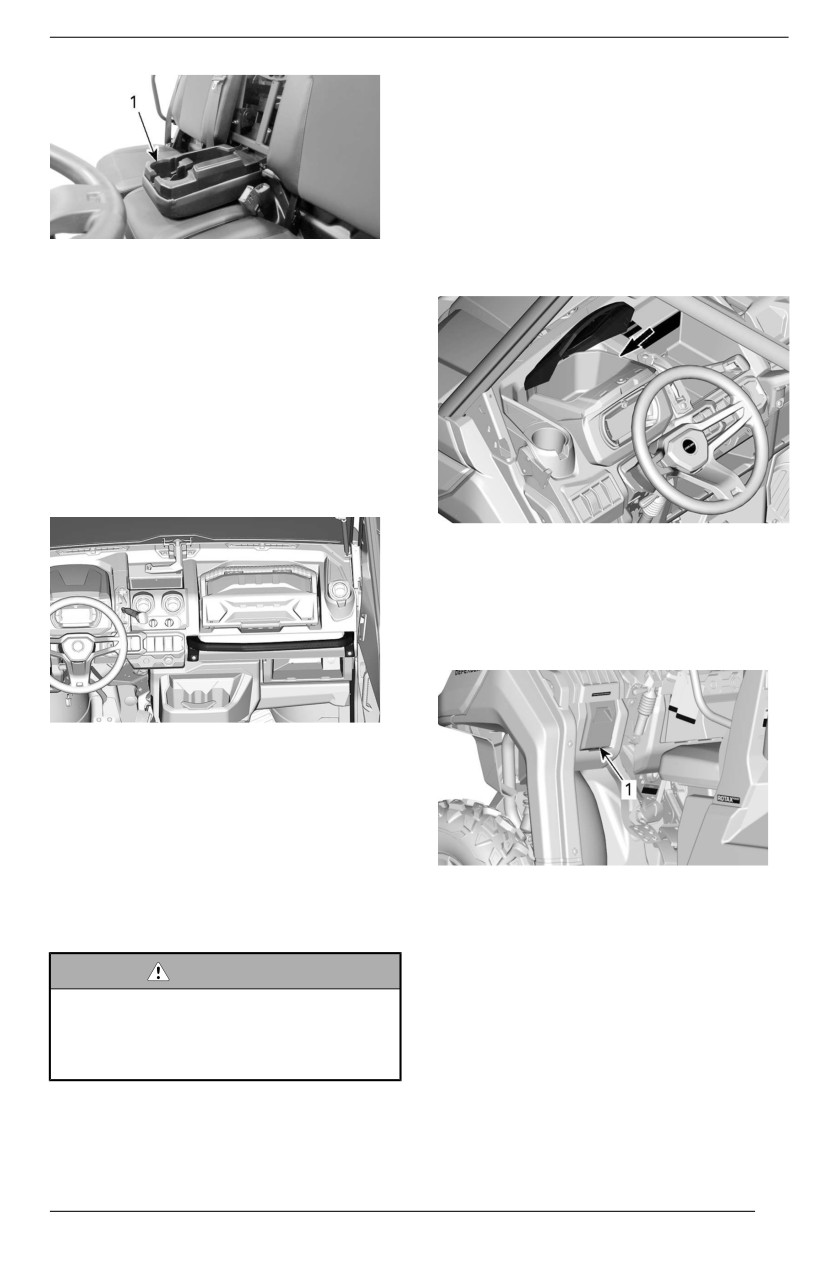
EQUIPMENT
Storage Compartments
The vehicle is equipped with storage
compartments designed to carry light
objects.
Mulltiifunctiion Gauge Storage
Compartment
TYPICAL
A storage compartment is available
1. Central passenger backrest cup holder
above the multifunction gauge.
NOTE:
Do not use cup holders while riding in
rough conditions.
Passengers Handhold
The passengers have access to a
front handhold located in front of their
seats.
Driver Storage Compartment
A small storage compartment is avail-
able on the driver side.
Pull on handle to rotate it open.
Adjust the seat position in order to get
a solid and comfortable grip on the
handholds. Refer to Passenger’s Seat
for adjustment procedure.
Holding the handhold helps the pas-
sengers brace against the movement
TYPICAL
of the vehicle and helps keep hands
1. Driver storage compartment
and body inside the cockpit in the
event of a rollover.
Removable Tool Box
WARNING
A removable tool box is located on the
upper console in front of the passen-
Never use any part of vehiclle
ger’s seat..
cage as handholds. Hands can be
struck by objects outsiide the
cockpit or crushed iin a rollover.
87
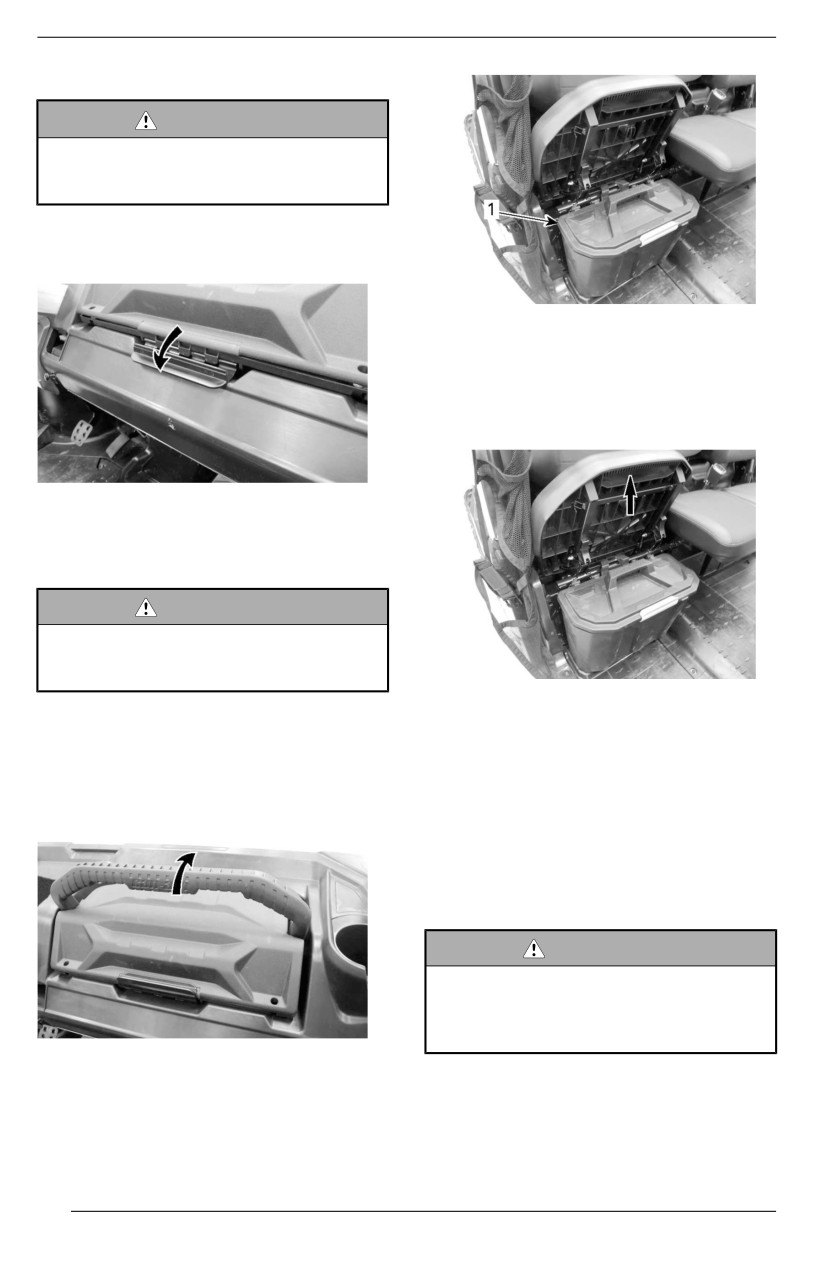
EQUIPMENT
Openiing the Tool Box Lid
WARNING
Before ridiing, always make sure
tool box is secured to vehiicle and
l
lid iis locked.
1. Push the lock downwards and lift
the lid.
TYPICAL
1. Under seat storage box
To remove under seat storage box, lift
RH passenger seat and remove under
seat storage box by pulling it upwards.
2. To close the lid, lower it and push
the lock upwards.
Removiing and Securing the Tool
Box
WARNING
Before ridiing, always make sure
tool box is secured to vehiicle and
l
lid iis locked.
TYPICAL
1. To remove the tool box from the
NOTE:
vehicle, lift its transport handle.
When reinstalling under seat storage
2. To secure the tool box in place, po-
box, make sure to align it properly with
sition it carefully and lower the
seat tubes and floor emboss so it fits
transport handle.
properly under the seat.
Open Storage Compartments
Multiple open storage compartments
are available in the console.
WARNING
When ridiing vehicle, make sure
no objject stored in open storage
compartments coulld cause harm
in the event of a rolll over.
SECURING TOOL BOX IN PLACE
Under Seat Storage Box
A convenient removable under seat
storage box is available.
88
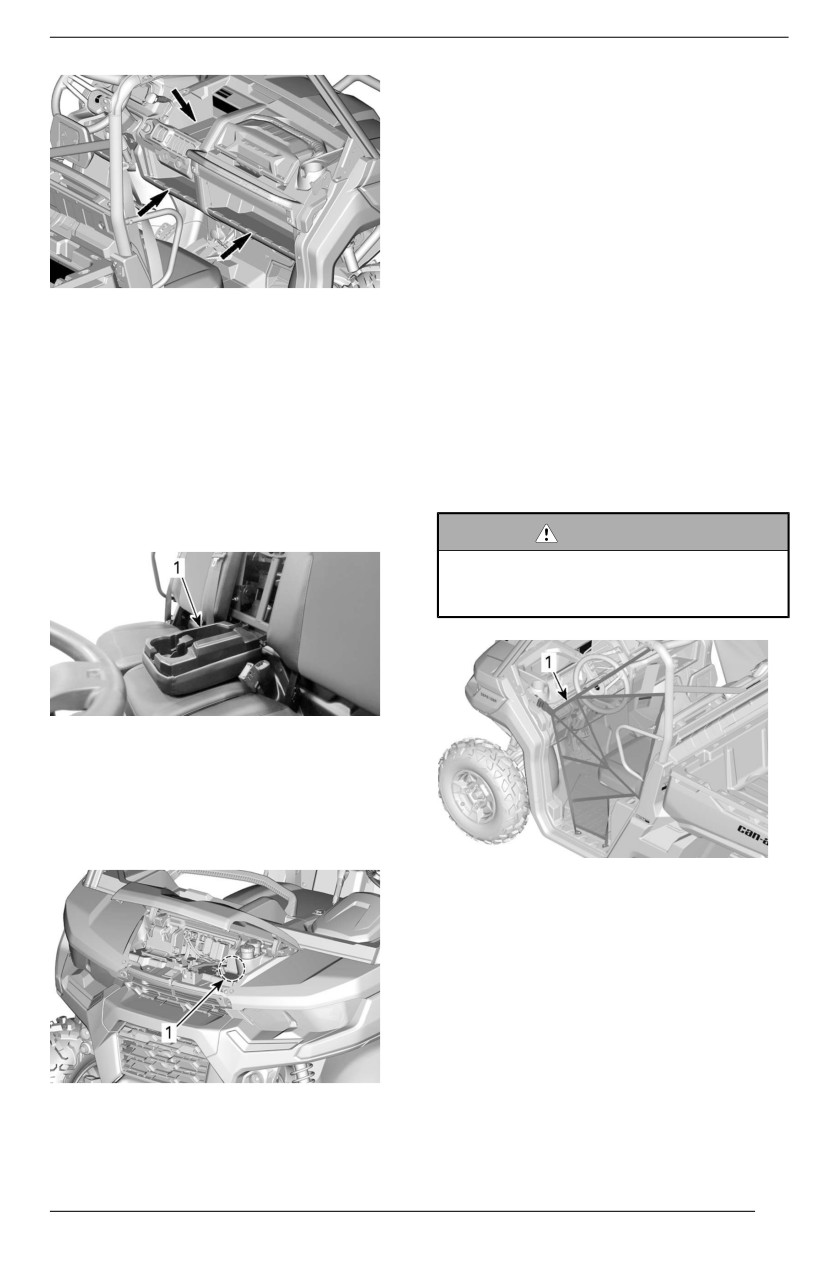
EQUIPMENT
Footrests
The vehicle is equipped with driver
and RH passenger footrests to allow
firmly planting feet on vehicle floor,
which helps to maintain proper body
position while riding.
The footrests help minimize the risk of
leg or foot injury.
Always wear appropriate footwear.
ALL EXCEPT BASE
See Riding Gear.
Central Passenger Backrest
Side Nets
Storage Area
A side net is provided on each side of
When central passenger seat back-
the cockpit to help arms, legs or
rest is pulled down a storage area is
shoulders stay inside the vehicle, thus
available.
reducing the risk of injuries. Side nets
may also keep bushes or other debris
NOTE:
out of the cockpit.
Always empty storage area before
putting central passenger backrest up.
WARNING
Never operate the vehicle unless
both siide nets are iin pllace and
bucklled.
TYPICAL
1. Central passenger backrest storage area
Tool Kit
A tool kit with basic tools is provided.
It is located in the front service center.
1. Side net
Side nets are adjustable and must be
kept as tight as possible.
To adjust side nets proceed as
follows:
1. Secure side net with buckle.
2. Pull on all adjustment straps to
tighten.
1. Tool kit
89
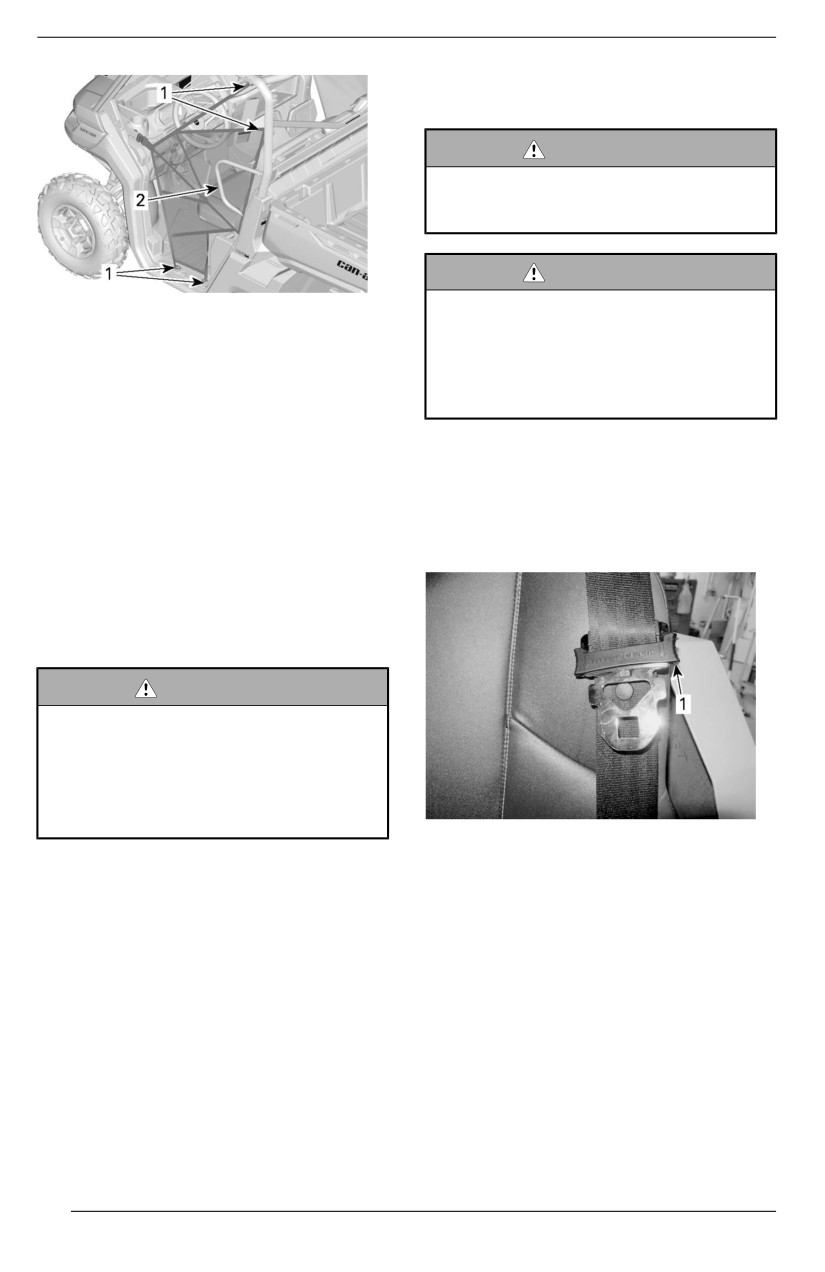
EQUIPMENT
of approximately 20 km/h (12
MPH) on flat ground.
WARNING
The vehiclle may reach hiigher or
lower speed dependiing on
incliines.
WARNING
1. Side net adjustment locations
There is no iindicator llight or mes-
2. Shoulder guard
sage for the passengers seat belt.
The driver is responsiible for the
passenger safety and shoulld en-
Shoulder Guards
sure the passengers bucklle theiir
The vehicle is equipped with shoulder
seat belt.
guards to help restrain the entire body
of driver and passengers inside
Fastening and Adjjusting the Seat
vehicle.
Belt
The seat belt is equipped with a semi--
Seat Belts
cinching tab that locks the lap belt
This vehicle is equipped with 3 points
when the webbing is under tension.
seat belts to help protect driver and
passenger in the event of a collision,
rollover, or tipover. The seat belts can
help keep occupants stay in the pas-
senger compartment.
WARNING
Wear seat belts properly at alll
tiimes.
Seat belts reduce the riisk of injury
i
in case of a crash and hellp to
keep liimbs iinsiide the cockpiit dur-
i
ing a rolllover or any acciidents.
TYPICAL
1. Semi-cinching tab
If driver's seat belt is not fastened
when:
To fasten the seat belt, insert the latch
- The ignition is turned ON
plate into the buckle, then pull the belt
to ensure it is properly fastened.
- The seat belt indicator lamp will
be turned ON.
Adjust the seat belt tightly against
- The multifunction gauge will
your body by pulling the shoulder belt
display the message: SEAT
upwards.
BELT.
- The engine is started and shift lev-
er is moved out of PARK, vehicle
speed will be limited to a maximum
90
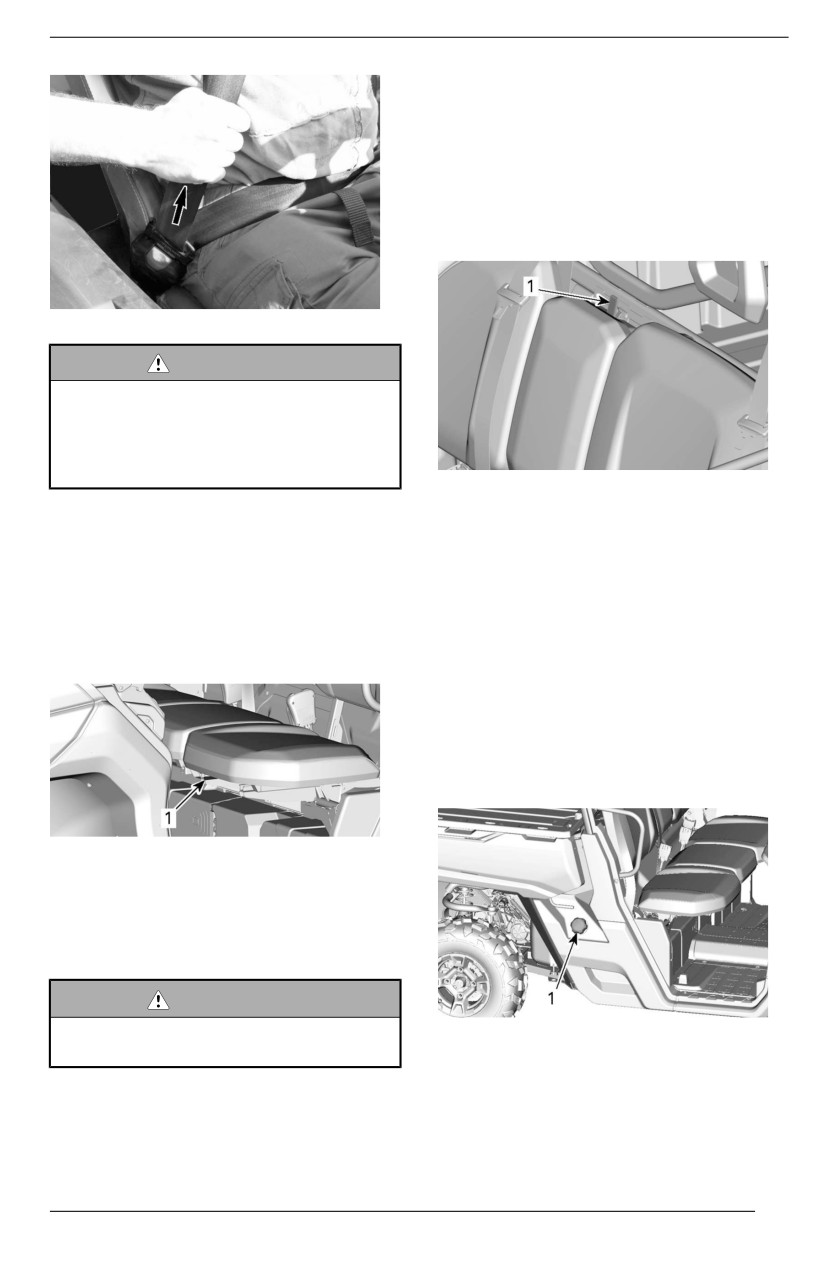
EQUIPMENT
Passenger Seats
The passenger seats are not
adjustable.
The central passenger seat backrest
can be tilted forward for access to cup
holders by releasing the latch located
on top of the backrest.
TYPICAL
WARNING
Wear seat bellt properly. Make
sure iit remaiins securelly fastened
and tiightened against the body.
Make sure it iis not twiisted or
defective.
TYPICAL
1. Backrest clip locking mechanism
To release the seat belt, push on the
red button on the seat belt buckle.
On applicable models, the seats can
be lifted to allow access to removable
Driver''s Seat
under seat storage compartment.
On applicable models, the driver's
To lift seat, pull on front of seat to un-
seat can be adjusted forward and
clip it and lift until it "clips" in the upper
backward.
position.
Fuel Reservoir Cap
The fuel reservoir cap is located on
the right hand side of the vehicle car-
go box release handle.
TYPICAL
1. Adjustment lever
To adjust seat, move the seat lever to
unlock the seat. Release the lever to
lock the seat into desired position.
WARNING
Never adjust the seat posiitiion
TYPICAL
whiile driiviing.
1. Fuel reservoir cap
Refer to Fuel section for information
on fueling procedure and fuel
requirements.
91

EQUIPMENT
Winch
of 3000 RPM to increase charging
power to the battery.
WARNING
To avoid severe injjury or death or
WARNING
i
important components damages.
Make sure vehiclle is in NEUTRAL
– Never use the wiinch cablle/
(N) before increasing engiine
rope to retaiin a vehicle during
RPM.
traiileriing.
– Never ride with the winch ca-
Cargo Box
ble/rope attached to a load or
another vehiclle.
The vehicle is equipped with a an in-
– Only use the wiinch to hellp a
clinable cargo box. The cargo box
stuck vehicle (snow, mud,
may be used for various types of
etc.).
cargo.
– Allways refer to the winch man-
ufacturer''s instruction before
WARNING
pulliing loads.
To reduce the riisk of loss of con-
troll or loss of lload, use the cargo
Refer to your winch guide included
box only iin accordance with Car-
with your vehicle for proper winch
rying Loads in the Safety Informa-
operation.
tion section.
The winch can be actuated inside the
Cargo Box Separations
vehicle using the winch control switch
on the upper console.
Cargo box can be easily separated in-
to smaller storage compartments to
NOTICE
prevent cargo loads from mixing.
Using the winch intensiivelly over a
l
long periiod of time may discharge
the battery.
Intensive use of the winch may cause
the built-in circuit breakers to momen-
tarily turn OFF. In such a case, wait a
moment, then continue winching. The
breakers automatically turn ON once
they have cooled down.
The following tips will help to reduce
EXAMPLE
OF
CARGO
BOX
the risk of discharging the battery:
SEPARATIONS
- Always unreel manually: Unlock
Cargo Box Tilt
the cable using the handle then
pull on the hook strap to unreel.
Cargo Box Tillt Release Handles (If
- Let the vehicle run while winching.
equipped)
Do not stop vehicle immediately
after winching to let battery
The latching mechanism of the cargo
recharge.
box can be actuated from either side
- Also, when winching for more than
of the vehicle through a release
30 seconds, it is recommended to
handle.
increase engine RPM in the range
92
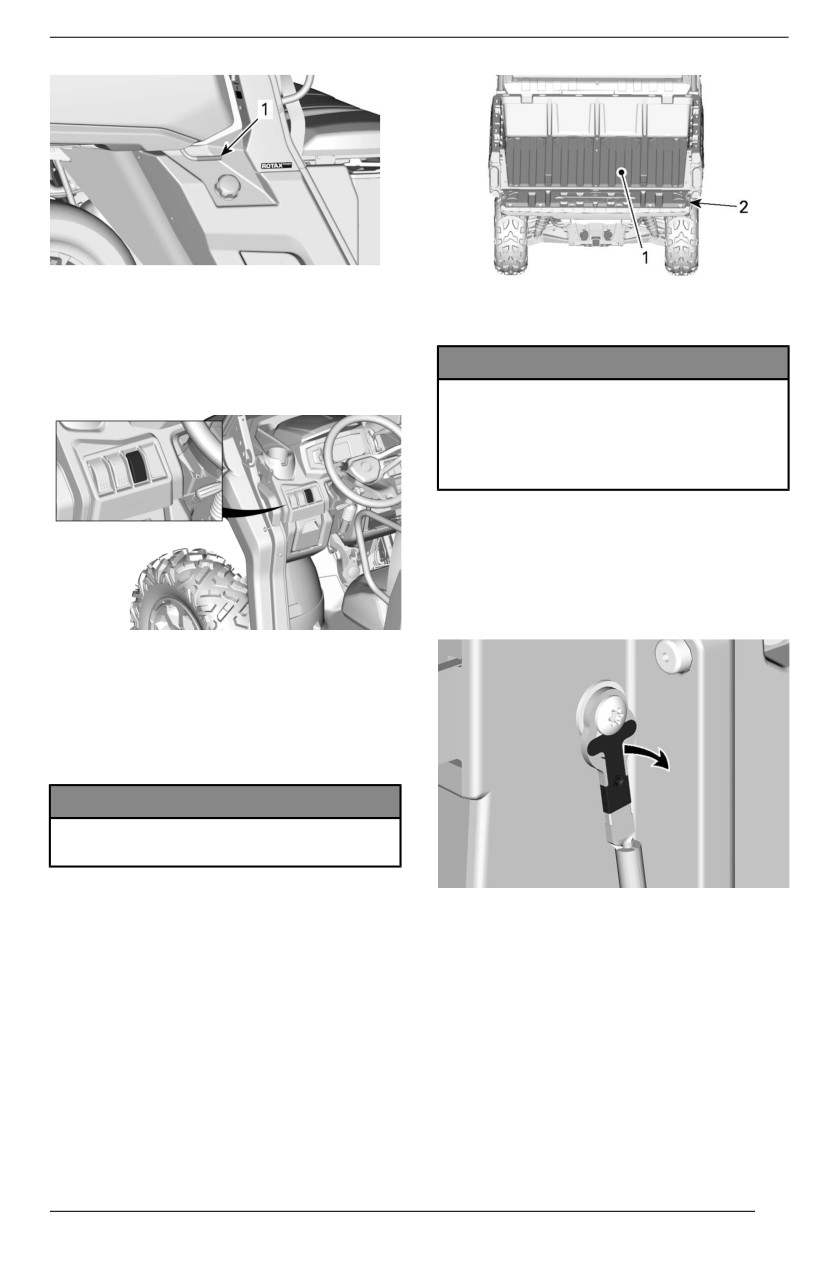
EQUIPMENT
1. Cargo box release handle
1. Cargo box
2. Tailgate
Cargo Box Power-Tilt (If equiipped)
The cargo box can be tilted with the
control switch located in the upper
NOTICE
control.
Do not exceed 113 kg (250 llb) of
weight on the taiilgate duriing lload-
i
ing or unlloading. Allways cllose
taillgate before operatiing to re-
duce the risk of lloss of load.
Removiing the Taillgate
1. Open tailgate.
2. Using a flat screwdriver, gently pry
the spring clip past the screw head
on each side.
Anchoring Hooks
To provide anchoring point in order to
secure cargo inside the cargo box, 4
anchoring hooks are located inside
the cargo area.
NOTICE
Never llift vehicle using anchoring
hooks.
Tailgate
3. Lift the tailgate 45°.
4. Lift the RH side off it’s hinge.
The cargo box can be closed with a
5. Remove the tailgate by sliding it to
tailgate.
the right.
6. The installation is the reverse of
the removal procedure.
Trailer Hitch
The vehicle comes equipped with a
50.8 x 50.8 mm (2 x 2 in) standard re-
ceiver hitch.
93
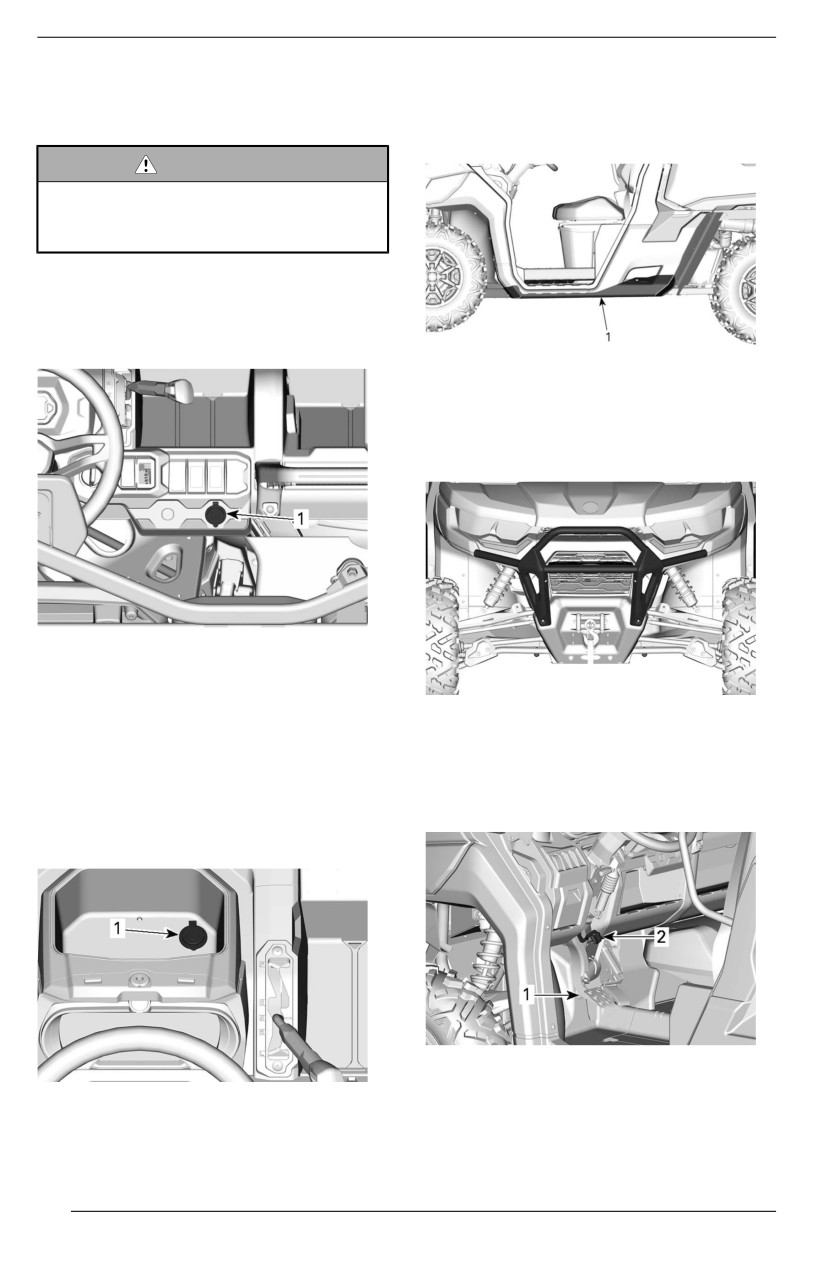
EQUIPMENT
For the proper usage of the hitch sup-
Rock Sliders
port, refer to Moving Loads and Doing
Aluminium rock sliders for additional
Work.
lower body protection.
WARNING
To reduce the risk of lloss of con-
trol or lloss of load, allways respect
the maxiimum hauliing capacity.
12-Volt Power Outlets
Convenient for handheld spotlight or
other portable equipment.
1. Rock slider
Front Bumper
Steel bumper for additional front body
protection.
ALL MODELS
1.
12 V power outlets
Remove protective cap to use. Always
reinstall it after use to protect against
Brake Holding Mechanism
weather.
The brake holding mechanism lever is
located on the LH side of the steering
USB Power Outlet
wheel, above the brake pedal.
Some models are equipped with a
USB port used for charging.
TYPICAL
1. Brake pedal
1. USB charging port
2. Brake holding mechanism lever
94
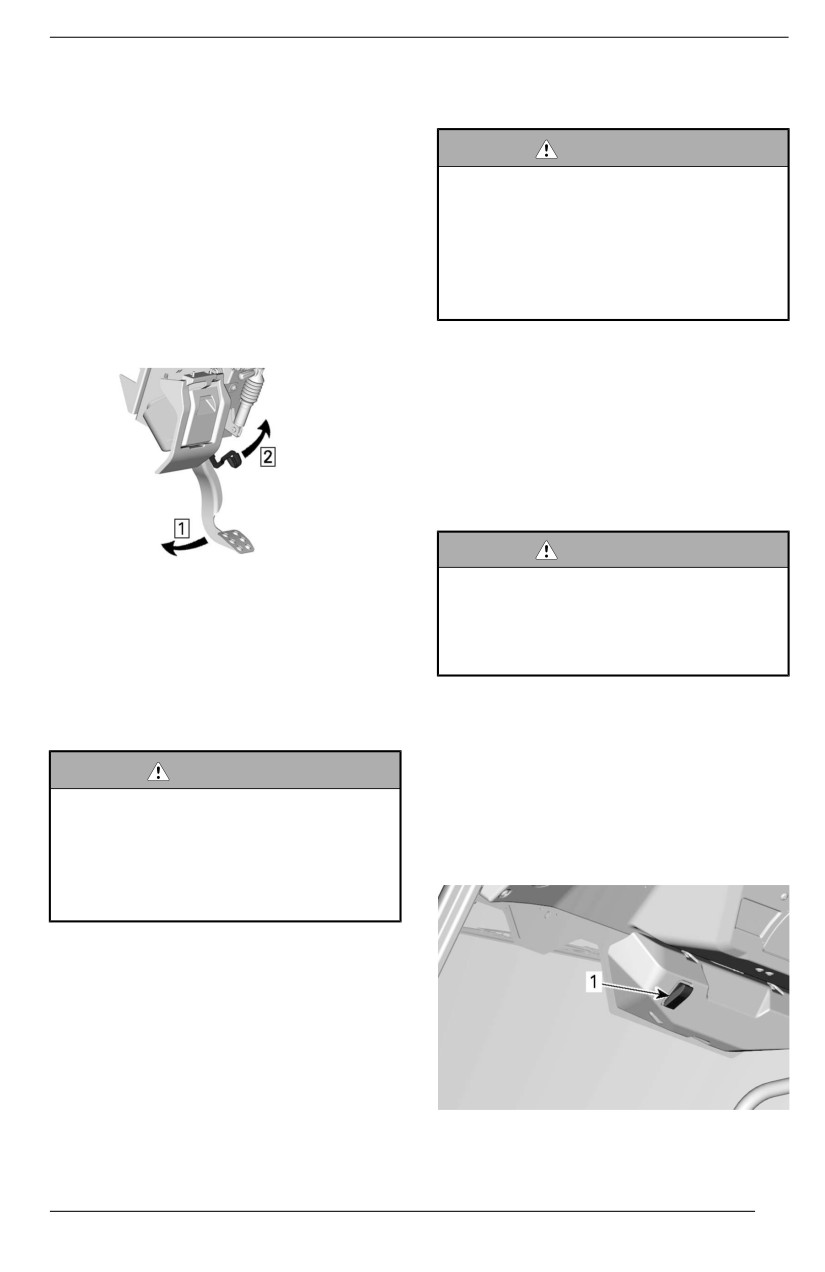
EQUIPMENT
The brake holding mechanism func-
recommended to use the brake hold-
tion is to maintain brakes to all wheels
ing mechanism on its own.
while shift lever is set to Park.
WARNING
To engage the brake holding mecha-
nism, proceed as follow:
Make sure brake holldiing mecha-
niism is released before operating
1. Immobilize vehicle,
the vehiiclle. If the brake holdiing
2. Apply and hold the brakes,
mechaniism is lleft ON whille riding,
3. Put shift lever in Park,
i
it may cause damage to the brake
4. While holding the brakes, lift lever
system and lead to lloss of braking
toward the steering wheel,
capaciity and/or fire.
5. Remove foot from brake pedal, the
pedal should stay lowered.
Full Doors With Electric
Windows
Some vehicles come equipped with
full doors and electric windows.
Doors can be removed from the ve-
hicle. See an authorized Can-Am Off--
road dealer for information.
WARNING
Always iinstalll safety nets and
Step 1. Apply and hold brake pedal
shoulder bars whenever removing
Step 2. Lift lever
fulll doors from vehiiclle. See an au-
thorized Can-Am Off-road dealer
for installation iinstructiions.
NOTE:
The brake holding mechanism lever
Windshield with Wiper
can be set to several positions.
Some vehicles are equipped with a full
glass windshield and a wiper.
WARNING
When the brake hollding mecha-
To activate wiper, press activation
nism iis appliied, make sure the ve-
switch. The switch is located on the
hicle stays securely in pllace.
central panel at the top of the
ALWAYS put the shiift llever in
windshield.
PARK when usiing the brake hold-
i
ing mechaniism.
To release the brake holding mecha-
nism, simply apply and hold the brake
pedal, put shift lever in gear then re-
lease brake pedal. When released it
should return to the rest position.
Safe usage of the brake holding
mechanism requires the shift lever to
be set to the Park position. It is not
1. Wiper activation switch
95
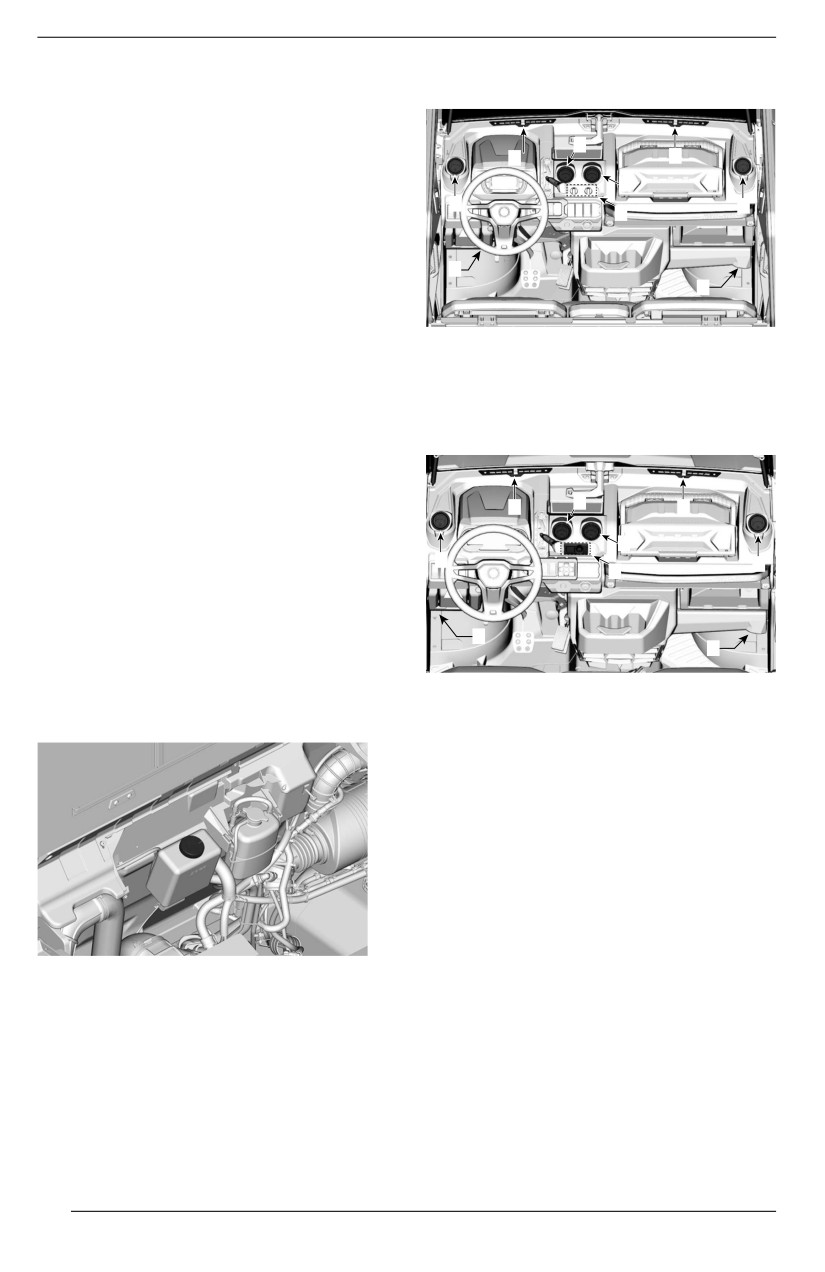
EQUIPMENT
To activate windshield washer, hold
Climate Control System
activation switch up.
Full glass windshield with wiper can
2
be removed from vehicle. See an au-
1
1
thorized Can-Am Off-road dealer for
2
information.
2
2
4
Windshiield Positiion
Windshield can be set to 3 different
3
3
positions.
- Closed
- Partially opened (second position
MODELS WITHOUT A/C
on the handle)
1. Windshield air vents
- Fully opened (handle is released)
2. Central air vents
3. Footwell air vents
NOTE:
4. Climate control
When riding the vehicle with the wind-
shield in one of the open position, ad-
just your speed to the terrain. The
glass windshield is not as strong when
1
2
1
not seated in its closed position.
2
2
2
To close windshield, pull on handle
4
until it closes.
Fiillling up Wiindshielld Washer
3
3
Open cargo box.
MODELS WITH A/C
Lift service cover and remove wind-
1. Windshield air vents
shield washer bottle cap.
2. Central air vents
3. Footwell air vents
4. Climate control
Wiindshielld Air Vents
Located on the top of the dash, they
allow distribute the air flow on the
windshield.
Fill windshield washer bottle.
96
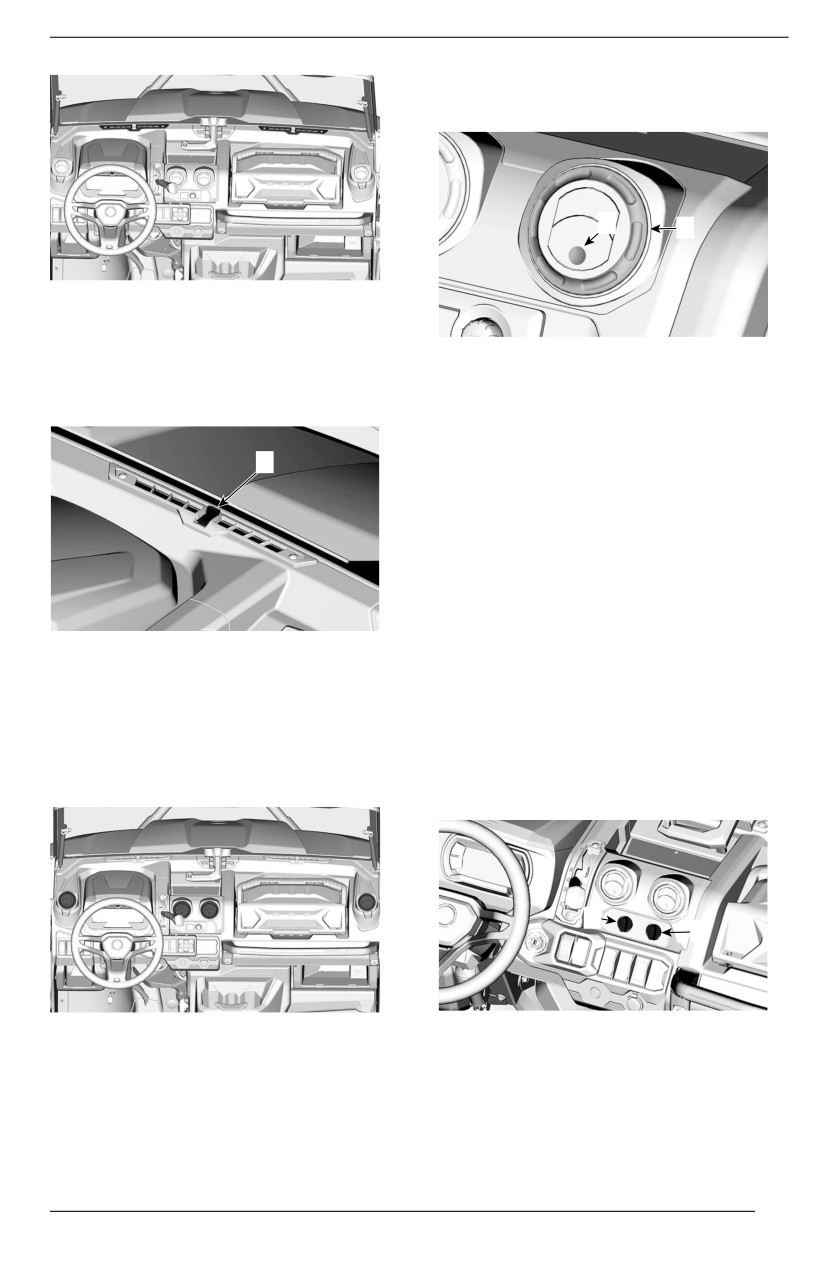
EQUIPMENT
Rotate the external ring of the vent to
orient the air flow in the cockpit.
1
2
The air flow may be adjusted using
the central knob.
- Push the knob toward the wind-
1. Molded dot
shield to close the vent.
2. External ring
- Pull it to open the vent.
Footwelll Aiir Vents
Located underneath the dash, each
1
side of the vehicle, they allow distrib-
ute the air flow at the bottom of the
cockpit.
Push on the molded dot to open the
vent.
Push on vent tabs to close.
CLOSED POSITION SHOWN
Cliimate Controll - Wiithout A/C
1. Central knob
This vehicle is equipped with an heat-
ing system.
Consolle Aiir Vents
This system is controlled by two
Located on the center of the console,
knobs.
they allow distribute the air flow inside
- Fan speed control
the cockpit.
- Temperature control
1
2
1. Fan speed control
Push on the molded dot to open the
2. Temperature control
vent.
Fan Speed Controll
Push on vent tabs to close.
Controls the flow of air circulated in
the vehicle.
97
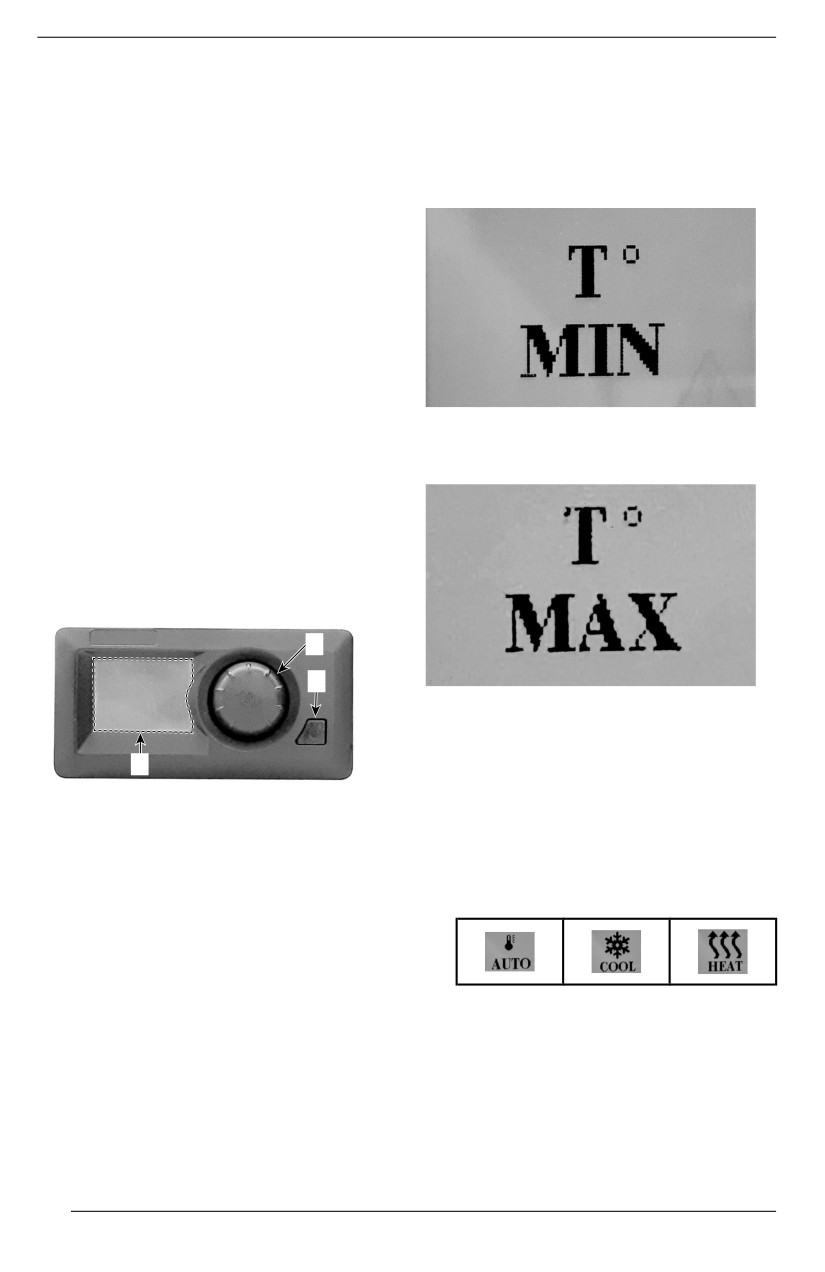
EQUIPMENT
Turn to select the desired fan speed
The temperature can be set between
or to switch it off.
13 °C and 28 °C (56 °F and 82 °F) in 1
degree increments.
NOTE:
In position T
° MIN, the system
If the fan is switched off, the wind-
switches to continuous cooling.
shield may fog up.
Temperature Control
Controls the temperature of the air cir-
culated in the vehicle.
Turn to select
the
desired
temperature.
Cliimate Controll - Wiith A/C
This vehicle is equipped with an heat-
ing/air conditioning system.
In T ° MAX, the system
switches
to
This system is controlled by a multi-
continuous heating.
function module. This module gives
access to the following functions:
- Temperature
- Temperature mode
- Fan speed
- Settings
2
1
NOTE:
In either T ° MIN or T ° MAX position,
3
the system can not regulate a stable
temperature.
1. Power switch
Temperature Mode
2. Selector knob
3. Display
1. To select the temperature mode,
press the selector knob until one of
For an optimal efficiency of the sys-
the following icon appear.
tem, the supply control of the outside
air is determined automatically by the
climate control module. No operator
action is required.
2. Turn the selector knob to change
Temperature
the mode.
To adjust the temperature, turn the se-
lector knob to select the desired
NOTE:
temperature.
After
5 seconds, the module saves
your selection and returns automati-
cally to the temperature display.
98
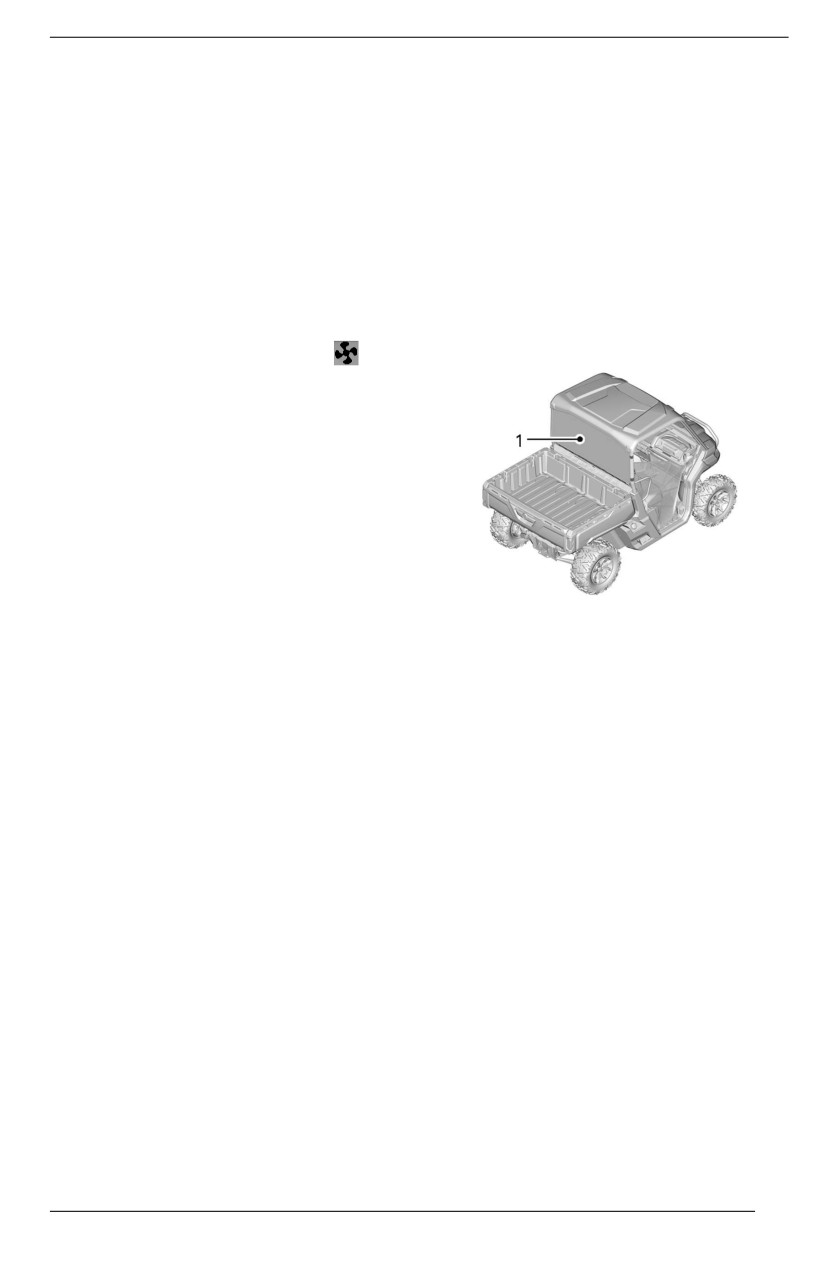
EQUIPMENT
In AUTO mode, the system automati-
To change the BRIGHTNESS: press
cally adjusts to heat or cool the cockpit
the selector knob 1 time, then turn the
to obtain the selected temperature as
knob until the desired level is reached.
quickly as possible by adjusting the
To select °C or °F: press the selector
fan speed automatically.
knob 2 times, and turn the knob to
If an other fan speed is selected while
change the unit.
in AUTO mode, the system will fall in
cool or heat mode depending the am-
Rear Deflector
bient conditions.
Clear rear deflector to protect from
Fan Speed
back draft of dust or rain in harsh envi-
ronments. Sliding quick mount for
To adjust the fan speed, press the se-
easy installation.
lector knob until the fan icon
ap-
pears then turn the knob to select the
desired speed.
3 settings are available for fan speed:
- LOW
- MED
- HIGH
NOTE:
After
5 seconds, the module saves
your selection and returns automati-
cally to the temperature display.
1. Rear deflector
Settiing
Removiing the Rear Defllector
The following settings can be modified
To remove the rear deflector,
slide
by the operator.
clamp toward the unlock icon.
- Contrast (0% to 100%)
- Brightness (0% to 100%)
- Unit (°C or °F)
To modify a setting, press the selector
knob 2 time to reach the Fan Speed
page.
NOTE:
Each next action must be performed
within 10 seconds, otherwise the mod-
ule will come back to the temperature
display.
Press and hold the power button while
turning the selector knob clockwise for
at least 3 clicks.
To change the CONTRAST: turn the
selector knob until the desired level is
reached.
99
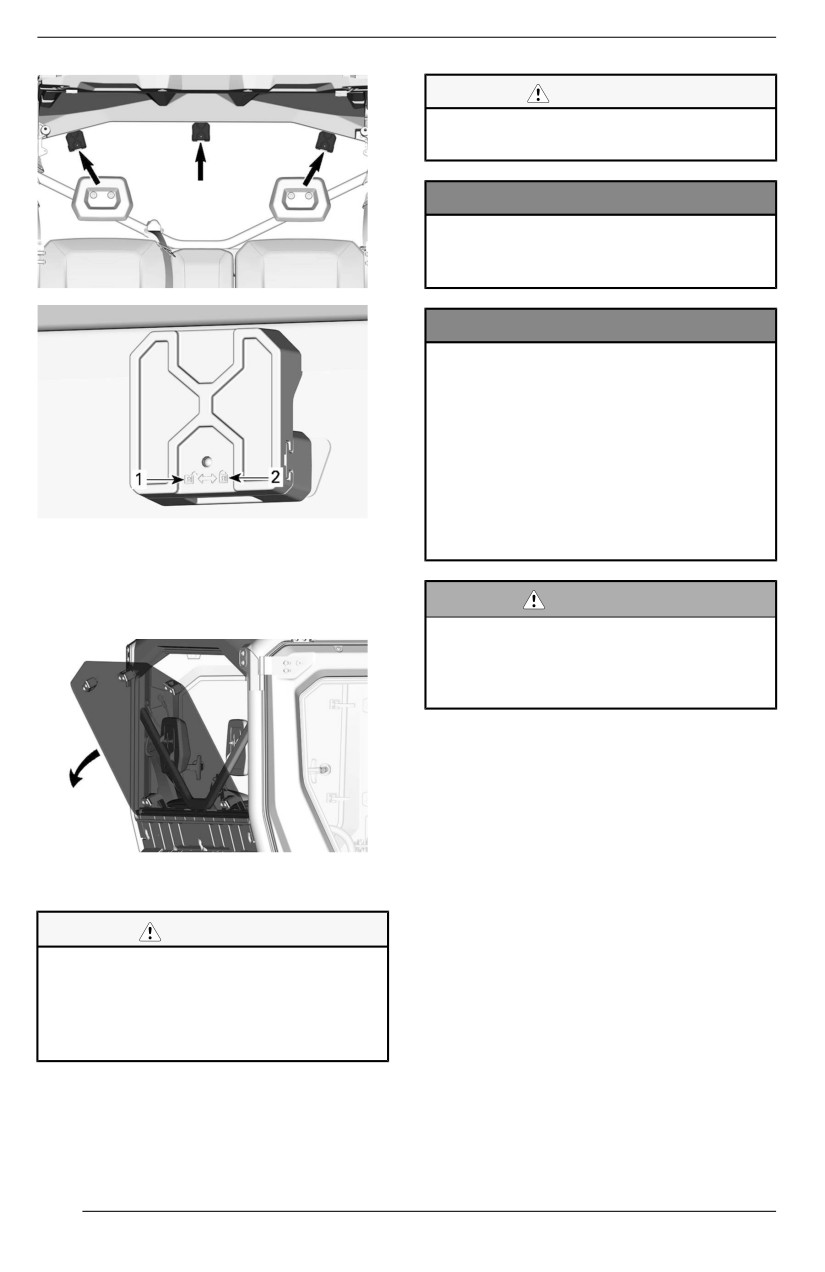
EQUIPMENT
CAUTION
Do not manipulate the audiio con-
trolller whille operatiing the vehiiclle.
NOTICE
Extended use of ellectriical acces-
soriies without the engiine running
willl drain the battery.
NOTICE
Do not use a pressure washer.
Allthough the uniit is sealled
agaiinst most water or diirt iintru-
sion, excessive pressure washiing
or compllete submersion iin water
or snow is beyond the unit’s de-
sign liimits and the ellectronic com-
ponents can be damaged. Such
damage willl not be covered under
CLAMP
any warranty.
1. Unlock icon
2. Lock icon
WARNING
Tilt toward the rear and lift.
This audiio roof sound system is
heavy and coulld change the ve-
hicle’’s behaviior whiile ridiing. Ad-
just your driving accordingly.
For more information about the audio
system, refer to the Mediamaster® 50
Owner’s Manual. This manual, along
with the wireless remote controller, is
located in the toolbox.
Replacing Audio-Related Fuses
Audio System
Before replacing a burnt fuse, check
for a short circuit or a faulty compo-
CAUTION
nent on that circuit. Ensure that all
Prolonged exposure to lloud music
connectors are properly seated and
can damage your hearing. There-
that no wires are damaged or broken.
fore, a 10-miinute break iis sug-
Radio Maiin Power Fuse
gested for every 45 minutes of
llisteniing.
1. Locate the radio main power fuse.
100
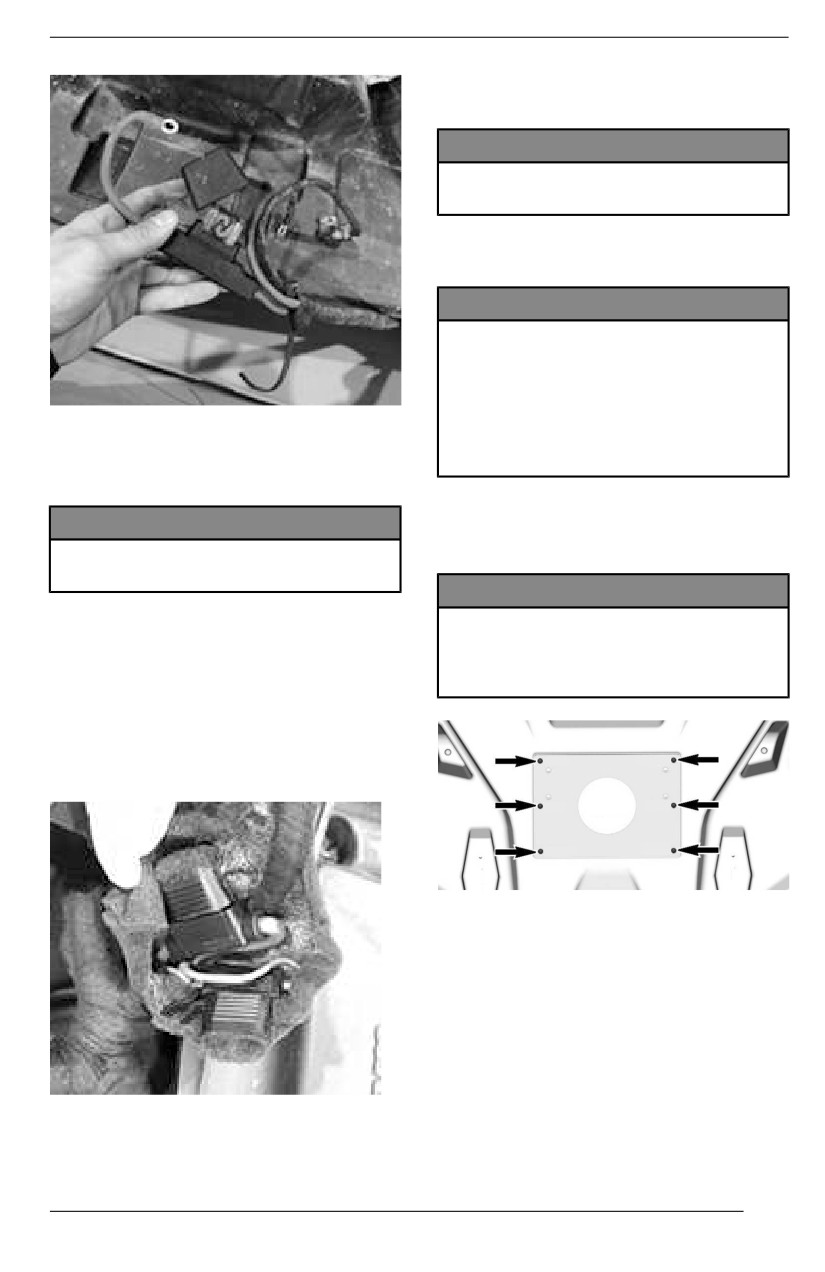
EQUIPMENT
4. If a fuse is burnt, replace it with
one of the same rating.
NOTICE
Do not use a hiigher-rated fuse, as
this can cause severe damage.
Removiing the Audio System
Ampllifiier
NOTICE
If the audio ampliifier is mallfunc-
tiioniing, check for a short circuit or
a faulty component on the circuit
before repllacing the ampllifier. En-
2. Check the fuse using a continuity
sure that alll connectors are prop-
tester.
erlly connected and that no wiires
3. If the fuse is burnt, replace it with
are damaged or broken.
one of the same rating.
1. Remove the six screws securing
NOTICE
the amplifier mounting plate to the
Do not use a higher-rated fuse, as
audio roof.
this can cause severe damage.
NOTICE
4. Re-install all of the removed parts
Be carefull because the amplifiier
mounting plate wiilll no llonger be
Ampllifier Fuses
retained, and the ampllifier willl stilll
be attached to it.
1. Remove the amplifier, refer to Re-
moving the Audio System
Amplifier.
2. Locate the fuses on the amplifier
harness, under the foam wrapping.
MOUNTING PLATE
2. Remove and keep the four M4
nuts and four M4 x 16 hex head
screws that hold the amplifier to
the mounting plate.
3. Check the fuses using a continuity
tester.
101
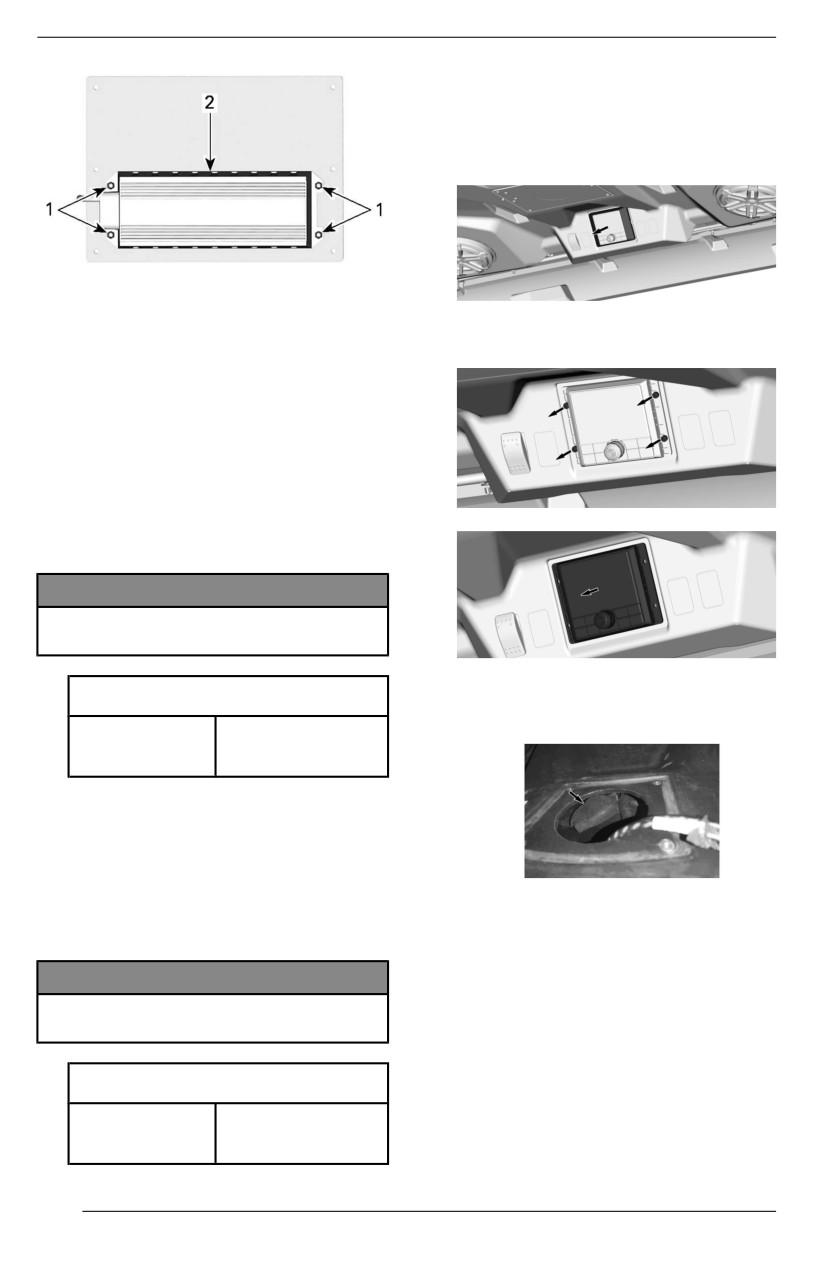
EQUIPMENT
Head Uniit Fuse
1. To replace a fuse inside the enclo-
sure, remove the trim from around
the head unit (located under the
front
roof).
REAR OF MOUNTING PLATE
1. M4 nuts
2. Amplifier
2.
Remove and keep the four M4 x
12 screws that secure the head
3. Gently let the amplifier hang
unit,
as
shown
below.
WITHOUT disconnecting any
wires.
Installling the Audiio System
Ampllifiier
1. Secure the amplifier to the mount-
ing plate using the screws and
3.
Pull
the
head unit out.
nuts previously removed. Tighten
to the specified torque.
NOTICE
Use of a needlle torque wrench iis
recommended.
4.
Then gently pull the harness out,
Tighteniing Torque
making sure not to damage any
wires or connections. Locate the
M4 x 16 hex
1 N∙m
fuse
cover.
head screws
(9 lbf∙in)
2. Transfer the wires from the old am-
plifier to the new one, taking care
to disconnect and reconnect them
ONE by ONE to the same
connectors.
3. Secure the mounting plate to the
5.
Remove the fuse cover and re-
audio roof. Tighten to the specified
place the blown fuse. Re-install all
torque.
of the removed parts.
NOTICE
Use of a needlle torque wrench iis
recommended.
Tighteniing Torque
M4 x 16 hex
1 N∙m
head screws
(9 lbf∙in)
102
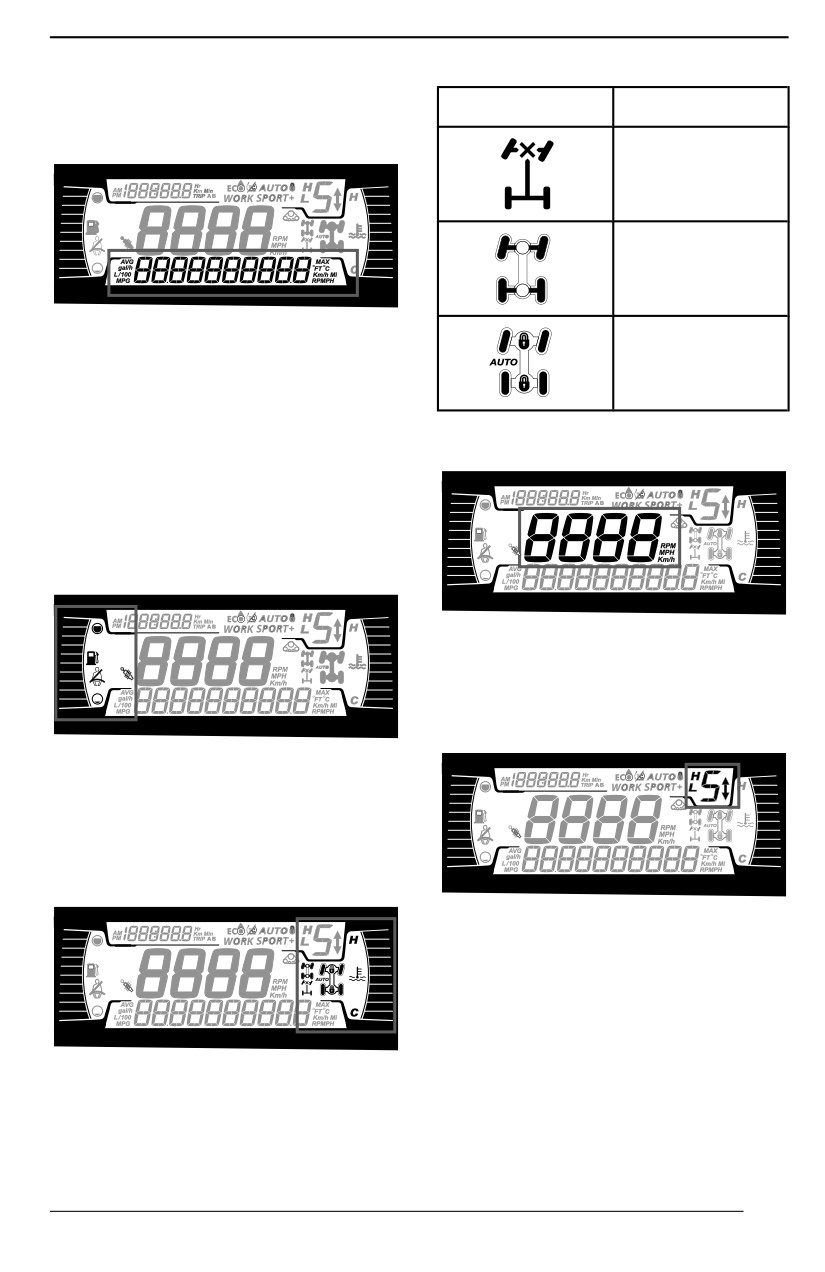
4.5” DIGITAL DISPLAY
Multifunction Display
Icon
Description
Lower Display
2x4 icon
4X4 icon
May display the following:
Front differential
- RPM
lock
- Speed statistics
- Engine Temperature
- Battery Voltage
Central Display
- Settings
- Messages
Use LOWER button to change the dis-
played information.
Left Lateral Display
Display the vehicle speed in km/h or
MPH or RPM.
Transmission
Position
Display
The left lateral display includes:
- Fuel level indicator
- Seat belt icon
- Smart-Shox suspension icon
Right Lateral Display
This display shows gear position of
gearbox:
- P (Park)
- R (Reverse)
- N (Neutral)
- H (High Range)
- L (Low Range)
The right lateral display includes:
- Gear 1 to 7
-
- (Invalid Range)
- Engine Temperature
–
2WD/4WD/Diff lock
Engine Mode Display
103
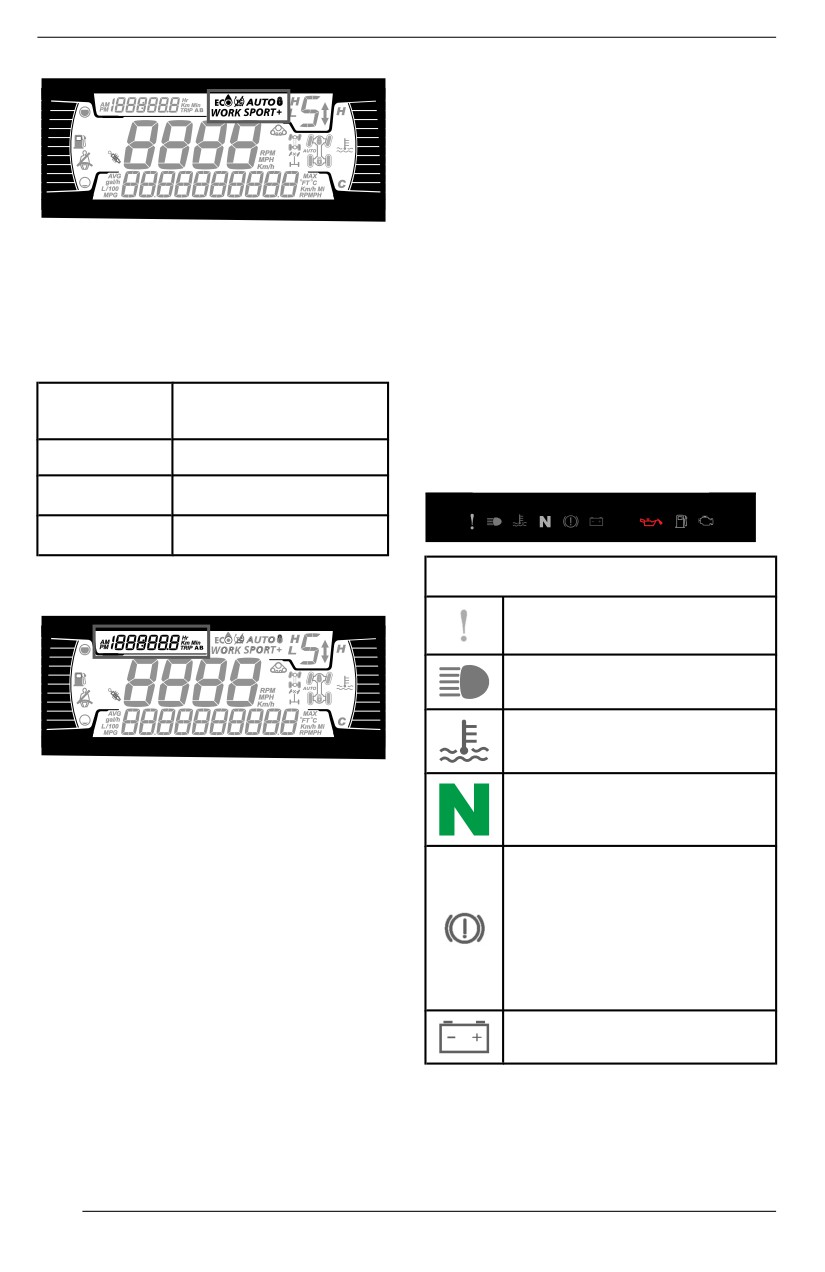
4.5” DIGITAL DISPLAY
Warning Lamps and
Indicators
The following indicator lamps will alert
you to a vehicle condition that may be-
come serious. Some lamps will illumi-
nate when starting the vehicle to
make sure they work. If any lamps re-
main on after starting the vehicle, refer
The MODE display indicates the se-
to the respective system warning lamp
lected mode of operation:
for further information.
- AUTO mode
- NORMAL
NOTE:
- SPORT
Some warning indicators appear in
- SPORT+
the display of the multifunction gauge
and function the same as an indicator
Message at
Drive Mode
lamp but do not display when starting
Activation
the vehicle.
Normal
NORMAL MODE
Tellltalle Liights - Lower Bar
Sport
SPORT MODE
Sport+
SPORT+ MODE
Warniing and Tellltale Lights
Trip Display
ORANGE - Vehicle
Malfunction
BLUE - High Beam
RED - The engine
temperature is too high.
This display shows trip information:
GREEN - Neutral
- Cumulative distance odometer
- Trip A
- Trip B
RED - (Blinking)
- Vehicle hour meter
Accelerator pedal and the
- Clock
brake are activated
simultaneously for a certain
time
(a torque limitation is
Use UPPER button to change the dis-
active)
played information.
Hold UPPER button to reset Trip A/B
RED - Low battery.
meters.
104
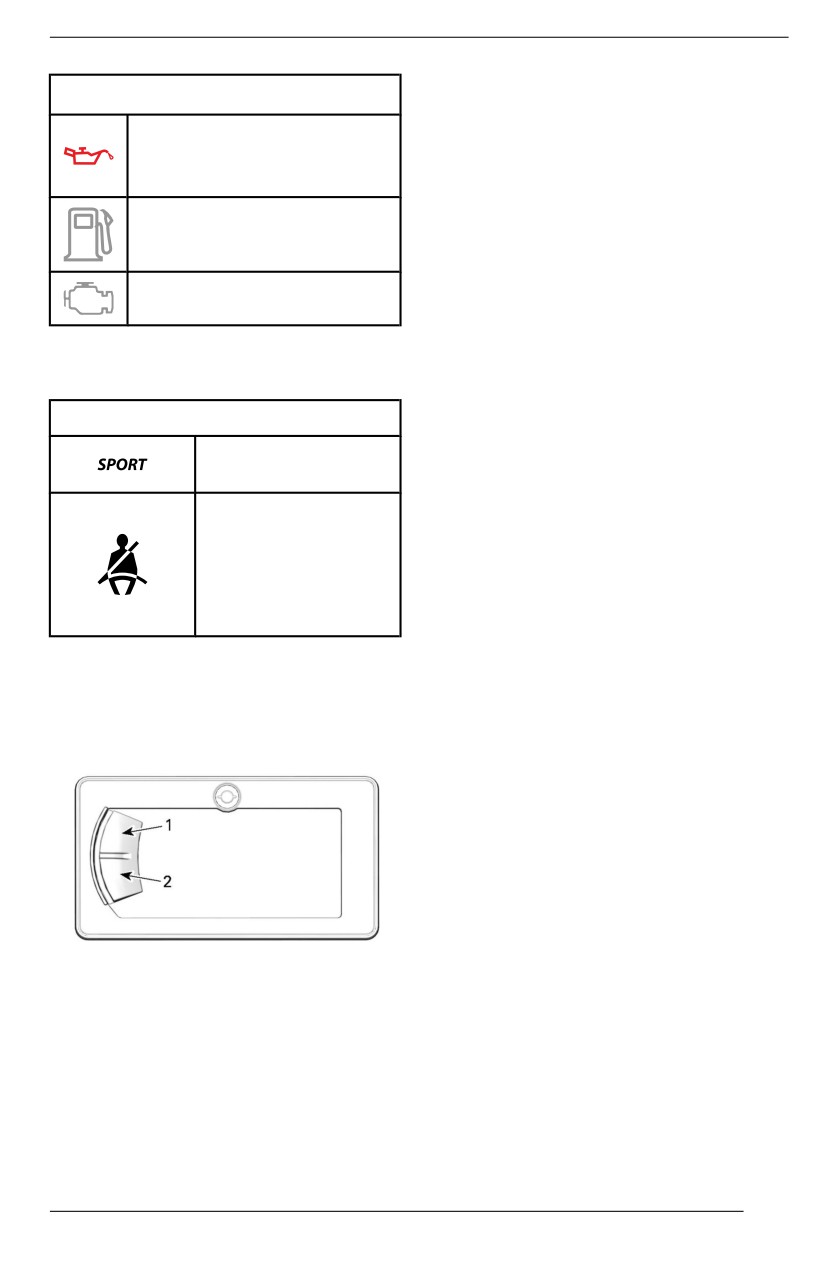
4.5” DIGITAL DISPLAY
Maiintenance Reset
Warning and Tellltale Lights
NOTE:
RED - Low oil pressure
Only when the maintenance icon is
(Normally ON at engine
displayed.
OFF)
Using LOWER button, select RES
MAINT and hold to reset
ORANGE - Low fuel level
maintenance.
Fault Codes
ORANGE - Check engine
Available only when at least one code
is activated.
Icons and Indiicators - Multifunction
Using LOWER button, select CODES
Diispllay
and hold to see actives fault codes.
Icons and Indicators
Fault codes will be scrolled on the
Denotes SPORT
Lower Display.
mode is selected.
Reset Stats
When lit, seat belt
Using LOWER button, select RESET
not buckled with
STAT and hold to reset.
vehicle
immobilized.
Unit Selection
Flashing when
vehicle is moving.
This multifunction gauge is factory
preset in Imperial units but it is possi-
ble to change it to Metric units.
Settings
Using LOWER button, select UNITS
The buttons to navigate through me-
and hold button to change units.
nus are located on the left side of the
LCD display.
Setting Cllock
All of the following action must be per-
formed using the LOWER button.
1. Select CLOCK and hold to adjust
clock.
2. Press the button to select clock
display.
1
3. Push and hold the button for
second.
1. Upper button
4. Press the button to select 12:00
2. Lower button
AM PM or 24:00 time base.
5. Push and hold the button to ac-
Setup
knowledge selection.
Using LOWER button, select SET-
6. Press the button to change hours
TINGS and hold to enter setting
(hours flash).
menu.
7. Push and hold the button to ac-
knowledge hour selection.
8. Press the button to switch to mi-
nutes (minutes flash).
105

4.5” DIGITAL DISPLAY
9. Push and hold the button to ac-
knowledge minutes selection.
Setting Language
The gauge display language can be
changed.
Refer to an authorized Can-Am Off--
road dealer for language availability
and to setup the gauge to your
preference.
Setting Briightness
The brightness of the LCD display can
be adjusted.
Using LOWER button, select
BRIGHTNESS and hold button to
change brightness.
Using LOWER button, adjust bright-
ness then push and hold the button to
acknowledge selection.
106
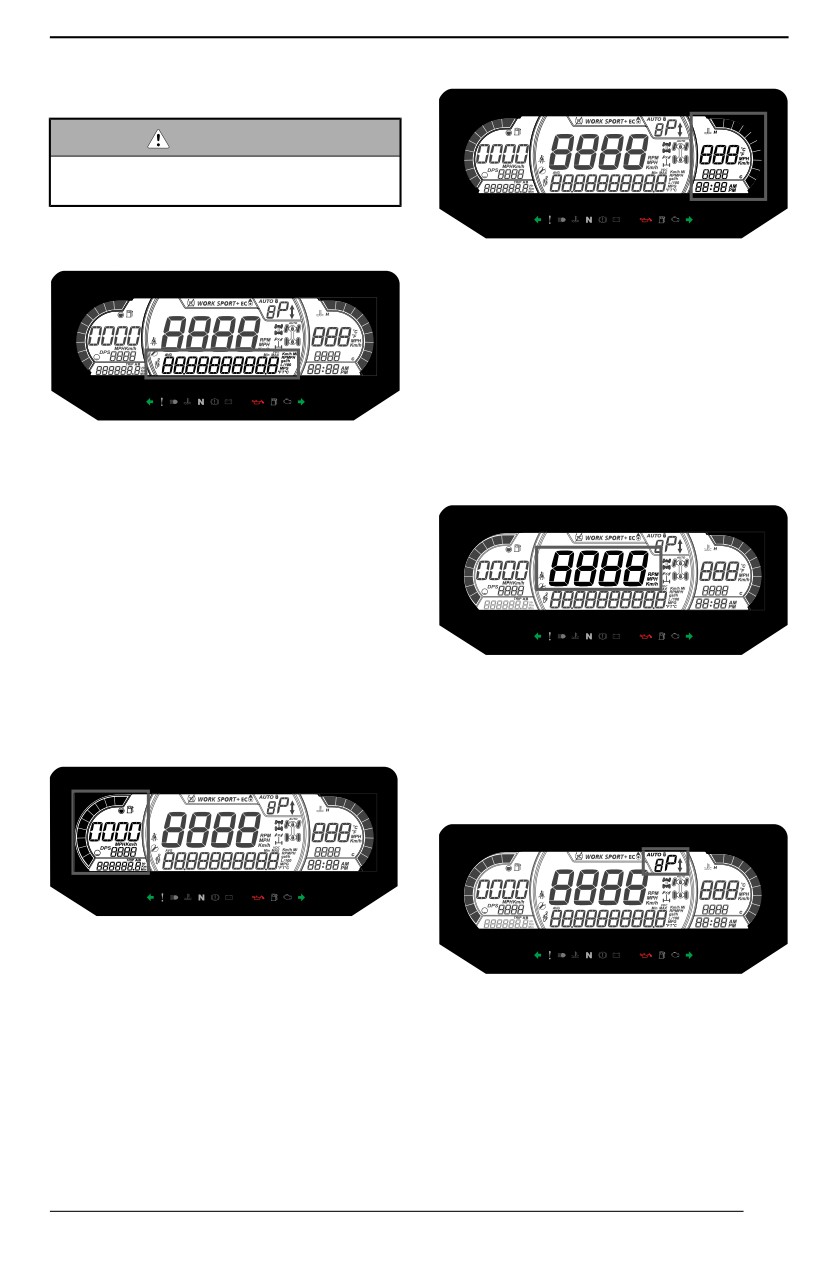
7.6" DIGITAL DISPLAY
Multifunction Display
WARNING
Do not adjust the diispllay whille
riidiing, you could llose control.
Lower Display
The right lateral display includes:
- Engine Temperature
- Clock
- Speed indicator
The speed indicator in this display is
activated when the central display
shows information other than the
speed. Otherwise it is blank.
May display the following:
- RPM
Central Display
- Speed statistics
- Engine Temperature
- Battery Voltage
- Settings
- Messages
- Active DPS mode
The SPEED STAT display shows the
maximum and the average speed.
Hold MENU or OK button for 1 second
May display the following:
to reset.
- RPM
Left Lateral Display
- Vehicle speed
Transmission
Position
Display
The left lateral display includes:
- Fuel level indicator
- Tripmeter (A - B)
This display shows gears position of
- Odometer
gearbox:
- Vehicle Hour meter
- DPS indicator
- AUTO (Automatic)
- P (Park)
Right Lateral Display
- R (Reverse)
- N (Neutral)
- H (High range)
- L(Lowrange)
107
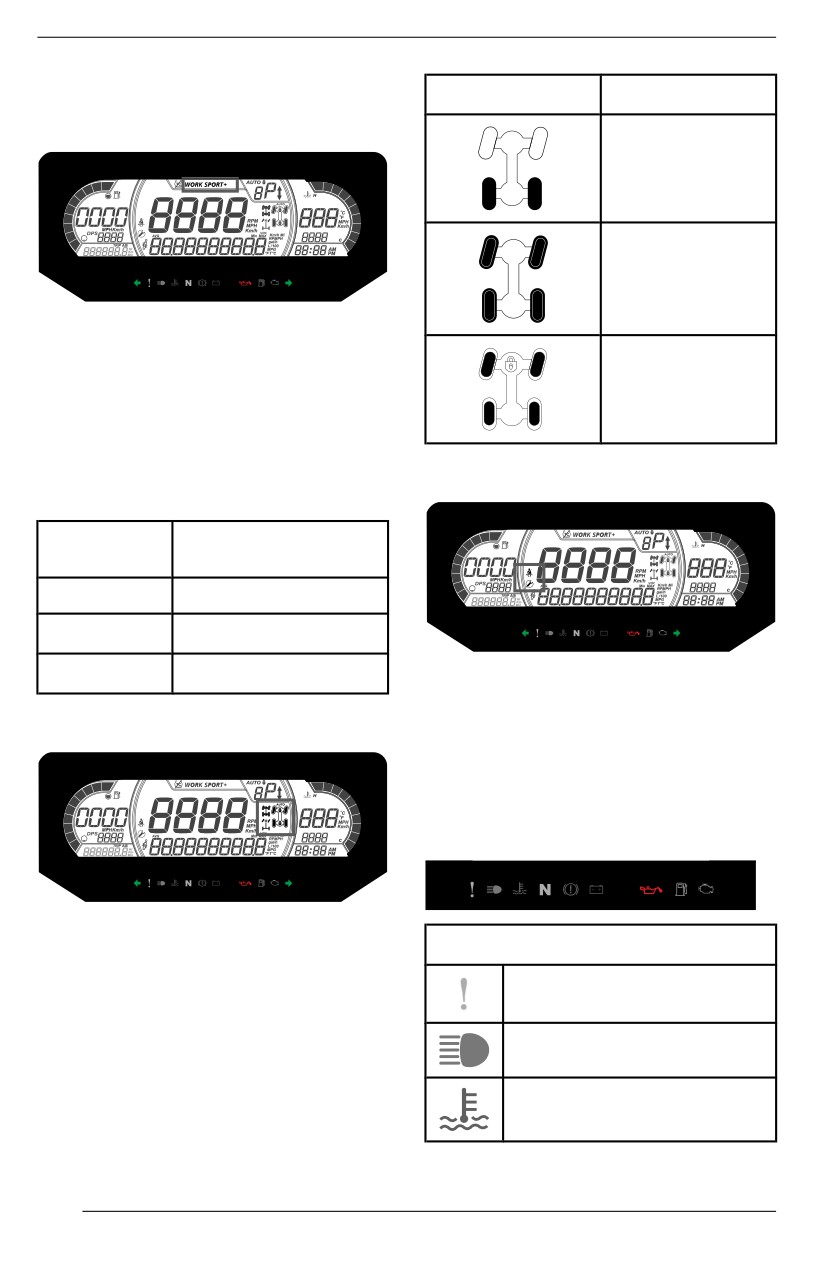
7.6" DIGITAL DISPLAY
-
- (Invalid gear)
Icon
Descriiptiion
Engine Mode Display
2x4 icon
4X4 icon
The engine mode display indicates
the selected mode of operation:
- NORMAL
Front differential
- SPORT
lock
- SPORT+
A message of the selected mode will
Middle Left Display
be displayed on the lower display at
activation and deactivation as follow:
Message at
Drive Mode
Activation
Normal
NORMAL MODE
Sport
SPORT MODE
Sport+
SPORT+ MODE
The middle left lateral
display
includes:
Middle Right Display
- Seat belt reminder
- Maintenance reminder
Indicator Lamps
Warning and Telltale Liights
The middle right display indicates the
WARNING and Tellltalle Liights
selected mode of operation:
-
2X4
ORANGE - Vehicle
–
4X4
Malfunction
–
Front differential lock (Smart-Lok)
BLUE - High Beam
RED - The engine
temperature is too high.
108
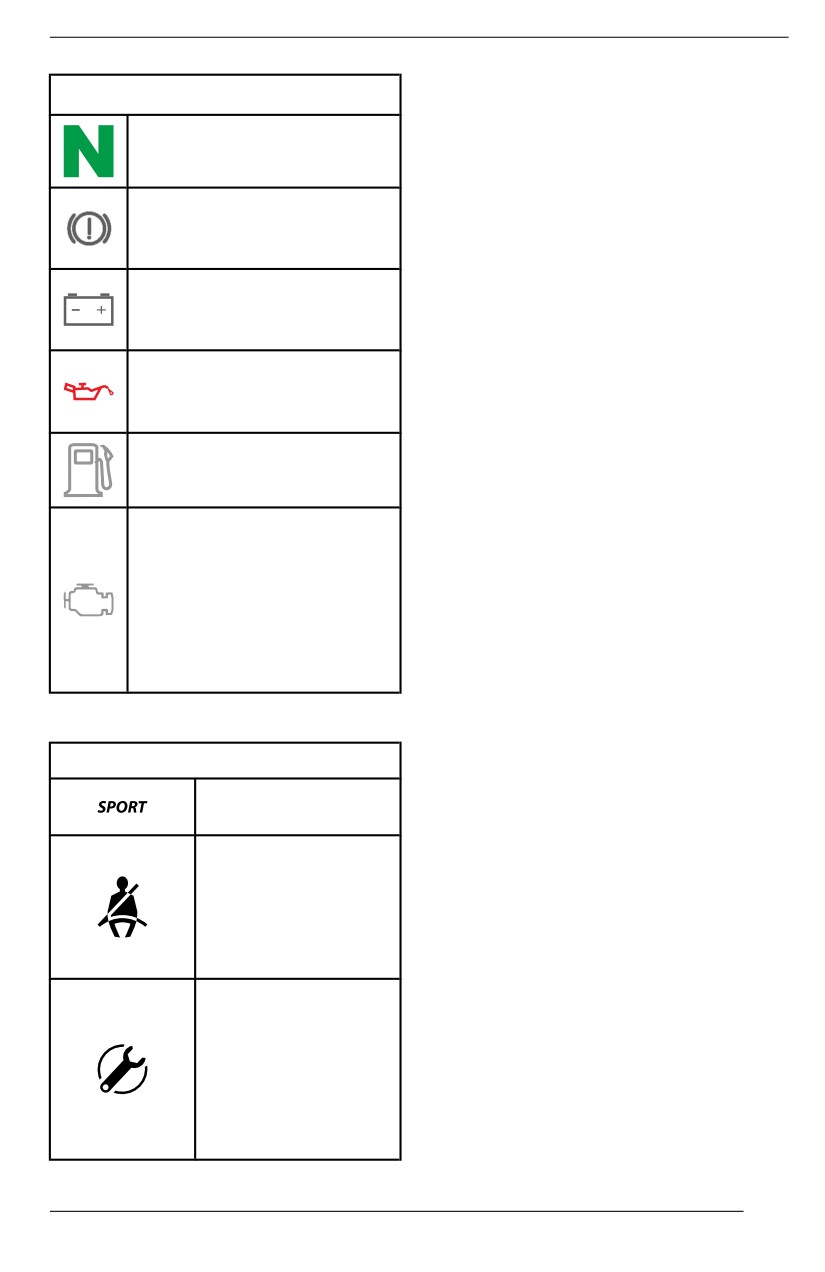
7.6" DIGITAL DISPLAY
Settings
WARNING and Tellltalle Liights
Setup
GREEN - Neutral
Using the MENU button on the key-
pad, select SETTINGS and hold to
enter setting menu.
RED - Brake lock lever is
engaged or malfunction of
OK button can be pressed instead of
the brake system
holding MENU button.
RED - The battery voltage
Maiintenance Reset
too low or problem with the
electrical system
NOTE:
Only when the maintenance icon is
RED - Low oil pressure
displayed.
Normally ON when engine
is OFF
Using MENU button, select RES
MAINT and hold to reset
maintenance.
ORANGE - Low fuel level
Fault Codes
ORANGE
Available only when at least one code
Turn on: Malfunction of the
is activated.
vehicle emissions control
system
Using MENU button, select CODES
Bliink: Engine problems,
and hold to see active fault codes.
the limp home mode is
Fault codes will be scrolled on the
activated. Have the vehicle
Lower Display.
serviced immediately.
Reset Stats
Icons and Indiicators
Using MENU button, select RESET
STAT and hold to reset.
Icons and Indicators
Denotes SPORT
Unit Selection
mode is selected.
This multifunction gauge is factory
preset in Imperial units but it is possi-
When lit, seat belt
ble to change it to Metric units.
not buckled with
vehicle
Using MENU button, select UNITS
immobilized.
and hold button to change units.
Flashing when
vehicle is moving.
Speed/RPM
When lit, indicates
The speed and RPM display can be
that a maintenance
swapped.
is required. See
Using MENU button, select SPEED/
your authorized
RPM and hold button to invert speed
Can-Am dealer or
and RPM display.
person of your own
choosing for the
maintenance.
109

7.6" DIGITAL DISPLAY
Setting Clock
All of the following action must be per-
formed using the MENU button.
1. Select CLOCK and hold to change
time.
2. Press the button to select clock
display.
3. Push and hold the button for
1
second.
4. Press the button to select 12:00
AM PM or 24:00 time base.
5. Push and hold the button or OK
button to acknowledge selection.
6. Press the button to change hours
(hours flash).
7. Push and hold the button or OK
button to acknowledge hour
selection
8. Push the button to switch to mi-
nutes (minutes flash).
9. Push and hold the button to ac-
knowledge minutes selection.
Setting Briightness
The brightness of the LCD display can
be adjusted.
Using MENU button, select BRIGHT-
NESS and hold MENU button to se-
lect the brightness setting.
Using MENU button, adjust brightness
then push and hold MENU button to
acknowledge selection.
Setting Language
The gauge display language can be
changed.
Refer to an authorized Can-Am Off--
road dealer for language availability
and to setup the gauge to your
preference.
DPS Modes
The lower display can show which
DPS mode is active. Refer to Tune
Your ride.
110

FUEL
Fuel Requirements
NOTICE
Allways use fresh gasolline. Gaso-
l
line wiilll oxiidize; the resullt iis loss
NOTICE
of octane, vollatiile compounds,
and the production of gum and
Never experiment wiith other
varniish deposiits which can dam-
fuels. Engine or fuel system dam-
age the fuell system.
ages may occur with the use of an
iinadequate fuell.
Alcohol fuel blending varies by coun-
try and region. Your vehicle has been
NOTICE
designed to operate using the recom-
Do NOT use fuell from fuel pumps
mended fuels, however, be aware of
llabelled E85.
the following:
-
Use of fuel containing alcohol
Use of fuel labeled E15 is prohibited
above the percentage specified by
by U.S. EPA Regulations.
government regulations is not rec-
ommended and can result in the
Vehicle Fueling Procedure
following problems in the fuel sys-
tem components:
WARNING
- Starting and operating
– Fuel iis fllammablle and expllo-
difficulties.
sive under certain condiitiions.
- Deterioration of rubber or plas-
tic parts.
– Never use an open flame to
- Corrosion of metal parts.
check fuel llevell.
- Damage to internal engine
– Never smoke or alllow flame or
parts.
spark in viciiniity.
– Allways work in a welll-ventii-
-
Inspect frequently for the presence
lated area.
of fuel leaks or other fuel system
– Vehicle must be on a level sur-
abnormalities if you suspect the
face to perform fuelling.
presence of alcohol in gasoline ex-
ceeds the current government
regulations.
1. Place vehicle on a level surface.
-
Alcohol blended fuels attract and
2. Move the shift lever into PARK
hold moisture which may lead to
position.
fuel phase separation and can re-
3. Stop engine.
sult in engine performance prob-
lems or engine damage.
WARNING
Always stop engine before
Recommended Fuel
refueliing.
The gasoline must have the following
minimum octane requirements:
4. Have occupants get out of vehicle.
Regular unleaded gasoline with an
AKI (R+M)/2 octane rating of 87, or
an RON octane rating of 91
Use unleaded gasoline containing
MAXIMUM 10% ethanol.
111

FUEL
WARNING
Do not alllow anyone to remain iin
the vehiiclle whiile fuelling. If there
i
is a fiire or explosion during fuell-
i
ing, a vehicle occupant coulld be
unable to quiicklly lleave the area.
5. Slowly unscrew the fuel reservoir
cap counterclockwise to remove it.
WARNING
If a differential pressure condiitiion
i
is notiiced (whiistlling sound heard
when loosening fuell reservoir
cap) have vehiiclle inspected and/
or repaired before further
operatiion.
6. Insert the spout into the filler neck.
7. Pour fuel slowly so that air can es-
cape from the tank and prevent
fuel flow back. Be careful not to
spill fuel.
8. Stop filling when the fuel reaches
the bottom of filler neck. Do not
overfilll.
WARNING
Never top up the fuell tank before
pllaciing the vehiiclle in a warm
area. As temperature iincreases,
fuel expands and may overflow.
9. Fully tighten fuel reservoir cap
clockwise until you hear a clicking
noise.
NOTICE
Always wipe off any fuel spilllage
from the vehiclle.
112

BREAK-IN PERIOD
Operation During Break-In
A break-in period of
10
operating
hours or 300 km (200 mi) is required
for the vehicle.
Engine
During the break-in period:
- Avoid full throttle operation.
- Avoid pressing accelerator pedal
more than 3/4 of the stroke.
- Avoid sustained accelerations.
- Avoid prolonged cruising speeds.
- Avoid engine overheating.
However, brief accelerations and
speed variations contribute to a good
break-in.
Brakes
WARNING
New brakes willl not operate at
theiir maximum effiiciency untiil
theiir break-iin iis complleted. Brak-
i
ing performance may be reduced,
so use extra caution.
Apply moderate brakiing force for
the 40 to 50 fiirst brakiing events.
Belt
A new belt requires a break in period
of 50 km (30 mi).
During the break-in period:
- Avoid strong acceleration and
deceleration.
- Avoid pulling a load.
- Avoid high speed cruising.
113

BASIC PROCEDURES
Starting the Engine
Pay attention to the following:
Press the brake pedal.
Low range
Insert key in ignition switch and turn to
Low range should be used whenever:
the ON position.
-
Pulling
–
Pushing
NOTE:
–
Hauling a load
If shift lever is not set to PARK (P) or
–
4x4 applications
(N) NEUTRAL, the brake pedal must
–
Mud holes
be pressed to allow engine starting.
–
Water holes
–
Crossing obstacles
Turn the key to the start position and
–
Climbing onto trailer
hold until the engine starts.
–
Hill climbing
NOTE:
It is also recommended to use low
Do not press the accelerator pedal. If
range if driving for prolonged periods
the accelerator pedal is pressed at
at speeds under 24 km/h
least 50%, the engine will not start.
(15 MPH).
Release the engine start position im-
Please refer to Break-in Period for
mediately when the engine has
drive belt break-in information.
started.
Hiigh range
NOTICE
High is the default riding range.
If engiine does not start after a few
seconds, do not holld the start po-
Electroniic Driive Bellt Protection (if
siitiion more than 10 seconds. Re-
availlablle and actiivated on your
fer to Troublleshootiing.
modell)
Some vehicles have the electronic
drive
belt
protection
function
Operating the Shift Lever
activated.
Apply brakes and select the desired
shift lever position.
Refer to your authorized Can-Am Off--
road dealer for availability and possi-
Release brakes.
ble activation.
NOTICE
This function is activated when riding
at too slow speed for the high range,
When changing gear selectiion, al-
such as in the following situations:
ways completely stop the vehiicle
and applly the brakes prior to shiift-
-
Pulling
i
ing. Damage to the gearbox may
–
Pushing
occur.
–
Hauling a load
-
4x4 applications
–
Mud holes
Choosing the Correct Range
–
Water holes
(Low or High)
–
Crossing obstacles
It is important to limit situations known
–
Climbing onto trailer
to make the drive belt slip excessively.
–
Hill climbing
The main reason the drive belt will slip
In the above mentioned situations the
is if the gearbox is in high range when
electronic drive belt protection will
it should be in low range.
help protect the CVT drive belt from
114

BASIC PROCEDURES
being damaged by activating the en-
Tips for Maximizing Drive
gine torque limiter. The gauge will also
Belt Durability
scroll a LOW GEAR message, sug-
gesting the operator to immobilize the
Riding style and conditions have a di-
vehicle and set to LOW GEAR.
rect impact on drive belt durability.
Your vehicle features a CVT system
Whenever the electronic driive belt
design that is optimized to offer the
protectiion iis activated, you MUST
best performance. The CVT and drive
shiift iin LOW range. Refer to Operat-
belt have successfully endured thou-
ing the Shift Lever.
sands of miles of durability tests. How-
ever, to maximize drive belt durability
Stopping the Engine and
and to prevent premature failures, it is
important that the operator under-
Parking the Vehicle
stands the limits of a belt driven CVT
system and adapts their riding style
WARNING
and speed accordingly.
Avoid parking on steep slope as
the vehicle may rolll away.
If riding in any of the conditions listed
below, BRP highly recommends not to
constantly hold the throttle wide open
WARNING
(WOT) for more than five (5) minutes.
Allways put the vehicle iin PARK
- High ambient temperatures (above
when stopped or parked to pre-
30 °C (86 °F)
vent rollling.
- Heavy loads: Passengers / Heavy
cargo
- Heavy drag: Soft sand / Hill climb-
WARNING
ing / Mud / Using a track kit.
Avoid parking in places where hot
After a few minutes at WOT, partially
parts can start a fire.
release the accelerator and allow the
CVT to cool down.
When stopped or parked always bring
For more tips for maximizing the drive
shift lever to park position. This is es-
belt durability, refer to Choosing the
pecially important when parking on a
Correct Range (Low or High).
slope. On very steep inclines or if the
vehicle is carrying a cargo, the wheels
should be blocked using rocks or
bricks.
Select the flattest terrain available for
parking.
Release accelerator pedal and use
brakes to completely stop the vehicle.
Set shift lever in PARK position.
Turn key in ignition switch to OFF
position.
Remove key from ignition switch.
115
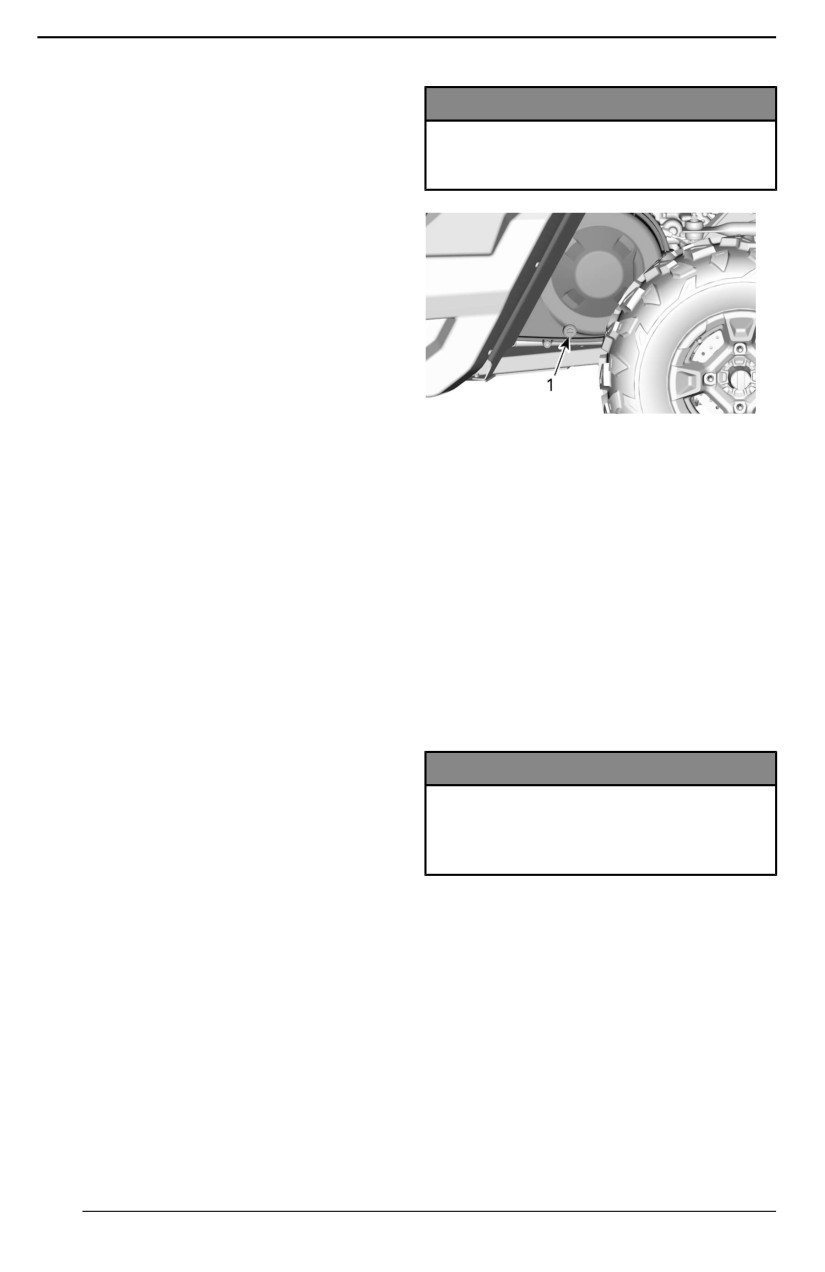
SPECIAL PROCEDURES
NOTE:
NOTICE
Component failures resulting from
these events are not covered by
Stop the engiine and drain the
warranty.
water to avoid damage to the
CVT.
Fuel Flooded Engine
If the engine does not start and it is
fuel-flooded, the drowned mode can
be activated to prevent fuel injection
and to cut ignition while cranking. Pro-
ceed as follows:
1. Move shift lever in park position.
2. Turn the ignition key in ON
position.
3. Press completely and HOLD ac-
TYPICAL
- LEFT SIDE OF VEHICLE
celerator pedal.
UNDER CARGO BOX
4. Turn the ignition key to the START
1. CVT drain
position and hold in this position
for 10 seconds.
See an authorized Can-Am dealer , a
5. Release the ignition key.
repair shop or person of your choos-
6. Release
accelerator
pedal
ing to have the CVT inspected and
completely.
cleaned.
7. Turn the ignition key to START po-
sition again to allow starting.
What to do if Battery is
If it does not work:
Drained Out
1. Remove the spark plugs. Refer to
The vehicle can be jump started by
Spark Plugs in Maintenance Pro-
using the RED (+) cable to the battery
cedures section.
positive pole and the BLACK (-) cable
2. Crank engine several times.
to the vehicle chassis.
3. Install new spark plugs if possible
or clean and dry spark plugs.
NOTICE
Do not connect any ellectrical
If engine does not start, see an au-
source to the steering collumn or
thorized Can-Am Off-road dealer, a
components whiich are iin contact
repair shop, or a person of your own
with DPS.
choosing for maintenance, repair, or
replacement.
What to Do if Vehicle Rolled
Please refer to the US EPA Emis-
Over
sion-Related Warranty contained
herein for information about warranty
Abrupt maneuvers, sharp turns, side
claims.
hilling or accident may cause vehicle
to rollover.
What to do if Water is
Should the vehicle be rolled over, it
Suspected to be in the CVT
will be necessary to have it trans-
If water is present in the CVT, the en-
ported to an authorized Can-Am Off--
gine will accelerate but the vehicle will
road dealer for inspection as soon as
remain still.
possible. NEVER START THE
ENGINE!
116

SPECIAL PROCEDURES
Points to be verified, including but not
limited to:
- All fluid levels
- Seat belts, including retractors,
buckles and semi-cinching tabs
- Cage and its attachment points
- Steering system
- Suspension and its attachment
points.
What to do if Vehicle is
Submerged
Should the vehicle become immersed,
it will be necessary to have it trans-
ported to an authorized Can-Am Off--
road dealer as soon as possible.
NOTICE
Never start the engine as immer-
sion of the vehiiclle can cause serii-
ous damage to the engine iif the
correct restart procedure iis not
folllowed.
117
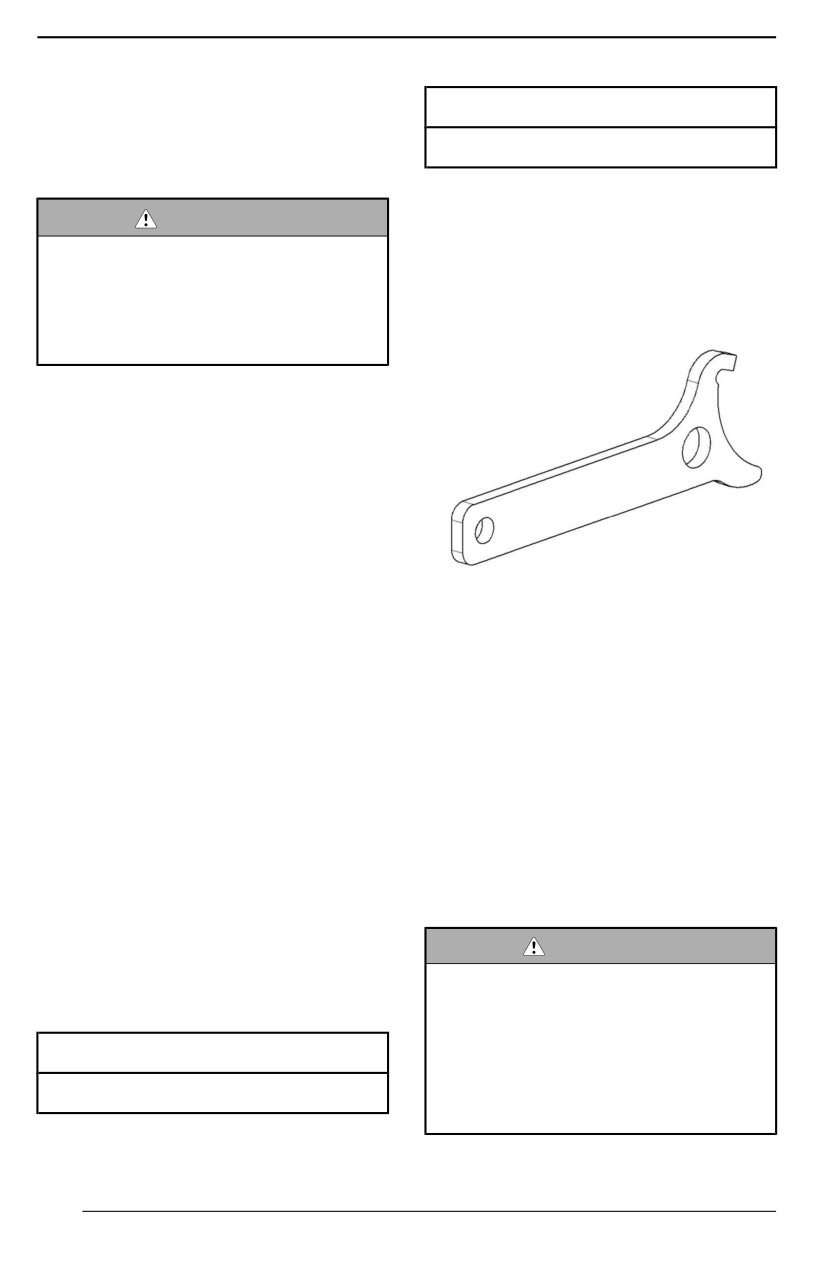
TUNE YOUR RIDE
Suspension Adjustment
Spring Preload
Guidelines
Cam position 1 (soft)
Your vehicle handling and comfort de-
pend upon suspension adjustments.
Suspension Adjustments
WARNING
Suspensiion adjjustment could af-
Spring Prelload Adjjustment
fect vehicle handlling. Allways take
Following are guidelines to fine-tune
tiime to familliariize yoursellf with
suspension. Use suspension adjust-
the vehiiclle''s behaviior after any
ment tool provided in the tool kit.
suspension adjjustment has been
made.
Choice of suspension adjustments
vary with vehicle load, personal pref-
erence, riding speed and terrain
condition.
The best way to set up the suspen-
sion, is to start from factory settings,
then customize each adjustment one
at a time.
Front and rear adjustments are inter-
The spring preload affects the ground
related. It may be necessary to read-
clearance of the vehicle.
just the rear shock absorbers after
adjusting front shock absorbers for
Shorten the spring for a firmer ride
instance.
and rough riding condition or when
pulling a trailer.
Test run the vehicle under the same
conditions; trail, speed, load, etc.
Lengthen the spring for a softer ride
Change one adjustment and retest.
and smooth riding condition.
Proceed methodically until you are
satisfied.
NOTE:
Factory settings are suitable for al-
Suspension Factory Settings
most all conditions. Take into consid-
eration that an increase in ground
Factory settings are suitable for al-
clearance can affect the handling of
most all conditions.
the vehicle.
Take into consideration that an in-
crease in ground clearance can affect
WARNING
the handling of the vehicle.
The left and right shock adjjust-
ment on front or rear suspension
Front Suspension
must allways be set to the same
posiitiion.
Spriing Preload
Never adjjust one shock only.
Uneven adjjustment can cause
Cam position 1 (soft)
poor handliing and loss of stabillity,
whiich could lead to an acciident.
Rear Suspension
118
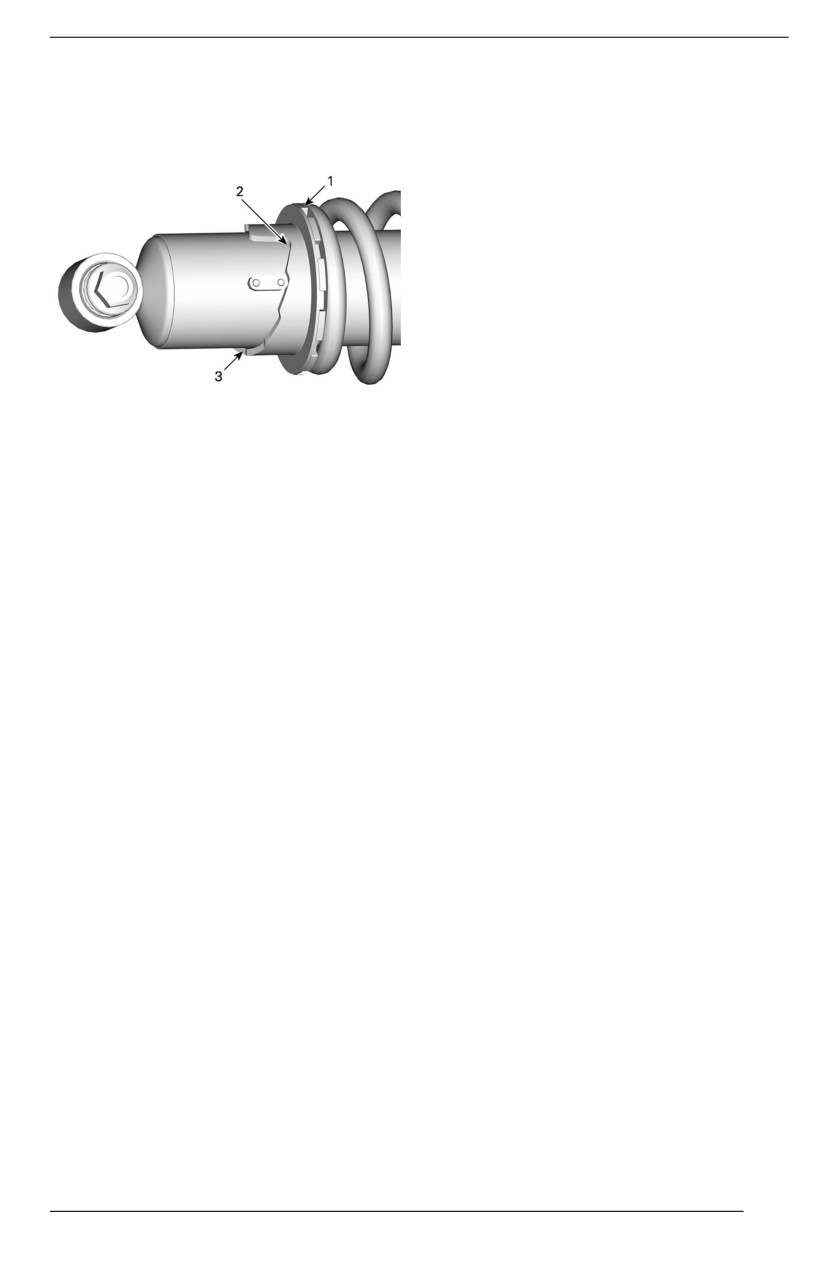
TUNE YOUR RIDE
Lift the vehicle to adjust spring
preload.
Adjust by turning adjusting cam.
1. Turn adjusting cam
2. Soft adjustment
3. Firm adjustment
DPS Function
The Dynamic Power Steering (DPS)
provides a computer controlled, varia-
ble power assist, achieved by an elec-
tric motor to optimize the amount of
steering input required by the rider.
119

TRANSPORTING THE VEHICLE
When contacting a towing or transporting service, be sure to ask if they have a
flatbed trailer, loading ramp or power ramp to safely lift the vehicle and tie-down
straps. Ensure the vehicle is properly transported as specified in this section.
NOTICE
Do not tow thiis vehicle — towiing can seriiously damage the vehiclle''s drive
system.
NOTICE
Avoiid usiing chains to tie the vehiclle — they may damage the surface fin-
i
ish or pllastic components.
WARNING
To avoid severe injjury or death or iimportant components damages.
– Never use the wiinch cablle/rope to retain a vehiiclle duriing traiilering.
– Never ride with the winch cable/rope attached to a load or another
vehiiclle.
– Only use the wiinch to hellp a stuck vehiiclle (snow, mud, etc.).
– Allways refer to the winch manufacturer''s iinstructiion before pullling
loads.
WARNING
Make sure alll accessoriies, cargo and loose objects iinsiide the vehiiclle are
properly secured, or remove iit to prevent from faiiliing on the road and cre-
ating a hazard for folllowing vehiclles.
WARNING
Always transport the vehiiclle facing forward to avoid damagiing the wind-
shielld or other components. Parts may detach during transport.
WARNING
Before attempting to mount vehiiclle onto a pllatform or a traiiler, make sure
to respect the following safety precautiions.
Safety Precautions
The carrying item (platform or trailer or flat bed)
must be of appropriate dimensions and
Carrying equipment
capacity to safely support and transport the
vehicle.
Do not exceed vehicle hauling capacity and
Hauling vehicle
specifications. Ensure the trailer or platform is
properly secured to the hauling vehicle hitch.
120
//////////////////////////////////////////