BRP Sea-Doo SPARK SERIES. OPERATOR’S GUIDE (2024) - page 1
KNOW BEFORE YOU GO
Available Languages
Dieses Handbuch ist möglicherweise in Ihrer Landessprache
Deutsch
verfügbar. Bitte wenden Sie sich an Ihren Händler oder besuchen Sie:
This guide may be available in your language. Check with your dealer or
English
go to: www.operatorsguides.brp.com
Es posible que este manual esté disponible en su idioma. Consulte a su
Español
distribuidor o visite: www.operatorsguides.brp.com
Ce guide peut être disponible dans votre langue. Vérifier avec votre
Français
concessionnaire ou aller à: www.operatorsguides.brp.com
Questa guida potrebbe essere disponibile nella propria lingua. Contattare
Italiano
il concessionario o consultare:
Deze handleiding kan beschikbaar zijn in uw taal. Vraag het aan uw dealer
Nederlands
of ga naar: www.operatorsguides.brp.com
Denne boken kan finnes tilgjengelig på ditt eget språk. Kontakt din
Norsk
forhandler eller gå til: www.operatorsguides.brp.com
Este manual pode estar disponível em seu idioma. Fale com sua
Português
concessionária ou visite o site: www.operatorsguides.brp.com
Воспользуйтесь руководством на вашем языке. Узнайте
Русский
о его наличии у дилера или на странице по адресу
Käyttöohjekirja voi olla saatavissa omalla kielelläsi. Tarkista jälleenmyyjältä
Suomi
tai käy osoitteessa: www.operatorsguides.brp.com
Denna bok kan finnas tillgänglig på ditt språk. Kontakta din återförsäljare
Svenska
eller gå till: www.operatorsguides.brp.com
Covered Models
SPARK 60 for 2
SPARK Convenience 90 for 2
SPARK 90 for 3
SPARK TRIXX 90 for 1
SPARK TRIXX 90 for 3
2
TABLE OF CONTENTS
KNOW BEFORE YOU GO
1
GENERAL INFORMATION
FOREWORD
10
Know Before You Go
10
Safety Messages
10
About this Operator’s Guide
10
SAFETY INFORMATION
BEFORE YOU GO
14
Operating Age and Ability
14
Drugs and Alcohol
14
Safe Boating Courses
14
Applicable Boating Laws
14
Protective Gear
14
Helmets: Weighing the Risks vs Benefits
15
Required Equipment
15
GET FAMILIAR WITH THE WATERCRAFT
17
Jet Thrust
17
Steering
17
Tether Cord (Safety Lanyard)
17
Braking
18
Learning Key (available as accessory)
18
Cargo and Storage
18
Accessories and Modifications
19
RIDE SAFELY
20
Riding with Passenger(s) (If equipped with passenger seat and
handholds)
20
Avoiding Collisions
20
Riding Behaviors
20
Speeding
21
Reboarding
21
Moving Parts
21
Know the Waters
22
Navigation Rules
22
Night-Time Operation
22
Carbon Monoxide (CO) Poisoning
23
Gasoline Fires and Other Hazards
23
Burns From Hot Parts
24
Watersports (Towing with the Watercraft)
24
PRACTICE EXERCISES
27
Where to Practice Exercises
27
Practice Exercises
27
FUELING
29
Fueling Procedure
29
Fuel Requirements
29
Recommended Fuel
30
3
TABLE OF CONTENTS
TRANSPORTING THE WATERCRAFT
31
IMPORTANT ON-PRODUCT LABELS
33
Watercraft Safety Labels
33
Canadian Compliance - Notice Label
46
Hang Tag
47
PRE-RIDE INSPECTION
49
What to Do Before Launching the Watercraft
49
What to Do After Launching the Watercraft
54
What to Do After Leaving the Water
54
ANNUAL SAFETY MAINTENANCE
56
WATERCRAFT INFORMATION
CONTROLS
58
Handlebar
59
Engine START/STOP Button
60
Engine Cut-Off Switch
61
Left Controller
61
Throttle Lever
63
iBR Lever (intelligent Brake and Reverse)
63
4.5" DIGITAL DISPLAY
65
Multifunction Gauge Description
65
Warning Lamps and Indicators
67
Settings
68
EQUIPMENT
70
Glove Box
70
Safety Equipment Kit Storage Compartment
71
Storage Bin
71
Seat
71
Passenger Handholds (If Equipped)
72
Boarding Step (Convenience Package)
72
Boarding Platform
73
Front and Rear Eyelets
73
Bilge Drain Plug
74
Sponsons
74
Rear Footrests (Trixx Models)
74
Adjustable Handlebar Riser (Trixx Models)
75
Audio System (If Equipped)
75
Trim Cover (If Equipped)
79
BREAK-IN PERIOD
82
Operation During Break-In Period
82
OPERATING INSTRUCTIONS
83
Boarding the Watercraft
83
Starting the Engine
87
How to Stop the Engine
87
Steering the Watercraft
88
How to Engage Neutral (Models with iBR)
89
How to Engage Forward
89
How to Engage and Use Reverse
89
How to Engage and Use Braking
90
Variable Trim System (VTS)
92
General Operating Recommendations
94
4
TABLE OF CONTENTS
OPERATING MODES
96
Default Riding Mode
98
Sport Mode
98
Trixx Mode (Trixx models only)
99
ECO Mode (Fuel Economy Mode)
100
SPECIAL PROCEDURES
101
Jet Pump Water Intake and Impeller Cleaning
101
Capsized Watercraft
103
Submerged Watercraft
103
Water-Flooded Engine
104
Towing the Watercraft in Water
104
MAINTENANCE
MAINTENANCE SCHEDULE
106
EPA Regulation - Canadian and USA Watercrafts
106
Maintenance Schedule
107
MAINTENANCE PROCEDURES
112
Engine Oil
112
Engine Coolant
114
Steering Alignment
116
Central Body
116
Ignition Coils
121
Spark Plugs
121
Exhaust System
122
Heat Exchanger and Water Intake Grate
123
Sacrificial Anode
124
Fuses
124
WATERCRAFT CARE
127
Post-Operation Care
127
Seat Cleaning
127
Body and Hull
127
STORAGE AND PRESEASON PREPARATION
129
Storage
129
Preseason Preparation
133
MAINTENANCE RECORDS
134
TECHNICAL INFORMATION
WATERCRAFT IDENTIFICATION
144
Hull Identification Number
144
Engine Identification Number
144
Engine Manufacturer Identification
144
COMPLIANCE
145
Emission Control Hang Tag - 3 Stars
145
Emission Control Label - 3 Stars
146
EPA Compliance Label
147
Regulation Exemption Label
148
BRP European Distribution SA
149
REP France - TRIMAN Signage
149
5
TABLE OF CONTENTS
RF D.E.S.S. KEY
150
BRP AUDIO SYSTEM
152
ENGINE EMISSIONS INFORMATION
154
Manufacturer's Responsibility
154
Dealer's Responsibility
154
Owner’s Responsibility
154
EPA Emission Regulations
154
Evaporative Emission Control System
154
EU DECLARATION OF CONFORMITY
155
Left blank for EU Conformity
155
UK DECLARATION OF CONFORMITY
156
Left blank for UK Conformity
156
EAC DECLARATION OF CONFORMITY
157
TECHNICAL SPECIFICATIONS
ENGINE
160
Rotax 900 ACE
160
VEHICLE
162
Spark Series
162
TROUBLESHOOTING
TROUBLESHOOTING GUIDELINES
166
MONITORING SYSTEM
172
Fault Codes
172
Indicator Lights and Message Display Information
173
Beeper Code Information
175
WARRANTY
BRP LIMITED WARRANTY – USA AND CANADA: 2024 SEA-DOO PER-
SONAL WATERCRAFT
178
1) SCOPE OF THE LIMITED WARRANTY
178
2) LIMITATIONS OF LIABILITY
178
3) EXCLUSIONS-ARE NOT WARRANTED
178
4) WARRANTY COVERAGE PERIOD
179
5) CONDITIONS TO HAVE WARRANTY COVERAGE
179
6) WHAT TO DO TO OBTAIN WARRANTY COVERAGE
180
7) WHAT BRP WILL DO
180
8) TRANSFER
180
9) CONSUMER ASSISTANCE
181
US EPA EMISSION-RELATED WARRANTY
182
Emission-Related Warranty Period
182
Components Covered
183
Limited Applicability
183
CALIFORNIA EVAPORATIVE EMISSIONS CONTROL SYSTEM WAR-
RANTY STATEMENT
185
Your Warranty Rights and Obligations
185
Manufacturer’s Warranty Coverage
185
Owner’s Warranty Responsibilities
185
6
TABLE OF CONTENTS
CALIFORNIA AND NEW YORK EMISSION CONTROL WARRANTY
STATEMENT FOR MODEL YEAR 2024 SEA-DOO® PERSONAL
WATERCRAFT
187
Your Warranty Rights and Obligations
187
Star Rating System
189
BRP INTERNATIONAL LIMITED WARRANTY: 2024 SEA-DOO®
WATERCRAFT
191
1) SCOPE OF THE LIMITED WARRANTY
191
2) LIMITATIONS OF LIABILITY
191
3) EXCLUSIONS-ARE NOT WARRANTED
192
4) WARRANTY COVERAGE PERIOD
192
FOR PRODUCTS SOLD IN AUSTRALIA ONLY
193
5) CONDITIONS TO HAVE WARRANTY COVERAGE
193
6) WHAT TO DO TO OBTAIN WARRANTY COVERAGE
193
7) WHAT BRP WILL DO
194
8) TRANSFER
194
9) CONSUMER ASSISTANCE
194
BRP LIMITED WARRANTY FOR THE EUROPEAN ECONOMIC AREA,
THE COMMONWEALTH OF THE INDEPENDENT STATES AND TURKEY:
2024 SEA-DOO® PERSONAL WATERCRAFT
195
1) SCOPE OF THE LIMITED WARRANTY
195
2) LIMITATIONS OF LIABILITY
195
3) EXCLUSIONS-ARE NOT WARRANTED
196
4) WARRANTY COVERAGE PERIOD
196
5) FOR PRODUCTS SOLD IN FRANCE ONLY
197
6) CONDITIONS TO HAVE WARRANTY COVERAGE
197
7) WHAT TO DO TO OBTAIN WARRANTY COVERAGE
198
8) WHAT BRP WILL DO
198
9) TRANSFER
198
10) CONSUMER ASSISTANCE
198
CUSTOMER INFORMATION
DATA PRIVACY INFORMATION
200
CONTACT US
202
Asia Pacific
202
Europe, Middle East and Africa
202
Latin America
203
North America
203
CHANGE OF ADDRESS/OWNERSHIP
204
7
TABLE OF CONTENTS
This page is intentionally blank
8
GENERAL INFORMATION
9
FOREWORD
Congratulations on your purchase of a
The safety alert symbol
indicates
new Sea-Doo® personal watercraft
a potential injury hazard.
(PWC)
(hereinafter referred to as
“watercraft”). It is backed by the BRP
warranty and a network of authorized
DANGER
Sea-Doo watercraft dealers ready to
Indiicates a potentiall hazard
provide the parts, service or accesso-
whiich, iif not avoided, wiilll resullt iin
ries you may require.
seriious iinjjury or death.
Your dealer is committed to your satis-
faction. He has taken training to per-
WARNING
form the initial setup and inspection of
Indiicates a potentiall hazard
your watercraft as well as completed
whiich, iif not avoided, could result
the final adjustment before you took
in serious injury or death.
possession. If you need more com-
plete servicing information, please ask
your dealer.
CAUTION
At delivery, you were also informed of
Indiicates a potentiallly hazardous
the warranty coverage and signed the
situatiion which, iif not avoiided,
Pre-Delivery Check List to ensure
coulld result iin minor or moderate
your new watercraft was prepared to
injjury.
your entire satisfaction.
NOTICE
Know Before You Go
Indiicates an iinstruction which, iif
To learn how to reduce the risk for you
not folllowed, could severely dam-
or other persons being injured or
age watercraft components or
killed, read the following sections be-
other property.
fore you operate the watercraft:
- Safety Information
- Watercraft Information.
About this Operator’s Guide
Read and understand all safety labels
This operator's guide has been pre-
on your watercraft and watch atten-
pared to acquaint the owner / operator
tively the Safety Video located at:
or passenger with this watercraft and
its various controls, maintenance and
safe riding instructions.
Or, use the following QR code.
Keep this Operator’s Guide in the
watercraft as you can refer to it for the
operation, instructing others, mainte-
nance and troubleshooting. This oper-
ator's guide needs to remain with the
watercraft at all time.
This guide is available in several lan-
guages. In the event of any discrep-
ancy, the English version shall prevail.
Safety Messages
If you want to view and/or print an ex-
tra copy of your operator's guide, sim-
This operator’s guide utilizes the fol-
ply visit the following website:
lowing symbols and words to empha-
size particular information:
10
FOREWORD
The information contained in this
document are correct at the time of
publication. However, BRP maintains
a policy of continuous improvement of
its products without imposing upon it-
self any obligation to install them on
products previously manufactured.
Due to late changes, some differen-
ces between the manufactured prod-
uct and the descriptions and
/ or
specifications in this guide may occur.
BRP reserves the right at any time to
discontinue or change specifications,
designs, features, models or equip-
ment without incurring any obligation
upon itself.
11
FOREWORD
This page is intentionally blank
12
SAFETY INFORMATION
SAFETY INFORMATION
13
BEFORE YOU GO
WARNING
Diisregarding any of the safety precautions and iinstructiions included in
this sectiion could cause injury iincludiing the possibillity of death. Any po-
tential operator shoulld read and understand thiis guide before operatiing
the watercraft.
Operating Age and Ability
Operators must be qualified. Make sure the operator is 16 or older and has taken
a boater safety course. Your state (or province) may have additional require-
ments. Laws regarding the minimum age and licensing requirements vary from
one jurisdiction to another. Be sure to contact the local boating authorities for in-
formation regarding the legal operation of a watercraft in the intended jurisdiction
of use.
Operation of this watercraft with a disability that impairs vision, reaction time,
judgment, or operation of the controls is not recommended.
Remember that sun, wind, fatigue or illness may impair your judgment and reac-
tion time.
Each passenger must be able to simultaneously place both feet firmly flat against
each footwell when properly seated.
Drugs and Alcohol
Never ride after consuming alcohol or drugs. Riding on a watercraft requires the
operator and passenger(s) to be sober, attentive and alert. The use of drugs and
alcohol, singly or in combination, decreases reaction time, impedes judgment,
impairs vision, and inhibits your ability to safely ride on a watercraft.
Safe Boating Courses
Many countries recommend or require a boating safety course. Check with your
local competent authorities.
Applicable Boating Laws
Check boating laws applicable to the waterways where you intend to use your
watercraft. Learn the local navigation rules.
Protective Gear
All riders MUST wear:
1. An approved Personall Fllotation Deviice (PFD) meeting your country regu-
lations. The size of the PFD shall be appropriate for the wearer.
2. Shorts wiith neoprene (wetsuit material) to keep water from being forcefully
injected into rectum or vagina during a fall backward. Riders not wearing neo-
prene shorts have received severe rectal, vaginal, and internal injuries result-
ing in permanent damage. Normal swimwear does not adequately protect
against forceful entry of water into the lower male or female body opening(s).
Footwear, gloves, safety goggles or glasses can be worn. Wind, water spray,
bugs and speed may cause a person’s eyes to water and create blurred vision.
14
SAFETY INFORMATION
BEFORE YOU GO
If you are planning a ride in cold weather or water, consider adding appropriate
warm clothing such as a complete wet suit or dry suit. Not only will it make your
ride more comfortable, but it may delay or protect you from hypothermia if you fall
into cold water. Be prepared for changing conditions.
Helmets: Weighing the Risks vs Benefits
Since each option minimizes some risks, but increases others, before each ride
you must decide whether to wear or not wear a helmet based on your particular
situation. If you decide to wear a helmet, look for helmets that meet DOT or Snell
standards, and if possible, choose one designed for motorized watersports.
Helmets are designed to offer some degree of protection in case of impacts to
the head. In most motorized sports, the benefits of wearing a helmet clearly out-
weigh the drawbacks. However, in the case of motorized watersports such as rid-
ing personal watercraft, this is not necessarily true as there are some particular
risks associated with the water.
Benefiits
A helmet helps to reduce the risk of injury in case of a head impact against a hard
surface such as another craft in the case of a collision. Similarly, a helmet with a
chin guard might help prevent injuries to the face, jaw or teeth.
Riisks
On the other hand, in some situations when falling off the watercraft, helmets
have a tendency to catch the water, like a “bucket”, and put severe stresses on
the neck or spine. This could result in choking, severe or permanent neck or
spine injury or death. Helmets may also interfere with peripheral vision and hear-
ing, or increase fatigue which could contribute to increase the risk of a collision.
Required Equipment
As the owner of the watercraft, you are responsible for ensuring that all required
safety equipment is aboard. Check your local regulations about requirements.
This could include:
SAFETY INFORMATION
15
BEFORE YOU GO
- Fire extinguisher. Maintenance, repair and refilling must be carried out in ac-
cordance with the manufacturer’s instructions.
- A watertight flashlight or approved flares
- Sound-producing device (horn, whistle or bell etc.)
- Visual Distress Signal
- Phone in a watertight compartment designed for this application
- Current local map
- First aid kit
- Throw rope.
16
SAFETY INFORMATION
GET FAMILIAR WITH THE WATERCRAFT
The performance of this watercraft may exceed the performance of other water-
crafts you may have operated. Do not assume that all watercrafts handle
identically.
Make sure you read and understand the content of this operator’s guide to be-
come completely familiar with the controls and operation of the watercraft before
embarking on your first trip, or taking on a passenger(s). If you have not had the
opportunity to do so, practice in a suitable traffic-free area to become accus-
tomed to the feel and response of each control. Be fully familiar with all controls
before accelerating above idle speed.
Jet Thrust
Your watercraft features a jet drive propulsion system. The water is drawn up
from underneath the watercraft from the intake grate and is accelerated by the
venturi to produce thrust. This accelerated water is going out at the rear of the
craft.
All riders must wear shorts with neoprene (wetsuit material) to keep water from
being forcefully injected into rectum or vagina during a fall backward. Riders not
wearing neoprene shorts have received severe rectal, vaginal, and internal inju-
ries resulting in permanent damage. Normal swimwear does not adequately pro-
tect against forceful entry of water into the lower male or female body opening(s).
The jet pump may pick up debris and throw it rearward causing a risk of injuring
people, damaging the jet pump, or other property.
Do not start the engine or operate the watercraft if anyone is in the water nearby,
or near the rear of the watercraft.
Steering
Your watercraft has a steerable nozzle at the rear of the boat controlled by the
handlebars which direct the stream of water from left to right. To turn the water-
craft, both steering and power are necessary.
Do not release the throttle when trying to steer away from objects — as with other
powerboats, you need power to steer.
If the engine is shut off, steering is lost.
Tether Cord (Safety Lanyard)
Keep the tether cord clip attached to the operator’s PFD or wrist (wrist strap re-
quired) at all times and keep it free from snagging on the handlebars to help en-
sure the engine stops should the operator fall off.
If the operator falls off the watercraft and the tether cord is not attached as rec-
ommended, the engine will not stop and the watercraft will keep running without
a driver. The operator may not be able to swim back to it.
After riding, always remove the tether cord from the engine cut-off switch to avoid
unauthorized use by children or others and to prevent starting in a closed envi-
ronment (e.g.: garage).
SAFETY INFORMATION
17
GET FAMILIAR WITH THE WATERCRAFT
To prevent accidental starting, always detach the tether cord from the engine
cut-off switch when swimmers are boarding, nearby, or during removal of any
weeds or debris from the intake grate.
Braking
Most watercrafts have no means of braking.
On some models, advancement in technologies now permits us to offer a braking
system called the iBR (intelligent Brake and Reverse). Practice braking maneu-
vers in a safe traffic-free area to become familiar with handling under braking and
with stopping distances under various operating conditions.
Stopping distance will vary depending on initial speed, load, wind, number of
riders and water conditions. The amount of braking power commanded by the
operator using the iBR lever will also affect stopping distance.
When braking, riders must brace themselves against the deceleration force to
prevent from moving forward on the watercraft and losing balance.
When operating an iBR equipped watercraft, be aware that other boats following
or operating in close proximity may not be able to stop as quickly. Inform the op-
erator of a watercraft who intends to follow you in a convoy formation of the brak-
ing capability of your watercraft and the need of keeping a greater distance
between watercraft.
The brake feature of the iBR system cannot prevent your watercraft from drifting
due to current or wind. It has no braking effect on the rearward velocity. Also note
that your engine must be running to be able to use the brake.
Learning Key (available as accessory)
The Sea-Doo LK™ learning key limits the speed of the watercraft. It could be an
option for first time users and less experienced operators to learn how to operate
the watercraft.
Visit your BRP authorized Sea-Doo dealer to see if this accessory is available for
your model.
Cargo and Storage
Do not store any objects in areas that are not designed specifically for storage.
Do not transport cargo on the rear platform unless it is properly secured with a
BRP LinQ™ certified accessory. Compatible accessories which are not BRP cer-
tified may not be considered as fit for this purpose.
When carrying loads on the rear platform or onto cargo accessories, reduce your
speed and adapt your driving behavior to reduce the risk of ejection from the
watercraft or contact with cargo possibly leading to injuries.
Do not exceed the payload or passenger capacities for your watercraft. Over-
loading can affect manoeuvrability, stability and performance. Also, heavy seas
reduce capacity.
18
SAFETY INFORMATION
GET FAMILIAR WITH THE WATERCRAFT
Never carry loads on the rear platform when practicing watersports. The cargo
may interfere with the rope and get unlatched, becoming an obstacle to the per-
son being towed.
Refer to Technical Specifications for the maximum loading capacity.
Accessories and Modifications
Any modifications or addition of accessories approved by BRP may affect the
handling of your vehicle. It is important to take the time to get familiar with the ve-
hicle once modifications are made to understand how to adapt your driving be-
havior accordingly.
Avoid installing equipment not specifically approved by BRP for the vehicle and
avoid unauthorized modifications. These modifications and equipment have not
been tested by BRP and may create hazards. For example, they could:
- Create a loss of control and increase risk of crash
- Cause overheating or short circuits increasing the risk of fire or burn injuries
- Affect the protection features provided by the vehicle.
Your vehicle may also become illegal to ride.
As an example, installing an additional GPS or cell phone support may prevent
the driving capabilities of the vehicle and increase the risk of a loss of control.
Ask your authoriized BRP dealler for suiitablle avaiilablle accessoriies for your
vehiiclle.
SAFETY INFORMATION
19
RIDE SAFELY
Riding with Passenger(s) (If equipped with passenger seat
and handholds)
The operator is responsible to inform and protect the passenger(s) invited to ride.
Instruct all passenger (s) to use the handholds, seat strap, or to hold on to the
waist of the person in front of them. Each passenger must be able to simultane-
ously place both feet firmly flat against each footwell when properly seated.
Be sure riders are properly seated and holding on. Riders can be thrown off
watercraft during unexpected acceleration or aggressive operation. Avoid ag-
gressive operation, sharp turns, and unexpected acceleration.
Falls can result in severe injury or death.
All riders must wear shorts with neoprene (wet suit material) to keep water from
being forcefully injected into rectum or vagina during a fall backward. Riders not
wearing neoprene shorts have received severe rectal, vaginal, and internal inju-
ries resulting in permanent damage.
When going over waves, riders(s) may raise their body slightly off the seat to ab-
sorb the shocks with their legs.
When braking or decelerating, riders must brace themselves against the deceler-
ation force to prevent from moving forward on the watercraft and losing balance.
Riding with passenger (s) makes the watercraft handle differently and requires
greater skill.
Avoiding Collisions
Scan your surroundings constantly for people, objects and other watercraft.
Stay far enough away from others so you can always safely coast to a stop. Do
not release throttle when trying to steer away from objects - as with other power-
boats, you need throttle to steer.
Be alert for conditions that may limit your visibility or block your vision of others.
Do not go near others to spray or splash them with water, go too close to other
boats, or go too fast for traffic conditions. You may misjudge the ability of the
watercraft or your own riding skills and strike a boat or person.
If your watercraft is equipped with a braking system, be aware that other boats
following or operating in close proximity may not be able to stop as quickly.
Stopping distance will vary depending on initial speed, load, wind and water con-
ditions. The amount of braking power commanded by the operator using the iBR
lever will also affect stopping distance.
Although the preferable manoeuvre to avoid an obstacle is to steer away while
applying throttle, the iBR can also be used by fully braking and turning in the di-
rection to avoid the obstacle.
Riding Behaviors
Ride within your limits and level of riding ability.
20
SAFETY INFORMATION
RIDE SAFELY
Scan constantly for people, objects and other watercraft. Stay far enough away
from others so you can always safely coast to a stop.
Avoid aggressive operation, sharp turns, and unexpected acceleration that can
cause riders to be thrown off.
Avoid riding in very rough waters or practicing extreme manoeuvres like jumping
wakes or waves - jumping can cause injuries such as back or spinal injuries
(paralysis).
Speeding
While your watercraft has the capacity of operating at high speeds, it is strongly
recommended that high-speed operation only be applied when ideal conditions
exist and are permitted. Higher speed operation requires a higher degree of skill
and increases the risk of severe injuries.
The forces generated on the body of riders while turning, negotiating waves or
wakes, operating in choppy waters, or falling off the watercraft, especially at high-
er speeds, may cause injury including the possibility of broken bones or more
serious bodily injuries.
Reboarding
Operator and passenger (s) need to know how to swim and how to reboard the
watercraft from the water. Boarding in deep water can be strenuous.
Also, make sure you and all passengers know how to reboard when accessories
are installed at the rear. Board the watercraft from the rear and carefully get
around the accessories. If you have difficulties, you should know how to remove
the accessories and move them towards the front to provide better access to the
boarding platform.
If the accessories are too heavy, swim toward the side, use passenger handhold
and/or seat strap to lift yourself aboard.
Ask inexperienced riders to practice how to board the watercraft close to shore
(all methods explained here) before venturing into deep water, especially when
cargo is installed aboard on the rear platform.
To prevent accidental starting, always detach the tether cord from the engine
cut-off switch when passenger(s) swimmers are boarding.
Moving Parts
Never turn handlebar while someone is near the rear of watercraft. Keep away
from steering moving parts (nozzle, iBR gate, linkages, etc.).
Keep away from the intake grate while the engine is running. Items such as long
hair, loose clothing, or PFD straps can become entangled in moving parts.
Be aware of the iBR gate movement when starting the engine, shutting down the
engine or using the iBR lever. Automatic movement of the gate may squeeze fin-
gers or toes of people taking a hold on the back or your watercraft.
SAFETY INFORMATION
21
RIDE SAFELY
Know the Waters
Know the waters in which the watercraft is to be operated.
Plan your route and avoid shallow waters or hidden rocks, rapids, as well as oth-
er possible risks. When leaving dock always inform someone you trust on land of
your planned route, and estimated time of arrival. They can then contact rescue if
you are late and did not reach them.
Current, tides, rapids, hidden obstacles, wakes and waves, etc., can affect safe
operation. It is not advisable to operate the watercraft in rough waters or inclem-
ent weather. Keep an eye on the weather. Check local weather broadcasts be-
fore departure. Be alert to changing conditions.
Keep accurate and up-to-date charts of the boating area on board. Before getting
underway, check water conditions in the planned boating area.
Ensure there is enough fuel on board for the planned trip. Always verify fuel level
before use and during the ride. Apply the principle of 1/3 of the fuel to reach your
destination, 1/3 to return, and keep 1/3 in reserve. Allow for changes due to ad-
verse weather or other delays.
In shallow water, proceed with caution and at very low speeds. Grounding or
abrupt stops may result in injury and watercraft damage. Always be alert for de-
bris and objects in the water. They could be picked up and thrown rearward by
the jet pump onto people.
Navigation Rules
Always ride responsibly and safely. Use common sense and courtesy.
Operating a watercraft can be compared with driving on unmarked highways and
roads. To prevent collisions or avoid other boaters, a system of operating rules
must be followed. Generally keep to your right and safely avoid collisions by
keeping a safe distance from other watercrafts, boats, people and objects.
Make sure you know and understand the navigation system applicable to the
waterways where you intend to use the watercraft.
Navigational aids on shore or on waters, such as signs or buoys, can assist you
in identifying safe waters. They can indicate:
- whether you should keep to the right (starboard) or to the left (port) of the
buoy
- which channel you can continue
- whether you are entering a restricted or controlled area such as a no wake or
low speed zone
- hazards
- speed limits, no power craft or boating, anchorage and other useful
information.
Respect no wake zones, the environment, and the rights of other users of the
waterways.
Night-Time Operation
This watercraft is not designed for night-time operation.
22
SAFETY INFORMATION
RIDE SAFELY
Carbon Monoxide (CO) Poisoning
All engine exhaust contains carbon monoxide (CO), a deadly gas. Breathing CO
can cause headaches, dizziness, drowsiness, nausea, confusion and eventually
death.
Carbon monoxide is a colorless, odorless, tasteless gas that may be present
even if you do not see or smell any engine exhaust. Deadly levels of CO can col-
lect rapidly, and you can quickly be overcome and unable to save yourself. Also,
deadly levels of CO can linger for hours or days in enclosed or poorly ventilated
areas. If you experience any symptoms of CO poisoning, leave the area immedi-
ately, get fresh air and seek medical treatment.
To prevent serious injury or death from CO:
- Never run the watercraft in poorly ventilated or partially enclosed areas such
as boat houses, garage, seawalls or other watercrafts in close proximity.
Even if you try to ventilate engine exhaust, CO can rapidly reach dangerous
levels.
- Never run the watercraft outdoors where engine exhaust can be drawn into a
building through openings such as windows and doors.
- Never stand behind the watercraft while the engine is running. A person
standing behind a running engine may inhale high concentrations of exhaust
fumes.
After riding, always remove the tether cord from the engine cut-off switch to avoid
unauthorized use by children or others and to prevent starting in a closed envi-
ronment (ex: garage).
Gasoline Fires and Other Hazards
Gasoline is extremely flammable and highly explosive. Fuel vapors can spread
and be ignited by a spark or flame many feet away from the engine. To reduce
the risk of fire or explosion, follow these instructions:
- Use only an approved red gasoline container to store fuel.
- Strictly adhere to the instructions in Fueling section.
- Never start watercraft if gasoline or gasoline vapor odors is present in the en-
gine compartment.
- Never start or operate the engine if the fuel cap is not properly secured.
- Do not carry gasoline containers in ANY of the storage compartments.
- Use only a BRP approved LinQ fuel caddy, which shall be properly installed
and secured.
- Never refill the fuel caddy on the watercraft, refill on the dock or shore.
- Never tow a skier or a wakeboarder while having a fuel caddy installed on the
swim platform.
Gasoline is poisonous and can cause injury or death.
- Never siphon gasoline with your mouth.
- If you swallow gasoline, get any in your eyes, or inhale gasoline vapors, see a
doctor immediately.
If gasoline is spilled on you, wash thoroughly with soap and water and change
your clothes.
SAFETY INFORMATION
23
RIDE SAFELY
Burns From Hot Parts
Certain components may become hot during operation. Avoid contact during and
shortly after operation to avoid burns.
Watersports (Towing with the Watercraft)
Models with a Seatiing Capaciity of 3 or More Only
Attachment and Towing Deviices
Certain watercraft models come equipped with tow eyelets or a ski pylon.
Use the ski pylon, if equipped, to attach a tow rope for a skier or wake boarder.
Use the rear tow eyelet to attach a tow rope for a tube.
Do not use these attachment points or any other portion of the watercraft to tow a
parasail, kites, gliders or any devices which can become airborne or for pulling
any other craft. Personal injury or severe damage may occur.
Never carry loads on the rear platform when practicing watersports. The cargo
may interfere with the rope and unsecure it, becoming an obstacle to the person
being towed.
Watercraft Capacity When Towing
Always carry an observer to observe the person being towed and inform the op-
erator about the participant’s hand signals. The operator must focus his attention
on operating the watercraft and the waters ahead.
You need to have seats for everyone: operator, observer, towed person. There-
fore, if you are the only vessel, your watercraft must have a seating capacity of 3
or more and you can tow only one person.
Towing and Observiing
If you have never towed someone behind your watercraft before, it is a good idea
to spend some hours as an observer, working with and learning from an experi-
enced operator. It is also important to be aware of the skill and experience of the
person being towed.
Pulling a tube, skier or wakeboarder makes the watercraft handle differently and
requires greater skill.
Always respect the safety and comfort of the person being towed.
Proceed with only as much speed as required and follow the observers’
instructions.
Never make sharp turns while towing skier or rider(s). Sharp turns may result in
sudden acceleration or the skier's/ rider's speed. Do not use the braking system
unless absolutely necessary. Remember that although this watercraft is manoeu-
vrable and has stopping capabilities, the person in tow may not be able to avoid
an obstacle, or your watercraft.
The driver, the observer and the person being towed, skier or rider (s), need to
learn the hand signals before departure.
24
SAFETY INFORMATION
RIDE SAFELY
Participate in watersports only in safe areas. Stay away from other watercrafts,
channels, beaches, restricted areas, swimmers, and heavily travelled waterways
and underwater obstructions.
Hand Siignalls
5. Cut motor
1. Speed up
Slashing hand across
Thumbs up
throat
6. OK after falll
2. Slow down
Hands clasped over the
Thumbs down
head
3. Turn
7. Stop
Circling motion above
head followed by
Hand raised with fingers
pointing in the direction
outstretched
of the turn
8. Alll OK
4. Back to shore
An "0" made with the
Pat top of head
thumb and index finger
Tow Rope
Never wrap the tow rope around your wrist, hand, or any body part. The rope
may suddenly lose its slack and cause serious injuries, such as amputation.
Both the operator and observer shall monitor the location of the tow rope when
participating in water sports. A slack tow rope can become entangled with a per-
son (s) or objects on the watercraft or in the water, particularly when making a
tight turn or circling, and cause serious personal injury.
Do not pull the tow rope in front of other boats and be careful not to run over the
rope with the watercraft because it could get trapped in the jet pump.
Do not tow a person in any water sport on a short tow rope such that the person
inhales exhaust fumes in concentration. Inhalation of concentrated exhaust
fumes, which contain carbon monoxide, can result in CO poisoning, personal in-
jury and death.
Always use a tow rope of proper tensile strength and of sufficient length. Inspect
the rope and connectors before each use. Do not use if damaged. Make sure that
the tow rope is adequately secured to your watercraft.
Always disconnect and safely stow the tow rope in the watercraft when not in
use. While some watercraft are equipped or can be fitted with a specially de-
signed towing mechanism, avoid installing a tow pole on a watercraft. It can be-
come a hazard should someone fall on it.
SAFETY INFORMATION
25
RIDE SAFELY
Falllen Skier or Rider
Any fall may result in injury: Give immediate attention to a person who has fallen.
He or she is vulnerable in the water alone and may not be seen by other boaters.
Always keep the fallen skier or rider in view and on the driver's side of the water-
craft. Circle fallen skier or rider slowly to return the tow rope handle or pick up the
fallen skier/ rider. Always turn engine OFF when a skier/ rider is getting into or
out of the watercraft or is near the watercraft.
26
SAFETY INFORMATION
PRACTICE EXERCISES
It is always a good idea to practice and get familiar with all controls, functions
and handling characteristics of your watercraft before venturing on the water.
Where to Practice Exercises
Find a suitable area to practice the exercises. Ensure that the area meets the fol-
lowing requirements:
- No traffic
- No obstacles
- No swimmers
- No current
- Ample space to maneuver
- Adequate water depth
Practice Exercises
Practice the following exercises.
Turning
Practice turning in circles in both directions at slow speed.
When comfortable with the exercise, increase difficulty by making some figure 8.
When this is mastered, repeat the above exercises but at increased speed.
Stoppiing Distances
Practice stopping the watercraft in a straight line at various speeds and braking
force. Remember that watercraft speed, load, water conditions, current and wind
also affect stopping distances.
Practice releasing the throttle while going at speed and feel the deceleration rate
with different speed.
Repeat exercise, but this time while applying iBR lever (if equipped). Note that
the iBR system takes control of the throttle.
Steeriing and Avoidiing an Obstaclle
Practice obstacle avoidance (choose a virtual point on the water) by steering
watercraft and maintaining throttle.
Repeat exercise, but this time release throttle while turning.
Repeat exercise, but this time while applying iBR lever (If equipped). Note that
the iBR system takes control of the throttle.
NOTE:
With this exercise, you will learn that you need throttle to steer the watercraft in a
different direction.
Reverse
Practice reverse operation to learn how the watercraft operates in reverse and
reacts with steering inputs.
SAFETY INFORMATION
27
PRACTICE EXERCISES
NOTE:
Remember that steering direction is reversed when backing.
Docking
Practice docking using the throttle, the steering and the iBR (if equipped) to be-
come familiar with the response of the watercraft and to develop good control
skills.
Slow Speed Mode, Skii Mode and Speed Limiiter Mode (if equipped)
If your watercraft has any of these modes, it is also important to understand their
operation and to become familiar with these features prior to using them on a ride
with other people.
WARNING
The ski and the speed llimiiter modes are not an automatiic piilot; they wiilll
not drive the watercraft for you.
28
SAFETY INFORMATION
FUELING
Fueling Procedure
WARNING
Gasolline is extremely flammablle and highly expllosiive under certain con-
ditiions. Folllow the instructions iin this section expliiciitly. Improper handlling
of fuel could resullt in property damage, seriious injjury or death. Leaking
fuell is a fire and explosion hazard. Inspect system for lleaks frequentlly.
Fuel is flammable and explosive under certain conditions. Do not smoke or allow
open flames or sparks in the vicinity.
1. Stop engine.
2. Have the operator and passenger(s) get off of watercraft.
3. If on the water, moor the watercraft securely to the dock.
4. Unscrew slowly the fuel cap counterclockwise to stabilize pressure before re-
moving it.
NOTE:
A short whistling sound is normal.
5. Insert the spout into the filler neck.
NOTE:
Be certain that you are putting fuel in the right location and not using a ventilation
hole or ski pylon hole by mistake.
6. Pour fuel slowly so the air can escape from the tank and prevent fuel flow
back. Be careful not to spill fuel.
7. Stop filling after the release of the gas pump nozzle handle and wait a mo-
ment before removing the spout. Do not retract the gas pump nozzle to put
more fuel into the fuel tank. Do not overfill.
8. Install fuel tank cap and tighten it clockwise until you hear a ratchet sound.
9. Always wipe off any fuel spillage from the watercraft.
10. After refueling, always open or remove the seat or the lateral panel (depend-
ing on models) and ensure there is no gasoline odor inside the engine com-
partment. Do not start watercraft if you smell gasoline odor.
Fuel Requirements
NOTICE
Allways use fresh gasolline.
Gasoline will oxidize; the result is loss of octane, volatile compounds, and the
production of gum and varnish deposits which can damage the fuel system.
Alcohol fuel blending varies by country and region. Your vehicle has been de-
signed to operate using the recommended fuels, however, be aware of the
following:
SAFETY INFORMATION
29
FUELING
- Use of fuel containing alcohol above the percentage specified by government
regulations is not recommended and can result in the following problems in
the fuel system components:
- Starting and operating difficulties.
- Deterioration of rubber or plastic parts.
- Corrosion of metal parts.
- Damage to internal engine parts.
- Inspect frequently for the presence of fuel leaks or other fuel system abnor-
malities if you suspect the presence of alcohol in gasoline exceeds the cur-
rent government regulations.
- Alcohol blended fuels attract and hold moisture which may lead to fuel phase
separation and can result in engine performance problems or engine
damage.
Recommended Fuel
The gasoline must have the following minimum octane requirements:
Engiine
Recommended Fuel
Use Premium gasoline with an AKI
300
(RON+MON)/2 octane rating of 92 or an RON
octane rating of 95.
Use common gasoline with an AKI (RON+MON)/
All other
2 octane rating of 87 or an RON octane rating of
91.
Use unleaded gasoline containing MAXIMUM 10% ethanol.
NOTICE
Never experiment wiith other fuels. Engine or fuel system damages may
occur wiith the use of an iinadequate fuell.
NOTICE
Do NOT use fuell from fuel pumps labeled E85.
Use of fuel labeled E15 is prohibited by U.S. EPA Regulations.
30
SAFETY INFORMATION
TRANSPORTING THE WATERCRAFT
NOTICE
The span of the trailler bunks iinclludiing bunk wiidth shoulld be adjusted to
proviide support throughout the fulll llength of the hulll. The ends of both
trailler bunks shoulld not exceed the llength of the watercraft.
Ensure the trailer wheels are positioned so that the center of gravity of the water-
craft is slightly ahead of the wheels to properly distribute the weight of the
watercraft.
Carry the watercraft in its normal operating position.
Check the applicable laws and regulations in your area concerning towing a
trailer, especially for the following items:
- Brake system
- Tow vehicle weight
- Mirrors.
Respect tow vehicle maximum weight capacity and the tongue weight capacity
as recommended by the manufacturer.
Tie the watercraft to both front and rear (bow/stern) eyelets so that it is firmly se-
cured on the trailer. Use additional tie-downs if necessary.
Ensure fuel tank cap, front storage compartment cover, glove box cover, board-
ing platform and seat are properly latched.
Make sure all accessories and cargo are properly secured.
Observe trailering safety precautions.
Do not route ropes or tie-downs over the seat or attach them to the grab handle
to avoid these parts permanently damaged. Wrap ropes or tie-downs with rags or
similar protectors where they can come into contact with the watercraft body.
A Sea-Doo cover can protect the watercraft, particularly when driving on dirt
roads, to prevent dirt entry through the air inlet openings.
When transporting 2 watercrafts, it may be necessary to remove the inner wake-
board rack, if equipped.
SAFETY INFORMATION
31
TRANSPORTING THE WATERCRAFT
For more information, see the following video: SEA-DOO HOW TO SERIES -
PROPER WATERCRAFT TRAILERING
Or, use the following QR code.
WARNING
Make sure alll seats, accessories and cargo are properlly secured, or re-
move it to prevent from fallling on the road and creating a hazard for fol-
l
lowiing vehicles.
32
SAFETY INFORMATION
IMPORTANT ON-PRODUCT LABELS
Watercraft Safety Labels
These labels are affixed to the vehicle for the safety of the operator, passengers
or bystanders.
The operator and when applicable, the passenger, shall read and understand
this information before riding.
The labels illustrated on the following pages are on your watercraft. If missing or
damaged, they can be replaced free of charge. See an authorized Sea-Doo
dealer.
NOTE:
In the event of any discrepancy between this guide and the vehicle, the safety la-
bels on the vehicle have precedence over the labels in this guide.
SAFETY INFORMATION
33
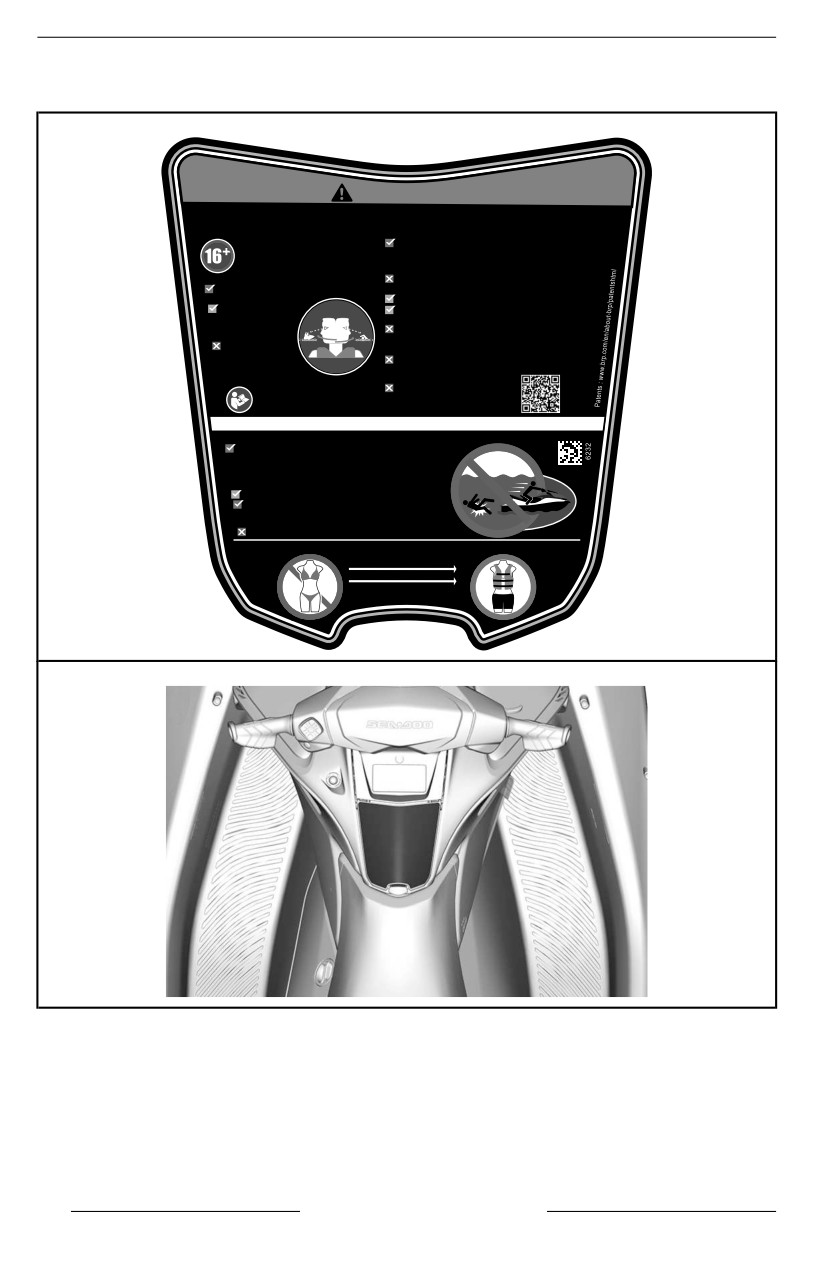
IMPORTANT ON-PRODUCT LABELS
General Information – Warning Label
WARNING
Require Proper Operation of the Boat
Improper operation can result in severe injury or death.
Operators Must Be Qualified
Protect All Riders
Make sure operator is 16 or older
Wear shorts with neoprene (wet suit material) and an
and has taken a boater safety
approved PFD (personal flotation device) - see Rider Safety
course.Your state (or province)
section of this label. Tell riders to read the Rider Safety
may have additional requirements.
section and make sure they are dressed appropriately.
Operators Must Avoid Collisions
Do not apply throttle when anyone is boarding or at
Scan constantly for people, objects
rear of PWC.
and other watercraft.
Be sure riders are properly seated and holding on.
Stay far enough away
Avoid aggressive operation, sharp turns, and unexpected
from others so you
acceleration that can cause riders to be thrown off.
can always safely
Do not jump waves or wakes - jumping can cause
coast to a stop.
injuries such as back or spinal injuries (paralysis).
Do not release
Do Not Permit Reckless Operation:
throttle when trying
to steer away from
Do not go near others to spray or splash them with
objects-as with other
water, go too close to other boats, or go too fast for
powerboats, you need throttle to steer.
traffic conditions.
Never ride after consuming
Read Operator’s Guide
alcohol or drugs.
Watch safety video.
RIDER SAFETY
Falls Can Result in Severe Injury or Death
You must wear shorts with neoprene (wet suit material)
to keep water from being forcefully injected into rectum
or vagina during a fall backward. Riders not wearing
neoprene shorts have received severe rectal, vaginal,
and internal injuries resulting in permanent damage.
You must wear an approved PFD (personal flotation device).
Be sure you are properly seated and holding on.
Riders can be thrown off PWC during unexpected
acceleration or aggressive operation.
Never ride after consuming alcohol or drugs.
Do not ride if you are not dressed appropriately.
Wear PFD
Wear Neoprene
See Operator’s Guide
34
SAFETY INFORMATION
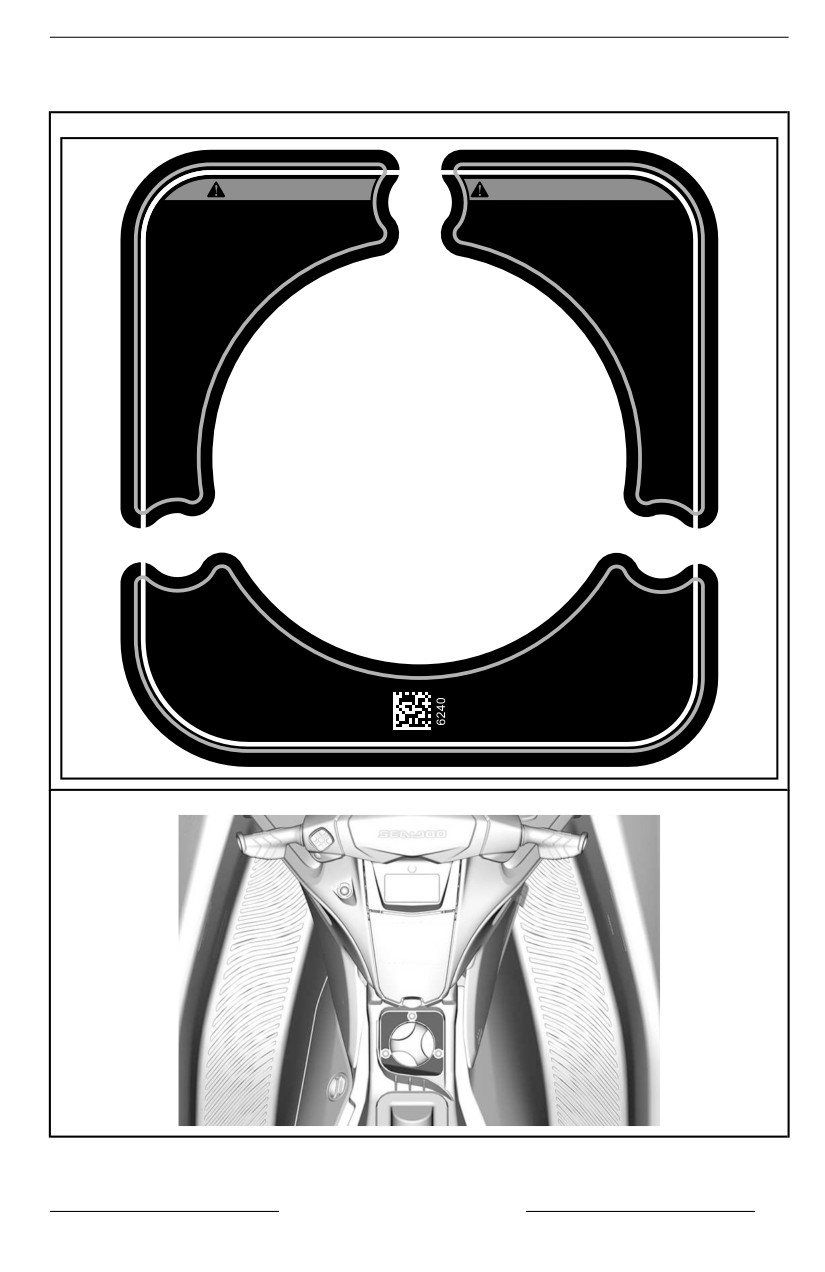
IMPORTANT ON-PRODUCT LABELS
Fueling Procedure - Warning Label
WARNING
AVERTISSEMENT
• After refueling, always open the
• Après avoir fait le plein, toujours ouvrir le
access cover to ensure there is no
couvercle d’accès afin de s’assurer qu’il
gasoline vapor odor inside the
n’y ait pas d’émanation d’essence dans
engine compartment.
le compartiment moteur.
• Gasoline vapor may cause
• Les émanations d’essence
fire or explosion.
peuvent provoquer des
• Do not overfill
incendies ou des
gas tank.
explosions.
• Keep the
• Éviter de trop
watercraft
remplir le
away from
réservoir
open
d’essence.
flames
• Garder la
and
motomarine
sparks.
à l’écart
des
flammes
et des
étincelles.
• Ne pas démarrer la
• Do not start watercraft
motomarine en présence
if liquid gasoline or gasoline
d’essence liquide ou
vapor odor is present.
d’émanation d’essence.
• Always replace access
• Toujours remettre le couvercle d’accès en
cover before starting.
place avant de démarrer la motomarine.
SAFETY INFORMATION
35
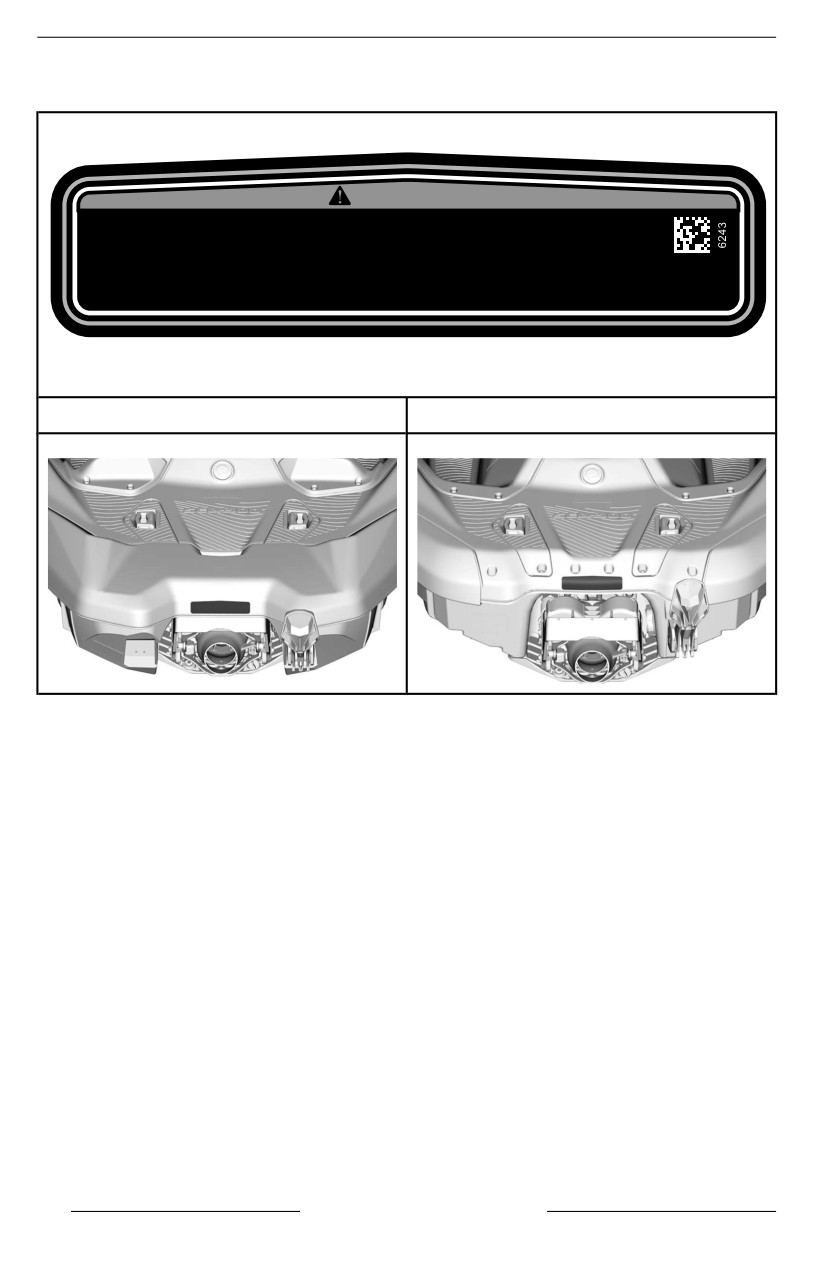
IMPORTANT ON-PRODUCT LABELS
Re-Boarding - Warning Label
WARNING
AVOID SERIOUS INJURY OR DEATH:
• Engine must be turned off before re-boarding.
• Keep away from propulsion system and intake grate.
WHEN RE-BOARDING: • Re-board one person at a time. • Stay centered to keep balance.
Never use the boarding step (if so equipped) for pulling, towing, jumping or boarding a PWC
that is out of water or any purpose for which it was not designed.
For 3 models
For 1 or for 2 Models
36
SAFETY INFORMATION
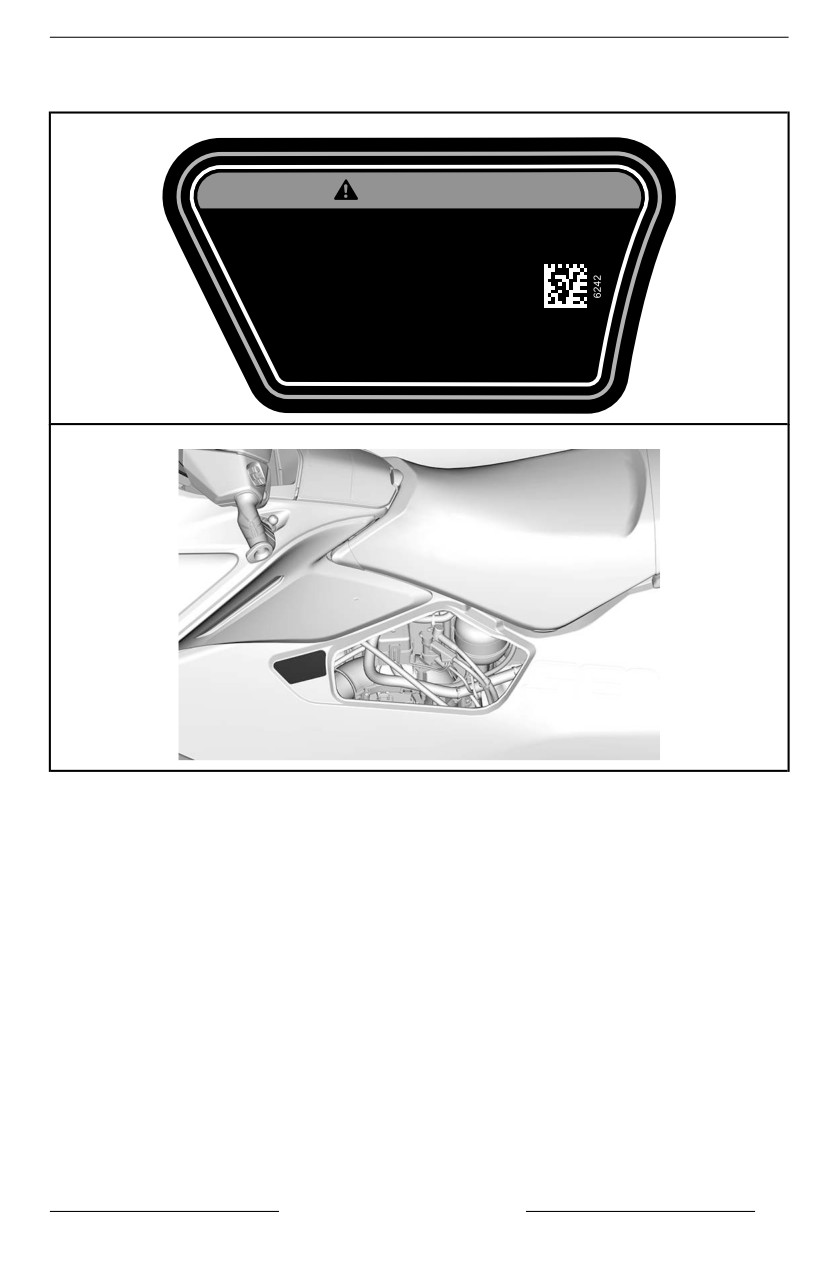
IMPORTANT ON-PRODUCT LABELS
Charging the Battery - Warning Label
WARNING
• Remove battery from watercraft before charging.
• Do not overcharge battery.
• Improper charging of battery can
cause explosion.
• Certain components in the engine
compartment may be very hot. Direct
contact may result in skin burn.
SAFETY INFORMATION
37
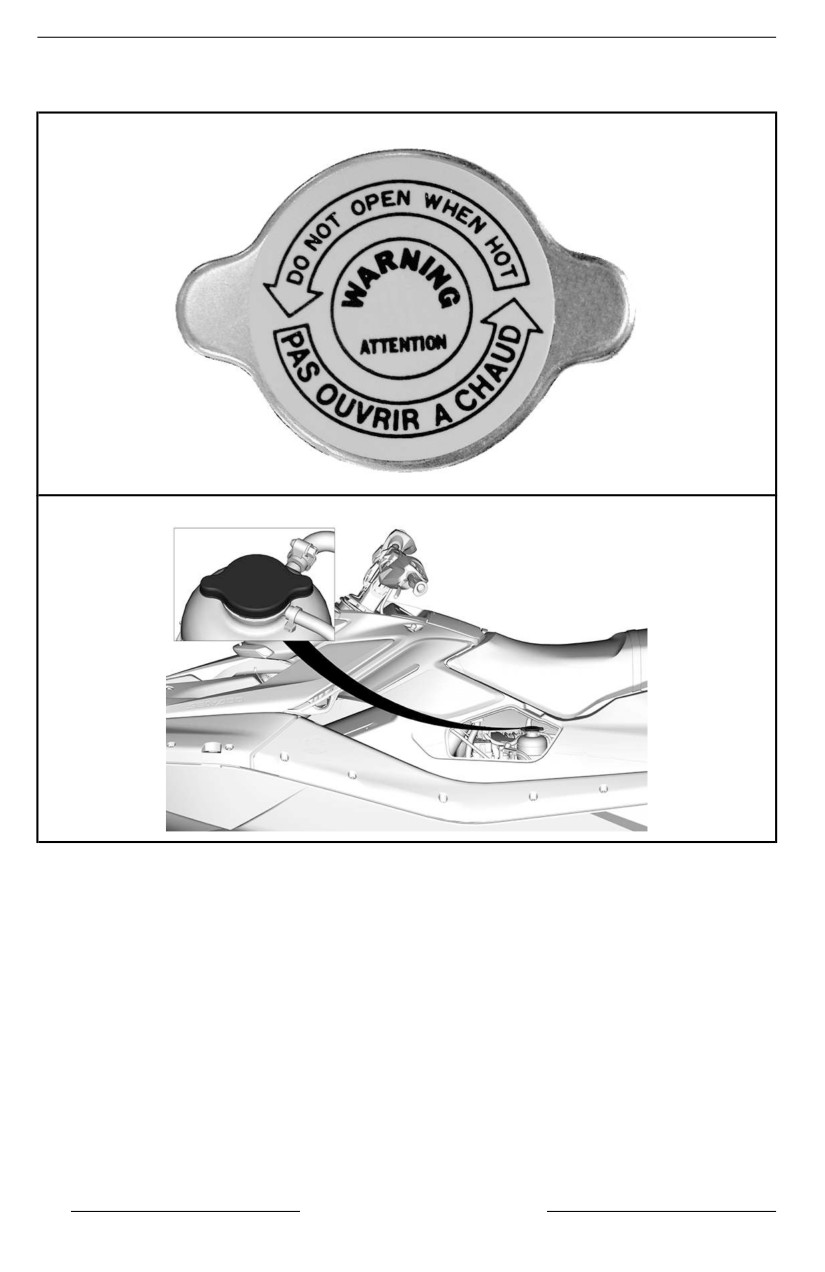
IMPORTANT ON-PRODUCT LABELS
Do Not Open When Hot - Warning Label
38
SAFETY INFORMATION
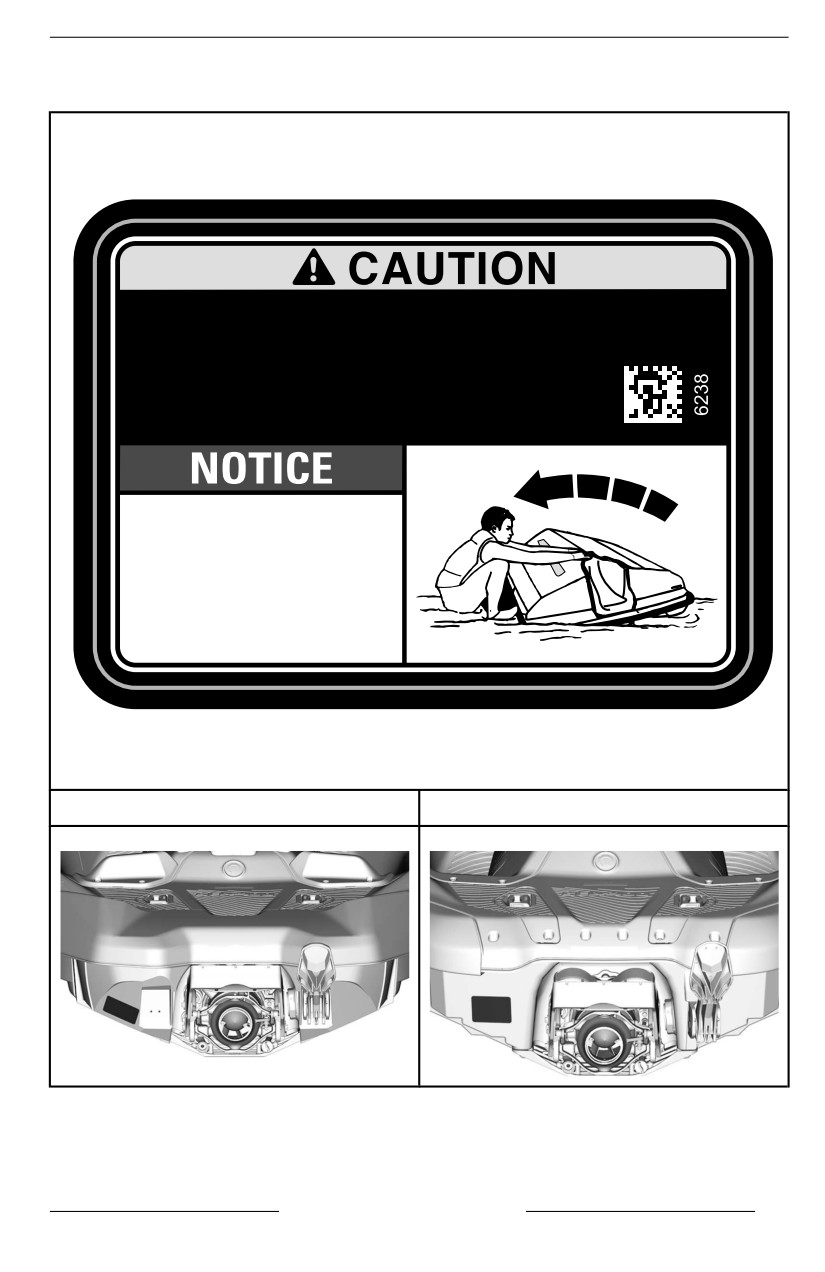
IMPORTANT ON-PRODUCT LABELS
Tip Over - Caution Label
Heat exchanger in the hull may become
very hot. Avoid any contact with heat
exchanger as burns may occur.
• Make sure engine is off.
• Grab inlet grate and
step on bumper.
• Roll PWC.
For 3 models
For 1 or for 2 models
SAFETY INFORMATION
39
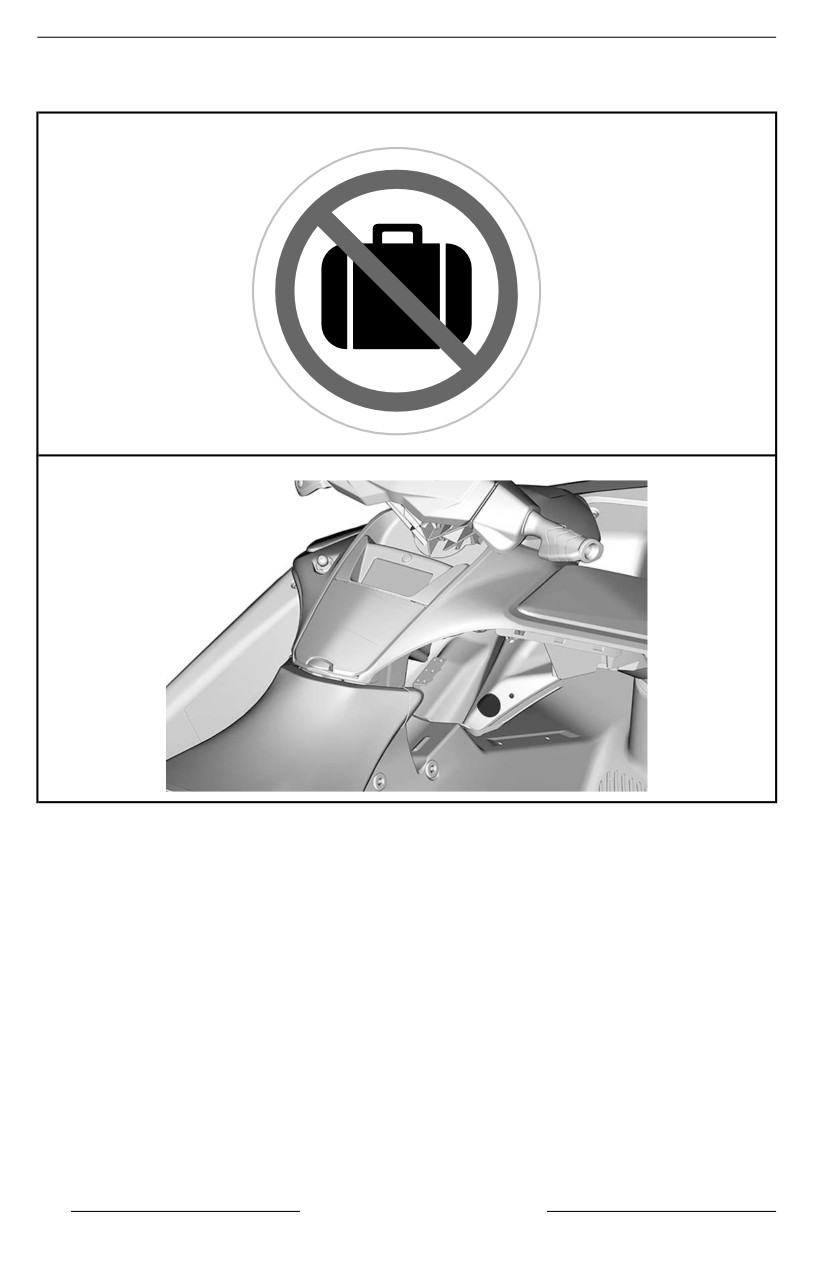
IMPORTANT ON-PRODUCT LABELS
Do Not Use for Storage – Label
40
SAFETY INFORMATION
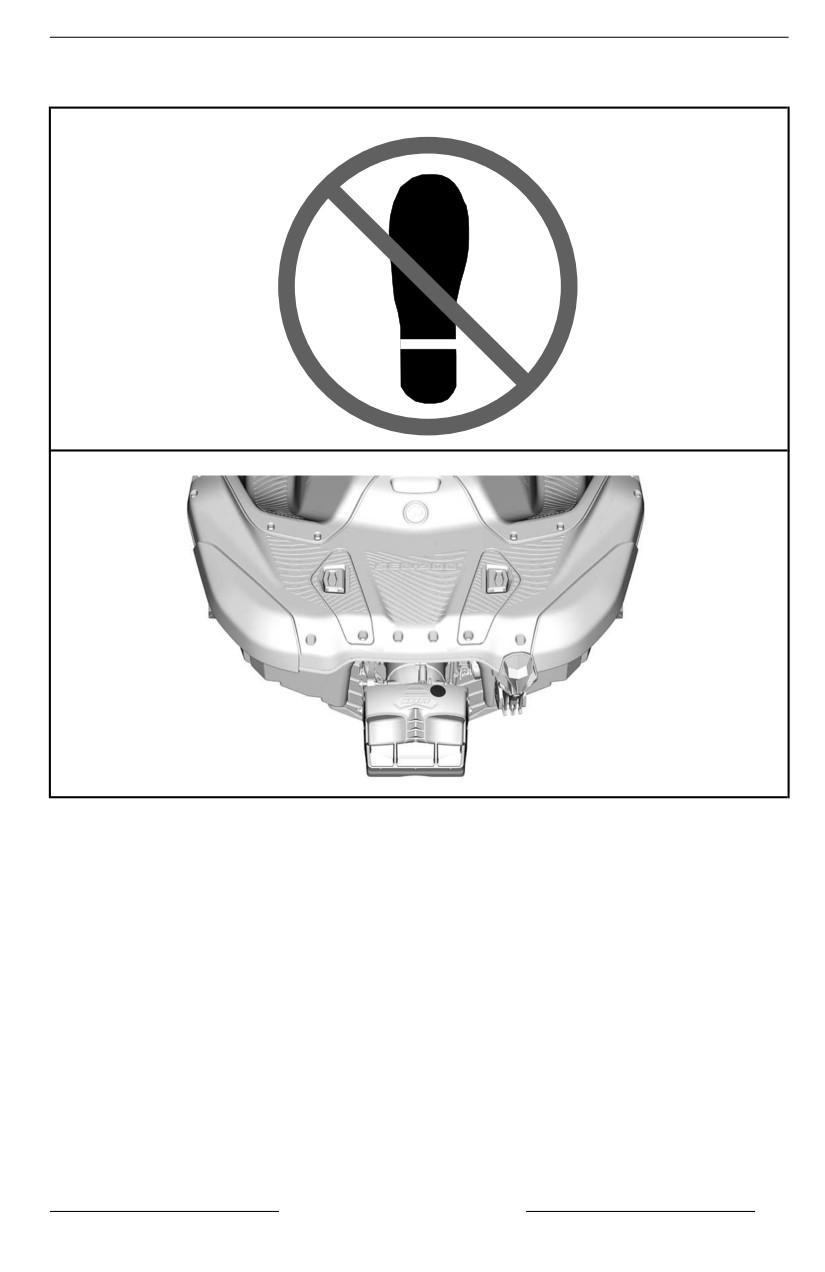
IMPORTANT ON-PRODUCT LABELS
Do Not Use to Onboard
SAFETY INFORMATION
41
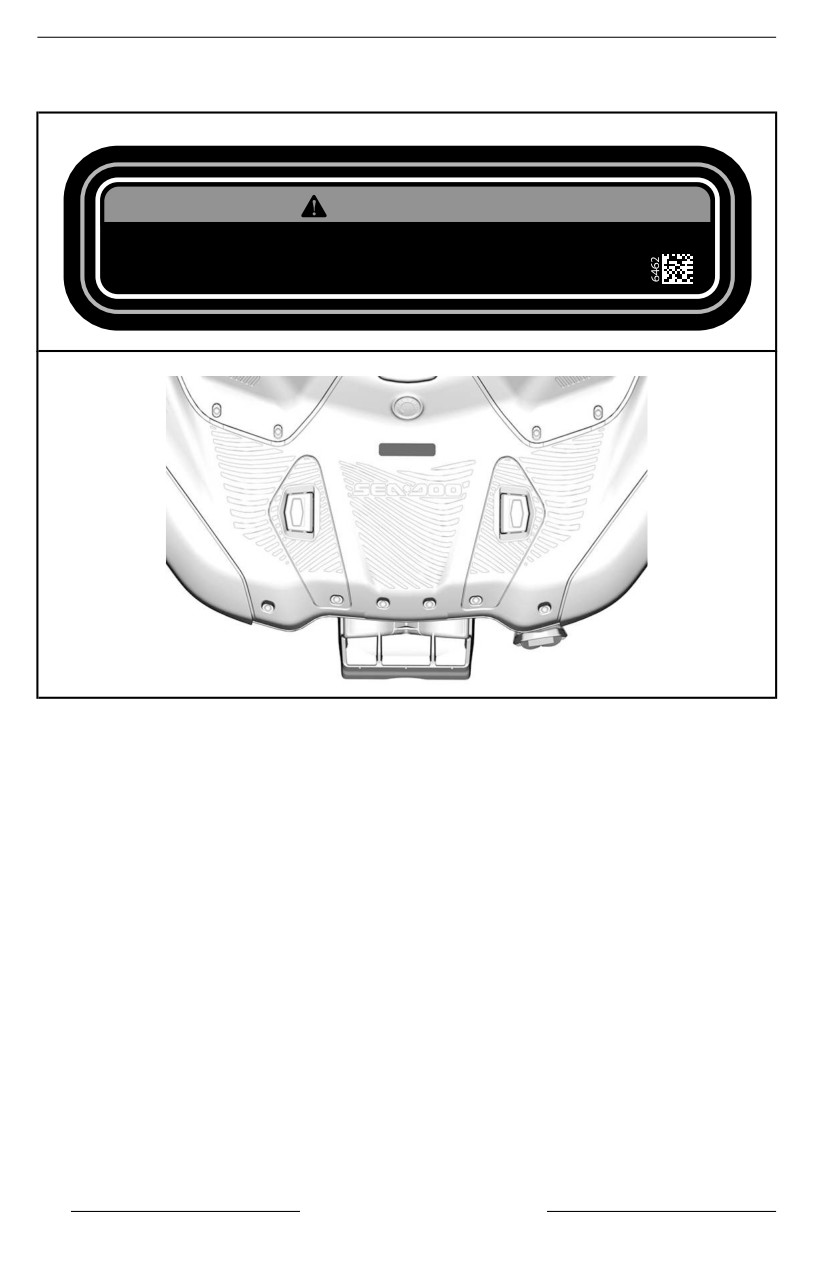
IMPORTANT ON-PRODUCT LABELS
Storage Compartment
WARNING
NEVER exceed watercraft capacity speci!ed on Compliance Notice label.
MAXIMUM CARGO LOAD : 20 kg (44 lb).
42
SAFETY INFORMATION
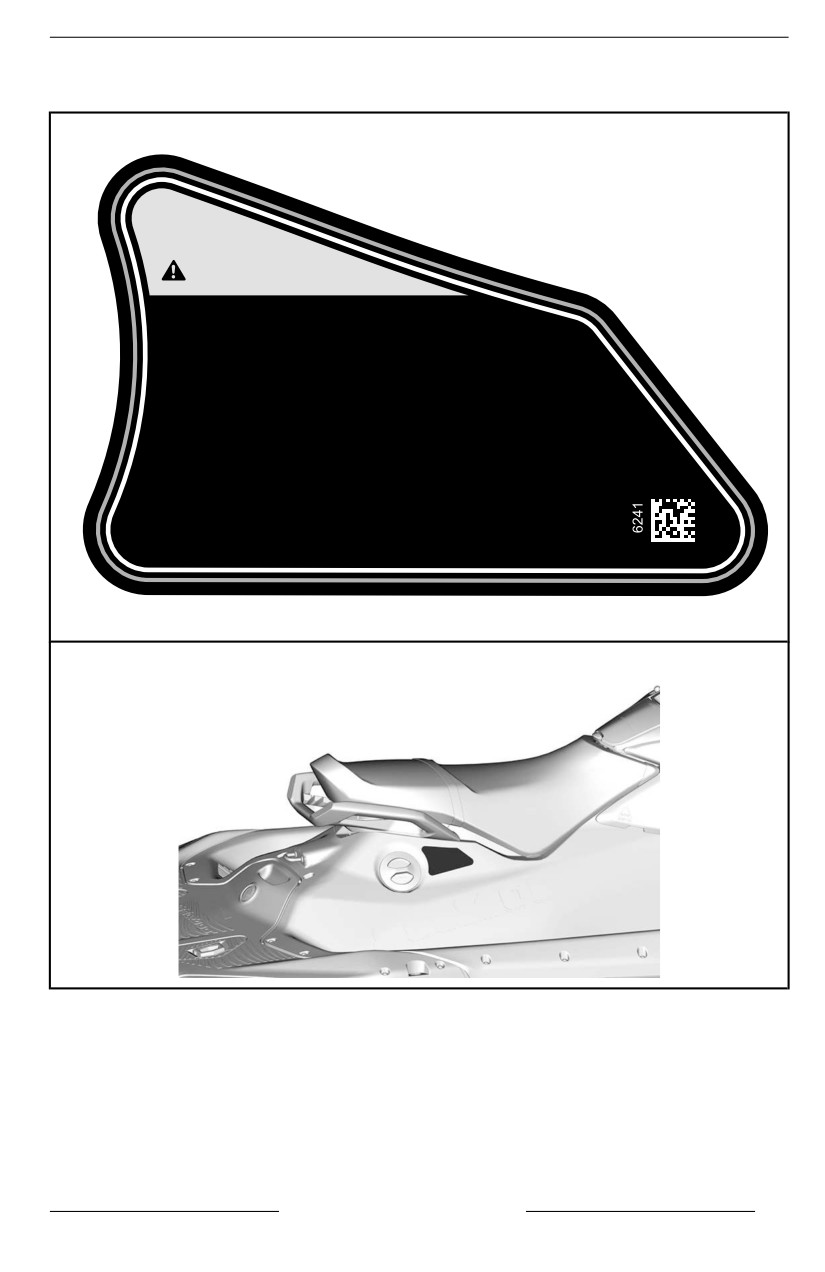
IMPORTANT ON-PRODUCT LABELS
Engine Oil Level
CAUTION
ENGINE OIL AND CERTAIN COMPONENTS IN
THE ENGINE COMPARTMENT MAY BE HOT.
DIRECT CONTACT MAY RESULT IN SKIN BURN.
CHECKING ENGINE OIL LEVEL
• Make sure engine is at operating temperature.
(Never let engine run out of water without the flush
kit connected as it may damage the engine)
• Vehicle must be level to perform verification.
• Let engine running at idle for at least 30 seconds.
• Stop engine and wait at least 30 seconds.
• Check oil level using the dipstick.
SAFETY INFORMATION
43
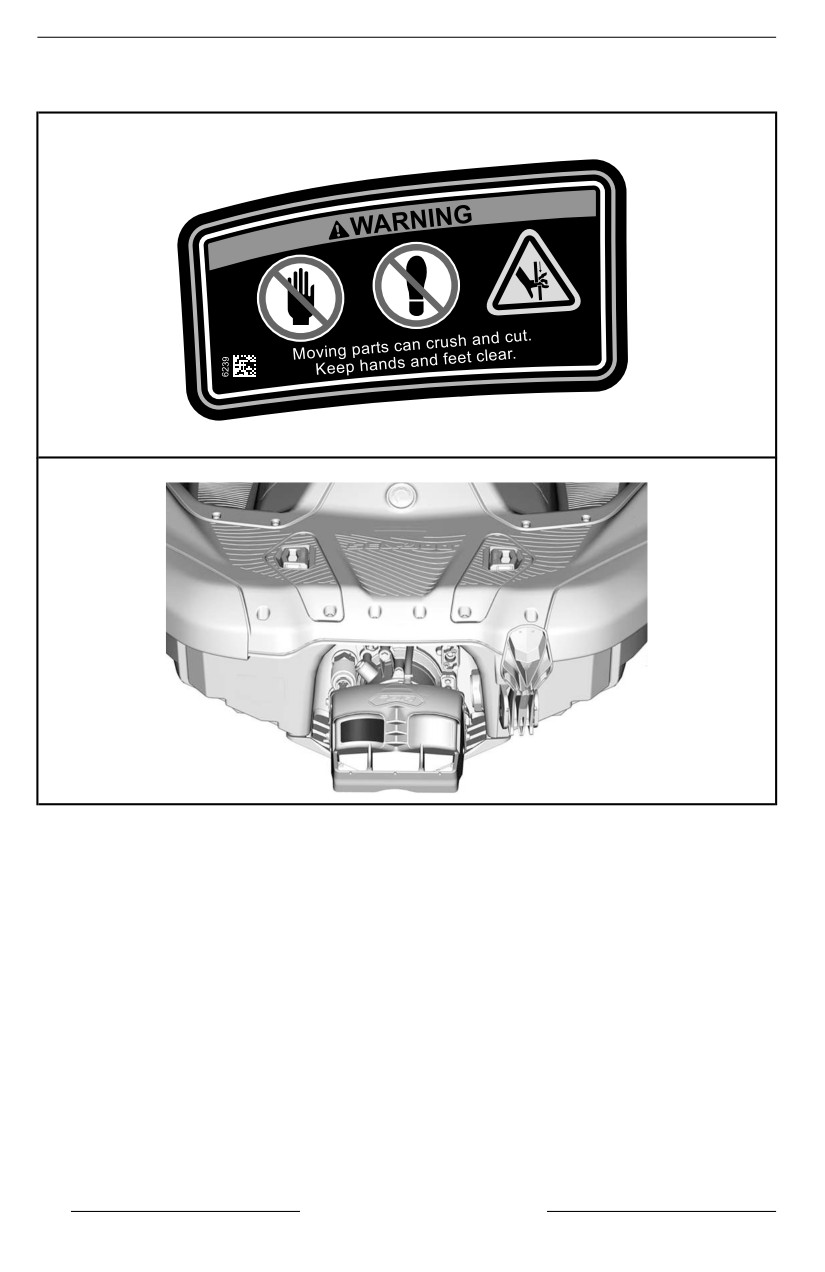
IMPORTANT ON-PRODUCT LABELS
iBR Gate - Warning Label
44
SAFETY INFORMATION
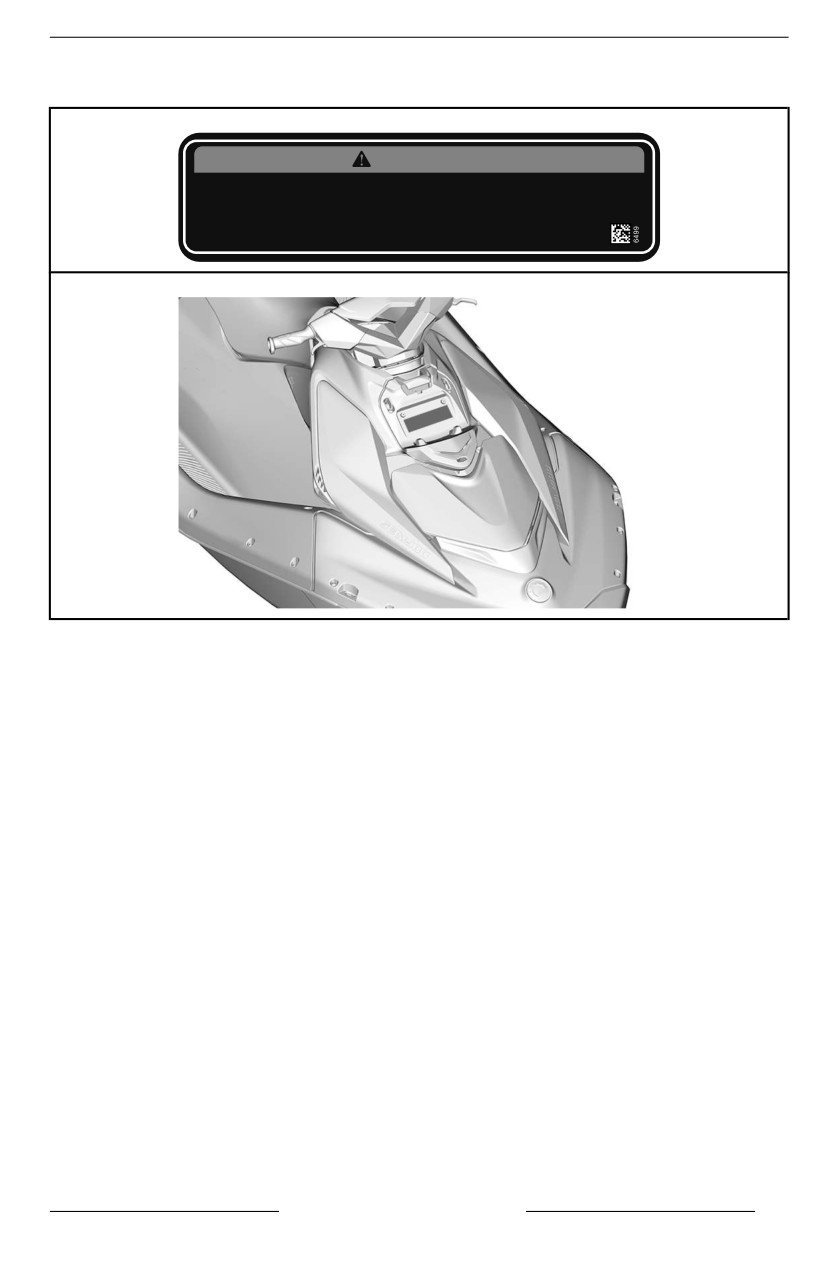
IMPORTANT ON-PRODUCT LABELS
RADIO / TRIM COVER INSTALLATION LABEL
WARNING
ALWAYS ensure correct installation of the cover with its 4 attachment
points or of the radio with its 3 attachment points.
Refer to the operator's guide for installation instructions.
SAFETY INFORMATION
45
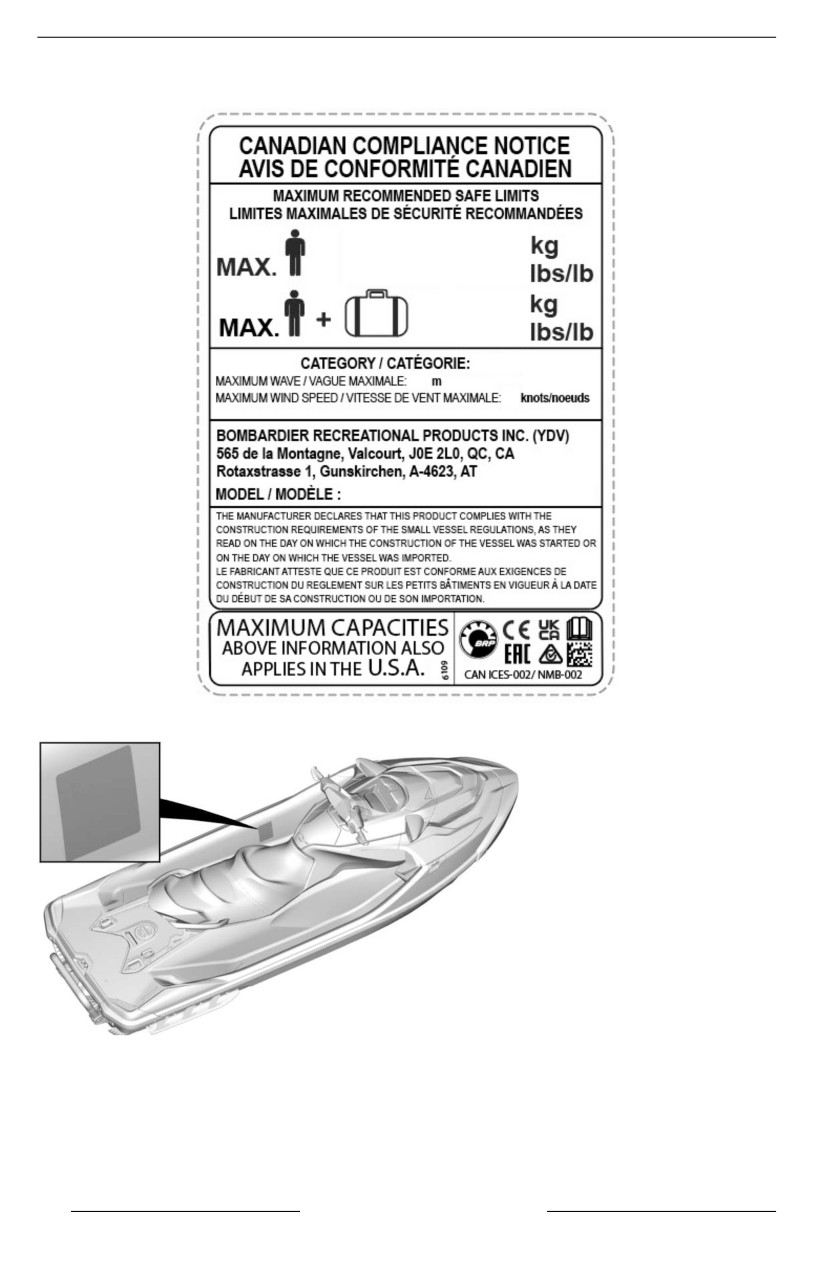
IMPORTANT ON-PRODUCT LABELS
Canadian Compliance – Notice Label
CANADIAN COMPLIANCE – NOTICE LABEL
TYPICAL – LABEL LOCATION
46
SAFETY INFORMATION
IMPORTANT ON-PRODUCT LABELS
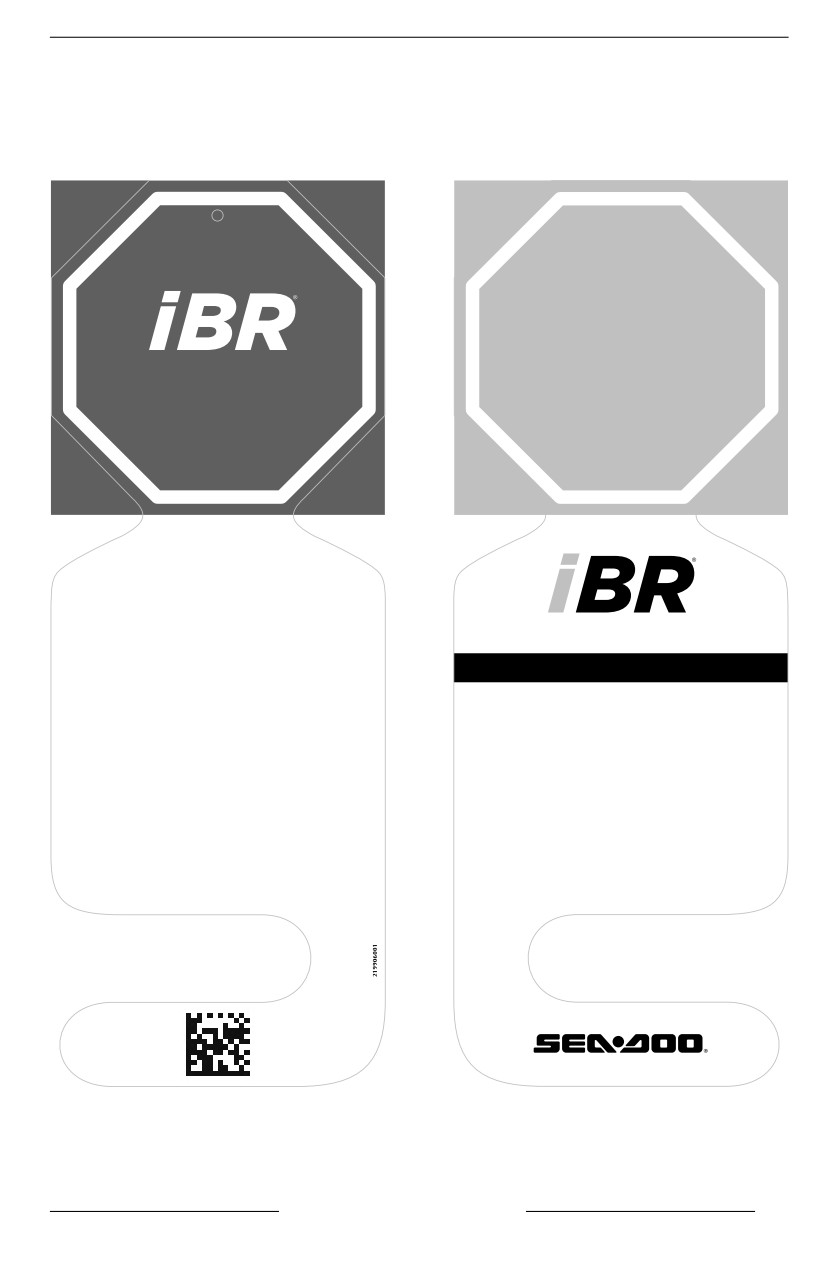
Hang Tag
iBR Hang Tag
STOP
INSTRUCTIONS
How to brake
• Squeeze brake lever.
INTELLIGENT BRAKE AND REVERSE
How to reverse
• Maintain brake lever engaged.
THIRD GENERATION
How to go forward
• Tap throttle lever to engage forward
• Allows you to stop sooner for greater
movement from neutral position.
peace of mind .
• Squeeze throttle lever to accelerate.
• Recognized by the U.S. Coast Guard for
improving boating safety since 2009.
How to get to neutral
• Tap brake lever.
• The Third Generation provides more
precise and responsive control when
braking and docking.
Refer to the operator’s guide for more information.
SAFETY INFORMATION
47
IMPORTANT ON-PRODUCT LABELS
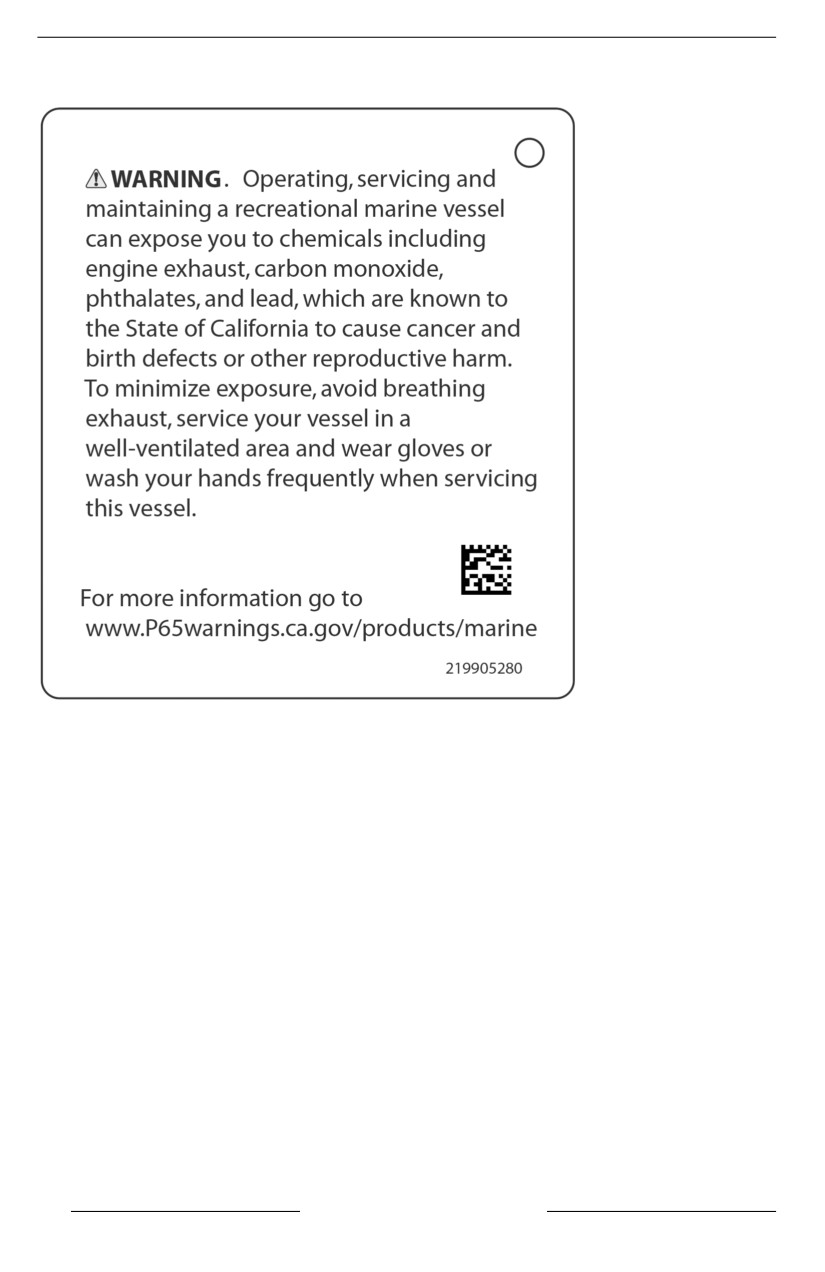
Caliifornia Proposition 65 Warniing
48
SAFETY INFORMATION
PRE-RIDE INSPECTION
Always inspect and confirm the safe operating condition of your vehicle prior to
ride.
Always follow the maintenance schedule described in this Operator's Guide.
WARNING
Perform a pre-riide inspection before each ride to detect potentiall prob-
l
lems during operation. The pre-riide iinspectiion can help you monitor wear
and deterioratiion before they become a probllem. Correct any problems
that you diiscover to reduce the riisk of a breakdown or crash.
Before using this vehicle, the operator should always perform the following pre--
ride inspection check list.
Refer to Maintenance Procedures for details.
What to Do Before Launching the Watercraft
WARNING
Engine shoulld be off and the tether cord cap shoulld allways be removed
from the engine cut-off switch priior to verifyiing any of the folllowing points.
Only start watercraft once alll items have been checked and operate prop-
erly, or if requiired to perform a speciific procedure.
NOTE: Before starting the engine and taking off, it is recommended to shake
vertically the rear of the watercraft to shake away any sand that may have accu-
mulated near the propulsion and reverse systems.
Check the items listed in the following table before launching the watercraft.
ITEM
OPERATION
Inspect hull, ride plate and
water inlet grate for damages
Properly clean the hull before
Hull
launching the watercraft when
moving to a different water plan
to prevent from spreading
aquatic invasive species (AIS)
Jet pump water intake
Inspect/clean
Drain plugs
Tighten
Fuel tank
Refill
Check for any visible fluid leaks
Engine compartment
and gasoline vapor odor
Engine oil level
Check/refill
SAFETY INFORMATION
49
PRE-RIDE INSPECTION
Engine coolant level
Check/refill
Steering system
Check operation
Check operation. (Depress and
release the lever to check for
freedom of movement. If any
iTC lever
friction is felt in the throttle
lever, refer to an authorized
Sea-Doo dealer.)
Check operation. (Depress and
release the lever to check for
freedom of movement. If any
iBR lever (if equipped)
friction is felt in the iBR lever,
refer to an authorized Sea-Doo
dealer.)
Front storage compartment cover (if
Ensure they are closed and
equipped), glove box and seat
latched.
Engine START/STOP button
Check operation
Engine cut-off switch and the monitoring
Check operation
beeper
Battery condition and connections
Check every month
Inspect every month (more
Sacrificial anode
often in saltwater use) and
change if necessary
- Before installation, ensure
latch can move freely and
Audio System (if equipped)
return to its initial position
- After installation, ensure
audio system is properly
installed and secured
Hulll
Inspect hull for cracks and other damages.
Properly clean the hull before launching the watercraft when moving to a different
water plan to prevent from spreading aquatic invasive species. Refer to Aquatic
Invasive Species (AIS) at the end of this section.
Jet Pump Water Intake
Remove weeds, shells, debris or anything else that could restrict the flow of
water and damage the propulsion unit. Clean as necessary. If any obstruction
cannot be removed, refer to an authorized Sea-Doo dealer for servicing.
50
SAFETY INFORMATION
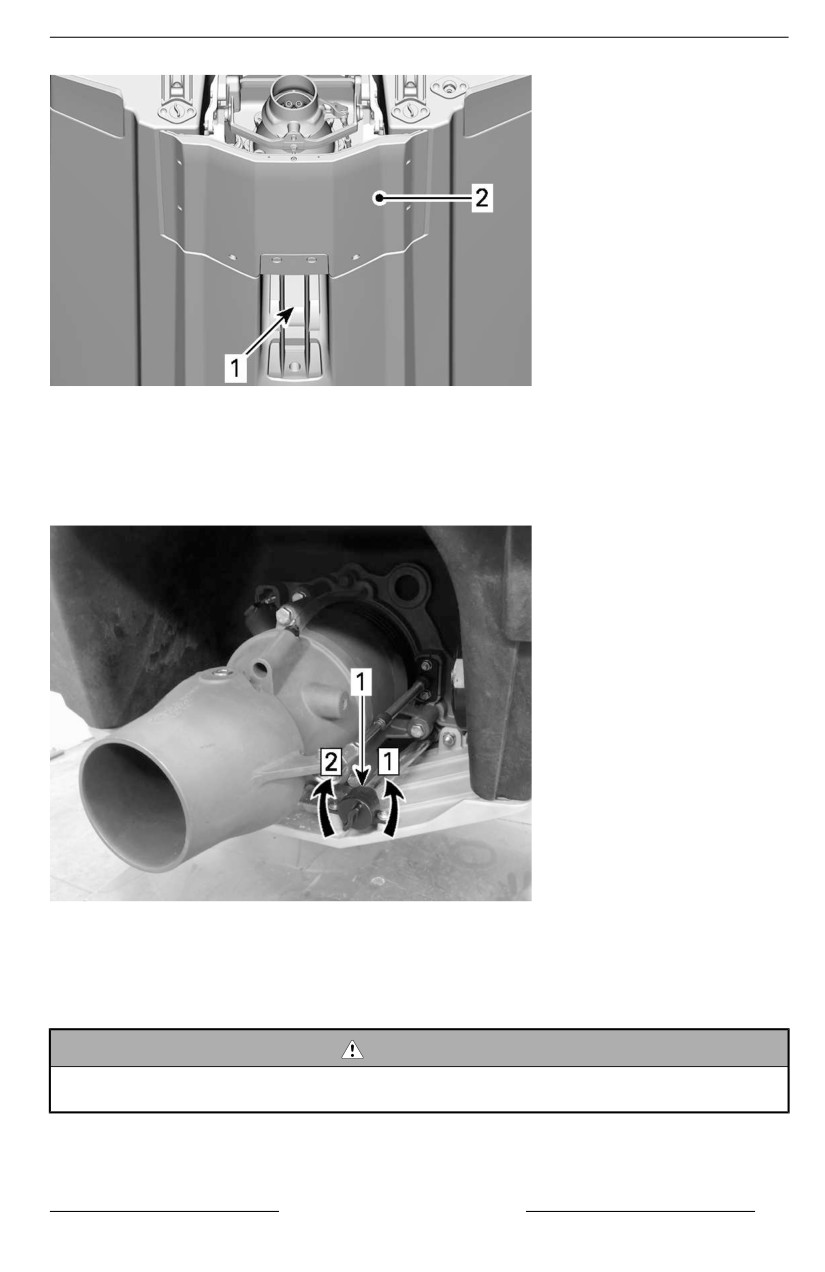
PRE-RIDE INSPECTION
1. Water intake
2. Ride plate
Draiin Plug
Secure bilge drain plug.
TYPICAL
1. Drain plug
1. Untighten
2. Tighten
WARNING
Ensure biilge drain plugs are properly secured priior to llaunching the
watercraft in water.
Fuel Tank
SAFETY INFORMATION
51
PRE-RIDE INSPECTION
Fill the fuel tank.
WARNING
Strictlly adhere to iinstructiions detaiiled in Fueliing Procedure.
Engiine Compartment
Inspect the engine compartment for fuel vapor odor.
WARNING
Shoulld any leak or gasoliine odor be present, do not applly ellectriicall
power or start the engiine. You shoulld seek service from an authoriized
Sea-Doo dealler, repair shop, or person of your own choosing for mainte-
nance, repair, or repllacement. Please refer to the US EPA Emiissiions-re-
l
lated warranty contaiined herein for informatiion about warranty claims.
To access the engine compartment, remove the LH access cover. Refer to Main-
tenance Procedures.
Engiine Oiil
Ensure oil level is within specification as described in Maintenance Procedures
section.
Engiine Coolant
Ensure coolant level is within specification as described in Maintenance Proce-
dures section.
Check for coolant leaks on engine, in bilge and from ride plate.
CAUTION
When operating the engine wiith the watercraft out of the water, the en-
giine and heat exchanger iin the riide pllate may become very hot. Avoid
any contact with hot engine parts and the ride plate as burns may occur.
Steering System
Assisted by another person, check steering operation for free movement.
When the handlebar is horizontal, the jet pump nozzle should be in the straight
ahead position. Ensure the jet pump nozzle pivots easily and in the same direc-
tion as the handlebar (e.g.: when handlebar is turned to the left, the nozzle open-
ing must point towards the LH side of watercraft).
WARNING
Check handllebar and corresponding steeriing nozzlle operation before
startiing. Never turn handlebar whiile someone is near the rear of the
watercraft. Keep away from steering moviing parts (nozzle, iBR gate, llink-
ages etc.).
52
SAFETY INFORMATION
PRE-RIDE INSPECTION
iTC Lever (Throttle Control)
Check the iTC lever for free and smooth operation. It should return to its initial po-
sition immediately after it is released.
WARNING
Check the iiTC llever operatiion before startiing the engiine. If any friction is
felt in the iTC lever, refer to an authoriized Sea-Doo dealer.
iBR Lever
Check the iBR lever for free and smooth operation. It should return to its initial
position immediately after it is released.
WARNING
Check iBR llever operation before startiing the engine. If any friictiion iis fellt
i
in the iBR llever, refer to an authoriized Sea-Doo dealer.
Storage Compartments, Boarding Pllatform and Seat
Ensure the glove box, boarding platform, access panels, and seat are closed and
latched.
WARNING
Ensure the seat, boarding platform, access panels, and alll storage com-
partment covers are securelly llatched.
Engine Cut-Off Swiitch and Engiine START/STOP Button
Press the start button once without installing the tether cordon the engine cut-off
switch.
Install the tether cord cap on the engine cut-off switch.
Press the START/STOP button to start the engine, then stop it by pressing the
START/STOP button a second time.
Restart the engine, then stop it by removing the tether cord from the engine cut--
off switch.
WARNING
Should the tether cord cap be loose or faill to remaiin on the engiine cut-off
swiitch, repllace the tether cord immediiatelly iin order to avoiid unsafe use.
If removing the tether cord cap from the engine cut-off switch or pressiing
the START/STOP button does not stop the engine, do not use the water-
craft. See your authorized Sea-Doo dealler.
SAFETY INFORMATION
53
PRE-RIDE INSPECTION
What to Do After Launching the Watercraft
Check the items listed in the following table after launching the watercraft and be-
fore going for a ride.
WARNING
Engiine should be off and the tether cord cap should always be removed
from the engine cut-off switch prior to verifying any of the folllowiing points.
Onlly start watercraft once alll iitems have been checked and operate , or if
required to perform a specifiic procedure.
NOTE: Before starting the engine and taking off, it is recommended to shake
vertically the rear of the watercraft to shake away any sand that may have accu-
mulated near the propulsion and reverse systems.
i
iBR System
NOTICE
Ensure there iis suffiiciient space ahead and behiind watercraft to safely
carry out the iiBR system test to avoid a collliisiion. Watercraft willl move
duriing test.
1. Remove the moorings lines securing the watercraft to the dock.
2. Start the engine and ensure the watercraft does not move.
3. On the left handlebar, depress the iBR lever completely in, the watercraft
should move slowly backwards.
4. Release the iBR lever, there should not be any reverse thrust.
WARNING
Always ensure proper iiBR system operation before taking the watercraft
out for a riide.
Variiablle Trim System (VTS) (iif equipped)
With the engine running in forward thrust, use the VTS to move the jet pump noz-
zle up, and then down alternately to check VTS operation. Confirm the VTS posi-
tion indicator movement in the information center.
Also test the VTS preset trim positions by double clicking the VTS UP/DOWN
button (as applicable to model).
Refer to Operating Instructions for detailed instructions.
What to Do After Leaving the Water
Aquatic Invasive Species (AIS) are non-native plant or animal species that threat-
en the diversity or abundance of the native species. They also threaten the natu-
ral ecology of the body of water they infest. AIS almost always has a negative
impact on the waterway, it’s native species, and recreational or commercial
activities.
54
SAFETY INFORMATION
PRE-RIDE INSPECTION
Common examples of AIS are:
- Eurasian Watermilfoil
- Hydrilla
- Sea Lampreys
- Zebra Mussels
- Asian Carp
- Gobies.
Many other examples of AIS exist throughout the world’s waterways.
A typical factor in AIS infestations is that the non-native species are introduced
by human activity. Some AIS are introduced by commercial operations; however,
AIS can be introduced through recreational boating activities. The transportation
of recreational watercraft and water sports equipment between waterways can
be a major factor in the spread of AIS.
As responsible watercraft owners, we MUST do our part to prevent the spread of
these aquatic hitchhikers. Check your watercraft each time you leave the water!
In many cases it is required by law, be sure to check the local regulations for the
waterways you visit.
Clean, Drain and Dry - Everything, Every Time!
After each boating trip, before you leave the water access, follow these three
simple steps to stop the spread of AIS. This is the boater’s way to help protect
the environment from the damage that AIS can cause.
Clean
Inspect and remove any visible plants, fish, animals, mud, or other debris from
the watercraft (including hull, intake grate, and jet pump nozzle), trailer, and any
water sports equipment, gears and accessories before leaving the water body.
Clean all parts, equipment, and gear that came in contact with the water.
Drain
Drain and flush all water from the watercraft, exhaust system, bilge, pontoon
floats, and every conceivable space or item that can hold water.
Dispose of unwanted live bait in the trash.
Dry
Allow everything to dry completely (for 5 days or more, refer to local laws) before
visiting any other bodies of water.
SAFETY INFORMATION
55
ANNUAL SAFETY MAINTENANCE
BRP recommend to have an annual safety inspection of your vehicle. Contact an
authorized Sea-doo dealer for further details.
Though not required, it is recommended that an authorized BRP dealer performs
the preseason preparation of your vehicle.
Each visit to your authorized Sea-Doo dealer is a great opportunity for your deal-
er to verify if your vehicle is included in any safety campaign. We also urge you
to visit your authorized Sea-Doo dealer in a timely manner if you become aware
of any safety related campaigns.
56
SAFETY INFORMATION
WATERCRAFT
INFORMATION
57
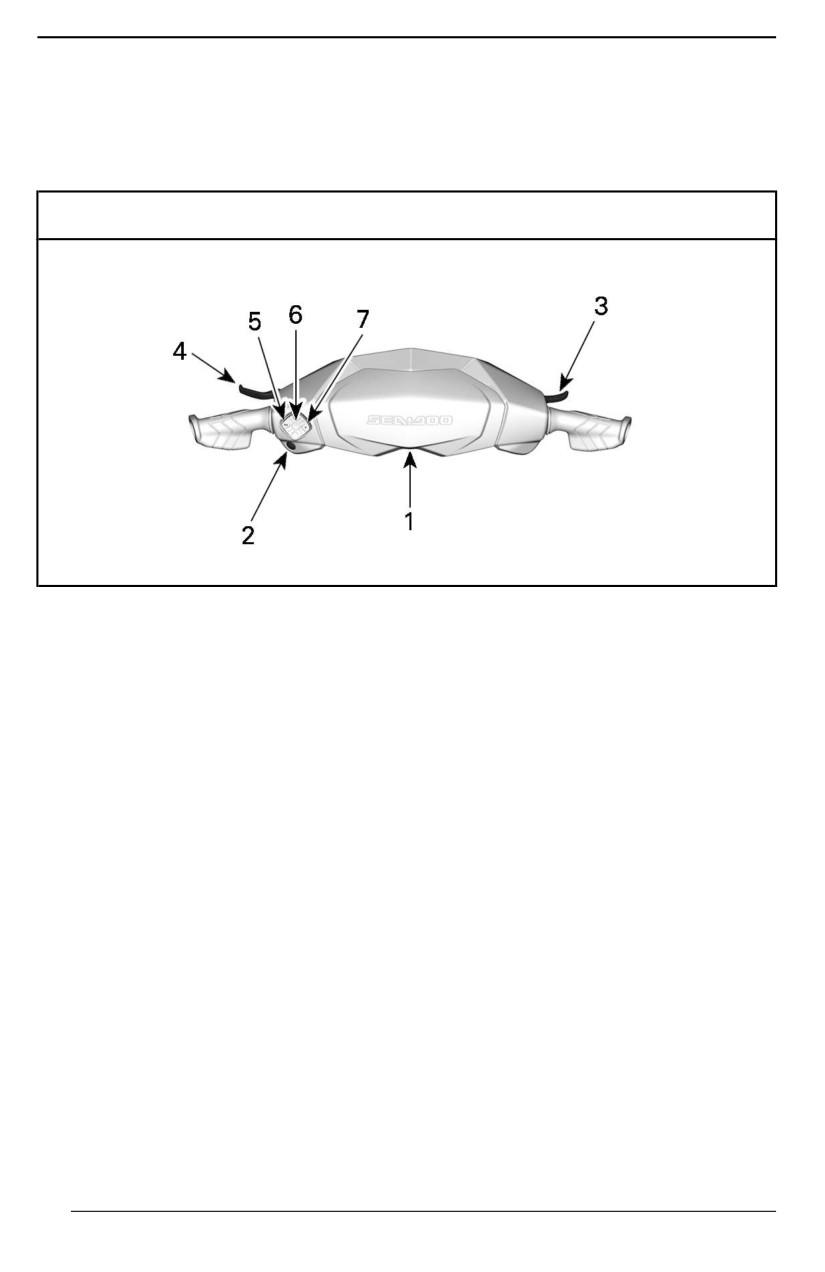
CONTROLS
Some vehicle safety labels are not shown on illustrations. For information on ve-
hicle safety labels, refer to Important On-Product Labels.
Some indications, functions and features described in this section may not apply
to every PWC model, or may be available as an option.
3 Modes Keypad
1. Handlebar
2. Engine START/STOP Button
3. Throttle Lever
4. iBR Lever (intelligent Brake and Reverse)
5. Mode Button
6. Info Button
7. Trip Button
58
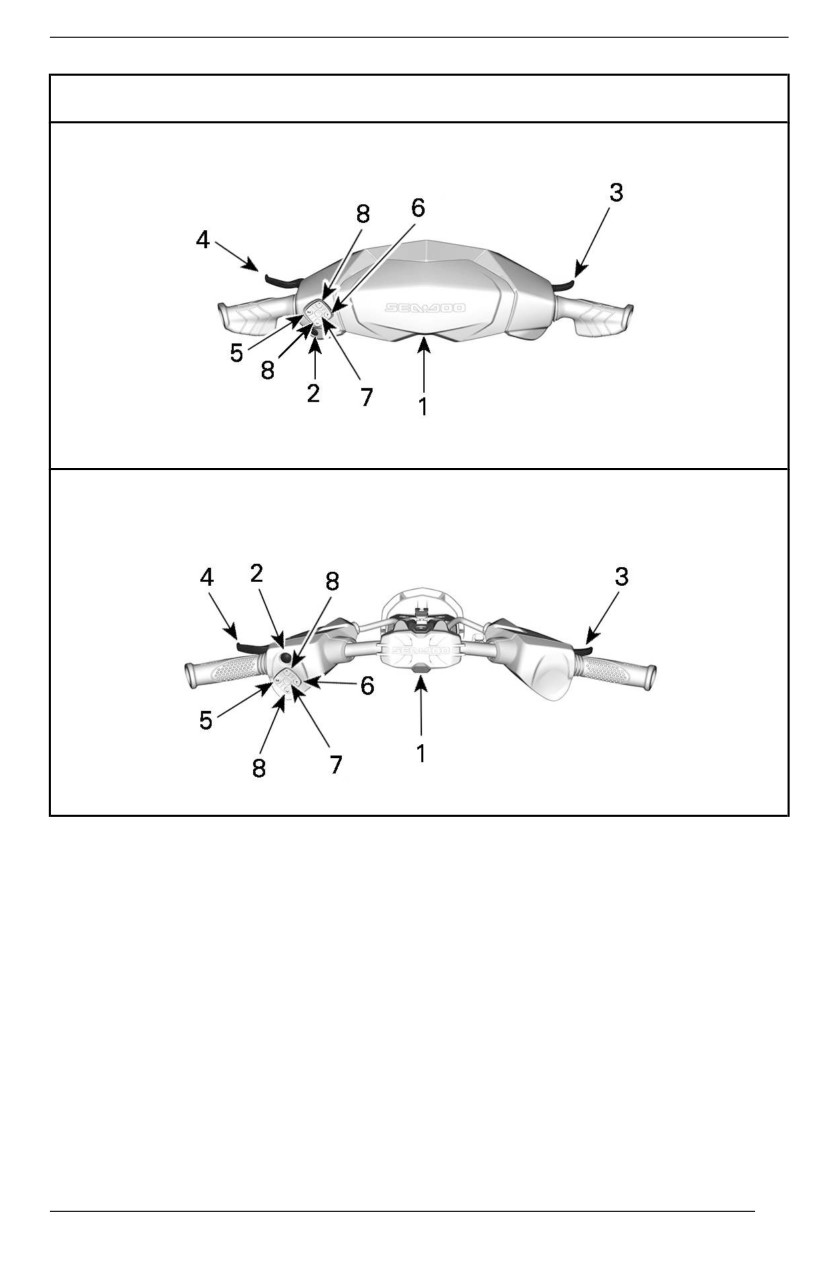
CONTROLS
5 Modes Keypad
1. Handlebar
2. Engine START/STOP Button
3. Throttle Lever
4. iBR Lever (intelligent Brake and Reverse) (Models with iBR)
5. Mode Button
6. Trip ButtonVariable
7. Info Button
8. Trim System (VTS) Button
Handlebar
The handlebar controls the direction
of the watercraft. During forward oper-
ation, turning the handlebar to the
right steers the watercraft to the right
and inversely.
59
CONTROLS
Waking Up the Ellectrical System
WARNING
Press the START/STOP button once
Check handllebar and correspond-
without installing the tether cord on
iing steering nozzle operatiion be-
the engine cut-off switch.
fore starting. Never turn the
handlebar whiile someone is near
This will power up the electrical sys-
the rear of the watercraft. Keep
tem; the information center will cycle
away from the propulsion system.
through a self-test function.
The electrical system will stay pow-
When operating in reverse, the steer-
ered up for approximately 75 seconds
ing direction is reversed. Turning the
after the START/STOP button was
handlebar to the right while backing
depressed.
up steers the watercraft to the left.
When the tether cord is installed on
Engine START/STOP Button
the engine cut-off switch, the system
will be powered for
60 minutes (If
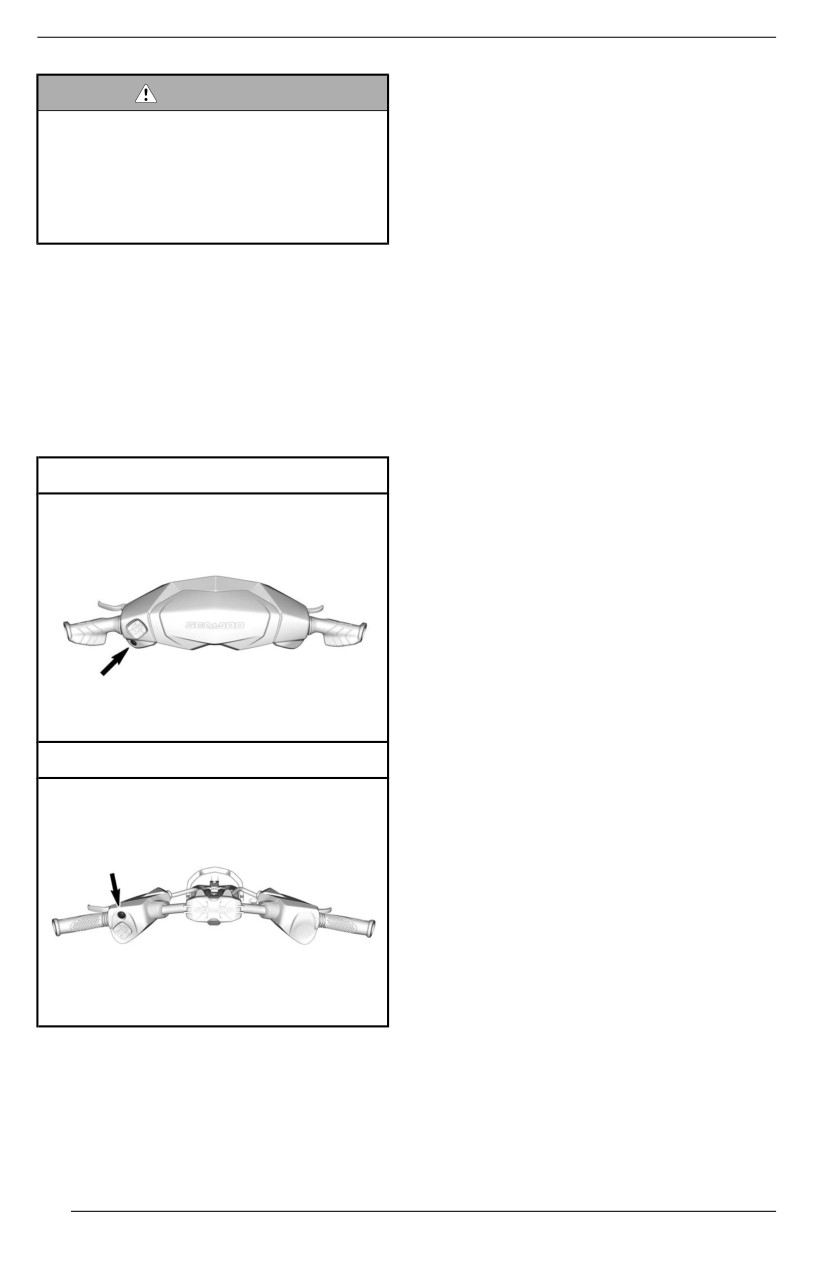
The engine START/STOP button is lo-
equipped).
cated on the LH handlebar.
Every time the START/STOP button is
SPARK
pressed, the countdown restarts.
When the battery voltage drops below
12.3V, the LOW BATTERY indicator
lamp will light up and the electrical
system will shut down after
75
seconds.
Post-Drive Battery Management (If
equipped)
This feature keeps the electrical sys-
tem awake to allow using accessories
when the engine is turned off. It also
prevents draining the battery too
SPARK TRIXX
much when using accessories. When
the battery voltage reaches 12.3V or
less, the system will automatically
shut down to ensure enough power
remains to start the engine.
When the electrical system is acti-
vated by pressing START/STOP
briefly while the engine is shut down
the wake-up time will be managed as
follows:
- Key off: System will shut down
after 75 seconds.
- Key on: System will shut down
after 60 minutes or if the voltage
Engiine Starting and Stopping
threshold is reached.
Refer to Operating Instructions
for
complete procedures on how to start
and stop the engine.
60
CONTROLS
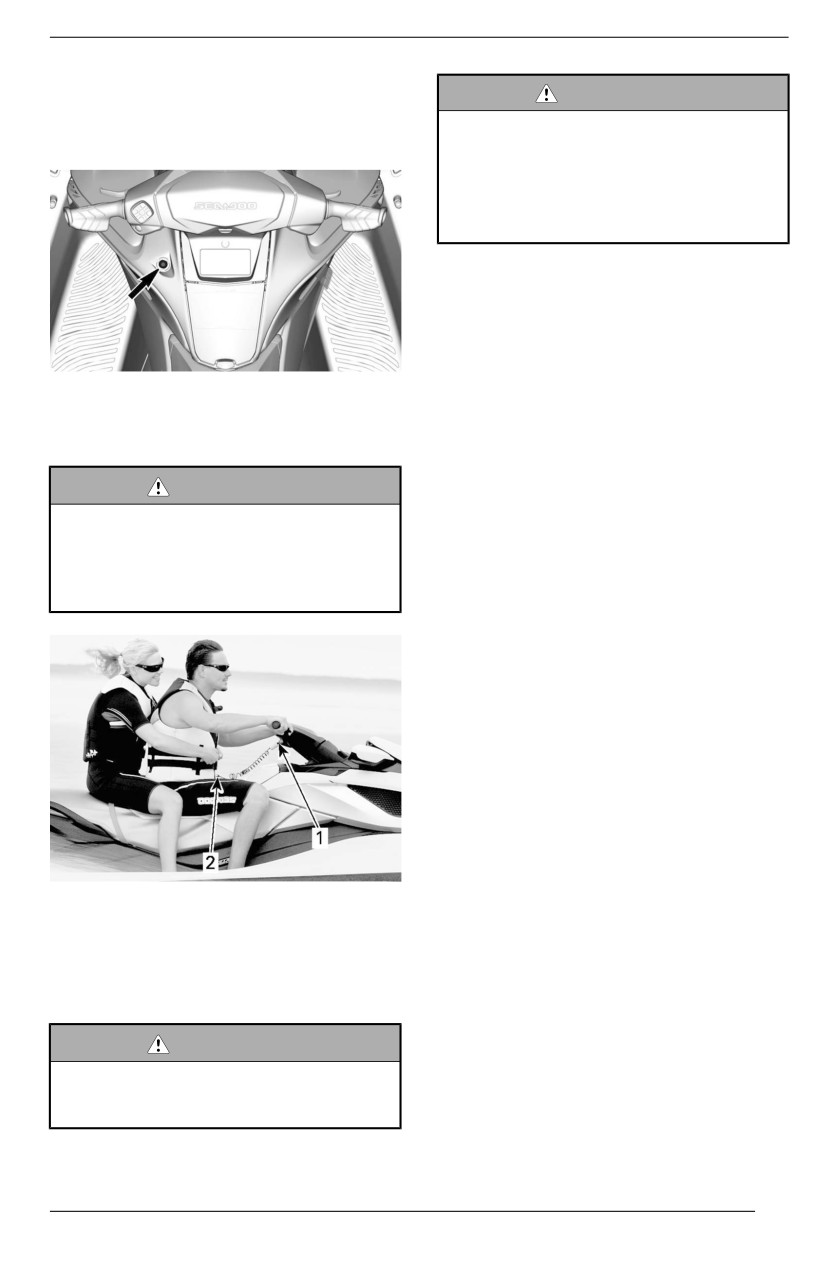
Engine Cut-Off Switch
WARNING
The engine cut-off switch is located on
Always disconnect tether cord
the LH side of the multifunction
when watercraft iis not iin opera-
gauge.
tiion iin order to prevent accidental
engine starting or to avoid unau-
thorized use by others, children,
and to prevent theft.
Radiio Frequency Digiitallly Encoded
Security System (RF D.E.S.S.) Key
(Availlable as an optiion)
The tether cord cap contains an elec-
tronic circuit (D. E. S. S.™ key) that is
programmed to give it a unique elec-
To allow engine starting, the tether
tronic serial number. This is the equiv-
cord cap must be securely snapped to
alent of a conventional key.
the engine cut-off switch.
The D.E.S.S. system reads the key in-
WARNING
stalled on the engine cut-off switch
and only allows engine starting for
Allways attach the tether cord cliip
keys it recognizes.
to the operator''s personall fllota-
tion deviice (PFD) or wrist (wrist
The D.E.S.S. system brings great flex-
strap required) before starting the
ibility. You can buy additional tether
vehiiclle.
cords and have the D.E.S.S. keys pro-
grammed for your watercraft.
A total of ten D. E. S. S. keys can be
programmed.
To have a key programmed to your
watercraft, see your authorized BRP
Sea-Doo dealer.
Left Controller
The left controller (Keypad) is located
on the LH side of the handlebar.
TYPICAL
Variiablle Trim System Button (If
1. Tether cord cap on the engine cut-off switch
Equiiped)
2. Tether cord secured to operator's PFD
It provides watercraft pitch trim adjust-
ments by adjusting the vertical posi-
To stop engine, pull the tether cord
tion of the jet nozzle.
cap from the engine cut-off switch.
The VTS can be electrically trimmed
WARNING
to desired attitude, or to one of tree
preset trim positions (full up, middle
Should the engine be stopped, the
and full down).
brake function and alll watercraft
directionall control iis lost.
Refer to Operating Instructions for
details.
61
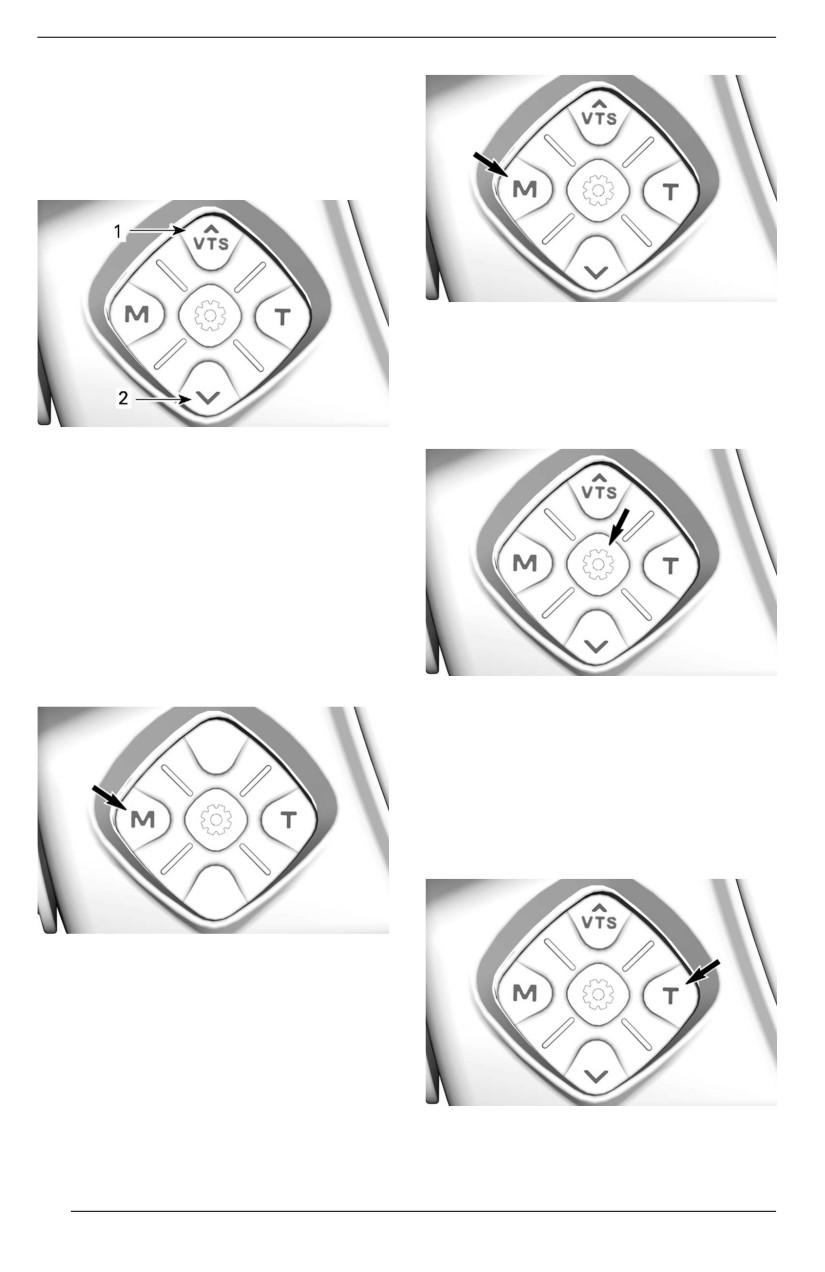
CONTROLS
NOTE:
The VTS button is used for Neutral ad-
justment. This is to adjust the neutral
position of the watercraft. Refer to Op-
erating Modes for details
Refer to Operating Modes for details.
INFO Button (If Equipped)
The INFO button is located on the LH
handlebar (keypad).
1. Bow up
2. Bow down
MODE Button
The MODE button is located directly
on the left controler (Keypad).
3 Modes Keypad
It is used to choose between Touring
or Eco mode
Refer to Operating Modes for details.
It is used to navigate through the me-
nus and to change some settings.
Refer to Operating Modes for details.
TRIP Button
The TRIP button is located directly on
the left controler (Keypad).
5 Modes Keypad
It is used to choose between Touring,
Sport, Trixx
(If equipped) or Eco
mode.
Refer to Operating Modes for details.
1. TRIP button
62
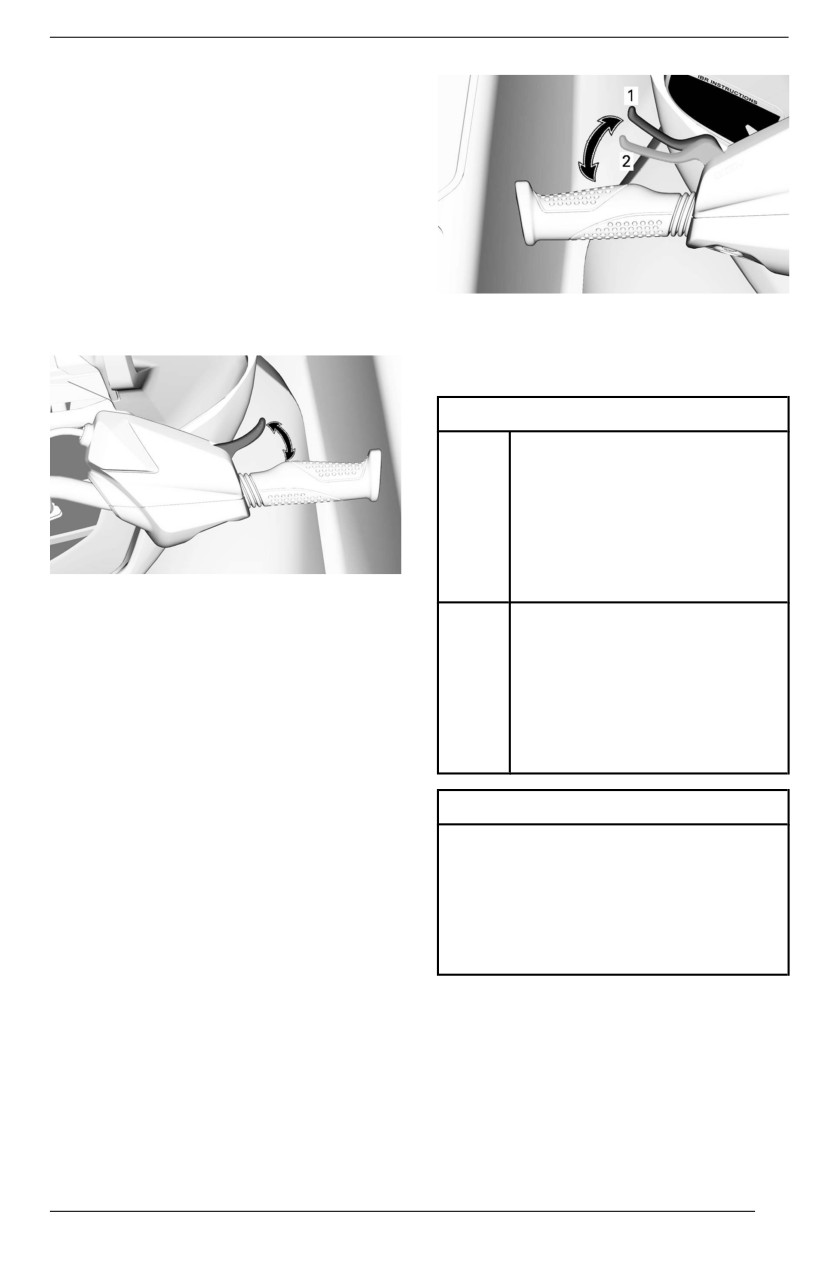
CONTROLS
Refer to Operating Modes for details.
Throttle Lever
The throttle lever on the RH handlebar
controls electronically the engine
speed.
To increase or maintain watercraft
speed, pull the throttle lever with your
finger.
TYPICAL
To decrease watercraft speed, re-
lease the throttle lever.
1. Lever rest position
2.
25% stroke required to activate iBR
functions
Trixx models
For 1
- The reverse will be engage
only when speed is below
25 km/h (16 MPH)
- At speeds above 25 km/h
(16 MPH), pulling the iBR
lever in will engage the
brake.
The throttle lever is spring loaded and
should return to rest position
(idle)
For 3
- The reverse will be engage
when not pressed.
only when speed is below
18 km/h (11 MPH).
iBR Lever (intelligent Brake
- At speeds above 18 km/h
and Reverse)
(11 MPH), pulling the iBR
lever in will engage the
The iBR lever on the LH handlebar
brake.
can electronically command:
- Brake
- Reverse
All others models
- Neutral.
- The reverse will be engage only
when speed is below10 km/h (6
NOTE:
MPH).
A minimum of 25% of iBR lever stroke
is required to activate iBR functions.
- At speeds above 10 km/h (6 MPH),
pulling the iBR lever in will engage
the brake.
When the iBR lever is released after
63
CONTROLS
braking or reverse operation, neutral
is engaged.
WARNING
If the throttlle llever iis stilll pullled in
when relleasiing the iBR llever, for-
ward movement wiilll be initiiated
after a short dellay. If forward ac-
celeration is not desired, release
the throttle lever.
NOTE:
The neutral position can be fine tuned
by trimming the iBR system.
Refer to Operating Instructions for de-
tailed instructions.
64
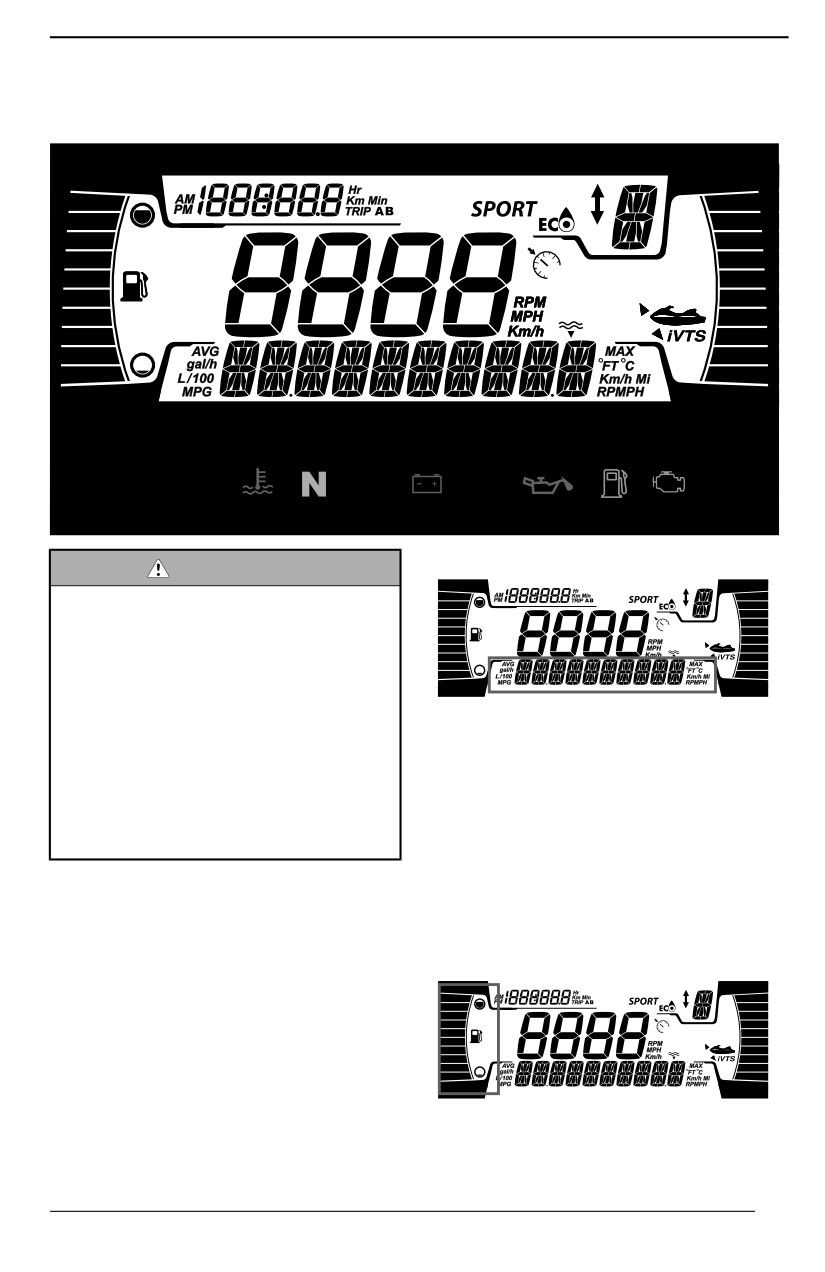
4.5" DIGITAL DISPLAY
Multifunction Gauge
Description
Lower Display
WARNING
Readiing or tamperiing wiith the
multiifunctiion gauge can distract
you from the operatiion of the ve-
hicle, and particularlly from con-
stantly scanning the environment.
Allways pay attention to water con-
ditiions, and ensure your environ-
The lower display can cycle through
ment is cllear and free from
the following:
obstacles.
- RPM
Furthermore, when riidiing, only
- Water temp : Displays the temper-
glance at the mulltifunction gauge
ature of the water (if equipped)
briefly to stay focused on your
- Depth (if equipped)
enviironment.
- Settings
- Messages
The multifunction gauge includes digi-
- Speed Stat (if equipped)
tal gauges (temperature and tachome-
- Distance to Empty
ter), telltale lights, icons and a digital
screen to see important information
Left Laterall Diispllay
(speed, RPM, etc.).
The left lateral display includes:
- Fuel level indicator
65
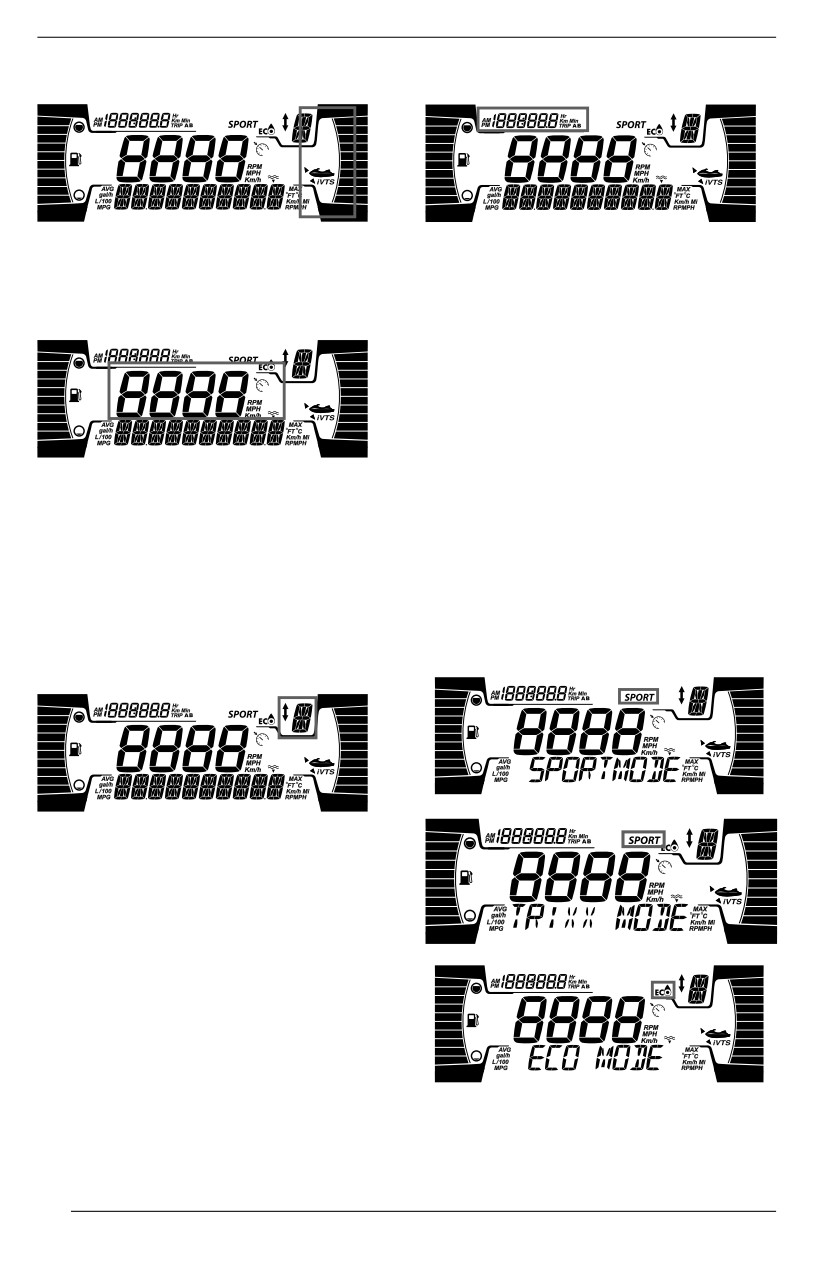
4.5" DIGITAL DISPLAY
Right Lateral Display
Left Upper Diispllay
The right lateral display includes:
The left lateral display includes:
- VTS position
- Tripmeter
- Clock
Central Diispllay
The tripmeter cycles through the
following:
- Watercraft hours : Displays the to-
tal vehicle hours
- Trip KM : Displays the distance
since the last reset.
- Trip HR : Displays the time since
The central display includes:
the last reset.
- Watercraft speed
NOTE:
- Speed control indicator (if
The clock is shown only if the inte-
equipped)
grated GPS receives a signal from the
The speed control indicator in this dis-
satellites. This may take several sec-
play is only activated when a target
onds after waking up the system.
speed is set.
MODE Diispllay
i
iBR Position Displlay
This display shows the iBR gear posi-
tion (if equipped):
- N (neutral)
- F (forward)
- R (reverse)
It can also display the selected speed
level
(1 to 9) when the slow speed
mode is selected.
The MODE display indicate the se-
lected alternative mode of operation:
66
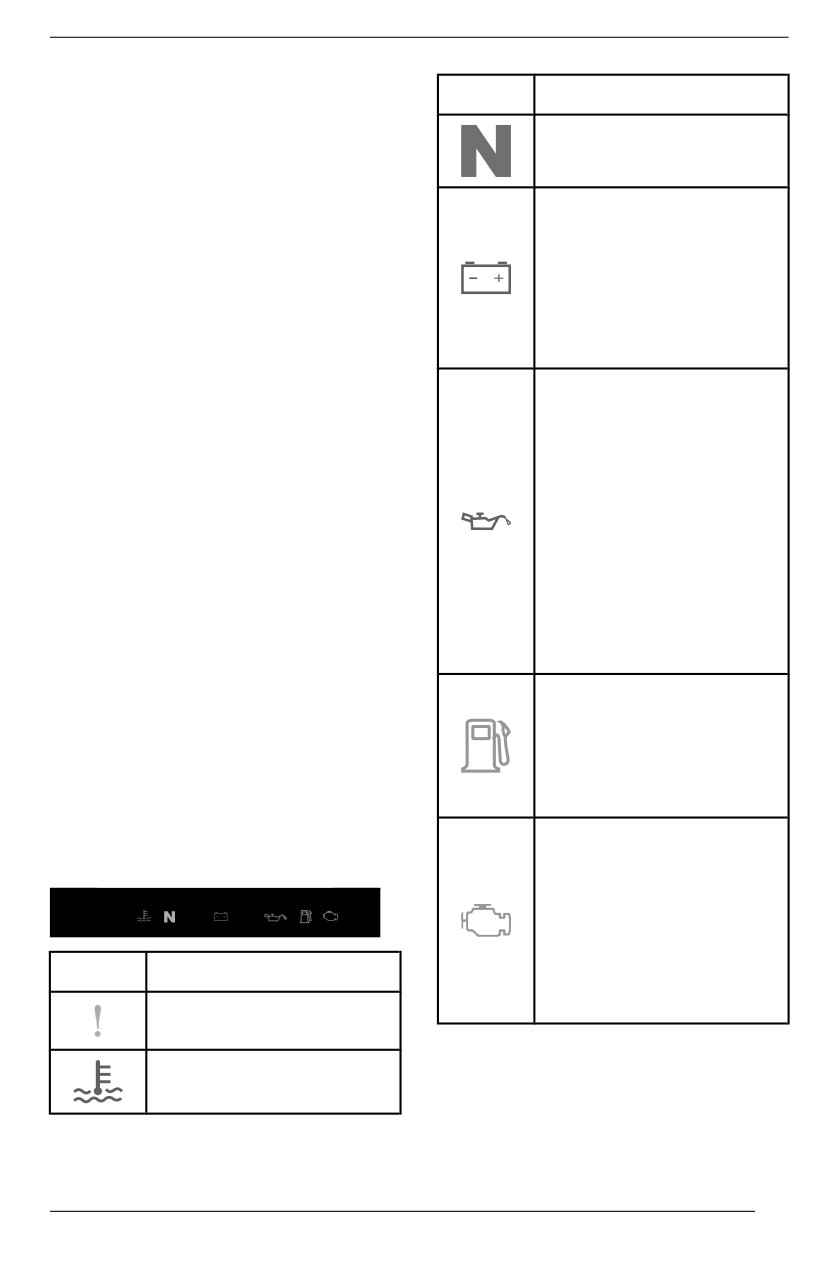
4.5" DIGITAL DISPLAY
- TOURING (Default mode)
Liights
Descriiptiion
- SPORT
- TRIXX (If equipped)
GREEN - The neutral
- ECO
gear is selected
To cycle through the MODES;
- From Touring mode, press MODE
RED - If illuminated while
button to access Sport mode. To
driving, it indicates a
activate the Sport mode, refer to
malfunction.
OPERATING MODES section.
Turn off all unnecessary
- Press MODE button again to ac-
electrical equipment and
cess Trixx mode. To activate the
have the electrical and
Trixx mode, refer to OPERATING
charging systems
MODES section. (If equipped)
checked.
- Pressing MODE button again will
RED - If illuminated while
activate the ECO mode.
the engine is running or
- Pressing MODE button again will
while driving, this
activate the Touring mode .
indicates a malfunction.
Stop the vehicle as soon
Warning Lamps and
as it is safe to do so and
Indicators
turn the engine off.
The following indicator lamps will alert
Check the engine oil
you to a vehicle condition that may be-
level.
come serious. Some lamps will illumi-
Have the lubrication
nate when starting the vehicle to
system checked a soon
make sure they work. If any lamps re-
as possible, even if the
main on after starting the vehicle, refer
level appears to be
to the respective system warning lamp
correct.
for further information.
ORANGE - Illuminated
when the fuel level is low
NOTE:
or when the fuel tank is
Some warning indicators appear in
near empty.
the display of the multifunction gauge
Refuel as soon as
and function the same as an indicator
possible.
lamp but do not display when starting
the vehicle.
ORANGE
Turned on: Malfunction
Tellltalle Liights - Lower Bar
of the vehicle emissions
control system
Bllink: Engine limitation,
limp home mode is
activated. Have the
Lights
Description
vehicle serviced
immediately.
ORANGE - Vehicle
malfunction
RED - The engine
temperature is too high.
67
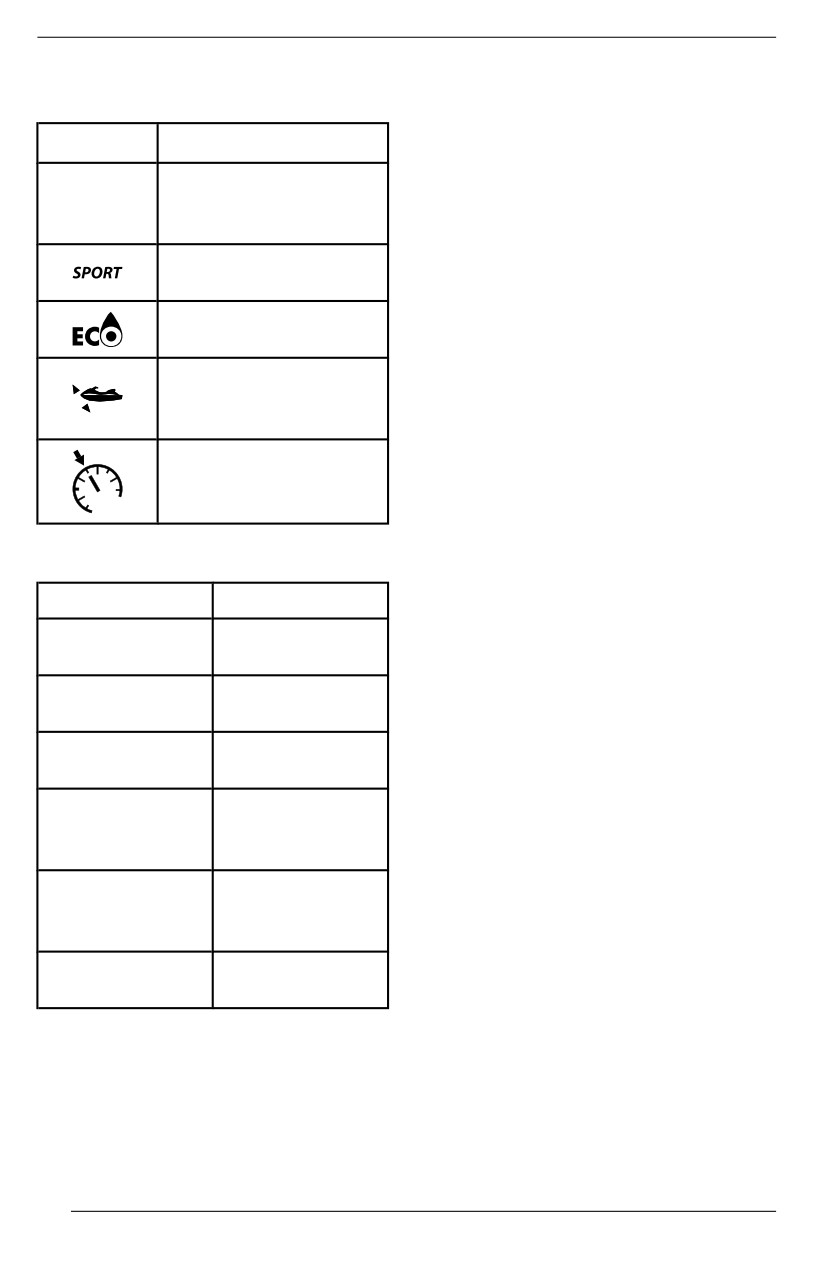
4.5" DIGITAL DISPLAY
Icons and Indicators - Multiifunctiion
Diispllay Codes
Display
Refer to Displaying Fault Codes.
Icons
Description
Settiing Tripmeter
Denotes TRIXX mode
Select TRIP and press Trip to cycle
TRIXX
is selected (if
through Vehiiclle Hours, Triip KM and
equipped).
Trip HR.
Denotes SPORT
Press and hold Trip to reset selected
mode is selected.
trip info.
Denotes ECO mode is
Settiing Learning Key (if equiipped)
selected.
Connect a normal key to the vehicle.
Press Info button for going through
Steady ON: indicates
the option. SelectL-KEY
#and long
that the VTS is
press on Info button to set the desired
activated (if equipped).
learning key level between 1 and 5.
Denotes Speed
NOTE:
Limiter or Slow Speed
The default learning key level is
1
mode (if equipped)
(lowest performance).
Settings
Unit Sellectiion
Press Info button for going through
To...
Action
the option. Select UNITS and long
press on Info button for changing
Navigate in the
Single press on
units.
menu
INFO
Long press
NOTE:
Enter menu
INFO
Changing units will apply to all the dis-
played units.
Single press on
Edit value
INFO
Settiing Brightness
Press Info button for going through
Change
the option. SelectBRIGHTNESS and
information
Press TRIP
long press on Info button to adjust
display
brightness level (from -4 to 4).
Reset Trip
Long press
Settiing Clock
(when
TRIP
displayed)
Select CLOCK.
Fault codes/
Long press
1. Press INFO button to select clock
Maintenance
INFO
display.
2. Long press INFO button to enter
For the navigation
in the menu, use
clock editing.
only the Info button. Select an action
3. Press INFO button to select 12:00
and press on Info button for going
AM PM or 24:00 time base.
through the option and long press for
4. Long press INFO button to confirm
selecting or changing value.
and display hours.
68
4.5" DIGITAL DISPLAY
5. Press INFO button to change
hours.
6. Long press INFO button to
confirm.
NOTE:
Menu available only if GPS is
synchronized.
To exit SETTINGS, long press Info
button.
Resettiing Speed Statiistiics (If
Equipped)
Press Info button for going through
the option. SelectSPEED STAT and
long press on Info button to reset the
speed statistics.
NOTE:
The speed statistics are automatically
reset after the gauge shut down.
Settiing Language
The language of the display is factory
setup by default in English. Refer to
an authorized Sea-Doo dealer for lan-
guage availability and to setup the
gauge to your preference.
69
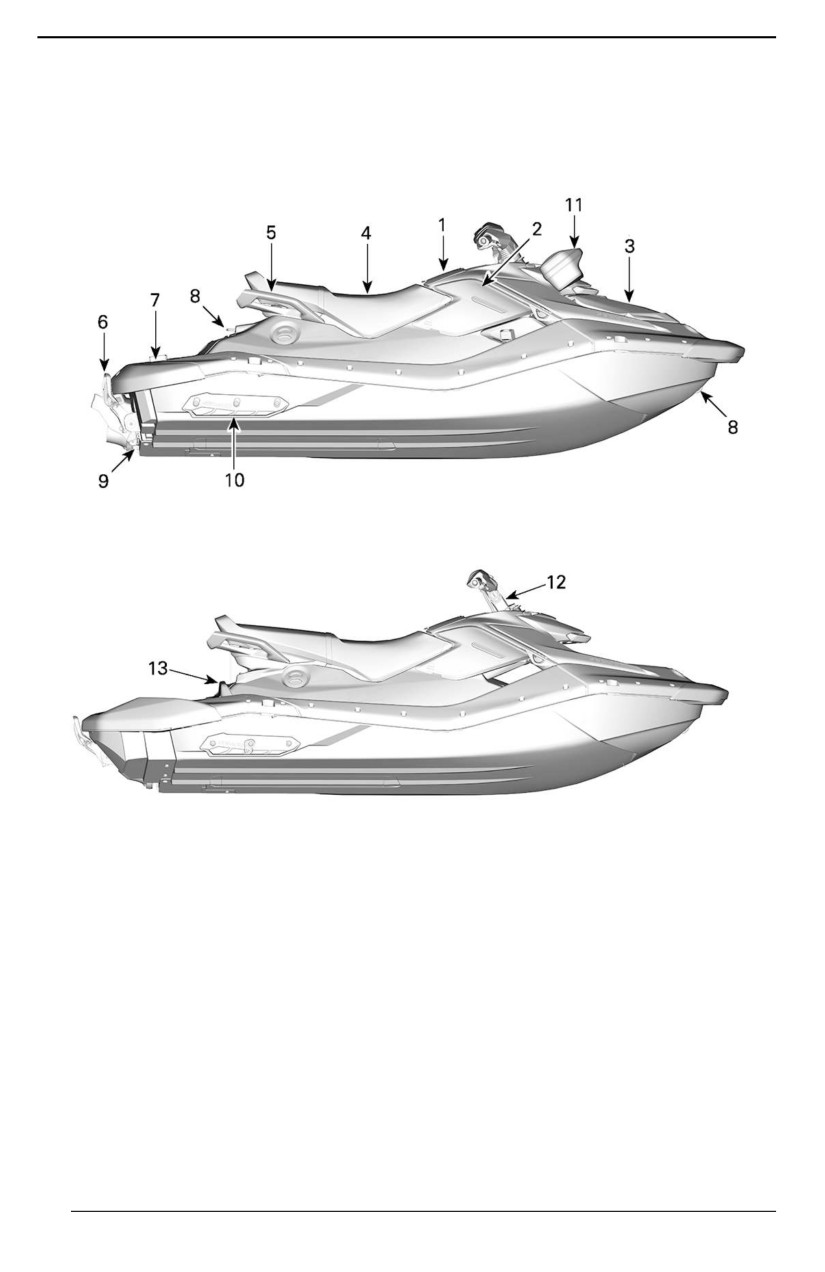
EQUIPMENT
Illustrations may not be accurate for
Some vehicle safety labels are not
every model and are only provided as
shown on illustrations. For information
a visual guide.
on vehicle safety labels, refer to
Watercraft Safety Labels.
1. Glove Box
12. Adjustable Handlebar Riser (Trixx
2. Safety Equipment Kit Storage
Models)
Compartment
13. Rear Footrests (Trixx Models)
3. Storage
Bin
(Convenience
Package)
Glove Box
4. Seat
A small storage compartment for per-
5. Passenger Handholds
sonal articles, with a watertight phone
6. Boarding Step
(Convenience
storage inside the glovebox located at
Package)
the front of the seat.
7. Boarding Platform
8. Front and Rear Eyelet
NOTE:
9. Bilge Drain Plug
Glove box is not watertight.
10. Sponsons
11. Audio System (If equipped)
Push tab forward to open glove box.
70
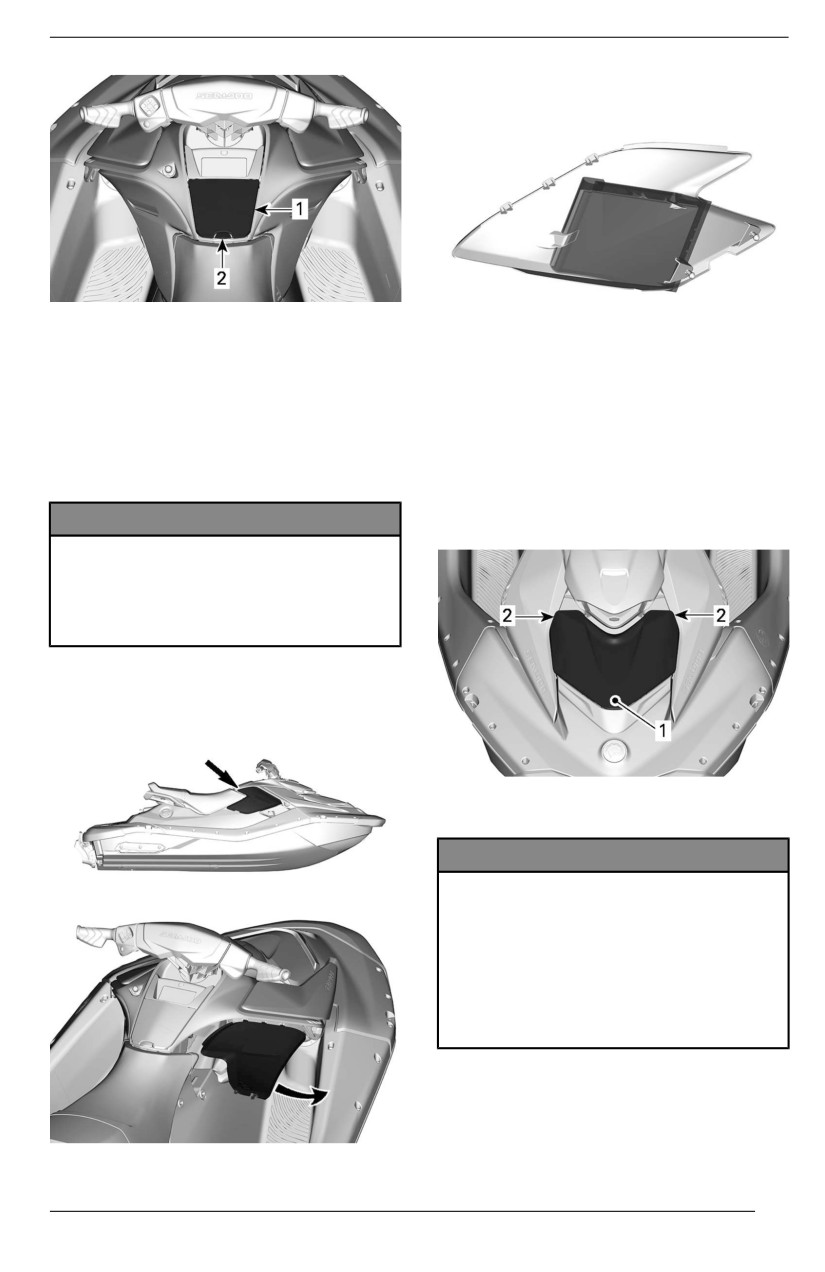
EQUIPMENT
The operator’s guide location is inside
the cover.
1. Glove box
OPERATOR''S GUIDE
2. Tab
Storage Bin
Safety Equipment Kit Storage
Compartment
A convenient area to carry personal
articles.
An area to store the operator's guide,
safety equipment kit or emergency kit
To open the storage bin front cover,
only (not supplied with vehicle).
release the lid hooks on each side. Al-
ways close and latch cover when
NOTICE
riding.
Thiis area is not iintended for gen-
eral storage. Do not store any oth-
er items in this area. Storing other
i
items in this area can damage the
vehiiclle.
To open this storage compartment,
manually release and remove the RH
side panel.
1. Front cover
2. Lid hooks
NOTICE
Never carry any loose, heavy,
sharp, or breakable objects iin the
storage bin. Do not exceed maxii-
mum load capaciity; 2.5 kg (5 lb).
Never operate the watercraft wiith
the storage biin front cover open.
Thiis is not a watertight
compartment.
Seat
The seat latch is located under the
back end of the seat.
71
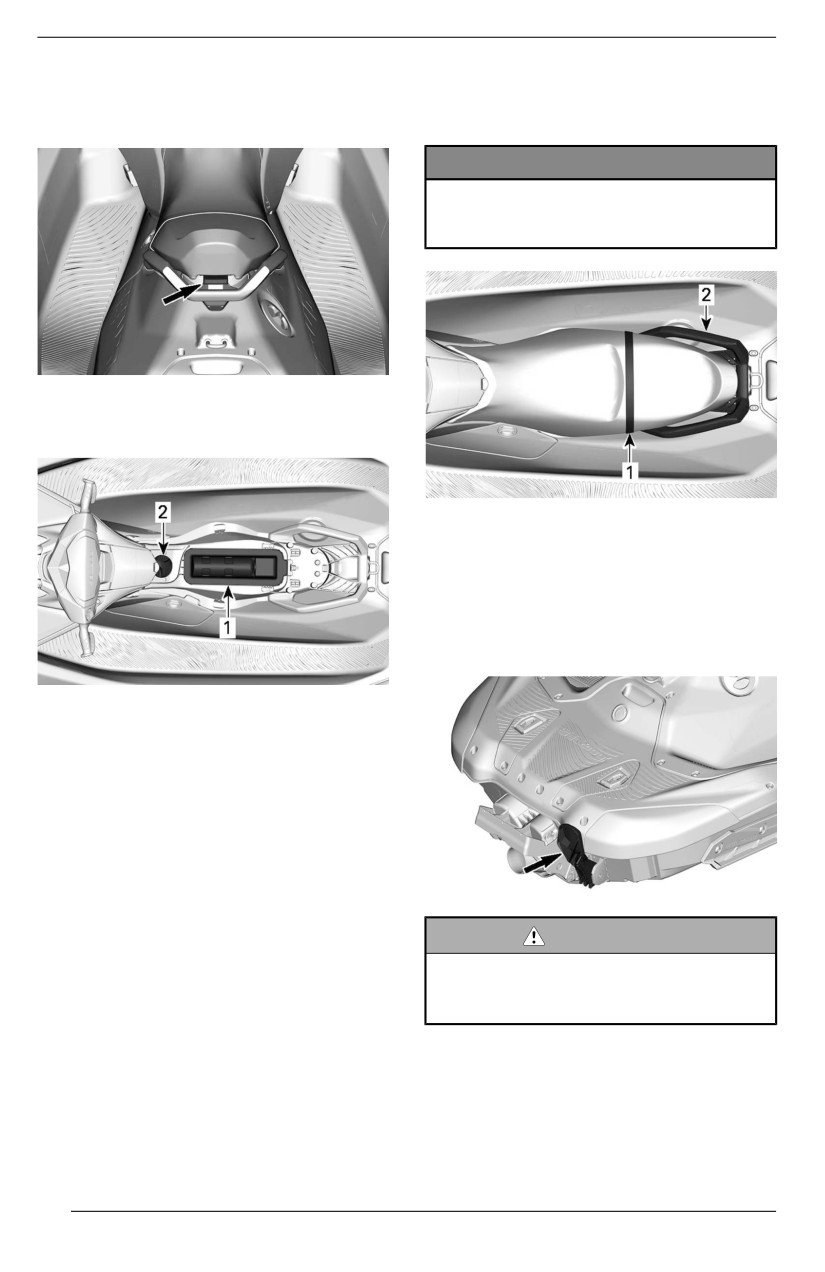
EQUIPMENT
To remove the seat, push up on the
the skier/wakeboarder spotter (if appli-
latch handle and slide the seat
cable) or boarding the watercraft from
backward.
the water.
NOTICE
Never use the molded grab han-
dle to tow anything or to llift the
watercraft.
Removing the seat provides access to
the fire extinguisher (not supplied with
vehicle) and the fuel cap.
1. Seat strap
2. Molded grab handle
Boarding Step (Convenience
Package)
A convenient step used for boarding
the watercraft from the water.
1. Fire extinguisher holder
2. Fuel cap
To install the seat, position the seat in
place and push the seat forward until
the latch clicks.
Pull up on the rear portion of the seat
to ensure it is properly latched.
Passenger Handholds (If
Equipped)
WARNING
The seat strap provides a handhold
Engine must be OFF when board-
for a passenger to hold on to when
ing the watercraft or when using
riding.
the boardiing ladder.
The sides of the molded grab handle
at the rear of the seat also provide a
Pull down the step with your hand and
handhold for a passenger.
hold until a knee is put on the step.
The rear portion of the molded grab
handle also provides a handhold for
72
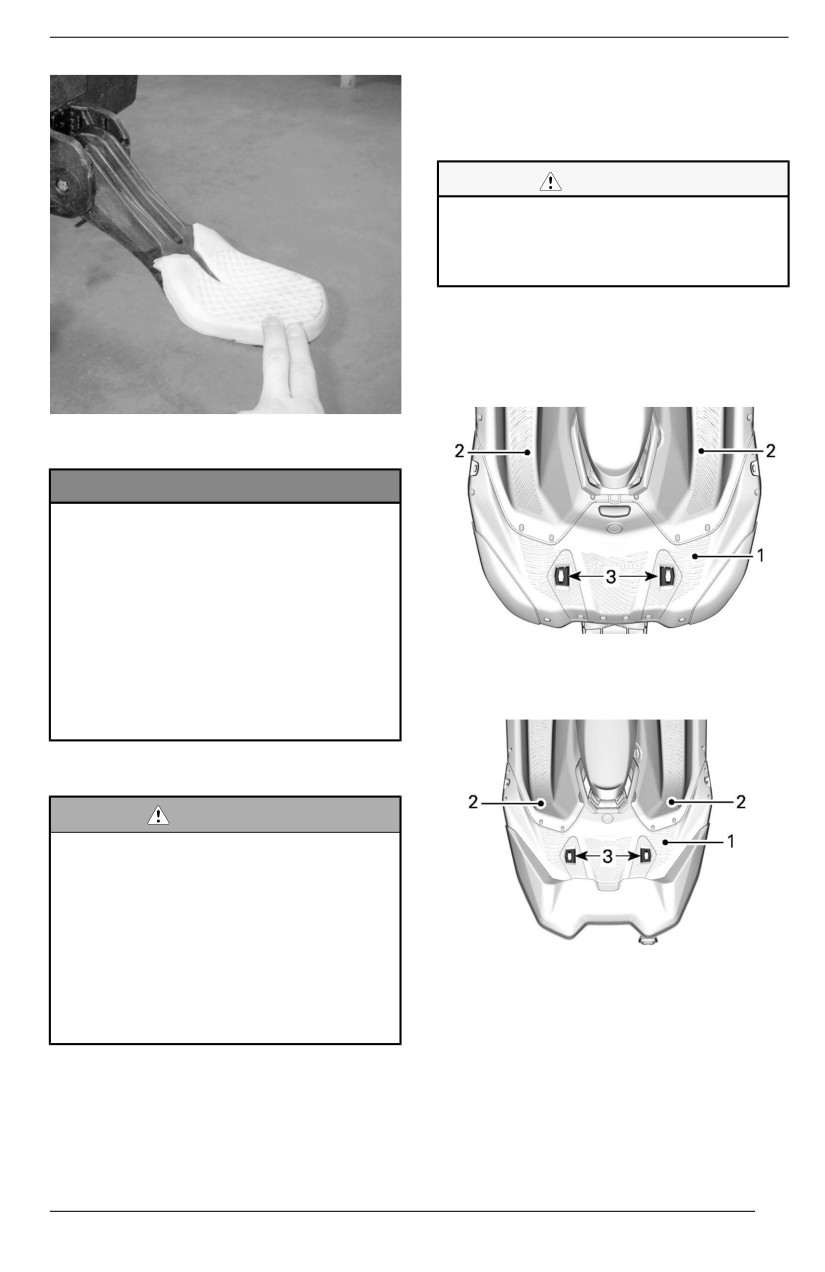
EQUIPMENT
Boarding Platform
The rear deck area serves as the
boarding platform.
CAUTION
The two LiinQ attachment poiints
are used to carry accessoriies and
should always be retracted when
not in use.
Two indentations in the platform are
used as foot rests for the rear facing
spotter when towing
a
skier,
wake-
boarder or tuber.
BOARDING STEP HELD DOWN FOR
BOARDING FROM WATER
NOTICE
– Never use the step for board-
i
ing a watercraft that is out of
water.
– Never use the step for pullliing,
towing, diiviing or jjumping, or
any other purpose other than
as a boardiing step.
1.
Boarding platform
– Onlly one person at a time on
2.
Footrests
the step.
3.
LinQ attachments
– Onlly board the step with a
knee, not a foot.
Modells wiith iiBR
WARNING
Be aware of the iiBR gate move-
ment when starting the engine,
shutting down the engine or usiing
the iiBR lever. Automatic move-
ment of the gate may squeeze fin-
gers or toes of peoplle taking a
1.
Boarding platform
hold on the back or your water-
2.
Spotter footrests
craft.Never use iBR gate as a sup-
3.
LinQ attachments
portiing poiint to board the
watercraft.
Front and Rear Eyelets
Eyelets can be used for mooring, tow-
ing a water skier (Spark for 3), wake
boarder or tuber (Spark for 3), and as
73
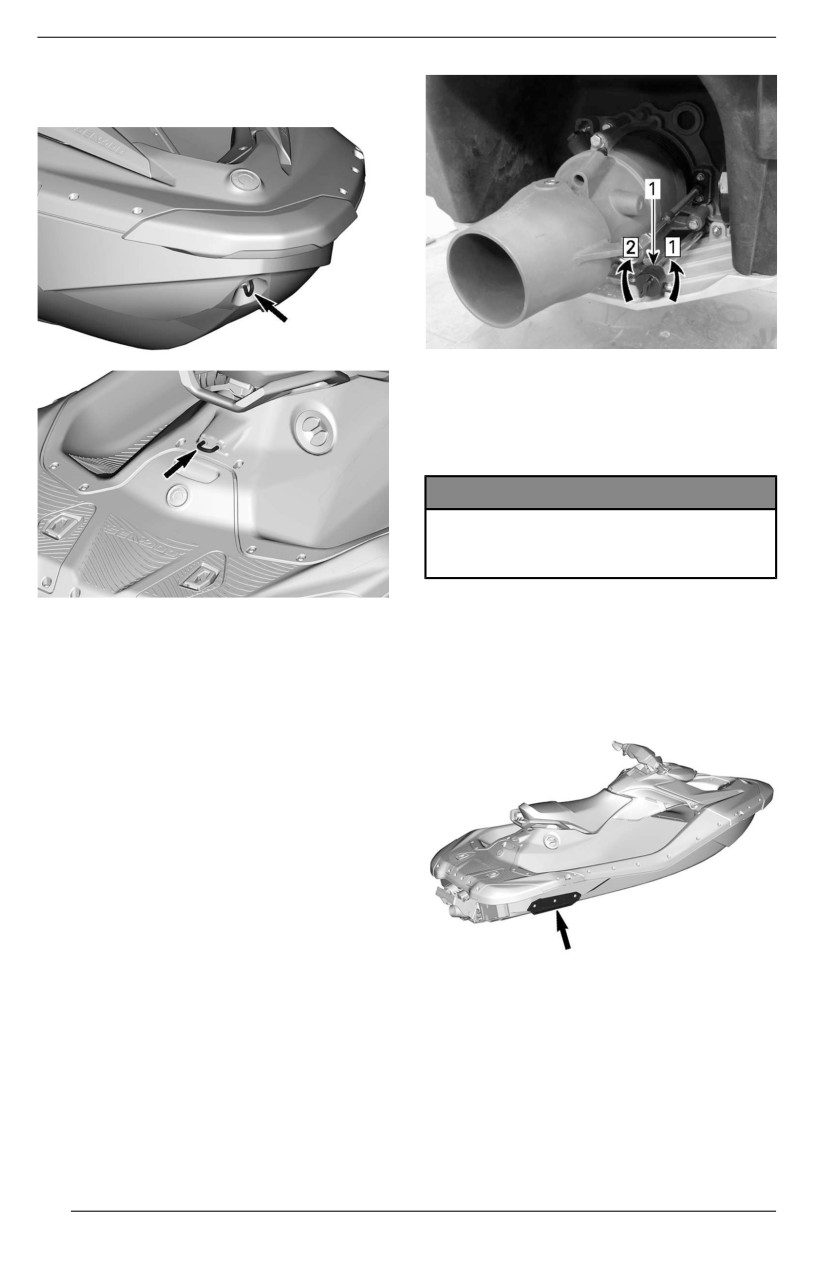
EQUIPMENT
tie-down points when trailering your
watercraft.
TYPICAL
1. Drain plug
1. Untighten
2. Tighten
NOTICE
Ensure drain pllugs are properly
secured priior to llaunching the
watercraft in water.
Sponsons
Bilge Drain Plug
Two fixed sponsons, one on each side
Unscrew drain plugs whenever water-
at the rear of the hull, assist in water-
craft is on the trailer. This will allow
craft stability. The sponsons are not
water accumulated in the bilge to be
adjustable.
evacuated and helps to reduce
condensation.
Rear Footrests (Trixx
Models)
Angled footrests used to enhance
control when purposely raising the
bow.
74
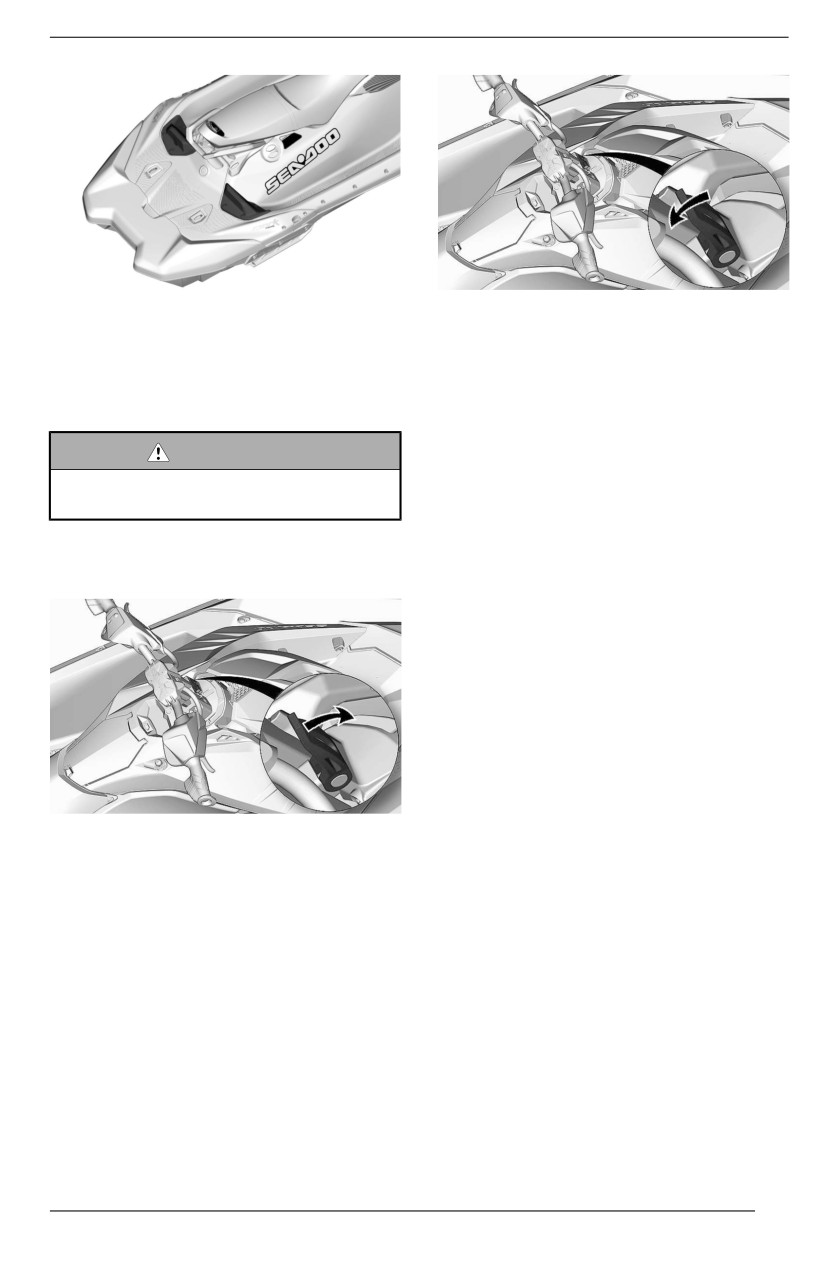
EQUIPMENT
Adjustable Handlebar Riser
Audio System (If Equipped)
(Trixx Models)
Some models are equipped with a
portable audio system.
The handlebar height can be set to
suit the operator's preference.
The BRP audio system is composed
of two waterproof speakers, two twee-
WARNING
ters, one passive radiator, a keypad, a
charging port and a vent port. The
Allways turn off engine before ad-
system connects via Bluetooth to a
j
justing handllebar height.
smartphone.
1.
Unlock the mechanism using the
When the Play/Pause/Power button
lever.
is pressed, the system will be
powered.
Blluetooth Pairiing Mode - When the
unit is powered On, the system will au-
tomatically try to pair with the last con-
nected device or will go in pairing
mode if no paired devices are de-
tected. When the system is in pairing
mode, all the button lights will blink.
To manually enter the pairing mode,
hold down the Pllay/Pause/Power
button for 0.5 second. The buttons will
2.
Adjust the handlebar to the desired
start blinking to indicate it's in pairing
height.
mode. Search for BRP Connect from
3.
Lock the mechanism using the
your device's Bluetooth menu.
3
lever.
beeps will indicate successful pairing.
When paired, select a playlist or other
source of music from your
smartphone.
Never pair a smartphone or change
the playlist or music source on the
75
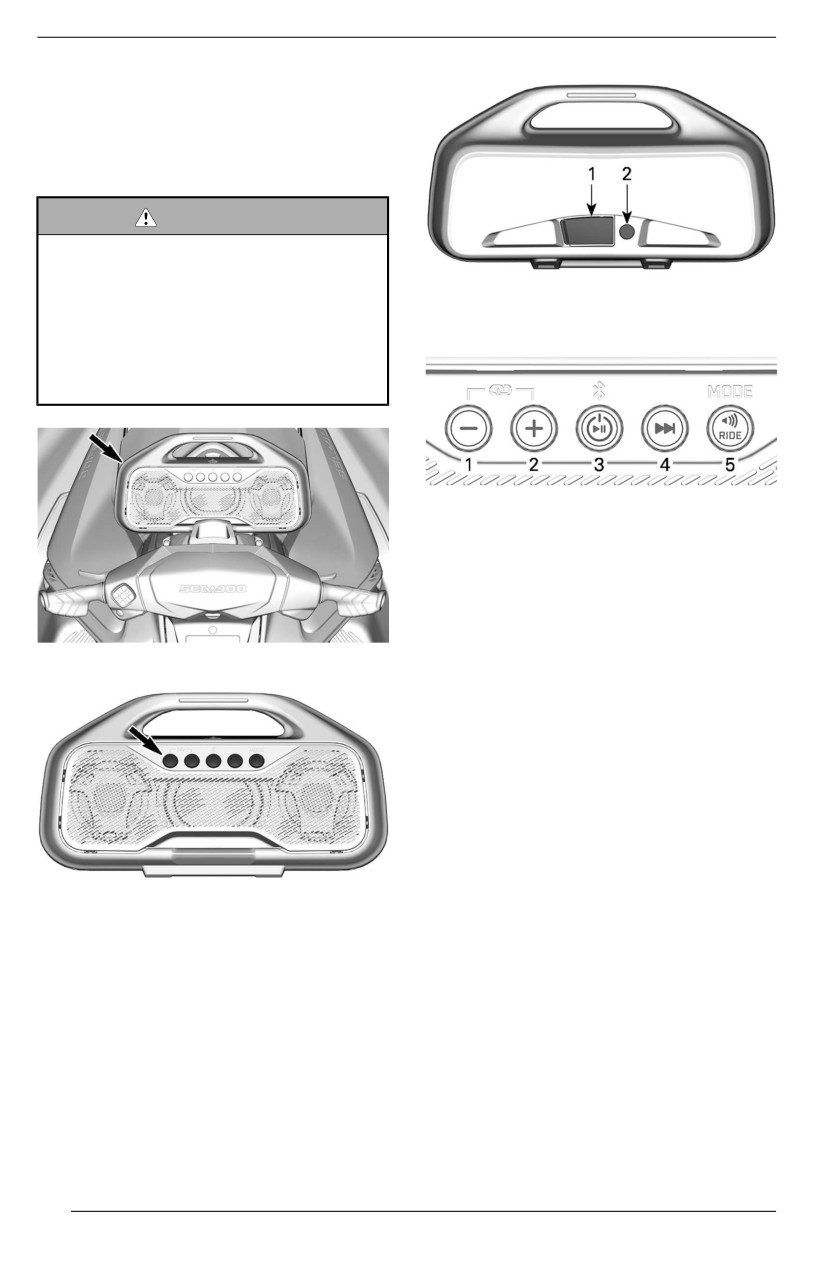
EQUIPMENT
device while driving or operating the
vehicle.
NOTE:
On applicable devices.
WARNING
Using a smartphone or trying to
paiir a device whiile driviing can
diistract the driver from operatiing
the watercraft. Always use but-
1. Charging port
tons wiith cautiion and always stay
2. Vent port
allert on the water, keepiing eye
contact wiith your enviironment at
alll tiimes.
1. Volume DOWN
2. Volume UP
3. Play/Pause/Power
4. Next track
5. Mode
Play/Pause/Power
-
The Play/
Pause/Power button gives you the
TYPICAL – AUDIO SYSTEM
ability to play or to pause the current
track with a single press.
Pressing the Play/Pause/Power but-
ton will turn the unit On if currently Off
or holding the Play/Pause/Power but-
ton for 3 seconds will turn the unit Off
if currently On. The unit will emit
4
small beeps to indicate when power is
turned Off.
Volume Up and Vollume Down
-
These buttons will turn up or turn
KEYPAD
down the output of the volume. When
the unit has reached the minimum or
maximum output level, the unit will
beep to indicate that no further adjust-
ment is possible.
76
EQUIPMENT
Audio Controls
State
Audio Feedback
Visual Feedback
White sequence from
Power ON
Fade in
center to outside
buttons
White sequence from
Power OFF
Fade out
outside to center
buttons
All buttons flashing
Pairing Mode
-
white
Pairing Mode success
3 beeps
-
Max volume
2 beeps
-
Min volume
1 long beep
-
Mode button steady
Ride Mode
-
white
Home Mode
-
Mode button off
Both Volume buttons
Concert Mode
-
steady white
Play/Pause/Power
Concert Mode - Primary
-
button and +/- button
audio system
steady bright
Concert Mode -
Play/Pause/Power
Secondary audio
-
button off and +/- button
system
steady bright
Concert Mode -
Play/Pause/Power
Secondary audio
-
button flashing white
system muted
Play/Pause/Power
Paused
-
button flashing white
Play/Pause/Power
Low battery
-
button steady red
Play/Pause/Power
Charging
-
button steady blue
77
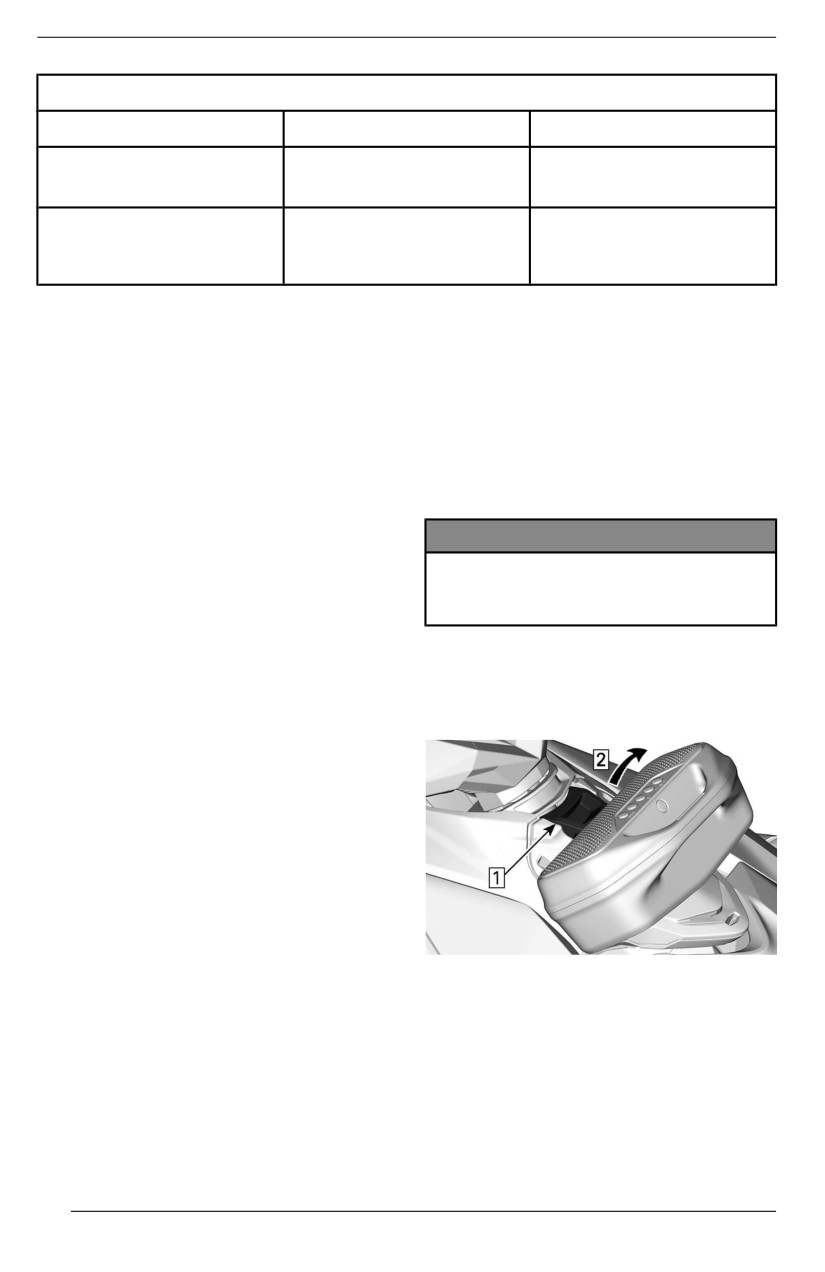
EQUIPMENT
Audiio Controlls
State
Audiio Feedback
Viisuall Feedback
Play/Pause/Power
Battery fully charged
-
button steady white
Play/Pause/Power
Battery too low to power
-
button flashing red 3
ON
times
NOTE:
other audio systems paired will also
Play/Pause/Power button flashing
be muted. Each individual secondary
rapidly (red and blue) during 5 secs
audio system can be muted by press-
followed by a shutdown indicates the
ing the Play/Pause/Power button.
unit is not operating in appropriate
This system is completely self con-
temperature or at a sufficient battery
tained and has no electrical connec-
level.
tion to the PWC. It needs to be
connected to a 110V household elec-
Mode Button - The Mode button will
trical outlet to be charged.
allow you to switch the DSP (Digital
Signal Processing) between
“Ride
Mode” and “Home Mode” to adapt the
NOTICE
sound to the location.
Use only the suppllied chargiing
adapter to charge the audio
Next Button - The Next button will al-
system.
low you to advance to the next song.
Concert Mode - The Concert Mode
When not in use, the unit will shut
will allow you to stream audio on multi-
down after 10 minutes if is not paired.
ple audio systems through only one
audio system.
To remove
First, make sure only the primary
audio system is connected to a phone.
Disconnect any phone linked to the
secondary audio system(s).
Press both volume buttons (+/-) simul-
taneously to initiate Concert Mode on
the primary audio system. It will auto-
matically switch its DSP setting to
“Home Mode”. It can be changed on
each individual audio system later.
Step 1. Push button to open the latch lever.
Make sure each of the secondary
Step 2. Lift radio by handle.
audio system(s) is in Pairing Mode. In-
itiate Concert Mode, press both vol-
Installlation
ume buttons (+/-) and wait for the
pairing.
Before installing the audio system,
make sure the latch and the tabs on
Each audio system has control of its
the vehicle are still in good condition.
volume level in Concert Mode. If the
primary audio system is muted, all
78
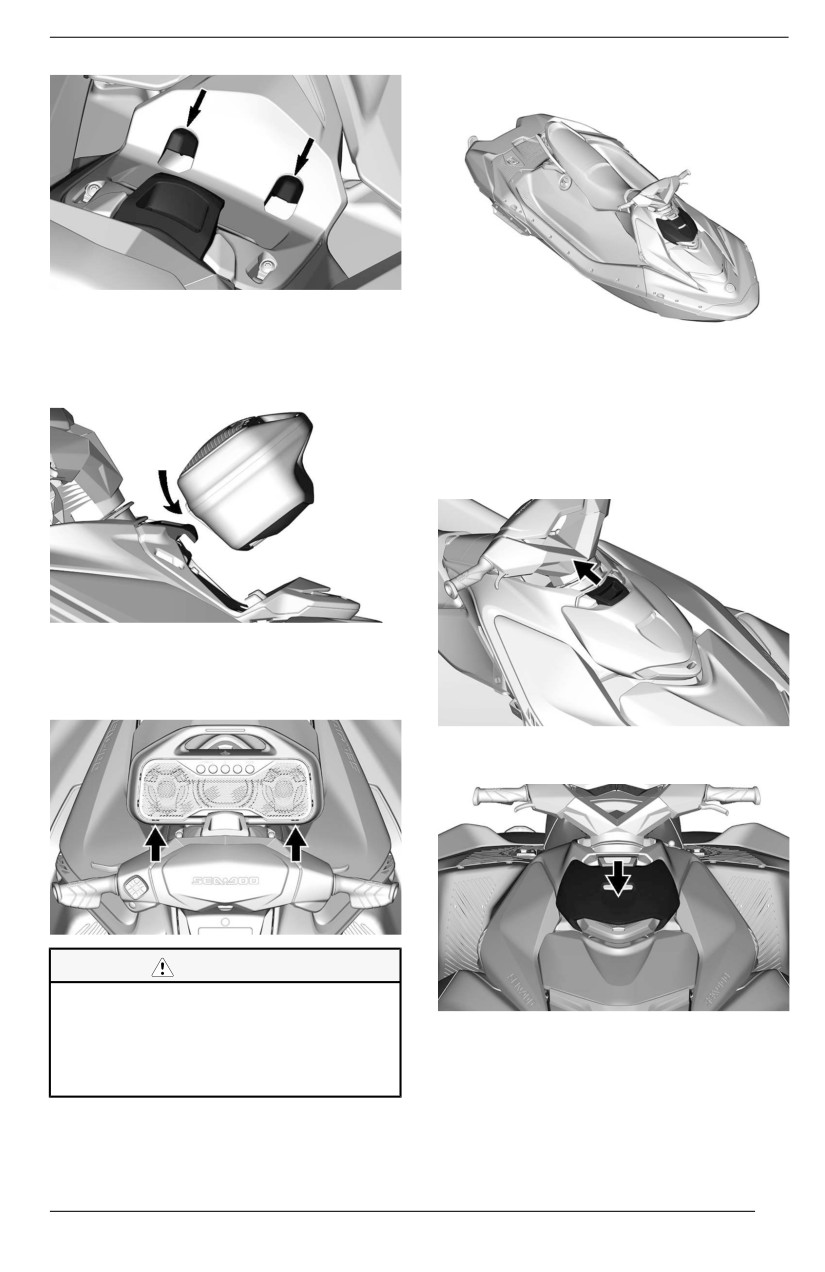
EQUIPMENT
Trim Cover (If Equipped)
To install the audio system, start by in-
serting it in the front locking tabs and
TRIM COVER (IF EQUIPPED)
then push down to engage the latch
lever completely.
To access the audio system support,
remove the cover.
Removiing the Trim Cover
1. Release the latch lever.
Make sure the audio system is prop-
erly installed and secured by pushing
both sides upward.
2. Gently push down on the center of
the cover.
CAUTION
Prollonged exposition to lloud mu-
sic can damage your heariing.
3. Lift the side tabs.
Therefore, we suggest a 10 mii-
nutes break time every 45 mii-
nutes of llisteniing.
79
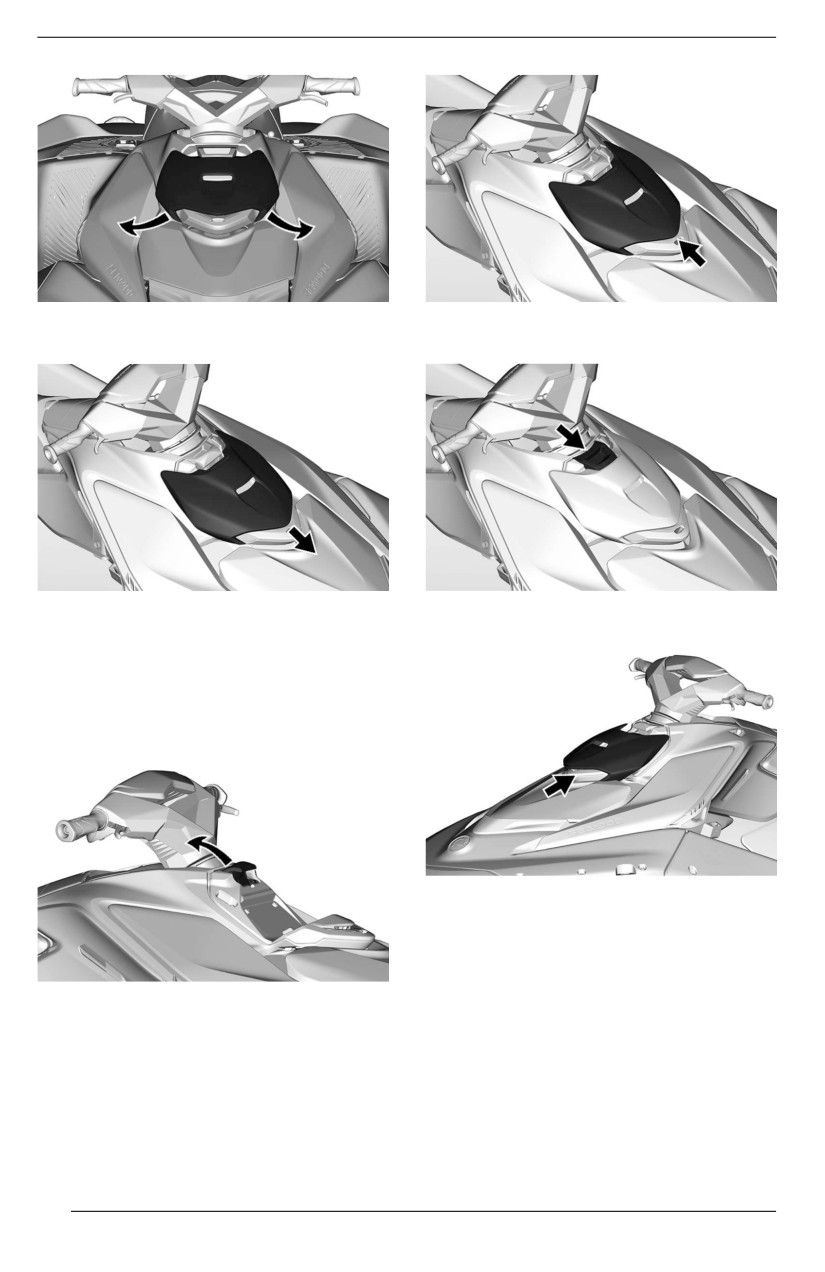
EQUIPMENT
4. Slide down the cover
(towards
3. Lower the latch lever to lock the
front of watercraft).
cover in place.
4. Ensure the front tab is anchored in
Installling the Trim Cover
the front console slot.
Before installing the cover, ensure
thatthe front LinQ attachment point is
empty, and that the hood is opened.
1. Lift the latch lever
5. Snap the LH and RH side tabs in
place.
2. Slide the cover upward toward the
latch lever. It should snap in place.
80
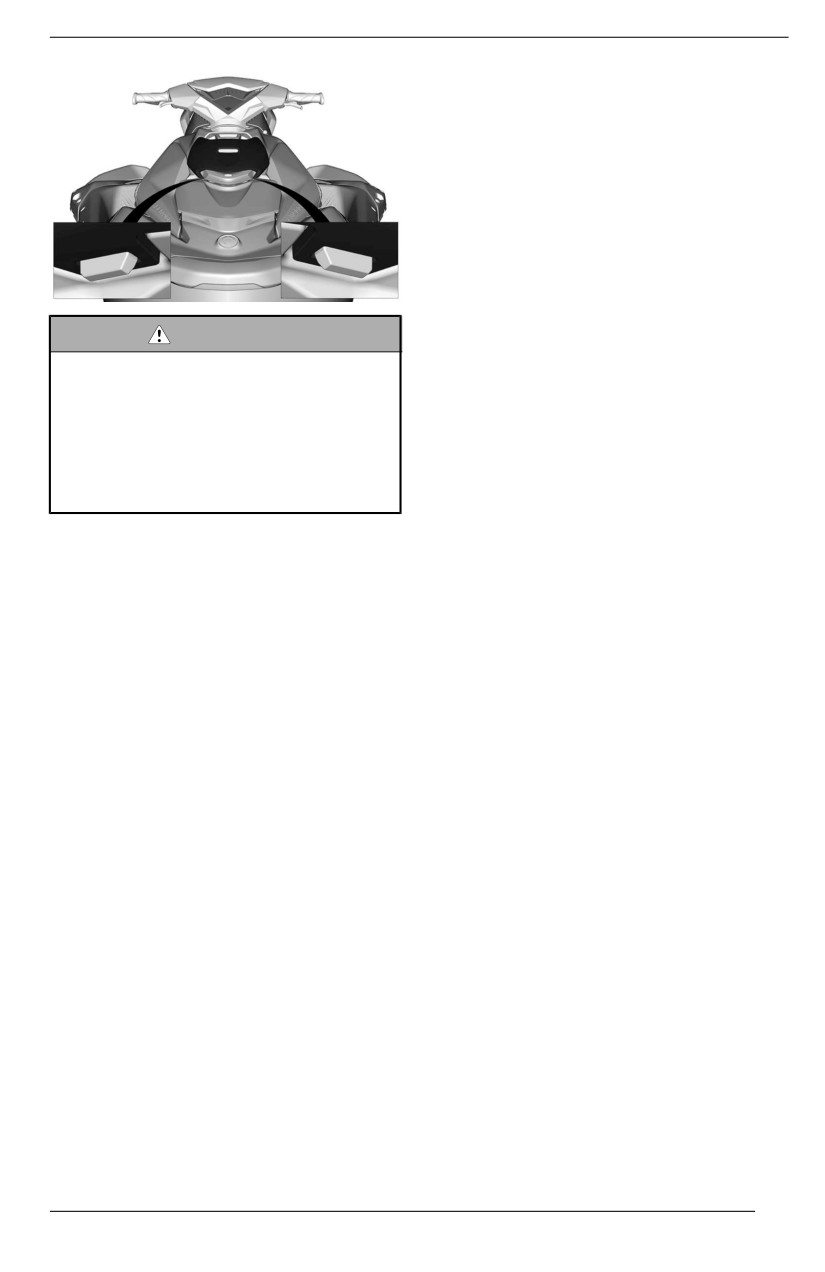
EQUIPMENT
WARNING
Make sure the cover iis properly in-
stallled and secured with its 4 at-
tachment poiints:
– Latch llever
– Front tab
– LH side tab
– RH siide tab
81
BREAK-IN PERIOD
Operation During Break-In
Period
A break-in period of 5 operating hours
is recommended before running the
watercraft at sustained full throttle.
During this period, maximum throttle
should not exceed 1/2 to 3/4 opening.
However, brief full acceleration and
speed variations contribute to a good
break-in.
NOTICE
Contiinued wide open throttle ac-
celerations or operatiion, pro-
l
longed cruising speeds are
detrimental during the break-iin
periiod.
82
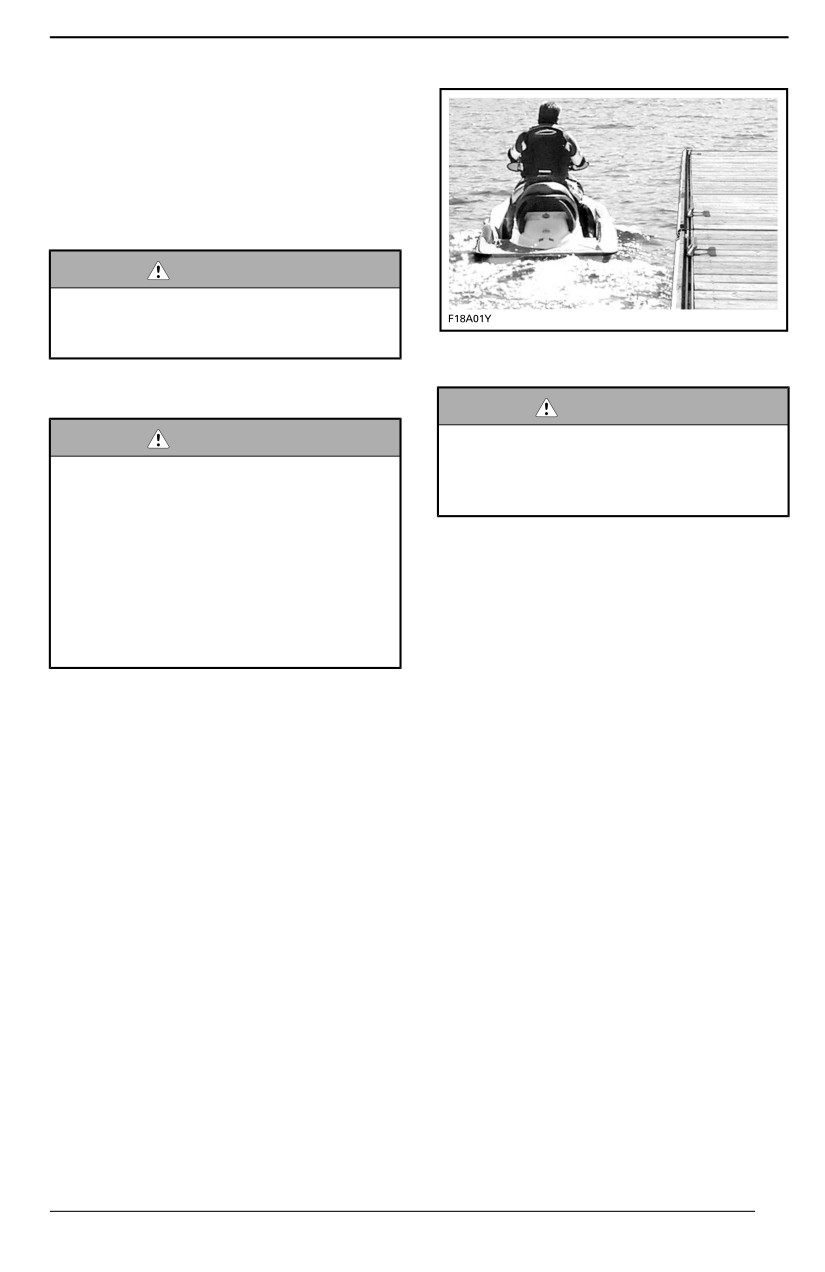
OPERATING INSTRUCTIONS
Boarding the Watercraft
As with any watercraft, boarding
should be done carefully.
Make sure to practice each boarding
methods until fully able to safely board
in any potential condition.
WARNING
Do not applly throttlle when anyone
iis boarding or at rear of water-
craft. Shut down the engiine
Boarding from Shalllow Water
Watercraft wiith iiBR system
WARNING
WARNING
Keep llimbs away from propulsion
system or iintake grate.Never use
Be aware of the iiBR gate move-
propulsion systems a supporting
ment when starting the engine,
poiint to board the watercraft.
shutting down the engine or usiing
the iiBR lever. Automatic move-
ment of the gate may squeeze fin-
1. Board the watercraft from either
gers or toes of peoplle taking a
the side or the rear.
hold on the back or your water-
2. Ensure there is at least 90 cm (3 ft)
craft.Never use iBR gate as a sup-
of water underneath the lowest
portiing poiint to board the
rear portion of the hull.
watercraft.
NOTE:
Before starting the engine and when
Boarding from a Dock
the engine is already running, take in-
1. Slowly place one foot on the water-
to account that the hull will be lower in
craft footboard nearest the dock
the water when all passengers are
while holding the handlebar, and at
aboard. Be certain to maintain the
the same time, transfer the body
specified depth so sand, pebbles and
weight to the other side in order to
rocks will not be drawn up in the jet
balance the watercraft.
pump.
2. Then bring the other foot over the
seat and place it on the other
footboard.
3. Push the watercraft away from the
dock.
83
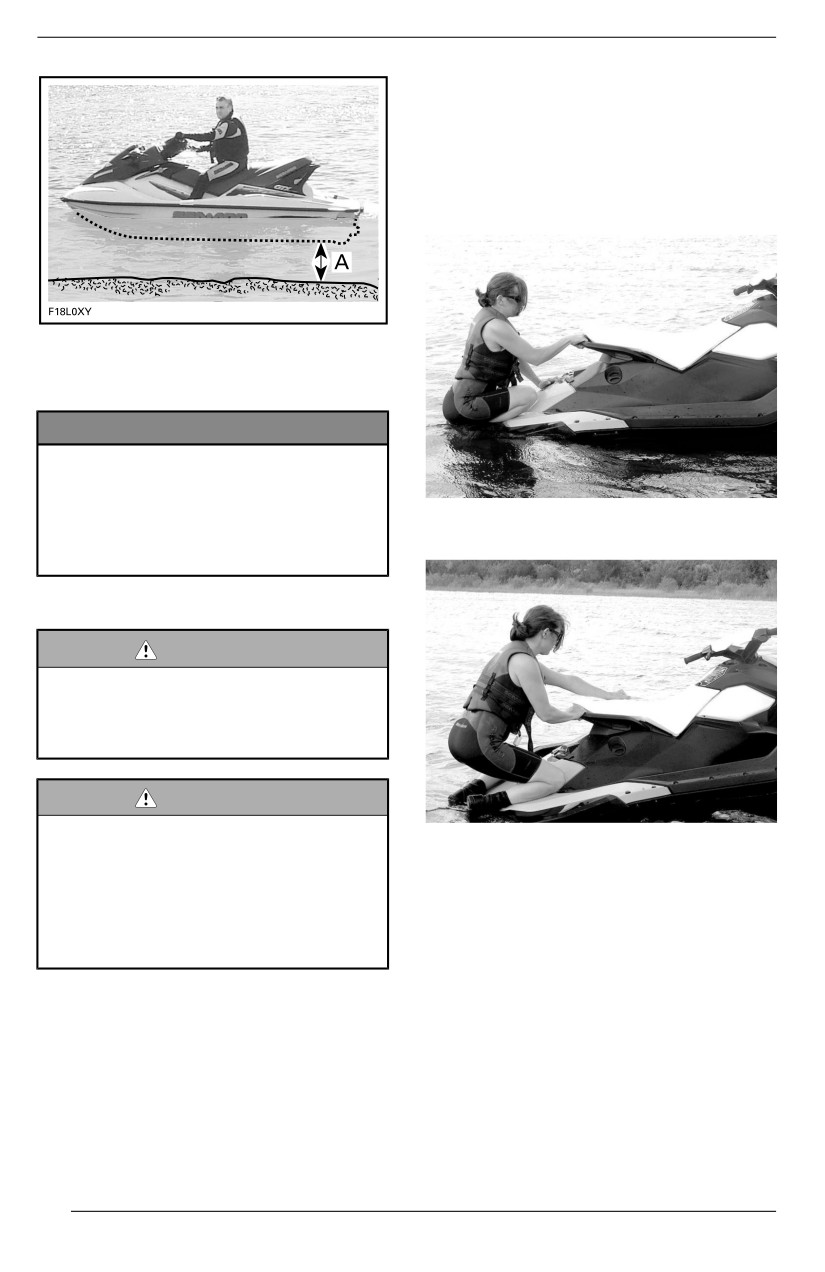
OPERATING INSTRUCTIONS
set aside in the footwell to get ac-
cess to the handle. Always prop-
erly secure the cargo before riding.
3. With the other hand on the board-
ing platform, lift your body until you
can lay one knee on the boarding
platform.
A. Maintain at least 90 cm (3 ft) underneath the
lowest rear portion of the hull when all pas-
sengers are aboard
NOTICE
Startiing the engine or riidiing the
watercraft iin shalllower water may
damage the iimpelller or other jjet
4.
Lay the other knee on the boarding
pump components.Stay on center
platform.
of the step.Only one person at a
tiime on the ladder.
Boarding iin Deep Water
WARNING
Keep llimbs away from propulsiion
system or iintake grate.Never use
propulsion systems a supporting
poiint to board the watercraft.
WARNING
Ask iinexperienced riiders to prac-
5.
Take hold of the seat strap to help
tiice how to board the watercraft
maintain your balance and step
cllose to shore (alll methods ex-
forward onto the footboards on ei-
pllained here) before venturing in-
ther side of the seat.
to deep water, especiallly when
cargo is installled aboard on the
rear platform.
Operator Allone Wiithout a Boarding
Step
1. Using one hand, grab the rear
handle.
2. NOTE: If cargo is properly secured
on the boarding platform, it can be
used as a handle or removed and
84
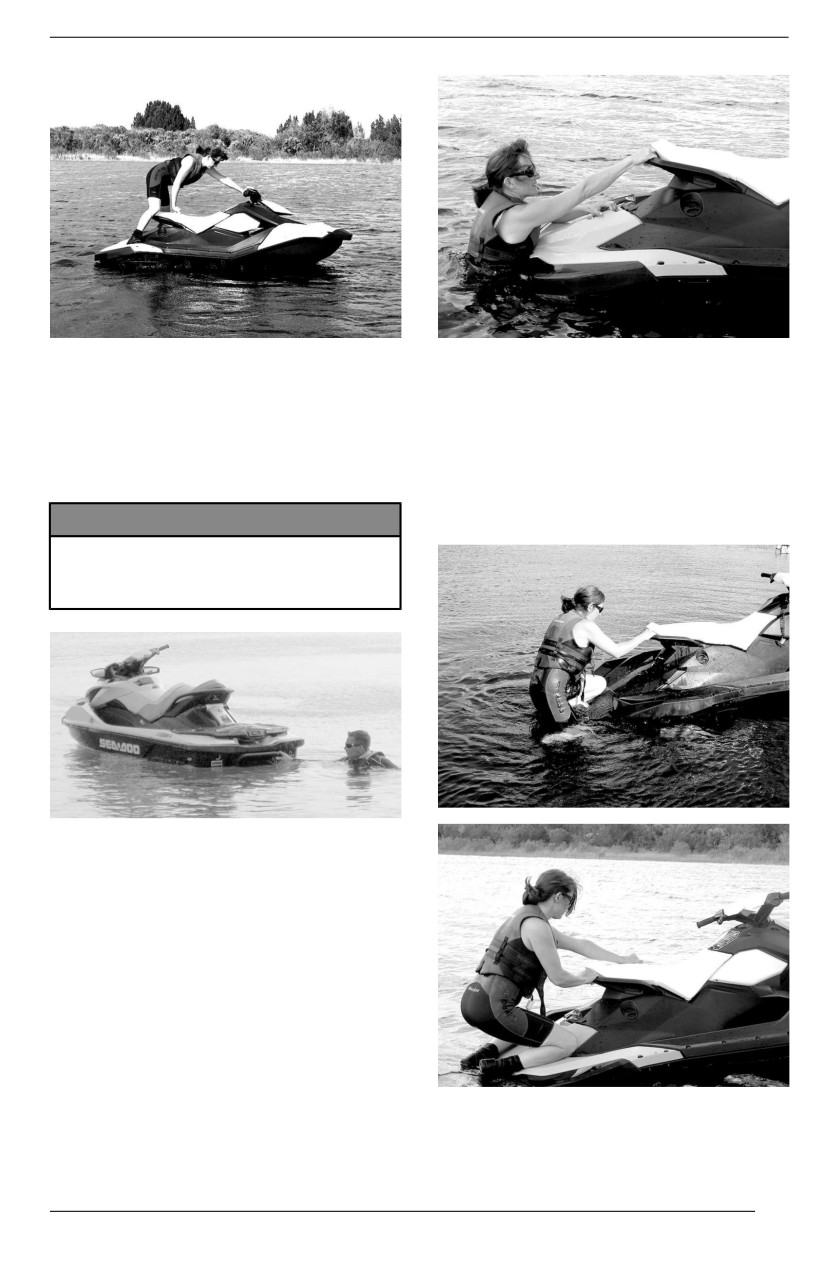
OPERATING INSTRUCTIONS
6. Sit astride the seat.
5. NOTE: If cargo is properly secured
on the boarding platform, it can be
Operator Alone With a Boardiing
used as a handle or removed and
Step
set aside in the footwell to get ac-
1. Swim to the rear of the watercraft.
cess to the handle. Always prop-
2. Using one hand, lower the board-
erly secure the cargo before riding.
ing step.
6. Holding on to the handle behind
the seat, step up onto the boarding
platform.
NOTICE
Never use propulsion system
components to board. Onlly board
the step wiith a knee, not a foot.
TYPICAL
3. Using the other hand, take hold of
the edge of the boarding platform,
then pull yourself up so that you
can knee onto the boarding step.
4. Reach forward with one hand and
take hold of the molded handles
on the sides of the back seat or the
rear handle, then stand on the
boarding step.
7. Take hold of the seat strap to help
maintain your balance and step
85
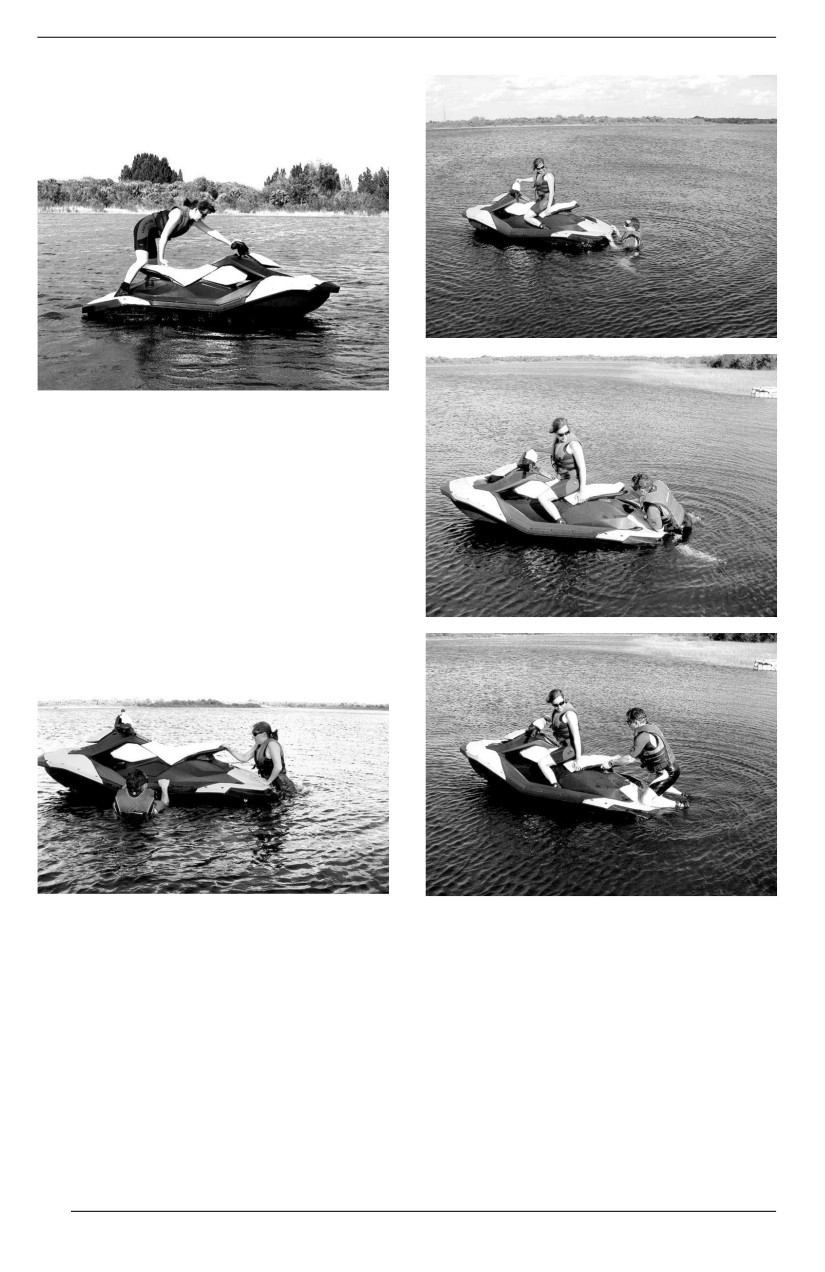
OPERATING INSTRUCTIONS
forward onto the footboards on ei-
ther side of the seat.
8. Sit astride the seat.
Operator with a Passenger
1. The operator climbs on the water-
craft in the same way as explained
previously.
In choppy water, while in the
water, the passenger may hold the
watercraft steady to help the oper-
ator climb aboard.
2. The passenger then climbs onto
the watercraft while the operator
maintains balance by sitting as
close as possible to the console.
86
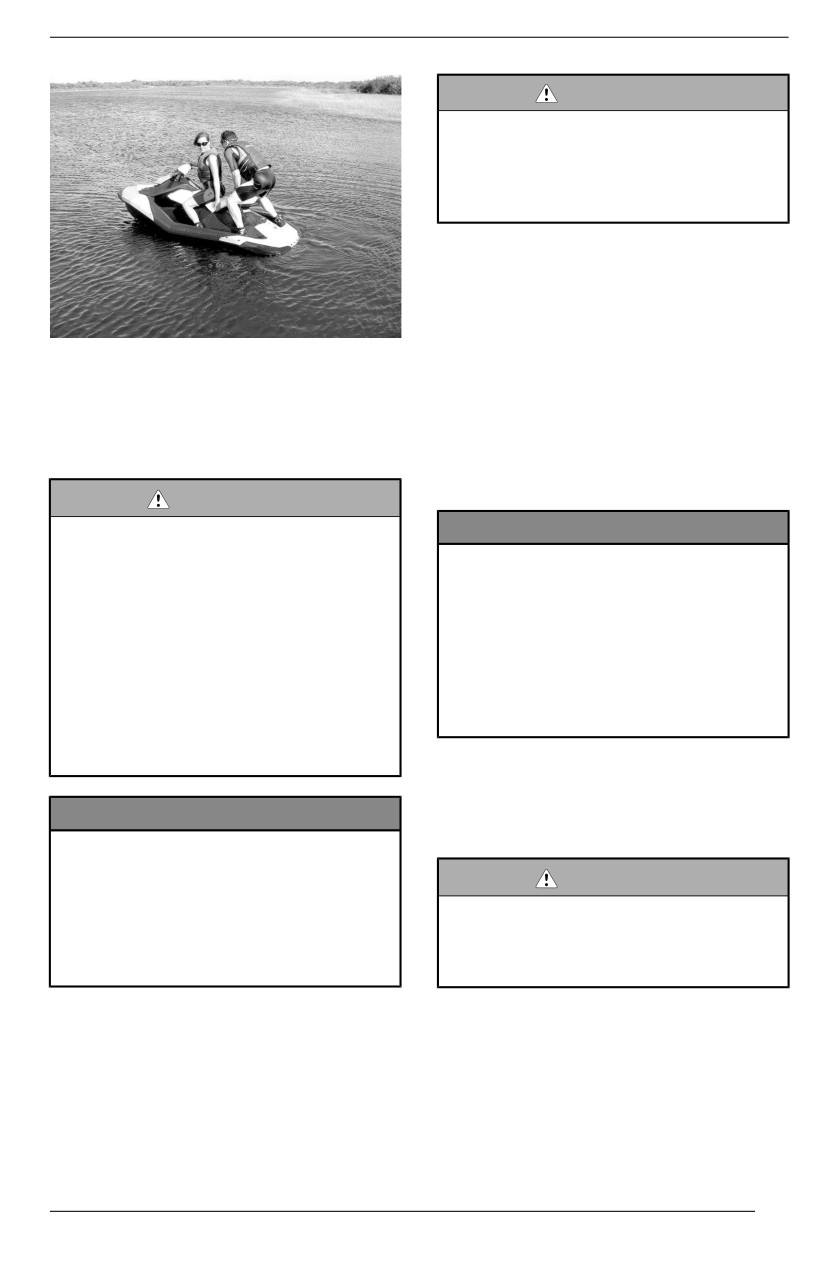
OPERATING INSTRUCTIONS
WARNING
The tether cord shalll always be
attached to the operators person-
all flotation deviice or to the wrist
(wriist strap required) when start-
i
ing or operatiing the watercraft.
2. Firmly grip handlebar with your left
hand and place both feet on the
footboards.
3. Press the engine START/STOP
button to wake up the electrical
3. The passenger must sit astride the
system.
seat and maintain a firm grip of a
4. As the information center cycles
handhold or the waist of the per-
through its self test function, install
son in front of them.
the tether cord on the engine cut--
off switch.
Starting the Engine
5. Depress the START/STOP button
to start the engine.
WARNING
Before startiing the engiine, the op-
NOTICE
erator and passenger(s) should
In the event the engine does not
always:
start riight away, do not hold
– Be properly seated on the
START/STOP button more than
watercraft.
10 seconds to avoiid starter over-
– Have a firm grip on a handholld
heating. A rest period should be
or hold on to the waiist of the
observed between the cranking
person iin front of them.
cyclles to alllow the starter to cooll
– Wear appropriate protectiive
down. Refer to Troublleshooting
cllothing iinclludiing a PFD ap-
sectiion.
proved by local authoriitiies and
a wet suit bottom.
6. Release engine START/STOP
button after engine is started.
NOTICE
How to Stop the Engine
Ensure there is at least 90 cm (3
ft) of water under the lowest rear
WARNING
portiion of the hulll when alll pas-
sengers are aboard priior to start-
To maiintaiin watercraft diirectiional
i
ing the engine. Otherwise damage
controll, the engiine shalll be run-
to the propullsiion system compo-
niing untill the watercraft iis
nents may occur.
stopped.
1. Attach the tether cord clip to your
To shut off the engine:
PFD or to the wrist (wrist strap
- Press the engine START/STOP
required).
button, or
87
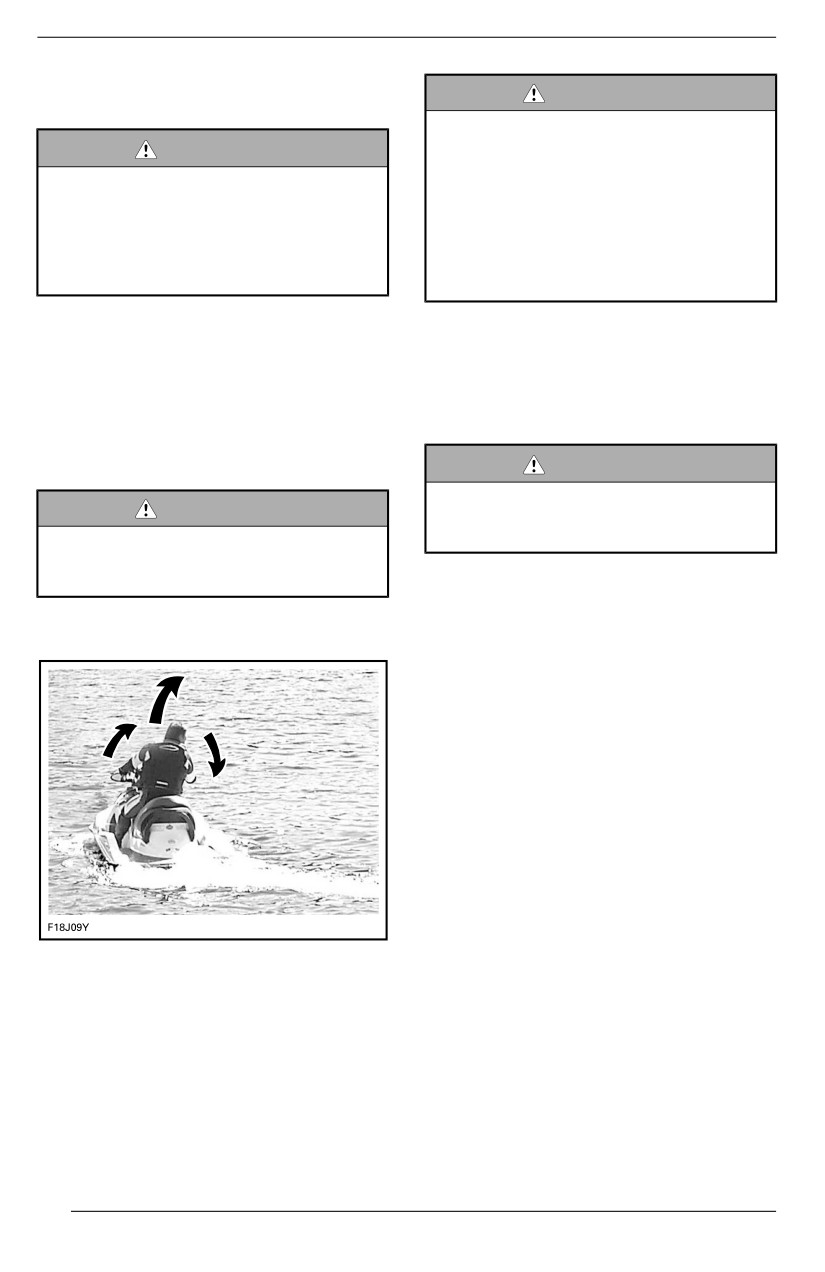
OPERATING INSTRUCTIONS
- Pull off the tether cord cap from
WARNING
the engine cut-off switch.
Throttlle must be appliied and han-
dlebar turned to change the diirec-
WARNING
tion of the watercraft. Steering
Never lleave the tether cord on the
effiiciiency wiilll differ dependiing on
engine cut-off switch when diisem-
the amount of throttle appllied, the
barking watercraft to prevent
number of passengers, the load,
theft, acciidental engine starting,
the water condiitions and the envi-
and to avoid unauthorized use by
ronmental factors such as the
chilldren or others.
wind.
If the engine is shut off using the
Unlike a car, a watercraft needs some
START/STOP button and the tether
throttle to turn. Practice in a safe area
cord is left on the engine cut-off
applying the throttle and turning away
switch, the electrical power will shut
from an imaginary object. This is a
off after approximately 60 minutes to
good collision avoidance technique.
prevent battery discharge.
Models Without iiBR
WARNING
Directiionall controll is reduced
WARNING
when the throttlle iis released and
The engine must stop running for
lost when the engiine is off.
the watercraft to come to a fulll
stop.
The watercraft behaves differently
with a passenger and requires greater
skill. The passenger (s) shall grip the
Steering the Watercraft
seat strap, the molded grab handle, or
the waist of the person ahead of them.
Reduce speed and avoid sharp turns.
Avoid choppy water conditions when
carrying a passenger.
O.T.A.S.TM System (If Equipped)
(Off-Throttlle Assiisted Steeriing)
The O. T. A. S. (Off-Throttle Assisted
Steering) system provides additional
maneuverability
in
off-throttle
situations.
If the driver releases the throttle to idle
when initiating a full turn, the O.T.A.S.
system will be electronically activated,
Turning the handlebar pivots the jet
and will slightly increase engine speed
pump nozzle which controls the water-
to allow completion of the turn.
craft direction. Turning the handlebar
to the right will turn the watercraft to
When the handlebar is brought back
the right and inversely. You need to
towards its center position, the throttle
apply throttle to steer.
reverts to idle.
88
OPERATING INSTRUCTIONS
We recommend that you familiarize
when the iBR lever is released, if
yourself with this feature during your
throttle is not applied.
first ride.
NOTE:
Tight Turns and Other Special
The throttle lever must be fully re-
Maneuvers
leased for the iBR gate to move to the
neutral position when the iBR lever is
Any tight turns or special maneuvers
released.
that will cause the air inlet openings to
be kept under water for a prolonged
If the engine is stopped in forward or
time, water will seep into the bilge.
reverse, the iBR gate will move to the
Combustion engines need air to oper-
neutral position on engine shutdown.
ate; consequently this watercraft can-
To engage neutral from forward posi-
not be totally watertight.
tion, tap the iBR lever.
NOTICE
To engage neutral from reverse posi-
If the air iinlet openings are kept
tion, release the iBR lever and throttle
under water, such as turning con-
lever.
stantly in tiight circles, pllungiing
the bow through waves, or capsiz-
How to Engage Forward
iing the watercraft, water may
To engage forward thrust from neu-
seep iinto the biilge, whiich may
tral, tap on the throttle lever.
cause severe damage to iinternal
parts of the engiine. Refer to the
The gate will move to forward thrust
Warranty sectiion contaiined iin thiis
position and the watercraft will accel-
guide.
erate forward.
To engage forward thrust from re-
How to Engage Neutral
verse, release the iBR lever while ap-
(Models with iBR)
plying throttle moderately.
To re-engage forward thrust from
WARNING
braking, simultaneously pull in the
The drive shaft and impelller are
throttle lever while releasing the iBR
always turning when the engine is
lever. The watercraft will accelerate
runniing, even when the iBR gate
forward after a short delay.
i
is set to the neutrall posiitiion. Keep
away from the propullsion system
How to Engage and Use
of the watercraft.
Reverse
Reverse can only be engaged be-
When the watercraft is first started,
tween idle speed and the threshold
the iBR system automatically sets the
forward speed of 10 km/h (6 MPH).
iBR gate to the neutral position by
default.
1. Pull in the iBR lever at least 25%
of the lever travel.
If the gate is in forward thrust position,
2. Release the iBR lever to end re-
tap the iBR lever. The gate will move
verse operation.
to neutral.
3. Apply enough throttle to stop rear-
If braking or reverse is used, the iBR
ward movement.
gate will move to the neutral position
89
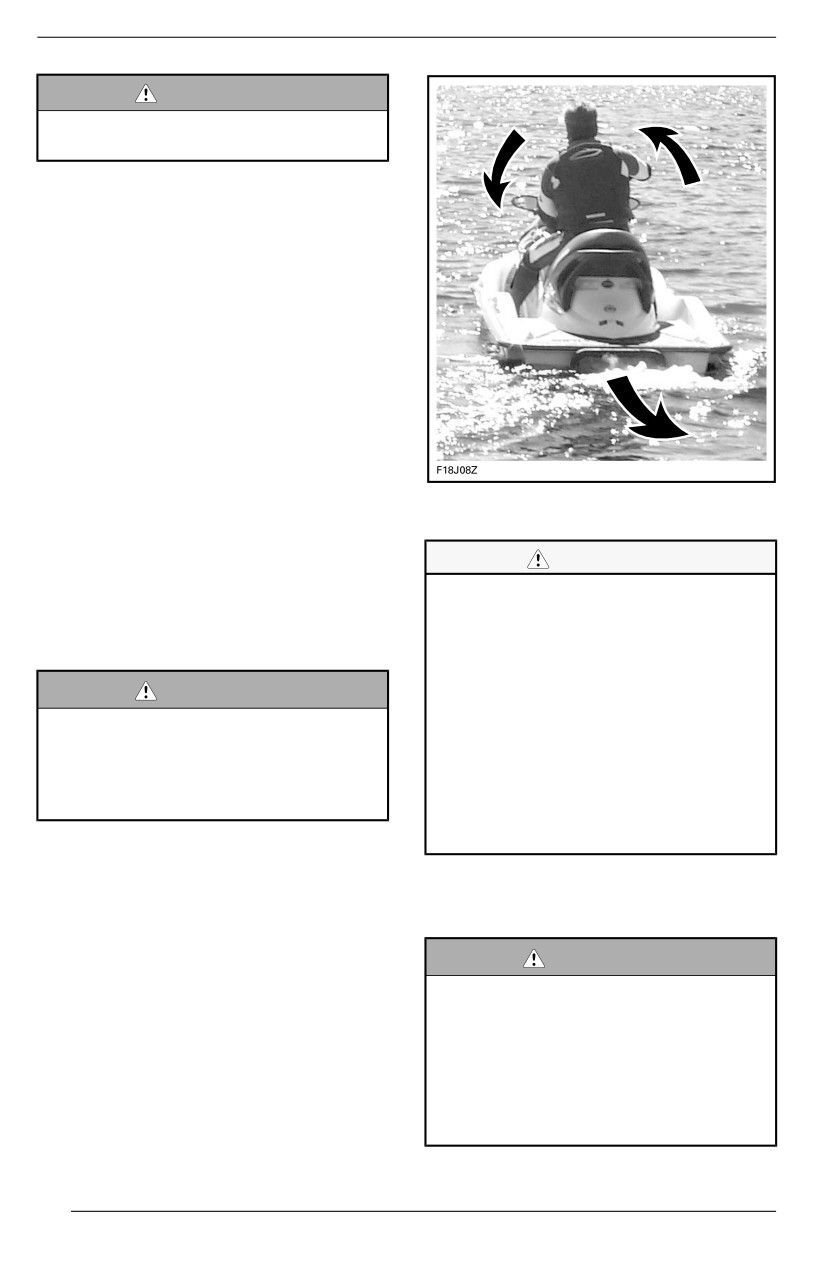
OPERATING INSTRUCTIONS
WARNING
The brake functiion has no effect
when travellling in reverse.
When operating the iBR lever in re-
verse mode, the throttle lever can be
used to control engine RPM, and thus
the amount of reverse thrust
produced.
By modulating both the iBR and throt-
tle levers simultaneously, reverse
thrust can be more precisely con-
trolled. Too much RPM will create
water turbulence and reduce reverse
efficiency.
NOTE:
Engine power will be reduced to idle
whenever the iBR lever position is
TYPICAL
- STEERING DIRECTION
RE-
changed.
VERSED WHEN BACKING
Available engine power is limited in re-
CAUTION
verse mode, which limits reverse
Steering diirectiion iin reverse
speed. However, speeds above 10
thrust is opposite of forward
km/h (6 MPH) may be obtained in re-
thrust. To steer the stern to port
verse depending on conditions.
(left) in reverse, turn the handle-
bar to starboard (right). To steer
WARNING
the stern to starboard (riight), turn
the handllebar to port (lleft). Re-
Onlly use reverse at slow speed
verse thrust operation should be
and for the shortest time possiible.
practiced in open waters in order
Always ensure the path behiind iis
to become fullly famiiliiar wiith the
cllear of objects, obstaclles and
controls and watercraft handling
people.
characteriistics before operating in
close quarters.
When operating in reverse, turn the
handlebar in the opposite direction
that you want to move the rear of the
How to Engage and Use
watercraft.
Braking
For example, to steer the rear of the
WARNING
watercraft to port (left), turn the han-
The engiine must be running to be
dlebar to starboard (right).
ablle to use the brake.The brake is
onlly appllicablle when operating in
forward movement, iit has no ef-
fect on rearward velocity.The
brake cannot prevent your water-
craft from driiftiing due to current or
wind.
90
OPERATING INSTRUCTIONS
The braking function can only be en-
CAUTION
gaged during forward operation at or
above the threshold speed of 10 km/h
As the watercraft sllows to a stop,
(6 MPH).
the wake created by the water-
craft wiill catch up and tend to
Braking is engaged and controlled
push the watercraft forward. En-
when the iBR lever on the LH handle-
sure there are no obstacles or
bar is pulled in at least
25% of its
bathers iin the directiion of travell.
travel.
If the throttle lever is still pulled in
WARNING
when releasing the iBR lever, the
Braking shoulld be practiiced in
watercraft will accelerate forward after
open waters and at graduallly in-
a short delay. Acceleration will be pro-
creasing speeds in order to be-
portional to the throttle lever position.
come fullly famiiliiar wiith the
controls and watercraft handliing
WARNING
characteriistiics.
If forward acceleration is not de-
siired when the brake lever is re-
When IBR lever is applied, the throttle
l
leased, rellease the throttlle lever.
lever command is overridden by the
IBR module to controle the decelera-
tion rate.
When at speed and the brake is first
applied, a plume of water will shoot up
CAUTION
in the air behind the watercraft which
may cause the operator of a following
When brakiing, riiders must brace
watercraft to momentarily loose sight
themselves agaiinst the decellera-
of your PWC.
tion force to prevent from moving
forward on the watercraft and llos-
i
ing balance. The operator should
WARNING
always keep both hands on the
It is iimportant to iinform other op-
handllebars, and alll passengers
erators who intends to folllow iin a
shoulld maiintaiin a fiirm grip of a
convoy formatiion of the braking
handhold or the waist of the per-
and maneuvering capabillity of
son iin front of them.
your vehiiclle, what the pllume of
water iindicates, and that a greater
diistance shoulld be maiintaiined.
WARNING
Stoppiing diistance wiilll vary de-
Braking iin a Turn
pendiing on iiniitial speed, lload,
wind, number of riders, water con-
Throttle must be applied for turning to
ditiions, and the amount of brakiing
ensure directional control. However
power commanded by the opera-
braking can be initiated during a turn
tor. Always adjust your ridiing stylle
using the iBR lever as previously de-
accordingly.
scribed. Get ready to maintain your
balance while the wake is crossing
your watercraft.
When the watercraft slows to less
than 10 km/h (6 MPH), braking mode
ends and reverse mode is engaged.
Release the iBR lever once the water-
craft is stopped. Otherwise, a rear-
ward movement will be initiated.
91
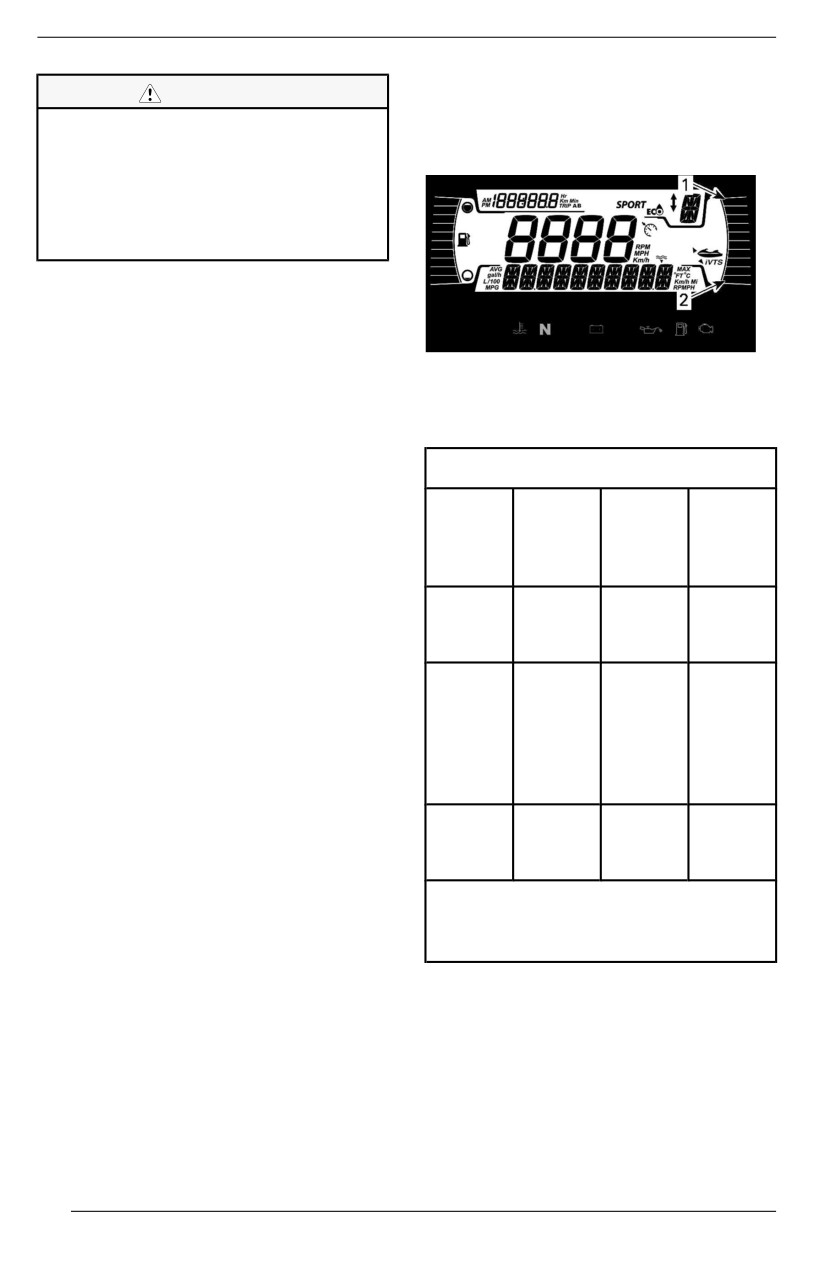
OPERATING INSTRUCTIONS
NOTE:
CAUTION
VTS position is indicated on a bar
As the watercraft slows to a stop
gauge in the right lateral display of the
whille brakiing iin a turn, the wake
information center.
created by the watercraft willl
catch up and tend to push the
watercraft siideways. Be prepared
to maintain balance as the wake
crossed the watercraft.
Variable Trim System (VTS)
The variable trim system
(VTS)
changes the vertical position of the jet
pump nozzle to provide the operator
1. Bow up
with a fast, effective system to com-
2. Bow down
pensate for load, thrust, riding position
and water conditions. Correctly ad-
VTS Trimming Methods
justed, it can improve handling, re-
Avaiilable VTS Triimmiing Methods
duce porpoising, and position the
watercraft at its best riding attitude to
Spark
Spark
Spark
attain maximum performance.
with
wiith
Triixx
When first using the watercraft, the
out
VTS
operator should become familiar with
VTS
the use of the variable trim system
VTS
-
X
X
(VTS) at varying speeds and water
trim
conditions. A mid-range trim is gener-
button
ally used when cruising. Experience
alone will dictate the best trim for the
-
VTS
X
X
conditions. During the watercraft
"Dou
break-in period, when lower speeds
ble
are recommended, it is an excellent
Click"
opportunity to become familiar with
trim
trim adjustment and its effects.
ming
When the nozzle is positioned in an
-
VTS
X
X
upward angle, the water thrust directs
"Pre
the bow of the watercraft upward. This
sets"
position is used to optimize high
speed.
X = Indicates a standard feature
- = See your Sea-Doo dealer for
When the nozzle is directed down-
availability.
ward, the bow is forced downward
and increases the watercraft turning
capabilities. As with any watercraft,
Adjustiing the VTS
speed and operator body position and
Nine trim positions are available.
movement (body English), will deter-
mine the degree and sharpness of the
With the watercraft operating-in
for-
watercraft turn. Porpoising can be re-
ward thrust, proceed as follows.
duced or eliminated if the nozzle is
downward and speed is adjusted
proportionately.
92
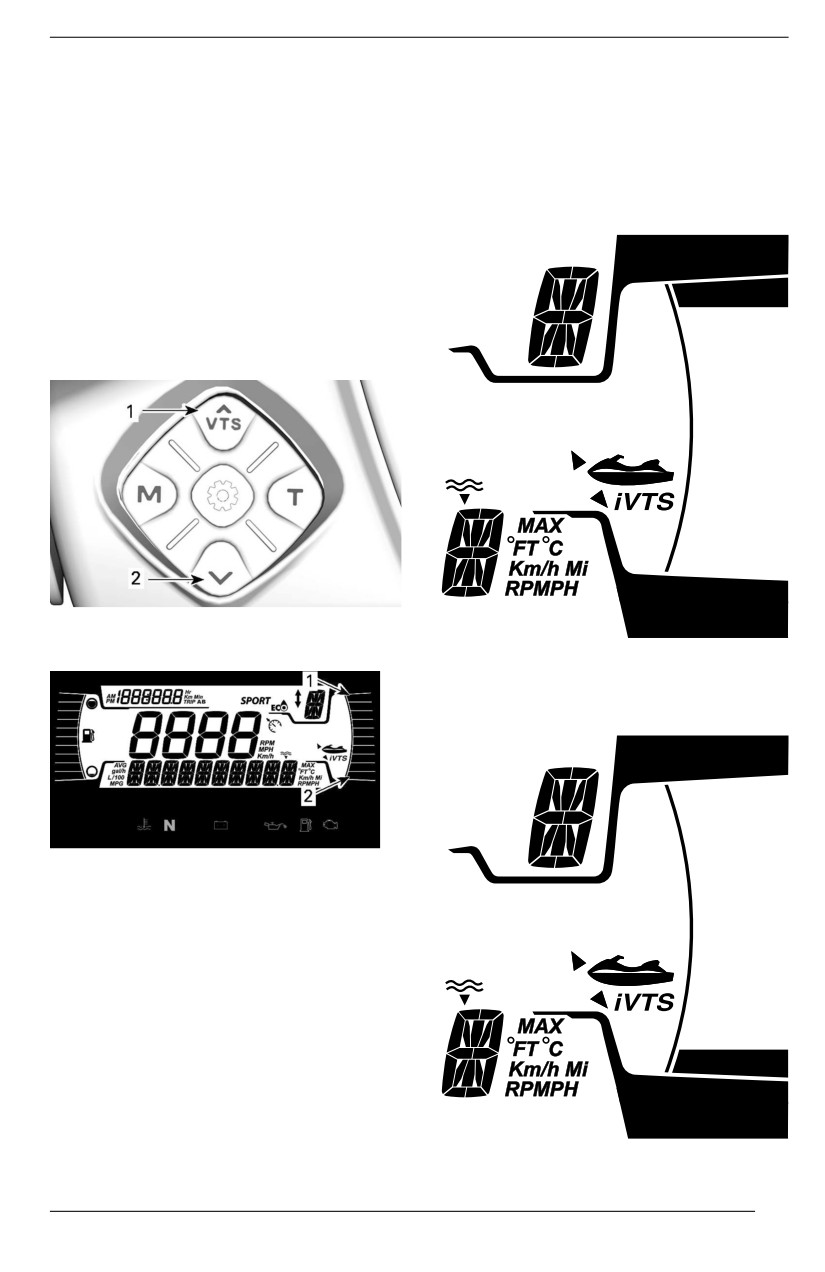
OPERATING INSTRUCTIONS
NOTE:
Usiing Preset Triim Positions
Pressing the VTS trim button without
Three preset trim positions can be
the engine in forward thrust will only
selected.
change the indication. The nozzle will
move to the selected VTS trim posi-
To select the highest trim position re-
tion when forward thrust is engaged.
corded, double-click on the VTS UP
button (bow up).
1. Press the VTS UP button once to
trim the bow of the watercraft up to
the next up trim position.
2. Press the VTS DOWN button once
to trim the bow of the watercraft
down to the next down trim
position.
1. Bow up
2. Bow down
To select the lowest trim position re-
corded, double-click on the VTS
DOWN button (bow down).
1. Bow up
2. Bow down
NOTE:
If the VTS UP or DOWN button is
pressed and held, the pump nozzle
will keep moving until the button is re-
leased at the desired trim attitude or
the maximum trim position
(up or
down) is reached.
93
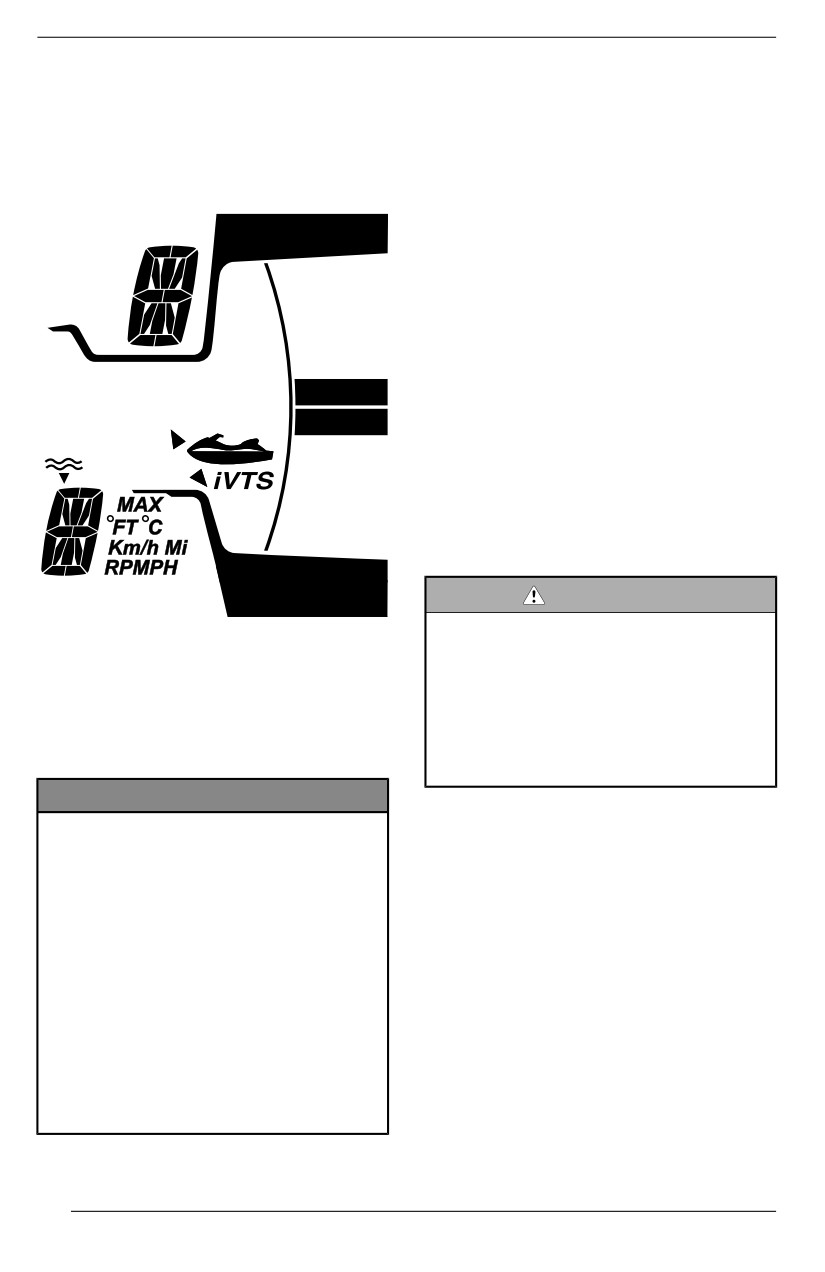
OPERATING INSTRUCTIONS
To select the mid trim position, it de-
Rough Water or Poor Visibiiliity
pends on the actual trim position.
Operation
Double-click on the VTS UP button if it
Avoid operation in these conditions. If
is positioned below mid trim or dou-
you must do so, proceed with caution
ble-click on the VTS DOWN button if it
using minimum speed.
is positioned above mid trim.
Crossiing Wakes or Waves
1. The operator must grip the handle-
bar firmly and keep both feet on
the footboards.
2. The passenger must grip the
handholds with both hands and
keep both feet on the footboards.
3. Reduce speed.
4. Always be prepared to steer and
maintain
your balance as
necessary.
5. When going over waves, raise
your body slightly off the seat to
absorb the shocks with your legs.
6. When crossing wakes, always
keep a safe distance from water-
craft ahead.
WARNING
When crossing wakes or waves,
slow down. Operator and passen-
NOTE:
ger(s) shoulld brace themselves
These preset
trim
positions
are
not
and adopt a semi-standiing posi-
adjustable.
tion to help absorb the bumps.Do
not jjump wakes or waves - jump-
General Operating
ing can cause iinjjuries such as
Recommendations
back or spiinall injjury (paralysis).
NOTICE
Combustiion engines need air to
Stopping/Docking
operate; consequently thiis water-
When the throttle is released, the
craft cannot be totallly watertiight.
watercraft is slowed by water drag
Any maneuvers such as turning
against the hull. The stopping dis-
constantlly in tight ciirclles, pllung-
tance will vary depending on the
iing the bow through waves, or
watercraft size, weight, speed, water
capsiizing the watercraft, that
surface condition, presence and direc-
cause the aiir iinllet openings to be
tion of wind and current.
under water may cause severe
engine probllems due to water in-
The iBR system can also be used for
gestiion. Refer to How to Steer the
slowing down or for stopping more
Watercraft iin the Operatiing In-
quickly, and for increasing maneuver-
structiions section and the War-
ability especially when docking.
ranty sectiion contaiined iin thiis
The operator should practice in open
Operator’’s Guiide.
waters at various speeds to become
familiarized
with
the
stopping
94
OPERATING INSTRUCTIONS
distances under different conditions.
move the stern to the right when back-
Stopping using the iBR system in a
ing up, and vice-versa.
straight line and in a turn should be
practiced extensively to become famil-
WARNING
iar with the handling characteristics of
Diirectional control is reduced
the watercraft under partial or full
when the throttle is relleased and
braking conditions.
l
lost when engine is off. Steering
diirection iis reversed when operat-
i
ing the watercraft in reverse.
WARNING
Allways practice brakiing iin open
Beaching
waters ensuring there are no
watercrafts or boats iin your iimme-
NOTICE
diate viicinity, especiiallly astern.
Other users of the waterways may
It is not recommended to run the
not be able to maneuver or stop iin
watercraft to the beach.
time to avoiid you should you un-
expectedlly come to a fulll stop in
Drive slowly towards the beach and
front of them.
shut off the engine before the water is
less than 90 cm (3 ft) deep under the
lowest rear portion of the hull. Then
pull the watercraft to the beach.
WARNING
It is important to inform other op-
NOTICE
erators who iintend to folllow iin a
Riidiing the watercraft in shalllow
convoy formation of the brakiing
water may resullt in damage to the
and maneuveriing capabiiliity of
i
impelller, iiBR components, or oth-
your vehicle and that a greater
er jjet pump components. Allways
distance should be maintained.
shut off the engine before water is
l
less than 90 cm (3 ft) deep and
The operator should also practice
never use reverse or braking.
docking with an imaginary dock using
the various controls available (iBR lev-
er and throttle lever).
Release the throttle at a sufficient dis-
tance before the expected landing
area.
Reduce speed to idle.
Maneuver using a combination of the
iBR lever and throttle lever, shifting to
neutral, reverse, or forward as
required.
Remember that when operating in re-
verse, steering direction is reversed.
Turning the handlebars to the left will
95
OPERATING MODES
Spark
Operating modes availlablle
Spark 60
Spark 90
Triixx
Touring mode (Default riding mode)
X
X
X
Sport mode
N/A
X
X
Trixx mode
N/A
N/A
X
ECO mode
X
X
X
X = Indicates a standard feature
N/A = Not Applicable
96
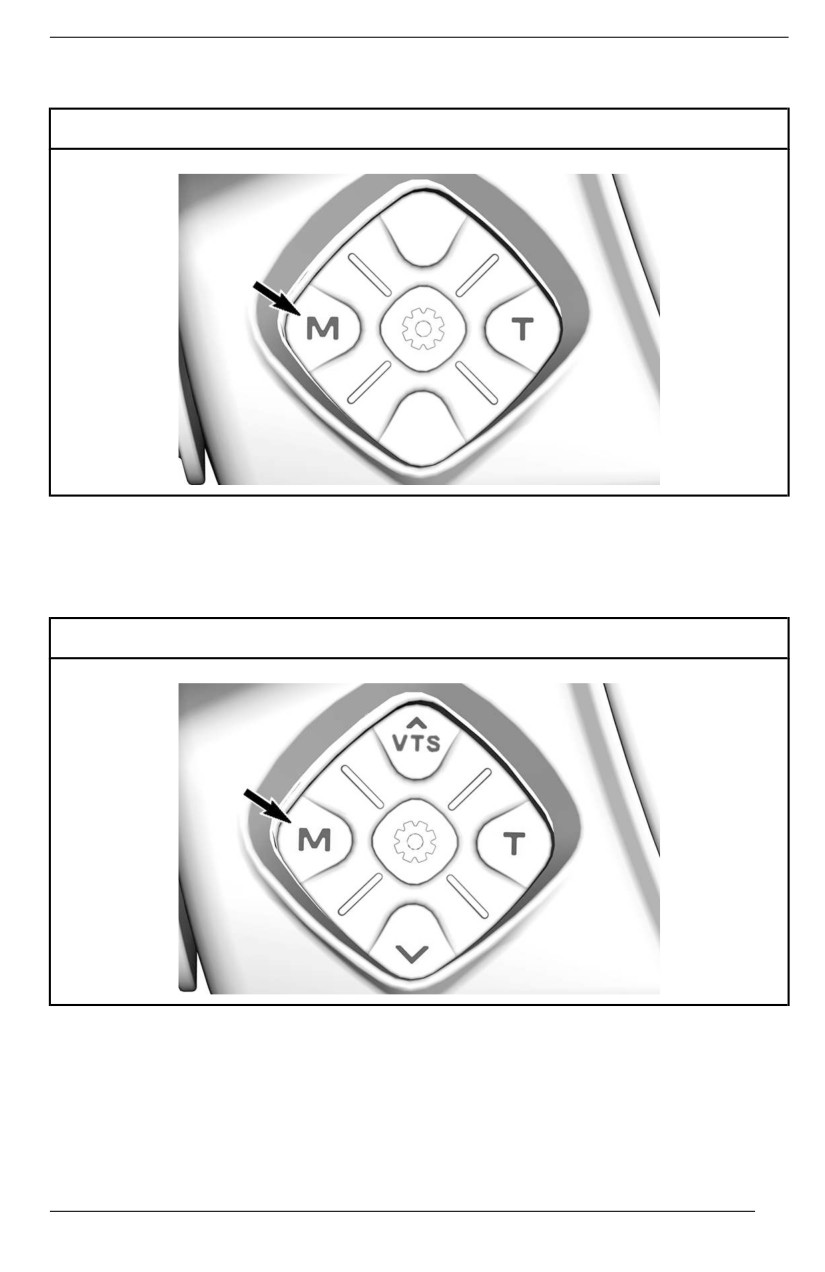
OPERATING MODES
To change the operating mode wiith Spark 60
Spark 60 keypad
- Press MODE button will activate the ECO mode.
- Pressing MODE button again will deactivate the ECO mode and returning to
default riding mode.
To change the operating mode wiith Spark 90 and Spark Triixx
Spark 90 and Spark Triixx keypad
- Pressing MODE button will select SPORT mode. To activate or deactivate
SPORT mode see instructions below.
- Pressin MODE button again will select TRIXX mode. To activate or deactivate
TRIXX mode see instructions below. (Spark Trixx models only),
- Pressing MODE button again will activate the ECO mode.
- Pressing MODE button again will deactivate the ECO mode and returning to
default riding mode.
97
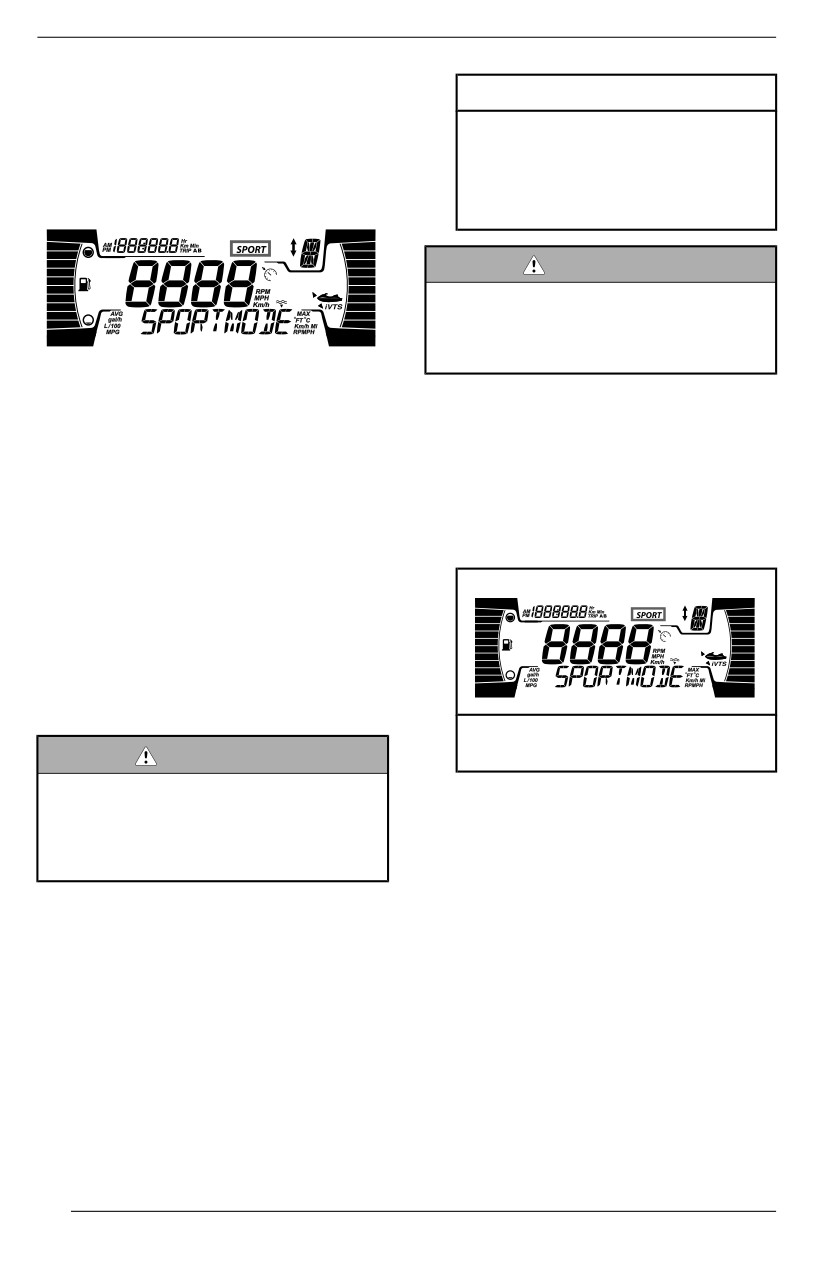
OPERATING MODES
Default Riding Mode
MESSAGE DISPLAYED
By default, the watercraft is set to DE-
SPORT MODE - INCREASED
FAULT riding mode of operation when
ACCELERATION - INSTRUCT
started.
PASSENGERS TO HOLD -
HOLD MODE BUTTON TO
Sport Mode
CONFIRM
WARNING
Ensure passengers are adviised
that sport mode provides for iin-
creased accelleratiions and that
they are to hold on tightlly.
SPORT MODE provides for instant
throttle response and more rapid ac-
3. Press and hold the MODE button
celerations than TOURING MODE.
for at least 3/4 of a second to acti-
vate sport mode.
A SPORT mode indicator is ON in the
multifunction gauge to confirm the ac-
One beep will be heard and Sport
tive mode of operation.
mode icon stop to flash, to confirm
that sport mode has been
Once activated, SPORT MODE will
activated.
remain active until it is deactivated by
the operator, or the engine is shut
down whereby it defaults back to
TOURING MODE.
Activating Sport Mode
To activate sport mode, carry out the
following:
SPORT mode indicator stop to
WARNING
flash.
When activatiing sport mode, be
sure to maiintaiin siituational
NOTE:
awareness of other watercraft,
After a few seconds, the gauge will re-
obstacles, or persons iin the
vert to its normal display.
water.
4. Ensure the SPORT mode indicator
is turned on.
1. Start engine.
2. Press the MODE button to select
NOTE:
sport mode
The SPORT mode indicator will come
Two beeps will be heard and the
on and stay on as long as sport mode
following message will be dis-
is active. If the throttle is not fully re-
played in the multifunction gauge:
leased and the engine is not at idle,
SPORT mode cannot be activated.
The following message will then ap-
pear in the multifunction gauge.
98
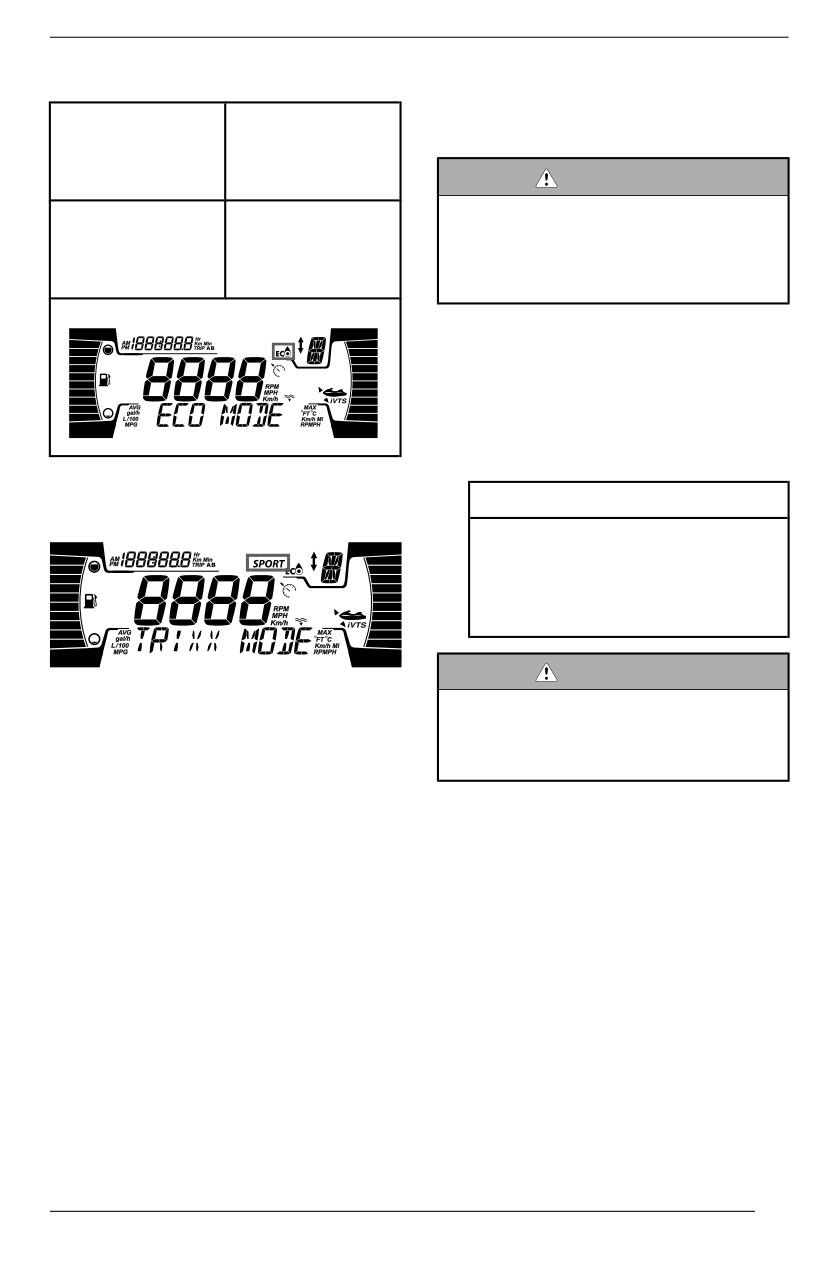
OPERATING MODES
Deactiivatiing Sport Mode
Activating Trixx Mode
To activate Trixx mode, carry out the
Spark 90
Press once time
following:
on MODE button
will take you to
the ECO mode.
WARNING
When activatiing Trixx mode, be
Spark Trixx
Press twice time
sure to maiintaiin siituational
on MODE button
awareness of other watercraft,
will take you to
obstacles, or persons iin the
the ECO mode.
water.
1. Start engine.
2. Press the MODE button twice to
select Trixx mode.
Two beeps will be heard and the
following message will be dis-
played in the multifunction gauge:
Trixx Mode (Trixx models
MESSAGE DISPLAYED
only)
TRIXX MODE - INCREASED
ACCELERATION - INSTRUCT
PASSENGERS TO HOLD -
HOLD MODE BUTTON TO
CONFIRM
WARNING
Trixx MODE provides for instant throt-
Ensure passengers are advised
tle response and more rapid accelera-
that Trixx mode provides for in-
tions than DEFAULT riding MODE.
creased accelerations and that
Trixx mode also increases the reactiv-
they are to holld on tiightly.
ity of IBR. Reverse speed is increased
and braking behaviour is also
different.
3. Press and hold the MODE button
for at least 3/4 of a second to acti-
Once activated, TrixxMODE will re-
vate Trixx mode.
main active until it is deactivated by
the operator, or the engine is shut
One beep will be heard and Sport
down whereby it defaults back to DE-
mode icon stop to flash, to confirm
FAULT riding MODE.
that sport mode has been
activated.
99
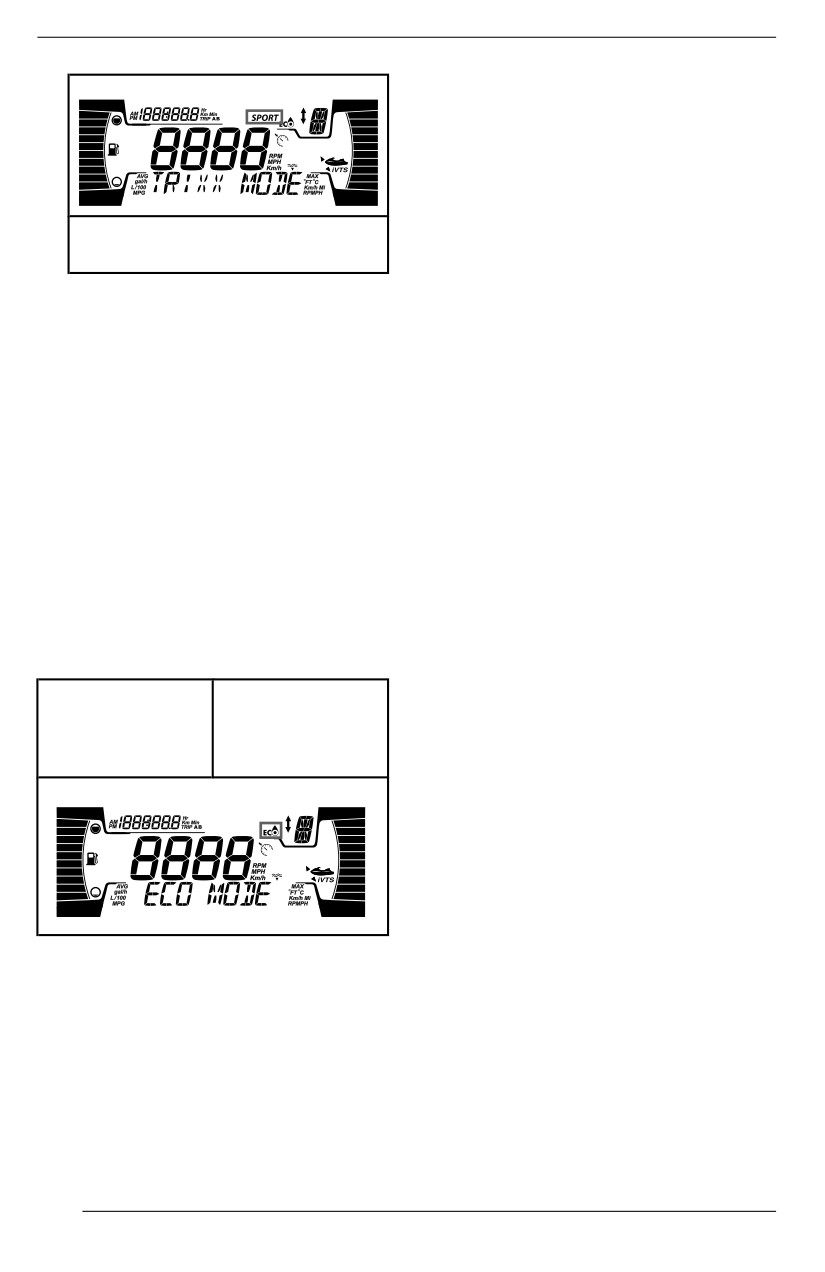
OPERATING MODES
SPORT mode indicator stop to
flash.
NOTE:
After a few seconds, the gauge will re-
vert to its normal display.
4. Ensure the SPORT mode indicator
is turned on.
NOTE:
The SPORT mode indicator will come
on and stay on as long as Trixx mode
is active. If the throttle is not fully re-
leased and the engine is not at idle,
trixx mode cannot be activated. The
following message will then appear in
the multifunction gauge.
Deactivating Trixx Mode (Trixx
models only)
Spark Triixx
Press once time
on MODE button
will take you to
the ECO mode.
ECO Mode
(Fuel Economy Mode)
ECO mode provides a smoother throt-
tle application and increased fuel
economy.
100
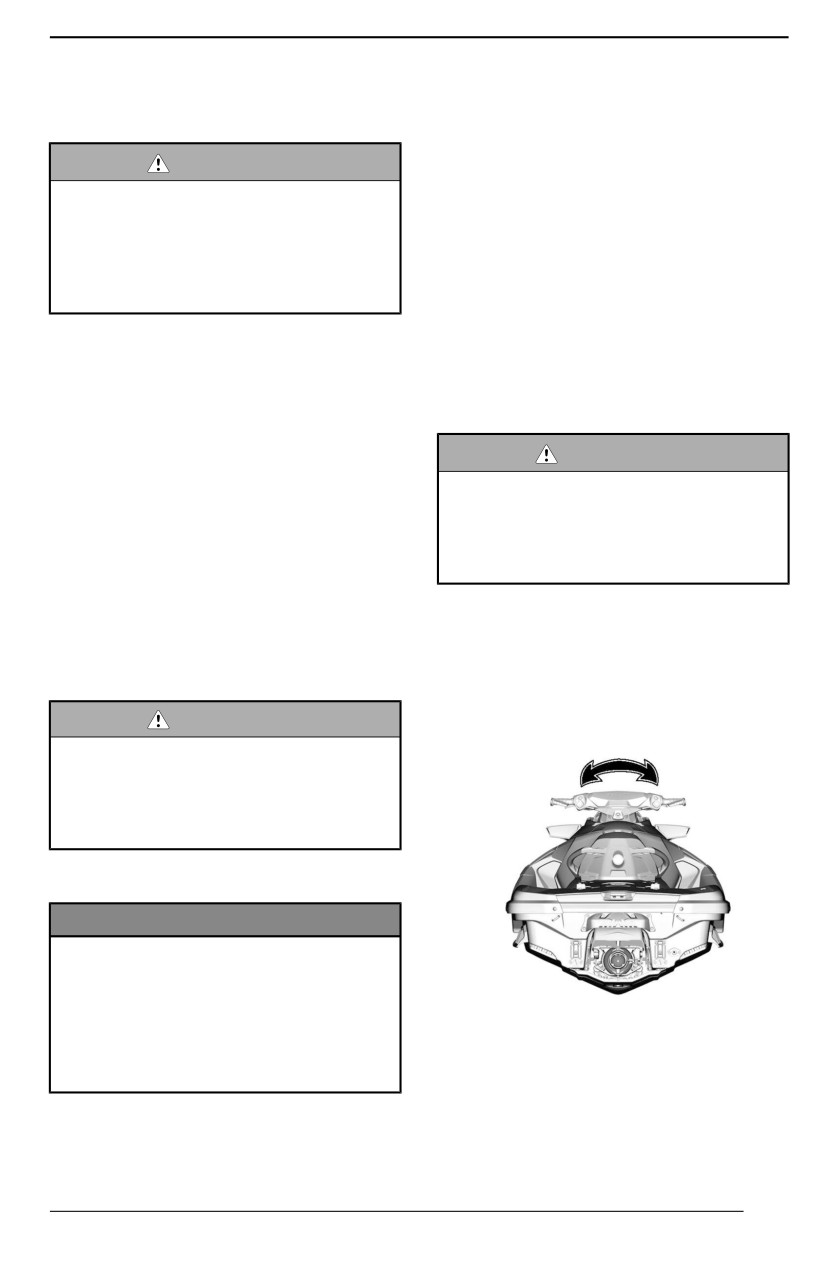
SPECIAL PROCEDURES
Jet Pump Water Intake and
2. Start engine and make sure water-
craft operates properly.
Impeller Cleaning
If the aforementioned method does
WARNING
not work:
Keep away from intake grate
3. With engine running and before
whiile engine is running. Items
applying throttle, pull the iBR lever
such as long haiir, lloose clothing
in to select reverse operation.
or personal flotatiion device straps
4. Vary throttle quickly several times.
can become entanglled iin moviing
5. Repeat procedure if necessary.
parts.
If system is still blocked, move the
watercraft out of the water for
Weeds, shells or debris can get
cleaning. Refer to On-Beach
caught on the intake grate, drive shaft
Water Cleaning.
and/or impeller. A clogged water in-
take may cause troubles such as:
On-Beach Water Cleaning
- Caviitation: Engine speed is high
but watercraft moves slowly due to
WARNING
reduced jet thrust, jet pump com-
The tether cord MUST BE RE-
ponents may be damaged.
MOVED from the engiine cut-off
- Overheating: Since the jet pump
switch to prevent accidentall en-
operation controls the flow of water
giine startiing before clleaning the
to cool the exhaust system, a
jjet pump area.
clogged intake will cause the en-
gine to overheat and damage en-
1. Place a cardboard or a carpet be-
gine internal components.
side the watercraft to prevent
A weed clogged area can be cleaned
scratching when turning the water-
as follows:
craft for cleaning.
2. Rotate the watercraft to any side
WARNING
for cleaning.
If it is necessary to reach in to re-
move any foreiign object caught iin
the propulsion system, the tether
cord MUST BE REMOVED from
the engine cut-off switch.
In-Water Cleaning
NOTICE
Ensure there is at least 90 cm (3
ft) of water under the lowest rear
portiion of the hulll when alll pas-
sengers are aboard priior to start-
TYPICAL
i
ing the engine. Otherwise damage
3. If equipped, move the iBR to the
to the propullsiion system compo-
forward position. Refer to iBR
nents may occur.
Override Function for detailed
instructions.
4. Clean the water intake area.
1. Rock the watercraft several times.
Most of the time, this will remove
the blockage.
101
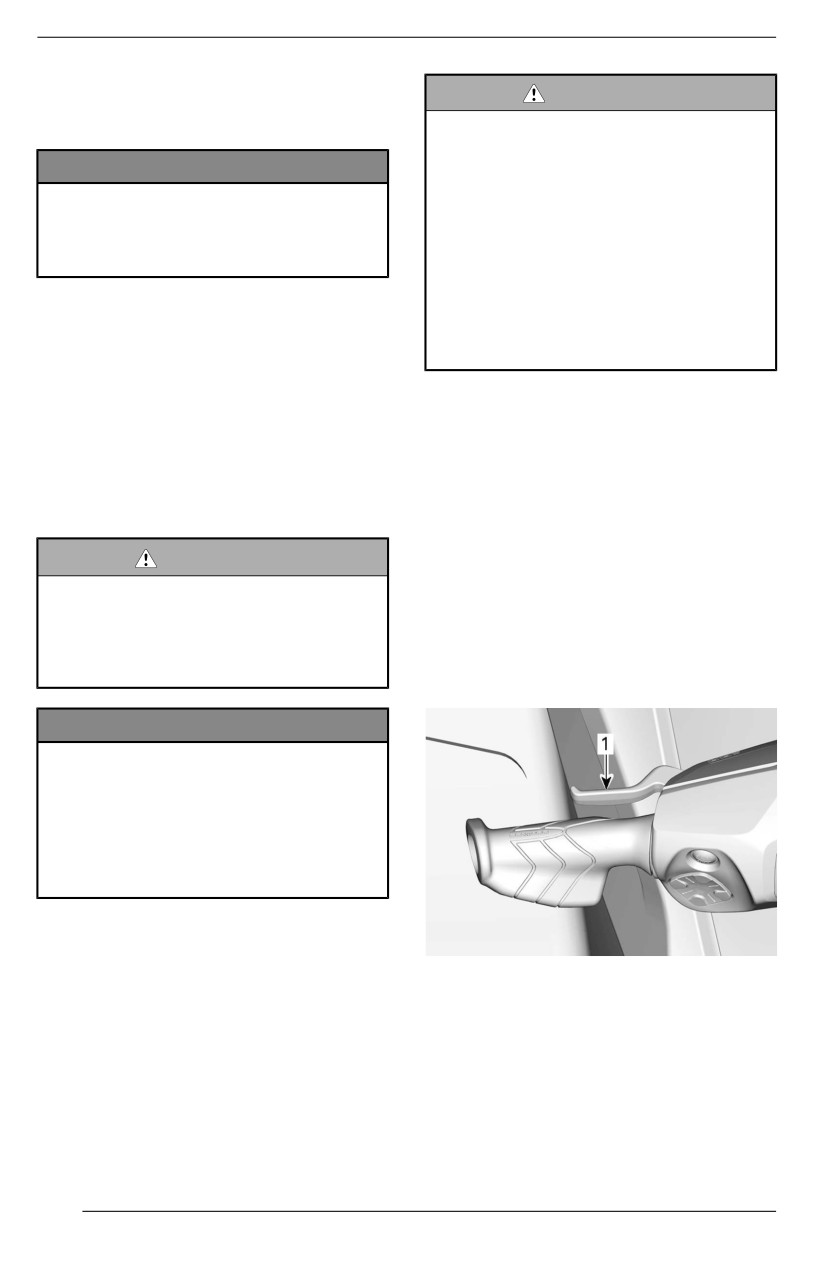
SPECIAL PROCEDURES
If the system is still clogged, refer
WARNING
to an authorized Sea-Doo dealer
for servicing.
If iit is necessary to reach in to re-
move any foreign object caught iin
NOTICE
the propullsion system, strictly ob-
serve the folllowiing before
Inspect water intake grate for
proceeding:
damage. Refer to an authorized
– Remove tether cord from the
Sea-Doo dealler for repair as
engine cut-off switch.
necessary.
– Wait at least 5 miinutes.
– Do not press on START/STOP
iiBR Overriide Functiion
button. Shoulld the START /
STOP button be pressed, waiit
When the iBR override function is acti-
another 5 miinutes.
vated, it allows the user to electrically
move the iBR gate and nozzle through
its full range of motion using the VTS
Actiivating iiBR Override Functiion
control button.
1. Power up the electrical system by
pressing the START/STOP button.
NOTE:
2. Install the tether cord on the en-
The iBR override function is only avail-
gine cut-off switch.
able when the engine is not running.
NOTE: The tether cord must be in-
WARNING
stalled to ensure the information cen-
ter will not shut off all indications after
When moviing the iBR gate using
its self test function. Electrical power
the iBR override function, ensure
will stay on for approximately 1 hour.
no one is near the rear of the
watercraft. Movement of the gate
3. Pull in and hold the iBR lever for
may squeeze fiingers.
the entire procedure.
NOTICE
An objject or tooll caught iin the iiBR
system when using the iiBR over-
ride functiion may cause damage
to the iiBR components. Remove
alll riigid foreiign objjects that may
obstruct the iiBR gate travel before
moviing iit.
1. iBR lever pulled and held
4. When the IBR OVERRIDE
-
PRESS MODE BUTTON mes-
sage appears in the multifunction
gauge, press the MODE button.
When the function is activated, a
ON message will be shown.
102
//////////////////////////////////////////