Kawasaki Diesel MULE 4010 TRANS 4x4 (KAF950G9). Manual - part 25
 

  Index      Engines     Kawasaki Diesel MULE 4010 TRANS 4x4 (KAF950G9) - service manual


Search            


Content   ..  23  24  25  26   ..


Kawasaki Diesel MULE 4010 TRANS 4x4 (KAF950G9). Manual - part 25


3-30 FUEL SYSTEM

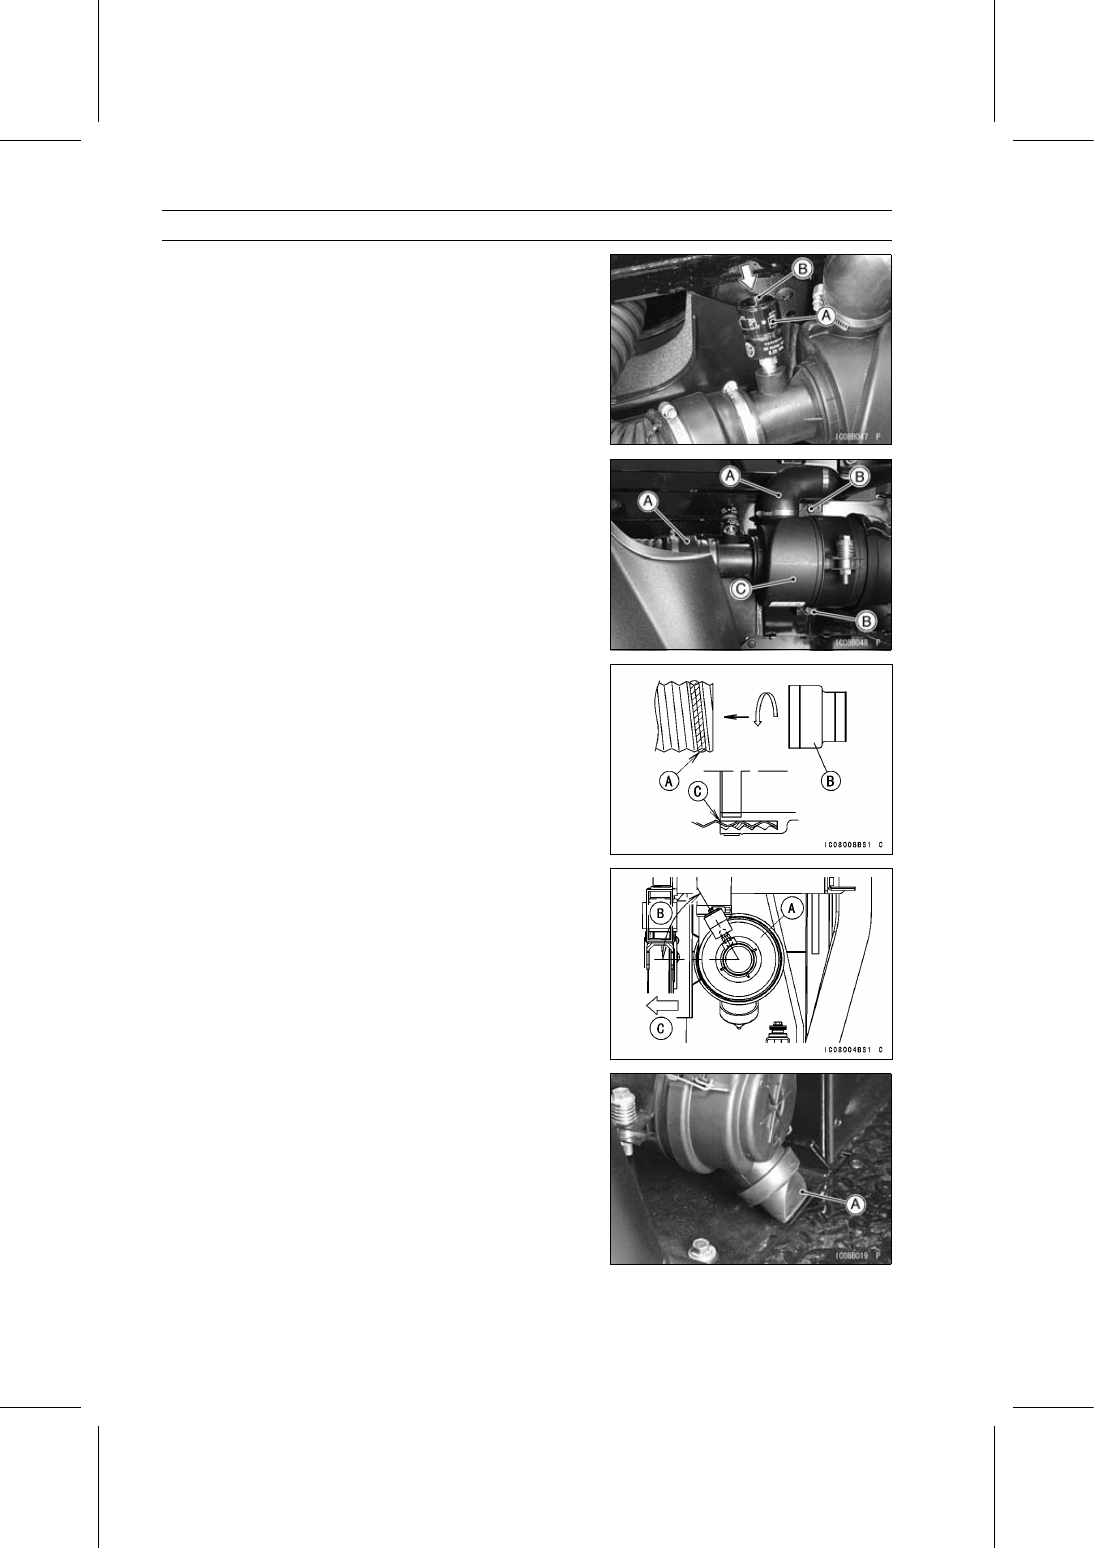
Air Cleaner

Reset the air filter restriction gauge [A].

After servicing the air cleaner element, the restriction
gauge should be reset by pushing the button [B] at the
end of the gauge.

Air Cleaner Housing Removal

Tilt up the seat.

Remove:

Air Ducts [A]
Air Cleaner Housing Mounting Bolts [B]
Air Cleaner Housing [C]

Air Cleaner Housing Installation

Apply sealant to the area [A] shown in the figure.

Sealant - General Electric: RTV100 (Black)

Do not apply sealant to the inside [C] of the duct.

Install the air ducts [B] and tighten the clamp screws.

Install the air cleaner housing [A] as shown in the figure.

Approximately 60° [B]
Inside [C]

Tighten:

Torque - Air Cleaner Housing Mounting Bolts: 20 N·m (2.0

kgf·m, 15 ft·lb)

Air Cleaner Housing Dust and/or Water Inspection

Push open the drain tube [A] on the bottom of the air
cleaner housing.

FUEL SYSTEM 3-31

Fuel Filter

Fuel Filter Removal

Tilt up the cargo bed.

Remove:

Clamp [A]
Fuel Hose [B]
Fuel Filter Mounting Bolts [C]

Remove:

Clamp [A]
Fuel Hose [B]
Fuel Filter [C]

Fuel Filter Installation

Install:

Fuel Filter
Fuel Hoses (see Cable, Wire, and Hose Routing section
in the Appendix chapter)

Tighten:

Torque - Fuel Filter Mounting Bolts: 20 N·m (2.0 kgf·m, 15

ft·lb)

Bleed the air from the fuel filter.

Loosen the air vent plug [A].

Pump the priming button [B] until the fuel comes out of
the air vent.

Tighten the air vent plug securely.

Torque - Air Vent Plug: 5.0 N·m (0.51 kgf·m, 44 in·lb)

Wipe up any spilled fuel.

Start the engine, and check for fuel leakage.

Fuel Filter Cartridge Replacement

Refer to the Fuel Filter Element Replacement in the Peri-
odic Maintenance chapter.

Water Draining

Refer to the Fuel Filter Water Draining in the Periodic
Maintenance chapter.

3-32 FUEL SYSTEM

Fuel Tank

Fuel Tank Removal

WARNING

Fuel is extremely flammable and can be explosive
under certain conditions. Turn the main switch off.
Do not smoke. Make sure the area is well ventilated
and free from any source of flame or sparks; this
includes any appliance with a pilot light.

Remove:

Front Seat Lower Cover Front and Rear (see Floor Cen-
ter Panel Removal in the Frame chapter)
Fuel Tank Cap [A]
Screws [B]
Front Seat Lower Cover Right [C]

For KAF950G9

∼ GC/HA

Remove:

Clamps and Fuel Hoses [A]
Clamp and Air Vent Hose [B]
Bolt [C] and Washer

Remove:

Bolt [A], Washer and Nut
Bolt [B] and Washer
Fuel Tank [C]

For KAF950GD

Disconnect the fuel level gauge lead connector.

Remove the clamps and fuel hoses [A].

FUEL SYSTEM 3-33

Fuel Tank

Remove the clamp [A] and air vent hose [B].

Remove the bolt [A] and washer.

Remove:

Bolt [A], Washer and Nut
Bolt [B] and Washer
Fuel Tank [C]

Fuel Tank Installation

Check that the dampers [A] are in place on the fuel tank.

[B] KAF950G9, GA/HA
[C] KAF950GB


Content   ..  23  24  25  26   ..