Toyota FJ Cruiser (GSJ 10, 15 series). Manual - part 202
EXTERIOR – FRONT DOOR GLASS WEATHERSTRIP
ET–39
ET
REMOVAL
HINT:
The procedure described below is for the LH side. Use the
same procedure for both the RH and LH sides, unless
otherwise specified.
1.
DISCONNECT CABLE FROM NEGATIVE BATTERY
TERMINAL
2.
REMOVE FRONT DOOR ARMREST BASE UPPER
PANEL
HINT:
Use the same procedure as for the RH side (See page
).
3.
REMOVE FRONT DOOR TRIM BOARD SUB-
ASSEMBLY
HINT:
Use the same procedure as for the RH side (See page
).
4.
REMOVE FRONT DOOR NO. 2 SERVICE HOLE
COVER
HINT:
Use the same procedure as for the RH side (See page
).
5.
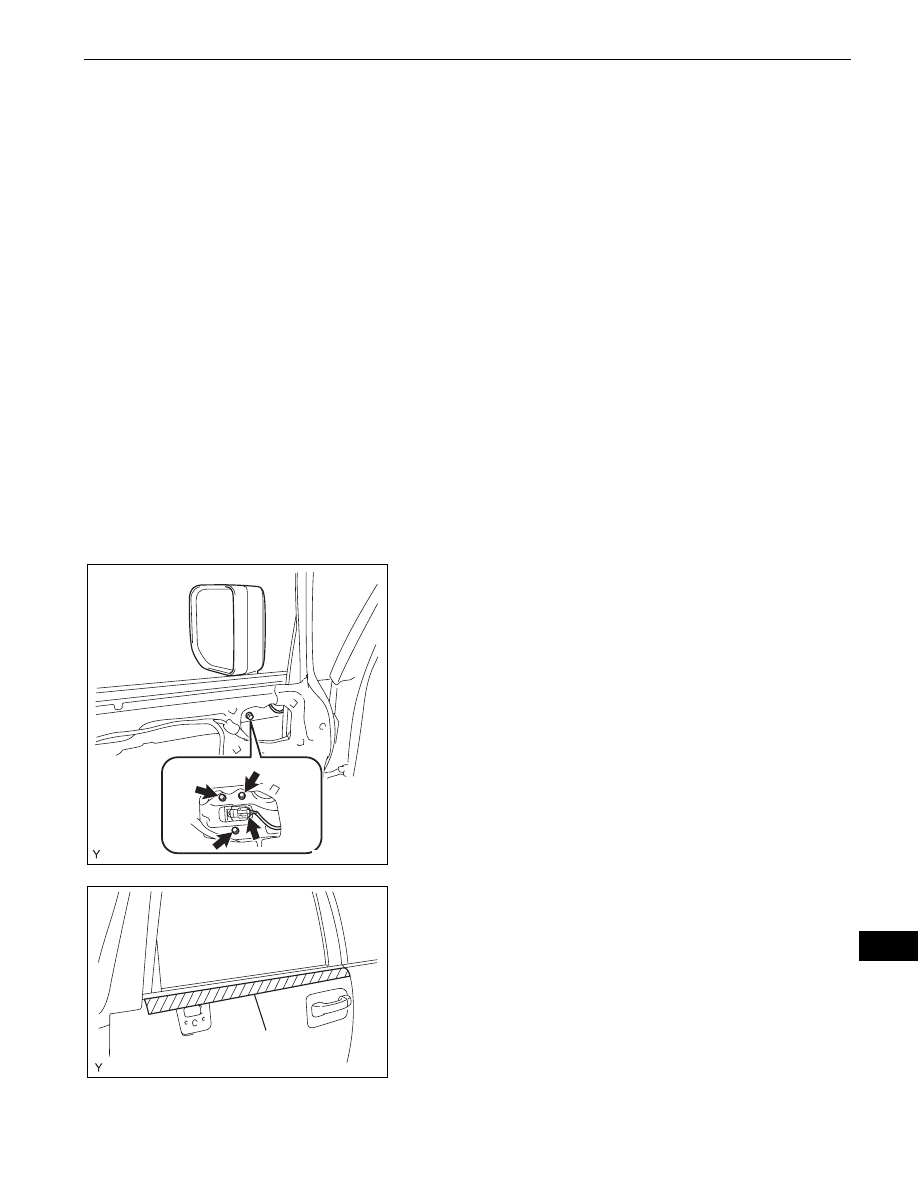
REMOVE OUTER REAR VIEW MIRROR ASSEMBLY
(a) for Driver Side:
(1) Provisionally install the power window regulator
master switch.
(b) for Front Passenger Side:
(1) Provisionally install the power window regulator
switch.
(c) Close the door glass.
(d) Disconnect the connector.
(e) Remove the 3 bolts and the outer rear view mirror.
NOTICE:
Do not drop or damage the outer rear view
mirror when removing the bolts.
6.
REMOVE FRONT DOOR GLASS OUTER
WEATHERSTRIP ASSEMBLY
(a) Apply protective tape to the front door panel in the
area around the front door glass outer weatherstrip.
B135564
Protective Tape
B135099E01