Peugeot Expert (2006 year). Manual - part 4
 

  Index      Peugeot     Peugeot Expert - service manual 2006 year in english


Search            copyright infringement  


Content   ..  2  3  4  5   ..


Peugeot Expert (2006 year). Manual - part 4


51

-

Access and starting

ELECTRONIC ENGINE 

IMMOBILISER

This  locks  the  engine  control  sys-

tem as soon as the ignition has been 

switched  off  and  therefore  prevents 

starting of the vehicle by anyone who 

does not have the key.

The ignition key has an electronic chip 

which  has  a  special  code.  When  the 

ignition is switched on, the code must 

be recognised for the vehicle to start.

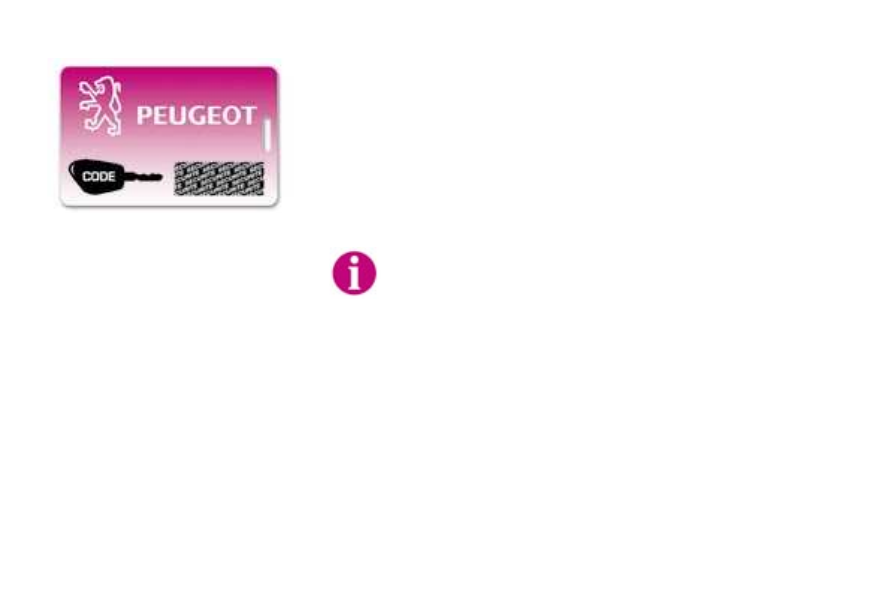
CONFIDENTIAL CARD

This  is  given  to  you  on  delivery  of 

your vehicle with the duplicate keys.

It  contains  the  identification code

necessary  for  any  work  carried  out 

by a PEUGEOT dealer on the elec-

tronic immobiliser system. This code 

is hidden by a film, which should be

removed only if necessary.

Keep  your  card  in  a  safe  place, 

never inside the vehicle. 

When undertaking a long trip or jour-

ney, however, it is advisable to take 

it  with  you  along  with  your  personal 

papers.

Make a careful note of the 

number  of  each  key.  This 

number is coded on the la-

bel attached to the key. 

If  the  keys  are  lost,  your 

PEUGEOT dealer can rapidly supply 

you with new keys.

The high frequency remote control is 

a sensitive system; do not operate it 

while it is in your pocket as there is a 

possibility that it may unlock the vehi-

cle, without you being aware of it.

The remote control does not operate 

when the key is in the ignition, even 

when  the  ignition  is  switched  off,  

except for reprogramming.

Driving  with  the  doors  locked  may 

make access to the passenger com-

partment by the emergency services 

more difficult in an emergency.

As a safety precaution (with children 

on board), remove the key from the 

ignition when you leave the vehicle, 

even for a short time.

Do not repeatedly press the buttons 

of your remote control out of range of 

your vehicle.

You  run  the  risk  of  stopping  it  from 

working and the remote control would 

have to be reprogrammed.

When purchasing a second-hand ve-

hicle:

-  ensure that you are given the confi-

dential card;

-  have the key codes memorised by a 

PEUGEOT dealer, to ensure that the 

keys in your possession are the only 

ones which can start the vehicle.

Do not make any modifications to the

electronic engine immobiliser system.

If the system does not function cor-

rectly,  the  electronic  engine  immobi-

liser warning light, situated in the centre 

of the fascia, flashes rapidly when the

ignition  is  switched  on  (2nd  notch).  In 

this case your vehicle will not start.

Contact a PEUGEOT dealer as soon 

as possible.

51

-

Access and starting

ELECTRONIC ENGINE 

IMMOBILISER

This  locks  the  engine  control  sys-

tem as soon as the ignition has been 

switched  off  and  therefore  prevents 

starting of the vehicle by anyone who 

does not have the key.

The ignition key has an electronic chip 

which  has  a  special  code.  When  the 

ignition is switched on, the code must 

be recognised for the vehicle to start.

CONFIDENTIAL CARD

This  is  given  to  you  on  delivery  of 

your vehicle with the duplicate keys.

It  contains  the  identification code

necessary  for  any  work  carried  out 

by a PEUGEOT dealer on the elec-

tronic immobiliser system. This code 

is hidden by a film, which should be

removed only if necessary.

Keep  your  card  in  a  safe  place, 

never inside the vehicle. 

When undertaking a long trip or jour-

ney, however, it is advisable to take 

it  with  you  along  with  your  personal 

papers.

Make a careful note of the 

number  of  each  key.  This 

number is coded on the la-

bel attached to the key. 

If  the  keys  are  lost,  your 

PEUGEOT dealer can rapidly supply 

you with new keys.

The high frequency remote control is 

a sensitive system; do not operate it 

while it is in your pocket as there is a 

possibility that it may unlock the vehi-

cle, without you being aware of it.

The remote control does not operate 

when the key is in the ignition, even 

when  the  ignition  is  switched  off,  

except for reprogramming.

Driving  with  the  doors  locked  may 

make access to the passenger com-

partment by the emergency services 

more difficult in an emergency.

As a safety precaution (with children 

on board), remove the key from the 

ignition when you leave the vehicle, 

even for a short time.

Do not repeatedly press the buttons 

of your remote control out of range of 

your vehicle.

You  run  the  risk  of  stopping  it  from 

working and the remote control would 

have to be reprogrammed.

When purchasing a second-hand ve-

hicle:

-  ensure that you are given the confi-

dential card;

-  have the key codes memorised by a 

PEUGEOT dealer, to ensure that the 

keys in your possession are the only 

ones which can start the vehicle.

Do not make any modifications to the

electronic engine immobiliser system.

If the system does not function cor-

rectly,  the  electronic  engine  immobi-

liser warning light, situated in the centre 

of the fascia, flashes rapidly when the

ignition  is  switched  on  (2nd  notch).  In 

this case your vehicle will not start.

Contact a PEUGEOT dealer as soon 

as possible.

52 - Access and starting

FRONT DOORS AND SLIDING 

SIDE DOOR

Opening the doors from outside 

(front and side doors)

Opening the doors from inside 

(front doors)

The  front  door  opening  controls  per-

mit complete unlocking of the vehicle.

Locking/Unlocking from the 

inside
Front door

To lock, lower button 

A.

To unlock and open, lift button 

A and 

pull the handle towards you.

The opening/closing control of one of 

the front doors permits complete un-

locking/locking of the vehicle.

Sliding side door

The side door opening/closing control 

only controls the door concerned.

To lock, push down button 

B.

To  unlock  and  open,  raise  button 

B 

and pull the handle towards the rear.

Note:  the  sliding  side  door  can  be 

secured in the fully open position. To 

release  it,  pull  the  handle  firmly to-

wards the front and slide the door.

Side door child lock

This  prevents  opening  of  the  side 

door from the inside.
 

Turn the control a quarter turn us-

ing the ignition key.

53

-

Access and starting

HINGED REAR DOORS

Opening the doors from outside

To open, pull the rear right door han-

dle  towards  you  and  open  the  rear 

left  door  by  pulling  the  lever  on  the 

inside.

Locking/Unlocking from inside 

(Van)

To unlock and open, pull the handle 

towards you.

To  open  the  other  door,  push  le-

ver 

A.

Note: when closing from the inside, 

close the vehicle’s left-hand door first

ensuring  that  lever 

A is in the verti-

cal position then close the right-hand 

door.

Opening the hinged rear doors to 

180°

To  open  the  rear  doors  to  180°,  re-

lease the check strap 

B towards you 

when the door is partially open.

When  closing  the  door,  the  check 

strap hooks itself in place again au-

tomatically.

Opening the doors from inside

Each  opening  control  only  unlocks 

the door concerned.

54 - Access and starting

OPENING THE BONNET

Inside  the  vehicle:  pull  the  handle 

on  the  right-hand  side,  under  the 

fascia.

BONNET STRUT

Secure  the  strut  to  hold  the  bonnet 

open.

Before  closing  the  bonnet,  replace 

the strut in its housing.

To close

Lower  the  bonnet  and  release  it  at 

the  end  of  its  travel.  Check  that  the 

bonnet is locked.

Outside  the  vehicle:  lift  the  catch 

and raise the bonnet.

55

-

Access and starting

FILLING WITH FUEL

The  engine  must  be  switched  off 

when filling with fuel.

 Insert  the  key  then  turn  it  to  the 

left.

 Remove the cap.

An indication on the cap reminds you 

which type of fuel to use.

When you fill your tank, do not con-

tinue  after  the  third  cut-off  of  the 

pump. This could cause your vehicle 

to malfunction.

The capacity of the tank is approx-

imately 80 litres.

 After filling the tank, lock the cap.

Low fuel level

When  the  minimum 

fuel level in the tank is 

reached,  this  warning 

light comes on.

You  have  enough  fuel  remaining 

to drive for approximately 30 miles 

(50 km).

Ensure  that  the  right-hand 

sliding  side  door  is  not 

opened while you are filling

with fuel.
The key cannot be removed 

from the lock until the cap has been 

replaced on the fuel tank.

If  the  tank  is  filled with fuel which

does  not  conform  to  your  vehicle’s 

engine,  it  is  essential  that  the  fuel 

tank  is  drained  before  the  engine  is 

switched on.

56 - Visibility

In  good  or  rainy  weather, 

both  day  and  night,  the 

front fog lamps and the rear 

fog  lamp  are  dazzling  and 

are prohibited.

Do not forget to switch them off when 

they are no longer needed.

THE LIGHTS STALK

Front and rear lights

Selection  is  by  turning  ring 

A.  The 

status  is  confirmed by the indicator

light on the instrument panel.

Lights off

Side lights 

Dipped/main beam 

headlamps

Dipped/Main beam change

Pull the stalk fully towards you.

Lights on buzzer

With the ignition off, when the driver’s 

door  is  opened,  a  buzzer  sounds  if 

you have left your lights on.

Front fog lamps and rear fog 

lamp

Rotate the ring forwards to switch on 

and backwards to switch off. The sta-

tus is confirmed by the indicator light

on the instrument panel.

Fog lamps off

Vehicles fitted with a rear fog

lamp (ring B)

Rear fog lamp

This  operates  with  the  dipped/main 

beam headlamps.

The front fog lamps operate with the 

side  lights,  the  dipped  headlamps 

and the main beam headlamps.

Front  and  rear  fog 

lamps  (2nd  notch  of 

the ring forwards). 

Front fog lamps (first notch

of the ring forwards)

Vehicles fitted with front fog

lamps and a rear fog lamp (ring C)

Direction indicators (flashers)

Left: downwards.

Right: upwards.

57

-

Visibility

When  using  a  car  wash, 

switch  off  the  ignition  or 

check  that  the  windscreen 

wipers  stalk  is  in  position 

0-Off.

In winter, you are advised to wait un-

til  the  windscreen  has  been  de-iced 

fully before operating the windscreen 

wipers stalk.

WINDSCREEN WIPER STALK

Front windscreen wiper

2  Fast wipe (heavy rain).

1  Normal wipe (moderate rain).

l 

Intermittent wipe.

0  Off.

  Single wipe  

(press downwards).

Operation

In  position 

1  or  2,  when  the  vehicle 

stops,  the  windscreen  wiper  chang-

es  to  a  lower  wiping  speed,  then 

resumes  its  initial  speed  when  the 

vehicle starts again.

In the 

Intermittent position, the wiping 

speed is proportional to the speed of 

the vehicle.

Windscreen wash 

Pull the wiper stalk towards you.

 The 

windscreen  wash,  then  the  wind-

screen  wipers,  operate  for  a  speci-

fied time.

58 - Visibility

ELECTRIC WINDOWS

1 -  Driver’s electric window 

switch.

2 -  Passenger’s electric window 

switch.

SLIDING SIDE WINDOW

To  open  the  window,  pull  control 

A 

and push the window forwards.

To close the window, push it towards 

the rear and press control 

B to lock it.

Always  remove  the  key 

from the ignition when leav-

ing  the  vehicle,  even  for  a 

short time.

If  an  obstacle  is  detected 

when operating the electric windows, 

you  must  reverse  the  movement  of 

the  window.  To  do  this,  press  the 

control concerned.

When  the  driver  operates  the  pas-

senger  electric  window  controls,  he 

must ensure that no one is prevent-

ing correct closing of the windows.

The driver must ensure that passen-

gers  use  the  electric  windows  cor-

rectly.

Be aware of children when operating 

the windows.

Notes:

In the event of unwanted opening of 

the window when closing (for exam-

ple,  in  the  case  of  frost),  press  the 

control until the window is fully open, 

then  pull  it  again  until  the  window 

closes.  Continue  to  pull  the  control 

for  approximately  one  second  after 

closing.

Following reconnection of the battery, 

in the event of a malfunction, release 

the control and pull it again until the 

window closes completely.

Continue  to  pull  the  control  for  ap-

proximately one second after closing.

Automatic operation  

(driver’s side):

 press or pull the switch fully. One 

touch  completely  opens  the  win-

dow. 

You have two options:

Manual operation:

 press  or  pull  the  switch  gently. 

The window stops as soon as the 

switch is released.

59

-

Visibility

MIRRORS

Electric exterior mirrors
 

Move  switch 

A  to  the  right  or  to 

the  left  to  select  the  correspond-

ing mirror.

 

Move  switch 

A  in  all  four  direc-

tions to adjust.

 

Return switch 

to the centre po-

sition.

When  parked,  the  mirrors  can  be 

folded back manually.

Manual exterior mirrors

Move  the  lever  in  all  four  directions 

to adjust.

When the vehicle is parked, the ex-

terior  mirrors  can  be  folded  back 

manually.

Manual interior mirror

The interior mirror has two positions:

-  day (normal),

-  night (anti-dazzle).

To  change  from  one  to  the  other, 

push  or  pull  the  lever  on  the  lower 

edge of the mirror.

AREAS FOR TOLL CARDS/

CAR PARK TICKETS

The athermic windscreen has two non- 

reflective zones located either side of

the base of the interior mirror.

They  are  intended  for  affixing toll

cards and/or car park tickets.

60 - Comfort and safety

HEADLAMP ADJUSTMENT

Depending on the load or the number 

of people in your vehicle, it is recom-

mended  that  the  headlamp  beam  is 

adjusted.

0  -  Empty/Driver only.

-  -  2 or 3 people.

1  -  Minimal load/5 or 6 people.

2  -  Medium load/7 to 9 people.

3  -  Maximum load/1 to 3 people 

in the front + maximum 

authorised loads.

Initial setting is position 0.

STEERING WHEEL HEIGHT 

ADJUSTMENT

When  stationary,  push  the  handle 

A  fowards  to  unlock  the  steering 

wheel.

Adjust it to the desired height.

Pull the handle 

A towards you fully to 

lock the steering wheel.

HAZARD WARNING LIGHTS

Press the button, the direction indica-

tors flash.

They  can  operate  with  the  ignition 

off.

HORN

Press the end of the lights 

and  direction  indicators 

stalk.

61

-

Comfort and safety

COURTESY LIGHTS

1 -  Front courtesy light

Horizontal position:

lighting  on  opening  one  of  the  front 

doors.

Tilted position:

permanent lighting, key in the acces-

sories or ignition on position.

2 -  Rear courtesy light (Combi)

Horizontal position:

off.

Tilted position:

on, key in the accessories or ignition 

on position.

3 -  Rear courtesy light (Van)

Horizontal position:

off.

Tilted position:

on, key in the accessories or ignition 

on position.

62 - Comfort and safety

1.  Fittings in the doors


A. Armrest.


B. Storage compartment.


C. Bottle holder/Can holder.


D. Storage compartment.

2.  Overhead storage

Overhead storage maximum load:

 5 kg.

3.  Courtesy light

4.  Sun visors

The sun visors are equipped with a ticket holder.

FRONT FITTINGS

63

-

Comfort and safety

For  greater  safety,  always 

ensure that the loads trans-

ported are stowed securely.

5.  Glove box or passenger air 

bag*

This location is reserved either for a 

glove box or for a passenger air bag 

with a storage compartment.

6.  Glove box/Fuse box

To  open  the  glove  box  with  cover, 

push the handle towards the left.

It  permits  access  to  the  fascia  fuse 

box.

LASHING RINGS

Use  the  4  lashing  rings  on  the  lug-

gage  compartment  floor to secure

your loads.

7.  Lighter

8.  Removable ashtray

To open, lift the cover and release it; 

the cover opens automatically.

To close, lift the cover to the stop and 

fold it back.

To  empty,  after  opening,  press  the 

left  edge  of  the  cover  then  pull  up-

wards to remove.

*  According to destination.

63

-

Comfort and safety

For  greater  safety,  always 

ensure that the loads trans-

ported are stowed securely.

5.  Glove box or passenger air 

bag*

This location is reserved either for a 

glove box or for a passenger air bag 

with a storage compartment.

6.  Glove box/Fuse box

To  open  the  glove  box  with  cover, 

push the handle towards the left.

It  permits  access  to  the  fascia  fuse 

box.

LASHING RINGS

Use  the  4  lashing  rings  on  the  lug-

gage  compartment  floor to secure

your loads.

7.  Lighter

8.  Removable ashtray

To open, lift the cover and release it; 

the cover opens automatically.

To close, lift the cover to the stop and 

fold it back.

To  empty,  after  opening,  press  the 

left  edge  of  the  cover  then  pull  up-

wards to remove.

*  According to destination.

66 - Driving

MANUAL GEARBOX

Reverse*

To  change  to  reverse  gear,  lift  the 

ring  under  the  gear  lever  knob  and 

push the gear lever to the left then to 

the front.

Reverse gear can only be engaged 

when the vehicle is stationary with 

the engine idling.

*  According to engine.

AIR BAGS

The air bags have


been designed to 

maximise the safety of the occupants 

in  the  event  of  serious  collisions. 

They  work  in  conjunction  with  the 

pretensioning  seat  belts  with  force 

limiter.

The electronic detectors register and 

analyse  any  abrupt  deceleration  of 

the  vehicle:  if  the  triggering  thresh-

old is reached, the air bags inflate in-

stantly and protect the occupants of 

the vehicle.

Immediately after the impact, the air 

bags  deflate rapidly so that they do

not  hinder  the  visibility  of  the  occu-

pants nor their exit if necessary from 

the vehicle.

The air bags are not deployed in the 

case of minor collisions, for which the 

seat belt is sufficient to ensure maxi-

mum protection. The seriousness of 

a collision depends on the nature of 

the obstacle and the speed of the ve-

hicle at the moment of impact.

Air bags only operate when the ig-

nition is switched on.

Note: the gas escaping from the air 

bags can be a minor irritant.

FRONT AIR BAGS

These are folded in the centre of the 

steering  wheel  for  the  driver  and  in 

the  fascia  for  the  front  passenger 

(one seat). They are deployed simul-

taneously.

If  this  warning  light  comes 

on on the instrument panel, 

accompanied  by  an  audible 

signal, contact a PEUGEOT 

dealer  to  have  the  system 

checked.

Front air bag fault


Content   ..  2  3  4  5   ..