Peugeot 1007 Dag (2005.5). Manual - part 4
 

  Index      Peugeot     Peugeot 1007 Dag 2005.5 - service manual in english


Search            


Content   ..  2  3  4  5   ..


Peugeot 1007 Dag (2005.5). Manual - part 4


50 - Audio equipment and telematics

01-10-2005

51

-

Audio equipment and telematics

01-10-2005

RADIO

Notes on radio reception

Car  radio/telephone  receivers  are 

subject to phenomena which do not 

affect domestic radio sets. Both MW/

LW  and  FM  are  subject  to  various 

forms  of  interference.  This  is  not  a 

relection on the quality of the equip-

ment, but is due to the nature of the 

signals and the way in which they are 

transmitted.

On  MW/LW  interference  may  be 

noticed  when  passing  under  high 

voltage power lines or bridges, or in 

tunnels.

On FM, interference may be the result 

of  the  increasing  distance  from  the 

transmitter,  delection  of  the  signals 

by  obstacles  (mountains,  hills,  build-

ings, etc.) or of being in an area which 

is not covered by a transmitter.

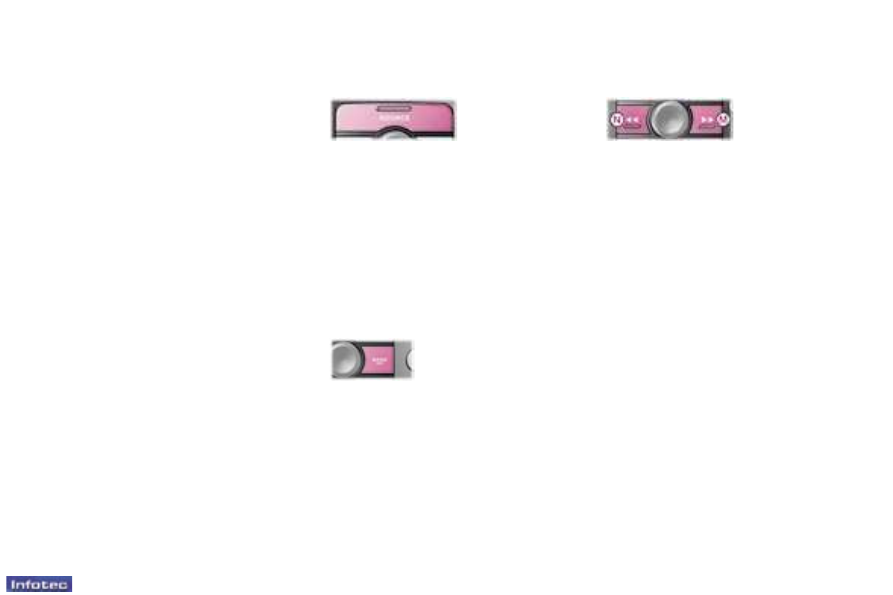
Selecting the radio

Press 

"SOURCE" several times.

Automatic station search

Briely press button 

or N to search 

for the station immediately above or 

below.

The  search  stops  at  the  irst  station 

found.

If the 

TA trafic programme is select-

ed,  only  the  most  powerful  stations 

broadcasting this type of programme 

are selected.

Selecting a waveband

Briely press button

 ''BAND/AST'' to 

select the FM1, FM2 , FMast and AM 

wavebands.

Search sensitivity

It  is  possible  to  carry  out  automatic 

searches at two levels of sensitivity:

-  To  tune  in  to  the  most  powerful 

transmitters, select the local search 

mode 

"LO" (default option).

-  To  tune  in  to  the  weakest  or  most 

distant transmitters, select the sen-

sitive search mode 

"DX".

The station search is carried out irst 

in 

"LO"  (local)  sensitivity,  then  in 

"DX" (distant) sensitivity.

To make a direct search in 

"DX" (dis-

tant) sensitivity, press button 

M or N 

twice in succession.

52 - Audio equipment and telematics

01-10-2005

53

-

Audio equipment and telematics

01-10-2005

Automatic storing of FM stations 

in the memory (autostore)

Recalling stations stored in the 

memory

For each waveband, briely press the 

buttons

  "1"  to  "6"  to  recall  the  cor-

responding stored station.

In  the  case  of  an  RDS  station,  the 

frequency appears for a few seconds 

before its name.

Recalling an RDS station may result 

in  a  search  for  the  frequency  which 

corresponds  to  the  region  through 

which you are travelling.

Press  the

  ''BAND/AST''  button  for 

more than two seconds.

Your  audio/telephone  automatically 

stores the 6 stations with the strong-

est signal in FM. These stations are 

stored in the FMast waveband.

If it is not possible to ind 6 stations, 

the remaining memories are empty.

Manual station search

Briely  press  button 

H  or  I 

to  increase  or  decrease  the 

frequency displayed.

By  continuing  to  press 

the  button  in  the  direction 

selected,  you  will  obtain 

continuous  scrolling  of  the 

frequency.

Scrolling stops when you re-

lease the button.

Manual station storing

Select the station required.

Press one of the buttons 

"1" to "6" 

for more than two seconds.

A window appears on the screen, the 

station is stored when it is displayed 

on  the  memory  number  that  you 

have allocated to it.

52 - Audio equipment and telematics

01-10-2005

53

-

Audio equipment and telematics

01-10-2005

RDS SYSTEM

Using the RDS (Radio Data 

System) function on FM

Most FM radio stations use the RDS 

system.

This  system  allows  you  to  continue 

listening to the same station, whatever 

frequency it is using for the region you 

are going through.

This  screen  indicates 

the  name  of  the  sta-

tion  selected.  The 

audio/telephone  con-

tinuously searches for the transmitter 

which transmits the same programme 

with  the  best  reception.  This  search 

may cause slight interference with the 

transmission.

The  function  can  be  switched  on  or 

off via the "RDS" button or the 

"AU-

DIO FUNCTIONS" main menu.

The screen will show:

"RDS" if the function is active and 

available for the station selected.

"RDS"  crossed  out  or  "RDS" 

greyed  out  on  the  screen*  if  the 

function  is  active  but  is  not  avail-

able on the station.

If the station to which you are listen-

ing  does  not  have  several  frequen-

cies in the region through which you 

are travelling, you can switch off the 

automatic frequency following.

Trafic information programme

Press  the

  ''TA/PTY'' 

button  to  switch  the 

function on or off.

The 

multi-function 

screen will show:

-

  TA if the function is selected,

-

  TA  crossed  out  or  greyed  out* 

if  the  function  is  selected  but  not 

available.

Any  trafic  information  lash  will  be 

given  priority,  whatever  source  you 

are  listening  to  (radio,  CD  or  CD 

changer).

If you wish to interrupt the broadcast-

ing  of  a  message,  press  the 

''TA/

PTY'' button.

Notes:  the  volume  of  the  trafic 

information is independent of the 

volume of normal audio/telephone 

listening. 

You can adjust it by using the volume 

button. The setting will be stored and 

will be used when the next messages 

are broadcast.

You must be on the FM waveband.

During  station  search  or  automatic 

storing  phases,  if  the 

"TA"  function 

is  selected,  transmitters  which  are 

compatible  with  the  broadcasting  of 

these  messages  will  be  tuned  to  or 

stored irst.

The  station  being  listened  to  must 

indicate  via  the  RDS  system  that  it 

broadcasts trafic information.

Stations  which  are  organised  in  a 

network  (EON)  have  regional  trans-

mitters  which  broadcast  their  own 

programmes:  you  can  listen  to  one 

of  these  stations  and  switch  to  the 

network station which broadcasts the 

trafic information messages.

RDS station following

Regional following mode (REG)

When  they  are  part  of  a  network, 

certain  stations  broadcast  regional 

programmes  in  the  various  areas 

they  serve.  With  regional  following 

mode  you  can  keep  listening  to  the 

same programme.

You can choose to follow:

• Either a regional station only.

• Or the entire network, with the pos-

sibility  of  listening  to  a  different 

programme.

The  function  can  be  switched  on  or 

off  via  the 

"AUDIO  FUNCTIONS

main menu or by pressing the 

"RDS" 

button for more than 2 seconds.

The multi-function screen will show:

REG if the function is active,

REG crossed out or greyed out* 

if the function is active but not avail-

able.

* According to screen

54 - Audio equipment and telematics

01-10-2005

55

-

Audio equipment and telematics

01-10-2005

PTY function 

This  allows  you  to  listen  to  stations 

broadcasting  a  speciic  type  of  pro-

gramme,  selected  from  the  list  of 

available types below:

NEWS   

SCIENCE

AFFAIRS 

VARIED

INFO   

POP M

SPORT 

ROCK M

EDUCATE 

EASY M

FICTION 

LIGHT M

CULTURE 

OTHER M

WEATHER 

LEISURE

FINANCE 

JAZZ

CHILDREN 

COUNTRY

SOCIAL 

NATIONAL M

RELIGION 

OLDIES

PHONE IN 

FOLK M

TRAVEL 

DOCUMENT

When  FM  is  selected,  press  button 

"TA/PTY" for more than two seconds 

to switch the function on or off.

To ind a 

PTY programme:

-  select the 

PTY button,

-  turn  button 

G  to  scroll  down  the 

different  types  of  programmes  of-

fered, then conirm your choice,

when the programme of your choice 

is  displayed  press  button 

M  or  N  to 

carry out an automatic search (after 

an  automatic  search  the 

PTY  func-

tion  is  switched  off  if  no  station  has 

been found).

In 

PTY  mode  the  different  types  of 

programmes  can  be  stored  in  the 

memory. To do this, press the prese-

lection  buttons 

"1"  to  "6''  for  more 

than two seconds. To recall the type 

of programme stored in the memory, 

briely press the corrresponding but-

ton.

EON system

This system connects stations which 

are  part  of  the  same  network.  It 

enables  the  broadcast  of  trafic  in-

formation  or  a 

PTY  programme,  by 

a  station  that  is  part  of  the  same 

network  as  the  station  to  which  you 

are listening.

The  service  is  available  when  you 

have selected the 

TA trafic informa-

tion programme or the

 PTY function.

Audio functions menu

Select the 

"Audio functions" menu 

from the 

general menu to:

"Activate/Deactivate  RDS  fre-

quency following",

"Activate/Deactivate 

regional 

mode",

"Activate/deactivate  Radio  Text 

display",  broadcast  by  the  radio 

station if available ("RT" is displayed 

at the bottom of the screen).

"Activate/deactivate  CD  details 

display",  also  permits  MP3  dis-

play.

54 - Audio equipment and telematics

01-10-2005

55

-

Audio equipment and telematics

01-10-2005

Contextual menu

By  pressing  knob 

G,  the  contextual 

menu  allows  you  to  access  the  fol-

lowing functions:

"Inputting a frequency",

"List  of  stations"  to  access  the 

30 stations  picked  up  locally  di-

rectly,

"Refresh list" to update this list,

"Display  Radio  Text"  broadcast 

by the radio station if it is available 

("RT" is displayed at the bottom of 

the screen).

When you are in radio mode, press-

ing  knob 

G  enables  you  to  call  up 

the Radio contextual menu to select 

"Read  Radio  Text"  (information 

broadcast  by  the  station  concern-

ing the programme to which you are 

listening)  (example:  name  of  singer, 

title of the song...).

COMPACT DISC

Selecting CD mode

After  inserting  a  disc,  printed  face 

upwards,  the  CD  drive  starts  auto-

matically.

If  a  disc  has  already  been  inserted, 

press  the

  ''SOURCE''  button  to  se-

lect CD mode.

Selecting a track

Press  button 

M to select the follow-

ing track.

Press button 

N to return to the start 

of  the  current  track  or  to  select  the 

previous track.

Press several times in succession to 

skip several tracks.

Press  button 

B  to 

eject the disc from the 

drive.

If  the  CD  is  not  re-

moved  within  10  to  15  seconds  fol-

lowing  ejection,  it  is  re-inserted  into 

the  drive  automatically  but  is  not 

played.

Ejecting a disc

Accelerated play

Press  and  hold  button 

M  or  N  for 

forwards  or  backwards  accelerated 

play.

Accelerated  play  stops  as  soon  as 

the button is released. 

Notes:

• Before inserting a CD, press button 

B to check that the drive does not 

already contain a CD.

• When  the  navigation  CD  is  in  the 

drive, it is not possible to listen to a 

CD 

in CD mode.

54 - Audio equipment and telematics

01-10-2005

55

-

Audio equipment and telematics

01-10-2005

Contextual menu

By  pressing  knob 

G,  the  contextual 

menu  allows  you  to  access  the  fol-

lowing functions:

"Inputting a frequency",

"List  of  stations"  to  access  the 

30 stations  picked  up  locally  di-

rectly,

"Refresh list" to update this list,

"Display  Radio  Text"  broadcast 

by the radio station if it is available 

("RT" is displayed at the bottom of 

the screen).

When you are in radio mode, press-

ing  knob 

G  enables  you  to  call  up 

the Radio contextual menu to select 

"Read  Radio  Text"  (information 

broadcast  by  the  station  concern-

ing the programme to which you are 

listening)  (example:  name  of  singer, 

title of the song...).

COMPACT DISC

Selecting CD mode

After  inserting  a  disc,  printed  face 

upwards,  the  CD  drive  starts  auto-

matically.

If  a  disc  has  already  been  inserted, 

press  the

  ''SOURCE''  button  to  se-

lect CD mode.

Selecting a track

Press  button 

M to select the follow-

ing track.

Press button 

N to return to the start 

of  the  current  track  or  to  select  the 

previous track.

Press several times in succession to 

skip several tracks.

Press  button 

B  to 

eject the disc from the 

drive.

If  the  CD  is  not  re-

moved  within  10  to  15  seconds  fol-

lowing  ejection,  it  is  re-inserted  into 

the  drive  automatically  but  is  not 

played.

Ejecting a disc

Accelerated play

Press  and  hold  button 

M  or  N  for 

forwards  or  backwards  accelerated 

play.

Accelerated  play  stops  as  soon  as 

the button is released. 

Notes:

• Before inserting a CD, press button 

B to check that the drive does not 

already contain a CD.

• When  the  navigation  CD  is  in  the 

drive, it is not possible to listen to a 

CD 

in CD mode.

56 - Audio equipment and telematics

01-10-2005

57

-

Audio equipment and telematics

01-10-2005

Contextual menu

By  pressing  knob 

G,  the  contextual 

menu  permits  you  to  switch  the  fol-

lowing functions on or off:

-  playing of the start of a track ("Intro-

scan"), 

-  random play ("Random"), 

-  programming  of  the  track  playing 

order,

-  list of tracks.

Do not use copied CDs as 

these  could  damage  your 

player.

Insert  circular  compact 

discs only.

Playing MP3 CDs

Following  the  insertion  of  an  MP3 

CD,  playing  of  the  irst  song  of  the 

irst  MP3  directory  begins.  You  can 

select  the  track  to  be  played  using 

buttons 

M or N or the MP3 directory 

using buttons 

H or I.

Note:  when  the  navigation  CD  is  in 

the drive, it is not possible to listen to 

an MP3 CD 

in CD mode.

MP3 contextual menu

Selecting a track

To display the list of MP3 directories, 

press the 

MODE button to enter MP3 

mode. When the knob 

G is pressed, 

the contextual menu permits display-

ing of the 

"list of tracks".

In  MP3  mode,  pressing  the  knob 

G 

enables  you  to  switch  the  following 

functions on or off:

-  Playing of the start of each track on 

the CD ("Introscan").

-  Random play ("Random").

-  Repeating of the tracks in the cur-

rent MP3 directory.

-  List of MP3 tracks.

This equipment enables you to listen 

to  music  which  is  usually  protected 

by copyright in accordance with cur-

rent  national  and  international  regu-

lations.

Please refer to these regulations and 

comply with them.

The  playing  and  displaying  of  an 

MP3 compilation may depend on the 

recording programme and/or the pa-

rameters used.

We recommend use of the ISO 9660 

recording standard.

Using  buttons 

H  or  I

select  the  MP3  direc-

tory to be played.

To  open  an  MP3  di-

rectory, press knob 

G.

Using buttons 

M or N, se-

lect the track to be played. 

Conirm by pressing knob 

G.

56 - Audio equipment and telematics

01-10-2005

57

-

Audio equipment and telematics

01-10-2005

COMPACT DISC CHANGER

Selecting CD changer mode

Press the 

''SOURCE'' button several 

times.

Selecting a track

Press  button 

M to select the follow-

ing track.

Press button 

N to return to the start 

of  the  current  track  or  to  select  the 

previous track.

Press several times in succession to 

skip several tracks.

Contextual menu

By  pressing  knob 

G,  the  contextual 

menu  permits  you  to  switch  the  fol-

lowing functions on or off:

-  playing of the start of the track ("In-

troscan"), 

-  random play ("Random"), 

-  programming  of  the  track  playing 

order,

-  list of tracks.

Selecting a disc

Press one of the buttons

 ''1'' to ''5'' 

on the audio/telephone to select the 

appropriate disc.

Accelerated play

Press  and  hold  button 

M  or  N  for 

forwards  or  backwards  accelerated 

play.

Accelerated  play  stops  as  soon  as 

the button is released.

Buttons 

and I allow 

you  to  select  respec-

tively  the  previous  or 

following  disc  in  the 

changer.

Playing  of  the  irst 

track  on  the  disc  be-

gins automatically.

Following each change 

of source, on returning 

to CD changer mode, play will resume 

where it stopped.

58 - Audio equipment and telematics

01-10-2005

59

-

Audio equipment and telematics

01-10-2005

TELEPHONE

This function is a GSM dual-band tele-

phone (900 and 1 800 MHz) incorpo-

rated in the RT3 GPS audio/telephone 

system.

It is a 

''hands free'' telephone. This 

function is provided by a microphone 

located  next  to  the  front  courtesy 

light,  the  speakers,  a  steering  col-

umn  control  and  voice  commands 

which  allow  access  to  most  of  the 

functions  (the  audio/telephone  con-

trol panel buttons allow access to all 

the functions).

Display  of  the  principal 

''mobile'' 

type  functions,  as  well  as  consulta-

tion of the indexes, is provided by the 

multi-function display.

This  function  is  active,  whatever 

position the ignition key is in even af-

ter thirty minutes, when the message


''Economy  mode  active''  appears 

on the multi-function display.

"Telephone and telematic 

services" menu

Press  the 

MENU button then, using 

the  knob 

G,  select  the  "Telephone 

and telematic services" application 

and conirm to gain access to the fol-

lowing options:

"Call".

"Service",  permits  access  to  the 

PEUGEOT services.

"Telephone  functions",  permits 

setting of all of the telephone func-

tions.

"Text  messages  (SMS)",  permits 

management of all of the functions 

for the text messages (SMS).

Contextual menu

Press  button 

D  to  display  the  tele-

phone contextual menu.

This  menu  enables  you  to  gain  ac-

cess to the following functions:

"List of calls".

"Enter number".

"Access to directory".

"Access to your voice mail" (mes-

sage service of your GSM operator).

Note:

Do  not  allow  yourself  to  become 

distracted  when  you  are  behind 

the  wheel  and  comply  with  current 

national  legislation.  The  driver  is 

advised  to  stop  in  order  to  hold  a 

telephone  conversation  or  carry  out 

certain  actions  (manual  dialling  of  a 

number, for example).

58 - Audio equipment and telematics

01-10-2005

59

-

Audio equipment and telematics

01-10-2005

Within each menu:

Move around and se-

lect a function by turn-

ing the

 G button then 

validate  by  pressing 

the button.

Using the alphanumeric keypad

For a given button, to input a charac-

ter in the second or subsequent rows 

press  until  you  obtain  the  character 

required. 

Buttons Associated characters

[1] 

1 or

 space

[2] 

2 or A B C 2 or a b c 2

[3] 

3 or D E F 3 or d e f 3

[4] 

4 or G H I 4 or g h i 4

[5] 

5 or J K L 5 or j k l 5

[6] 

6 or M N O 6 or m n o 6

[7] 

7 or P Q R S 7 or p q r s 7

[8] 

8 or T U V 8 or t u v 8

[9] 

9 or W X Y Z 9 or w x y z 9

[0] 

0 or + (long

 press)

[#] 

# or validation

[*] 

* or erasing of last character 

input (long press)

Cancel an operation using the

 ''ESC'' 

button.

Using the menus, example 

"Telephone functions"

Press the 

''MENU'' button to display 

the

  general  menu.  Select  the  "Tele-

phone  and  telematic  services" 

application,  validate

  "Telephone 

functions"  to  access  the  principal 

telephone  functions,  then  the  vari-

ous menus, in order to reach the one 

required.

This menu allows you to access the 

following functions:

-  "Network":  allows  you  to  select 

the  network  search  mode  and  to 

see the networks available.

-  "Duration  of  calls":  allows  you 

to consult the duration recorder of 

calls made and zero re-set.

-  "Process  the  PIN  code":  allows 

you to use or modify the PIN code.

-  "Call options": allows you to con-

igure the calls with entering of my 

number,  automatic  answering  after 

X rings, speciication of ring options 

and  allows  you  to  conigure  the 

diversion  number  for  the  text  mes-

sages and clear the list of calls and 

the text messages.

60 - Audio equipment and telematics

01-10-2005

61

-

Audio equipment and telematics

01-10-2005

Installing the SIM card

Open lap

 L by pressing the point of a 

pencil on the circular opening above 

the lap.

Insert your SIM card, available from 

a  mobile  telephone  operator,  as  in-

dicated  in  the  graphics,  then  close 

the lap.

Note: removal or insertion of the SIM 

card  must  only  be  carried  out  after 

the  RT3  audio/telephone  has  been 

switched off (key in position S (igni-

tion switch) and screen off).

If  you  have  a  duplicate  card,  when 

carrying out the irst installation or to 

update your directory you must insert 

your  mobile  telephone's  SIM  card 

then  transfer  its  information  to  the 

RT3 audio/telephone directory - refer 

to the Directory main menu.

Input  your  PIN  code  using  the  al-

phanumeric  keypad  and  validate  by 

pressing button

 G or button # to ac-

cess the network. Connection to the 

network  is  validated  by  the  appear-

ance of a symbol on the screen.

Warning: if you make three errors in 

succession when inputting your PIN 

code, your SIM card will be blocked. 

To  unblock  it,  you  will  need  to  input 

the PUK code. The PUK code will be 

supplied  to  you  by  the  person  sell-

ing your SIM card (input of the PUK 

code allows for 10 errors in succes-

sion; after this the SIM card becomes 

permanently unusable).

Note: the PIN code is required each 

time  the  ignition  is  switched  on,  un-

less  the  PIN  code  has  been  stored 

in  the  memory  or  protection  by  PIN 

code  is  not  activated  on  the  SIM 

card.

Inputting the PIN code

Cancelling of PIN code request

In the menu

 ''Telephone functions'' 

select

 ''Process the PIN code'', then 

validate the 

''Cancel'' function.

Warning:  in  this  case,  do  not  lose 

your SIM card. Losing it would mean 

anyone who inds it would be able to 

make unlimited calls.

60 - Audio equipment and telematics

01-10-2005

61

-

Audio equipment and telematics

01-10-2005

Telephone function screens

Not in use

This  screen  indicates  the  presence 

of  voice  messages  or  text  mes-

sages  (SMS)  not  listened  to/read, 

the cumulative time in use since the 

last zero reset and the status of your 

telephone.

In use

This  screen  indicates  the  time 

elapsed  since  the  start  of  the  con-

versation, as well as the number* or 

name of the person to whom you are 

speaking  (if  recorded  in  the  index) 

and the status of your telephone.

* If this option and service are avail-

able.

Making a call

Press button

 D to display the contex-

tual menu of the telephone.

Entering a number

Select the function 

"Call" 

then 

''Enter  number'' 

then  enter  the  number 

of the person you wish to 

speak to using the alpha-

numeric keypad.

Press button 

D to make the call.

Making a call from a directory

Select  the 

"Call"  function  then  "Di-

rectory" to access all the iles con-

taining  a  telephone  number  or  the 

"List of calls" function to access the 

list of the last twenty incoming (if the 

number  display  option  is  active)  or 

outgoing calls.

Note:  there  are  two  directories,  the 

RT3  audio/telephone  directory  and 

the SIM card directory.

Receiving a call

When a ringing sounds to 

let you know that a call is 

waiting,  you  can  choose 

either  to  accept  it  by 

pressing  button 

D  or  the 

end of the steering wheel 

remote control or not to accept it by 

pressing the button 

Q or by selecting 

and  validating  the 

"NO"  button  on 

the 

"Answer?" screen.

If  you  accept  the  call,  to  end  your 

communication, press button 

Q.

If  you  do  not  accept  the  call,  it  is 

transferred to your voice mail or to a 

call diversion number.

62 - Audio equipment and telematics

01-10-2005

63

-

Audio equipment and telematics

01-10-2005

Text messages (SMS)

Receiving text messages

When the buzzer sounds (if the SMS 

text  messages  buzzer  option  is  ac-

tive)  and  a  superimposed  screen 

announces 

"Do  you  wish  to  read 

the  new  text  message  (SMS)?"

you can choose to read the text mes-

sage received by selecting and vali-

dating 

"YES"  or  postpone  reading 

it  by  selecting  and  validating

  "NO"

by pressing the

 "ESC" button or by 

waiting  until  the  announcement  dis-

appears. The message is read by the 

voice synthesiser, if it is active.

Note:  the  old  text  messages  stored 

and  the  new  text  messages,  the 

reading of which you wished to post-

pone,  can  be  consulted.  Press  the 

"MENU"  button  then  validate  the 

"Telematic"  icon,  select 

"Text  mes-

sages (SMS)" and validate the func-

tion 

"Reading  of  SMS  received" 

by  pressing  button 

G.  Then  scroll 

through the list by turning the button 

and  press  the  button  to  select  the 

text message to be read (if the voice 

synthesiser is active).

Sending a text message

In  the  menu 

"Text  messages 

(SMS)" validate the function "Typing 

of an SMS". Type your text message 

using  the  alphanumeric  keypad  and 

validate  it  using  the 

"OK"  button  to 

store it or validate the 

"Send" button 

to  send  it.  Validation  of  the

  "Send" 

button  enables  you  to  enter  the 

number of your recipient or select it 

from the directory or from the list of 

calls and send the message.

"Duration of calls" menu

Select  the 

"Duration  of  calls" 

function from the 

"Telephone func-

tions" menu to consult the duration 

counters for the calls made. The par-

tial counter totals the duration of the 

calls since the last zero reset carried 

out using the 

"Zero reset" button.

"Telephone options" menu

Select  the 

"Call  options"  function 

from  the 

"Telephone  functions" 

menu to access the functions:

"Conigure  the  calls"  which  per-

mits  activation  and  deactivation  of 

the  "show  my  number"  and  "auto-

matic answering after X rings" func-

tions

"Ringing  options"  which  permits 

adjustment  of  the  ringing  volume 

for voice calls, activation of the text 

messages  (SMS)  receipt  buzzer 

and  selection  of  a  ring  tone  from 

the ive offered

-

  "Voice  call  diversion  number" 

which permits recording of the call 

diversion  number  chosen  by  the 

customer, otherwise the call will be 

transferred  to  the  voice  mail  if  the 

call diversion box is ticked.

Replying to a text messages

After  reading  a  text  messages,  you 

can:

Reply  directly  to  the  sender  by  se-

lecting 

"Reply".  A  screen  appears 

automatically to enable you to enter 

your message.

Record the number of the sender of 

the text message in your current di-

rectory by selecting 

"Record".

62 - Audio equipment and telematics

01-10-2005

63

-

Audio equipment and telematics

01-10-2005

Services*

Press  button 

E  to  dis-

play  the 

"Services" 

menu and select one of 

the following services:

Emergency call*

In an emergency, press but-

ton 

V until a signal is heard 

and a call validation/deletion 

screen  is  displayed  (delay 

of  6  seconds)  or  enter 

112 

directly.

Make  an  emergency  call  if 

you  are  involved  in  a  situa-

tion which leads you to fear serious 

consequences (injuries, ...) for those 

who are exposed to it (if you witness 

or are involved in a accident resulting 

in injuries, an attack, ...).

Before making a call of this kind, the 

audio/telephone  must  detect  a  cel-

lular network.

If  you  have  not  signed  the  speciic 

PEUGEOT contract, the parameters 

of the 

SOS button are set so that a 

call is made to 

112 - unique number 

made  available  by  the  worldwide 

GSM  network,  reserved  for  emer-

gency calls.

No  security  mode  is  required  and, 

depending on the network or country, 

you  do  not  need  to  insert  your  SIM 

card or enter your PIN.

If  you  have  signed  the  speciic 

PEUGEOT  contract,  your  call  will 

be  located  and  you  will  be  put  in 

contact  with  a  PEUGEOT  assist-

ance team.

For  further  details,  refer  to  the  gen-

eral conditions of your contract.

"PEUGEOT Assistance"/

Emergency call
During  a  connection  to  "PEUGOT 

Assistance" or an emergency call, 

it is not possible to send or receive 

calls or SMS text messages; these 

will  be  transferred  to  your  voice 

mail.

In this case, a green diode lashes 

on  the  RT3  GPS  audio/telephone 

panel, when the emergency call or 

"PEUGEOT  Assistance"  call  pro-

cedure begins, then lights continu-

ously when the call is taken by the 

services concerned.

* If option and service available.

"Customer  Contact  Centre"  which 

enables you to contact the 

PEUGEOT 

Customer  Contact  Centre  directly 

and access the services offered (this 

type of call is suspended if an emer-

gency or breakown call is made).

"PEUGEOT  Assistance"  which 

enables you to contact the call cen-

tre  which  controls  the  PEUGEOT 

breakdown  service  directly  and 

receive  rapid  assistance  (you  have 

6 seconds  within  which  to  cancel 

the call when it is made). During the 

breakdown  call  phase  it  is  not  pos-

sible to make any other calls with the 

exception of emergency calls. If you 

have signed the speciic PEUGEOT 

contract, your call will be located.

"Operator  services"  which  gives 

access  to  the  list  of  services  spe-

ciic to your operator (e.g.: customer 

service,  consumption  monitoring, 

news, stock market, weather, travel, 

games, etc) if they are available.

64 - Audio equipment and telematics

01-10-2005

65

-

Audio equipment and telematics

01-10-2005

The Directory

General

The directory can contain up to 396 

iles divided into 4 independent sub-

directories  (

"User  1",  "User  2"

"User 3" and "User 4").

When  the  system  is  delivered,  the 

default current directory is 

"User 4".

A ile can contain:

-  an address,

-  5 telephone numbers,

-  5 e-mails,

-  a note,

-  a  voice  description  which  can  be 

used for a voice command.

The address is entered by indicating 

the town and the street.

Note: if you enter the address in the 

absence of the navigation CD ROM, 

you  will  not  be  able  to  use  this  ad-

dress for navigation.

To modify an existing ile, select it us-

ing  the 

"Consult  or  modify  a  ile" 

function of the 

"Management of di-

rectory  iles"  menu  then  make  the 

modiications.

Note: when the address is entered, 

the  navigation  CD-Rom  must  be 

present  in  order  to  obtain  guidance 

to this destination.

"Directory" menu

Press  the 

MENU button then, using 

the  knob 

G,  select  the  "Directory" 

application  and  conirm  to  gain  ac-

cess to the following options:

"Management  of  directory  iles" 

with:

• 

"Consult or modify a ile".

• 

"Add a ile", enter the descrip-

tion  of  the  new  ile  then  select 

on  the  ile  the  section  to  be 

completed  then  conirm  and 

enter the information.

• 

"Delete a ile".

• 

"Delete all iles" in a directory.

"Directory coniguration" with:

• 

"Select a directory".

• 

"Name a directory".

• 

"Select the starting directory" 

(current directory).

"File transfer", with:

• 

"Exchange by infra-red" of the 

iles to portable equipment and 

vice versa.

• 

"Exchange with the SIM card" 

of the information entered in the 

RT3 GPS audio/telephone.

"Consult or modify a ile"

64 - Audio equipment and telematics

01-10-2005

65

-

Audio equipment and telematics

01-10-2005

Description of a directory ile

When  a  description  is  linked  to  a 

directory  ile,  you  can  record  the 

description  vocally  so  that  it  can  be 

used subsequently for direct access 

by  voice  commands  (e.g.: 

"Call" 

"[Name of the voice description]" 

or 

"Guide to" "[Name of the voice 

description]").

Select  "Consult  or  modify  the  ile" 

from  the  "Management  of  direc-

tory iles" menu to access the screen 

which permits entering and recording 

of the description.

TMC (Trafic Message Channel) 

RDS Trafic Information 

You  can  access  information  regard-

ing  the  trafic  conditions  from  the 

"Navigation  -  Trafic  Info"  menu, 

then from the 

"TMC Trafic Informa-

tion" function (see section "Satellite 

navigation system").

"File transfer" 

Press  the  record  button  and  follow 

the instructions.

Send all of the iles to the SIM card 

from  the  current  directory  of  your 

RT3 GPS audio/telephone.

Send  one  ile  to  the  SIM  card  from 

the  current  directory  of  your  RT3 

GPS audio/telephone.

Receive all of the iles from the SIM 

card  in  the  current  directory  of  the 

RT3 GPS audio/telephone.

Receive one ile from the SIM card in 

the current directory of the RT3 GPS 

audio/telephone.

Reminder:  when  transferring  a  ile 

from  the  RT3  GPS  audio/telephone 

to the SIM card, only the irst number 

entered in the ile is recorded.

Note:  The  SIM  card  represents  an 

independent collection of information 

among which the telephone numbers 

may be accessible by consulting the 

current directory.

To 

"Exchange  by  infra-red"  be-

tween the RT3 GPS audio/telephone 

and  portable  equipment  (which  has 

an  infra-red  port)  all  or  some  of  the 

iles  recorded  in  the  current  direc-

tory.

Following  selection  of  the 

"File 

transfer" menu and of the direction 

of this transfer, you must initiate the 

exchange by presenting at the same 

time  opposite  the  infra-red  port,  the 

portable  equipment  on  which  you 

started  the  transfer  (consult  the  in-

structions  provided  with  this  equip-

ment). A  message  conirms  that  the 

exchange is progressing correctly.

To 

"Exchange with the SIM card":


Content   ..  2  3  4  5   ..