Nissan Qashqai (2007-2010). Manual - part 38
EM-100
< DISASSEMBLY AND ASSEMBLY >
[HR16DE]
CYLINDER BLOCK
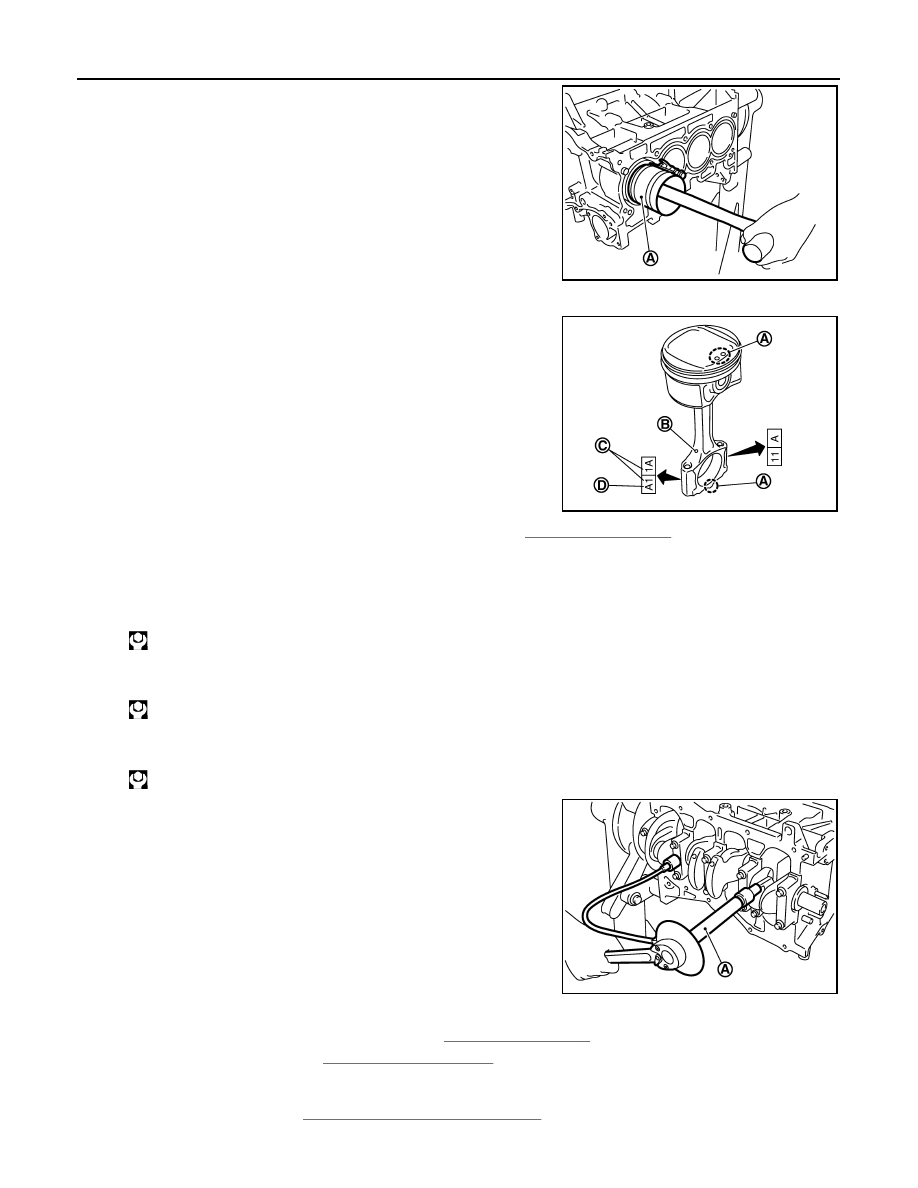
• Using the piston ring compressor (SST: EM03470000) (A) or
suitable tool, install piston with the front mark on the piston
head facing the front of the engine.
CAUTION:
• Be careful not to damage matching surface with con-
necting rod cap.
• Be careful not to damage the cylinder wall and crank-
shaft pin, resulting from an interference of the connect-
ing rod big end.
12. Install connecting rod cap.
• Match the stamped cylinder number marks (C) on connecting
rod with those on connecting rod cap to install.
13. Inspect outer diameter of connecting rod cap bolts. Refer to
.
14. Tighten connecting rod bolt with the following procedure:
a.
Apply new engine oil to the threads and seats of connecting rod bolts.
b.
Tighten bolts in several steps.
c.
Completely loosen bolts.
d.
Tighten bolts in several steps.
e.
Then turn all bolts 60 degrees clockwise (angle tightening).
CAUTION:
Confirm the tightening angle by using the angle wrench
[SST: KV10112100] (A) or protractor. Avoid judgment by
visual inspection without the tool.
• After tightening connecting rod bolt, make sure that crankshaft rotates smoothly.
• Check the connecting rod side clearance. Refer to
15. Install oil pan (upper). Refer to
NOTE:
Install the rear oil seal after installing the oil pan (upper).
16. Install rear oil seal. Refer to
EM-89, "Removal and Installation"
.
17. Install flywheel.
PBIC3765E
A
: Front mark
B
: Oil hole
D
: Connecting rod big end grade
JPBIA0537ZZ
: 27.5 N·m (2.8 kg-m, 20 ft-lb)
: 0 N·m (0 kg-m, 0 ft-lb)
: 19.6 N·m (2.0 kg-m, 14 ft-lb)
PBIC3753E