Lexus ES300 (1997 year). Service manual - part 221
 

  Index      Lexus     Lexus ES300 - service and repair manual 1997 year


Search            


Content   ..  219  220  221  222   ..


Lexus ES300 (1997 year). Service manual - part 221


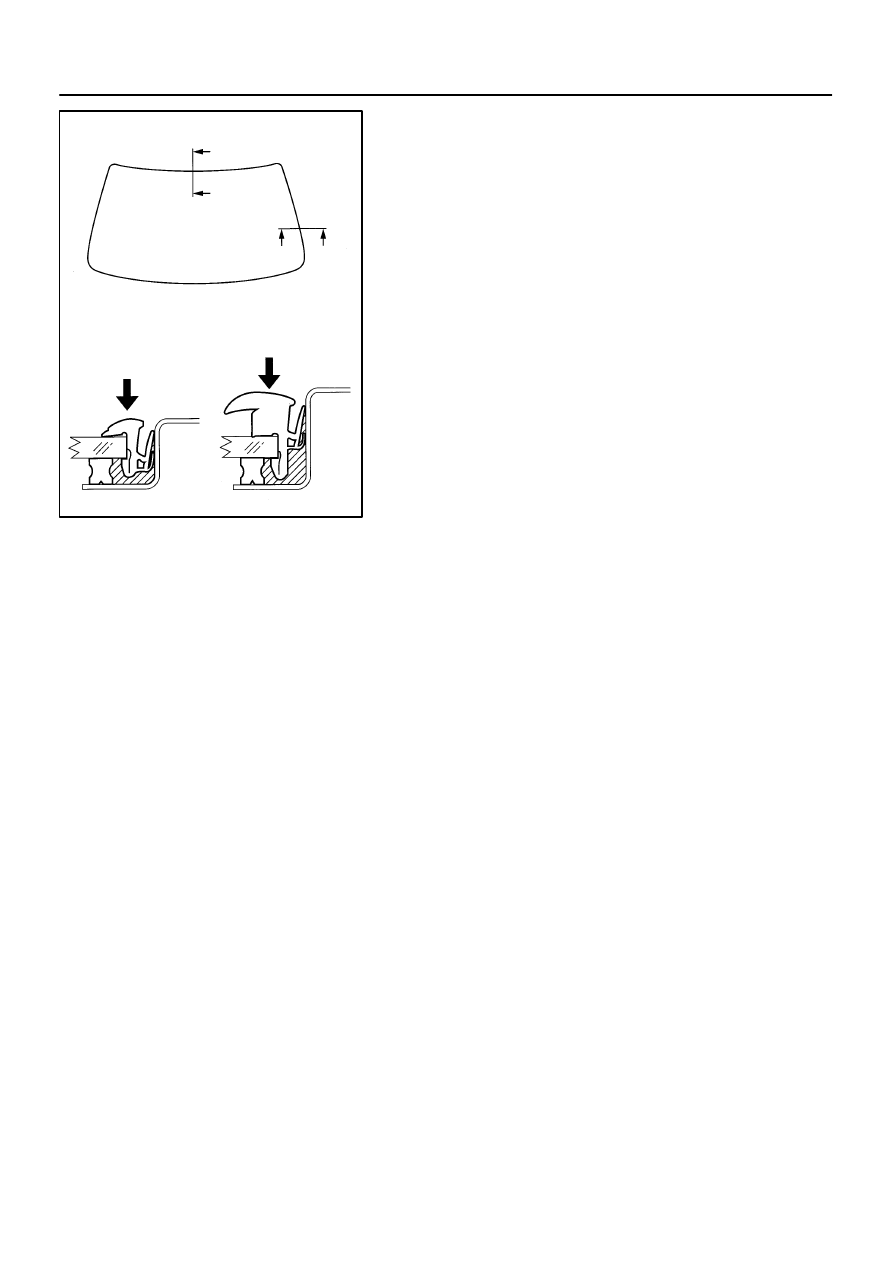
N22038

A – A

B – B

A

A

B

B

CANADA:

BO–66

BODY

WINDSHIELD

1244

1997 LEXUS ES300   (RM511U)

15.

CANADA:
INSTALL WINDSHIELD MOULDING

Place the moulding onto the body and tap it by hand.
16.

INSTALL THESE PARTS:

(a)

Front side of roof headlining

(b)

Roof console box

(c)

Cowl top ventilator louver

(d)

Hood to cowl top seal

(e)

Wiper arm and blades
Torque: 24 N·m (245 kgf·cm, 18 ft·lbf)

(f)

Front pillar garnishes

(g)

Sun visors and holders

BO0AH–04

N21845

N·m (kgf·cm, ft·lbf) : Specified torque

Non–reusable part


 Stopper


 Stopper


 Back Window Moulding

Back Window Glass

Rear Seat Cushion

Rear Seatback

Roof Side
Inner Garnish

Rear Speaker Grille

Roof Side
Inner Garnish

Package Tray Trim

18 (185, 13)

BODY

BACK WINDOW GLASS

BO–67

1245

1997 LEXUS ES300   (RM511U)

BACK WINDOW GLASS

COMPONENTS

BO0AI–04

N21430

: 4Clips

N21407

N17178

BO–68

BODY

BACK WINDOW GLASS

1246

1997 LEXUS ES300   (RM511U)

REMOVAL

1.

REMOVE REAR SEAT CUSHION AND SEATBACK
(See page 

BO–105

)

2.

REMOVE ROOF SIDE INNER GARNISH

Remove the clip and garnish.

3.

REMOVE REAR SPEAKER GRILLE

(a)

Using a screwdriver, remove the rear speaker grille as
shown in the illustration.

HINT:
Tape the screwdriver tip before use.
(b)

Disconnect the connector.

4.

REMOVE PACKAGE TRAY TRIM

5.

REMOVE BACK WINDOW MOULDING

Using a knife, cut off the moulding as shown in the illustration.
NOTICE:
Do not damage the body with the knife.
6.

REMOVE BACK WINDOW GLASS

Remove the glass in the same way as windshield.
(See page 

BO–60

)

BO0AJ–04

N17193

BODY

BACK WINDOW GLASS

BO–69

1247

1997 LEXUS ES300   (RM511U)

INSTALLATION

HINT:
Refer to the installation of windshield and install the back win-
dow glass by following operations. (See page 

BO–62

)

1.

CLEAN AND SHAPE CONTACT SURFACE OF BODY

2.

REPLACE STOPPER

3.

CLEAN REMOVED GLASS

4.

POSITION GLASS

5.

CLEAN CONTACT SURFACE OF GLASS

6.

COAT CONTACT SURFACE OF BODY WITH PRIMER
”M”

7.

COAT CONTACT SURFACE OF GLASS WITH PRIMER
”G”

8.

APPLY ADHESIVE

9.

INSTALL GLASS

10.

INSPECT FOR LEAKS AND REPAIR

11.

APPLY ADHESIVE AT MOULDING INSTALLATION
AREA

12.

INSTALL BACK WINDOW MOULDING

Place the moulding onto the body and tap it by hand.
13.

INSTALL THESE PARTS:

(a)

Package tray trim

(b)

Rear speaker grille

(c)

Roof side inner garnish

(d)

Rear seat cushion and seatback


Content   ..  219  220  221  222   ..