Jaguar XJ (X350). Service manual - part 1143


  Index      Jaguar     Jaguar XJ (X350) - service and repair manual 2003-2009 year


Search            


Content   ..  1141  1142  1143  1144   ..


Jaguar XJ (X350). Service manual - part 1143


17 


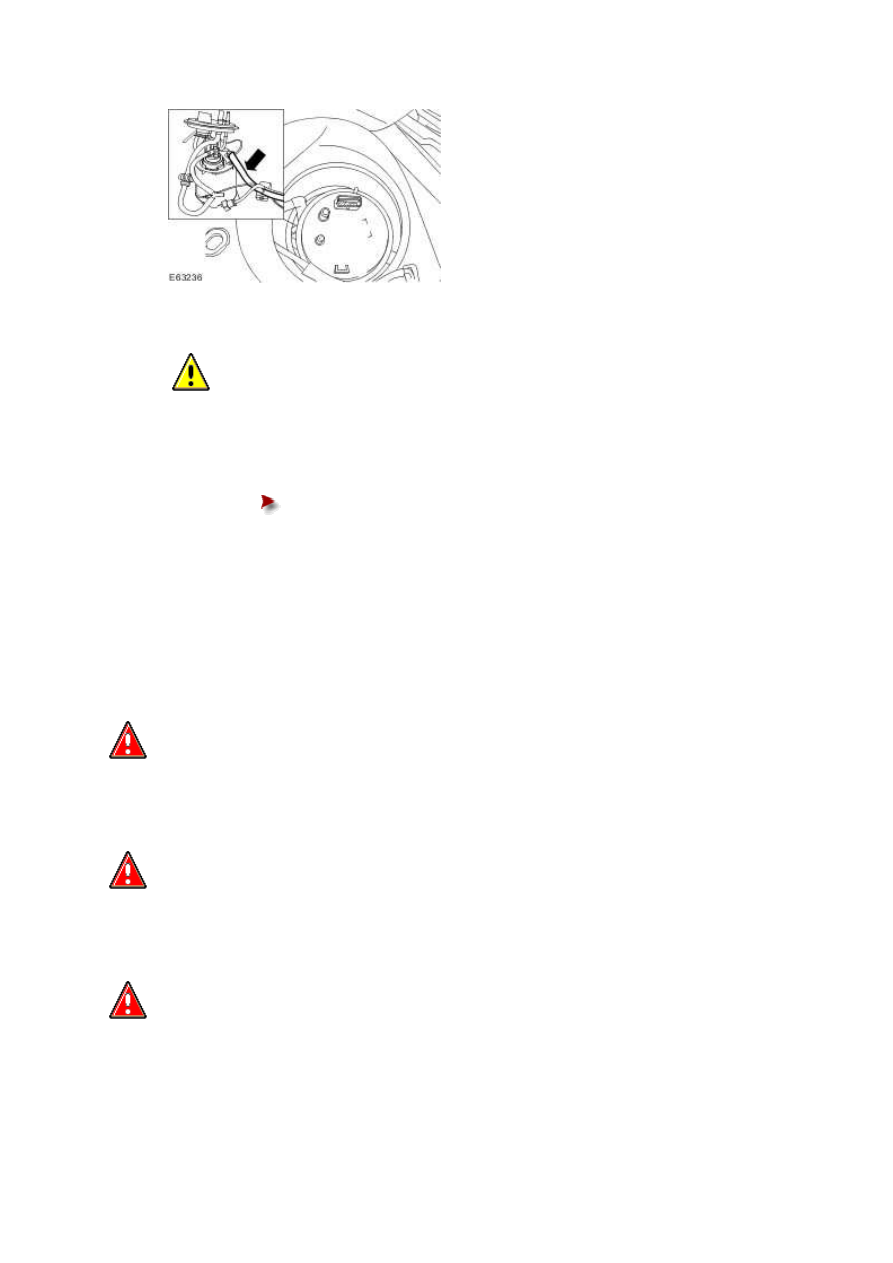
  CAUTION: Make sure no damage occurs to the fuel level float. 


Remove the fuel pump module.  


Press down and rotate the base of the fuel pump module counter-

clockwise.


Installation  

  WARNING: Place the vehicle in a quarantined area and arrange "No Smoking/Petrol Fumes" 

signs about the vehicle. 


  WARNING: Before any work is carried out on the fuel system, ground the vehicle to earth 

and maintain the ground connection until the work is complete. 


  WARNING: Do not smoke or carry lighted tobacco or open flame of any type when working 

on or near any fuel related components. Highly flammable vapors are always present and may 

ignite. Failure to follow these instructions may result in personal injury. 


  WARNING: The fuel system remains pressurized for a long time after the ignition is switched 

off. The fuel pressure must be relieved before attempting any repairs. Failure to follow these 

instructions may result in personal injury. 


  WARNING: After carrying out repairs, the fuel system must be checked visually for leaks. 

Failure to follow these instructions may result in personal injury. 


  WARNING: This procedure involves fuel handling. Be prepared for fuel spillage at all times 

and always observe fuel handling precautions. Failure to follow these instructions may result in 

personal injury. 


  WARNING: If taken internally do not induce vomiting, seek immediate medical attention. 

Failure to follow these instructions may result in personal injury. 


  WARNING: If fuel contacts the eyes, flush the eyes with cold water or eyewash solution and 

seek medical attention. 


  WARNING: Wash hands thoroughly after handling, as prolonged contact may cause 

irritation. Should irritation develop, seek medical attention. 


NOTE:  


Federal market vehicles, refer to step 6. 


NOTE:  


Non federal market vehicles, refer to step 5. 


www.


  CAUTION: On vehicles with supercharger make sure the arrow on the fuel pump 

module and the 'SC' marker on the fuel tank are aligned. 


  CAUTION: On vehicles without supercharger make sure the arrow on the fuel 

transfer module and the 'NA' marker on the fuel tank are aligned. 


  CAUTION: Make sure no damage occurs to the fuel level float. 


NOTE:  


All vehicles. 


Install the fuel pump module.  


Press down and rotate the base of the fuel pump module clockwise.


Connect the fuel transfer module transfer return tube.  


Make sure the coupling has latched onto the fuel pump module by pulling 

the tube after the connection has been made.


3 . Connect the left-hand fuel sender gauge electrical connector. 


Connect the fuel transfer module transfer feed tube.  


Make sure the quick release coupling has latched onto the fuel pump 

module fuel tube by pulling the tube after the connection has been made.


5 . NOTE:  


Non federal market vehicles only. 


Using the special tool, install the fuel pump module locking ring. 


Install a new O-ring seal.


Tighten to 60 Nm.


6 . NOTE:  


Federal market vehicles only. 


Install the fuel pump module locking ring.  


Install a new O-ring seal.


Tighten to 4 Nm.


www.


Content   ..  1141  1142  1143  1144   ..