Content .. 1054 1055 1056 1057 ..
Isuzu N-Series. Service manual - part 1056
CAB AND CHASSIS ELECTRICAL 8-329
Installation
To install, follow the removal steps in the reverse order,
noting the following points.
1. Bleed the air from brake and clutch fluid pipe line.
2. Check to see if the brake fluid level in the tank with-
in specified level.
3. Check to see if brake warning light comes on when
starter switch is turned on and then warning light
goes off after the engine running.
Parking Brake Indicator Light
The parking brake indicator light is connected in series
with the parking brake switch installed to the parking
brake lever bracket.
The light comes on when the parking brake lever is
pulled, and goes out when the parking brake lever is ful-
ly released.
Notice:
The parking brake indicator light illuminates to warn the
driver that the parking brake is on. This light does not in-
dicate the condition of the operability of the parking
brake.
Circuit Inspection
1. Disconnect the parking brake switch connector.
2. Connect the harness side connector terminal to the
ground.
3. Check to see if the indicator light comes on with the
starter switch “ON”.
Check the bulb or the harness when the result of
inspection is found abnormal.
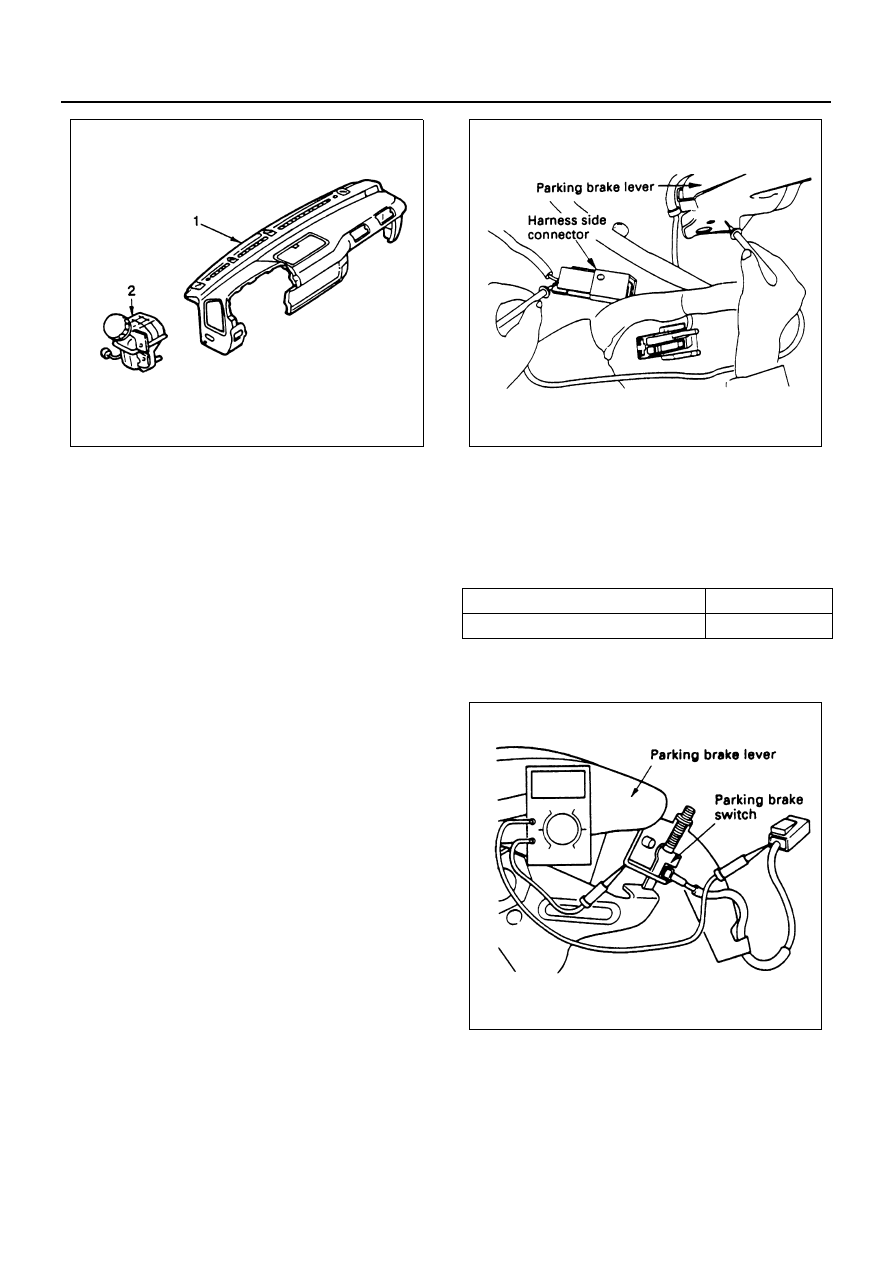
Parking Brake Switch
Inspection
1. Disconnect the parking brake switch connector.
2. Check to see if there is any continuity between the
switch terminal and the body ground with the circuit
tester connected between them.
Repair the parking brake switch or replace it when the
result of inspection is found abnormal.
Removal
Preparation:
Disconnect the battery ground cable.
1. Parking Brake Switch
1) Disconnect the connector.
2) Remove the fixing screw.
N8A0361E
When parking brake applied
Continuity
When parking brake released
No continuity
N8A0362E
N8A0363E