Honda Crosstour (2015 year). Manual - part 6
 

  Index      Honda     Honda Crosstour - service manual 2015 year in english


Search            copyright infringement  


Content   ..  4  5  6  7   ..


Honda Crosstour (2015 year). Manual - part 6


80

uu

Indicators

u

In

strum

e

nt Pa

nel

*1:Models with the smart entry system have an ENGINE START/STOP button instead of an ignition switch.

Indicator

Name

On/Blinking

Explanation

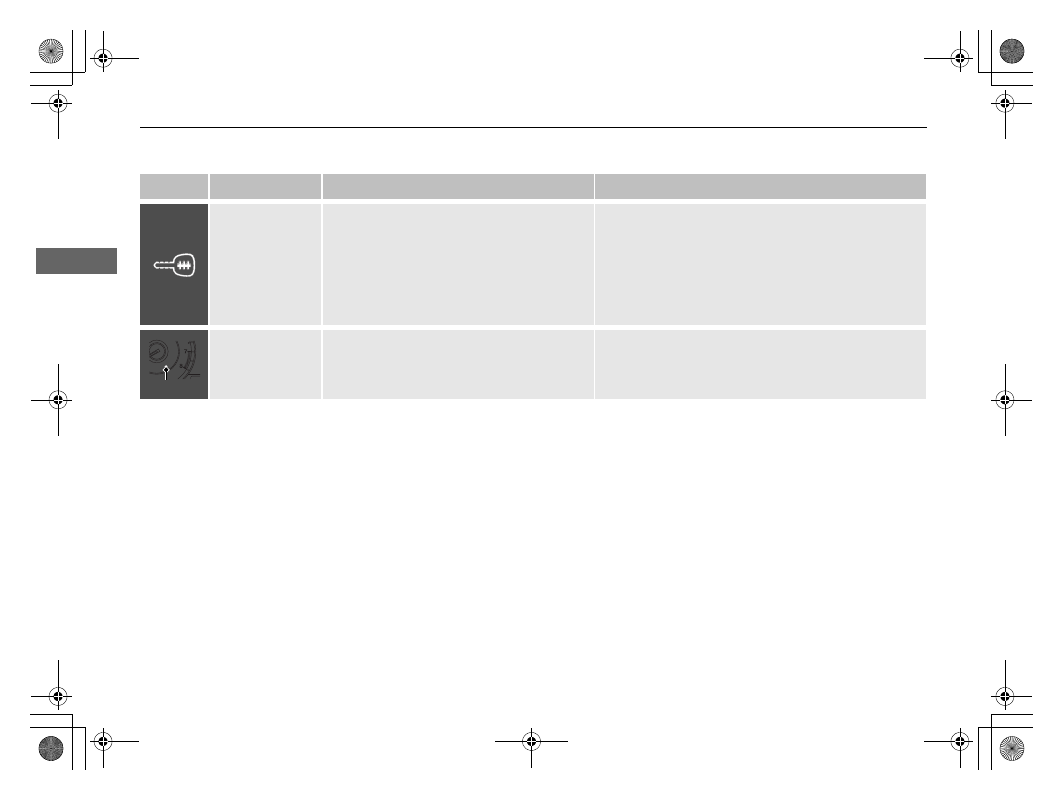
Immobilizer 
System Indicator

Comes on briefly when you turn the ignition 
switch to ON 

(

w

*1

, then goes off.

Comes on if the immobilizer system cannot 
recognize the key information.

Blinks - You cannot start the engine. Turn the ignition 
switch to LOCK 

(

0

*1

, pull the key out, and then insert 

the key and turn it to ON 

(

w

*1

 again.

Repeatedly blinks - The system may be 
malfunctioning. Have the vehicle checked by a dealer.

Do not attempt to alter this system or add other 
devices to it. Electrical problems can occur.

Security System 
Alarm Indicator

Blinks when the security system alarm has 
been set.

Security System Alarm P. 107

Indicator

81

uu

Indicators

u

In

strum

e

nt Pa

nel

*1:Models with the smart entry system have an ENGINE START/STOP button instead of an ignition switch.

Indicator

Name

On/Blinking

Explanation

CRUISE MAIN 
Indicator

Comes on when you press the CRUISE 
button.

Cruise Control P. 432

CRUISE 
CONTROL
 
Indicator

Comes on if you have set a speed for cruise 
control.

Cruise Control P. 432

Washer Level 
Indicator

*

Comes on when washer fluid gets low.

Refill washer fluid.

Refilling Window Washer Fluid P. 483

Maintenance 
Minder Indicator

Comes on when you turn the ignition switch 
to ON 

(

w

*1

, then goes off.

Comes on when the scheduled maintenance 
is due soon.

Maintenance Minder

TM

 P. 465

* Not available on all models

82

uu

Indicators

u

Information Display Warning and Information Messages

In

strum

e

nt Pa

nel

Information Display Warning and Information Messages

The following messages appear only on the information display.

Message

Condition

Explanation

Appears when the fuel fill cap is loose or is not installed.

Check Fuel Cap Message P. 535

Message

Condition

Explanation

Appears if you push the ENGINE START/STOP button 
to turn the engine off without the shift lever in 

(

P.

Push the ENGINE START/STOP button twice after 
moving the shift lever to 

(

P.

Appears when the power mode is in ACCESSORY.

Appears when the steering wheel is locked.

Move the steering wheel left and right while pressing 
the ENGINE START/STOP button at the same time.

Appears when you close the door with the power mode 
in ON without the smart entry remote inside the vehicle.

Disappears when you bring the smart entry remote back 
inside the vehicle and close the door.

Appears when the smart entry remote’s battery 
becomes weak.

Replace the battery as soon as possible.

Replacing the Button Battery P. 507

Models with smart entry system

83

In

strum

e

nt Pa

nel

Gauges and Displays

Gauges

Gauges include the speedometer, tachometer, fuel gauge, and related indicators. 
They are displayed when the ignition switch is in ON 

(

w

*1

.

Displays your driving speed in mph or km/h.

Shows the number of engine revolutions per minute.

Displays the amount of fuel left in the fuel tank.

Displays the temperature of the engine coolant.

*1: Models with the smart entry system have an ENGINE START/STOP button instead of an 
ignition switch.

Speedometer

Tachometer

Fuel Gauge

Temperature Gauge

1

Fuel Gauge

NOTICE

You should refuel when the reading approaches 

.

Running out of fuel can cause the engine to misfire, 
damaging the catalytic converter.

The actual amount of remaining fuel may differ from 
the fuel gauge reading.

E

1

Temperature Gauge

NOTICE

Driving with the temperature gauge pointer in the 
upper zone can cause serious engine damage. Pull 
safely to the side of the road and allow engine 
temperature to return to normal.

Overheating P. 532

84

uu

Gauges and Displays

u

Information Display

In

strum

e

nt Pa

nel

Information Display

The information display shows the odometer, trip meter, engine oil life and 
maintenance service item codes, and other gauges.

Press the 

 (Select/Reset) knob to change the display.

Shows the total number of miles or kilometers that your vehicle has accumulated.

Switching the Display

1

Switching the Display

Each time you press the 

 knob, the information 

display changes as follows:

Some of the items on the information display also 
appear on the audio/information screen

*

. They also 

change along with the information display changes 
while the fuel consumption is shown.

Outside Temperature

*

Trip Meter B

Engine Oil Life

Odometer, Trip Meter A

Outside Temperature

*

Trip Meter A

Odometer

Select/Reset 
Knob

* Not available on all models

Continued

85

uu

Gauges and Displays

u

Information Display

In

strum

e

nt Pa

nel

Shows the total number of miles (U.S.) or kilometers (Canada) driven since the last 
reset. Meters A and B can be used to measure two separate trips.

Resetting a trip meter

To reset a trip meter, display it, then press and hold the 

 knob. The trip meter is 

reset to 0.0.

Shows the remaining oil life and Maintenance Minder

TM

.

Maintenance Minder

TM

 P. 465

Appears when the fuel fill cap is loose or is not installed.

Check Fuel Cap Message P. 535

Trip Meter

Engine Oil Life

Check Fuel Cap

1

Trip Meter

Switch between trip meter A and trip meter B by 
pressing the 

 knob.

uu

Gauges and Displays

u

Information Display

86

In

strum

e

nt Pa

nel

Shows the outside temperature in Fahrenheit (U.S.) or Celsius (Canada).

Adjusting the outside temperature display

Adjust the temperature reading up to ±5°F or ±3°C if the temperature reading 
seems incorrect.

1. Turn the ignition switch to ON 

(

w

*1

.

2. Press and hold the 

 (Select/Reset) knob for 10 seconds or more while the 

outside temperature is shown on the information display.

u

The information display goes into temperature adjustment mode. The display 
starts showing from -5°F to +5°F (U.S.) or -3°C to +3°C (Canada).

3. Release the 

 knob when the right adjustment amount is shown.

u

The adjustment is complete.

*1: Models with the smart entry system have an ENGINE START/STOP button instead of an 
ignition switch.

Outside Temperature

*

1

Outside Temperature

*

The temperature sensor is in the front bumper. Road 
heat and exhaust from another vehicle can affect the 
temperature reading when your vehicle speed is less 
than 19 mph (30 km/h).

It may take several minutes for the display to be 
updated after the temperature reading has stabilized.

Use the audio/information screen’s customized 
features to correct the temperature.

Customized Features

*

 P. 280

Models with audio touch screen

* Not available on all models

87

Controls

This chapter explains how to operate the various controls necessary for driving.

Setting the Clock ................................ 88
Locking and Unlocking the Doors

Key Types and Functions .................... 91
Low Smart Entry Remote Signal Strength

*

.. 93

Locking/Unlocking the Doors from the 

Outside ............................................ 94

Locking/Unlocking the Doors from the 

Inside ............................................... 99

Childproof Door Locks ..................... 100
Auto Door Locking/Unlocking .......... 101

Opening and Closing the Tailgate... 105
Security System ................................ 107

Immobilizer System .......................... 107
Security System Alarm...................... 107

Opening and Closing the Windows..... 110

Opening and Closing the Moonroof .. 113
Operating the Switches Around the 

Steering Wheel

Ignition Switch

*

............................... 114

ENGINE START/STOP Button

*

........... 115

Ignition Switch and Power Mode 

Comparison ................................... 118

Turn Signals ..................................... 119
Light Switches.................................. 119
Fog Lights ........................................ 122
Daytime Running Lights ................... 122
Wipers and Washers ........................ 123
Brightness Control ........................... 125
Rear Defogger/Heated Door Mirror Button.. 126
Driving Position Memory System

*

.... 127

Adjusting the Steering Wheel .......... 129

Adjusting the Mirrors....................... 130

Interior Rearview Mirror ................... 130
Power Door Mirrors ......................... 131

Adjusting the Seats .......................... 133

Adjusting the Seat Positions............. 133

Interior Lights/Interior Convenience 

Items ................................................ 142

Interior Lights .................................. 142
Interior Convenience Items .............. 144

Heating and Cooling System

*

......... 154

Using Vents, Heating and A/C.......... 154

Climate Control System

*

.................. 157

Using Automatic Climate Control .... 157
Automatic Climate Control Sensors... 162

* Not available on all models

88

Co
ntrols

Setting the Clock

Clock

You can adjust the time in the clock display with the ignition switch in ON 

(

w

*1

.

Using the Settings menu on the audio/information screen

1. Press and hold the DISP button.
2. Rotate 

 to select Info Settings, then 

press .

u

Repeat the procedure to select Clock 
Adjustment
.

3. Rotate 

 to change hour, then press 

.

4. Rotate 

 to change minute, then press 

.

Using the audio touch screen

1. Select .
2. Select Clock.
3. Adjust the hours and minutes by selecting 

/

.

4. Select 12H or 24H.
5. Press Set to set the time.

*1: Models with the smart entry system have an ENGINE START/STOP button instead of an 
ignition switch.

Adjusting the Time

1

Clock

The clock is automatically updated through the 
navigation system, so the time does not need to be 
adjusted.

These indications are used to show how to operate 
the selector knob or the MENU/SEL (Selector) knob.
Rotate  

to 

select.

Press 

 to enter.

You can customize the clock display to show the 12 
hour clock or 24 hour clock.

Customized Features

*

 P. 280

You can turn the clock display on and off.

Customized Features

*

 P. 280

Models with navigation system

Models without navigation system

Models with audio touch screen

Models without navigation system

Models with audio touch screen

3 4

* Not available on all models

Continued

89

uu

Setting the Clock

u

Clock

Co
ntrols

Using the MENU button

1. Press the MENU button.
2. Rotate 

 to select CLOCK ADJUST in the 

display.

3. Press . 

CLOCK ADJUST appears.

4. Rotate 

 to select the item you want to 

adjust (12/24 hour mode, hour, minute). 
Then press 

.

5. Rotate 

 to make the adjustment.

6. Press 

 to enter your selection. The display 

returns to CLOCK ADJUST. Repeat steps 4 
to 6 to adjust other items.

7. To enter the selection, Rotate 

 and select 

SET, then press 

.

8. Press the MENU button to go back to the 

normal display.

1

Clock

You can switch the clock display between 24 hours 
and 12 hours when in the menu mode. 

Selector Knob Icon details
Rotate  

to 

select.

Press 

 to enter.

To set the time to the nearest hour:
Press and hold the CLOCK button until the clock 
display begins to blink, then press the 

(

6 (Reset) 

button.

Depending on the displayed time, the clock sets 
forward or backward.
Example:
1:06 will reset to 1:00
1:53 will reset to 2:00

Models without audio touch screen

MENU Button

Minute Setting

 Hour Setting

12/24 Hour Mode

90

uu

Setting the Clock

u

Clock

Co
ntrols

Using the CLOCK button

1. Press and hold the CLOCK button until the 

clock display begins to blink.

2. Press the 

(

4 (Hour) button to change the 

hours.

3. Press the 

(

5 (Minute) button to change the 

minutes.

4. Press the CLOCK button to go back to the 

normal display.

CLOCK Button

(

6 Button

(

4 Button

(

5 Button

91

Continued

Co
ntrols

Locking and Unlocking the Doors

Key Types and Functions

This vehicle comes with the following keys:

Use the key to start and stop the engine, and 
to lock and unlock the doors, tailgate, and 
fuel fill door.

You can also use the remote transmitter or 
smart entry system

*

 to lock and unlock the 

doors, tailgate, and fuel fill door.

The seat automatically moves to the preset 
position when you unlock the door using the 
remote transmitter or smart entry system.

Driving Position Memory System

*

 P. 127

Smart entry remote

The built-in key can be used to lock/unlock the 
doors and tailgate when the smart entry 
remote battery becomes weak and the power 
door lock/unlock operation is disabled.

To remove the built-in key, pull it out while 
sliding the release knob. To reinstall the built-
in key, push the built-in key into the smart 
entry remote until it clicks.

Master Keys

1

Key Types and Functions

All the keys have an immobilizer system. The 
immobilizer system helps to protect against vehicle 
theft.

Immobilizer System P. 107

The keys contain precision electronics.
Adhere to the following advice to prevent damage to 
the electronics:

Do not leave the keys in direct sunlight, or in 
locations with high temperature or high humidity.

Do not drop the keys or set heavy objects on them.

Keep the keys away from liquids.

Do not take the keys apart except for replacing the 
battery.

If the circuits in the keys are damaged, the engine 
may not start, and the remote transmitter may not 
work.
If the keys do not work properly, have them 
inspected by a dealer.

Master Key

*

Smart Entry 
Remote

*

Built-in Key

Release Knob

* Not available on all models

uu

Locking and Unlocking the Doors

u

Key Types and Functions

92

Co
ntrols

Can be used to start and stop the engine, and 
lock and unlock driver’s door.

Contains a number that you will need if you 
purchase a replacement key.

Valet Key

*

1

Valet Key

*

When you need to leave a key with a third party, 
leave the valet key.

Gray

Key Number Tag

1

Key Number Tag

Keep the key number tag separate from the key in a 
safe place outside of your vehicle.
If you wish to purchase an additional key, contact a 
dealer.

If you lose your key and you cannot start the engine, 
contact a dealer.

* Not available on all models

93

uu

Locking and Unlocking the Doors

u

Low Smart Entry Remote Signal Strength

*

Co
ntrols

Low Smart Entry Remote Signal Strength

*

The vehicle transmits radio waves to locate the smart entry remote when locking/
unlocking the doors and tailgate, or to start the engine.

In the following cases, locking/unlocking the doors and tailgate, or starting the 
engine may be inhibited or operation may be unstable:
• Strong radio waves are being transmitted by nearby equipment.
• You are carrying the smart entry remote together with telecommunications 

equipment, laptop computers, cell phones, or wireless devices.

• A metallic object is touching or covering the smart entry remote.

1

Low Smart Entry Remote Signal Strength

*

Communication between the smart entry remote and 
the vehicle consumes the smart entry remote’s 
battery.
Battery life is about two years, but this varies 
depending on regularity of use.
The battery is consumed whenever the smart entry 
remote is receiving strong radio waves. Avoid placing 
it near electrical appliances such as televisions and 
personal computers.

* Not available on all models

94

uu

Locking and Unlocking the Doors

u

Locking/Unlocking the Doors from the Outside

Co
ntrols

Locking/Unlocking the Doors from the Outside

Locking the doors

Press the lock button.
Once:

u

Some exterior lights will flash, all the 
doors, tailgate, and fuel fill door will lock, 
and the security system sets.

Twice (within five seconds after the first 
push):

u

The beeper sounds and verifies the 
security system is set.

Using the Remote Transmitter

1

Using the Remote Transmitter

If you do not open a door within 30 seconds of 
unlocking the vehicle with the remote transmitter, 
the doors will automatically relock.

You can change the relock timer setting.

Customized Features

*

 P. 280

If the interior light switch is in the door activated 
position, the interior lights come on when you press 
the unlock button.
No doors opened: The lights fade out after 30 
seconds.
Doors relocked with the remote: The lights go off 
immediately.

Interior Lights P. 142

The remote transmitter uses low-power signals, so 
the operating range may vary depending on the 
surroundings.

The remote transmitter will not work when the key is 
in the ignition switch.

You can lock or unlock doors using the remote 
transmitter or smart entry system only when the 
power mode in VEHICLE OFF.

The remote will not lock the vehicle when a door or 
the tailgate is open.

Models with audio touch screen

Models without smart entry system

Models with smart entry system

All models

LED

Unlock Button

Lock Button

* Not available on all models

Continued

95

uu

Locking and Unlocking the Doors

u

Locking/Unlocking the Doors from the Outside

Co
ntrols

Unlocking the doors

Press the unlock button.
Once:

u

Some exterior lights flash twice, and the driver’s door and fuel fill door unlock.

Twice:

u

The remaining doors and tailgate unlock.

1

Using the Remote Transmitter

If the distance at which it works varies, the battery is 
probably low.
If the LED does not come on when you press a 
button, the battery is dead.

Replacing the Button Battery P. 507

You can customize the door unlock mode setting.

Customized Features

*

 P. 280

Models with audio touch screen

* Not available on all models


Content   ..  4  5  6  7   ..