Harley Davidson 1999-2005 Harley Dyna Models. Repair Manual - page 13
-------------------------------------------------------------------------------------------------------------------------------------------------------------
240
CHAPTER SIX
31
32
Inspection
33
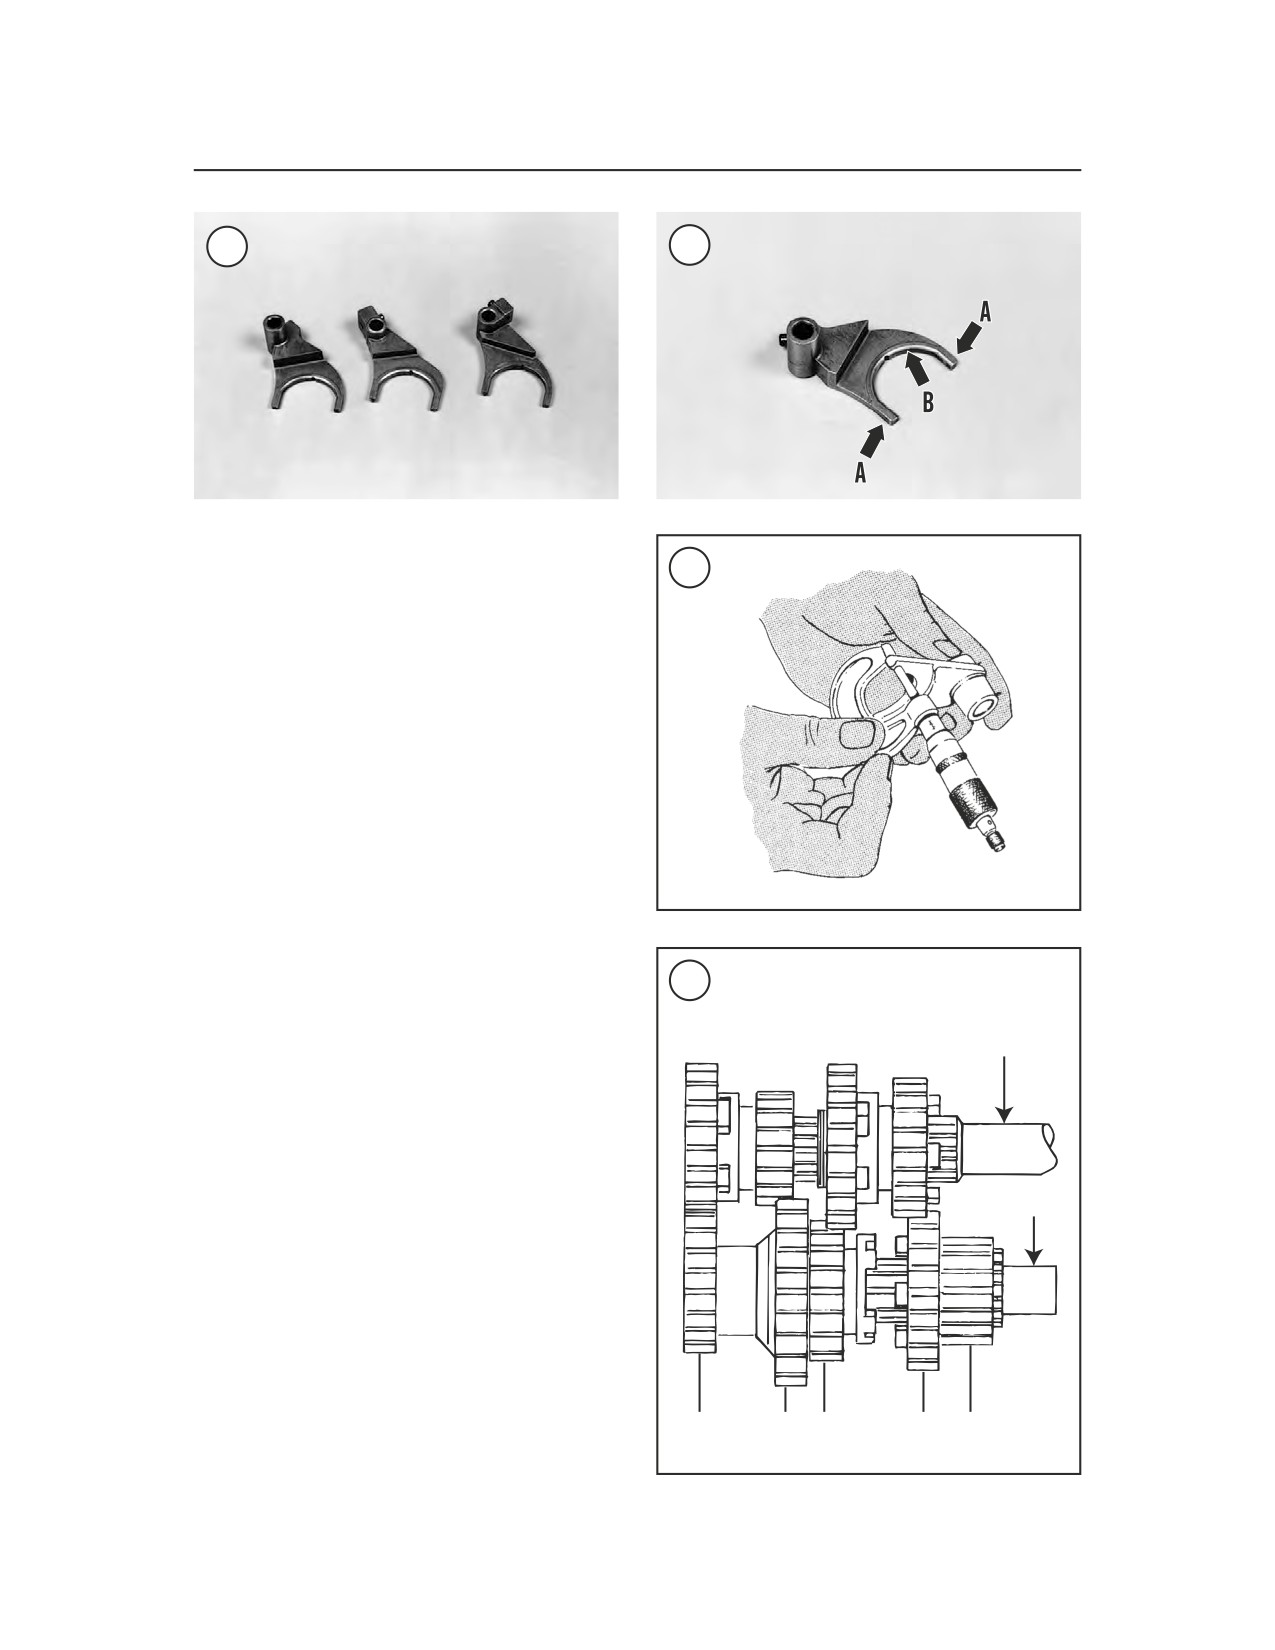
1. Inspect each shift fork (Figure 31) for excessive
wear or damage. Replace worn or damaged shift
forks as required.
2. Measure the thickness of each shift fork finger
(A, Figure 32) where it contacts the sliding gear
groove (Figure 33). Replace any shift fork with a
finger thickness worn to the specification in Table 2.
3. Check the shift forks for arc-shaped wear or burn
marks (B, Figure 32). Replace damaged shift forks.
4. Roll the shift fork shaft on a flat surface and
check for bending. Replace the shaft if bent.
5. Install each shift fork on the shift shaft. The shift
fingers must slide smoothly with no binding or
roughness.
Assembly
34
Refer to Figure 34 to identify the transmission
gears.
Mainshaft
1. Coat all bearing and sliding surfaces with assem-
bly oil.
2. To install the shift forks and shaft (Figure 28),
perform the following:
a. Insert the No. 1 shift fork into the mainshaft
first gear groove.
Countershaft
b. Install the No.
2
shift fork into the
countershaft third gear groove.
c. Install the No. 3 shift fork into the mainshaft
second gear groove.
3. Insert the shift shaft through the transmission
case (A, Figure 29), through each of the three shift
forks and into the transmission case.
4. Install the transmission side door as described in
this chapter.
4th
1st
3rd
2nd
5th
5. Check that the shift forks move smoothly when
shifting the gears by hand.