Harley Davidson 2013 Sportster Models. Service Manual - page 29
Prevent accidental vehicle start-up, which could cause
death or serious injury. First disconnect negative (-) battery
cable at engine and then positive (+) cable from battery.
(00280b)
3.
Remove battery. See
4.
Remove fuel tank. See
or
.
5.
XR 1200X:
Remove air cleaner. See
6.
Remove wire harness caddy. See
.
7.
See
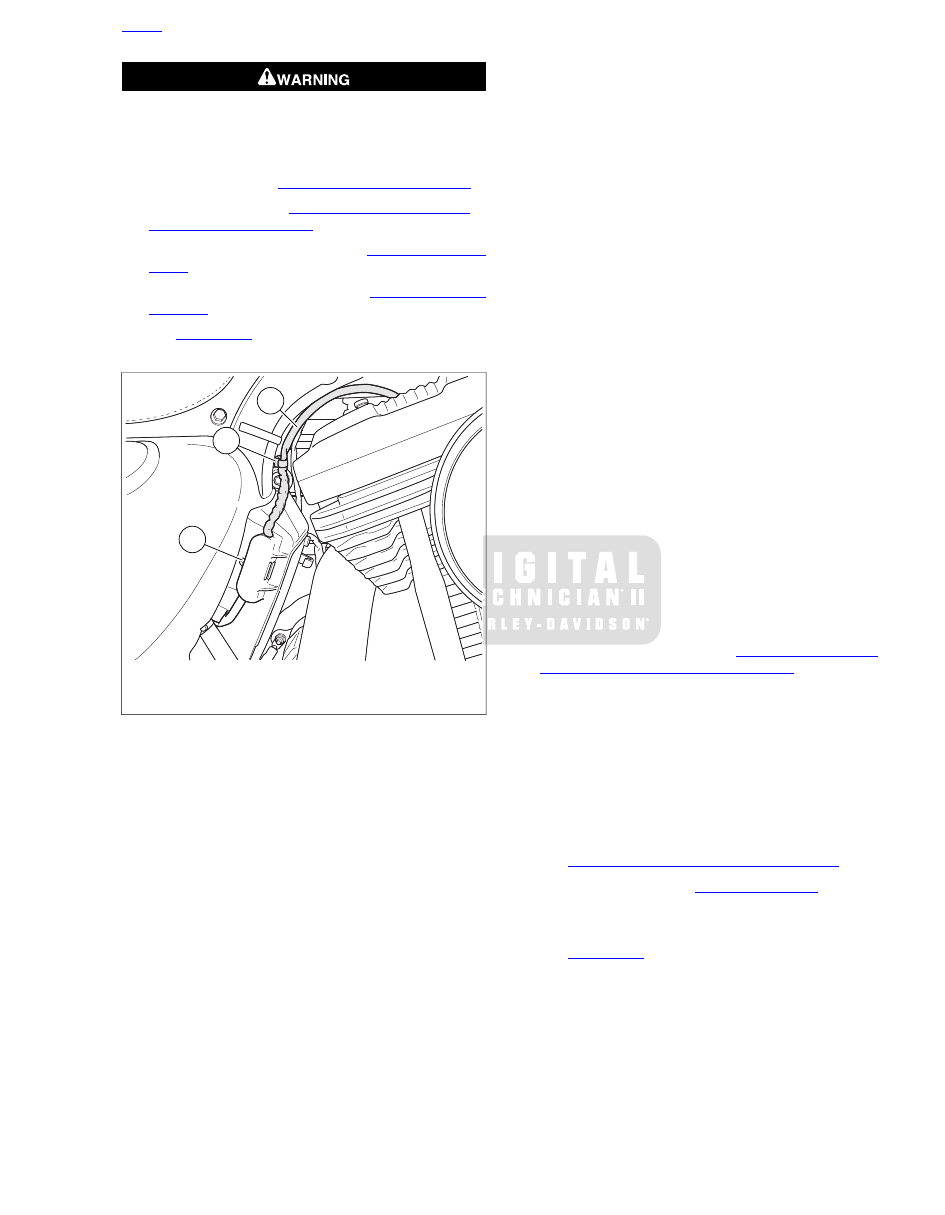
. Cut cable strap (2) securing ET sensor
to harness.
3
2
1
sm06586
1. Harness loop
2. Barbed cable strap
3. Engine temperature sensor connector location
Figure 6-107. ET Sensor Harness: XL Models
8.
Unplug the following harness connectors from the main
harness:
a.
Oil pressure switch [120B],
b.
Voltage regulator DC output [77B],
c.
Crank Position (CKP) sensor [79B],
d.
Front oxygen (O2) sensor [138B],
e.
Rear oxygen (O2) sensor [137B],
f.
Neutral switch jumper [136B],
g.
Engine temperature (ET) sensor [90B],
h.
Ignition coil [83B],
i.
Horn [122B],
j.
JIffy stand sensor [133] (if equipped),
k.
ECM [78B],
l.
Harness ground wire at engine crankcase [GND1],
m. Rear stop lamp switch [121B],
n.
Vehicle speed sensor (VSS) [65B],
o.
Green starter motor wire [128B].
p.
Optional Security Siren:
Unplug security siren con-
nector [142B].
9.
Locate engine sub-harness connector [145A] and rear
lighting sub-harness connector [7A] on top of oil tank.
Unplug both sub-harnesses from main harness.
10. Pull P&A battery harness/connector [160B] and fuel sender
resistor assembly/connector [200] out from recess in top
left rear corner of oil tank, under frame.
11. Remove TSM/TSSM/HFSM. See
SECURITY MODULE (TSM/TSSM/HFSM)
a.
Reach under battery tray. Push TSM/TSSM/HFSM
up from cavity in bottom of tray.
b.
Unplug harness connector [30B].
c.
H-DSSS equipped models:
unplug antenna con-
nector [208B].
12. Remove wiring harness from two frame clips on front left
frame downtube.
13. Remove vapor valve hose from clip on wiring harness.
See
4.20 EVAPORATIVE EMISSIONS CONTROL
.
14. Remove battery tray. See
NOTE
XL Models: Remove both fasteners securing the ECM caddy.
15. See
. Remove the ECM caddy.
16. Pull harness away from rear frame downtube.
17. Remove main wiring harness from left side. Carefully slide
wire harness caddies between rear cylinder and frame.
2013 Sportster Service: Electrical 6-71