Ford Mondeo (petrol engines). Manual - part 79
using the method outlined in (2) above.
(2) If the vehicle is fitted with automatic
transmission, see (2) above.
(c) If the engine/transmission has been
removed and separated, use the method
shown in illustration 21.11.
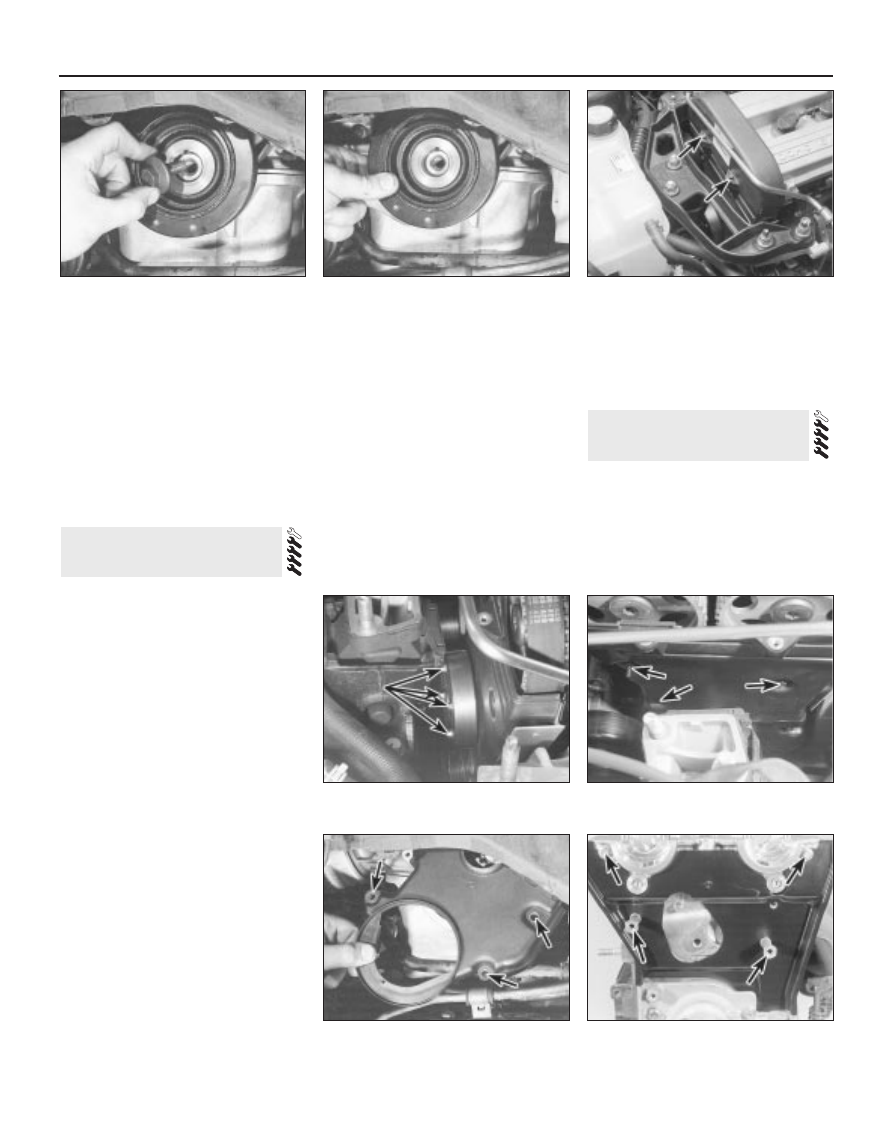
4 Unscrew the pulley bolt and remove the
pulley (see illustrations).
5 Refitting is the reverse of the removal
procedure; ensure that the pulley’s keyway is
aligned with the crankshaft’s locating key,
and tighten the pulley bolt to the specified
torque wrench setting.
Upper cover
1 Unscrew the cover’s two mounting bolts
and withdraw it (see illustration).
2 Refitting is the reverse of the removal
procedure; ensure the cover edges engage
correctly with each other, and note the torque
wrench setting specified for the bolts.
Middle cover
3 Unscrew the six nuts securing the
engine/transmission right-hand mounting
bracket, then withdraw the bracket.
4 Slacken the water pump pulley bolts.
5 Remove the timing belt upper cover (see
paragraph 1 above).
6 Remove the auxiliary drivebelt (see Chap-
ter 1).
7 Unbolt and remove the water pump pulley
(see illustration).
8 Unscrew the middle cover fasteners (one
bolt at the front, one at the lower rear, one
stud at the top rear) and withdraw the cover
(see illustration).
9 Refitting is the reverse of the removal
procedure. Ensure the cover edges engage
correctly with each other, and note the torque
wrench settings specified for the various
fasteners. When reassembling the engine/
transmission right-hand mounting, renew the
self-locking nuts, and do not allow the
mounting to twist as the middle two of the
bracket’s six nuts are tightened.
Lower cover
10 Remove the crankshaft pulley (see
Section 8).
11 Unscrew the cover’s three securing bolts
and withdraw it (see illustration).
12 Refitting is the reverse of the removal
procedure; ensure the cover edges engage
correctly with each other, and note the torque
wrench settings specified for the various
fasteners.
Inner shield
13 Remove the timing belt, its tensioner
components and the camshaft toothed
pulleys (see Sections 10 and 11).
14 The shield is secured to the cylinder head
by two bolts at the top, and by two studs
lower down; unscrew these and withdraw the
shield (see illustration).
15 Refitting is the reverse of the removal
procedure; note the torque wrench settings
specified for the various fasteners.
Note: To carry out this operation, a new
timing belt (where applicable), a new cylinder
head cover gasket, and some special tools
(see text) will be required. If the timing belt is
being removed for the first time since the
vehicle left the factory, a tensioner spring and
retaining pin must be obtained for fitting on
reassembly.
10 Timing belt - removal,
refitting and adjustment
9 Timing belt covers -
removal and refitting
2A•10 In-car engine repair procedures
8.4A Unscrew pulley bolt to release
crankshaft pulley
8.4B Ensure pulley is located on
crankshaft Woodruff key on reassembly
9.1 Remove bolts (arrowed) to release
timing belt upper cover
9.8 Remove fasteners (arrowed) to release
timing belt middle cover
9.7 Slacken water pump pulley bolts and
remove pulley
9.11 Removing timing belt lower cover -
bolt locations arrowed
9.14 Timing belt inner shield fasteners
(arrowed)